Vietnamese Cuisine
Giò Thủ: Vietnamese Head Cheese for Your Festive Spread
Lure your guests’ palates with the captivating flavors of Vietnam’s iconic giò thủ, a traditional head cheese that showcases the ingenuity of Vietnamese cuisine.
Delight your guests this festive season with the vibrant flavors of Vietnam's iconic giò thủ, a captivating Vietnamese head cheese. This traditional dish showcases the versatility of pork, blending tender, fatty, and gelatinous textures into a savory, umami-rich treat. Family recipes passed down over generations offer unique twists, reflecting the ingenuity and resourcefulness of Vietnamese cuisine. Serve giò thủ on its own or alongside zesty dipping sauces, fresh herbs, and other charcuterie for a truly memorable dining experience. This versatile delicacy is sure to spark conversations and encourage your guests to explore the depth of Vietnamese culinary traditions. Let's delve deeper into the extraordinary world of giò thủ.
Key Takeaways
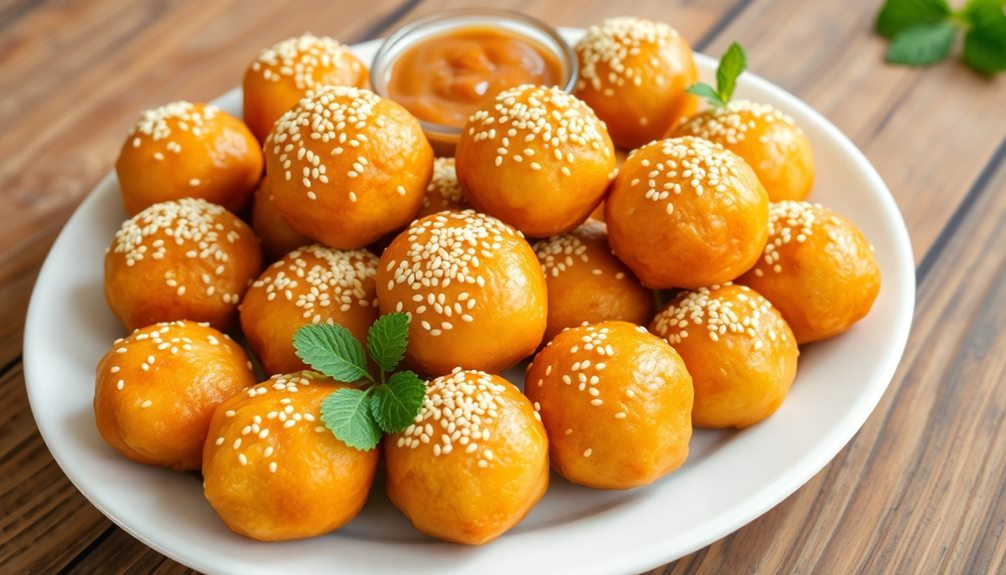
- Serve Vietnamese head cheese as a unique and flavorful addition to your festive spread, showcasing its cultural significance and culinary versatility.
- Impress guests with the harmonious blend of fatty, tender, and gelatinous textures in Vietnamese head cheese, complemented by savory, slightly sweet, and aromatic flavors.
- Pair Vietnamese head cheese with zesty dipping sauces and fresh herbs for an enhanced flavor experience, or incorporate it into charcuterie boards, sandwiches, and rice/noodle dishes.
- Vietnamese head cheese is a time-honored dish that bridges cultural exchange, inviting guests to explore the depth of Vietnamese culinary traditions.
- Serve Vietnamese head cheese as a conversation-starter, leaving a lasting impression and encouraging guests to expand their culinary horizons.
History
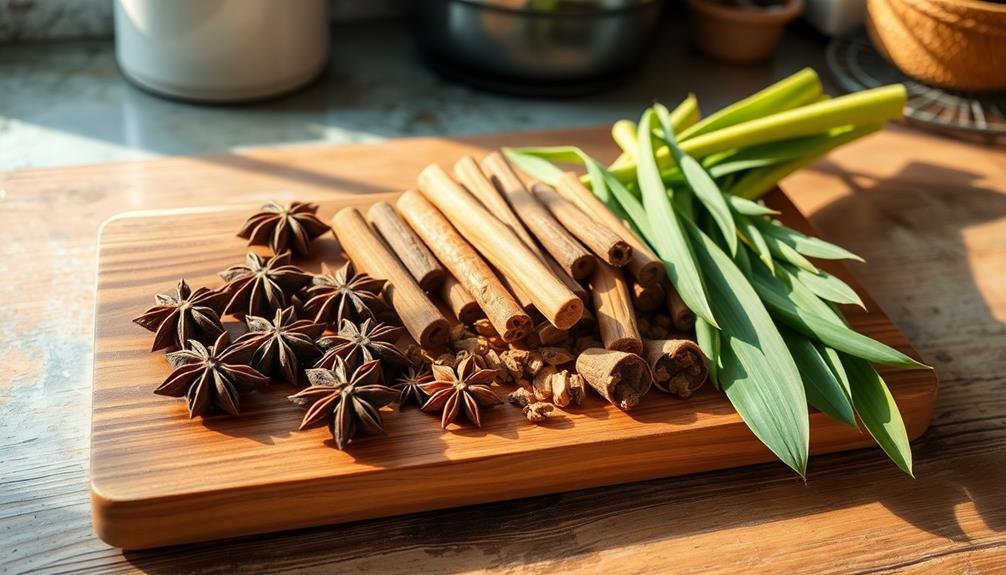
Although the origins of Vietnamese head cheese can be traced back centuries, the dish has evolved over time to reflect the diverse culinary influences found in Vietnam. From the flavorful spices of Chinese cuisine to the bold, lemongrass-infused tastes of traditional Vietnamese cooking, giò thủ has become a cherished part of the country's vibrant food culture.
Over the generations, families have passed down their secret recipes, each with its own unique twist. Some add a touch of fish sauce for extra umami, while others incorporate aromatic herbs like cilantro or mint.
The texture can range from delicate and silky to hearty and gelatinous, depending on the preparation methods and the chef's preferences.
Nowadays, giò thủ is a beloved staple at Vietnamese celebrations and gatherings, where it's often served alongside an array of festive dishes.
Whether you're hosting a Lunar New Year feast or a cozy family dinner, this savory and flavorful head cheese is sure to delight your guests and bring a taste of Vietnamese tradition to your table.
Recipe
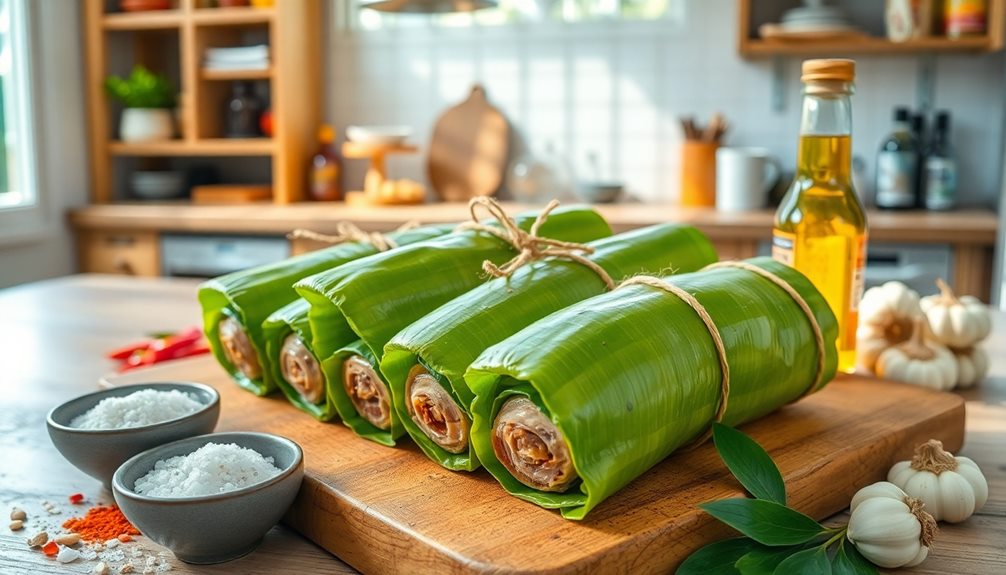
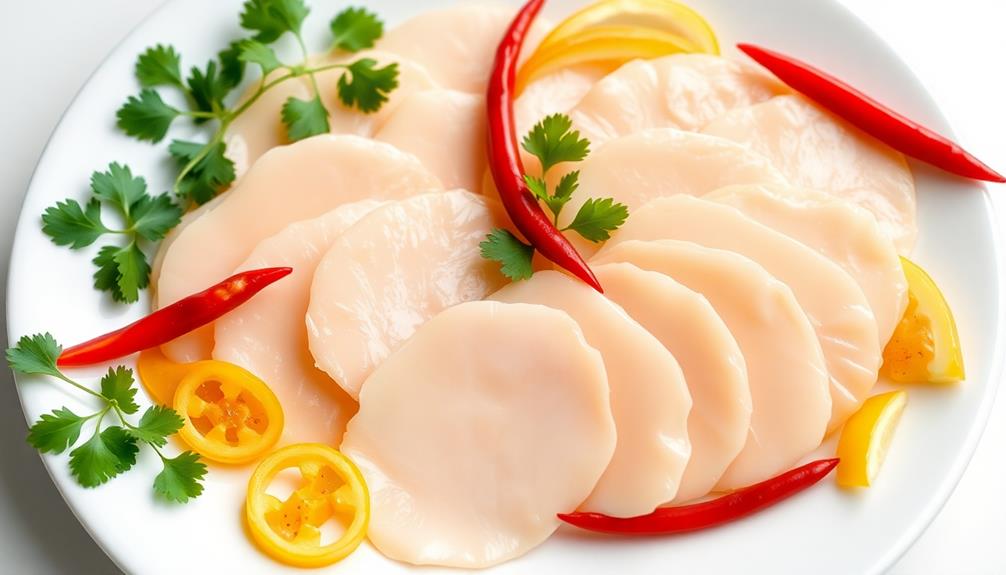
Head cheese, a traditional Vietnamese dish, is a savory and flavorful delicacy that showcases the versatility of the porcine anatomy. This gelatinous terrine, made from various cuts of the pig's head, is a testament to the resourcefulness of Vietnamese cuisine, where every part of the animal is utilized with reverence.
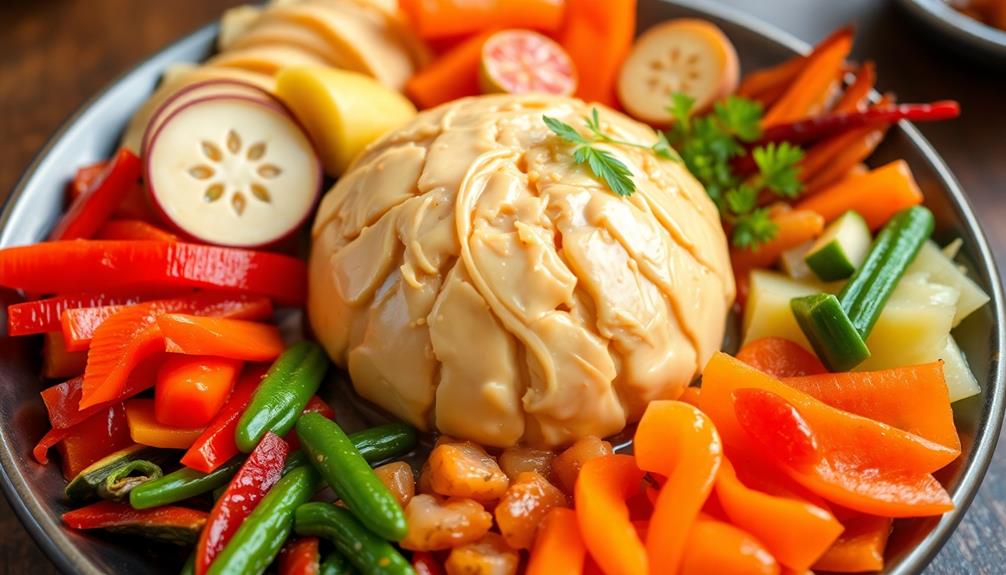
The process of creating head cheese is an intricate one, requiring patience and a keen understanding of the interplay between the different textures and flavors. Incorporating elements like a fermented vegetable plate can enhance the dining experience, providing a contrast to the rich, savory notes of the head cheese. The resulting dish is a harmonious blend of fatty, tender, and gelatinous elements, all bound together in a delightful culinary experience.
- 1 pig's head, cleaned and split in half
- 1 onion, diced
- 3 cloves of garlic, minced
- 1 teaspoon of ground black pepper
- 1 teaspoon of salt
- 2 bay leaves
- 1 tablespoon of fish sauce
- 1 tablespoon of rice vinegar
Place the split pig's head in a large pot and cover with water. Bring to a boil, then reduce heat and simmer for 2-3 hours, or until the meat is tender and easily separates from the bone. Remove the head from the pot and set aside to cool.
Strain the cooking liquid and reserve. In a separate pan, sauté the onion and garlic until fragrant. Add the cooked meat, the reserved cooking liquid, and the remaining ingredients. Simmer for an additional 30 minutes, stirring occasionally, until the mixture has thickened.
Pour the mixture into a mold or loaf pan and refrigerate for at least 4 hours, or until the head cheese has set.
When serving, the head cheese can be sliced and enjoyed on its own or as part of a larger Vietnamese-inspired meal. The gelatinous texture and rich, savory flavors make it a unique and satisfying dish to share with family and friends.
Cooking Steps
First, you'll need to soak the pork parts overnight to tenderize them.
Then, boil the pork for 2 hours until it's cooked through.
Once it's done, strain the mixture and let it chill before slicing it into tasty squares.
Step 1. Soak Pork Parts Overnight
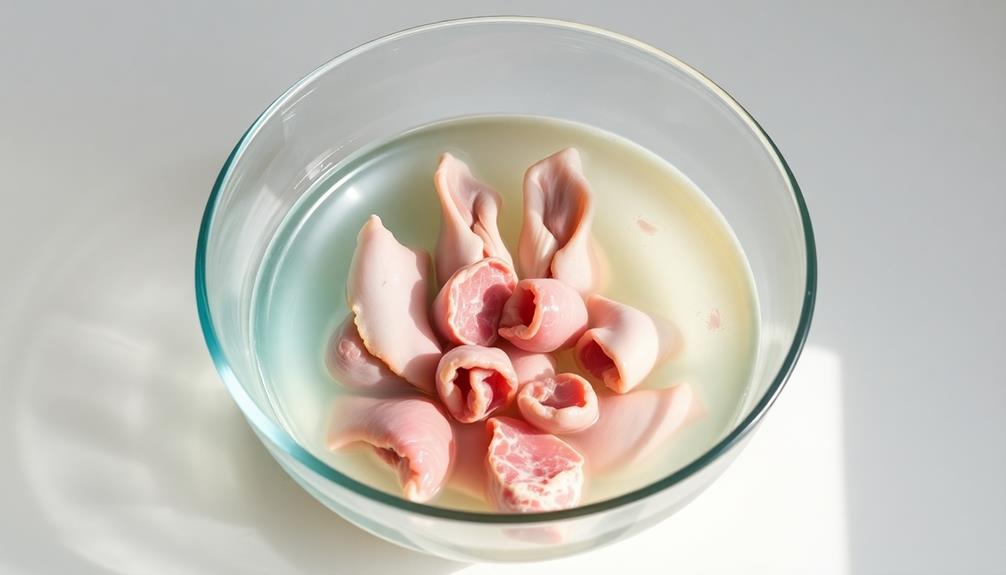
To begin preparing the Vietnamese Head Cheese, you'll need to soak the pork parts overnight.
Grab a large bowl or container and fill it with cool water. Then, add the pork parts – like the head, feet, and any other desired bits.
Let them soak for 8 to 12 hours, making sure to change the water a couple of times. This step helps to remove any impurities and tenderize the meat.
Once the soaking is done, drain the pork parts and give them a good rinse.
You're now ready for the next step in creating your delicious Vietnamese Head Cheese! This traditional dish is perfect for sharing at festive gatherings with family and friends.
The long soak helps ensure the pork is juicy and flavorful, setting you up for success in the kitchen.
Get ready to wow your guests with this authentic Vietnamese delicacy!
Step 2. Boil Pork Parts for 2 Hours
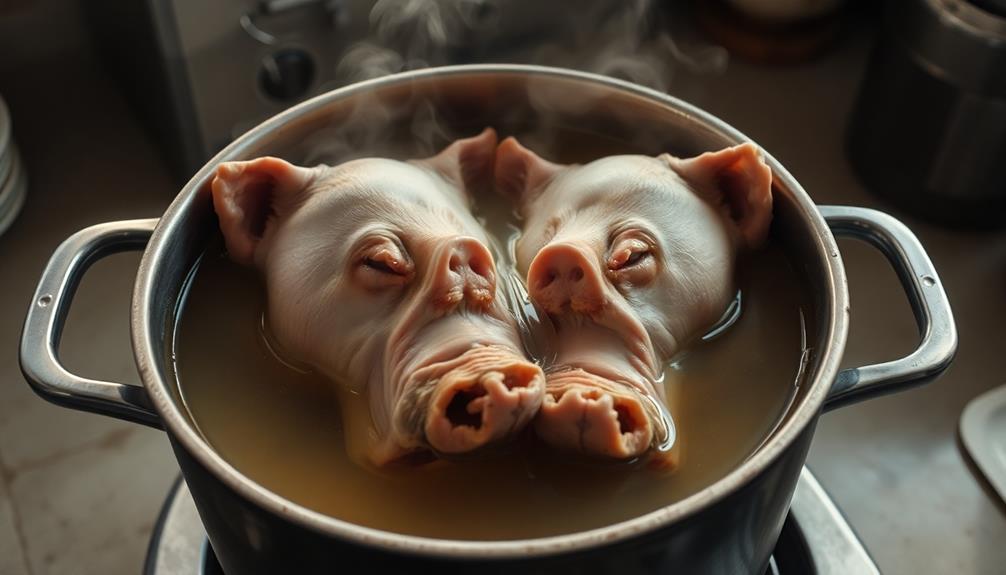
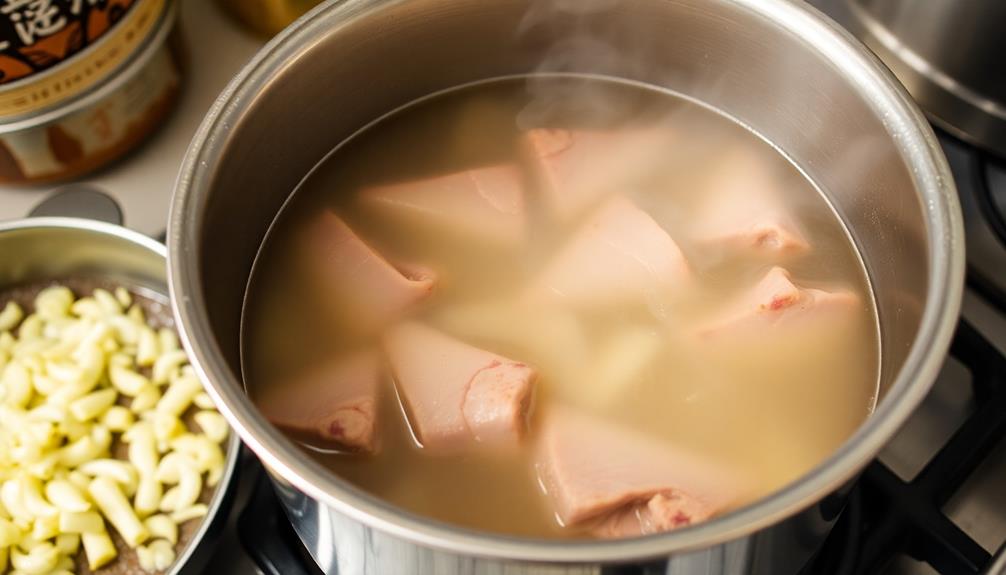
Next, go ahead and start boiling the pork parts. Grab your largest pot and fill it with enough water to cover the pork completely.
Place the pot on the stovetop and turn the heat to high. As the water comes to a boil, you'll start to see the pork parts float to the surface. That's a good sign! Let the pork parts simmer for a full 2 hours, stirring occasionally. This long, slow cooking process will help the meat become incredibly tender and flavorful.
During the boiling, you might notice some foam or scum rising to the top. No worries – just use a spoon to skim it off. This helps keep the broth nice and clear.
After the 2 hours are up, use tongs to carefully remove the pork pieces from the pot. Set them aside to cool slightly before moving on to the next step.
With the pork parts cooked to perfection, you're well on your way to creating an authentic Vietnamese head cheese that will delight your guests!
Step 3. Strain and Chill Pork Mixture
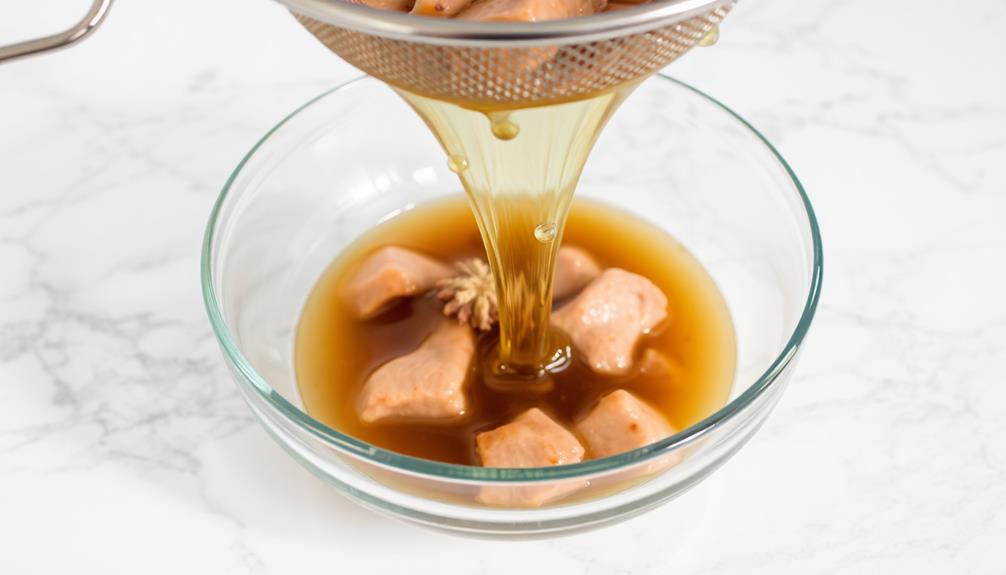
After the pork pieces have cooled slightly, it's time to strain the pork mixture. Grab a large colander and carefully pour the contents of the pot through it, separating the delicious broth from the tender pork.
Don't worry if a few bits and pieces slip through – that's all part of the rustic charm!
Next, transfer the strained pork to a clean bowl. You'll want to give it a gentle squeeze to remove any excess liquid. This will help the pork firm up as it chills.
Pop the bowl in the fridge and let the pork chill for about an hour. This resting period allows the flavors to meld and the texture to firm up, so the pork is ready for the next step.
Once the pork is nicely chilled, it's time to assemble your Vietnamese head cheese. Gather your mold, whether it's a loaf pan or individual ramekins, and get ready to create a festive, flavorful dish!
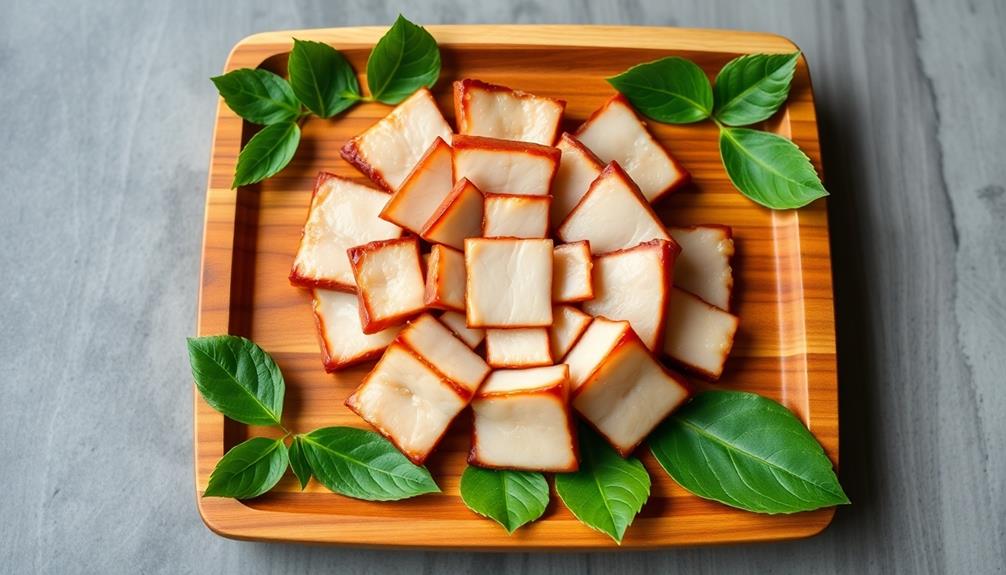
Step 4. Slice Pork Mixture Into Squares
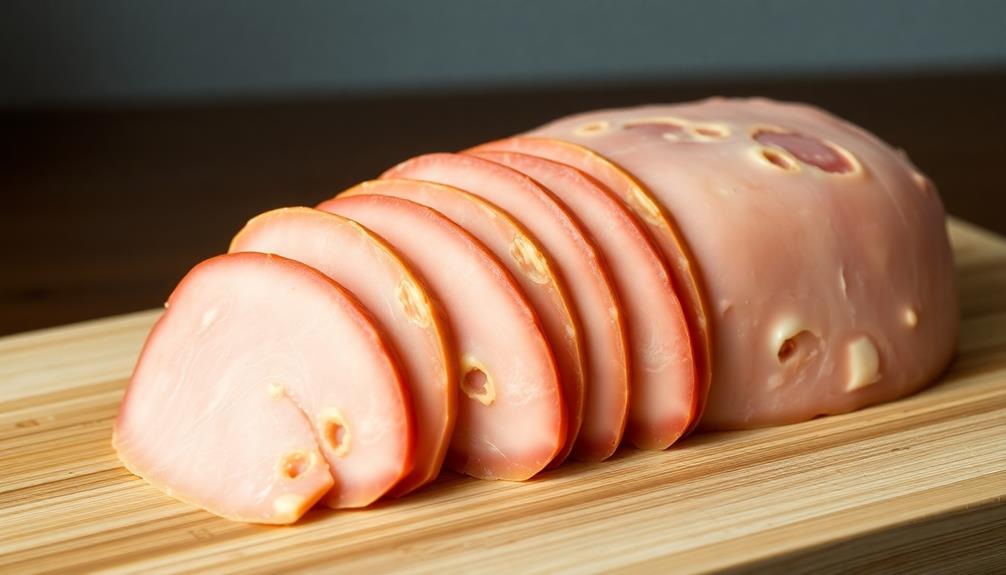
Once the pork has chilled, you can start slicing it into neat squares. Grab a sharp knife and carefully cut the solidified pork mixture into bite-sized pieces, about 1-inch each. This uniform shape will make it easier to serve and enjoy.
As you slice, try to keep the pieces evenly sized for a tidy presentation. Don't worry if the edges aren't perfectly straight – the rustic look adds to the charm of this traditional Vietnamese dish.
Once you've sliced the entire pork mixture, arrange the squares on a serving platter. You can even get creative and stack them in a pretty pattern.
Now your Giò Thủ, or Vietnamese Head Cheese, is ready to shine on your festive spread. These savory, gelatinous pork squares are a unique and flavorful addition to any celebration. Invite your guests to try this unique Vietnamese delicacy and enjoy the festive flavors together.
Step 5. Arrange Pork Squares on Platter
With the pork squares now sliced, arrange them in an aesthetically pleasing manner on a serving platter.
Carefully place the squares in neat rows, ensuring they're evenly spaced. This presentation will make your Vietnamese Head Cheese dish look extra special and inviting.
Feel free to get creative with the arrangement! You could create patterns, like a checkerboard design, or place the squares in a spiral for a dynamic look.
Garnish the platter with fresh herbs, such as mint or cilantro, for a vibrant pop of color. You could also drizzle a bit of the reserved cooking liquid over the pork to keep it moist and glossy.
Once your pork squares are neatly arranged, your Vietnamese Head Cheese is ready to serve.
This festive dish is sure to impress your guests and have them coming back for more. Enjoy the combination of savory, slightly sweet, and aromatic flavors in every delightful bite.
Final Thoughts
In the end, Vietnamese head cheese is a unique and flavorful dish that showcases the ingenuity and resourcefulness of Vietnamese cuisine.
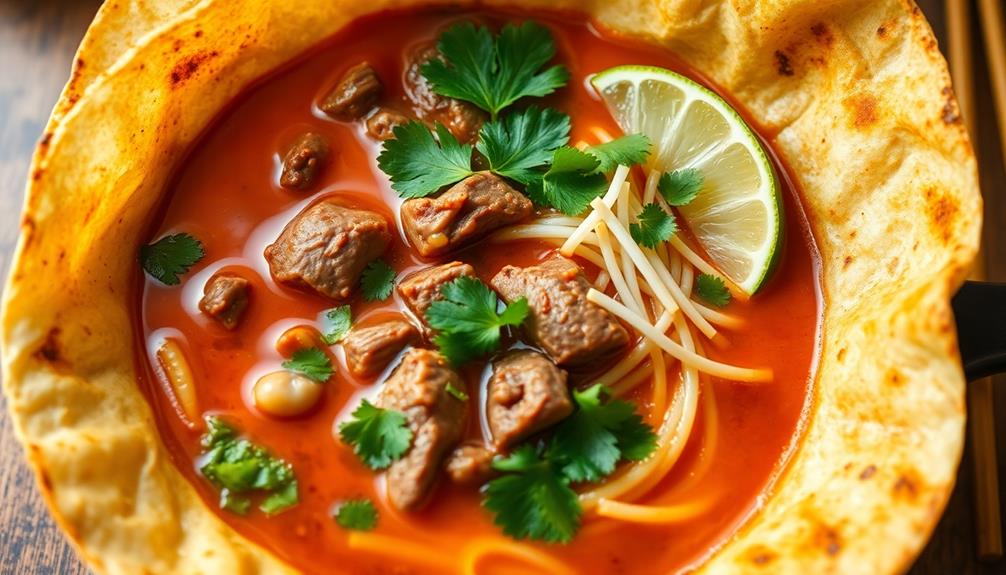
This savory and gelatinous delicacy is the perfect addition to your festive spread, offering a tantalizing taste of Vietnamese culture. Whether you serve it as an appetizer or incorporate it into your main dishes, it's sure to impress your guests and leave them craving more. Made with a careful balance of traditional spices and techniques, this dish captures the essence of Vietnam’s rich culinary heritage. Pair it with a side of Vietnamese spiced beef jerky for a bold contrast in flavors that will elevate your dining experience. Perfect for any occasion, it’s a true testament to the artistry and passion behind Vietnamese cuisine.
The versatility of Vietnamese head cheese is truly remarkable. You can enjoy it on its own, alongside fresh herbs and a zesty dipping sauce, or you can use it to add depth and texture to your favorite recipes.
Imagine the delight of your family and friends as they discover this unique and mouthwatering ingredient, expanding their culinary horizons and creating lasting memories around the table.
Frequently Asked Questions
How Long Does Gio Thu Last After Being Made?
Gio thu, the Vietnamese head cheese, can last up to a week when stored properly in the refrigerator. To maximize its shelf life, make sure to keep it tightly sealed and consume it within 5-7 days of preparation.
Can Gio Thu Be Frozen for Later Use?
Yes, you can freeze gio thu for later use. It'll keep in the freezer for up to 3 months. Just make sure to wrap it tightly to prevent freezer burn. When you're ready to use it, simply thaw it in the refrigerator.
What Are the Common Serving Suggestions for Gio Thu?
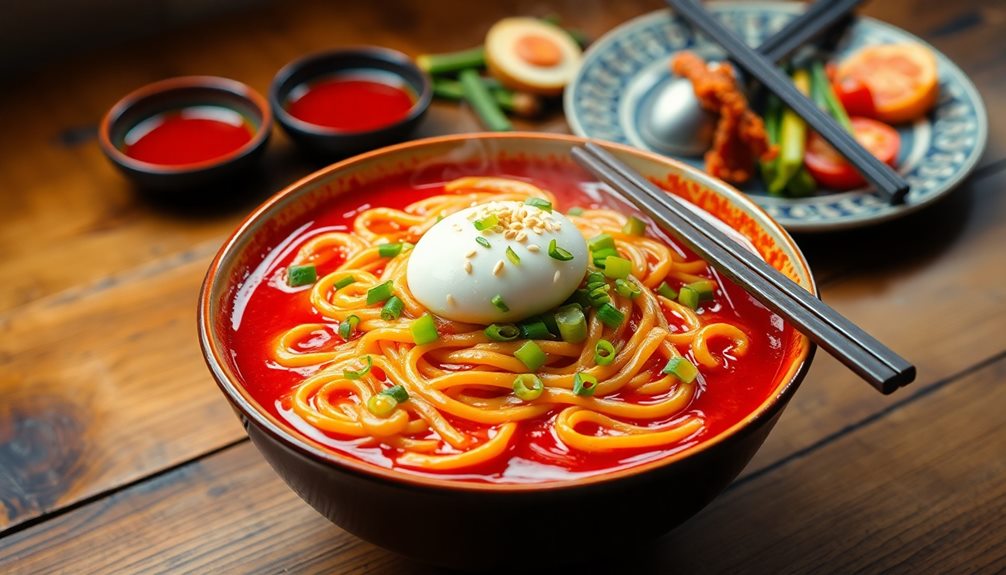
You can serve gio thu in a variety of ways. It's commonly sliced and added to rice paper rolls, paired with fresh herbs, or even used as a topping for pho. You can also incorporate it into appetizer platters or enjoy it on its own.
Is Gio Thu a Common Everyday Dish in Vietnam?
No, gio thu is not a common everyday dish in Vietnam. It's typically reserved for special occasions and holidays due to the labor-intensive preparation process. Most Vietnamese families don't have the time or resources to make it regularly.
Can I Substitute Any Ingredients in the Gio Thu Recipe?
You can certainly substitute some ingredients in the gio thu recipe. Feel free to experiment with different meats or spices to suit your taste preferences. Just be mindful of balancing the flavors and textures to maintain the dish's authenticity.
Mai is a passionate chef specializing in Vietnamese cuisine. From fragrant pho to fresh spring rolls and banh mi, Mai’s dishes showcase the balance of sweet, salty, sour, and spicy that defines Vietnamese cooking. Her recipes emphasize fresh herbs, flavorful broths, and the light, vibrant ingredients that make Vietnamese food so special.
Vietnamese Cuisine
Savory, Tender, and Authentic: Vietnamese Thịt Kho Tàu
Gaze upon the captivating Vietnamese dish, Thịt Kho Tàu, a savory and tender pork belly delicacy that has been a cherished part of the country’s culinary traditions for centuries.
You're in for a real treat with Thịt Kho Tàu, the iconic Vietnamese braised pork belly dish! This savory, tender, and authentic recipe has been part of Vietnamese culinary traditions for centuries, bringing families together during celebratory Lunar New Year feasts. The pork belly simmers in a caramelized sauce packed with umami flavors from fish sauce and brown sugar, creating a mouthwatering balance of sweet, salty, and savory. Enjoy this cherished comfort food over fragrant jasmine rice, and get ready to dive deeper into the rich history and flavors of this Vietnamese culinary treasure.
Key Takeaways
- Thịt Kho Tàu is a treasured Vietnamese dish with a rich history, representing the country's culinary heritage and cultural significance.
- The dish features savory and tender pork belly braised in a caramelized sauce, creating a unique balance of sweet, salty, and umami flavors.
- The recipe involves marinating the pork, browning it, and simmering it in a sauce made with fish sauce, sugar, and coconut water until fork-tender.
- Thịt Kho Tàu is traditionally served with steamed rice, and its communal dining experience strengthens family and social bonds.
- The dish's enduring legacy as a culinary treasure ensures the continuation of Vietnamese culinary traditions for generations to come.
History
Originating from the rich culinary traditions of Vietnam, Thịt Kho Tàu has a storied history that dates back centuries. This beloved dish has been a cherished part of Vietnamese culture, passed down through generations and celebrated during important festivals and gatherings.
The name "Thịt Kho Tàu" literally translates to "braised pork in caramel sauce," reflecting the dish's iconic flavors. The technique of caramelizing the sauce was likely introduced centuries ago, adding a delightful sweetness and depth of flavor to the tender pork.
Over time, regional variations emerged, each showcasing the ingenuity and culinary artistry of Vietnamese cooks.
Today, Thịt Kho Tàu remains a beloved comfort food, bringing families and communities together through shared meals and memories. Whether enjoyed during Tết, the Vietnamese New Year, or savored on any ordinary day, this dish continues to be a cherished part of Vietnam's vibrant and evolving culinary heritage.
Recipe
Tết Kho Tàu, also known as Vietnamese Braised Pork Belly, is a beloved dish that graces many Vietnamese tables during the Lunar New Year celebration. This savory and tender pork dish is a true delight, featuring the rich, caramelized flavors of pork belly simmered in a flavorful sauce.
The key to a successful Tết Kho Tàu lies in the slow, gentle braising process that allows the pork to absorb the complex layers of sweetness, saltiness, and umami. The dish is a testament to the culinary ingenuity of the Vietnamese people, who've perfected the art of transforming humble ingredients into a gastronomic masterpiece.
- Pork belly, cut into 1-inch cubes
- Shallots, thinly sliced
- Garlic, minced
- Fish sauce
- Soy sauce
- Brown sugar
- Whole black peppercorns
- Star anise
- Water or chicken stock
In a large pot or Dutch oven, sauté the shallots and garlic until fragrant. Add the pork belly cubes and sear until browned on all sides. Stir in the fish sauce, soy sauce, brown sugar, peppercorns, and star anise. Pour in enough water or chicken stock to just cover the pork.
Bring the mixture to a boil, then reduce the heat to low, cover, and simmer for 1.5 to 2 hours, or until the pork is tender and the sauce has thickened.
When cooking Tết Kho Tàu, patience is key. The long, slow braising process is essential for developing the rich, caramelized flavors and ensuring the pork becomes meltingly tender.
Serve this dish with steamed rice, and enjoy the perfect balance of savory, sweet, and umami goodness that makes Tết Kho Tàu a true Vietnamese culinary treasure.
Cooking Steps
First, you'll need to marinate the pork in soy sauce to infuse it with flavor.
Then, brown the pork to get a nice sear on the outside.
Step 1. Marinate Pork in Soy Sauce
To begin the marinating process, you'll want to grab a mixing bowl and combine the pork with the soy sauce. Gently toss the meat until it's evenly coated, ensuring each piece is thoroughly seasoned. This simple step adds a rich, savory flavor that will permeate the pork as it simmers.
Next, cover the bowl and let the pork marinate for at least 30 minutes, or up to 2 hours if you have the time. The longer you can let it sit, the more the flavors will develop. Be sure to give the mixture a stir every so often to redistribute the sauce.
Now that your pork is nicely marinated, you're ready to move on to the next step in creating this authentic Vietnamese dish.
Get excited, because the aromas are about to fill your kitchen and have your taste buds tingling in anticipation!
Step 2. Brown the Pork
With the marinated pork ready, heat a large skillet or wok over medium-high heat.
Once the pan is nice and hot, add a splash of oil and let it heat up.
Now, carefully add the pork to the pan. You'll hear that sizzle – that's the sound of deliciousness!
Spread the pork out in an even layer and let it brown, stirring occasionally.
You'll know it's ready when the edges start to get nice and crispy. This should take about 5-7 minutes.
Be patient and let the pork do its thing – you don't want to overcrowd the pan or the meat won't get that perfect golden-brown color.
Once the pork is beautifully browned, transfer it to a plate.
Don't worry, we're not done yet! The next step is to make the savory sauce that will bring all the flavors together.
Get ready for some serious Vietnamese comfort food magic!
Step 3. Add Fish Sauce and Sugar
In the same pan, add the fish sauce and sugar. These two key ingredients will infuse the pork with a captivating blend of savory and sweet flavors. The fish sauce lends a umami depth, while the sugar helps to balance the saltiness and create a caramelized glaze.
Stir the mixture well, ensuring the pork is evenly coated. As the sauce simmers, it will thicken slightly, forming a sticky, appetizing coating on the meat. The aromas will fill your kitchen, making your mouth water in anticipation.
Once the pork has simmered for about 10 minutes, it's time to taste and adjust the seasoning. Add a bit more fish sauce if you'd like a stronger savory note, or sprinkle in some extra sugar for a sweeter touch.
Play with the flavors until they're perfectly balanced to your liking. The pork is now ready to be served, its tender chunks glistening with the delectable fish sauce-sugar glaze.
Get ready to enjoy the authentic, mouthwatering flavors of Vietnamese Thịt Kho Tàu!
Step 4. Add Coconut Water
After the pork has simmered in the flavorful fish sauce and sugar mixture, it's time to add the coconut water. This step infuses the dish with a delightful tropical twist. Simply pour in the refreshing coconut water and give it a gentle stir. The pork will immediately start to absorb the sweet and creamy coconut essence, creating an irresistible balance of savory and lightly sweet flavors.
As the coconut water simmers, you'll notice the sauce thickening and the pork becoming even more tender. This step is crucial for achieving the signature velvety texture of Thịt Kho Tàu. The coconut water also helps to tame any lingering fishiness from the sauce, resulting in a harmonious blend of tastes.
Keep a close eye on the pot, stirring occasionally, until the sauce has reached your desired consistency. The coconut water will work its magic, transforming this Vietnamese classic into an even more captivating and well-rounded dish.
Step 5. Simmer Until Pork Is Tender
Once the coconut water has been added, let the pork simmer gently until it becomes fork-tender. This can take about 30-40 minutes, so be patient.
As the pork simmers, the flavors will meld together beautifully, creating a rich, savory sauce.
Stir the pot occasionally to prevent sticking. You'll know the pork is ready when it easily separates with a fork. The meat should be incredibly tender and practically fall apart.
Breathe in the mouthwatering aroma – the combination of soy sauce, fish sauce, and spices is simply divine.
Now, it's time to adjust the seasonings. Taste the braising liquid and add a touch more fish sauce or sugar if needed, to balance the flavors perfectly.
The pork should be glazed in a thick, glossy sauce that coats each bite. Serve the Thịt Kho Tàu over steamed rice for a complete, satisfying meal.
Get ready for your family to devour this Vietnamese classic!
Final Thoughts
As you reflect on this delectable Vietnamese dish, Thet Kho Tau, it's clear that its rich, complex flavors and satisfying textures make it a true culinary delight.
The long, slow simmer allows the pork to become meltingly tender, while the caramelized sauce coats each bite with a delightful balance of sweet, salty, and savory notes.
Whether enjoyed on its own or served over fragrant jasmine rice, this hearty and comforting meal is sure to delight the senses.
The vibrant colors and aromas of Thet Kho Tau also make it a wonderful centerpiece for family gatherings and festive celebrations.
With its ability to bring people together around the table, this dish truly embodies the heart and soul of Vietnamese cuisine.
As you savor the final bites, you can't help but feel a sense of satisfaction and appreciation for the depth of flavor and the rich cultural heritage that this dish represents.
Thet Kho Tau is a true treasure, and one that should be savored and shared with loved ones for years to come.
Frequently Asked Questions
What Is the Ideal Ratio of Ingredients for ThịT Kho Tàu?
The ideal ratio of ingredients for thịt kho tàu is generally 1 part pork to 2 parts fish sauce, with adjustments to taste. You'll want a flavorful, tender pork that's complemented by the savory fish sauce.
How Long Can ThịT Kho Tàu Be Stored For?
You can store thit kho tau for up to 5 days in the refrigerator. After that, the flavors may start to deteriorate, and the dish won't taste as fresh. Make sure to keep it tightly covered to maintain its delicious taste.
Can ThịT Kho Tàu Be Made With Other Types of Meat?
Yes, you can make thịt kho tàu with other types of meat. Pork is commonly used, but you can experiment with beef, chicken, or even fish to create your own unique version of this classic Vietnamese dish.
What Are Some Common Accompaniments for ThịT Kho Tàu?
Common accompaniments for thịt kho tàu include steamed rice, pickled vegetables, and fresh herbs like cilantro or mint. You can also serve it with crusty bread or a fried egg on top for a complete meal.
Is ThịT Kho Tàu Gluten-Free or Suitable for Special Diets?
Thiết kho tàu can be gluten-free, making it suitable for those with gluten sensitivities. The dish's primary ingredients, like pork and vegetables, don't typically contain gluten, allowing you to enjoy this authentic Vietnamese meal.
Mai is a passionate chef specializing in Vietnamese cuisine. From fragrant pho to fresh spring rolls and banh mi, Mai’s dishes showcase the balance of sweet, salty, sour, and spicy that defines Vietnamese cooking. Her recipes emphasize fresh herbs, flavorful broths, and the light, vibrant ingredients that make Vietnamese food so special.
Vietnamese Cuisine
Nems: The French Take on Vietnamese Fried Spring Rolls
Fusing Vietnamese and French culinary traditions, nems offer a delightful balance of flavors and textures that will leave you craving more.
Nems – the beloved French take on Vietnamese fried spring rolls – blend delightful flavors and textures, showcasing the harmonious fusion of two distinct culinary traditions. Tracing back to the early 20th century during French colonization, nems evolved from Vietnamese spring rolls, incorporating local French ingredients like wheat flour and pork. Today, you'll enjoy the signature crunch as you bite into these golden-brown delights, savoring the perfect balance of crisp wrappers and flavorful fillings. From soaking the noodles to folding and frying, each step in the process contributes to the sensory experience. Discover the rich history and mouthwatering appeal of nems – a delectable treat that connects cultures.
Key Takeaways
- Nems originated from the Vietnamese spring roll "cha gio," adapted by the French during colonial times with local ingredients like wheat flour and pork.
- The dish blends Vietnamese and French culinary traditions, symbolizing the shared culinary history between the two cultures.
- Nems are prepared by folding a filling of noodles, vegetables, and protein into a spring roll wrapper, then deep-frying until golden brown.
- The careful handling of noodles, including soaking, draining, and squeezing, is crucial for achieving the desired crunchy texture of the final dish.
- Nems represent the harmony of flavors and textures, reflecting the creativity and cultural significance of Vietnamese cuisine through a French-influenced lens.
History
The origins of nems, the French Vietnamese fried spring rolls, can be traced back to the early 20th century. When the French colonized Vietnam, they were introduced to the delicious Vietnamese spring rolls known as "cha gio."
The French fell in love with these crispy, flavor-packed rolls and decided to put their own spin on them. They used French ingredients like wheat flour and pork, creating a unique twist on the traditional Vietnamese recipe.
Over time, these French-influenced nems became a beloved part of Vietnamese cuisine, blending the best of both cultures.
Today, nems are enjoyed all over France and Vietnam, a tasty testament to the shared culinary history between the two nations. Whether you're biting into a savory nem at a Parisian bistro or a family-owned Vietnamese restaurant, you'll savor the delicious fusion of flavors that makes these fried spring rolls so special.
Cooking Steps
Once you've gathered all the necessary ingredients, the fun part of preparing the nems begins.
First, take a small amount of the filling mixture and place it in the center of a spring roll wrapper. Carefully fold the bottom of the wrapper up over the filling, then fold in the sides and continue rolling until you have a neat little package. Make sure to keep the rolls tightly wrapped to prevent them from unraveling during frying.
Next, heat a few inches of oil in a large pot or Dutch oven to 350°F. Gently lower the nems into the hot oil and fry for 2-3 minutes, turning occasionally, until they're golden brown and crispy.
Drain the fried nems on a paper towel-lined plate to remove any excess oil.
Step 1. Soak Noodles in Warm Water
Soaking the noodles in warm water is the next crucial step. You'll want to do this before adding them to your spring roll filling.
Simply fill a bowl with warm water and gently submerge the dried noodles. Let them soak for about 10-15 minutes, until they become soft and pliable. This step helps the noodles absorb flavors more easily when you add them to the filling.
Once the noodles have softened, drain them in a colander and give them a quick rinse under cool water. This stops the cooking process and ensures the noodles don't get too soft.
Now they're ready to be cut into bite-sized pieces and mixed with the other delicious ingredients like shredded cabbage, carrots, bean sprouts, and herbs. The warm, soaked noodles will bind everything together perfectly, creating that classic spring roll texture you know and love.
Just remember to work quickly, as you don't want the noodles to dry out.
Step 2. Drain and Squeeze Noodles
After soaking the noodles, drain them thoroughly in a colander. Give them a good shake to remove any excess water.
Now, it's time to squeeze those noodles dry! Grab a handful and give them a good, firm squeeze. You want to get as much water out as possible. Keep squeezing until the noodles feel light and springy.
Don't worry, your hands won't get tired – this is an important step that will help your spring rolls stay crispy. Once all the noodles are squeezed, you can set them aside, ready for the next step.
Properly draining and squeezing the noodles is key to achieving that perfect, crunchy texture in your Vietnamese fried spring rolls. Take your time with this part, and you'll be well on your way to nailing this delicious French-Vietnamese dish.
Step 3. Add Vegetables and Protein
Now that you've thoroughly drained and squeezed the noodles, it's time to start building the filling. Grab a big bowl and let's add the veggies!
You'll want to chop up some cabbage, carrots, and bean sprouts into bite-sized pieces. These crunchy veggies will give your nems that satisfying texture.
Next, let's add the protein. You can use ground pork, shrimp, or a mix of both. Sauté the protein in a pan until it's cooked through, then toss it into the veggie-filled bowl. Mmm, can you smell that savory aroma already?
Now, it's time to season everything up. Sprinkle in some minced garlic, a dash of soy sauce, a pinch of sugar, and a squeeze of fresh lime juice.
Give it all a good stir to combine the flavors. Your filling is now ready to be wrapped up in those delicate rice paper wrappers. Get ready to roll up some tasty nems!
Step 4. Fold and Roll Nems Tightly
With your filling all set, it's time to start rolling up the nems.
First, take a rice paper wrapper and place it on a clean, damp surface. Dip your fingers in water and lightly moisten the wrapper to make it pliable.
Place a spoonful of the vegetable and protein filling near the bottom of the wrapper. Fold the bottom edge over the filling, then fold in the sides and continue rolling it up tightly.
Make sure to roll it snugly, without any gaps or air pockets. Once the nem is fully rolled, wet your fingertips and run them along the seam to seal it.
Repeat this process with the remaining wrappers and filling. Be gentle but firm as you roll, and watch out for any rips or tears in the paper.
With your nems all rolled up, they're ready to be fried to a golden-brown perfection!
Step 5. Fry Nems in Hot Oil
To fry the nems, heat about 2-3 inches of vegetable oil in a heavy-bottomed pot or Dutch oven over medium-high heat.
Once the oil is shimmering, it's time to add those delicious rolls! Gently lower the nems into the hot oil, being careful not to overcrowd the pot. Fry the nems for 2-3 minutes per side, or until they're golden brown and crispy.
Use a slotted spoon or tongs to transfer the fried nems to a paper towel-lined plate. This will help drain off any excess oil.
Repeat the process with the remaining nems, frying in batches to maintain the oil temperature.
Keep a close eye on the oil and adjust the heat as needed to prevent the nems from burning.
Once all the nems are fried, give them a final blot with paper towels to remove any lingering oil.
Now, you've got perfectly crispy, golden-brown nems ready to enjoy! Serve them hot and let the crunchy goodness delight your taste buds.
Final Thoughts
Why not take a moment to reflect on the joys of savoring these delectable Vietnamese fried spring rolls?
After all the careful preparation and frying, it's time to sit back, relax, and indulge. Imagine the satisfying crunch as you take that first bite, the filling bursting with vibrant flavors.
These nems are a true delight for the senses – the aroma, the texture, the taste. Each one is a little package of goodness, a testament to the culinary creativity of the Vietnamese people.
As you enjoy them, let your mind wander to the bustling streets of Saigon or the tranquil countryside. These fried spring rolls are more than just a snack; they're a cultural experience, a way to connect with a rich heritage.
Frequently Asked Questions
How Do Nems Differ From Traditional Vietnamese Spring Rolls?
Nems differ from traditional Vietnamese spring rolls as they're typically larger, heavier, and have a more crispy exterior due to the French influence in their preparation. The filling also tends to be more finely chopped and seasoned differently.
What Are the Typical Fillings Used in Nems?
The typical fillings used in nems often include minced pork, shredded cabbage, carrots, vermicelli noodles, and various seasonings. These ingredients are then wrapped in a thin, crispy rice paper or wheat-based wrapper before being fried to perfection.
How Do You Achieve the Perfect Crispy Texture in Nems?
To achieve the perfect crispy texture in nems, you'll need to use a combination of techniques. Make sure to fry the rolls at the right temperature, use a light and airy wrapper, and drain them well after cooking.
Can Nems Be Made in Advance for a Party or Event?
Yes, you can make nems in advance for a party or event. They can be fried, cooled, and stored in the fridge for up to 3 days. Just reheat them in the oven or air fryer before serving to ensure they're crispy.
Are There Any Variations or Regional Differences in Nems Recipes?
Absolutely! Nems can vary regionally in Vietnam, with different fillings, seasonings, and folding techniques. Some areas may use more pork, others emphasize shrimp or vegetables. Get creative and explore the diverse flavors of this classic Vietnamese dish.
Mai is a passionate chef specializing in Vietnamese cuisine. From fragrant pho to fresh spring rolls and banh mi, Mai’s dishes showcase the balance of sweet, salty, sour, and spicy that defines Vietnamese cooking. Her recipes emphasize fresh herbs, flavorful broths, and the light, vibrant ingredients that make Vietnamese food so special.
Vietnamese Cuisine
Bê Thui: Discover Vietnam’s Smoky Grilled Veal Dish
Flavorful, fragrant, and deeply satisfying, bê thui is a Vietnamese grilled veal dish that will captivate your senses and leave you craving more.
Discover the smoky, tender delight of bê thui, a beloved grilled veal dish that's been captivating taste buds in Vietnam for centuries. Skilled cooks grill marinated veal over charcoal, infusing it with a delectable smoky flavor. Pair the succulent meat with fresh herbs, tangy pickled veggies, and sticky rice – it's a mouthwatering celebration of Vietnam's culinary heritage. Whether you're grilling at home or exploring a bustling Vietnamese market, bê thui offers a unique and unforgettable flavor experience that'll have you craving more. Dive deeper into this hidden gem of Vietnamese cuisine and uncover its rich history and delicious secrets.
Key Takeaways
- Bê Thui is a traditional Vietnamese dish dating back to the 18th century, featuring grilled veal with a smoky flavor from charcoal cooking.
- The dish showcases Vietnam's culinary heritage, with skilled cooks marinating veal in a flavorful mixture of fish sauce, garlic, shallots, sugar, and black pepper.
- Grilling the marinated veal over high heat results in a caramelized crust, while the meat remains tender and juicy on the inside.
- Bê Thui is often served with steamed jasmine rice, fresh herbs, and pickled vegetables, creating a harmonious balance of flavors and textures.
- The dish remains a beloved street food in Vietnam, reflecting the country's vibrant culinary culture and the evolution of local ingredients and preferences.
History
Bê thui, Vietnam's smoky grilled veal dish, has a rich history rooted in the country's culinary traditions. This beloved delicacy has been a part of Vietnamese cuisine for generations, with its origins dating back to the 18th century.
Back then, it was a common sight in open-air markets and street stalls, where skilled cooks would skillfully grill tender veal over charcoal fires, imparting a delicious smoky flavor.
Over the years, the recipe for bê thui has been passed down, evolving and adapting to local ingredients and preferences. Today, it remains a beloved staple, beloved by locals and travelers alike.
The dish's distinct aroma and mouthwatering taste have made it a must-try for anyone exploring the vibrant food scene of Vietnam. From the bustling streets of Hanoi to the coastal towns of the south, bê thui continues to delight and inspire, showcasing the rich culinary heritage of this captivating country.
Cooking Steps
Alright, let's dive into the cooking steps for Bê Thui, Vietnam's smoky grilled veal dish.
First, you'll need to marinate the veal in a savory blend of fish sauce, garlic, shallots, sugar, and black pepper. Let this sit for at least an hour, or up to 24 hours in the fridge for maximum flavor.
Next, fire up your grill to medium-high heat. Grill the marinated veal, turning occasionally, until it's nicely charred on the outside but still juicy on the inside. This should take around 10-12 minutes total.
Be sure to let the veal rest for a few minutes before slicing into it.
Serve the grilled veal with a side of steamed jasmine rice and some fresh herbs like mint, cilantro, and basil. Drizzle over a bit of the reserved marinade for extra zing.
Enjoy this smoky, flavorful Vietnamese classic!
Step 1. Soak Veal in Marinade Overnight
To start, let's soak the veal in the marinade overnight. This step is crucial to infusing the meat with the aromatic flavors of garlic, lemongrass, and fish sauce.
You'll want to use a large resealable bag or a shallow baking dish to hold the veal and the marinade. Gently massage the marinade into the veal, making sure every nook and cranny is coated.
Then, pop the veal into the fridge and let it soak up all those tasty Vietnamese flavors for at least 8 hours, or even better, overnight. This long soaking time allows the marinade to really work its magic, tenderizing the meat and imbuing it with a complex, smoky-sweet taste.
When you're ready to cook, the veal will be bursting with flavor, ready to be grilled to perfection. Just remember to reserve a bit of the marinade to baste the veal as it cooks for extra moisture and flavor.
Step 2. Grill Veal Over Charcoal
Preheat your charcoal grill to high heat, ensuring the coals are glowing red-hot.
Once the grill is scorching, carefully place the marinated veal steaks on the grate. Listen as they sizzle and watch the meat begin to char, creating that tantalizing smoky aroma.
Resist the urge to move the steaks too much – let them develop a nice crust on the first side before flipping. After about 3-4 minutes, use tongs to gently turn the veal over, allowing the other side to get that same delightful char.
Continue grilling, flipping occasionally, until the veal reaches your desired level of doneness, usually around 6-8 minutes total for medium-rare.
The key is to let the natural flavors shine through, allowing the marinade to caramelize and the smoke to infuse the meat.
Soon, you'll have tender, flavor-packed veal that's ready to transport your taste buds straight to the heart of Vietnam.
Step 3. Garnish With Fresh Herbs
After grilling the veal to perfection, garnish the dish with vibrant fresh herbs. The aromatic blend of cilantro, mint, and Thai basil will add a burst of flavor and a touch of elegance to your Bê Thui.
Gently tear the leaves and sprinkle them over the top of the smoky veal, allowing the flavors to mingle. The cool, herbal notes will balance the rich, charred meat, creating a symphony of tastes.
For an extra pop of color, consider adding thinly sliced red chilies or drizzling a fragrant fish sauce and lime dressing over the top. The contrast of the spicy, tangy elements with the tender veal will awaken your senses.
Finish with a light sprinkling of toasted peanuts or sesame seeds for a satisfying crunch. The combination of textures and flavors will transport you straight to the lively street markets of Vietnam.
Enjoy this vibrant, flavor-packed dish with your family and friends.
Step 4. Serve With Pickled Vegetables
Serving a plate of tangy pickled vegetables alongside the smoky grilled veal elevates this Vietnamese dish. The contrasting flavors and textures create a harmonious balance that will delight your taste buds.
To make the pickled veggies, simply thinly slice some crisp carrots, radishes, and cucumbers. Then, mix them in a bowl with a tangy vinegar dressing made from rice vinegar, a touch of sugar, and a pinch of salt. Let the vegetables marinate for about 30 minutes, allowing the flavors to meld.
The result is a refreshing, crunchy accompaniment that perfectly complements the rich, grilled veal. The cool, acidic notes of the pickled vegetables help cut through the meatiness of the bề thui, making each bite an exciting journey for your palate.
Serve the pickled veggies on the side, inviting your guests to build their own flavorful bites by combining the tender veal and the zesty, pickled crunch.
Step 5. Enjoy With Sticky Rice
To truly savor the depth of flavors in this Vietnamese dish, you'll want to serve the smoky grilled veal atop a bed of warm, sticky rice. The glutinous texture of the rice perfectly complements the tender, juicy meat, creating a harmonious balance in every bite.
The stickiness of the rice allows it to soak up all the delicious juices and seasonings from the veal, infusing each grain with the aromatic blend of lemongrass, garlic, and spices. As you take a forkful, the soft, sticky rice will cling to the charred edges of the veal, delivering an explosion of savory, smoky notes in your mouth.
Enjoy this satisfying pairing by scooping the veal and rice onto your plate, then using your hands to shape the mixture into small bites. The tactile experience of eating with your fingers will only heighten the immersive, traditional feel of this beloved Vietnamese meal.
Savor each morsel, allowing the interplay of textures and flavors to transport you to the bustling streets of Vietnam.
Final Thoughts
While Bê Thui may not be as widely known as other Vietnamese dishes, this smoky grilled veal delicacy is a true hidden gem.
You've learned about its unique preparation and how to enjoy it with sticky rice, but there's more to discover. This dish's rich, bold flavors and tender texture make it a must-try for any adventurous eater.
The smokiness from the charcoal grill adds an irresistible layer of complexity, complementing the succulent veal perfectly. And of course, the vibrant herbs and dipping sauce bring everything together in a harmonious burst of taste.
As you savor each bite, you'll be transported to the bustling markets of Vietnam, where this beloved specialty has been enjoyed for generations.
Frequently Asked Questions
Is Bê Thui Made With Beef or Veal?
Based on the Current Question, you can see that Bê Thui is made with veal, not beef. Veal is the meat of young calves, which is often used in Vietnamese cuisine for its tender and delicate flavor.
Does Bê Thui Use Any Special Marinades or Seasonings?
The grilled veal dish uses a unique marinade with aromatic herbs and spices to infuse it with bold, smoky flavors. It's typically seasoned with lemongrass, shallots, fish sauce, and other Vietnamese aromatics.
How Long Does the Grilling Process Typically Take?
The grilling process typically takes around 15-20 minutes. You'll want to grill the meat over high heat, turning it occasionally, until it's nicely charred and cooked through. This helps infuse the meat with that delicious smoky flavor.
Is Bê Thui a Common Dish Across All of Vietnam?
Is bê thui a common dish across all of Vietnam? No, it's not. This specialty dish is primarily found in the central region of the country, where the grilling and preparation techniques have been perfected over generations.
Can Bê Thui Be Made With Alternative Protein Sources?
You can certainly make bê thui with alternative protein sources. While veal is the traditional meat, you could experiment with other lean and tender cuts like beef, pork, or even chicken to create delicious variations.
Mai is a passionate chef specializing in Vietnamese cuisine. From fragrant pho to fresh spring rolls and banh mi, Mai’s dishes showcase the balance of sweet, salty, sour, and spicy that defines Vietnamese cooking. Her recipes emphasize fresh herbs, flavorful broths, and the light, vibrant ingredients that make Vietnamese food so special.
-
Brazilian Cuisine3 months ago
Tacacá
-
Polish Comfort Food3 months ago
Krupnik (Barley Soup)
-
Brazilian Cuisine3 months ago
Caldeirada
-
Brazilian Cuisine3 months ago
Chicken in Brown Sauce
-
Southern Comfort Food3 months ago
Cheese Straws
-
African Cuisine3 months ago
Kedjenou (Ivory Coast)
-
Polish Comfort Food3 months ago
Vegetable Salad
-
American Diner Classics3 months ago
The Maillard Reaction: Understanding the Chemistry of Browning {Food Science and Cooking}