Connect with us

Cooking Techniques

Braising 101: Transforming Tough Cuts Into Tender Delights

Tender, flavorful, and budget-friendly, braising is the secret to crafting comforting meals that’ll have your family craving for more.

Published

on

tender delights from braising

Braising is the secret to transforming tough cuts into tender delights! This time-honored cooking technique has been perfected across diverse culinary traditions, and it's your key to crafting comforting, flavorful meals on a budget. By searing the meat to lock in its natural juices, then slowly simmering it in flavorful liquids, you'll achieve fall-off-the-bone tenderness that'll have your family begging for seconds. With a little patience and the right know-how, you can elevate affordable ingredients into gourmet dishes that'll have your taste buds dancing. And that's just the start of the incredible flavors you'll discover!

Key Takeaways

  • Braising is a slow-cooking method that enhances the tenderness and flavor of tough cuts of meat through searing and simmering in flavorful liquid.
  • The braising process involves searing the meat to create a caramelized crust, then submerging it in a simmering liquid for an extended period to tenderize the connective tissues.
  • Braising has a rich history, with techniques refined across various cuisines, and remains a popular cooking method for transforming affordable cuts into gourmet meals.
  • The key to successful braising is maintaining a gentle simmer and allowing sufficient time for the flavors to meld and the meat to become fork-tender.
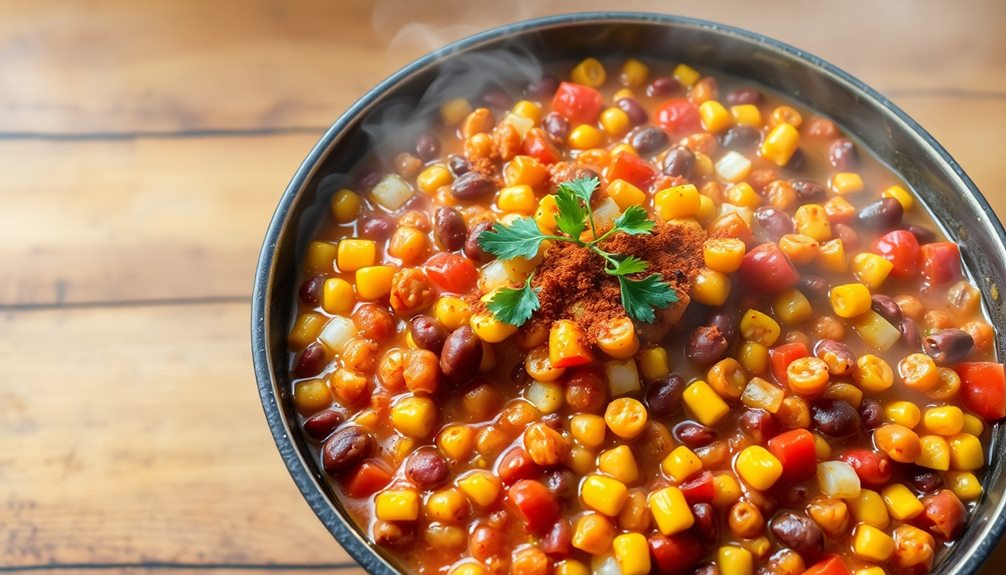
  • Braising is a versatile technique that can be applied to both meats and vegetables, allowing for experimentation with different liquids, aromatics, and seasonings to create a wide range of delicious dishes.

History

Braising originated centuries ago as a slow cooking method, allowing tough cuts of meat to become tender and flavorful. Back then, chefs and home cooks had to make do with less expensive, tougher meats. They discovered that by slowly cooking these cuts in liquid, the connective tissues would break down, creating a delicious, melt-in-your-mouth texture.

Over time, the art of braising evolved, with different cultures and regions developing their own unique approaches. The French perfected the technique, using it to create sumptuous dishes like beef bourguignon.

Braising also became a staple in Chinese and Mexican cuisines, where it lent itself perfectly to hearty stews and succulent pulled meats.

Today, braising remains a beloved cooking method, allowing home cooks to transform tough, affordable cuts into meals fit for a king. Whether you're making classic pot roast or experimenting with exotic flavors, the magic of braising never fails to impress.

Recipe

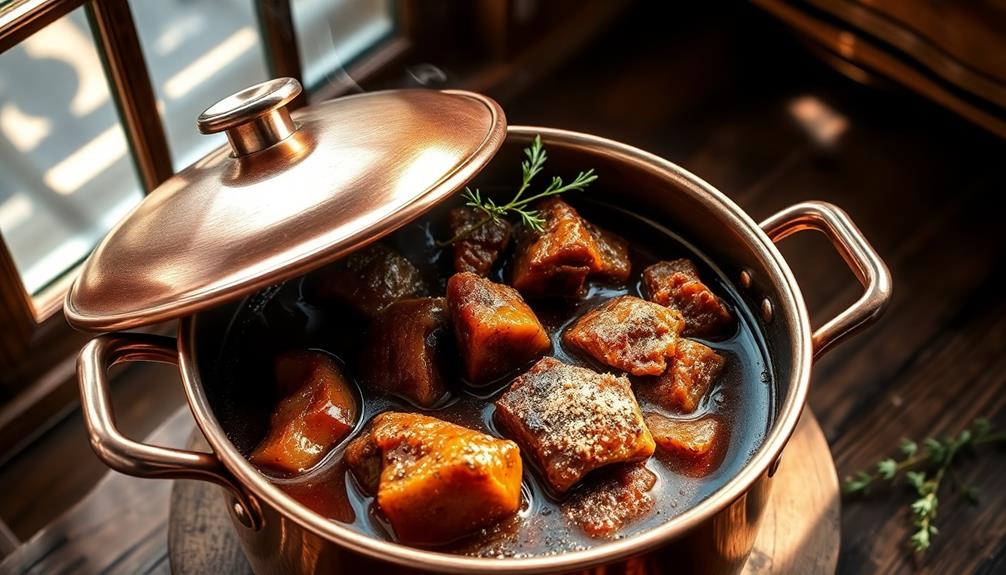
Braising is a moist-heat cooking method that involves searing the surface of a protein or vegetable, then slowly simmering it in a flavorful liquid until tender and succulent. This technique can transform even the toughest cuts of meat into fork-tender delicacies, making it an excellent choice for utilizing budget-friendly ingredients like beef chuck, which is rich in fat and flavor.

Advertisement

The key to successful braising is to balance the initial sear with the long, slow cooking process. This allows the connective tissues to break down, resulting in a rich, concentrated flavor that can't be achieved through any other cooking method and ensuring that you maximize the nutritional benefits of the dish, including the essential fatty acids found in butter, when used in moderation butter's nutritional information.

  • 3 lbs boneless beef chuck, cut into 2-inch cubes
  • 2 tablespoons olive oil
  • 1 large onion, diced
  • 3 cloves garlic, minced
  • 2 cups red wine
  • 4 cups beef broth
  • 2 bay leaves
  • 2 sprigs fresh thyme
  • Salt and pepper to taste

In a large Dutch oven or heavy-bottomed pot, heat the olive oil over medium-high heat. Working in batches if necessary, sear the beef cubes on all sides until a deep, golden-brown crust forms, about 2-3 minutes per side. Transfer the seared beef to a plate and set aside.

Reduce the heat to medium, and add the onions to the pot. Cook, stirring occasionally, until the onions are softened and lightly caramelized, about 5-7 minutes. Add the garlic and cook for an additional minute, until fragrant.

Return the seared beef and any accumulated juices to the pot. Pour in the red wine, beef broth, bay leaves, and thyme. Bring the liquid to a simmer, then reduce the heat to low, cover, and cook for 2-3 hours, or until the beef is fork-tender.

When the braised beef is ready, taste and adjust the seasoning with salt and pepper as needed. Serve hot, over mashed potatoes, polenta, or your favorite starch. The long, slow cooking process will result in a rich, deeply flavorful dish that will have your guests coming back for seconds.

Cooking Steps

Start by searing your meat over high heat to get that beautiful caramelized crust.

Advertisement

Then, add your meat to a flavorful liquid and let it simmer away, covered, until it's fall-off-the-bone tender.

Don't forget to check for doneness before removing your braised masterpiece!

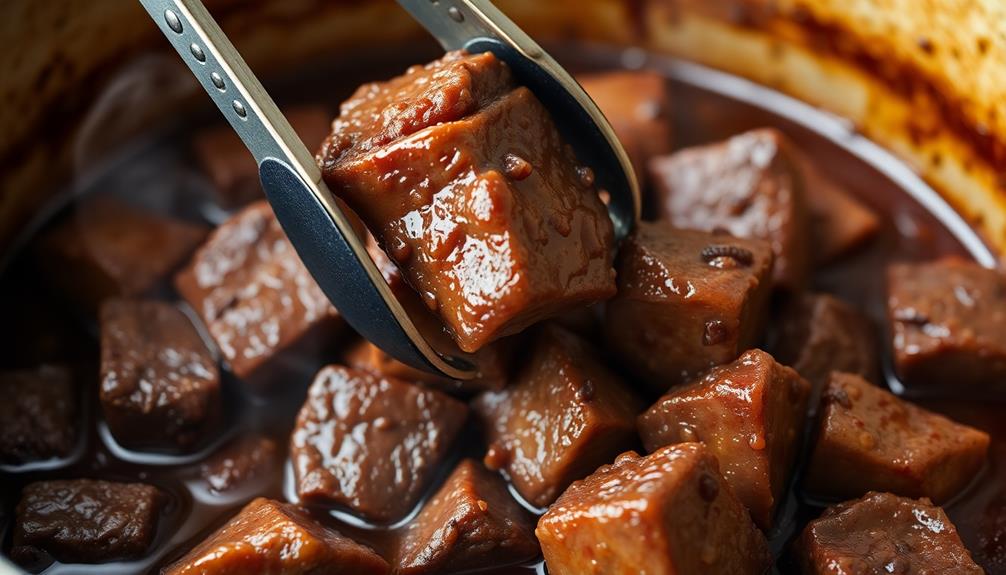
Step 1. Sear Meat Over High Heat

sear meat high heat

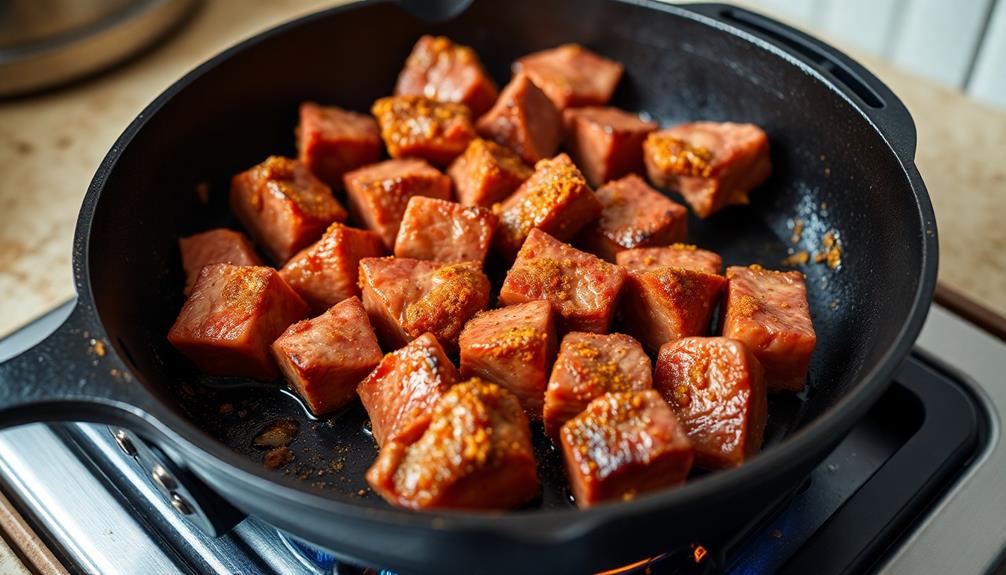
To sear the meat, turn your burner to high heat. This high temperature will create a beautiful brown crust on the outside of the meat.

Don't be afraid of the sizzle – that's the sound of flavor being locked in! Use tongs to gently lower the meat into the hot pan. Let it sear for 2-3 minutes without moving it. This gives the meat time to develop that delicious caramelized exterior.

Once the first side is nicely browned, flip the meat over using your tongs. Sear the other side for another 2-3 minutes. You may need to adjust the heat if the meat starts to burn. The goal is to get an even, golden-brown crust all around.

This step is crucial, as it kicks off the braising process by adding layers of flavor.

Advertisement

After searing, the meat will be ready to braise in the delicious liquids that transform it into a tender, succulent dish. Get ready for the amazing flavors to come!

Step 2. Braise in Flavorful Liquid

braise in flavorful liquid

Once you've seared the meat, it's time to braise it in a flavorful liquid. This is the key to transforming those tough cuts into melt-in-your-mouth delicacies! Start by choosing a liquid that'll infuse your dish with delicious flavors. Red wine, beef or chicken broth, or even a combination work great.

Gently lower the meat into the simmering liquid, making sure it's mostly submerged. Don't worry if it's not completely covered – the steam will do its magic.

Now, let the magic happen! Cover the pot and let the meat braise for an hour or more, until it's fall-off-the-bone tender. As it cooks, the tough fibers will break down, and the flavors will meld together beautifully.

Depending on the recipe, you might want to add some aromatics like onions, garlic, or herbs to further enrich the braising liquid. Just let them simmer alongside the meat, filling your kitchen with an irresistible aroma.

Get ready to enjoy a truly remarkable dish!

Advertisement

Step 3. Cover and Simmer

cover pot and simmer

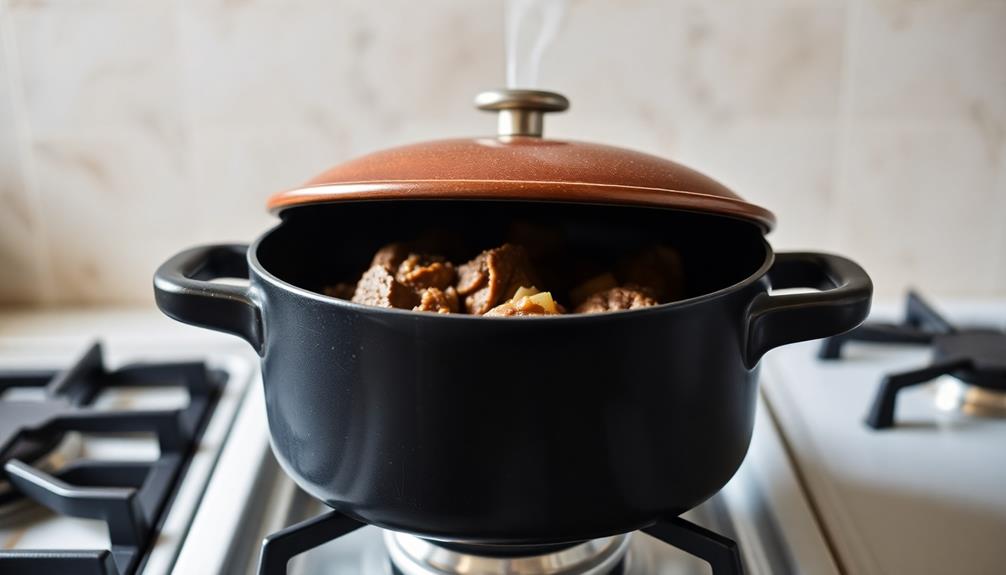
After lowering the meat into the simmering liquid, cover the pot and let the magic unfold. The lid traps the heat, allowing the ingredients to gently cook and meld together.

As the liquid simmers, it'll slowly tenderize the meat, breaking down the tough fibers and transforming the texture. You'll want to maintain a gentle simmer throughout the cooking time – not a rolling boil, which could make the meat tough.

Peek under the lid occasionally to check the liquid level, adding more as needed to keep the meat submerged. This steady, low-and-slow approach is key to achieving that melt-in-your-mouth tenderness.

Don't be tempted to remove the lid too often, as each time you do, you'll release precious heat and steam. Just sit back and let the magic happen!

After a while, the meat will become fork-tender and the flavors will have deepened wonderfully. Get ready to enjoy a truly comforting and delicious braise.

Step 4. Test for Doneness

test food for readiness

As the braising time nears its end, it's crucial to test the meat for doneness.

You'll want to use a fork or knife to gently pry into the thickest part of the meat. If it slides in and out with ease, the meat is perfectly tender and ready to serve. However, if you encounter any resistance, it needs a bit more time in the oven.

Advertisement

Another way to check for doneness is by gently pressing on the meat with your finger. Cooked-to-perfection meat will feel soft and yielding, while undercooked meat will still feel firm.

You can also use a meat thermometer for a more precise reading, aiming for an internal temperature between 195-205°F.

Once the meat reaches this range, it's time to take it out of the oven and let it rest for 10-15 minutes before slicing and serving. This final resting period allows the juices to redistribute throughout the meat, ensuring a moist and flavorful result.

Step 5. Remove Braised Meat

remove braised meat step

When the meat is perfectly tender, it's time to remove it from the oven. Carefully take the braising dish out and set it on a heat-safe surface. The meat should be falling-apart tender, easily shredding with just a fork.

Use tongs or a slotted spoon to transfer the meat from the braising liquid to a serving dish or plate.

Don't discard the flavorful braising liquid! This liquid gold is packed with all the delicious flavors that have been developing during the long, slow cooking process.

Advertisement

Strain the liquid through a fine-mesh sieve to remove any solids, then return it to the pan. You can use this sauce to spoon over the meat, or reserve it for another purpose, like making a rich gravy.

With the meat removed, you're one step closer to enjoying the meltingly tender, deeply flavored results of your braising efforts.

Get ready to dive in and savor every bite!

Final Thoughts

Braising is an immensely versatile cooking technique that can elevate even the simplest ingredients. Whether you're working with a tough cut of meat or a humble vegetable, the low-and-slow process of braising can transform them into something truly remarkable. The key is to be patient and let the flavors meld together over time.

As you've learned, the process of braising involves searing the ingredients, adding liquid, and then simmering them gently until they become fork-tender and infused with rich, complex flavors.

Advertisement

But the beauty of braising doesn't stop there. Experiment with different liquids, seasonings, and aromatics to create endless flavor combinations. The possibilities are truly endless! For instance, adding a splash of wine or a dash of soy sauce can introduce bold, complex profiles, while fresh herbs and citrus zest elevate the dish with bright, refreshing layers. Understanding the science behind food brining can further enhance your braising game, as it helps retain moisture and boosts seasoning at the cellular level. With every tweak and twist, you unlock new depths of flavor, transforming simple ingredients into extraordinary meals.

Ultimately, braising is a cooking method that rewards your efforts with deeply satisfying, comforting meals. Whether you're whipping up a weeknight dinner or hosting a special occasion, the techniques you've mastered in this guide will serve you well.

Frequently Asked Questions

What Equipment Is Required for Braising?

To braise, you'll need a heavy-duty pot or Dutch oven with a tight-fitting lid. This allows for the low and slow cooking that transforms tough meats into melt-in-your-mouth tenderness. Don't forget a sharp knife for prepping the ingredients.

How Do I Select the Right Pot for Braising?

When selecting a pot for braising, choose one that's large enough to accommodate the meat and vegetables with room to spare. Look for a heavy, lidded pot that retains heat well, like a Dutch oven or cast-iron pan.

Can I Braise in a Slow Cooker?

You certainly can braise in a slow cooker! The low and slow cooking method of braising works perfectly in a slow cooker, transforming tough cuts of meat into tender, flavorful dishes.

Advertisement

Should I Season the Meat Before Braising?

You should definitely season the meat before braising. Seasoning the meat with salt and pepper enhances the flavor, helps develop a nice crust, and ensures the meat is well-seasoned throughout the dish.

How Long Can Braised Dishes Be Stored?

Braised dishes can typically be stored for 3-5 days in the refrigerator or up to 3 months in the freezer. The exact storage time will depend on the ingredients used and how well the dish is sealed.

Advertisement

Cooking Techniques

Radish Slices: the Crisp Side Dish That Complements Any Meal

Mastering the art of radish slice preparation, this versatile side dish promises to elevate any meal with its peppery flavor and crisp texture.

Published

on

crisp radish side dish

Radish slices have a history that dates back to ancient civilizations, celebrated for their peppery flavor and rejuvenating properties. Today, you can find a wide variety of radishes, from red globe to watermelon, that make for a versatile and nutritious side dish. To prepare, simply rinse the radishes, slice them thin, toss with olive oil, salt, and pepper, then bake until crisp. Serve these warm radish slices immediately for the best taste and texture. Whether you enjoy them in salads, as a snack, or alongside your favorite main course, radish slices are sure to complement any meal. Now let's explore the rich history and countless ways to serve this crisp delight.

Key Takeaways

  • Radish slices offer a delightful crunch and peppery flavor that can elevate a wide range of dishes, from salads to main courses.
  • Easily prepared by thinly slicing radishes and tossing them with oil, salt, and pepper before baking for a crisp texture.
  • Versatile in their applications, radish slices can be enjoyed as a standalone snack or paired with dips and dressings.
  • Packed with nutritional benefits, radish slices provide a healthier alternative to traditional side dishes or snacks.
  • Radish slices complement various cuisines and can be used to garnish or add a refreshing contrast to meals.

History

chronicles of past events

Radish slices have long graced the plates of culinary enthusiasts, tracing their roots back to ancient civilizations. These vibrant, crunchy delights were prized by the ancient Egyptians, Greeks, and Romans, who celebrated their peppery flavor and rejuvenating properties.

Over the centuries, radish slices have become a beloved side dish, complementing a wide array of cuisines worldwide.

While their popularity endures, the humble radish has evolved significantly. Today, you can find a dazzling array of radish varieties, from the classic red globe to the delicate watermelon radish. Each type offers its own unique taste and texture, allowing you to experiment and discover your personal favorites.

Whether you enjoy them tossed in a salad, served alongside a savory main course, or even pickled for a tangy crunch, radish slices are a versatile and nutritious addition to any meal. Their crisp, refreshing nature makes them an irresistible accompaniment that's sure to delight your taste buds.

Cooking Steps

follow recipe instructions carefully

To prepare the radish slices, begin by thoroughly washing the radishes and trimming off the stems and root ends. Slice the radishes into thin, even rounds using a sharp knife or a mandoline slicer. This will ensure they cook evenly and get that lovely crispiness you're after.

Next, bring a pot of water to a boil. Carefully add the radish slices and let them blanch for about 2 minutes. This quick dip in hot water helps to soften the radishes slightly and enhance their natural crispness.

Advertisement

Drain the slices in a colander and pat them dry with paper towels.

Now, heat a skillet over medium-high heat and add a drizzle of olive oil. Arrange the radish slices in a single layer and cook for 3-4 minutes per side, until they're lightly browned and crispy around the edges.

Season with a sprinkle of salt and pepper, then serve the radish slices warm as a tasty side dish.

Step 1. Rinse Radish Slices Under Water

rinse radish slices thoroughly

Rinse the sliced radishes under cool running water, gently swishing them back and forth to remove any dirt or debris. This simple step ensures your radishes are clean and ready for the next part of the cooking process.

Be sure to use your hands to carefully separate the slices, allowing the water to reach every nook and cranny. Once the radishes are rinsed, you can give them a gentle pat dry with a clean paper towel or kitchen cloth.

This will help them maintain their crisp texture when you add them to your dish. With the radishes now prepped, you're one step closer to enjoying their satisfying crunch and peppery flavor.

Advertisement

Step 2. Slice Radishes Into Thin Rounds

slice radishes into rounds

With the radishes now cleaned, it's time to slice them into thin, even rounds. Grab a sharp knife and carefully start slicing the radishes, making each slice about 1/8-inch thick. Try to keep the slices uniform in size so they cook evenly.

As you slice, arrange the radish rounds in a single layer on a clean cutting board or plate. This thin, uniform slicing is the key to getting those perfect crisp radish slices. The thinner you can make them, the crispier they'll become when you cook them.

Don't worry if some of the slices break apart a bit – you can still use those irregular pieces. In fact, the smaller bits will get even crispier than the larger, intact slices.

Once you have all the radishes sliced, you're ready for the next step: cooking them to bring out their delicious crispness! Keep an eye on the thickness of your slices, and you'll be well on your way to radish slice perfection.

Step 3. Toss With Olive Oil, Salt, and Pepper

season with olive oil

After slicing the radishes, toss them with a drizzle of olive oil, ensuring each slice is lightly coated. This will help the radishes become extra crisp and flavorful.

Sprinkle on a pinch of salt and a few grinds of black pepper. The salt will enhance the natural peppery taste of the radishes, while the pepper adds a little kick. Use your hands to gently toss the radishes, making sure the seasoning is evenly distributed.

Once the radishes are coated, arrange them in a single layer on a baking sheet. This will allow them to get nice and crispy as they roast in the oven.

Advertisement

Pop the sheet into a preheated oven and let the radishes bake until they're tender on the inside and delightfully crunchy on the outside. Keep an eye on them, giving the pan a shake every few minutes, so they don't burn.

In no time, you'll have a tasty, crunchy side dish that's perfect for any meal!

Step 4. Bake Radish Slices Until Crisp

crisp radish slices baking

Preheat your oven to a toasty 400°F (200°C). Grab a baking sheet and line it with parchment paper or a silicone baking mat.

Slice your radishes into thin, even rounds, about 1/8-inch thick. Arrange the radish slices in a single layer on the prepared baking sheet. Drizzle the radishes with a bit of olive oil, making sure they're all evenly coated. Sprinkle with a pinch of salt and freshly ground black pepper.

Slide the baking sheet into your preheated oven and bake for 15-20 minutes, flipping the radish slices halfway through. Keep a close eye on them, as you want the radishes to become crisp and golden-brown, but not burnt.

Once they've reached your desired level of crispness, remove the baking sheet from the oven. Let the radish slices cool for a minute or two before serving. Enjoy these crunchy, flavorful radish slices as a delightful side dish that complements any meal.

Advertisement

Step 5. Serve Radish Slices Immediately

serve radish slices freshly

Serve the crisp radish slices immediately while they're still warm. The delightful crunch and tangy flavor are at their peak when you enjoy them fresh from the oven.

Don't let those tasty morsels sit too long – they're best savored right away!

Arrange the radish slices on a serving platter or plate. You can leave them as individual rounds, or gently group them together for a lovely presentation.

Sprinkle with a light dusting of salt or your favorite seasoning blend to enhance the natural peppery notes. The vibrant color and inviting aroma will have your family and guests eager to dig in.

These crispy radish slices are the perfect accompaniment to all kinds of meals. Pair them with grilled meats, fish, or hearty stews for a refreshing contrast.

They also make a fantastic snack on their own or dipped in a cool and creamy dip. No matter how you serve them, these crunchy radish slices are sure to delight.

Advertisement

Final Thoughts

concluding reflections and insights

Radish slices make a delightful side dish that's sure to impress. They're crunchy, refreshing, and add a pop of color to any meal. Whether you're serving a fancy dinner or enjoying a casual backyard BBQ, these little veggie discs are the perfect accompaniment.

Once you start snacking on radish slices, you won't be able to stop. Their subtle peppery flavor and satisfying crunch make them incredibly addictive. They pair beautifully with a variety of dips and dressings, from cool ranch to tangy lemon vinaigrette.

Plus, they're a healthy alternative to chips or crackers, so you can indulge guilt-free.

Radish slices are also incredibly versatile. Use them to garnish salads, tacos, or sandwiches. Or, serve them as a standalone appetizer with a selection of cheeses and olives.

No matter how you enjoy them, these crisp and flavorful veggies are sure to become a staple in your kitchen.

Frequently Asked Questions

How Long Do Radish Slices Last in the Refrigerator?

Radish slices can last 3-5 days in the refrigerator when stored properly in an airtight container. To ensure maximum freshness, you should wash and dry the radishes before slicing and storing them in the coldest part of your fridge.

Advertisement

Can I Substitute Other Types of Radishes for This Recipe?

You can absolutely substitute other types of radishes in this recipe. Whether you use round red radishes, daikon, or even watermelon radishes, the preparation and serving method will remain the same, providing a refreshing crunch to your meal.

What Is the Best Way to Store Leftover Radish Slices?

The best way to store leftover radish slices is to place them in an airtight container or plastic bag in the refrigerator. This will help maintain their crispness and prevent them from drying out.

Can I Make Radish Slices Ahead of Time for Meal Prep?

You can definitely make radish slices ahead of time for meal prep. Just store them in an airtight container in the fridge, and they'll stay crisp and fresh for several days. This makes for easy, convenient meal prep.

Are There Any Health Benefits to Consuming Radish Slices?

Yes, there are health benefits to eating radish slices. They're packed with vitamins and minerals like vitamin C, fiber, and antioxidants. Incorporating them into your meals can support your overall wellness and digestion.

Advertisement

Continue Reading

Cooking Techniques

Knife Skills: Chopping Like a Pro

Unlock the secret to chopping like a pro and elevate your culinary game with these essential knife skills that will leave your friends in awe.

Published

on

mastering professional chopping techniques

Mastering knife skills unlocks the secret to chopping like a pro! You can create beautifully uniform cuts that enhance the flavor and visual appeal of your cooking. Start with a firm grip, positioning the blade perpendicular to the cutting board. Slice at a 45-degree angle for thinner, more precise pieces. Maintain control by avoiding fingers and finding your rhythm through consistent motions. This patience and practice will boost your culinary creativity, allowing you to explore new recipes and impress your friends. Want to take your knife skills to the next level? Read on to learn more essential techniques!

Key Takeaways

  1. Maintain a firm and safe grip on the knife, using the "claw grip" to protect fingers during cutting.
  2. Position the blade perpendicular to the cutting board for maximum control and uniform slices.
  3. Slice at a 45-degree diagonal angle to enhance precision and create thinner, uniform pieces.
  4. Focus on consistent, smooth, and rhythmic slicing motions to achieve uniform cuts.
  5. Mastering knife skills boosts culinary creativity, enhances flavor, and elevates the overall cooking and dining experience.

History

Tracing the evolution of knife skills, the use of bladed tools can be traced back to the earliest human civilizations. From the sharp stones used by our ancestors for hunting and gathering, to the intricate knives and cleavers of today, the history of knives is a fascinating journey.

As technology advanced, so did the design and functionality of these essential tools. The ancient Egyptians, Greeks, and Romans all had their own unique styles of knives, each reflecting the needs and traditions of their cultures.

Even in the Middle Ages, knights and nobles carried ornate daggers and swords, not just for battle, but also for preparing food. Nowadays, knife skills are celebrated as an art form, with chefs around the world honing their techniques to perfection.

Whether you're slicing, dicing, or chopping, the history of knives is woven into the very fabric of human progress.

Recipe

Knife skills are essential for any home cook. This recipe for a simple yet delicious dish showcases the importance of proper knife techniques.

Advertisement

Having the right tools, like a quality chef's knife, can significantly enhance your chopping efficiency and precision, making it easier to achieve uniform pieces that cook evenly. For those looking to elevate their cleaning routine in the kitchen, consider using best vacuums for dust removal in 2024 to keep your space tidy.

The key to this recipe is to ensure that all the ingredients are uniformly chopped, sliced, or diced. This not only enhances the visual appeal of the final dish but also ensures even cooking throughout.

Ingredients:

  • 2 boneless, skinless chicken breasts
  • 1 red bell pepper
  • 1 yellow onion
  • 2 cloves of garlic
  • 1 cup of sliced mushrooms
  • 2 tablespoons of olive oil
  • 1 teaspoon of dried thyme
  • Salt and pepper to taste

In a large skillet, heat the olive oil over medium-high heat. Carefully add the diced chicken and sear until golden brown on all sides, approximately 5-7 minutes. Remove the chicken from the skillet and set it aside.

In the same skillet, add the sliced mushrooms and sauté until they begin to release their moisture, about 3 minutes. Next, add the diced onion and continue cooking until the onion is translucent, another 5 minutes.

Mince the garlic and add it to the skillet, cooking for an additional minute until fragrant. Finally, add the sliced bell pepper to the skillet and sauté for 3-4 minutes, until the vegetables are tender.

Advertisement

Return the seared chicken to the skillet, sprinkle with dried thyme, and season with salt and pepper to taste. Simmer for an additional 5-7 minutes, or until the chicken is cooked through and the flavors have melded together.

Cooking Steps

Grip your knife firmly and safely, with your fingers curled back.

Position the blade perpendicular to the cutting board for maximum control.

As you slice, go at a diagonal angle – it's quicker and neater!

Remember, take your time and be careful not to cut your fingers.

Advertisement

Keep practicing these slicing motions, and you'll be a knife skills master in no time!

Step 1. Grip Knife Firmly and Safely

grip knife firmly safety

A firm and safe grip on your knife is essential for efficient and controlled cutting. Start by wrapping your fingers around the handle, with your index finger extended along the blade's spine. This gives you maximum control and stability. Tuck your thumb against the side of the blade for added security.

Keep your other fingers curled around the handle, not extended. This "claw grip" puts your knuckles in a protective position.

Hold the knife with confidence, but avoid squeezing too tightly. Your grip should feel solid yet relaxed. Lift the knife by bending at the elbow, not the wrist. This allows for smooth, accurate cuts.

As you chop, maintain this firm grip and keep your eyes on the blade. Pay attention to your fingers – they should be tucked safely out of the way. With practice, gripping a knife will become second nature, letting you slice, dice and mince with ease and safety.

Step 2. Position Blade Perpendicular to Cutting Board

blade perpendicular to board

With the knife firmly in your grasp, position the blade perpendicular to the cutting board. This orientation gives you the most control and precision as you slice, dice, and chop.

Hold the knife at a 90-degree angle, with the sharp edge facing down towards the board. Keep your fingers curled inward, using your knuckles to guide the blade. Slowly and steadily, run the knife straight through the food, making clean, even cuts.

Advertisement

This perpendicular position allows the full length of the blade to make contact with the surface, resulting in smooth, uniform slices. Remember to maintain a secure, balanced stance, with your feet shoulder-width apart.

As you become more comfortable, you can pick up the pace, but always keep the blade perpendicular for the best results. With practice, you'll be chopping like a professional in no time!

Step 3. Slice at a Diagonal Angle

diagonal angle slicing technique

Once you've mastered the perpendicular blade position, try slicing at a diagonal angle. This technique allows you to cut through ingredients with more precision and control.

Hold your knife at a 45-degree angle to the cutting board, with the blade facing away from your body. Slowly draw the knife through the food, using gentle, even strokes. This diagonal slice creates thinner, more uniform pieces that are perfect for even cooking.

As you gain confidence, experiment with different angles. A steeper diagonal can produce paper-thin slices, great for delicate items like mushrooms or zucchini. A shallower angle works well for heartier veggies like carrots or potatoes.

Just remember to keep your fingers curled under and your eyes on the blade. With a little practice, you'll be slicing like a pro in no time! The diagonal technique adds a special touch to all your culinary creations.

Advertisement

Step 4. Avoid Cutting Fingers With Control

control to prevent injuries

Although maintaining control of your knife is crucial, it's equally important to protect your fingers. By keeping a firm grip and using the right technique, you can slice and dice with confidence, without any unexpected nicks or cuts.

Start by curling your fingers inward, tucking them safely under as you guide the blade. This "claw" grip gives you better control and keeps your fingertips out of harm's way. Go slowly, focusing on precision rather than speed.

Maintain a stable, balanced stance, and let the knife do the work. If you feel yourself rushing or losing focus, take a deep breath and slow down. Remember, the kitchen is no place for multi-tasking!

Stay present, keep your eyes on the task at hand, and your hands will thank you. With a little practice, you'll be chopping like a pro in no time, all while keeping your digits intact.

Step 5. Repeat Slicing Motion Consistently

consistent slicing motion practice

Consistent, repetitive slicing motions are key to achieving uniform cuts. When chopping, try to keep your movements steady, smooth, and rhythmic. Visualize the knife gliding through the ingredient with ease, like a well-oiled machine. This takes practice, but it will soon become second nature.

Start by gripping the knife firmly, with your index finger resting on the blade for control. Raise the knife up, then bring it down with a decisive, straight slice. Pay attention to the sound – a sharp "thwack" means you're on the right track.

Repeat this motion, keeping your strokes even and your wrist relaxed. As you gain confidence, gradually increase your speed, but don't rush. Slow and steady is the way to go.

Advertisement

Visualize the perfect dice or julienne, then let your knife do the work. With patience and repetition, you'll be chopping like a pro in no time!

Final Thoughts

Mastering proper knife skills is one of the most valuable culinary techniques you can develop. With a bit of practice, chopping like a pro will become second nature. You'll zip through meal prep in record time and impress your family and friends with your lightning-fast knife skills.

The key is to keep that repeat slicing motion consistent. As you gain more experience, you'll start to develop a natural rhythm. Before you know it, your knife will be dancing across the cutting board, creating perfectly diced veggies and paper-thin slices of meat.

Best of all, mastering these techniques will boost your confidence in the kitchen. You'll feel like a true culinary artist, taking your cooking to the next level.

Frequently Asked Questions

How Do I Choose the Right Knife for Chopping?

To choose the right knife for chopping, consider the task at hand. A chef's knife is versatile for general chopping, while a cleaver works well for tougher ingredients. Opt for a sharp, high-quality blade that feels comfortable in your hand.

Advertisement

What Is the Proper Way to Hold a Chef's Knife?

To hold a chef's knife properly, grip the handle with your fingers curled around it and your thumb resting on the spine. Keep your wrist straight and use your other hand to guide the blade as you chop.

How Can I Avoid Cutting Myself While Chopping?

To avoid cutting yourself while chopping, keep your fingers tucked, use a steady grip, and focus on the task. Move the knife slowly and carefully, and keep your work surface clear of distractions.

How Do I Sharpen a Knife for Optimal Cutting Performance?

To sharpen your knife for optimal cutting performance, use a sharpening stone or electric knife sharpener. Run the blade along the sharpener at the proper angle, maintaining even pressure for a keen, razor-sharp edge.

What Are Some Common Mistakes to Avoid When Chopping Vegetables?

To avoid common mistakes when chopping vegetables, don't grip the knife too tightly, keep your fingers curled, and maintain a steady, even rhythm. Relax your wrist and use the full length of the blade for efficient cuts.

Advertisement

Continue Reading

Cooking Techniques

The Perfect Sear: Mastering Pan Temperatures

Delivering mouthwatering dishes starts with the perfect sear, a game-changer in the kitchen that requires mastering pan temperatures.

Published

on

mastering pan searing techniques

Mastering the perfect sear on your proteins is a game-changer in the kitchen! Through the ages, cooks have used pans to create mouthwatering dishes, from ancient Roman pizza to modern masterpieces. The secret? Proper temperature control. By preheating your pan and adding oil at just the right heat, you'll achieve a golden-brown crust that locks in delicious flavors. Be patient as you sear your protein, letting it sit untouched for 3-4 minutes per side. The sound of sizzling means you're on the right track! Mastering pan temperatures is a crucial culinary skill that'll wow your family and friends. Keep reading to discover more tips for pan-seared perfection.

Key Takeaways

  1. Proper pan preheating is essential for achieving a perfect sear, as it creates the necessary heat for browning and flavor development.
  2. Selecting the right cooking oil and monitoring its temperature ensure a good sear and prevent sticking, leading to an evenly cooked protein.
  3. Allowing the protein to sear undisturbed for 3-4 minutes on each side is crucial for building a golden-brown crust and locking in flavors.
  4. Adjusting the heat throughout the cooking process is critical to prevent burning while ensuring thorough cooking, a key skill for mastering pan temperatures.
  5. Consistent practice and experimentation with different recipes and techniques help cooks develop an intuitive understanding of optimal pan temperatures for various cooking methods.

History

When did the use of pans in cooking first gain prominence? Well, it all started thousands of years ago when early humans began cooking over an open fire! They'd use simple bowls and pots made from clay or stone to heat and prepare their food.

Over time, as cooking techniques evolved, so did the tools. Pans made from metals like copper and cast iron became more common, allowing cooks to achieve that perfect sear and evenly cook their meals.

The history of pans is really quite fascinating. Did you know that ancient Romans even used pans to bake early versions of pizza?

And in the Middle Ages, pans were often decorated with intricate designs, showing that cooking was seen as an art form.

Today, pans come in all shapes and sizes, from the classic cast iron skillet to the sleek nonstick variety. No matter the style, pans have been an essential part of the kitchen for centuries, helping cooks create delicious dishes that bring people together.

Advertisement

Recipe

Cooking a dish to perfection requires mastering the art of pan temperature control. The right temperature ensures even cooking, rich flavors, and a delightful texture. This recipe for a classic dish showcases the importance of temperature management throughout the cooking process.

Achieving the perfect pan temperature is crucial for searing, sautéing, and ensuring the ingredients cook evenly. Paying close attention to temperature changes and adjusting the heat accordingly will result in a dish that's both visually appealing and bursting with flavor.

  • 2 boneless, skinless chicken breasts
  • 2 tablespoons olive oil
  • 1 teaspoon salt
  • 1/2 teaspoon black pepper
  • 1 onion, diced
  • 2 cloves garlic, minced
  • 1 cup diced tomatoes
  • 1/2 cup chicken broth
  • 1/4 cup fresh basil leaves, chopped

Begin by heating the olive oil in a large skillet over medium-high heat. Season the chicken breasts with salt and pepper, then place them in the hot pan. Sear the chicken for 3-4 minutes per side, or until a golden-brown crust forms.

Reduce the heat to medium, cover the pan, and continue cooking the chicken for 10-12 minutes, or until it reaches an internal temperature of 165°F. Remove the chicken from the pan and set it aside.

In the same pan, sauté the onion over medium heat for 3-4 minutes, or until it becomes translucent. Add the garlic and cook for an additional minute, taking care not to let the garlic burn.

Deglaze the pan with the chicken broth, scraping up any browned bits from the bottom of the pan. Add the diced tomatoes and let the mixture simmer for 5 minutes. Return the chicken to the pan and garnish with the fresh basil. Serve immediately.

Advertisement

When cooking this dish, be mindful of the pan temperature at each step. The key is to start with a high heat to sear the chicken, then reduce the heat to medium to ensure the chicken cooks through without burning. Monitoring the temperature and adjusting the heat as needed will result in a juicy, flavorful dish.

Cooking Steps

Alright, let's get cooking!

First, you'll want to preheat your pan over medium-high heat.

Once it's nice and hot, add a drizzle of oil to the pan.

Now, it's time to add your protein and let it sear for about 3-4 minutes.

Advertisement

Flip it over and let the other side get nice and golden brown.

Step 1. Preheat Pan Over Medium-High Heat

preheat pan medium high heat

Preheating the pan over medium-high heat is a crucial step in the cooking process. You'll want to let that pan get nice and toasty before adding any ingredients. This helps create that perfect sear on your meats and veggies, locking in all the delicious flavors. Just turn up the heat and let the pan sit for a minute or two.

You'll know it's ready when you can hold your hand a few inches above the surface and feel the warm, radiant heat. A well-organized kitchen space can also enhance your cooking experience, allowing you to focus on the task at hand and reduce distractions.

Efficient storage strategies for your cooking tools and ingredients can lead to a more enjoyable culinary adventure.

Now, be careful – that pan is going to be hot! Use oven mitts or a kitchen towel to handle it. Once it's preheated, you can add a little oil or butter and let it shimmer and sizzle.

This is where the magic happens. The high heat will caramelize the outside of your food, making every bite absolutely mouthwatering. So don't be shy – crank up that heat and get ready for some serious culinary fireworks!

Advertisement

Step 2. Add Oil to Pan

add oil to pan

Once the pan is preheated, you'll want to add a bit of oil to it. This helps create that perfect sear on your food. You can use any type of oil you like, but some great options are olive oil, vegetable oil, or even a bit of butter. Just make sure to pour in enough to lightly coat the bottom of the pan.

As the oil heats up, you'll start to see it shimmer and maybe even hear a gentle sizzle. That's exactly what you want! The oil should be hot but not smoking. If it starts to smoke, that means it's too hot and you'll need to turn down the heat a bit.

Once the oil is ready, it's time to add your food. Be careful when placing it in the pan, as the oil may splatter a bit. But don't worry, that just means the pan is nice and hot – perfect for getting that delicious sear.

Step 3. Add Protein to Pan

add protein to pan

When the oil is hot and shimmering, it's time to add your protein! Whether you're cooking chicken, steak, or even tofu, you'll want to gently lower it into the pan.

Listen for that satisfying sizzle – that's the sound of your protein getting a delicious, golden-brown sear.

As the protein cooks, resist the urge to poke or fidget with it. Let it do its thing! After a minute or two, you can use tongs to flip it over and let the other side get in on the action.

Keep an eye on the color – you're looking for that perfect caramelized crust.

Advertisement

Once both sides are nicely seared, you can reduce the heat a bit and let the protein finish cooking to your desired doneness.

Remember, the temperature will continue to rise even after you take it off the heat, so don't overcook!

With a little practice, you'll be searing like a pro.

Step 4. Let Protein Sear for 3-4 Minutes

sear protein for minutes

With the pan hot and the oil shimmering, it's time to add your protein. Whether you're cooking chicken, steak, or tofu, the key is to let it sear for 3-4 minutes. As the protein hits the surface, you'll hear a satisfying sizzle.

This moment is crucial, as a high refresh rate in cooking can elevate the quality of your sear, much like how it enhances gaming experiences. Resist the urge to move it around – this is the magic moment when the Maillard reaction occurs, creating a beautiful brown crust.

Keep your eye on the clock, and when the time is up, use tongs to flip the protein over. You'll see a gorgeous golden-brown surface, full of flavor.

Advertisement

Let the other side sear for another 3-4 minutes, and you'll have a perfectly cooked piece of protein with a delicious caramelized exterior.

The secret to mastering this technique is all about patience and trusting the process. With a little practice, you'll be searing like a pro, elevating your meals to new heights of deliciousness.

Step 5. Flip Protein to Sear Other Side

flip protein for searing

Having allowed the protein to sear for the recommended 3-4 minutes, it's now time to flip it over.

This is the exciting part – you'll get to see the beautiful, golden-brown crust that's formed on the first side. Carefully grab your tongs or spatula and gently lift the protein, making sure not to tear or damage the crust.

Then, with confidence, flip it over to the other side. Listen for that satisfying sizzle as the uncooked side hits the hot pan.

Now, you'll want to let this second side sear for another 3-4 minutes, just like the first. Keep a close eye on it, so the crust doesn't burn.

Advertisement

Once that timer goes off, your protein will be perfectly seared on both sides, ready to be finished in the oven or served up as the star of your meal.

Get ready for that first delicious bite – it's going to be amazing!

Final Thoughts

Mastering the proper pan temperatures is a critical skill for any cook, whether you're searing a steak or sautéeing vegetables.

Once you've got the technique down, you'll be able to create mouthwatering dishes with ease. Remember, getting the temperature just right is the key to achieving that perfect sear or golden-brown finish.

Don't be afraid to experiment and find what works best for your favorite recipes. With a little practice, you'll be a pan-temperature pro in no time!

Advertisement

The right temperature can make all the difference, so keep an eye on that dial and trust your instincts. Before you know it, you'll be impressing your friends and family with your culinary skills.

Mastering pan temperatures is a game-changer in the kitchen, so embrace the challenge and have fun with it. Who knows, you might even discover a new favorite dish along the way!

Frequently Asked Questions

What Type of Pan Works Best for Searing?

You'll want to use a stainless steel or cast iron pan for the best sear. These materials get hotter and hold heat better than nonstick pans, allowing you to achieve that perfect, caramelized crust on your meats.

How Do I Know When My Pan Is Hot Enough?

You'll know your pan is hot enough when you hold your hand a few inches above it and can feel the intense radiant heat. Keep a close eye on the pan – it can go from not hot enough to too hot quickly.

Can I Reuse the Same Oil for Multiple Sears?

You can reuse the same oil for multiple sears, but it's best to strain and discard it once it becomes discolored or has a strong flavor. This helps maintain the oil's quality and prevent off-flavors in your food.

Advertisement

How Do I Prevent Food From Sticking to the Pan?

To prevent food from sticking to the pan, make sure the surface is hot enough before adding the food. Use a small amount of oil and don't overcrowd the pan. Allow the food to release naturally from the surface.

What's the Best Way to Clean the Pan After Searing?

After searing, let the pan cool slightly, then add some hot water. Gently scrub with a soft sponge or cloth to remove any stuck-on bits. Dry the pan thoroughly before storing or using it again.

Continue Reading

Affiliate Disclaimer
As an affiliate, we may earn a commission from qualifying purchases. We get commissions for purchases made through links on this website from Amazon and other third parties.

Advertisement

Vetted

top local car washes top local car washes
Vetted2 months ago

14 Best Car Washes Near You for a Sparkling Clean Ride

I discovered the 14 best car washes near you that promise a sparkling clean ride, and you won't want to...

top mops for 2024 top mops for 2024
Vetted2 months ago

The 15 Best Mops of 2025 – Your Ultimate Guide to a Spotless Home

Find the perfect mop for your cleaning needs in 2025, and discover how these top choices can revolutionize your home...

top women s fragrances 2024 top women s fragrances 2024
Vetted2 months ago

15 Best Perfumes for Women in 2025 – A Fragrance Guide You Can’t Miss

Keen to discover the top 15 perfumes for women in 2025? Uncover unique scents that will elevate your fragrance game!

top local bars guide top local bars guide
Vetted2 months ago

14 Best Bars Near You for an Unforgettable Night Out

Looking for the perfect bar to elevate your night out? Discover the 14 best spots that promise unforgettable experiences!

luxurious beard oil selection luxurious beard oil selection
Vetted2 months ago

15 Best Beard Oils for a Luxurious Grooming Experience in 2025

Shop the 15 best beard oils for a luxurious grooming experience in 2025 and discover which ones will elevate your...

top college laptops 2024 top college laptops 2024
Vetted2 months ago

15 Best College Laptops of 2025: The Ultimate Guide for Students

With our guide to the 15 best college laptops of 2025, discover which powerful models will elevate your academic experience...

waterproof mascaras for tears waterproof mascaras for tears
Vetted2 months ago

15 Best Waterproof Mascaras That Will Survive Any Tear-Jerker

Outstanding waterproof mascaras await to keep your lashes flawless through any emotional moment; discover which ones made the top 15...

top flavorful disposable vapes top flavorful disposable vapes
Vetted2 months ago

15 Best Disposable Vapes of 2025: Top Picks for Flavor and Convenience

Prepare to discover the 15 best disposable vapes of 2025 that blend exceptional flavor and convenience, but which ones truly...

refreshing lunch salad ideas refreshing lunch salad ideas
Vetted2 months ago

15 Best Salads Near You That Will Freshen Up Your Lunch Routine

Transform your lunch with the 15 best salads nearby that will tantalize your taste buds and leave you craving more...

top convertible car seats top convertible car seats
Vetted2 months ago

15 Best Convertible Car Seats of 2025 – Safety and Comfort for Your Little One

Get ready to discover the top 15 convertible car seats of 2025 that blend safety and comfort—find out which models...

delicious fast food breakfast delicious fast food breakfast
Vetted2 months ago

15 Best Fast Food Breakfast Options That Will Make Your Mornings Delicious

Uncover the 15 best fast food breakfast options that will transform your mornings into a delicious experience you won't want...

stylish contacts for vision stylish contacts for vision
Vetted2 months ago

14 Best America’s Contacts for Clear Vision and Style

Browse through the 14 best contact lenses in America for clear vision and style, and discover which one perfectly complements...

Trending