
TL;DR
Placing your rig in a closet can drastically cut noise, but it requires strategic treatment and ventilation. The key is targeting reflection points, sealing gaps, and ensuring airflow—then your closet becomes a surprisingly effective studio.
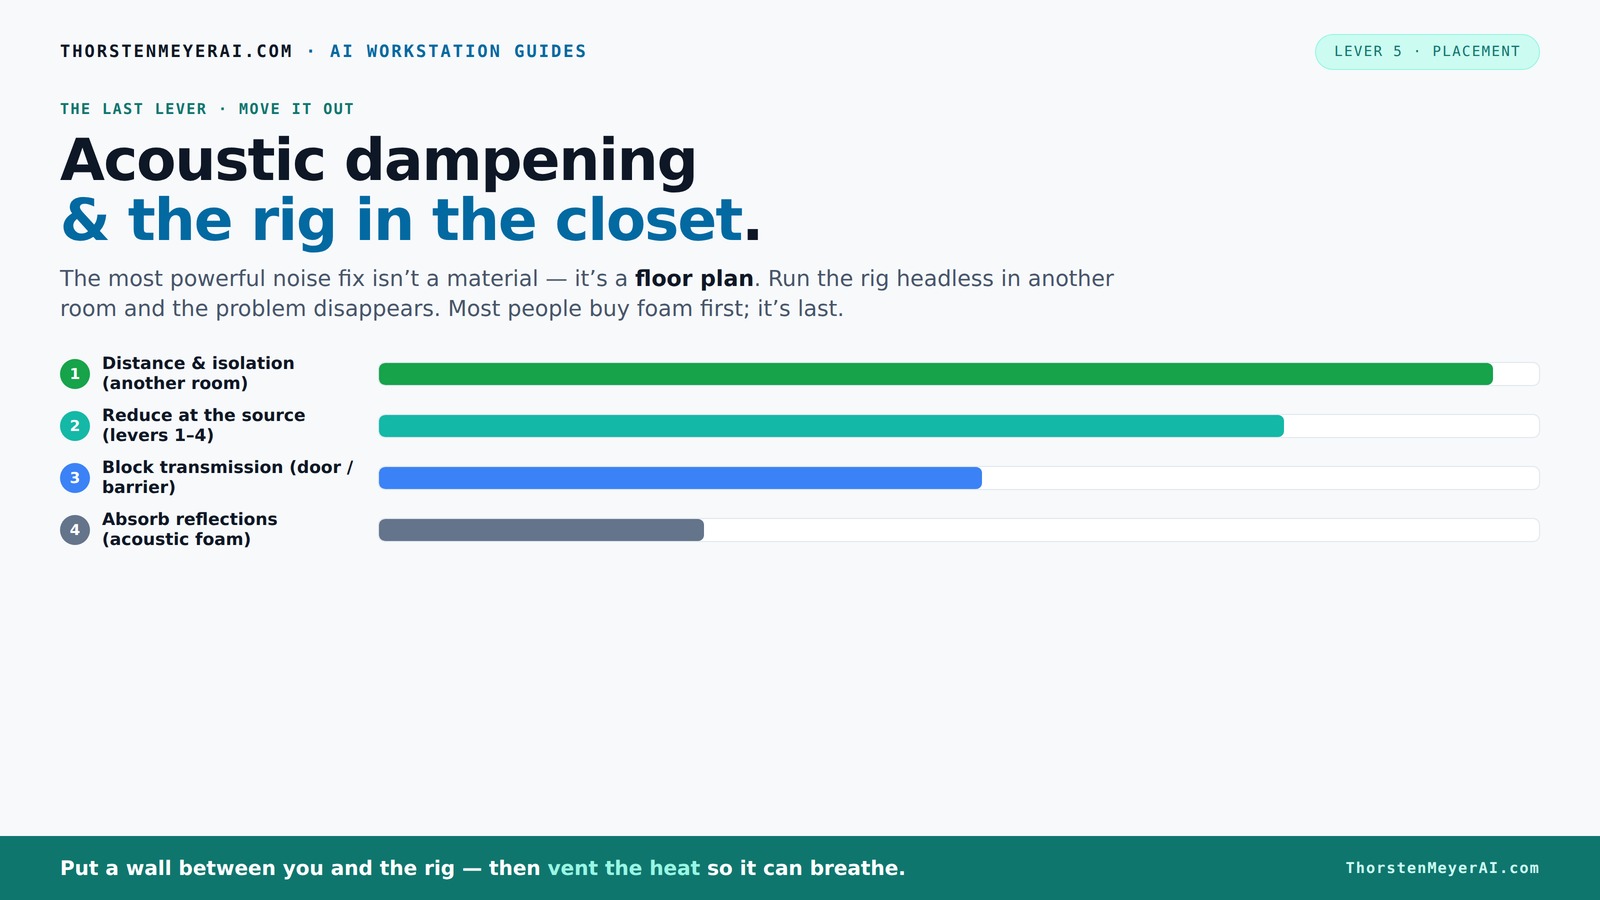
Acoustic dampening
& the rig in the closet.
The most powerful noise fix isn’t a material — it’s a floor plan. A rig you can’t hear because it’s in another room beats any amount of foam. Tap the approaches in Part 1 to see what actually works.
(another room)
(levers 1–4)
(door / barrier)
(acoustic foam)
Contain the noise, not the heat
Key Takeaways
- Treat reflection points—walls behind the mic, ceiling, and side walls—to make your voice clearer.
- Sealing gaps around the door and outlets prevents sound leaks, boosting your isolation.
- Ventilation is critical—use quiet fans or ducting to keep your rig cool without noise.
- Foam reduces echo but doesn't block sound leaks—combine with sealing and barriers.
- A closet rig works best for vocals and voice-over, not for loud instruments or full-band recordings.

24 Pack Black 12 x 12 x 2 Inches Pyramid Designed Acoustic Foam Panels, Sound Proof Foam Panels for Walls, High Density and Flame-Retardant Acoustic Panels, Sound Panels for Recording and Home Studio
- Effective Sound Absorption: Reduces echo and reverberation
- High-Quality Material: Durable, flame-retardant acoustic foam
- Stylish Pyramid Design: Enhances sound diffusion and decor
As an affiliate, we earn on qualifying purchases.
As an affiliate, we earn on qualifying purchases.
Why Most Closet Studios Still Need More Than Just Foam
Acoustic foam and blankets are great for reducing echoes inside your closet, but they won't block sound from leaking outside. Foam is a treatment, not a barrier. If you want silence on the other side, sealing gaps and controlling airflow are your best bets.
For example, overlapping foam around the door frame and sealing cracks with weatherstripping stops sound leaks. Without these steps, your mic picks up every sound that sneaks through gaps, defeating the purpose of your cozy setup.
The Truth About Acoustic Dampening vs. Soundproofing
Acoustic dampening reduces echo and reflections inside a small space. Soundproofing, on the other hand, blocks sound from leaving or entering. Think of foam as a way to soften inside noise, but you need barriers—like sealed doors or walls—to keep sound from leaking out.
Understanding this distinction is crucial because it impacts your approach. Over-relying on foam can give a false sense of isolation; you might still hear external noise or have your sound leak. Effective soundproofing involves a combination of dampening internal reflections and sealing the space's perimeter. For example, adding mass to doors or walls, using soundproof curtains, or installing acoustic barriers can significantly improve isolation. The tradeoff is often increased cost and complexity, but the payoff is a truly quiet environment suitable for professional recordings.
Placement Hacks: Where to Put Absorbers for Maximum Effect
In your tiny closet, placement matters more than the amount of foam. Focus on the first reflection points—these are the surfaces where sound bounces directly back to your mic. Usually, that's the wall behind you and the side walls near the mic.
For instance, a DIY setup used blankets and foam on the wall behind the mic, the ceiling, and even the door. These spots catch the most reflections, making your voice sound clearer and reducing harsh echoes.
Don’t forget to treat the desk surface if it causes reflections—soft cloths or rugs can help keep sound smooth and natural.
Proper placement is key because untreated reflection points can cause comb filtering and muddiness, degrading your recording quality. By targeting these specific areas, you effectively control the internal acoustics, which often results in a more natural and professional sound without needing excessive materials. Think of it as strategic armor for your sound—less is more when placed correctly.
How to Seal Gaps and Keep Sound Inside
Sound leaks through cracks, gaps, and the door perimeter. Using weatherstripping around the door frame and sealing outlets prevents unwanted noise from sneaking in or out. Even small cracks can let in or escape a surprising amount of sound.
For example, a streamer added weatherstripping and a door sweep to their closet door, drastically reducing background noise. This simple step made their voice recordings much cleaner and more professional.
Remember: the tighter the seal, the better the isolation. Neglecting this can lead to persistent background noise and reduced audio clarity, which often requires re-recording or post-processing. The tradeoff is minimal effort for significant improvement, making sealing gaps one of the most cost-effective ways to enhance your closet studio’s sound isolation.
Ventilation Tips for a Closet Rig — Keep It Cool and Quiet
Hot, enclosed spaces are a common issue when putting a rig in a closet. Without proper airflow, your PC or GPU can overheat, throttling performance and increasing noise. The key is providing ventilation that moves heat out without noise.
Active ventilation options include quiet exhaust fans or ducted vents with sound-dampening materials. For example, a creator installed a vent with a small, quiet fan and ducting to pull hot air out, keeping their system cool without adding extra noise.
Check out dedicated soundproof cabinets that combine silence and cooling for high-power setups — they are worth the investment.
Proper ventilation not only prevents overheating but also reduces the risk of heat-related hardware failures. The challenge is balancing airflow with noise control; using soundproof ducts or muffled fans helps maintain a quiet environment while ensuring your equipment stays cool.
The 'Rig in the Closet' Setup: Pros, Cons, and How to Do It Right
Putting your rig in a closet is a smart way to silence noise at the source. It’s especially useful if you mainly access your system remotely, over SSH or API. The main challenge? Heat buildup. Without proper airflow, your hardware risks overheating and throttling.
To do it right, add a vent or small exhaust fan, seal gaps, and treat reflection points inside. For example, a streamer used blankets, foam, and a small vented exhaust to create a quiet, cool closet booth for their voice-over recordings.
Remember: ventilation isn’t optional. It’s the difference between a silent, cool rig and a fried one. Carefully planning your airflow paths and choosing quiet, efficient fans are key to making this setup work without sacrificing performance or silence.
Cost-Effective Tricks to Improve Your Closet Studio
You don’t need expensive gear to make a closet studio work. Simple DIY solutions like blankets, rugs, curtains, and foam panels can drastically improve sound quality. Overlap blankets around the door and treat reflection points for a noticeable difference.
For example, a hobbyist used a collection of old blankets and foam on walls, adding a small fan for ventilation. The result? Clear vocals and almost no echo, all on a tight budget.
Small investments in weatherstripping and a quiet exhaust fan pay off big time.
Keep in mind that these budget solutions often involve tradeoffs—like less durability or aesthetic concerns—but when implemented thoughtfully, they provide a substantial boost to your recording quality without breaking the bank.