
Homemade apple pie is a cherished American tradition that's been passed down for generations. It all starts with fresh, juicy apples combined with a blend of warm spices like cinnamon, then nestled in a buttery, flaky crust. The aroma alone can transport you to cozy family gatherings, where slices of this classic dessert are eagerly shared. Whether enjoyed on its own or with a scoop of cool, creamy vanilla ice cream, homemade apple pie is a delightful treat that captures the very essence of comfort and nostalgia. There's more to discover about this timeless slice of Americana.
Key Takeaways
- Homemade apple pie has deep historical and cultural roots, tracing back to 14th century Europe and becoming a cherished American tradition.
- The classic recipe features a combination of a buttery, flaky crust and a sweet, cinnamon-spiced apple filling, made with fresh, ripe apples and careful preparation.
- The baking process involves peeling and slicing apples, making a homemade pie crust, assembling the pie, and baking it until the crust is golden brown and the filling is bubbling.
- Serving homemade apple pie with a scoop of creamy vanilla ice cream creates a decadent dessert experience, with the contrast of warm pie and cold ice cream enhancing the overall flavor.
- Crafting a homemade apple pie requires baking mastery and skill development, as it involves creating a warm, golden-brown crust and a sweet, fragrant filling that highlights the use of fresh ingredients.

MALACASA Ceramic Pie Pan, Pie Pan for Baking 9 Inch, 40 OZ Pie Plate Round Pie Dish for Baking Fluted Pie Dish Baking Pan, Non Stick Deep Pie Dishes for Quiche, Apple Pies, Pot Pies, Tart, etc.
- Premium Ceramic Material: High-quality, durable, stain-resistant ceramic
- Versatile Temperature Use: Microwave, oven, freezer, dishwasher safe
- Elegant Fluted Edge: Provides better grip and prevents slipping
As an affiliate, we earn on qualifying purchases.
As an affiliate, we earn on qualifying purchases.
History
The origins of apple pie can be traced back to the 14th century in Europe. Back then, people baked simple pies with apples, sugar, and spices in a basic pastry crust. As time passed, apple pie recipes became more elaborate, with the addition of a top crust and creative designs.
When the first settlers arrived in America, they brought their beloved apple pie recipes with them. Baking apple pie soon became a cherished tradition, filling homes with the mouthwatering aroma of cinnamon and sweet apples.
Over the centuries, the recipe has been passed down through generations, evolving to include local ingredients and personal touches.
Today, apple pie remains an iconic American dessert, a symbol of home, family, and the simple pleasures in life. Whether enjoyed warm with a scoop of vanilla ice cream or at room temperature, a slice of homemade apple pie is a delightful treat that connects us to the rich history and enduring appeal of this timeless classic.
Recipe
Homemade apple pie is a classic dessert that can be enjoyed year-round. The combination of a buttery, flaky crust and a sweet, cinnamon-spiced apple filling is simply irresistible. This recipe will guide you through the process of creating a delicious, homemade apple pie from scratch.
To enhance your kitchen experience, consider integrating modern appliances that promote efficiency, like a high flow toilet that maximizes water use in the home.
The key to a successful apple pie lies in the quality of the ingredients and the care taken in the preparation. Using fresh, ripe apples and a simple yet effective spice blend will result in a pie that's bursting with flavor. Additionally, taking the time to properly prepare the crust will ensure a perfect texture that complements the filling.
Ingredients:
- 2 1/2 cups all-purpose flour
- 1 tsp salt
- 1 cup unsalted butter, chilled and cubed
- 1/4 cup ice water
- 6-8 apples, peeled, cored, and sliced
- 3/4 cup granulated sugar
- 2 tsp ground cinnamon
- 1/4 tsp ground nutmeg
- 2 tbsp cornstarch
- 1 tbsp lemon juice
Directions:
In a large mixing bowl, combine the flour and salt. Cut in the chilled butter using a pastry blender or two forks until the mixture resembles coarse crumbs.
Add the ice water, one tablespoon at a time, and mix until the dough just begins to come together. Divide the dough in half, shape each half into a disc, wrap in plastic, and refrigerate for at least 30 minutes.
Preheat your oven to 375°F (190°C). In a large bowl, mix the sliced apples, sugar, cinnamon, nutmeg, cornstarch, and lemon juice until well combined.
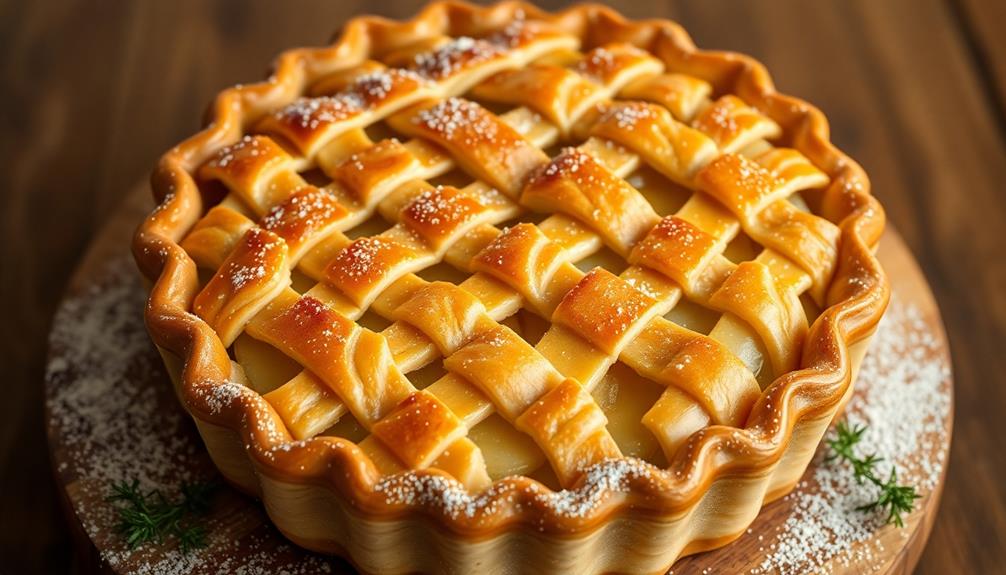
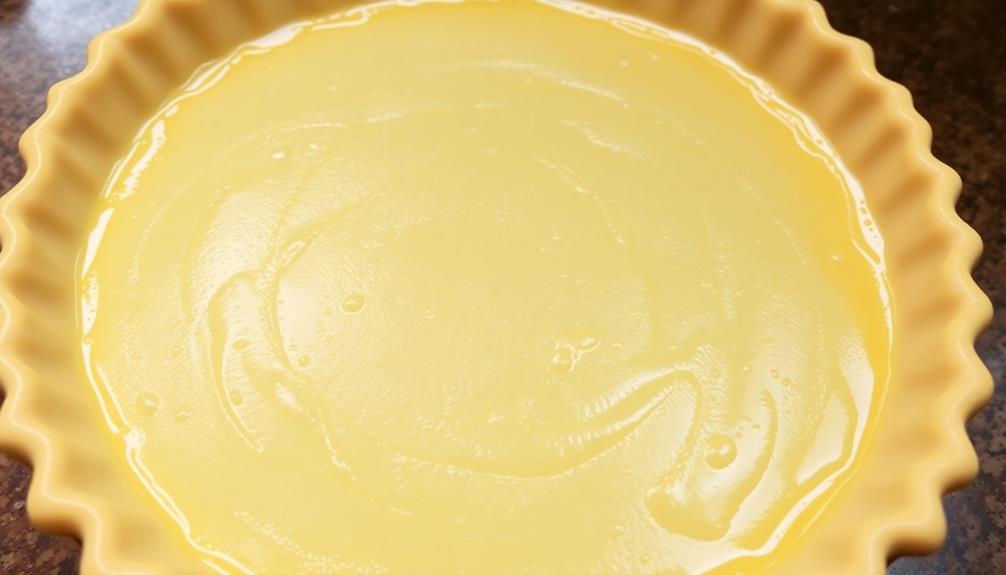
Roll out one of the dough discs and place it into a 9-inch pie dish. Pour the apple filling into the crust. Roll out the remaining dough and place it on top of the filling, crimping the edges to seal. Cut several slits in the top crust to allow steam to escape.
Bake the pie for 45-55 minutes, or until the crust is golden brown and the filling is bubbling. Allow the pie to cool completely before serving, as this will help the filling set.
Serve with a scoop of vanilla ice cream or a dollop of whipped cream for an extra special treat.
Cooking Steps
Peel and slice those crisp apples until you've got a mountain of juicy, golden slices.
Next, whip up a flaky, buttery pie crust – you've got this!
Now, layer the apples in the crust, sprinkle with cinnamon and sugar, and pop that baby in the oven.
Once it's golden brown, brush the crust with an egg wash for a gorgeous shine, then serve with a big scoop of cool vanilla ice cream. Yum!
Step 1. Peel and Slice the Apples
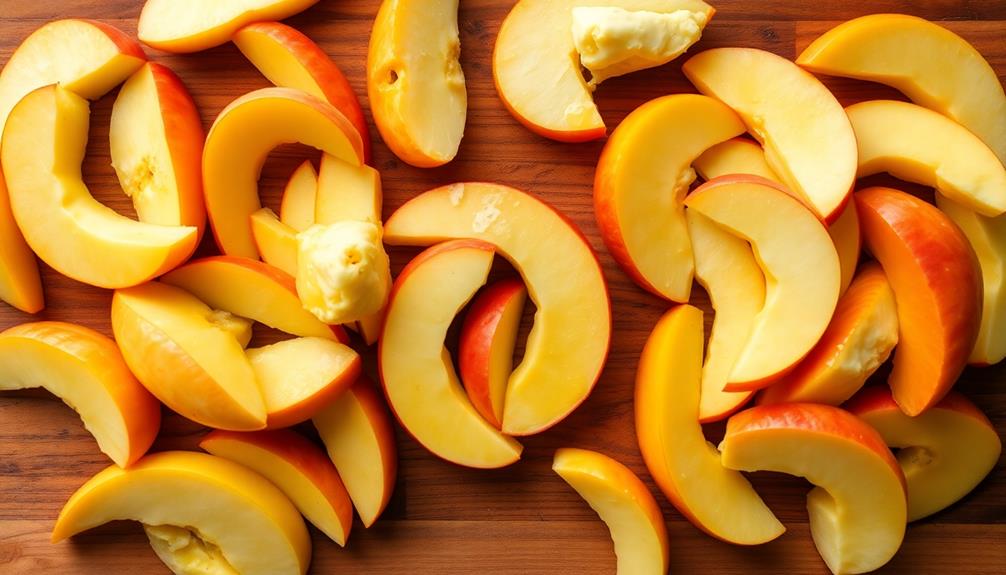
After assembling the necessary ingredients, it's time to peel and slice the apples.
You'll want to use a sharp knife or a sturdy peeler to remove the skin, taking care not to waste too much of the juicy flesh. Once the apples are peeled, slice them into thin, even pieces, about 1/4 inch thick. This will help them cook evenly in the pie.
As you slice, be sure to remove any seeds or cores, and try to keep the slices a similar size for the best texture. Toss the sliced apples into a large bowl, and you'll start to smell their sweet, crisp aroma.
Aren't you getting hungry already? With the apples ready, you're one step closer to enjoying a warm, homemade apple pie – the perfect treat on a cozy autumn day.
Step 2. Make Pie Crust
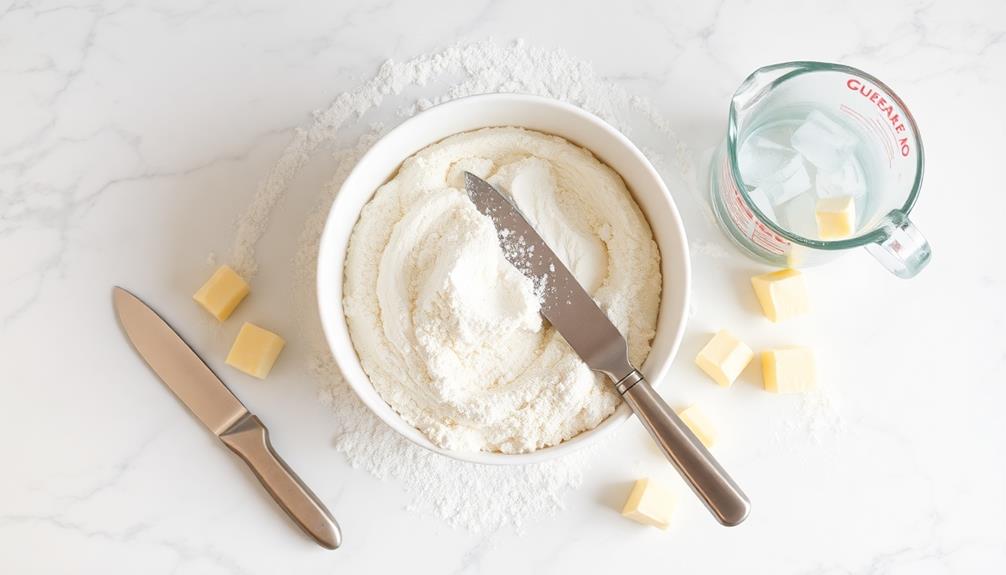
To make the pie crust, you'll need to gather a few key ingredients. You'll start with all-purpose flour, unsalted butter, and a bit of salt. Once you have these, you can begin the process of making the crust.
First, you'll want to cut the cold butter into small pieces and then use your fingers to work it into the flour until the mixture resembles coarse crumbs. This helps create that flaky, buttery texture you love in a homemade pie crust.
Next, you'll slowly add ice-cold water, just a little at a time, mixing it in gently until the dough starts to come together. Be careful not to overwork the dough, or it can become tough.
Once the dough is ready, you'll divide it in half and roll each piece out into a large circle, perfect for lining your pie dish.
With the crust ready, you can now move on to filling your pie with those delicious, freshly sliced apples!
Step 3. Assemble and Bake the Pie

With the flaky, homemade pie crust ready, you can now focus on assembling and baking the pie.
Start by peeling, coring, and slicing your crisp, juicy apples. Arrange the apple slices in the pie crust, overlapping them slightly to create a lovely, layered effect. Sprinkle the apples with a delightful mixture of sugar, cinnamon, and a pinch of nutmeg. This will give your pie a warm, spicy aroma and a delectable flavor.
Next, dot the top of the apples with bits of butter, which will melt and create a rich, buttery taste. Carefully place the top crust over the filling, pressing the edges to seal them together. Use a fork to crimp the edges, creating a decorative pattern. Cut a few slits in the top crust to allow steam to escape during baking.
Bake your homemade apple pie in a preheated oven until the crust is golden brown and the filling is bubbly. Allow it to cool slightly, then slice and serve with a scoop of vanilla ice cream or a dollop of whipped cream.
Enjoy this beloved American classic!
Step 4. Brush Crust With Egg Wash
Before placing the pie in the oven, you'll want to brush the top crust with an egg wash. This simple step will give your homemade apple pie a beautiful, golden-brown sheen.
To make the egg wash, simply crack an egg into a small bowl and whisk it until it's smooth and frothy.
Using a pastry brush, gently sweep the egg wash over the entire surface of the top crust, being careful not to let it drip down the sides. The egg wash will act as a sealant, helping to lock in the delicious apple filling and prevent the crust from drying out during baking.
Once the crust is evenly coated, you can sprinkle a bit of sugar on top for an extra touch of sweetness and shine.
Then, it's time to pop your pie into the oven and let the magic happen! The egg wash will create a lovely, crisp crust that will make your homemade apple pie look and taste absolutely irresistible.
Step 5. Serve Pie With Vanilla Ice Cream
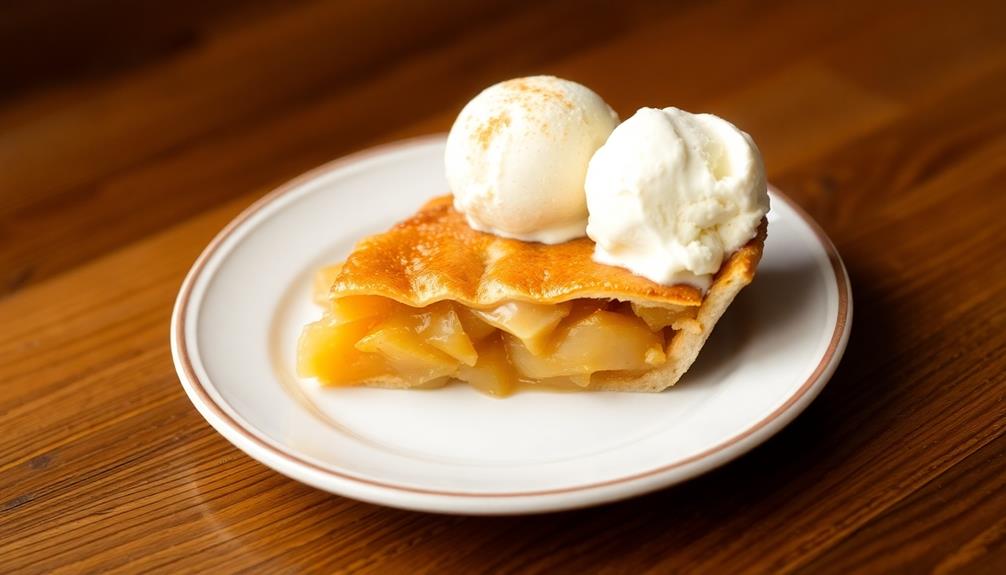
Once the homemade apple pie has finished baking and cooled slightly, you'll want to serve it with a scoop of creamy vanilla ice cream. The contrast between the warm, flaky crust and the cold, smooth ice cream is simply heavenly.
As you take a bite, the apple filling oozes out, perfectly complemented by the vanilla's rich, velvety texture. The combination of sweet and tart, hot and cold, will dance on your taste buds and transport you to a cozy autumn day.
Don't be afraid to be generous with the ice cream – after all, you've earned this delightful treat! The cool, luscious ice cream will melt into the pie, creating a decadent, indulgent dessert that's sure to satisfy your sweet tooth.
Go ahead, take another bite and savor the flavors of homemade goodness. This is a classic pairing that will have your family and friends raving about your baking skills.
Final Thoughts
Ultimately, you've mastered the art of crafting a delectable homemade apple pie. Just imagine the warm, golden-brown crust and the sweet, fragrant filling, bursting with the flavors of juicy apples and aromatic spices.
As you savor each bite, you can't help but feel a sense of pride and satisfaction. This pie isn't just a dessert – it's a beloved tradition, a taste of Americana that brings people together.
To complement your pie, consider incorporating a low carb high protein breakfast idea for a balanced start to your day. Whether you're serving it at a family gathering, a neighborhood potluck, or simply enjoying it on a cozy evening, this apple pie is sure to delight.
The combination of the flaky crust and the perfectly balanced filling is simply irresistible. As you reflect on your baking journey, remember that the joy is in the process – in the kneading of the dough, the careful slicing of the apples, and the careful monitoring of the oven.
Each step is an opportunity to create something truly special. So, indulge in a slice, share it with loved ones, and savor the sweetness of your homemade masterpiece.
Frequently Asked Questions
How Can I Make the Crust Flakier?
To make the crust flakier, you can use cold butter or shortening, handle the dough gently, and chill it before rolling it out. This helps create pockets of fat that expand during baking, resulting in a flaky crust.
What's the Best Way to Prevent a Soggy Bottom?
To prevent a soggy bottom, blind bake the crust before adding the filling. Prick the bottom with a fork, line it with parchment paper, and fill with pie weights or dry beans. Bake until lightly golden.
Can I Use Store-Bought Apples or Do I Need to Use a Specific Type?
You can use store-bought apples for your homemade apple pie, but certain varieties will work better than others. Look for firm, tart apples like Granny Smith or Honeycrisp that hold their shape during baking.
How Do I Achieve the Perfect Golden-Brown Crust?
To achieve a perfect golden-brown crust, you'll need to brush the pastry with an egg wash or milk before baking. This will create a shiny, crisp surface that's irresistible. Don't forget to bake at a high temperature for optimal results.
Can I Make the Pie in Advance and Reheat It?
You can absolutely make the pie in advance and reheat it. Bake the pie as directed, let it cool completely, then cover and refrigerate. When ready to serve, reheat the pie in a 350°F oven until warmed through.