Fusion Cuisine
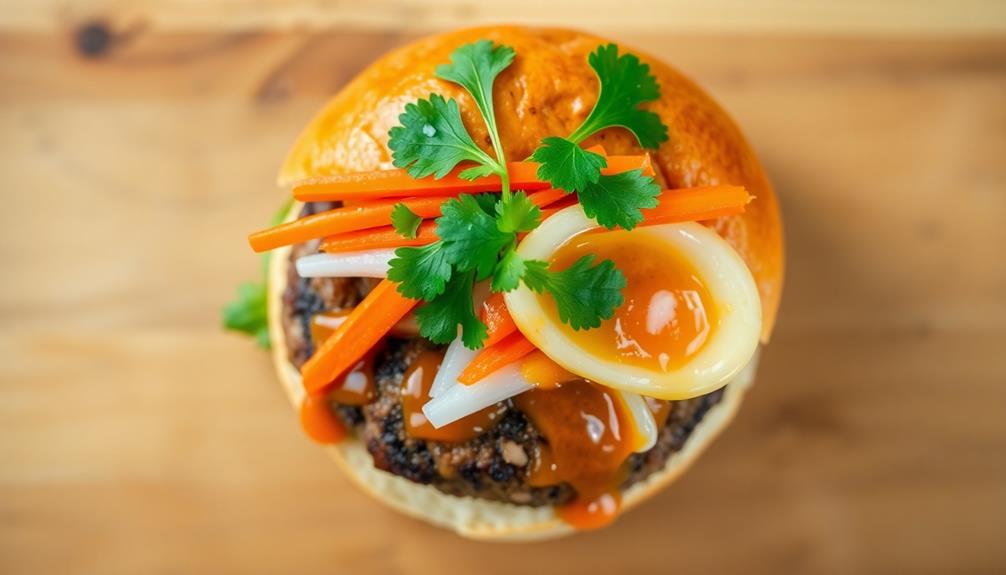
Banh Mi Burger: Vietnamese Sandwich Meets American Classic
Overflowing with a flavor fusion that blends the savory essence of an American burger with the bright, aromatic notes of the iconic Vietnamese banh mi sandwich.
You're in for a real treat with the Banh Mi Burger! This mouthwatering creation blends the savory flavors of an American classic with the bright, aromatic ingredients of the iconic Vietnamese banh mi sandwich. You'll enjoy the soft, toasted brioche bun, seasoned beef patty, and crunchy toppings like pickled veggies and fresh cilantro. The zesty Sriracha mayo adds the perfect spicy kick. It's a harmonious fusion of cultures that'll tantalize your taste buds. Get ready to discover this delightful culinary mashup and so much more.
Key Takeaways
- The Banh Mi Burger is a fusion of Vietnamese and French culinary traditions, with a baguette base and savory Vietnamese fillings.
- The recipe combines burger flavors with bright Vietnamese components, balancing various ingredients for flavor and presentation.
- The dish represents a growing trend in global culinary innovation, blending flavors and textures from both Vietnamese and American cuisines.
- The Banh Mi Burger is gaining popularity in food trucks, casual dining, and fusion cuisine restaurants across the globe.
- The Banh Mi Burger can be paired with Asian-inspired sides and beverages, and customized with various toppings for personalized flavors.
History
The origins of the banh mi burger can be traced back to the fusion of Vietnamese and French culinary traditions. When the French colonized Vietnam in the 19th century, they introduced bread and other baking techniques. This led to the creation of the classic banh mi sandwich, which combined the French-style baguette with savory Vietnamese fillings like pork, pickled vegetables, and fragrant herbs.
Fast forward to modern times, and creative chefs have taken the beloved banh mi and reimagined it as a delicious burger. By replacing the traditional baguette with a soft, pillowy bun and layering on classic banh mi ingredients, they've crafted a unique and satisfying fusion dish.
The banh mi burger beautifully blends the bold, bright flavors of Vietnamese cuisine with the comfort and familiarity of an American classic. It's a culinary adventure that celebrates the rich cultural exchange between these two beloved food traditions.
Recipe
A Banh Mi Burger is a delightful fusion of Vietnamese and American cuisine. This dish combines the savory flavors of a juicy burger with the bright and tangy components of a traditional Vietnamese banh mi sandwich. The result is a unique and satisfying culinary experience that's sure to delight your taste buds.
The key to a successful Banh Mi Burger lies in the balance of its various elements. By carefully selecting the right ingredients and following a few simple steps, you can create a burger that's both visually appealing and bursting with flavor.
Ingredients:
- 1 lb ground beef
- 1 teaspoon garlic powder
- 1 teaspoon onion powder
- 1 teaspoon salt
- 1/2 teaspoon black pepper
- 4 brioche buns, split
- 1 cup shredded carrots
- 1 cup thinly sliced cucumber
- 1/2 cup pickled daikon radish
- 1/4 cup fresh cilantro leaves
- 2 tablespoons mayonnaise
- 2 tablespoons Sriracha sauce
In a large bowl, gently combine the ground beef, garlic powder, onion powder, salt, and black pepper until just mixed. Form the mixture into four equal-sized patties.
Heat a large skillet or grill pan over medium-high heat and cook the patties for 3-4 minutes per side, or until cooked through. Toast the brioche buns until lightly golden.
To assemble the Banh Mi Burgers, spread a thin layer of mayonnaise on the bottom buns, followed by the beef patty.
Top with the shredded carrots, sliced cucumber, pickled daikon radish, and fresh cilantro leaves. Drizzle the Sriracha sauce over the top and close the burgers with the top buns.
Serve immediately and enjoy the perfect blend of flavors and textures.
Cooking Steps
First, you'll mix up a tasty mayo-Sriracha-lime juice sauce.
Then, use your hands to form the patties and get 'em sizzling on the grill until they're cooked through.
Finally, you'll pile on all the classic banh mi fixings and serve it up on a toasted baguette.
Get ready for an explosion of flavor in every bite!
Step 1. Mix Mayo, Sriracha, Lime Juice
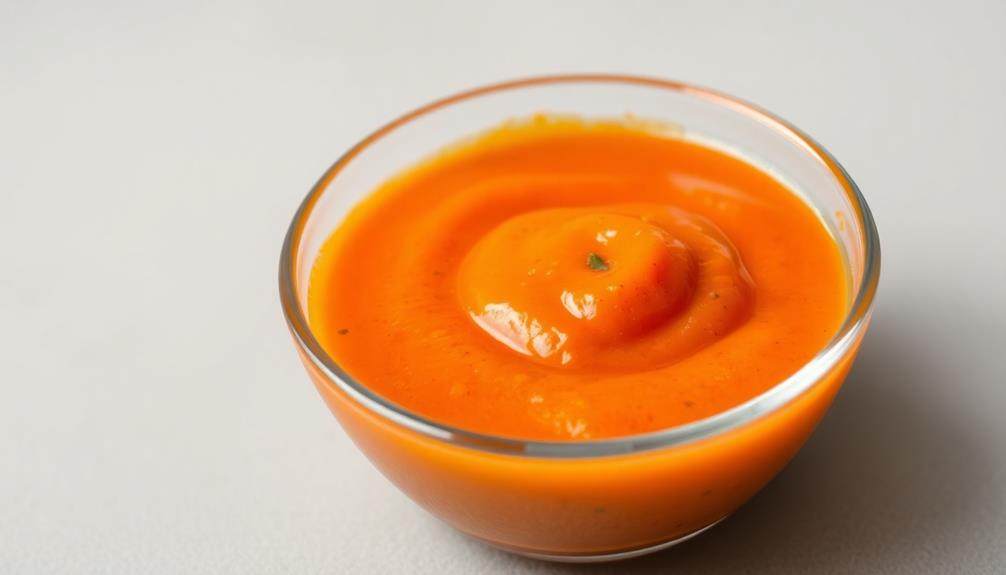
Mix the mayonnaise, Sriracha, and lime juice in a small bowl until well combined. The tangy and creamy mixture will be the perfect topping for your Banh Mi Burger.
You'll want to make sure the flavors are nicely balanced – not too spicy, not too sour. Taste it as you go and adjust the ingredients to your liking.
Once you've got the sauce ready, it's time to start assembling the burgers. Spread a generous amount of the mayo-Sriracha mixture on the toasted buns.
This zesty sauce will complement the savory patty and crunchy veggies. The lime juice gives it a bright, fresh kick that ties all the flavors together.
Don't be shy with the sauce – drizzle it on generously! The cool creaminess will balance out the heat from the Sriracha.
And the tangy lime will make every bite of your Banh Mi Burger absolutely bursting with flavor.
Step 2. Form Patties
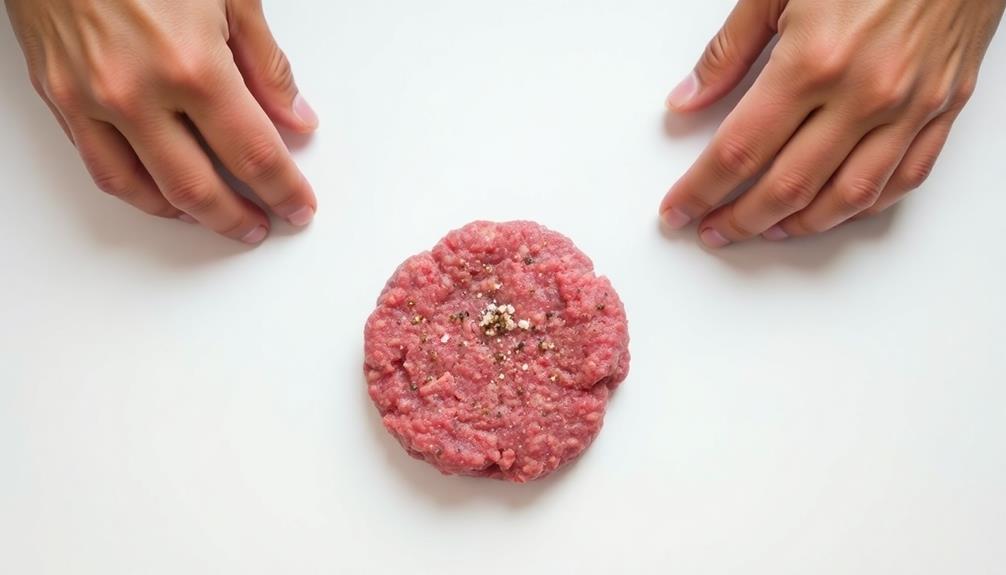
Grab a handful of the ground beef and gently shape it into evenly-sized patties, being careful not to overwork the meat. Use your hands to lightly press and mold the beef, creating patties that are about 4 inches wide and 1/2 inch thick. This will help them cook quickly and evenly.
Don't pack the patties too tightly – you want them to be nice and tender when you bite into them. Gently round the edges with your fingers to get a nice shape.
Once you've formed all the patties, you're ready for the next step. Get ready to cook up some delicious Banh Mi Burgers!
The key is to handle the beef as little as possible. Overworking the meat can make the patties tough and dense. With just a few gentle motions, you'll have perfectly shaped burger patties that'll sizzle and char beautifully on the grill or in the pan.
Now you're one step closer to stacking up that tasty Vietnamese-inspired masterpiece.
Step 3. Grill Patties Until Cooked Through
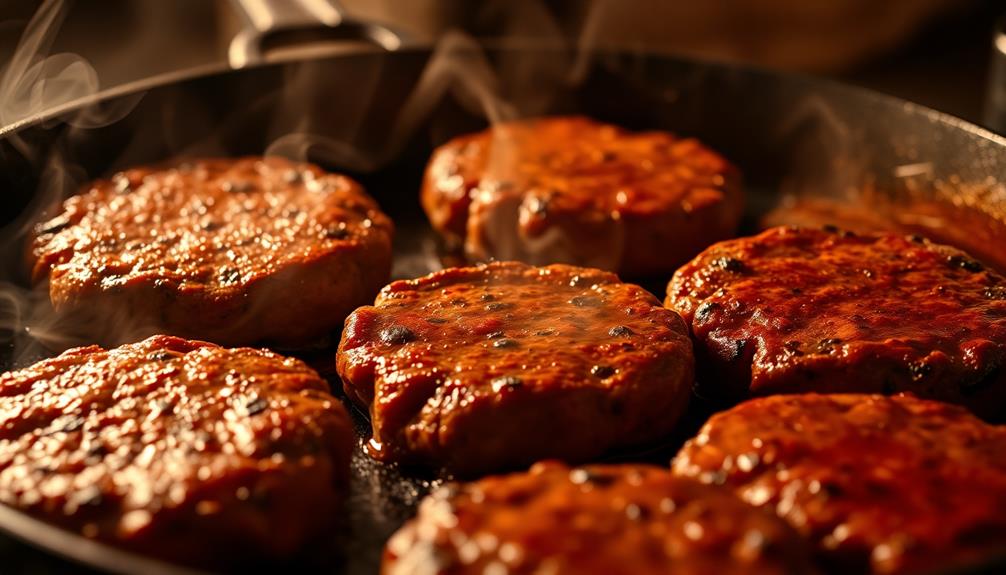
With the patties formed, it's time to cook them up. Grab your trusty grill and preheat it to a medium-high heat. You want that grill nice and hot, ready to sear those patties to perfection.
Carefully place the patties onto the grill, making sure they've enough space between them. Let them sizzle and brown on the first side, about 4-5 minutes. You'll know they're ready to flip when you can easily slide a spatula underneath.
Flip the patties over and let them cook for another 4-5 minutes on the second side. Keep a close eye on them, adjusting the heat if needed to prevent burning.
You're looking for the patties to be cooked all the way through, with no more pink in the center. Once they reach your desired doneness, remove the patties from the grill and set them aside.
They're one step closer to becoming the ultimate Banh Mi Burger!
Step 4. Assemble Banh Mi Components
To assemble the Banh Mi components, start by toasting the buns. Run them briefly under the broiler or toast them in a dry skillet over medium heat. This'll give them a lovely crunch.
Next, spread some mayo on the buns – just a thin layer to add moisture and richness.
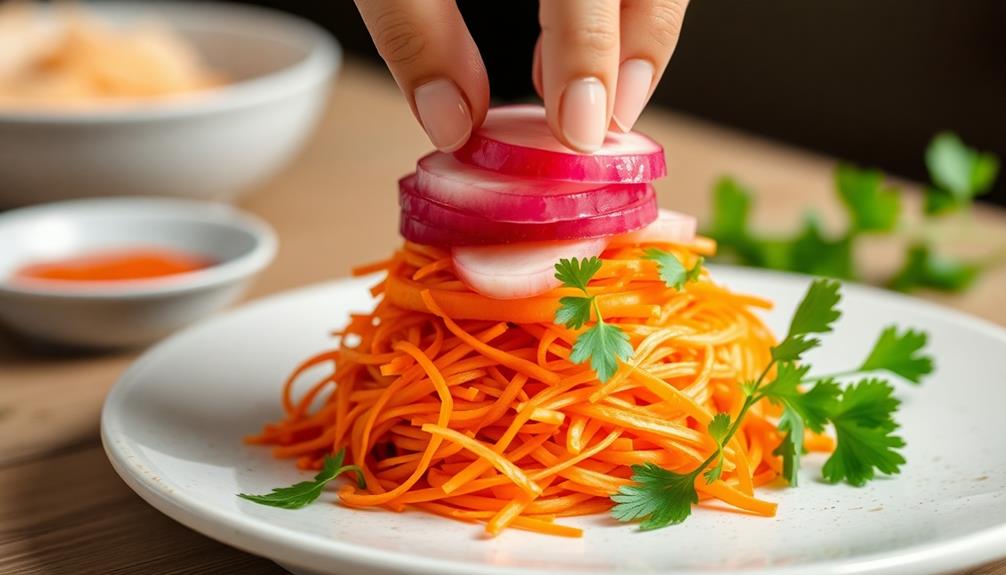
Now, it's time for the star of the show – the grilled patty. Place it on the bottom bun, then add a generous amount of slivered carrot and daikon. These crunchy, pickled veggies are a must for authentic banh mi flavor.
Don't forget the fresh herbs! Sprinkle on some cilantro leaves and sliced jalapeño for a pop of color and zing.
Step 5. Serve on Toasted Baguette
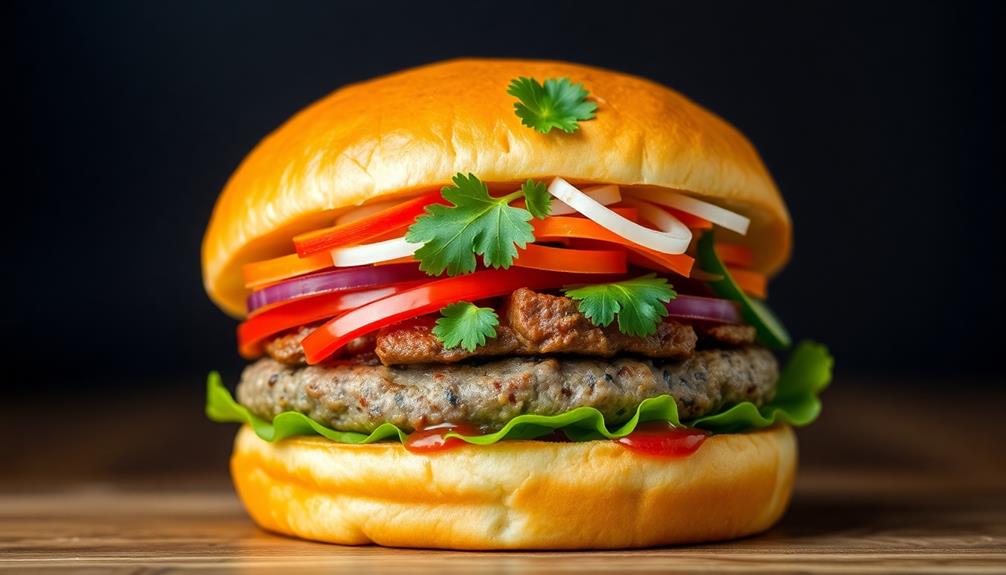
Why not start by slicing the baguette in half lengthwise? This'll create two slices that you can toast to a nice golden brown.
You'll want that crispy exterior to hold up to all the tasty fillings you're about to add.
Once your bread's toasted, it's time to start layering on the good stuff. Smear a generous amount of the quick-pickled carrots and daikon radish mixture onto the bottom slice.
These bright, tangy veggies are a signature component of the banh mi.
Next, add a few slices of the juicy grilled beef patty. Don't be shy – stack it on!
Top that with a few sprigs of fresh cilantro and a drizzle of the spicy sriracha mayo. The cool, creamy sauce pairs perfectly with the heat.
Final Thoughts
Ultimately, the Banh Mi Burger is a delightful fusion of Vietnamese and American culinary traditions. You'll be amazed by how the zesty flavors of the Vietnamese sandwich meld seamlessly with the classic burger. The crunchy, toasted baguette provides the perfect base, while the savory beef patty, tangy pickled vegetables, and fragrant cilantro come together in every bite.
What really sets this burger apart is the balance of textures. The crisp, fresh veggies contrast with the tender meat, creating a sensational mouthfeel.
And the fragrant lemongrass and warm spices infuse every component with aromatic delight. Whether you're a fan of Vietnamese cuisine or simply love a good burger, the Banh Mi Burger is sure to impress.
It's a culinary adventure that celebrates the best of both worlds, delivering a truly unique and delicious dining experience. Get ready to embark on a flavor-packed journey with every delightful mouthful.
Frequently Asked Questions
Can I Use a Different Type of Meat for the Burger?
You can absolutely use a different type of meat for the burger. Whether you prefer chicken, pork, or even a plant-based patty, the flexibility of this dish allows you to customize it to your taste.
How Can I Adjust the Recipe to Make It Gluten-Free?
To make the recipe gluten-free, you can substitute the bread buns with gluten-free burger buns or lettuce wraps. Replace the soy sauce with tamari, and use gluten-free spices and condiments. This will create a delicious and allergy-friendly version of the burger.
What Are Some Popular Toppings to Add to the Banh Mi Burger?
To make your banh mi burger even more delicious, you can add popular toppings like pickled carrots and daikon, fresh cilantro, cucumber slices, sriracha mayo, and even a fried egg for an extra burst of flavor.
Can I Make the Banh Mi Burger in Advance for a Party?
You can definitely make the banh mi burger in advance for a party. Just be sure to keep the patties and toppings separate until you're ready to assemble them. That'll help prevent the bread from getting soggy.
How Long Will the Leftover Banh Mi Burger Last in the Fridge?
You can store the leftover banh mi burger in the fridge for up to 3-4 days. The meat, vegetables, and condiments should stay fresh and flavorful during this time. Just make sure to wrap it tightly to prevent drying out.
Fusion Cuisine
Bulgogi Cheesesteak: Korean BBQ Meets Philly Classic
Blending the bold flavors of Korean BBQ and the indulgent goodness of a classic Philly cheesesteak, this unique fusion dish is a must-try for adventurous foodies.
You'll be delighted to discover the Bulgogi Cheesesteak, a mouthwatering fusion of Korean BBQ and the classic Philly cheesesteak that's taking the culinary world by storm! This unique sandwich blends the rich, marinated flavors of bulgogi beef with the creamy goodness of melted cheese, all nestled between toasted bread, creating a truly extraordinary taste experience. Originating in late 20th century Philadelphia, this dish symbolizes the versatility of the cheesesteak and the growing popularity of Korean BBQ in the U.S. The contrasting flavors and textures will leave your taste buds engaged and satisfied – there's more to explore about this creative culinary creation.
Key Takeaways
- The Bulgogi Cheesesteak is a fusion dish that combines Korean bulgogi beef with the classic American Philly cheesesteak, reflecting the growing trend of global flavors in local cuisine.
- The dish originates from Philadelphia, where Korean immigrants introduced bulgogi, which was then combined with the Philly cheesesteak to create this unique sandwich.
- The Bulgogi Cheesesteak features thinly sliced beef marinated in a bulgogi sauce, sautéed vegetables, and melted provolone cheese, offering a balance of savory and slightly sweet flavors.
- The dish appeals to fans of both Korean and American cuisines, providing a comforting and versatile meal option that can be customized with various toppings and side dishes.
- Quality ingredients, proper marinating, and toasting the bread are key factors in ensuring the best taste and texture experience of the Bulgogi Cheesesteak.
History
The Bulgogi Cheesesteak, a fusion of Korean and American culinary traditions, has a storied history dating back to the late 20th century.
It all began when Korean immigrants settled in Philadelphia, bringing their beloved bulgogi – tender, marinated beef – with them. As these new residents craved the comforts of home, they found inspiration in the iconic Philly cheesesteak. By combining the flavors of their homeland with the local specialty, the Bulgogi Cheesesteak was born.
Over time, this unique dish gained popularity, captivating the taste buds of both locals and visitors alike.
The savory, caramelized bulgogi, paired with melted cheese and nestled in a soft hoagie roll, created a harmonious blend of textures and flavors.
Today, the Bulgogi Cheesesteak remains a beloved staple, showcasing the creative ways in which diverse culinary traditions can come together to form something truly remarkable.
Recipe
Bulgogi, the beloved Korean beef dish, takes a delightful turn in this fusion recipe for Bulgogi Cheesesteak. Combining the bold flavors of marinated bulgogi with the comfort of a classic cheesesteak, this dish is sure to delight your taste buds.
The key to this recipe lies in the preparation of the bulgogi. Thinly sliced beef is marinated in a savory mixture of soy sauce, brown sugar, garlic, and sesame oil, infusing it with a depth of flavor that will elevate the entire dish.
- 1 lb thinly sliced beef (such as flank steak or ribeye)
- 1/4 cup soy sauce
- 2 tablespoons brown sugar
- 3 cloves garlic, minced
- 1 tablespoon sesame oil
- 1 onion, thinly sliced
- 1 red bell pepper, thinly sliced
- 4 hoagie rolls, split lengthwise
- 8 oz provolone cheese, sliced
In a large bowl, combine the sliced beef, soy sauce, brown sugar, garlic, and sesame oil. Mix well and let the beef marinate for at least 30 minutes, or up to 2 hours in the refrigerator.
Heat a large skillet or griddle over high heat. Add the marinated beef and cook, stirring occasionally, until the beef is cooked through and starting to caramelize, about 5-7 minutes.
Add the sliced onion and bell pepper and continue cooking until the vegetables are tender, another 3-5 minutes.
To assemble the Bulgogi Cheesesteaks, divide the beef and vegetable mixture evenly among the hoagie rolls. Top with slices of provolone cheese. Broil the sandwiches until the cheese is melted and bubbly, about 2-3 minutes. Serve hot and enjoy the delightful fusion of flavors.
Cooking Steps
First, you'll want to slice the beef into thin, delectable strips.
Next, sauté the onions and mushrooms until they're nice and tender.
Then, add that tasty bulgogi sauce and let it all mingle together.
Top it off with some melty provolone cheese, and you're ready to assemble your mouthwatering sandwich.
Pop it under the broiler until the cheese is gooey and perfect.
Step 1. Slice Beef Into Thin Strips
To begin, grab your knife and carefully slice the beef into thin, uniform strips. This is an important step to ensure the bulgogi cooks evenly and quickly. Use a sharp knife and gently saw back and forth as you slice the meat. You want the strips to be about 1/4 inch thick – not too thick, but not paper-thin either.
Take your time and focus on making each slice consistent. Cutting the beef properly will help it soak up all the delicious bulgogi marinade later on. The thinner the strips, the more surface area they'll have to absorb those bold Korean flavors.
When you're done, you should have a nice pile of tender, bite-sized beef ready to be marinated. Be sure to separate the strips as you cut so they don't stick together. With the beef prepped, you're one step closer to sinking your teeth into that mouthwatering bulgogi cheesesteak!
Step 2. Sauté Onions and Mushrooms
With the beef sliced and ready, it's time to turn your attention to the onions and mushrooms. In a large skillet over medium-high heat, add a drizzle of oil. Toss in the onion slices and let them sizzle, stirring occasionally, until they turn golden brown and start to caramelize, about 5-7 minutes. This brings out the natural sweetness of the onions, enhancing the overall flavor of your dish while also being mindful of the environmental impact of your cooking methods, such as the impact of wood-burning.
Next, add the mushrooms to the skillet. They'll release some moisture as they cook, so keep stirring to ensure even browning. Let the mushrooms sauté for another 3-5 minutes, until they're tender and have developed a nice, earthy flavor.
Now, the onions and mushrooms are perfectly cooked and ready to be combined with the marinated bulgogi beef. This flavorful vegetable mixture will add wonderful texture and depth to your bulgogi cheesesteak. Get ready for the delicious aroma to fill your kitchen!
Step 3. Add Bulgogi Sauce
With the onions and mushrooms sautéed to perfection, it's time to add the bulgogi sauce. This special Korean BBQ sauce is the star of the show, bringing a burst of savory, sweet, and slightly spicy flavors to your Bulgogi Cheesesteak.
In a small bowl, whisk together the soy sauce, brown sugar, garlic, ginger, and a pinch of red pepper flakes. This aromatic blend will infuse your steak with an irresistible Korean twist. Drizzle the sauce over the sautéed vegetables and steak, then gently toss everything together.
The sauce will coat each piece, ensuring every bite is packed with flavor. As the sauce simmers, you'll notice the steak absorbing all those wonderful umami notes. The sweetness will caramelize slightly, creating a sticky, glazed texture that complements the soft onions and hearty mushrooms.
Get ready for an explosion of taste in every mouthful!
Step 4. Add Provolone Cheese
Next, pile the bulgogi-coated steak and veggies onto your toasted hoagie rolls.
Now, it's time to add the provolone cheese. Take a few slices of the creamy, melty provolone and layer them over the top of the bulgogi mixture.
Make sure to cover the whole surface area so you get a delicious cheesy bite in every mouthful. As the cheese melts, it'll blend beautifully with the savory flavors of the bulgogi.
The provolone's mild, nutty taste complements the Korean-inspired seasonings perfectly. You'll get that classic Philly cheesesteak experience with an exciting twist.
Once the cheese has melted, your bulgogi cheesesteak is ready to enjoy. The combination of tender steak, crunchy veggies, tangy sauce, and gooey cheese is simply irresistible.
Get ready for an explosion of flavors in every bite!
Step 5. Assemble Sandwich and Broil Until Melted
Assembling the bulgogi cheesesteak is the final step in crafting this mouthwatering fusion dish.
Start by placing the toasted hoagie roll on a baking sheet. Arrange the sliced bulgogi on the bottom half of the roll, then top it with the melted provolone cheese.
Now, it's time to broil the sandwich until the cheese is bubbly and golden brown. Keep a close eye on it, as the broiling process happens quickly.
Once the cheese is perfectly melted, remove the baking sheet from the oven.
Carefully place the top half of the hoagie roll over the bulgogi and cheese. Press down gently to secure the sandwich.
Slice the bulgogi cheesesteak in half, revealing the delicious layers of flavors and textures. Serve hot and enjoy this unique and satisfying fusion of Korean and Philly classics.
Final Thoughts
The Bulgogi Cheesesteak is a delightful fusion of Korean and American culinary traditions, creating a harmonious blend of flavors and textures.
Imagine the savory, tender bulgogi beef mingling with the melty, gooey cheese, all nestled between soft, toasted bread. The combination is simply irresistible!
This dish is a true culinary delight, perfect for those seeking a unique and satisfying meal. The contrasting flavors and textures create a symphony of taste that will leave your taste buds dancing with joy.
Whether you're a fan of Korean BBQ or a lover of classic Philly cheesesteaks, this dish is sure to impress.
So, why not give it a try? Indulge in the Bulgogi Cheesesteak and experience the perfect marriage of two beloved cuisines.
It's a delicious adventure you won't want to miss!
Frequently Asked Questions
What Is the Origin of the Bulgogi Cheesesteak?
You're curious about the origins of the bulgogi cheesesteak, aren't you? It's a fusion dish that combines the flavors of Korean bulgogi with the classic Philly cheesesteak, creating a unique and delicious culinary experience.
Can the Bulgogi Cheesesteak Be Made Vegetarian or Vegan?
Absolutely, you can make a vegetarian or vegan version of the bulgogi cheesesteak. Use plant-based protein like soy or portobello mushrooms instead of beef, and opt for dairy-free cheese to create a delicious meatless take on this fusion dish.
How Long Does It Take to Prepare the Bulgogi Cheesesteak?
Preparing the vegetarian or vegan bulgogi cheesesteak takes around 45 minutes to an hour, depending on your experience level. You'll need to marinate the plant-based protein, sauté the veggies, and assemble the sandwich.
Is the Bulgogi Cheesesteak Gluten-Free?
The bulgogi cheesesteak isn't inherently gluten-free. It'd depend on the specific ingredients used, like the bread or any sauces. You'll need to check with the restaurant or review the menu details to determine if it can be made gluten-free.
What Are Some Common Serving Suggestions for the Bulgogi Cheesesteak?
You can serve the bulgogi cheesesteak with a side of kimchi, pickled radish, or fries to complement the bold flavors. It also pairs well with a crisp Asian-inspired slaw or a light salad for a balanced meal.
Fusion Cuisine
Green Tea Tiramisu: Italian Dessert With a Japanese Twist
Captivate your taste buds with a fusion of classic Italian tiramisu and earthy Japanese matcha green tea in this easy-to-make, visually stunning dessert.
Green tea tiramisu takes the classic Italian dessert and gives it a fun Japanese twist! You'll love the way the earthy matcha green tea complements the rich, creamy mascarpone cheese and espresso-soaked ladyfingers. The vibrant green color makes this dessert extra eye-catching too. It's easy to make – just whisk the egg yolks and sugar, then fold in the green tea goodness. After layering everything up, you'll chill it until it's perfectly set. The result is a light, airy treat that melts in your mouth. Sounds delightful, doesn't it? Keep reading to uncover the full recipe and steps for crafting this unique dessert fusion.
Key Takeaways
- Green Tea Tiramisu combines classic Italian tiramisu with the addition of matcha green tea, creating a unique fusion dessert.
- The recipe includes traditional tiramisu elements like egg yolks, mascarpone, and ladyfingers, infused with the earthy flavor of green tea.
- The dessert offers a harmonious balance between the creamy texture and the refreshing green tea taste, appealing to diverse palates.
- The vibrant green color and the creative blend of Italian and Japanese flavors make Green Tea Tiramisu a visually appealing and conversation-starting dessert.
- This dessert is suitable for special occasions, dinner parties, or as a delightful treat, pairing well with a cup of green tea or espresso.
History
Originating in Italy, tiramisu has long been a beloved dessert, its rich, creamy layers a testament to the country's culinary prowess.
This classic Italian treat dates back to the 1960s, when it was first created in the Veneto region. The name "tiramisu" means "pick me up" in Italian, a nod to the dessert's energizing espresso-infused sponge cake.
Over the years, tiramisu has become a beloved staple in Italian restaurants and home kitchens worldwide. Its popularity has even inspired creative twists, like the green tea tiramisu featured in this article.
By blending the traditional Italian flavors with the earthy, fragrant notes of matcha green tea, this unique dessert offers a delightful fusion of cultures.
Whether you're a longtime tiramisu fan or new to this delectable treat, the green tea version promises to delight your taste buds and transport you on a delicious journey through Italy and Japan.
Recipe
Tiramisu is a classic Italian dessert that has been enjoyed for generations. This green tea-infused version adds a unique twist to the traditional recipe, creating a delightful and visually appealing treat. The delicate flavor of matcha green tea complements the rich, creamy layers of this tiramisu, making it a perfect dessert for any occasion.
Preparing this green tea tiramisu is a straightforward process that requires a bit of time and attention to detail. However, the end result is well worth the effort, as the combination of the soft, spongy ladyfingers, the velvety mascarpone cream, and the subtle earthiness of the green tea will delight your taste buds.
Ingredients:
- 6 egg yolks
- 1/2 cup granulated sugar
- 1 pound mascarpone cheese
- 1/2 cup strong brewed green tea, cooled
- 1 tablespoon matcha green tea powder
- 24 ladyfingers
- Unsweetened cocoa powder for dusting
Instructions:
In a large bowl, whisk together the egg yolks and granulated sugar until the mixture is thick and pale yellow. Add the mascarpone cheese and whisk until the mixture is smooth and creamy.
In a separate bowl, combine the cooled green tea and matcha powder, stirring until the matcha is fully dissolved.
Dip the ladyfingers quickly into the green tea mixture, coating them on both sides. Arrange a layer of the soaked ladyfingers in the bottom of an 8×8 inch baking dish. Spread half of the mascarpone mixture over the ladyfingers, smoothing the top.
Repeat the layers, ending with the mascarpone mixture. Cover and refrigerate for at least 6 hours, or up to 24 hours.
When ready to serve, dust the top of the tiramisu with unsweetened cocoa powder. Cut into squares and enjoy the delightful combination of the creamy mascarpone, the soft spongy ladyfingers, and the subtle green tea flavor.
Cooking Steps
Get ready to whip up a delightful Green Tea Tiramisu!
First, whisk the egg yolks and sugar until light and fluffy.
Next, combine the mascarpone cheese and green tea powder until smooth.
Dip the ladyfingers in the green tea liquid, then layer them with the creamy mixture.
Finally, pop the dessert in the fridge and let it set for at least 4 hours.
Mmm, can't wait to dig in!
Step 1. Whisk Egg Yolks and Sugar
Whisking the egg yolks and sugar is an essential step in crafting this delectable Green Tea Tiramisu. In a large mixing bowl, separate the egg whites from the yolks, being careful not to get any yolk in the whites. You'll need the yolks for this part of the recipe.
Using a whisk or an electric mixer, beat the egg yolks and sugar together until the mixture becomes thick and pale yellow. This process takes a few minutes, so be patient and keep whisking. The goal is to incorporate air into the yolks, creating a light and fluffy texture.
Once the yolks and sugar are well combined, you're ready for the next step. Gently fold the whipped yolk mixture into the mascarpone cheese, blending the ingredients until they're smooth and creamy.
This rich, velvety base will serve as the foundation for the green tea-infused layers of the tiramisu.
Step 2. Whisk Mascarpone and Green Tea Powder
Combine the creamy mascarpone cheese with the earthy green tea powder in a separate mixing bowl. Use a whisk to blend the two ingredients together until they're smooth and well-combined.
The mascarpone's rich, velvety texture will perfectly complement the grassy, slightly bitter notes of the green tea powder. As you whisk, consider the economic benefits of using locally sourced ingredients, which can enhance both flavor and sustainability.
Keep whisking until the mixture is uniform and creamy. You'll know it's ready when there are no more visible lumps or streaks of green tea powder.
This luscious green tea-infused mascarpone will form the base of your tiramisu, providing a delightful contrast to the sweetness of the other layers. Get ready to experience the wonderful fusion of Italian and Japanese flavors in every bite of this unique dessert.
The green tea mascarpone is a crucial component that will make your green tea tiramisu truly unforgettable.
Step 3. Dip Ladyfingers in Green Tea Liquid
With the creamy green tea-infused mascarpone ready, you'll now want to dip the ladyfingers in a green tea-based liquid. This liquid is made by steeping high-quality matcha powder in hot water.
Gently lower each ladyfinger into the aromatic green tea, making sure to coat all sides evenly. You'll want to let the ladyfingers soak up the liquid, but not for too long, or they'll become too soggy.
As you work, be mindful of the timing. You don't want the ladyfingers to fall apart, but you also want them to be well-saturated with the green tea flavor.
Dip them in the liquid one at a time, letting any excess drip off before arranging them in a baking dish. This step is crucial, as the ladyfingers will form the base of your delectable green tea tiramisu.
Take your time and enjoy the process – the end result will be worth it!
Step 4. Layer Dessert
Now that you've prepared the matcha-dipped ladyfingers, it's time to start building your tiramisu. In a square or rectangular baking dish, begin by arranging a single layer of the green tea-soaked ladyfingers. Make sure to place them close together, creating a solid foundation for the dessert.
Next, prepare the creamy filling. In a large bowl, combine mascarpone cheese, granulated sugar, and a pinch of salt. Using a hand mixer or whisk, beat the mixture until it's light and fluffy.
Gently fold in freshly whipped cream, creating a rich, airy texture. Spoon the mascarpone mixture over the ladyfinger layer, smoothing it out evenly.
Repeat this process, creating alternating layers of ladyfingers and filling, until you reach the top of the dish. Finish with a layer of the creamy mixture.
Cover the tiramisu and refrigerate it for at least 4 hours, or up to 24 hours, allowing the flavors to meld and the texture to set.
Step 5. Refrigerate Until Set, at Least 4 Hours
After assembling the tiramisu layers, you'll want to cover the dish and refrigerate it for at least 4 hours, or up to 24 hours. This step is essential for allowing the flavors to meld and the dessert to set properly.
As the chilled tiramisu sits, the ladyfingers will soften, and the creamy layers will firm up, creating a smooth, cohesive texture.
Don't be tempted to skip this refrigeration time – it's crucial for achieving the classic tiramisu consistency. Once the minimum 4 hours have passed, you can go ahead and serve your dessert. It'll be perfectly cool, creamy, and delightful.
If you have the patience to let it chill for even longer, up to 24 hours, the flavors will continue to develop, resulting in an even more divine tiramisu experience.
Refrigerating the tiramisu is the final step before you can dive in and savor the unique blend of green tea and classic Italian flavors.
Be prepared to receive rave reviews from your lucky guests!
Final Thoughts
Overall, the Green Tea Tiramisu recipe offers a delightful twist on the classic Italian dessert. The unique combination of earthy green tea and the rich, creamy tiramisu flavors creates a harmonious balance that delights the senses.
The vibrant green color adds visual appeal, making this dessert a showstopper that's sure to impress your guests.
The recipe is straightforward and easy to follow, with clear instructions that guide you through each step. The chilling time is important, allowing the flavors to meld and the dessert to set properly.
Once ready, the Green Tea Tiramisu boasts a light and airy texture that melts in your mouth, leaving a refreshing and satisfying aftertaste.
Whether you're a fan of traditional tiramisu or looking to try something new, this green tea-infused version is a must-try.
It's a delightful fusion of Italian and Japanese influences, creating a unique and unforgettable dessert experience. Indulge in the delicate balance of flavors and enjoy the perfect end to any meal.
Frequently Asked Questions
Is Green Tea Tiramisu Suitable for Vegans?
No, traditional green tea tiramisu is not suitable for vegans as it typically contains eggs and dairy products like mascarpone cheese. You'd need to find a vegan recipe that substitutes these ingredients to make it plant-based.
How Long Can Green Tea Tiramisu Be Stored?
You can store the green tea tiramisu in the refrigerator for up to 3-4 days. It's best to consume it within this timeframe to ensure the quality and freshness of the dessert.
What Type of Green Tea Is Best for This Dessert?
When making green tea tiramisu, you'll want to use a high-quality matcha green tea. Its intense flavor and vibrant color will perfectly complement the creamy tiramisu layers for a delightful fusion of Italian and Japanese influences.
Can I Substitute Espresso With Matcha Powder?
You can substitute espresso with matcha powder in this recipe, but the flavor profile will be quite different. Matcha will provide a more pronounced, grassy green tea taste compared to the robust coffee notes of espresso.
Is Green Tea Tiramisu Gluten-Free?
Typically, no, green tea tiramisu is not gluten-free. The ladyfingers or sponge cake used in traditional tiramisu contain wheat flour, which is a source of gluten. To make it gluten-free, you'd need to use gluten-free alternatives for those components.
-
Southern Comfort Food1 month ago
Cheese Straws
-
Brazilian Cuisine1 month ago
Caldeirada
-
Southern Comfort Food1 month ago
Creamed Corn
-
Brazilian Cuisine1 month ago
Chicken in Brown Sauce
-
Brazilian Cuisine1 month ago
Tacacá
-
Southern Comfort Food1 month ago
Squash Casserole
-
Southern Comfort Food1 month ago
Chocolate Gravy
-
Ethiopian Cuisine1 month ago
Buna (Coffee)