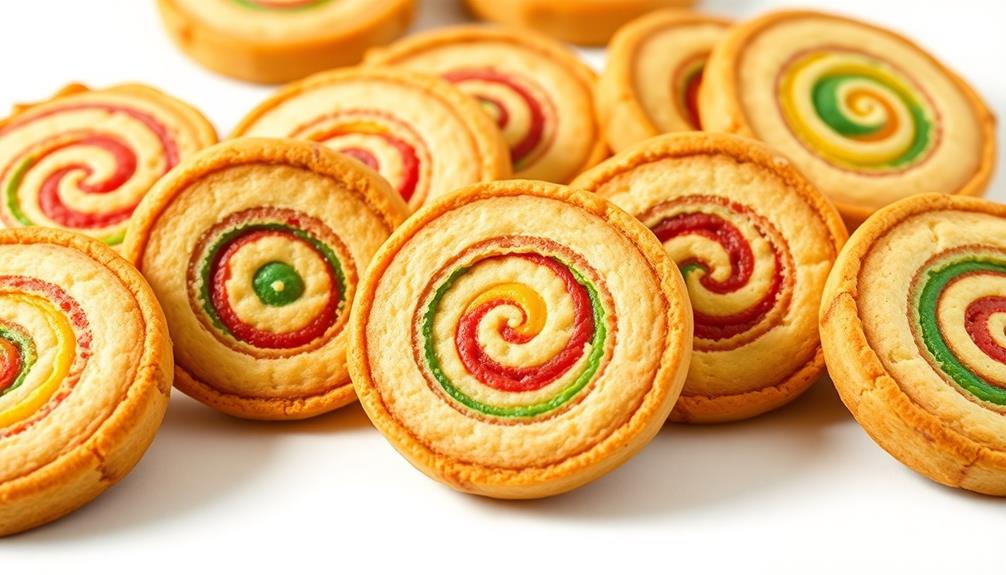
Christmas tree meringues are a delightful holiday treat! They've been enchanting bakers for generations, with their whimsical shapes, vibrant colors, and irresistible crunch. You'll start by whipping egg whites to stiff, glossy peaks, then fold in sugar for a sweet, fluffy texture. Pipe the meringue into festive tree shapes and bake until crisp. Top with green sanding sugar for a sparkly, festive look. These light and airy treats make perfect edible decorations for your holiday gatherings. And when you're done admiring their beauty, you'll love sinking your teeth into their delightful flavor.
Key Takeaways
- Classic Christmas dessert with a history dating back to the 18th century, reflecting the evolution of meringue-making techniques across Europe.
- Made by whipping egg whites into stiff peaks, folding in sugar, and piping into festive tree shapes before baking.
- Decorative options include colorful swirls, crushed candy canes, and edible glitters, adding to the visual appeal.
- Best enjoyed fresh but can be stored in an airtight container for up to 3 days, maintaining their crisp exterior and chewy interior.
- Offer a light, low-calorie treat that is naturally gluten-free, making them a guilt-free indulgence for holiday gatherings.
Top picks for "christma tree meringu"
As an affiliate, we earn on qualifying purchases.
History
The first recorded recipe for Christmas tree meringues dates back to the 18th century, when meringue-making techniques were rapidly evolving across Europe. Enterprising bakers began experimenting with shaping the delicate, whipped egg whites into festive designs, creating edible Christmas tree ornaments that delighted both the eyes and the taste buds.
These delightful treats, much like the benefits of cilantro for dogs, were enjoyed in moderation, adding to the festive cheer.
As the popularity of meringues grew, so too did the creativity of the cooks who crafted them. Soon, colorful swirls and flecks of crushed candy canes or sprinkles were added, transforming the simple meringue into a true holiday showstopper.
Imagine the delight of children as they gazed upon these whimsical, tree-shaped treats, each one a unique work of edible art.
Today, Christmas tree meringues remain a beloved part of the holiday season, a sweet and shimmering reminder of the joyful traditions that have been passed down through the generations.
With every bite, you can almost hear the laughter and feel the warmth of festive gatherings past.
Recipe
Christmas tree meringues are a delightful and festive treat that can add a touch of whimsy to your holiday celebrations. These light and airy confections aren't only visually stunning but also incredibly easy to prepare.
The key to creating the perfect Christmas tree meringues lies in mastering the art of meringue-making. By whipping egg whites to a stiff peak and carefully folding in sugar, you can achieve a beautifully structured and lightly sweet base for your holiday creations.
- 4 egg whites, at room temperature
- 1 cup (200g) granulated sugar
- Green food coloring (liquid or gel)
- Decorations (such as sprinkles, silver dragées, or crushed candy canes)
Begin by preheating your oven to 225°F (110°C). Line two baking sheets with parchment paper. In a large, clean bowl, whip the egg whites until they reach stiff peaks. Gradually add the sugar, one tablespoon at a time, while continuing to whip until the meringue is glossy and holds its shape.
Gently fold in a few drops of green food coloring, being careful not to overmix. Spoon the meringue into a piping bag fitted with a large star tip. Pipe the meringue onto the prepared baking sheets, starting from the bottom and working your way up to create a tree shape. Decorate the meringues with your desired toppings.
Bake the Christmas tree meringues for 1 to 1.5 hours, or until they're firm to the touch and can be easily lifted off the parchment paper. Allow them to cool completely on the baking sheets before serving.
These delicate treats are best enjoyed the same day they're made, but they can be stored in an airtight container for up to 3 days.
Cooking Steps
Separate those egg whites from the yolks and whip them up until they're nice and stiff.
Then, gently fold in the granulated sugar, a little at a time.
Now, grab your piping bag and pipe the fluffy meringue onto a baking sheet, ready to bake until they're crisp and delightful!
Step 1. Separate Egg Whites From Yolks
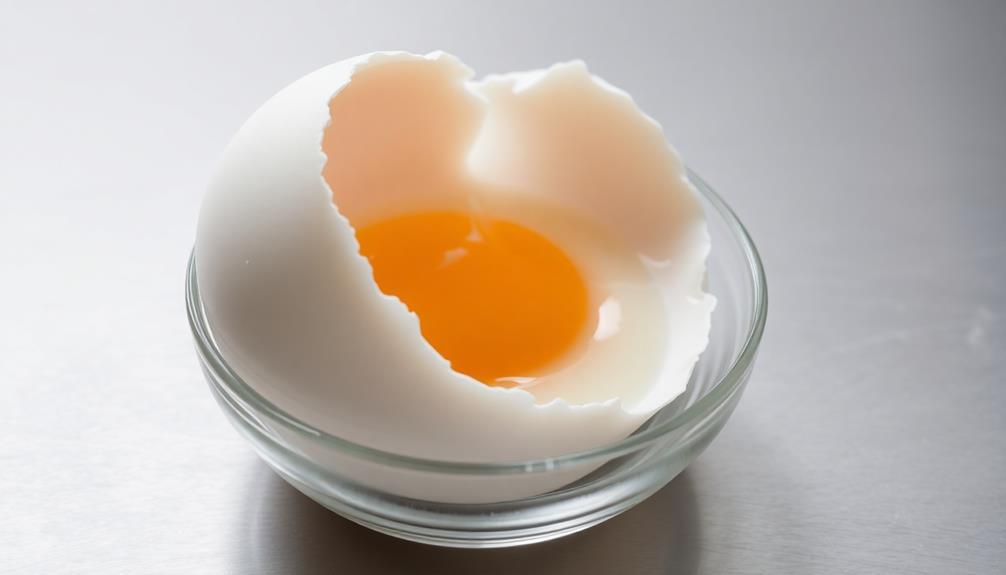
Separating egg whites from yolks is a crucial step in creating the delicate meringue that will form the base of your Christmas tree meringues. It may seem tricky at first, but with a little practice, you'll be cracking eggs like a pro!
First, you'll need to gently crack the eggs, one at a time, over a clean bowl. Slowly, let the yolk slide into your hand, allowing the white to drip into the bowl below. Be careful not to break the yolk – you don't want any of that golden goodness mixing in with your whites.
Once you've separated all the eggs, you'll have a bowl full of perfectly pure, protein-packed egg whites, ready to be whipped into fluffy, cloud-like meringue. It's an essential step, but don't worry, you've got this!
With a little elbow grease and some holiday cheer, you'll have those meringues piped and baked in no time.
Step 2. Whip Egg Whites Until Stiff
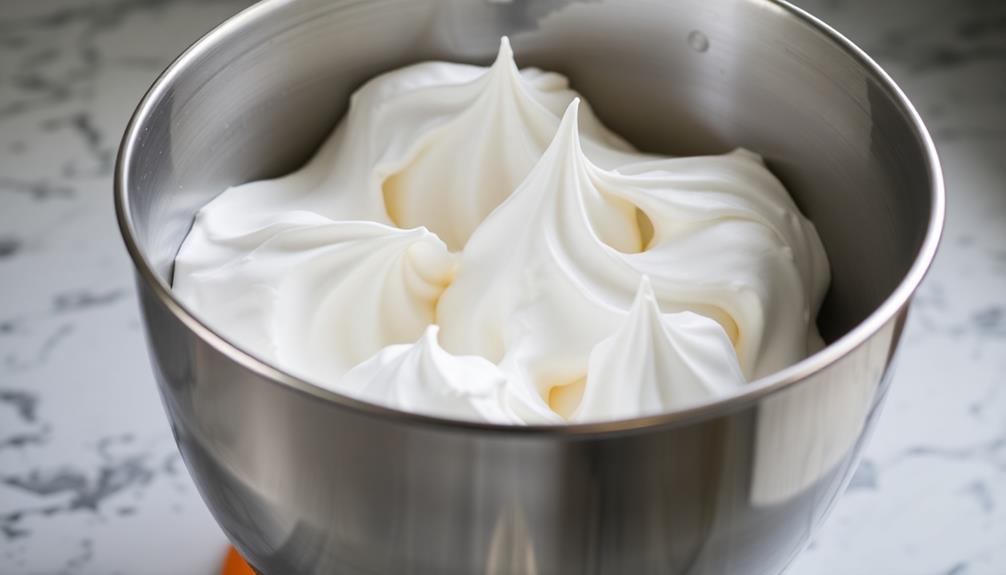
With your perfectly separated egg whites ready, it's time to get whipping! Grab your electric mixer and turn it on to high speed. The egg whites will begin to foam up, transforming from a clear, runny liquid into a thick, billowy meringue.
As you whip them, you'll notice the texture changing – the whites will become glossy and stiff, forming beautiful, voluminous peaks. Keep whipping until the meringue holds its shape when you lift the beaters. This usually takes around 5 minutes, but be patient and keep a close eye on it. You want those egg whites whipped to perfection!
Once they're stiff and shiny, you're ready to pipe your Christmas tree meringues. Gently fold in any food coloring or flavorings you'd like, then get creative with piping the meringue into festive tree shapes. With a little practice, you'll be whipping up a batch of fluffy, colorful Christmas tree meringues in no time!
Step 3. Fold in Granulated Sugar Gradually

Once your egg whites have reached the perfect stiff peaks, it's time to start adding the sugar.
Slowly and steadily, sprinkle in the granulated sugar, a little at a time. Be patient and don't rush this process – you want to fold the sugar in gently, so the air you've whipped into the egg whites doesn't escape.
As you gradually incorporate the sugar, you'll notice the mixture becoming thick and glossy.
Keep folding until all the sugar has disappeared and the meringue is smooth and shiny. Resist the urge to overmix, as that can deflate your precious peaks.
The key is to take your time and fold with a light touch. Imagine you're handling a delicate snowflake – you want to preserve its intricate, delicate structure.
Soon, you'll have a beautifully thick and voluminous meringue, ready to be piped into festive Christmas tree shapes. Get ready for baking magic!
Step 4. Pipe Meringue Onto Baking Sheet
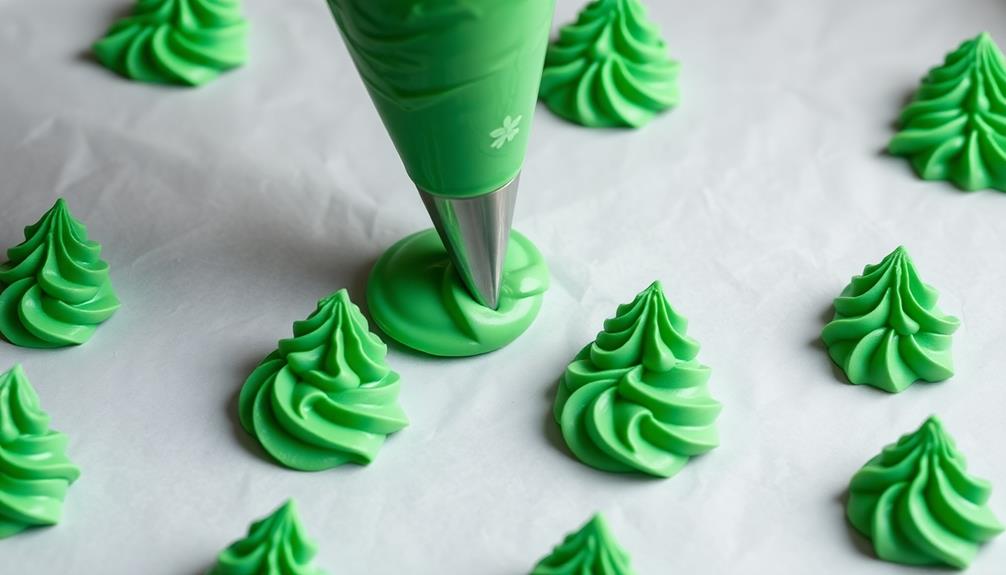
Grab a large piping bag and fit it with a large star tip.
Carefully spoon the fluffy meringue into the bag, making sure to pack it in tightly.
Position the bag over your baking sheet, holding it at a 90-degree angle with the tip just above the surface.
Gently squeeze the bag, applying steady pressure as you pipe the meringue onto the sheet, creating beautiful swirls and peaks that resemble a miniature Christmas tree.
Work your way around the sheet, piping the meringue in a circular pattern to build up the tree shape.
Don't be afraid to get creative, adding extra flourishes and details to make each tree unique.
Once you've filled the sheet, take a moment to admire your handiwork – these delicate, airy meringues are sure to dazzle your friends and family when you serve them up this holiday season!
Step 5. Bake at 200°F Until Crisp

Preheat your oven to 200°F. Once it's ready, you'll want to carefully transfer the piped meringue dollops onto your baking sheet.
Be gentle – you don't want to squish those fluffy, cloud-like meringues! Now, slide the tray into the oven and let the magic happen.
As the meringues bake, you'll start to notice them drying out and turning a lovely, crisp white. This process can take around 1-2 hours, so make sure to keep an eye on them.
You'll know they're done when you can lightly touch the meringues without them sticking to your finger.
Once they're perfectly crisp, remove the tray from the oven and let the meringues cool completely.
Aren't they just the cutest little Christmas tree shapes? Now you can admire your handiwork and get ready to dazzle your family and friends with these delightful holiday treats. You’ll be the star of the season with these festive creations, perfect for sharing during cozy evenings by the fire. While you’re at it, don’t forget to brush up on your Christmas goose cooking tips to complement these sweet treats with a savory showstopper. The combination of beautifully crafted desserts and a golden roasted goose will leave everyone asking for seconds.
Baking has never been so merry and bright!
Final Thoughts
These Christmas tree meringues have been a delightful journey, haven't they? You've followed along step-by-step, creating these whimsical and festive treats.
From whipping the egg whites to the perfect peaks, to piping the meringue into tree shapes, each stage has been both fun and rewarding.
And now, as you admire the crisp, snow-white meringues, you can't help but feel a sense of pride. These aren't just any ordinary cookies – they're edible works of art!
With a dusting of green sanding sugar, they're ready to bring joy to friends and family. The best part? You can enjoy them guilt-free, as meringues are light and airy, melting away on your tongue.
Frequently Asked Questions
How Long Do Christmas Tree Meringues Last?
You can expect your meringues to last 3-5 days when stored properly in an airtight container at room temperature. Their delicate texture may begin to deteriorate after that, so it's best to enjoy them soon after baking.
Can I Use Food Coloring in the Meringue?
You can certainly use food coloring in meringue. The coloring will infuse the meringue with vibrant hues, adding a festive touch. Just be mindful not to overdo it, as too much coloring can affect the delicate texture.
Do I Need to Use a Piping Bag for Shaping?
You don't necessarily need a piping bag to shape the meringue. You can use a spoon or a small scoop to create the desired shapes. However, a piping bag can make the process easier and allow for more intricate designs.
Can I Make the Meringues Ahead of Time?
Certainly! You can make the meringues ahead of time. Just store them in an airtight container at room temperature for up to a week. This allows you to prepare them in advance and enjoy their light, crisp texture when you're ready to serve.
How Should I Store the Finished Meringues?
You can store the finished meringues in an airtight container at room temperature for up to 1 week. Avoid placing them in the refrigerator, as the humidity can cause them to become soft and chewy.