Connect with us

Graduations/Birthdays

Mocktails

Knock yourself out with these vibrant, bubbly mocktails that let you enjoy the sophisticated taste of cocktails without the effects of alcohol.

Published

on

non alcoholic cocktail alternatives

Mocktails are the fun and flavorful non-alcoholic drinks that let you enjoy the sophisticated taste of cocktails without the effects of alcohol. Whether you're hosting a party or treating yourself, mocktails offer a wide range of delicious possibilities. You can craft vibrant, bubbly concoctions using fresh fruits, herbs, and sweeteners – the options are endless! Mocktails are perfect for any occasion, from fancy gatherings to casual get-togethers. Plus, they're a healthier alternative to alcoholic drinks. If you're curious to explore the exciting world of mocktails, keep reading to discover some popular recipes and tips for crafting your own.

Key Takeaways

  • Mocktails are non-alcoholic beverages designed to mimic the taste and experience of traditional cocktails.
  • Mocktail recipes often feature a combination of fresh fruits, herbs, sweeteners, and carbonated mixers.
  • Mocktails provide a sophisticated alternative to alcoholic drinks, suitable for all ages and occasions.
  • The history of mocktails dates back to the early 20th century, with increased popularity during the Prohibition era.
  • Crafting unique mocktails allows for creativity and experimentation with a wide range of flavorful ingredients.

History

The history of mocktails can be traced back to the early 20th century. Back then, people started experimenting with non-alcoholic drinks that tasted just as exciting as their boozy counterparts. They mixed up all sorts of fruit juices, spices, and fizzy waters to create refreshing and festive beverages.

As the Prohibition era rolled in, the demand for mocktails grew even stronger. People wanted to enjoy the fun and flavor of cocktails without the alcohol. Clever bartenders rose to the challenge, crafting creative mocktail recipes that delighted the thirsty crowds.

Over the decades, the art of mocktail-making has continued to evolve. Today, you can find all kinds of innovative, flavor-packed mocktails that rival the most sophisticated cocktails.

Whether you're looking for a sophisticated sipper or a fun, fruity refresher, the history of mocktails has paved the way for endless delicious possibilities.

Recipe

Mocktails are a refreshing and alcohol-free way to enjoy a delightful beverage. Whether you're looking to cut back on alcohol consumption, are pregnant, or simply prefer non-alcoholic options, mocktails offer a wide range of flavors and ingredients to satisfy your thirst.

Advertisement

Crafting a delicious mocktail is an art form in itself, as it involves balancing a variety of flavors and textures to create a perfectly balanced and refreshing drink. With a little creativity and the right ingredients, you can concoct a mocktail that will delight your taste buds and impress your guests.

Ingredients:

  • 2 cups of fresh pineapple chunks
  • 1 cup of fresh orange juice
  • 1/2 cup of fresh lime juice
  • 1/4 cup of honey
  • 1 cup of chilled sparkling water
  • Ice cubes

Instructions:

In a blender, combine the pineapple chunks, orange juice, lime juice, and honey. Blend until smooth and creamy.

Pour the mixture into a pitcher and stir in the chilled sparkling water. Serve over ice in glasses and garnish with a slice of lime or pineapple if desired.

Tips:

Advertisement

When choosing the fruits for your mocktail, opt for the freshest and ripest options to ensure maximum flavor.

You can also experiment with different fruit combinations, such as mango, berries, or even herbs like mint or basil, to create unique and personalized mocktail recipes.

Additionally, consider adding a splash of bitters or a pinch of salt to balance the sweetness and enhance the overall flavor profile.

Cooking Steps

First, gather your ingredients and equipment.

Next, combine the ingredients in a shaker and give it a good shake.

Advertisement

Then, strain the mixture into a chilled glass, garnish with a fresh citrus slice, and enjoy over ice.

Step 1. Gather Ingredients and Equipment

collect ingredients and tools

To start crafting your mocktails, you'll need to gather a few key ingredients and equipment. First, you'll want a variety of juices like citrus, berry, and tropical fruits. These will provide the delicious flavors for your mocktails.

You'll also need some syrups, like grenadine or simple syrup, to add sweetness and body. Don't forget some sparkling waters or seltzers to give your drinks that bubbly flair.

In terms of equipment, you'll need a cocktail shaker or mason jar to mix your ingredients. A muddler is great for mashing fruit and herbs to release their flavors.

A jigger or measuring cup will help you measure liquids precisely. Garnishes like fruits, herbs, or edible flowers can add the perfect finishing touch to your mocktails.

With these tools and ingredients on hand, you'll be ready to start shaking, stirring, and crafting delicious non-alcoholic cocktails.

Advertisement

Step 2. Combine Ingredients in Shaker

mix ingredients in shaker

With your ingredients and equipment ready, you can begin combining them to craft your mocktail. Grab your shaker and add the chilled liquids like juices or syrups first.

Then, carefully drop in any solid ingredients like muddled fruits or herbs. Secure the lid and give the shaker a vigorous shake for about 10-15 seconds. This will ensure all the flavors blend together perfectly.

Next, remove the lid and give the mixture a quick sniff. The aroma should be bright and inviting. If it's not quite right, you can always add a touch more of one ingredient to adjust the flavor profile.

When you're satisfied, use your strainer to pour the mocktail into your prepared glass. Top it off with any garnishes you'd like, like a citrus twist or a sprig of mint.

Your delicious and refreshing mocktail is now ready to enjoy! Remember to sip slowly and savor each flavorful sip.

Step 3. Strain Into Chilled Glass

strain into chilled glass

After shaking the ingredients vigorously, it's time to strain the mocktail into a chilled glass. This crucial step helps to ensure a smooth and refreshing texture. Simply hold a fine-mesh strainer over your serving glass and gently pour the mixture through. This will catch any small ice chips or fruit pulp, leaving you with a beautifully clear and well-balanced drink.

Be sure to use a chilled glass to keep your mocktail nice and cold. You can chill the glass in the freezer for a few minutes before straining, or fill it with ice water while you're preparing the rest of the drink.

Advertisement

When you're ready, just dump out the water and strain your mocktail right into the chilled glass.

With the drink now strained and in its serving vessel, you're almost ready to enjoy your delicious mocktail creation. The final step is to garnish it with a fresh fruit slice, herb sprig, or other decorative touch that complements the flavors.

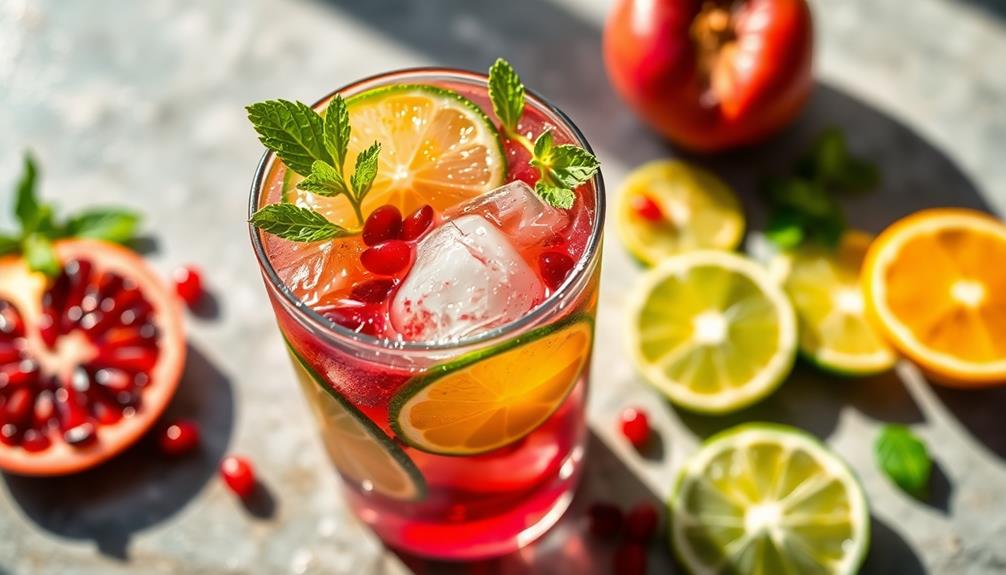
Step 4. Garnish With Fresh Citrus Slice

garnish with citrus slice

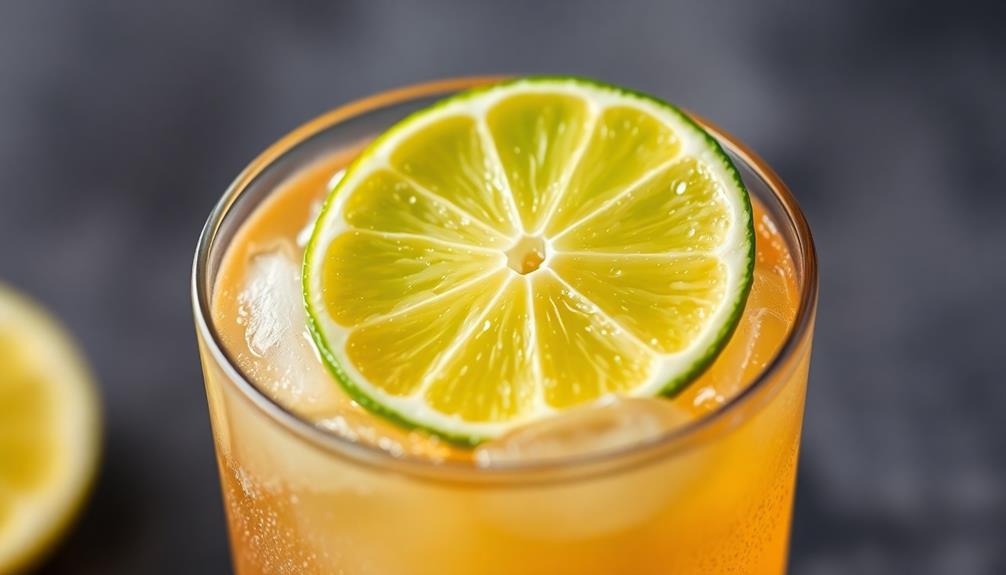
Adorning your chilled mocktail with a fresh citrus slice lends an elegant finishing touch, heightening both the visual appeal and aromatic experience. Selecting a vibrant, juicy slice of lemon, lime, or orange adds a pop of color and a tantalizing scent that tantalizes the senses.

Simply take your freshly prepared mocktail and carefully place the citrus slice on the rim of the glass, ensuring it sits at a slight angle. The slice not only looks stunning but also allows the natural oils to mingle with the drink, infusing it with a zesty burst of flavor.

As your guests lift the glass to their lips, they'll be delighted by the refreshing aroma and the touch of tartness that the citrus slice provides. This simple yet impactful garnish transforms your mocktail into a sophisticated and visually appealing non-alcoholic treat, elevating the overall drinking experience.

Step 5. Enjoy Over Ice

chill and savor drink

Serving your mocktail over ice infuses it with a delightfully chilled and refreshing quality. The ice cubes gently chill the drink, allowing the flavors to shine through while providing a satisfying temperature contrast. As the ice melts, it gradually dilutes the mocktail, creating a perfectly balanced sipping experience.

When preparing your mocktail, be sure to use high-quality ice cubes. Larger, clear cubes are best, as they melt more slowly and don't water down the drink too quickly.

Advertisement

Alternatively, you can fill a glass with crushed ice, which creates a fun, textured appearance and helps the mocktail stay cold for longer.

Don't be afraid to get creative with your ice! Try adding a few berries or citrus slices to the ice cubes for a visually appealing and flavorful touch. This not only enhances the overall presentation but also infuses the drink with subtle, natural flavors as the ice melts.

Final Thoughts

Mocktails can be a delightful and refreshing alternative to traditional cocktails, allowing you to enjoy the flavors and sociability of a bar experience without the need for alcohol.

As you've learned, crafting unique and tasty mocktails is a wonderful way to explore new ingredients and get creative in the kitchen.

Whether you're hosting a gathering or simply treating yourself, these non-alcoholic beverages can elevate any occasion with their vibrant colors, tantalizing aromas, and complex flavors.

Advertisement

Frequently Asked Questions

Are Mocktails Suitable for All Age Groups?

Mocktails are non-alcoholic beverages that can be enjoyed by people of all ages. You don't have to be of legal drinking age to enjoy the unique flavors and refreshing qualities of a well-crafted mocktail.

How Long Do Mocktails Last Once Made?

Mocktails can last for up to 3-4 days when stored properly in the refrigerator. The key is to use fresh ingredients and store them in an airtight container to maintain their flavor and prevent spoilage.

Can I Make Mocktails in Advance?

You can make mocktails in advance, but it's best to consume them within a few days. The ingredients may separate or lose their freshness over time, so it's ideal to prepare them shortly before serving.

What Are the Health Benefits of Mocktails?

Consuming mocktails can provide several health benefits. They're typically low in calories and sugar, helping you maintain a healthy weight. Plus, they can hydrate you without the negative effects of alcohol. Enjoy the flavor without the intoxication!

Can I Substitute Ingredients in Mocktail Recipes?

Absolutely! You can substitute ingredients in mocktail recipes to suit your taste preferences and dietary needs. Get creative and experiment with different flavors and combinations to find your perfect mocktail.

Advertisement

Conclusion

You've gotta give mocktails a try! They're the perfect solution when you want to enjoy a tasty, alcohol-free treat. From classic flavors to unique concoctions, the possibilities are endless. Whip up a refreshing mocktail and savor the delicious, guilt-free goodness. Whether you're hosting a party or relaxing at home, these fun, fizzy drinks are sure to delight. So what are you waiting for? Start exploring the world of mocktails today!

Continue Reading
Advertisement

Graduations/Birthdays

Cotton Candy Grapes

Satisfy your sweet tooth with the captivating flavor of Cotton Candy Grapes, a unique fruit that replicates the taste of fluffy cotton candy. Discover more about this delightful treat.

Published

on

sweet fruity unique grapes

You'll love the captivating flavor of Cotton Candy Grapes! These unique fruits were developed in the early 2000s to replicate the sweet, fluffy taste of cotton candy. Carefully crossbred by a fruit breeder, they've become an instant hit, offering a refreshing and indulgent snack. Low in calories with essential vitamins, they're a guilt-free treat. Enjoyed fresh or in recipes, the natural sweetness reduces the need for added sugars. Grab some at your local grocery store or farmers' market – you'll be amazed by this exciting twist on traditional grapes. There's more to discover about these delightful treats!

Key Takeaways

  • Cotton Candy Grapes are a unique grape variety developed in the early 2000s by fruit breeder David Cain to replicate the taste of cotton candy.
  • They are low in calories, contain essential vitamins and antioxidants, and provide hydration and dietary fiber.
  • Cotton Candy Grapes have gained significant popularity as a novel fruit, appealing to both children and adults.
  • They can be enjoyed as a healthy snack or incorporated into various recipes, such as salads, smoothies, and desserts.
  • Cultivating Cotton Candy Grapes requires specific climate conditions and meticulous care, involving sustainable farming practices and continuous research.

History

The Cotton Candy Grape was first developed in the early 2000s by fruit breeder David Cain. He knew people loved the sweet, fluffy taste of cotton candy, so he set out to create a grape with that same delightful flavor.

After years of careful crossbreeding, he finally succeeded in developing the Cotton Candy Grape.

These grapes are the result of crossing two different grape varieties to get the perfect balance of sweetness and texture. Cain worked tirelessly, testing different combinations until he found the winning formula.

The Cotton Candy Grape became an instant hit when it hit the market, as people were amazed by its uncanny resemblance to the classic carnival treat.

Today, Cotton Candy Grapes are grown in California and available in stores seasonally. Their popularity has only grown, with many people eagerly awaiting their arrival each summer.

Advertisement

The unique flavor and fun name make them a favorite for both kids and adults alike.

Recipe

Cotton Candy Grapes are a unique and delightful fruit that offer a delicious twist on the traditional grape. These grapes have a natural sweetness that resembles the flavor of cotton candy, making them a popular and sought-after treat.

To enjoy the full potential of these special grapes, a simple recipe can be prepared to highlight their natural flavors. This recipe requires minimal preparation, allowing the grapes to take center stage and provide a delightful experience for your taste buds.

Ingredients:

  • 1 pound of Cotton Candy Grapes
  • 1 tablespoon of honey (optional)

Instructions:

Wash the grapes thoroughly and pat them dry with a paper towel. If desired, lightly drizzle the grapes with honey, which can enhance their natural sweetness. Serve the grapes chilled or at room temperature, and enjoy the unique and delightful flavor of Cotton Candy Grapes.

Advertisement

Additional Tips:

It's important to note that the natural sweetness of Cotton Candy Grapes can vary depending on the growing conditions and the individual grape. Therefore, the amount of honey used, if any, may need to be adjusted to suit your personal taste preferences.

Additionally, these grapes are best consumed fresh, as their delicate flavor may diminish over time.

Cooking Steps

Rinse those cotton candy grapes and pat them dry.

Then, pop them in the freezer for 30 minutes.

Advertisement

Next, coat the frozen grapes in sugar for a sweet crunch.

Toss the sugary grapes in a cinnamon-sugar mixture and serve immediately to enjoy this delightful treat.

Step 1. Rinse and Pat Dry Grapes

rinse and dry grapes

Before proceeding with the cooking steps, begin by gently rinsing the cotton candy grapes under cool, running water. This helps remove any dirt, debris, or pesticide residue that may be on the grapes' surface.

Carefully pat the grapes dry with a clean, soft paper towel or cloth. It's important to be gentle during this process to avoid bruising or damaging the delicate skin of the grapes.

Patting them dry will also help ensure the grapes are ready for the next step in the recipe. Take your time and be mindful of each grape, making sure they're all thoroughly rinsed and dried.

With the grapes prepped, you can now move on to the next cooking step with confidence, knowing your cotton candy grapes are clean and ready to enjoy.

Advertisement

Step 2. Freeze Grapes for 30 Minutes

chill grapes for thirty minutes

After thoroughly rinsing and drying the cotton candy grapes, you'll want to pop them in the freezer for about 30 minutes. This quick freezing process helps to enhance the sweet, cotton candy-like flavor of these unique grapes. Not only are these grapes delicious, but they also provide a refreshing snack that can support your digestive health due to their high water content and fiber.

Simply place the prepared grapes in a single layer on a baking sheet or plate and slide them into the freezer.

As the grapes chill, the cold temperature will work its magic, locking in that delightful sweetness. You'll notice the grapes becoming slightly firmer and more solid. This is exactly what you're looking for! The freezing helps to concentrate the natural sugars, bringing out the cotton candy-esque taste.

For an added health benefit, consider sprinkling some chia seeds for digestive support alongside your frozen grapes.

After 30 minutes, you can remove the grapes from the freezer and transfer them to a serving bowl. The chilled grapes will be refreshingly cool and bursting with that signature cotton candy flavor. Enjoy these frozen treats as a healthy, kid-friendly snack or dessert!

Step 3. Coat Frozen Grapes in Sugar

sugar coated frozen grapes

Once the frozen grapes have reached their peak chill, it's time to up the sweetness factor. You'll want to grab a shallow baking dish or rimmed sheet pan and spread out your frosty grapes in a single layer.

Now, sprinkle a light, even coating of granulated sugar all over the grapes. Be sure to get the sugar into all the nooks and crannies!

Advertisement

Next, use your hands to gently toss and roll the grapes, making sure each one gets nicely coated. The sugar will stick to the cold, icy surface, creating a delightful crunchy-sweet shell.

Once they're evenly dusted, pop the tray back in the freezer for about 15 minutes. This allows the sugar to harden and crystallize, transforming your grapes into irresistible, candy-like treats.

When the time's up, you can dig in and enjoy your homemade cotton candy grapes! The cold, sweet crunch is absolutely heavenly.

Step 4. Toss Grapes in Cinnamon-Sugar Mixture

coat grapes with cinnamon sugar

Now that your frozen grapes are coated in a delightful sugar shell, it's time to take them to the next level with a cinnamon-sugar blend.

You'll love the way the warm spice complements the sweet crunchiness of the sugar-coated grapes.

In a large bowl, combine 1/4 cup of granulated sugar and 1 teaspoon of ground cinnamon.

Advertisement

Gently toss the frozen, sugar-coated grapes in the mixture until they're evenly coated. The cinnamon-sugar will stick to the icy surface, creating a tasty new texture.

Serve the cinnamon-sugar grapes immediately for a delightful snack.

The contrast of the cool, crisp grapes and the warm, aromatic coating is simply irresistible.

Your friends and family will be amazed by this simple yet sophisticated twist on a classic frozen grape treat.

Get ready to enjoy a truly special dessert that's bursting with flavor in every bite!

Advertisement

Step 5. Serve Immediately and Enjoy

serve and enjoy immediately

Serve the cinnamon-sugar grapes immediately for a delightful snack. The warm, cozy spices and the sweet, candy-like grapes are a match made in heaven. As soon as you toss the grapes in the cinnamon-sugar mixture, they're ready to be enjoyed. The sugar will still be glistening, and the grapes will be at their peak freshness.

Pop a grape into your mouth and savor the explosion of flavor. The soft, juicy flesh contrasts perfectly with the delicate crunch of the sugar coating. The cinnamon adds a touch of warmth and depth, elevating the natural sweetness of the grapes.

These cotton candy grapes are sure to put a smile on your face with every bite. Serve them in a bowl and invite your friends and family to dig in. They'll be amazed by the unique and delightful taste.

Grapes have never been more exciting! Savor every moment of this special snack.

Final Thoughts

Whether you're a fan of cotton candy or not, the Cotton Candy Grapes offer a unique and delightful flavor experience. These grapes have captivated taste buds around the world, blending the sweet, fluffy essence of cotton candy with the juicy, refreshing qualities of fresh grapes. As you savor each bite, you'll be transported to a world of pure indulgence.

The Cotton Candy Grapes are a true testament to the wonders of modern agriculture and the ingenuity of dedicated growers. While they may seem like a whimsical creation, these grapes are the result of careful cultivation and selective breeding, ensuring a consistent and exceptional flavor profile.

Advertisement

As you reach for your next handful, take a moment to appreciate the journey these grapes have taken to reach your table. Whether you're enjoying them as a snack, incorporating them into a refreshing salad, or blending them into a delightful smoothie, the Cotton Candy Grapes are sure to leave a lasting impression on your taste buds.

Frequently Asked Questions

Are Cotton Candy Grapes Genetically Modified?

Yes, cotton candy grapes are genetically modified. Breeders have used selective breeding techniques to create a grape variety that tastes like cotton candy, giving you a sweet treat without the traditional grape flavor.

How Long Do Cotton Candy Grapes Last?

How long do they last? Well, you can typically enjoy these delightful treats for about 7-10 days after purchasing them. Just be sure to store them properly in the fridge to preserve their sweet flavor and juicy texture.

Where Can I Buy Cotton Candy Grapes?

You can find cotton candy grapes at various grocery stores, specialty markets, and even some farmers' markets during their peak season. They're a popular seasonal treat, so be sure to grab them while they're available.

What Is the Nutritional Value of Cotton Candy Grapes?

Cotton candy grapes have a similar nutritional profile to regular table grapes. They're a good source of vitamins C and K, as well as antioxidants like resveratrol. However, their sweetness may mean they're higher in natural sugars than some other grape varieties.

Advertisement

Can I Grow Cotton Candy Grapes at Home?

You can grow cotton candy grapes at home, but it's not easy. They require specific growing conditions and may be challenging for the average gardener. With the right setup and care, it's possible to cultivate these unique grapes yourself.

Conclusion

You'll be amazed by these cotton candy grapes! They have a delightfully sweet flavor that'll transport you to a whimsical world of carnival treats. Pop 'em in your mouth and let the burst of sugary goodness delight your taste buds. Whether you're a kid or just a kid at heart, these grapes are a must-try! Get ready to indulge in a truly unique and delightful snacking experience.

Continue Reading

Graduations/Birthdays

Sprinkle-Rimmed Drinks

Whimsical and visually captivating, sprinkle-rimmed drinks transport you to a world of playful flavors and enchanting presentations that will leave you craving more.

Published

on

colorful rimmed beverages

You'll be delighted to discover the vibrant world of sprinkle-rimmed drinks! These colorful creations originated in the early 1900s, when creative bartenders began enhancing cocktails with decorative toppings. Today, the trend remains popular for parties and gatherings, with endless possibilities for rimming glasses with an array of sprinkles and candies. Whether you're mixing up a classic margarita or a refreshing mocktail, a sprinkle-rimmed glass adds a playful touch that captivates the senses. The key is balancing the sweetness of the sprinkles with the boldness of your chosen spirit or mixer. Prepare to be enchanted as you explore the delightful flavor and visual appeal of these festive drinks.

Key Takeaways

  • Sprinkle-rimmed drinks originated in the early 20th century as a creative bartender technique to enhance cocktail presentation and add textural interest.
  • Rimming glasses with assorted sprinkles, like nonpareils or crushed candies, provides a festive and visually appealing touch to both alcoholic and non-alcoholic beverages.
  • The balance between the sweetness of the sprinkles and the boldness of the liquor is crucial for achieving a harmonious flavor profile in sprinkle-rimmed drinks.
  • Sprinkle-rimmed drinks are versatile and suitable for a variety of occasions, from casual gatherings to themed parties and celebrations.
  • The creative customization of sprinkle combinations and garnishes allows for unique and personalized drink presentations that can elevate the overall drinking experience.

History

According to historical accounts, the concept of rimming drinks with sprinkles or other decorative toppings can be traced back to the early 20th century. During this time, creative bartenders began experimenting with unique ways to enhance the presentation of their cocktails.

They discovered that adding a colorful, crunchy rim couldn't only make drinks more visually appealing but also add a delightful textural contrast.

The trend quickly caught on, and soon sprinkle-rimmed drinks became a staple at parties and social gatherings. People loved the playful, whimsical touch it added to their beverages.

Over the decades, the practice evolved, with bartenders and home mixologists trying out different types of sprinkles, sugars, and even crushed cookies or candies to rim their drinks.

Today, sprinkle-rimmed drinks remain a popular way to add a touch of fun and flair to any occasion, from casual get-togethers to elegant celebrations.

Advertisement

Recipe

Sprinkle-Rimmed Drinks are a fun and festive way to add a touch of whimsy to any occasion. Whether you're hosting a party or simply treating yourself, these colorful and flavorful drinks are sure to delight.

The rimming of the glass with a variety of sprinkles not only adds a visually appealing element but also provides a delightful textural contrast to the smooth and refreshing drink within. The possibilities are endless when it comes to the sprinkle combinations, allowing you to tailor the drink to your personal taste or the theme of the event.

  • Assorted sprinkles (such as nonpareils, sanding sugar, or crushed candy)
  • Cocktail or mocktail of your choice (e.g., margarita, mojito, lemonade)
  • Lime wedges (optional)

Begin by preparing the sprinkle rim. Pour the desired sprinkles onto a shallow plate or saucer. Wet the rim of the glass with a lime wedge or a small amount of water. Carefully dip the rim of the glass into the sprinkles, gently twisting to ensure even coverage. Set the prepared glass aside.

Next, prepare your cocktail or mocktail according to the recipe. Once the drink is ready, carefully pour it into the sprinkle-rimmed glass. The sprinkles will cling to the sides, creating a festive and eye-catching presentation.

For an extra touch of flair, consider garnishing the drink with a lime wedge or a complementary fruit slice. The sprinkle-rimmed glasses can be made in advance, allowing you to quickly assemble your drinks when guests arrive.

Enjoy your Sprinkle-Rimmed Drinks and let the celebration begin!

Advertisement

Cooking Steps

First, rim the glass with colorful sprinkles to add a fun and festive touch.

Next, pour in your favorite liquor and mix in the remaining drink components.

Step 1. Rim Glass With Colored Sprinkles

rim glass colorful sprinkles

Prepare your glasses by lightly wetting the rim with a damp cloth or paper towel. This will help the sprinkles stick to the edge.

Next, choose your favorite colored sprinkles. Maybe you want to use rainbow sprinkles for a fun, festive look, or opt for subtle metallic sprinkles for a sophisticated touch.

Carefully pour a small amount of sprinkles onto a plate or shallow bowl. Gently dip the wet rim of the glass into the sprinkles, rolling it around to coat the edge evenly.

Tap off any excess sprinkles, then fill your glass with your desired beverage. The colorful, sprinkle-rimmed glass will instantly brighten up your drink and add a playful, decorative element.

Advertisement

Get creative and try different sprinkle colors and patterns to complement the drink inside. This simple technique is a great way to elevate your cocktails, mocktails, or even non-alcoholic beverages for any occasion.

Step 2. Add Liquor

incorporate alcohol into mixture

Now that you've created a whimsical sprinkle-rimmed glass, it's time to add the liquor.

Grab your favorite spirit, whether it's vodka, gin, or rum. Carefully pour it into the prepared glass, being mindful of the sprinkle rim.

The colorful sprinkles will dance and swirl as the liquor hits them, creating a mesmerizing display.

Don't be afraid to experiment with different spirits – each one will interact with the sprinkles in a unique way.

For a refreshing twist, you can even try adding a splash of soda or juice to the mix.

Advertisement

The key is to find the perfect balance between the sweetness of the sprinkles and the boldness of the liquor.

As you sip your creation, enjoy the playful interplay of flavors and textures.

Get ready to delight your senses and impress your guests with these sprinkle-rimmed cocktails.

Step 3. Add Drink Components

incorporate beverage ingredients

Once you've rimmed the glass with the colorful sprinkles, you'll want to start adding the drink components.

Begin by pouring in your favorite liquor. This could be vodka, gin, or even a flavored rum – the choice is yours! Did you know that some studies suggest coffee can enhance cognitive function? Coffee's health benefits can make for an interesting addition to your drink if you choose to incorporate coffee liqueurs.

Next, add a splash of sour mix or lemon juice to balance the sweetness. Don't be afraid to experiment with different juice combinations, like orange or pineapple, to create unique flavor profiles.

Advertisement

Now it's time to sweeten things up. A touch of simple syrup or honey can do the trick, but you can also get creative with flavored syrups, like raspberry or vanilla.

Stir everything together until it's well-combined.

Step 4. Stir in Desired Ingredients

mix in chosen ingredients

How about you stir in your desired ingredients next? This is where you can get creative and customize your sprinkle-rimmed drink to your own taste.

First, add any syrups, juices, or other liquids you'd like. Give it a gentle stir to combine everything.

Next, you can sprinkle in some spices, herbs, or even a bit of zest from a citrus fruit. Maybe a dash of cinnamon or a pinch of ginger would be nice. Don't be afraid to experiment! Just be sure to stir it all together well so the flavors meld.

Finally, you can top it off with a fun garnish, like a slice of fruit or a sprig of mint. This helps bring all the flavors together in a visually appealing way.

Advertisement

Once you've stirred in your desired ingredients, your sprinkle-rimmed drink is ready to enjoy. Sip and savor the unique flavors you've created.

Step 5. Garnish With Edible Flowers

garnish using edible flowers

Why not take your sprinkle-rimmed drink to the next level by garnishing it with edible flowers? These vibrant and whimsical additions can instantly elevate the presentation of your beverage. Carefully select complementary flowers that not only look beautiful, but also offer a subtle, natural flavor to enhance your drink.

Consider using delicate, petite blooms like pansies, violets, or nasturtiums. Their delicate, sweet flavors pair beautifully with many cocktails and mocktails. Arrange the flowers around the rim of the glass, letting them dangle gracefully over the edge. You can even float a few petals directly in the drink for a stunning visual effect.

Edible flowers add a touch of elegance and sophistication to your sprinkle-rimmed creations. Plus, they're a fun way to get creative and make your drinks truly one-of-a-kind.

Final Thoughts

While sprinkle-rimmed drinks may not be for everyone, they can add a delightful and whimsical touch to any gathering. Whether you're hosting a party, celebrating a special occasion, or simply looking to add a bit of fun to your everyday, these playful drinks are sure to bring smiles to your guests' faces.

The vibrant colors and unexpected texture of the sprinkles can transform a simple cocktail or mocktail into a true work of art.

Advertisement

Of course, the key to successful sprinkle-rimmed drinks is finding the right balance. You'll want to choose sprinkles that complement the flavors of your drink, and be careful not to overdo it.

A light dusting around the rim can go a long way in adding visual appeal and a touch of whimsy. So why not give it a try? Embrace your inner child and let your creativity shine through with these delightful, sprinkle-topped creations.

Frequently Asked Questions

What Is the Purpose of the Sprinkle Rim?

The purpose of the sprinkle rim is to add a decorative touch and enhance the flavour of the drink. It catches the eye, creating an enticing visual appeal, while also complementing the drink's overall taste and aroma.

How Long Will the Sprinkle Rim Last on the Drink?

The sprinkle rim won't last too long on your drink. The moisture from the liquid and agitation will cause the sprinkles to dissolve and disperse within a short time, usually less than 10 minutes.

Can I Use Any Type of Sprinkle for the Rim?

You can use a variety of sprinkles for the rim, but some may work better than others. Consider factors like moisture, texture, and adhesion to find the perfect sprinkle for your drink.

Advertisement

How Do I Get the Sprinkles to Stick to the Glass?

To get sprinkles to stick to the glass, you'll need a sticky surface. Moisten the rim with a bit of water, juice, or syrup, then dip it in the sprinkles. The moisture will help them adhere.

Can I Make the Sprinkle Rim in Advance?

You can make the sprinkle rim in advance. Simply apply the sprinkles to a moistened glass rim and allow it to dry completely. Then, when you're ready to serve, the sprinkles will still be firmly in place.

Conclusion

Whoa, you're really gonna love these sprinkle-rimmed drinks! They're a blast to make and even more fun to drink. Grab your favorite colorful sprinkles, rim those glasses, and get ready for a party in your mouth. These drinks are sure to put a smile on your face and bring out the kid in you. So, what are you waiting for? Let's get sprinkling!

Continue Reading

Graduations/Birthdays

Birthday Cake Puppy Chow

Uncover the captivating blend of crunchy Chex, creamy white chocolate, and vibrant sprinkles that make Birthday Cake Puppy Chow an irresistible treat for any celebration.

Published

on

festive puppy chow treats

Get ready to dive into the delightful world of Birthday Cake Puppy Chow! This festive twist on the classic Chex cereal treat combines the crunchy texture of Chex with the rich sweetness of white chocolate and the vibrant colors of rainbow sprinkles. It's the perfect treat for birthdays, parties, or any special occasion. You'll love how the irresistible flavors and textures come together to create a snack that's both visually appealing and utterly delicious. With just a few simple steps, you can whip up a batch and start celebrating in style. Let's explore the details that make this birthday-themed treat so irresistible.

Key Takeaways

  • Birthday Cake Puppy Chow is a sweet and crunchy treat that combines Chex cereal, white chocolate, and colorful sprinkles for a festive twist on traditional puppy chow.
  • The recipe originated in the 1950s and gained popularity as a party food for birthdays and special occasions, appealing to all ages.
  • The combination of the crunchy cereal, rich chocolate, and vibrant sprinkles creates an irresistible snack that is easy to prepare and perfect for sharing.
  • Birthday Cake Puppy Chow can be stored in an airtight container for up to a week, making it a convenient and enjoyable treat for various celebrations.
  • The festive appearance and sweet flavors of Birthday Cake Puppy Chow help create a joyful and celebratory atmosphere, making it an ideal addition to any birthday party or gathering.

History

The origins of Birthday Cake Puppy Chow can be traced back to the 1950s when resourceful home cooks began experimenting with traditional Puppy Chow recipes.

They wanted to create a fun, festive twist on the classic snack mix. By adding colorful sprinkles, vanilla flavoring, and a sweet coating, these innovative bakers transformed the traditional savory Puppy Chow into a delightful treat perfect for celebrations.

As the popularity of this birthday-themed variation grew, recipes were shared and refined, with bakers often using white chocolate or powdered sugar to achieve the desired birthday cake flavor and appearance.

Today, Birthday Cake Puppy Chow has become a beloved party food, brightening up birthdays, sleepovers, and other special occasions.

Its vibrant colors, sweet taste, and crunchy texture make it an irresistible snack that both kids and adults can't get enough of.

Advertisement

Whether homemade or store-bought, this festive twist on a classic favorite is sure to delight anyone with a sweet tooth.

Recipe

Birthday Cake Puppy Chow

Recipe

Puppy chow, also known as muddy buddies, is a classic and delicious snack. This birthday cake version takes the beloved treat and adds a festive twist. Coated in a sweet white chocolate and sprinkled with colorful sprinkles, this puppy chow is the perfect party food or sweet treat.

For those who enjoy a fun and easy dessert, this recipe fits right into that category! Whether you're celebrating a birthday or just looking for a fun and easy snack, this birthday cake puppy chow is sure to be a hit. The combination of crunchy Chex cereal, rich white chocolate, and festive sprinkles creates a flavor and texture that's utterly irresistible.

Advertisement

Ingredients:

  • 9 cups Chex cereal (any variety)
  • 1 cup white chocolate chips
  • 1/4 cup butter
  • 1 cup powdered sugar
  • 1/2 cup rainbow sprinkles

Instructions:

In a large microwave-safe bowl, melt the white chocolate chips and butter together in 30-second intervals, stirring between each, until smooth and fully melted.

Add the Chex cereal to the bowl and gently stir until the cereal is fully coated. Sift the powdered sugar over the coated cereal and fold gently to combine, ensuring all pieces are evenly coated.

Lastly, sprinkle the rainbow sprinkles over the puppy chow and toss gently to distribute.

Tips:

Advertisement

For best results, work in batches when coating the cereal to ensure even coverage.

Store the birthday cake puppy chow in an airtight container at room temperature for up to 1 week. The sprinkles may bleed color slightly over time, but the flavor will remain delicious.

Enjoy this treat as a party snack, gift, or simply as a sweet indulgence.

Cooking Steps

Measure out the Chex cereal into a large bowl.

Melt the butter and marshmallows in the microwave, then stir in the sprinkles.

Advertisement

Pour the melted mixture over the cereal and stir gently to coat each piece evenly.

Step 1. Measure Chex Cereal

measure chex cereal accurately

Carefully measure the crisp, golden Chex cereal, ensuring each piece is evenly distributed. You'll need 9 cups of the delightful, toasted corn squares.

Pour them into a large mixing bowl, ready to be transformed into a delectable birthday treat. Measure precisely to get the right balance – too little and you won't have enough, too much and the coating mightn't cover everything evenly.

Take your time and double-check the amount. With the Chex ready, you're one step closer to creating a crave-worthy birthday cake puppy chow.

The next stage is to blend in the other tasty ingredients that will give this snack its festive flair. Stay focused and enjoy this creative process – the end result will be worth it when you see the joy on everyone's faces as they dive into this homemade delight.

Step 2. Melt Butter and Marshmallows

melt butter and marshmallows

Next, you'll melt the butter and marshmallows together in a saucepan over medium heat. Stir the mixture constantly until it's smooth and fully combined. This should only take a couple of minutes. The butter will melt quickly, and the marshmallows will soften and blend in.

Once the butter and marshmallows are melted, remove the saucepan from the heat. Be careful, as the mixture will be hot.

Advertisement

You'll want to work quickly from this point on. Quickly pour the melted butter and marshmallow mixture over the Chex cereal in a large bowl. Use a spatula to gently fold and coat the cereal evenly. Work carefully to ensure all the pieces are coated.

After the cereal is fully coated, you're ready to move on to the next step of adding the birthday cake-flavored ingredients. This is where the fun really begins!

Step 3. Add Sprinkles to Melted Mixture

add sprinkles to mixture

After coating the Chex cereal in the melted butter and marshmallow mixture, it's time to add the birthday cake-flavored fun.

To ensure that your puppy chow is safe and enjoyable for everyone, be mindful of the ingredients, just like how it's important to offer your pets safe snacks safe snacks for hamsters.

Grab a handful of colorful sprinkles and start sprinkling them generously over the coated cereal. The sprinkles will add a festive touch, making your birthday cake puppy chow look like a true celebration.

Gently stir the sprinkles into the mixture, ensuring they're evenly distributed. You'll see the vibrant colors of the sprinkles pop against the gooey, marshmallow-y cereal. The sprinkles not only add a fun visual element but also provide a burst of sweetness in each bite.

Advertisement

Keep adding sprinkles until the entire batch is coated and the colors are vibrant. The more sprinkles, the better!

Once you're satisfied with the amount, give the mixture one final stir to make sure everything is well combined. Your birthday cake puppy chow is now ready for the next step, and you can't wait to see the delighted faces of your friends and family when they try it.

Step 4. Pour Cereal Mixture

pouring cereal mixture carefully

Once the sprinkles are evenly distributed, pour the coated Chex cereal mixture onto a large baking sheet or into a large bowl. This will allow the cereal pieces to spread out and cool down. You want to make sure they're not piled up on top of each other, so take your time and gently pour the mixture, spreading it out as you go.

Now, you'll want to let the cereal cool completely before moving on to the next step. This usually takes about 15-20 minutes. As it cools, the melted chocolate and peanut butter will harden, creating that classic puppy chow texture.

Keep an eye on it and stir the mixture occasionally to help it cool evenly.

Once the cereal is cooled and hardened, you're ready to enjoy your delicious birthday cake puppy chow! Feel free to sneak a few pieces as a reward for all your hard work. Just don't eat it all before you get to share it with your friends and family!

Advertisement

Step 5. Stir to Coat Cereal Evenly

coat cereal by stirring

With a gentle hand, stir the cereal mixture until every piece is thoroughly coated in the chocolatey-peanut butter goodness.

Don't be too vigorous – you want to ensure the coating spreads evenly without breaking the cereal.

Take your time, moving the spoon in slow, circular motions. As you stir, you'll notice the mixture start to thicken and the color deepen.

Keep going until there's no dry cereal left. You'll know it's ready when the whole batch looks rich and decadent, like a birthday cake batter.

Once it's fully coated, you're almost done! Just a few more steps before you can dive in and enjoy this delightful treat.

Final Thoughts

This Birthday Cake Puppy Chow recipe is a delightful treat that can brighten up any occasion. The final result is a scrumptious and visually appealing snack that's sure to put a smile on everyone's face. The blend of sweet and crunchy textures creates a truly irresistible experience.

Advertisement

For a festive gathering, consider pairing this tasty snack with some stylish home decor solutions like GEEORY Fall Pillow Covers to enhance the atmosphere.

Whether you're celebrating a special birthday or simply looking for a fun and festive snack, this puppy chow is the perfect choice. The vibrant colors and festive sprinkles make it an eye-catching addition to any party or gathering.

It's easy to prepare, and the hands-on process of mixing and coating the cereal can be an enjoyable activity for both kids and adults.

Once you've tried this Birthday Cake Puppy Chow, you'll find yourself craving it again and again. It's a delightful treat that's sure to become a new favorite in your household. Enjoy the sweet, satisfying flavors and the joy of sharing this delicious creation with your loved ones.

Frequently Asked Questions

How Do I Make Birthday Cake Puppy Chow Nut-Free?

To make the recipe nut-free, simply replace the nuts with an equal amount of seeds or a seed-based alternative, like sunflower or pumpkin seeds. This will provide the same crunchy texture without the nut allergens.

Advertisement

What Is the Shelf Life of Birthday Cake Puppy Chow?

The shelf life of homemade snack mixes can vary, but you can typically expect them to last 1-2 weeks when stored in an airtight container at room temperature. Be sure to check for signs of spoilage before enjoying.

Can I Use a Different Type of Cereal for the Recipe?

You can absolutely use a different type of cereal for the recipe. As long as the cereal is dry and crunchy, it should work well. Feel free to experiment with different flavors to suit your taste.

How Do I Adjust the Recipe for a Larger or Smaller Batch?

To adjust the recipe for a larger or smaller batch, you'll need to scale the ingredient amounts up or down proportionately. Start by determining the desired yield, then modify the quantities accordingly to achieve the preferred portion size.

Is Birthday Cake Puppy Chow Suitable for Dogs With Allergies?

While birthday cake puppy chow may contain ingredients that could be unsuitable for dogs with allergies, it's best to check the specific recipe and ingredients to ensure it's safe for your pup. Consult your veterinarian if you have any concerns.

Conclusion

You'll be amazed at how quickly and easily you can whip up this delightful birthday cake puppy chow! The combination of sweet and crunchy textures is simply irresistible. Whether you're baking for a party or just treating yourself, this recipe is sure to put a smile on everyone's face. So, what are you waiting for? Get in the kitchen and start mixing up this tasty birthday treat today!

Advertisement
Continue Reading
Advertisement

Affiliate Disclaimer
As an affiliate, we may earn a commission from qualifying purchases. We get commissions for purchases made through links on this website from Amazon and other third parties.

Advertisement

Latest

sweet fruity unique grapes sweet fruity unique grapes
Graduations/Birthdays2 mins ago

Cotton Candy Grapes

Satisfy your sweet tooth with the captivating flavor of Cotton Candy Grapes, a unique fruit that replicates the taste of...

colorful rimmed beverages colorful rimmed beverages
Graduations/Birthdays7 mins ago

Sprinkle-Rimmed Drinks

Whimsical and visually captivating, sprinkle-rimmed drinks transport you to a world of playful flavors and enchanting presentations that will leave...

festive puppy chow treats festive puppy chow treats
Graduations/Birthdays13 mins ago

Birthday Cake Puppy Chow

Uncover the captivating blend of crunchy Chex, creamy white chocolate, and vibrant sprinkles that make Birthday Cake Puppy Chow an...

magical colorful chocolate beverage magical colorful chocolate beverage
Graduations/Birthdays19 mins ago

Unicorn Hot Chocolate

Otherworldly and whimsical, unicorn hot chocolate transports you to a realm of vibrant colors and sweet indulgence, where the possibilities...

colorful skewered fruit delights colorful skewered fruit delights
Graduations/Birthdays24 mins ago

Rainbow Fruit Kebabs

Tantalizing and refreshing, these rainbow fruit kebabs offer a delightful twist on a classic snack, with a vibrant array of...

colorful cheese filled tortillas colorful cheese filled tortillas
Graduations/Birthdays30 mins ago

Confetti Quesadillas

Heighten your taste buds with the vibrant burst of color and flavor in confetti quesadillas, a fusion of Mexican cuisine...

celebratory dessert beverage fusion celebratory dessert beverage fusion
Graduations/Birthdays36 mins ago

Birthday Cake Milkshake

Fulfill your childhood nostalgia with the irresistible Birthday Cake Milkshake, a creamy, indulgent treat that's a celebration in every sip....

colorful cake batter dip colorful cake batter dip
Graduations/Birthdays41 mins ago

Funfetti Dip

Celebrate the vibrant and creamy delight of Funfetti Dip, the ultimate party treat that will captivate your taste buds and...

celebratory sweet snack treat celebratory sweet snack treat
Graduations/Birthdays47 mins ago

Birthday Cake Flavored Popcorn

Outrageous and irresistibly sweet, this birthday cake flavored popcorn promises a flavor explosion that will leave you craving more. Discover...

graduation jewelry and snacks graduation jewelry and snacks
Graduations/Birthdays53 mins ago

Class Ring Onion Rings

Feast on the nostalgic delight of Class Ring Onion Rings, a crispy, golden-brown treat that will transport you back to...

breadsticks resembling pencils breadsticks resembling pencils
Graduations/Birthdays59 mins ago

Pencil-Shaped Breadsticks

Harnessing the rich history and versatility of pencil-shaped breadsticks, explore how to craft these unique and captivating snacks that will...

colorful candy dessert layers colorful candy dessert layers
Graduations/Birthdays1 hour ago

Smarties Candy Parfaits

Observe the vibrant layers of creamy yogurt, pudding, and whipped cream, elevated by the delightful crunch of classic Smarties candies...

Advertisement

Trending