You'll love breaded pork cutlets for their crispy exterior, juicy interior, and versatile flavor that makes them a perfect comfort food for any occasion. To make them, you'll pound thin pork slices, coat them in seasoned flour, eggs, and breadcrumbs, then fry until golden brown. This dish has roots in various cuisines, from German Schnitzel to Japanese Tonkatsu. It's easy to customize with different spices and side dishes, making it ideal for family dinners or special events. The key to success lies in proper preparation and careful frying. Dive in to discover the rich history and mouthwatering techniques behind this beloved dish!
Key Takeaways
- Breaded pork cutlets are made by coating thin pork slices in seasoned flour, beaten eggs, and breadcrumbs.
- The dish achieves a crispy, golden-brown exterior with a tender, juicy interior when properly prepared and fried.
- Key steps include tenderizing the pork, seasoning it, and following the breading process of flour, egg, and breadcrumbs.
- Variations exist with different spices, sauces, and side dishes, allowing for customization and regional adaptations.
- Serve immediately with sides like mashed potatoes or salad for the best texture and flavor experience.
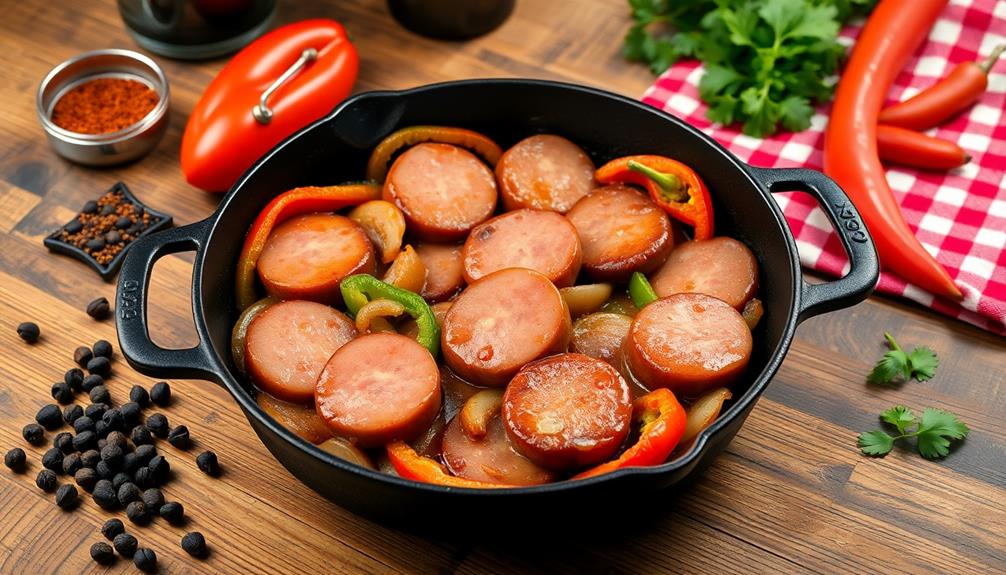
Top picks for "bread pork cutlet"
Open Amazon search results for this keyword.
As an affiliate, we earn on qualifying purchases.
History
The breaded pork cutlet's history stretches back centuries, with roots in various culinary traditions. You'll find similar dishes in many countries, each with its own twist. In Germany, it's called "Schnitzel," while in Japan, you might enjoy "Tonkatsu." These tasty cutlets have traveled the world, adapting to local tastes along the way.
In Poland, the beloved "Kotlet Schabowy" has been a staple since the 19th century. Picture a juicy pork chop, pounded thin, coated in crispy breadcrumbs, and fried to golden perfection. It's comfort food at its finest! You'd often see it served with creamy mashed potatoes and tangy sauerkraut.
As you explore the cutlet's journey, you'll discover how it became a favorite in many households. It's a dish that brings families together, perfect for Sunday dinners or special occasions.
The simplicity of the recipe has allowed it to stand the test of time, while its delicious taste keeps people coming back for more. Whether you're a food lover or just curious about culinary history, the breaded pork cutlet's story is sure to captivate you.
Recipe
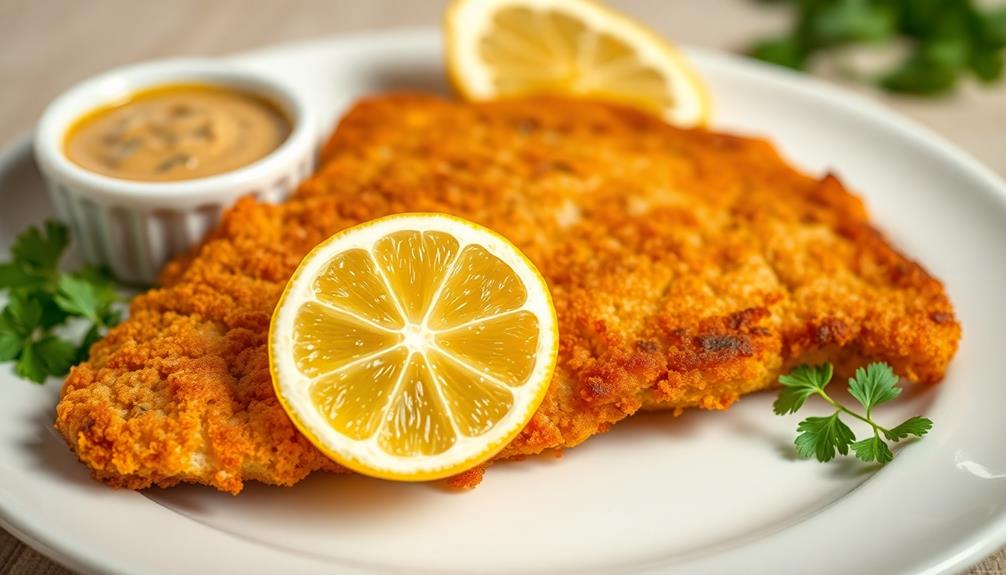
Breaded pork cutlet, also known as tonkatsu in Japanese cuisine or schnitzel in German cuisine, is a beloved dish enjoyed around the world. This crispy, golden-brown cutlet is made by coating a thin slice of pork in seasoned flour, beaten eggs, and breadcrumbs before frying it to perfection. The result is a tender, juicy interior encased in a crunchy exterior that's irresistibly delicious. Many people enjoy tonkatsu or schnitzel with a side of steamed rice and pickled vegetables, while others savor it with a squeeze of lemon juice or a dollop of spicy mustard. This versatile dish can also be enjoyed in a sandwich or as part of a rice bowl. And for a delightful twist, try pairing it with a sweet yeast bun recipe for an unexpected and delightful combination of flavors and textures.
While the basic concept remains the same, variations of this dish can be found in different cultures, each with its own unique twist. Some recipes call for additional spices in the breading, while others may suggest serving the cutlet with specific sauces or side dishes. Regardless of the variation, the key to a successful breaded pork cutlet lies in proper preparation and careful frying to achieve that ideal crispy texture.
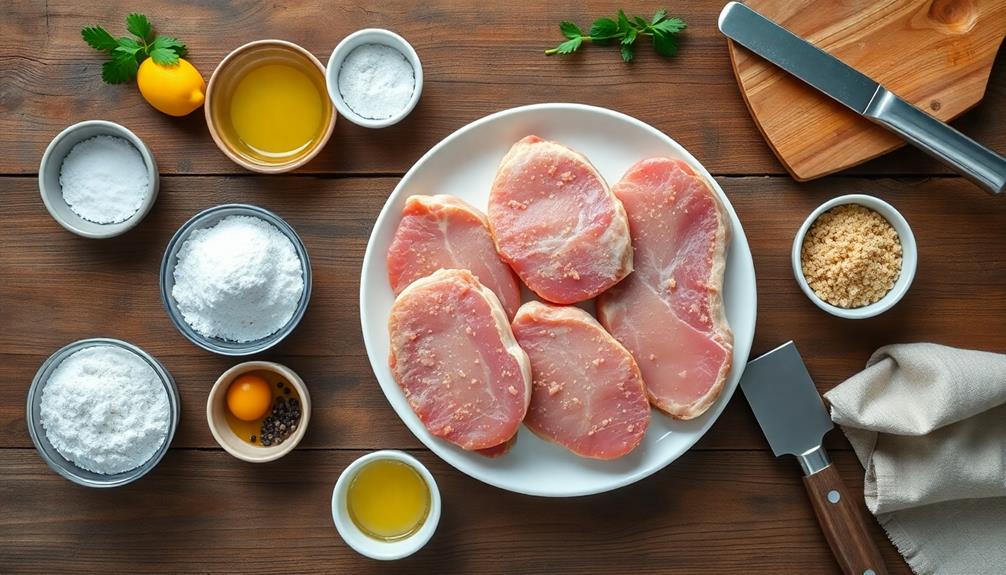
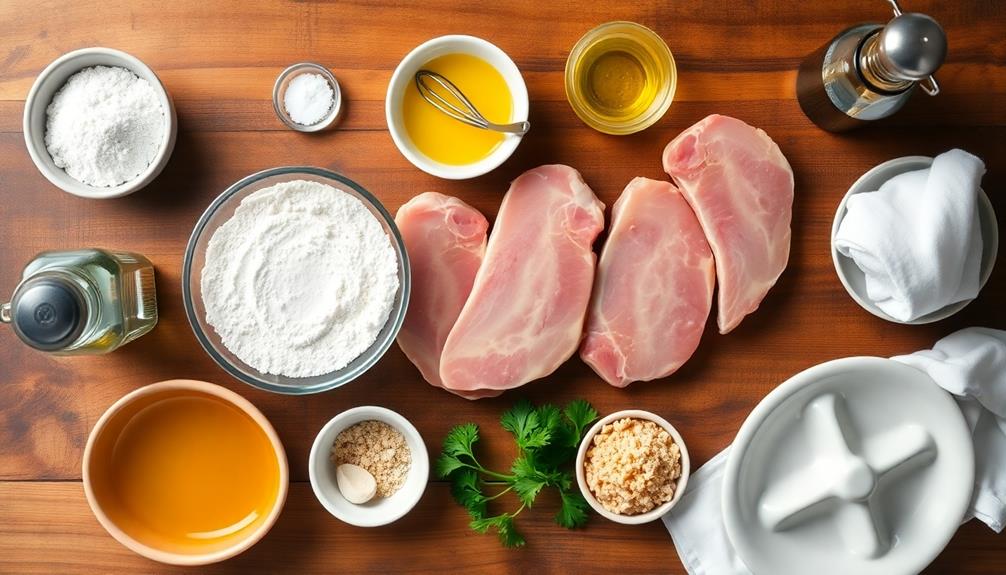
- 4 boneless pork loin chops
- 1 cup all-purpose flour
- 2 large eggs, beaten
- 2 cups panko breadcrumbs
- 1 teaspoon salt
- 1/2 teaspoon black pepper
- 1/4 teaspoon garlic powder
- Vegetable oil for frying
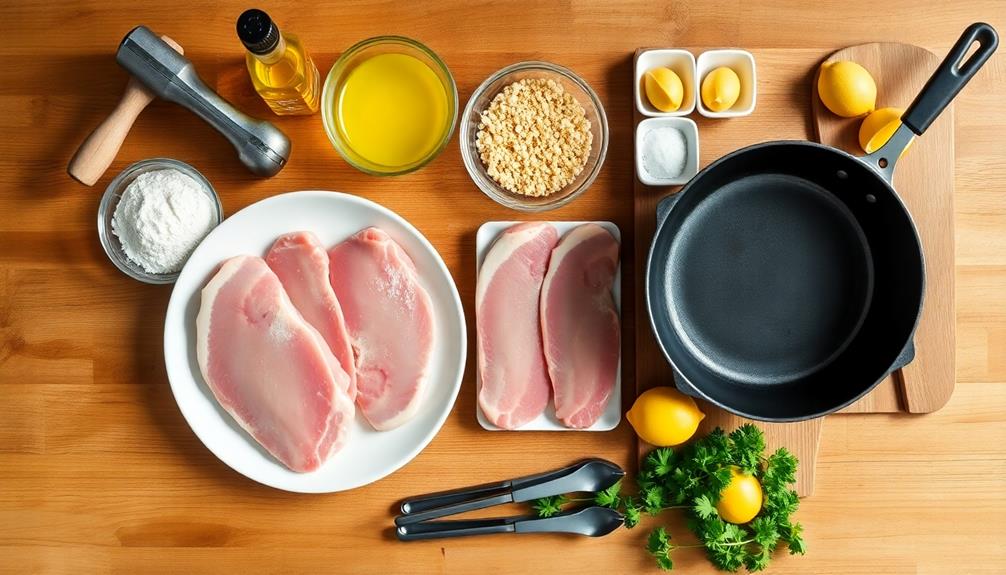
Begin by pounding the pork chops to about 1/4-inch thickness. Set up three shallow dishes: one with flour seasoned with salt, pepper, and garlic powder; one with beaten eggs; and one with panko breadcrumbs.
Dip each pork chop in the flour mixture, then the egg, and finally the breadcrumbs, ensuring it's well-coated. Heat oil in a large skillet over medium-high heat. Fry the breaded cutlets for 3-4 minutes on each side until golden brown and cooked through. Drain on paper towels before serving.
For best results, make sure the oil is hot enough before adding the cutlets; it should sizzle immediately when the breaded pork touches the pan. Avoid overcrowding the skillet, as this can lower the oil temperature and result in greasy cutlets.
If preparing for a crowd, you can keep cooked cutlets warm in a low oven while frying the remaining batches. Serve the breaded pork cutlets immediately for maximum crispiness, accompanied by lemon wedges, a side salad, or your favorite dipping sauce.
Cooking Steps
You're about to embark on a culinary adventure with breaded pork cutlets!
Let's start by tenderizing your pork with a mallet, then seasoning it generously with salt and pepper.
Next, you'll create a crispy coating by dredging the cutlets in flour, dipping them in beaten eggs, and finally coating them in breadcrumbs for that perfect golden crunch.
Step 1. Tenderize Pork With Mallet

Starting with the tenderizing process, you'll want to place your pork cutlets between two sheets of plastic wrap or wax paper. This step is crucial for creating that perfect, tender texture we're aiming for.
Grab your meat mallet or a heavy rolling pin – it's time to put some muscle into it!
Begin gently pounding the cutlets from the center outward. You're not trying to flatten them completely, just aiming to even out the thickness to about 1/4 inch. As you work, you'll notice the meat becoming more pliable and expanding slightly.
This tenderizing action breaks down the tough muscle fibers, ensuring your cutlets will be melt-in-your-mouth delicious.
Don't be afraid to apply some pressure, but be careful not to tear the meat. You'll know you're done when the cutlets have an even thickness throughout.
Once tenderized, remove the plastic wrap and season your pork with salt and pepper. Now your cutlets are primed and ready for the next exciting step in creating your mouthwatering breaded pork masterpiece!
Step 2. Season Pork With Salt, Pepper

With your pork cutlets perfectly tenderized, it's time to enhance their flavor. Grab your salt and pepper shakers, and let's get seasoning!
You'll want to be generous here, as the breading will absorb some of the seasoning later on. Start by sprinkling a good pinch of salt over each cutlet. Don't be shy – salt brings out the pork's natural flavors and helps create a delicious crust.
Next, add freshly ground black pepper to taste. The pepper adds a subtle kick that'll make your taste buds dance! As you season, make sure to cover both sides of the cutlets evenly.
You can gently pat the seasonings into the meat to help them stick. Take a moment to admire the flecks of salt and pepper on the rosy pork – it's already looking mouthwatering!
Step 3. Coat Pork in Flour
In preparation for the breading process, it's time to give your seasoned pork cutlets a light dusting of flour. This crucial step helps the egg wash and breadcrumbs adhere better, creating that perfect crispy coating we all love.
Start by spreading a thin layer of all-purpose flour on a large plate. Take each seasoned cutlet and gently place it on the flour. Press down lightly to ensure the flour coats the entire surface.
Now, flip the cutlet over and repeat on the other side. You'll want to make sure every nook and cranny is covered, but don't go overboard – a thin, even layer is all you need.
Once you've coated both sides, pick up the cutlet and give it a gentle shake to remove any excess flour. This prevents clumping and ensures a smooth, even breading later on.
As you finish each piece, set it aside on a clean plate. You'll notice the flour coating gives the pork a pale, powdery appearance – that's exactly what you're looking for!
This step might seem simple, but it's the foundation for that golden, crispy exterior you're aiming for.
Step 4. Dip Pork in Beaten Eggs
Now that your pork cutlets are lightly coated in flour, it's time to give them a quick dip in beaten eggs. Crack two or three eggs into a shallow bowl and whisk them until they're well combined. The eggs will help the breadcrumbs stick to the pork, creating that irresistible crispy exterior we're aiming for.
Pick up a floured cutlet with one hand and gently lower it into the beaten eggs. Use your other hand to spoon the egg mixture over the top, ensuring every inch of the pork is covered. Let any excess egg drip back into the bowl.
You'll notice the flour turning slightly paste-like as it absorbs the egg – that's perfect!
Remember to use separate hands for wet and dry ingredients to avoid messy fingers. As you work, you might need to add more beaten eggs to the bowl. Don't rush this step; a thorough egg coating is crucial for that golden, crispy finish.
Once each cutlet is evenly coated, you're ready to move on to the final breading step. Your kitchen will soon be filled with the mouthwatering aroma of perfectly crispy pork cutlets!
Step 5. Coat Pork in Breadcrumbs
After dipping your pork cutlets in beaten eggs, you're ready for the final breading step. Grab a shallow dish and fill it with breadcrumbs. You can use store-bought or make your own by crushing dry bread.
Now, take each egg-coated cutlet and gently place it in the breadcrumbs. Press down lightly to help the crumbs stick to the meat.
Flip the cutlet over and repeat on the other side. Make sure every part of the pork is covered in a nice, even layer of breadcrumbs. If you see any bare spots, sprinkle some extra crumbs on top and press them in. You want a beautiful golden crust all over!
Once you've coated all your cutlets, give them a gentle shake to remove any excess breadcrumbs. This will help prevent your breading from falling off during cooking.
Place the breaded cutlets on a clean plate or tray, keeping them in a single layer. Your pork is now perfectly coated and ready for frying! The crispy exterior you've created will turn golden brown and delicious in the pan.
Final Thoughts
While breaded pork cutlets may seem simple, they're a versatile dish that can elevate any meal. You'll find that these golden-brown delights are perfect for a quick weeknight dinner or a special occasion. They're crispy on the outside, tender on the inside, and bursting with flavor that'll make your taste buds dance.
Remember, practice makes perfect! Don't be discouraged if your first attempt isn't picture-perfect. Each time you make these cutlets, you'll get better at achieving that ideal crunch and juiciness.
Experiment with different seasonings in the breadcrumbs to create your own signature flavor. You can also try serving them with various side dishes – mashed potatoes, coleslaw, or a fresh green salad are all fantastic options.
Lastly, don't forget to share your culinary creation with friends and family. There's something magical about gathering around a table, enjoying a delicious meal together.
Frequently Asked Questions
Can Kotlet Schabowy Be Made With Chicken Instead of Pork?
You bet! You can definitely make a delicious chicken version of this dish.
It's a great alternative if you're craving something similar but don't eat pork. Simply swap out the pork for chicken breast and follow the same breading and frying process.
You'll end up with a crispy, golden-brown cutlet that's just as tasty. Many people enjoy this variation, and it's a fantastic way to mix things up in the kitchen.
Give it a try!
What Side Dishes Pair Well With Kotlet Schabowy?
You'll love pairing your delicious cutlet with some tasty side dishes!
Try creamy mashed potatoes or crispy roasted ones for a classic combo.
Don't forget your veggies – sautéed cabbage or crunchy coleslaw add a nice touch.
For a tangy twist, serve with pickled cucumbers or beets.
A simple green salad with a light dressing can balance the richness.
And don't forget a slice of crusty bread to soak up any leftover juices.
Yum!
How Long Can Leftover Kotlet Schabowy Be Stored in the Refrigerator?
You'll want to keep your leftover breaded pork cutlets fresh and tasty!
Store them in an airtight container in your refrigerator for up to 3-4 days. Make sure they've cooled down before putting them away.
When you're ready to enjoy them again, reheat them in the oven to keep that crispy coating.
Remember, if you notice any odd smells or appearances, it's best to toss them out.
Enjoy your delicious leftovers while they're still at their best!
Is Kotlet Schabowy Typically Served for Lunch or Dinner in Poland?
You'll find this delicious dish served at both lunch and dinner in Poland!
It's a versatile favorite that fits right in at any mealtime. Imagine sitting down to a hearty plate of kotlet schabowy, whether it's midday or evening.
The crispy, golden-brown cutlet is perfect for satisfying your hunger, no matter when you choose to enjoy it. Polish families often gather around the table, savoring this comforting meal together, creating warm memories at lunchtime or dinnertime.
Are There Any Vegetarian Alternatives to Traditional Kotlet Schabowy?
You've got options if you're looking for a veggie version of this classic dish!
Try swapping the pork for a thick slice of cauliflower or eggplant. Bread it just like the original and fry it up for a crispy, golden treat.
Some people use mushroom caps or even tofu slices. Get creative with your favorite veggies!
These alternatives capture the essence of the traditional dish while keeping it plant-based.
You'll still get that satisfying crunch and savory flavor you're craving!