Polish Comfort Food
Cold Beet Soup
Intrigued by the vibrant colors and tangy flavors of this Eastern European delicacy? Discover the captivating history and mouthwatering variations of cold beet soup.
Cold beet soup is a vibrant and refreshing dish that'll whisk you away to the streets of Eastern Europe. Its roots run deep, blending the earthy sweetness of beets with tangy yogurt and aromatic herbs to create a visually stunning and flavorful summer staple. Whether you're craving a light starter or a chilled main, this ruby-red soup checks all the boxes. Serve it up with crusty bread and get ready to be wowed by its nutritious benefits and satisfying flavors. Want to learn more about the captivating history and mouthwatering variations of this cold beet delight?
Key Takeaways
- Cold beet soup is a refreshing and vibrant dish, ideal for summer, originating from Eastern European culinary traditions.
- The soup combines the earthy sweetness of beets with tangy yogurt and fresh herbs, creating a unique blend of flavors.
- Key ingredients include beets, Greek yogurt, broth, lemon juice, garlic, dill, and chives, often served chilled with crusty bread or crackers.
- Cold beet soup is nutrient-dense, rich in vitamins, antioxidants, and dietary fiber, making it a healthy choice.
- The soup's flavor profile features a balance of sweet, sour, and earthy notes, enhanced by garnishes for added texture and visual appeal.
History
A rich and vibrant history surrounds the origins of cold beet soup, tracing its roots back to Eastern European culinary traditions. This beloved dish has been a staple in the region for centuries, with records of similar beet-based soups dating back to the 16th century.
Over time, the recipe has evolved, reflecting the diverse cultural influences that have shaped the cuisine of Eastern Europe.
The distinct ruby-red hue of cold beet soup, known as chłodnik in Polish or borscht in Russian, is a testament to the humble yet versatile beet. These nutrient-dense roots have long been celebrated for their earthy sweetness and vibrant color, making them an integral component of many traditional dishes.
As the soup spread across borders, local variations emerged, each one showcasing the unique flavors and ingredients of its respective region.
Recipe
Cold Beet Soup is a refreshing and vibrant dish that showcases the earthy sweetness of beets. This chilled soup is perfect for a hot summer day, offering a cooling and nourishing option.
The combination of beets, tangy yogurt, and fragrant herbs creates a delightful balance of flavors. The vibrant color of the soup also makes it a visually appealing addition to any meal.
Ingredients:
- 3 medium-sized beets, peeled and diced
- 1 cup plain Greek yogurt
- 2 cups vegetable or chicken broth
- 2 tablespoons lemon juice
- 1 garlic clove, minced
- 2 tablespoons fresh dill, chopped
- 1 tablespoon fresh chives, chopped
- Salt and pepper to taste
Instructions:
In a large saucepan, bring the vegetable or chicken broth to a boil. Add the diced beets and cook until tender, about 15-20 minutes. Drain the beets and let them cool completely.
In a blender or food processor, combine the cooked beets, yogurt, lemon juice, garlic, dill, and chives. Blend until smooth and creamy. Season with salt and pepper to taste.
Chill the soup in the refrigerator for at least 2 hours before serving. Garnish with additional dill and chives, if desired.
Tips:
For a thicker consistency, you can add more yogurt to the soup. Conversely, if you prefer a thinner soup, add more broth. Roasting the beets instead of boiling them can also add depth of flavor to the soup.
Serve the cold beet soup with crusty bread or crackers for a complete and satisfying meal.
Cooking Steps
Peel those beets and grate them up!
Next, stir in some sour cream and a squeeze of lemon juice.
Don't forget to sprinkle in the chopped fresh dill.
Once everything's mixed together, pop the soup in the fridge to chill before serving.
And don't be shy with the sugar – add a little to taste until it's just right!
Step 1. Peel and Grate the Beets
First, take the beets and thoroughly scrub them under running water to remove any dirt or debris.
Once they're clean, you'll need to peel off the tough outer skin. Use a sharp knife or vegetable peeler to carefully remove the skin, being cautious not to waste too much of the vibrant red flesh.
Next, grab a box grater and grate the peeled beets using the largest holes. Work slowly and steadily, grating the beets into thin, delicate shreds. The goal is to create a fine, even texture that will blend seamlessly into the soup.
As you grate, you may want to gather the shredded beets into a bowl to make the next step easier.
Grating the beets by hand takes a bit of elbow grease, but it's worth the effort to get that perfect texture. Just take your time and enjoy the satisfying "thwack" as the beets hit the grater.
Step 2. Add Sour Cream and Lemon
With the beets grated to perfection, it's time to introduce the cool and tangy elements that will transform this soup into a refreshing delight.
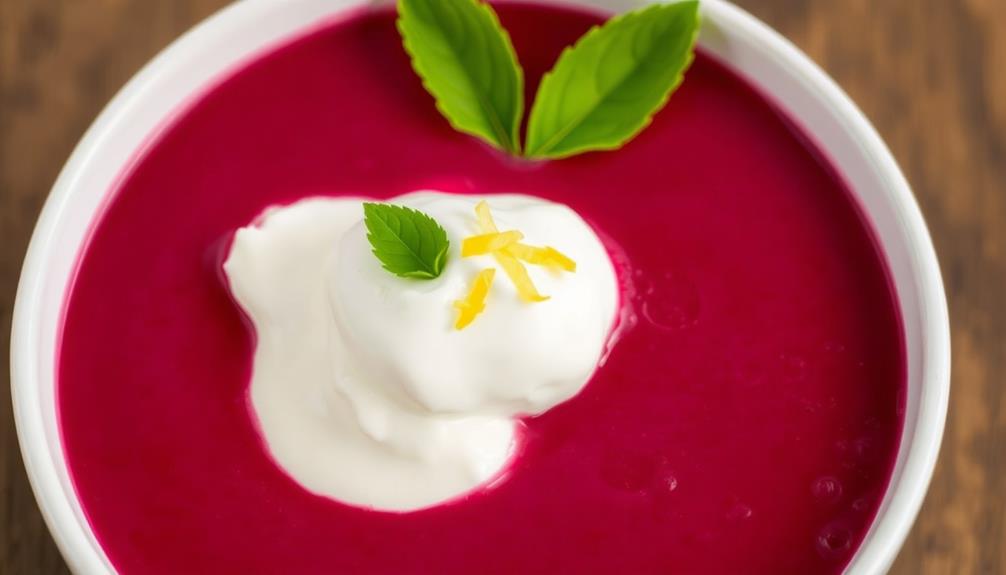
First, you'll want to add a generous dollop of sour cream to the mix. The cool, creamy texture will provide a beautiful contrast to the earthy beets, while the slight tanginess will help to balance the sweetness.
Next, give the soup a bright and citrusy kick by squeezing in the juice of half a lemon. The lemon's zesty notes will awaken your taste buds, cutting through the richness and bringing the entire flavor profile into harmony.
Gently stir the sour cream and lemon juice into the grated beets, blending the ingredients together until the soup takes on a velvety, homogeneous consistency.
The end result will be a chilled, aromatic masterpiece that's sure to delight your senses and leave you craving more.
Step 3. Add Chopped Dill
Next, grab a handful of fresh dill and give it a rough chop. The fragrant, feathery sprigs will add a lovely herbal note to your cold beet soup.
Incorporating fresh herbs like dill not only enhances the flavor but also aligns with the idea of maintaining high vibrational energy in your meals, much like mindset shifts necessary for achieving weight loss goals.
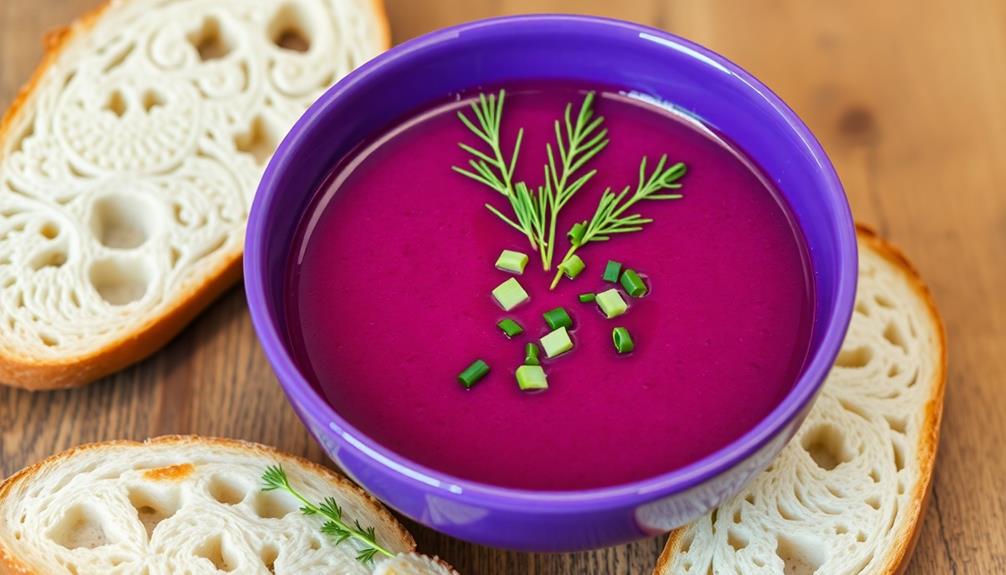
Sprinkle the chopped dill over the velvety purple soup, letting it float on the surface. Its bright green hue provides a beautiful contrast against the deep, earthy beet color.
The dill's distinct, slightly grassy flavor complements the sweetness of the beets perfectly. As you take a spoonful, the cool soup and the aromatic dill dance together on your tongue, creating a refreshing and balanced taste.
The dill also adds a delightful crunch, elevating the smooth, velvety texture of the soup.
Don't be shy with the dill – the more you add, the more pronounced that fresh, summery flavor will be.
Garnish each bowl generously, then invite your family and friends to savor this vibrant, herbaceous chłodnik together.
Step 4. Chill the Soup Before Serving
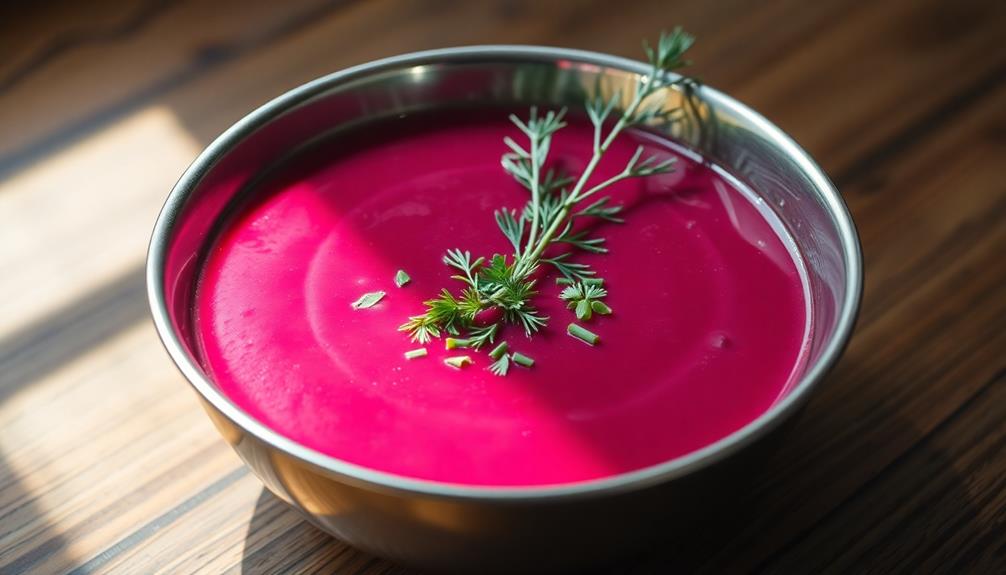
Once the dill is sprinkled over the soup, it's time to chill the dish before serving. Place the pot of soup in the refrigerator and let it cool for at least 2 hours. This will allow the flavors to meld and the soup to reach a refreshing, chilled temperature.
Chilling the soup is an important step, as it enhances the earthy sweetness of the beets and the bright, herbaceous notes of the dill. Additionally, this soup can be complemented with a touch of butter for richness, though it's important to be mindful of moderation due to its high calorie content.
As the soup chills, the vibrant fuchsia color will deepen, creating a visually stunning presentation. When you're ready to serve, ladle the cold soup into bowls and garnish each portion with an extra sprinkle of dill.
The cool, velvety texture and bold, piquant flavor will be a delightful contrast to the hot summer day. Enjoy this nourishing, vegetable-forward soup as a light and refreshing starter or a satisfying main course.
Step 5. Add Sugar to Taste
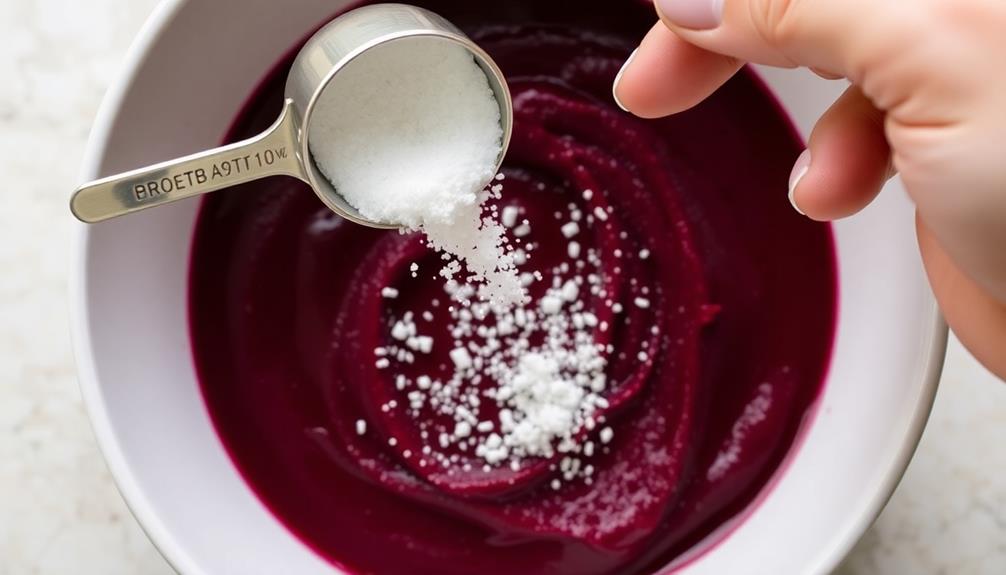
After chilling the soup, taste it and determine if it needs any additional sweetness.
Beets have a naturally earthy, slightly bitter flavor, so a touch of sugar can help balance the taste.
Start by adding a teaspoon of white granulated sugar and stir it in until dissolved.
Give the soup another taste – if it's still not quite sweet enough for your liking, add another teaspoon of sugar.
Continue this process, tasting after each addition, until the soup reaches your desired level of sweetness.
Be careful not to over-sweeten, as you want the beet flavor to still shine through.
The perfect cold beet soup strikes a harmonious balance between the earthy beets and the subtle sweetness.
Once it's just right, your soup is ready to serve and enjoy on a hot summer day.
Final Thoughts
Overall, this refreshing cold beet soup is a delightful summertime dish. You'll be amazed by the vibrant color and tangy flavor that the beets provide.
The creaminess from the sour cream or yogurt is a perfect complement, while the fresh dill and lemon juice add a bright, herbal note. Don't be afraid to experiment with garnishes – a sprinkle of toasted walnuts or crumbled feta cheese can take this soup to the next level.
Whether you serve it as a starter or a light main course, this chłodnik is sure to impress your guests. The blend of sweet, sour, and earthy flavors creates a truly unique and satisfying experience.
Plus, it's a great way to incorporate more nutrient-dense beets into your diet. So, the next time you're looking for a refreshing and vibrant summer soup, give this cold beet soup a try. Your taste buds will thank you!
Frequently Asked Questions
What Is the Origin of the Name "ChłOdnik"?
You know, the name "chłodnik" really intrigues me!
It's got this cool, almost mysterious sound to it, doesn't it? As it turns out, the word comes from the Polish root "chłód," which means "coolness" or "cold."
So the name "chłodnik" literally translates to "cold soup" – how clever is that?
It's a perfect description for this refreshing, chilled dish.
Don't you just love when a name so perfectly captures the essence of the food?
It makes me even more excited to try this tasty soup!
How Long Can ChłOdnik Be Stored Before Serving?
You can store chłodnik in the fridge for up to 5 days before serving. Just be sure to keep it chilled and covered.
The cool, refreshing flavors will stay crisp and vibrant, so you can enjoy this tasty soup whenever the mood strikes!
The bright, jewel-toned color of the beets is eye-catching, and the creamy, tangy broth is simply delightful.
Go ahead, give chłodnik a try – your taste buds will thank you!
Can ChłOdnik Be Made With Other Types of Beets?
Absolutely! You can make this tasty soup with different types of beets.
Red, golden, and even rainbow beets work great. The flavor will vary slightly, but they'll all give you that vibrant, earthy taste you love.
Just remember to adjust the cooking time based on the beet variety – some may need a bit more or less time to reach that perfect tenderness.
Get creative and try out different beet combos to find your new favorite version!
What Is the Ideal Temperature for Serving ChłOdnik?
The ideal temperature for serving chłodnik is chilled, around 50-60°F (10-15°C).
This refreshing cold soup is meant to be enjoyed on a warm day, providing a cool and invigorating experience.
Serve it straight from the fridge, or even with a few ice cubes to keep it extra cold.
The crisp, vibrant flavors really shine when the chłodnik is nicely chilled.
Experiment with the temperature to find your perfect balance of refreshment!
Is ChłOdnik Commonly Consumed Throughout Poland or Only in Certain Regions?
You're in for a treat! Chłodnik, the cold beet soup, is a beloved dish that's enjoyed throughout Poland.
While it might be more common in certain regions, this vibrant, refreshing soup has made its way into the hearts and kitchens of people across the country. There’s something about the combination of ripe tomatoes, savory broth, and a hint of cream that just hits the spot. Whether you’re whipping up a batch to warm up on a chilly evening or serving it chilled on a hot summer day, this creamy tomato soup recipe is a beloved classic. With just a few simple ingredients and a bit of time on the stove, you can enjoy a bowl of this comforting soup anytime.
Whether you're sipping it on a hot summer day or savoring it as a unique appetizer, chłodnik is a true taste of Polish culture that's sure to delight your senses.
Polish Comfort Food
Kutia (Wheat Berry Pudding)
Once a ceremonial dish, Kutia’s comforting flavors and time-honored recipes offer a delightful culinary journey through Eastern European cuisine.
Kutia, a traditional Eastern European wheat berry pudding, connects generations through its time-honored recipes and wholesome ingredients. This ceremonial dish was once reserved for festive occasions, but now you can savor its comforting flavors anytime. Imagine the satisfying chew of plump wheat berries, the natural sweetness of honey, and the crunch of walnuts – it's a symphony of textures and tastes. Whether served warm or at room temperature, Kutia offers a delightful culinary experience that invites you to explore the rich tapestry of Eastern European cuisine. Keep reading to uncover the captivating history and step-by-step instructions for creating this beloved treat.
Key Takeaways
- Kutia is a traditional sweet dish with roots in Eastern European culture, often served during holiday seasons and family gatherings.
- The dish is made from wheat berries or other grains, sweetened with honey and enhanced with raisins, walnuts, and spices.
- The cooking process involves soaking, boiling, and sweetening the grains, resulting in a unique blend of textures and flavors.
- Kutia serves as a reminder to savor cultural roots and traditions, reflecting the rich diversity of culinary practices worldwide.
- The dish promotes the importance of preserving culinary heritage and fosters community bonds through the sharing of recipes and stories across generations.
History
Kutia, a traditional sweet dish, has its roots deeply entrenched in the cultural tapestry of Eastern European countries. This ancient recipe, passed down through generations, is a testament to the region's rich culinary heritage.
Originating as a ceremonial dish, kutia was often served during important religious and cultural events, such as Christmas Eve and weddings. The dish's very name, derived from the Slavic word for "pot," hints at its long-standing tradition.
Over time, the recipe has evolved, with each family and region putting their own unique spin on the classic. Some versions feature a blend of cooked wheat berries, honey, and poppy seeds, while others incorporate nuts, dried fruits, or even spices.
Regardless of the specific ingredients, the essence of kutia remains the same – a comforting, sweet treat that brings people together and celebrates the flavors of the past.
Today, this cherished dish continues to hold a special place in the hearts and homes of those who embrace their Eastern European heritage.
Recipe
Kutia is a traditional Eastern European grain dish that's often served as a dessert or a sweet side dish. It's made from wheat or other grains, such as barley or millet, that are soaked, boiled, and then sweetened with honey or other sweet ingredients.
The origins of kutia can be traced back to ancient times, where it was a staple food for many cultures in the region. Over the centuries, the recipe has evolved, with different regions and households developing their own unique variations of the dish.
Ingredients:
- 1 cup of wheat berries (or other grains, such as barley or millet)
- 4 cups of water
- 1/2 cup of honey
- 1/2 cup of raisins
- 1/4 cup of chopped walnuts
- 1 teaspoon of ground cinnamon
- 1/2 teaspoon of ground cloves
Cooking Instructions:
Soak the wheat berries (or other grains) in water for at least 6 hours, or overnight. Drain the grains and place them in a large pot with the 4 cups of fresh water. Bring the mixture to a boil, then reduce the heat and simmer for 1-2 hours, or until the grains are tender and the liquid has been absorbed.
Remove the pot from the heat and stir in the honey, raisins, walnuts, cinnamon, and cloves until well combined.
Tips:
Kutia can be served warm or chilled, depending on personal preference. If you prefer a thicker consistency, you can simmer the mixture for a bit longer. You can also experiment with different types of dried fruits, nuts, and spices to customize the flavor to your liking.
Cooking Steps
First, you'll want to soak the wheat berries overnight to soften them up.
Drain and rinse the berries, then cook them until they're nice and tender.
Finally, stir in some honey and poppy seeds to add a touch of sweetness and crunch.
Serve the kutia warm or at room temperature – it's sure to be a hit!
Step 1. Soak Wheat Berries Overnight
To prepare the wheat berries, you'll want to soak them overnight. This simple step helps soften the grains, ensuring they'll cook up tender and plump.
Start by rinsing the wheat berries under cool running water. Then, transfer them to a large bowl and cover with at least 3 inches of water. Let the berries soak for 8-12 hours, or even overnight. This long soak time is key, as it allows the wheat to fully hydrate and become more pliable.
Once the soaking is complete, drain the wheat berries in a colander. They should have expanded in size and feel pleasantly soft to the touch.
At this point, they're ready to be cooked into the signature Kutia dish. The soaked wheat will simmer on the stovetop until tender, creating the perfect base for the rich, sweet flavors to come.
With this simple overnight prep, you're one step closer to enjoying the comforting, traditional taste of Kutia.
Step 2. Drain and Rinse Wheat Berries
After soaking the wheat berries overnight, the next step is to drain and rinse them.
Grab a colander and place it in the sink. Carefully pour the soaked wheat berries into the colander, allowing the water to drain out.
Once drained, turn on the faucet and gently rinse the wheat berries under cool, running water. Swish them around with your hand to remove any remaining debris or impurities.
The rinsing process helps to clean the wheat berries, preparing them for the next steps of the recipe.
You'll want to ensure they're free of any dirt, dust, or other unwanted materials.
After rinsing, give the colander a gentle shake to remove excess water.
The clean, rinsed wheat berries are now ready to be used in the Kutia recipe.
This simple yet essential step sets you up for success as you continue crafting your delicious wheat berry pudding.
Step 3. Cook Wheat Berries
Next, add the rinsed wheat berries to a large pot and cover them with fresh, cold water.
Bring the pot to a boil over high heat, then reduce the heat to medium-low and let the wheat simmer for about 45 minutes to an hour, until they're tender but still have a slight bite.
You'll know they're ready when you can easily squish one between your fingers.
Drain the cooked wheat berries in a colander, then return them to the pot.
Add in your desired sweeteners, like honey or brown sugar, along with a pinch of salt to enhance the flavors.
Stir everything together until the sweetener is fully dissolved.
If the mixture seems a bit dry, you can add a splash of milk or cream to reach your desired consistency.
Now your wheat berries are ready to be transformed into the classic Ukrainian dessert, kutia!
Step 4. Add Honey and Poppy Seeds
With your cooked and seasoned wheat berries ready, it's time to add the signature ingredients that transform them into traditional Ukrainian kutia.
Drizzle in a generous amount of golden honey, its sweet, floral notes complementing the nutty, earthy wheat.
Sprinkle in a handful of poppy seeds, their tiny black specks adding a delightful crunch and subtle, nutty flavor.
Stir the honey and poppy seeds into the wheat berries until everything is evenly distributed.
The honey will coat each grain, lending a glistening sheen, while the poppy seeds weave throughout, creating a visually stunning contrast.
Take a deep breath and savor the aroma – the fragrance of the honey and the warm, toasted notes of the poppy seeds intertwine, transporting you to a cozy Ukrainian kitchen.
With the signature ingredients incorporated, your kutia is now ready to serve.
Scoop the sweet, aromatic mixture into bowls and prepare to indulge in a taste of traditional Ukrainian hospitality. As you savor each bite of this delectable dessert, you can imagine yourself being welcomed into a Ukrainian home with open arms. The traditional recipe for karpatka has been handed down through generations, with each family adding their own unique touch to the dish. So, as you enjoy this delightful treat, you are experiencing a piece of Ukrainian culture and history.
Step 5. Serve Warm or at Room Temperature
You can serve the kutia warm or at room temperature, whichever you prefer. Warm kutia is a cozy, comforting treat, with the wheat berries and poppy seeds gently heated through. The honey and spices will release their aromas, filling the air with a welcoming scent.
If you enjoy a more refreshing dessert, letting the kutia come to room temperature allows the flavors to mingle and the texture to become more cohesive.
Regardless of temperature, the kutia should be smooth, creamy, and slightly thick. The wheat berries should be soft, yet retain a pleasantly chewy bite. Sprinkle some additional poppy seeds on top for a beautiful presentation. You can also drizzle a bit of extra honey over the top, if desired.
Serve the kutia in small bowls or cups, as it's quite rich and filling. Savor each spoonful, letting the comforting flavors and textures transport you. Whether warm or at room temperature, kutia is a delightful traditional delight.
Final Thoughts
The centuries-old tradition of Kutia serves as a cherished reminder of the enduring significance of cultural heritage. As you've now discovered, this wheat berry pudding isn't merely a dish – it's a time-honored practice that connects generations and celebrates the resilience of communities.
Whether enjoyed during the holiday season or as a comforting treat any time of year, Kutia invites you to slow down, savor the flavors, and reflect on the rich tapestry of your own cultural roots.
As you continue your culinary journey, remember that Kutia is more than just a recipe – it's a gateway to understanding the traditions and values that shape the lives of people around the world.
By embracing this delightful dessert, you honor the hard work, ingenuity, and resilience of those who've kept this tradition alive.
Frequently Asked Questions
How Long Can Kutia Be Stored After Preparation?
You can typically store freshly made kutia in the fridge for 3-5 days after preparing it.
Just make sure to keep it in an airtight container to lock in the flavors and prevent it from drying out.
The cooked wheat berries and creamy texture will hold up well during this time, so you can enjoy your tasty pudding for several days.
Just be sure to give it a good stir before serving to recombine any separated ingredients.
Can Kutia Be Frozen for Later Use?
Absolutely, you can freeze kutia for later enjoyment!
Once the wheat berry pudding has cooled completely, simply portion it out into airtight containers or freezer-safe bags. It'll keep in the freezer for 2-3 months.
When you're ready to savor it again, just thaw it in the fridge overnight. The texture and flavor will stay fresh, so you can relish that delightful, comforting dessert anytime.
Freezing is a fantastic way to extend the life of your homemade kutia and enjoy it for weeks or months to come.
What Are Some Common Variations of Kutia?
There are lots of fun and tasty variations of kutia that you can try!
Some folks like to add dried fruits like raisins or cranberries, while others enjoy a sprinkle of cinnamon or nutmeg on top.
You can even make it with different grains like barley or buckwheat for a new twist.
The best part is you can get creative and make it your own.
What kind of flavors would you want to try in your kutia?
Is Kutia Suitable for Those With Dietary Restrictions?
Absolutely! Kutia can be a great option for those with dietary restrictions.
Depending on the ingredients used, it can be gluten-free, vegan, or dairy-free. You can make it with different grains like barley, millet, or quinoa instead of wheat.
And you can get creative with toppings like dried fruit, nuts, or spices to suit your tastes and needs.
Just be sure to check the recipe and adjust as needed to accommodate your dietary preferences.
Give it a try – you might discover a new favorite!
How Does the Taste of Kutia Compare to Other Traditional Desserts?
Compared to other traditional desserts, kutia has a unique and delightful taste.
It's a bit like a warm, creamy rice pudding, but with a lovely nutty flavor from the wheat berries. The texture is pleasantly chewy, almost like tapioca pearls.
You'll also notice subtle sweetness from the honey or sugar. It's a comforting and satisfying treat that's different from your typical cakes or cookies.
If you're looking to try something new, kutia is definitely worth a taste!
Polish Comfort Food
Vegetable Salad
Discover the secret to crafting the ultimate vegetable salad that will leave you feeling satisfied and craving more. Keep reading to uncover the vibrant and refreshing details.
Vegetable salad is the perfect dish to brighten up your day! You'll love the vibrant colors, refreshing crunch, and harmonious flavors that come together in each bite. Start with a base of crisp greens, then add juicy tomatoes, crisp cucumbers, and crunchy bell peppers. Toss it all in a tangy-sweet dressing, and you've got a nourishing meal that'll leave you feeling satisfied. The best part? You can get creative and experiment with all sorts of tasty ingredients to find your new favorite combo. Intrigued? Keep reading to uncover even more tips for crafting the ultimate vegetable salad.
Key Takeaways
- Vegetable salad is a refreshing, nutritious dish that can be served as a light meal, side, or starter, featuring a variety of crisp, seasonal produce.
- The base of a vegetable salad typically includes mixed greens, cucumber, tomatoes, bell peppers, and onions, with options to add feta cheese and sunflower seeds.
- A simple vinaigrette dressing, made with olive oil, balsamic vinegar, Dijon mustard, honey, and garlic, harmonizes the flavors and textures of the salad.
- Vegetable salads offer versatility, as they can be customized with various seasonal ingredients, classic flavor combinations, and creative twists.
- Proper presentation, with vibrant colors and diverse textures, enhances the visual appeal of vegetable salads, encouraging their consumption.
History
Salads have been a part of human cuisine for centuries, with evidence of vegetable-based dishes dating back to ancient civilizations. The earliest known salads were simple affairs, featuring locally-sourced greens, herbs, and whatever other fresh produce was available.
As trade routes expanded, salads evolved to incorporate a wider variety of ingredients, from exotic fruits to fragrant spices. This evolution is a testament to the power of imagination, which allows for profound personal change and creativity in culinary practices enhances creativity.
In medieval Europe, salads were often served as a course before the main meal, with nobles and royalty enjoying elaborately-presented dishes.
By the 18th century, the concept of the "mixed salad" gained popularity, allowing home cooks to experiment with different combinations of greens, vegetables, and dressings. This paved the way for the vibrant, diverse salads we know and love today.
Salads have long been a healthy and delicious way to enjoy the bounty of the seasons. Whether you prefer a simple green salad or a more complex creation, the history of this versatile dish is full of culinary innovation and cultural traditions.
Recipe
Vegetable Salad is a refreshing and nutritious dish that can be enjoyed as a light meal or a side. The combination of crisp vegetables and a tangy dressing makes it a versatile option for any occasion.
Incorporating seasonal produce can elevate your salad's flavor profile and nutritional value, similar to the benefits of a fermented vegetable plate. To prepare this delightful salad, you'll need to gather a few simple ingredients and follow a straightforward cooking method. The result is a vibrant and flavorful dish that's sure to impress your family and friends.
Ingredients:
- 2 cups mixed greens (such as spinach, arugula, and kale)
- 1 cup sliced cucumber
- 1 cup cherry tomatoes, halved
- 1/2 cup diced red bell pepper
- 1/4 cup thinly sliced red onion
- 2 tablespoons crumbled feta cheese
- 2 tablespoons toasted sunflower seeds
Dressing:
- 2 tablespoons olive oil
- 1 tablespoon balsamic vinegar
- 1 teaspoon Dijon mustard
- 1 teaspoon honey
- 1 clove garlic, minced
- Salt and pepper to taste
Instructions:
In a large salad bowl, combine the mixed greens, cucumber, cherry tomatoes, red bell pepper, and red onion. Toss the salad ingredients together until they are well combined. In a separate small bowl, whisk together the olive oil, balsamic vinegar, Dijon mustard, salt, and pepper to make the dressing. Drizzle the dressing over the salad and toss to coat the vegetables evenly. For a refreshing twist on this classic salad, try our delicious cucumber salad recipe that includes fresh dill and a tangy lemon vinaigrette.
In a separate small bowl, whisk together the olive oil, balsamic vinegar, Dijon mustard, honey, and minced garlic. Season the dressing with salt and pepper to taste.
Pour the dressing over the salad and toss gently to coat. Sprinkle the crumbled feta cheese and toasted sunflower seeds on top.
Tips:
For best results, let the salad sit for a few minutes after tossing to allow the flavors to meld.
You can also experiment with different vegetables, such as shredded carrots, chopped avocado, or roasted beets, to customize the salad to your liking.
Additionally, you can add cooked grains, such as quinoa or bulgur, to make it a more substantial meal.
Cooking Steps
First, chop the vegetables into bite-sized pieces to create a visually appealing salad.
Next, gently mix the prepared veggies in a large bowl.
Step 1. Chop Vegetables Into Small Pieces
Next, chop the vegetables into small, even pieces. This step is crucial for creating a harmonious salad. Use a sharp knife and cutting board to dice the carrots, celery, and bell peppers into bite-sized cubes. Aim for pieces that are approximately 1/2 inch in size – this will ensure a consistent texture throughout the salad.
Slice the cucumbers into thin rounds, then cut each round in half. Mince the onion into fine pieces, releasing its aromatic flavors. Finally, roughly chop the parsley, dill, and any other herbs you're using.
The key is to cut everything to a similar size, so each forkful contains a delightful mix of textures and tastes. Take your time and focus on uniform, neat cuts. Properly chopping the vegetables is the foundation for a delicious and visually appealing vegetable salad.
Step 2. Mix Vegetables
With the vegetables chopped into uniform pieces, it's time to bring them together. In a large salad bowl, gently mix the crisp carrots, the tender zucchini, the crunchy bell peppers, and the fresh parsley.
Combine them with a light touch, ensuring each ingredient is evenly distributed throughout the bowl.
Next, add a drizzle of olive oil and a splash of red wine vinegar. Use your hands or a large spoon to toss the salad, coating the vegetables evenly with the flavorful dressing.
Sprinkle in a pinch of salt and a dash of black pepper, adjusting the seasoning to your taste.
Resist the urge to overmix, as you want to maintain the distinct textures and flavors of each vegetable.
Gently fold the salad until the dressing is thoroughly incorporated. Your vibrant, nutrient-packed vegetable salad is now ready to be served and enjoyed.
Step 3. Add Dressing
With the vegetables now perfectly chopped, it's time to dress the salad. In a small bowl, whisk together a simple dressing of olive oil, lemon juice, and a pinch of salt and pepper. The bright, tangy flavors will complement the crisp, fresh veggies beautifully.
To enhance the health benefits of your salad, consider adding a few drops of peppermint oil, known for its refreshing properties, to invigorate your dish.
Drizzle the dressing over the salad and use your hands or tongs to gently toss everything together until each piece is lightly coated. Be careful not to overmix, as you want to preserve the integrity of the ingredients. The salad should glisten with the dressing, not be drenched in it.
Once the salad is dressed, give it a final taste and adjust the seasonings as needed. A sprinkle of fresh herbs, such as parsley or dill, can also add a lovely finishing touch.
Now your vegetable salad is ready to serve and enjoy! The vibrant colors and flavors will surely delight your senses.
Step 4. Refrigerate Before Serving
After tossing the salad with the dressing, it's time to let the flavors meld. Cover the bowl or container and pop it in the fridge for at least 30 minutes. This chilling time allows the dressing to soak into the veggies, making every bite more delicious.
As the salad chills, the ingredients will firm up a bit, creating the perfect texture. The cool temperature also helps the flavors come together, so you'll get a harmonious blend in every forkful. Don't skip this important step! Refrigerating the salad before serving ensures the perfect taste and consistency.
When you're ready to enjoy, give the salad a gentle stir and serve it up. The vibrant colors and enticing aromas will have everyone's mouths watering.
This vegetable salad is best served chilled, so make sure to let it chill out in the fridge for a bit before digging in. Your taste buds will thank you!
Step 5. Garnish With Fresh Parsley
To finish off the vegetable salad, garnish it with some fresh, vibrant parsley. The herb's bright green leaves and delicate, lacy texture will add a lovely pop of color and a burst of flavor to your creation.
Simply pluck a few sprigs from the bunch, gently rinse them under cool water, and pat them dry with a paper towel. Then, use your fingers to tear the leaves into smaller, bite-sized pieces and sprinkle them evenly over the top of the salad.
The parsley won't only enhance the visual appeal of your dish but also complement the other vegetables with its subtly sweet, grassy notes. Feel free to be generous with the garnish – a little goes a long way in brightening up the flavors and making your vegetable salad shine.
The fresh parsley will add the perfect finishing touch, inviting your guests to dig in and enjoy every last bite.
Final Thoughts
Ultimately, a well-constructed vegetable salad can elevate any meal, providing a burst of vibrant colors, flavors, and textures that perfectly complement the main dish. When crafting your own salad masterpiece, don't be afraid to get creative and experiment with various combinations of fresh, seasonal produce.
For instance, you might consider incorporating elements inspired by classic dishes, such as the comforting indulgence of bread pudding for a unique flavor twist. Perhaps you'll discover a new favorite pairing, like the refreshing crunch of crisp cucumber and the earthy sweetness of roasted beets. Or maybe you'll find that a drizzle of tangy vinaigrette brings all the flavors together in perfect harmony.
The true beauty of a vegetable salad lies in its versatility. It can be a light and refreshing starter, a nourishing side, or even the star of the show as a main course.
Frequently Asked Questions
How Long Does the Salad Last in the Refrigerator?
You'll be pleased to know that your tasty vegetable salad can last up to 5 days in the fridge!
Just be sure to store it in an airtight container. The cool, refreshing flavors will stay crisp and vibrant, making it the perfect side dish or snack.
Enjoy the fresh veggies for several days – it's a great way to stretch out your meal prep.
With proper storage, this salad will keep you satisfied and nourished all week long!
Can I Substitute Any of the Vegetables in the Recipe?
Absolutely! You can totally substitute different veggies in this salad.
Get creative and use whatever fresh, crunchy vegetables you've got on hand. Carrots, celery, bell peppers, radishes – the possibilities are endless.
Just make sure to chop everything up into bite-size pieces so it mixes together nicely. Feel free to experiment and find your perfect veggie combo.
The key is to have fun and make it your own!
Is the Salad Suitable for a Vegetarian or Vegan Diet?
Absolutely! The vegetable salad is an excellent choice for vegetarians and vegans.
Since it's made entirely of plant-based ingredients, it's a delightfully wholesome and nutritious option. You can enjoy this colorful, crunchy salad without any worries, as it's free from meat, dairy, and other animal-derived products.
The combination of fresh veggies makes it a versatile and satisfying dish that everyone can savor. Go ahead and dig in – this salad is a wonderful way to get your daily dose of vitamins and minerals!
Can I Make the Salad in Advance for a Party?
Absolutely! Making the salad ahead of time is a great way to save time and stress on the day of your party.
Simply prepare the ingredients, combine them in a large bowl, and store it in the fridge until you're ready to serve. The flavors will have a chance to meld together, making the salad even more delicious.
Just don't forget to give it a quick toss before setting it out for your guests to enjoy!
What Are Some Serving Suggestions for This Salad?
When serving this tasty vegetable salad, you've got plenty of options! You can spoon it atop crisp lettuce leaves for a fresh and crunchy presentation.
Or, scoop it into small bowls or cups for individual servings at a party. Serve it alongside crusty bread or rolls to soak up the flavorful dressing.
You could even use it as a topping for baked potatoes or grilled meats. Get creative and have fun with how you showcase this colorful, nutrient-packed salad!
Polish Comfort Food
Kisiel (Fruit Pudding)
Prepare to indulge in the creamy, subtly sweet delight of Kisiel, a traditional Polish fruit pudding that has captivated taste buds for generations.
Kisiel, a beloved Polish fruit pudding, has delighted taste buds for centuries. This creamy yet slightly gelatinous dessert combines the natural sweetness of fresh or frozen fruit with a velvety, starch-thickened texture. Chilled or at room temperature, kisiel makes for a refreshing and comforting treat. Simply simmer fruit, sugar, and water, then thicken with cornstarch for a silky consistency. Top with nuts, whipped cream, or berries for an extra special presentation. Versatile and showcasing seasonal ingredients, kisiel is a true taste of Polish culinary heritage that you'll surely want to explore further.
Key Takeaways
- Kisiel is a traditional Polish dessert with a history dating back to the 14th century, reflecting regional flavors and seasonal ingredients.
- The basic kisiel recipe combines the sweetness of cooked fruit with a creamy, slightly gelatinous pudding-like texture.
- Kisiel can be served chilled or at room temperature and is often garnished with nuts, whipped cream, or fresh berries.
- Kisiel is known for its vibrant colors, natural sweetness, and comforting mouthfeel, making it a versatile and accessible dessert.
- The simplicity of the kisiel recipe, along with its ability to utilize seasonal fruits, contributes to its enduring popularity in Polish households.
History
According to culinary historians, the origins of kisiel, a traditional Polish fruit pudding, can be traced back to the 14th century. This delightful dessert has been a beloved part of Polish culture for centuries, evolving over time to reflect the regional flavors and seasonal ingredients available throughout the country.
In the early days, kisiel was often made with foraged berries, fruits, and even certain roots, cooked down into a thick, jiggly consistency. As the dish gained popularity, home cooks began experimenting with a wider variety of fruits, including apples, pears, plums, and cherries. Today, kisiel is still enjoyed as a dessert, particularly in Eastern European countries where it originated. Many modern recipes for kisiel call for using store-bought fruit purees or juices instead of foraged berries. However, purists still prefer to make kisiel from scratch, and there are numerous tutorials available online on how to make fruit compote for this purpose. The process typically involves simmering the fruit with sugar and water until it reaches a thick, syrupy consistency. How to make fruit compote is a skill that has been passed down through generations, and its versatility makes it a beloved ingredient in many traditional desserts.
The addition of milk, cream, or even sour cream helped to create a richer, creamier texture, while a touch of honey or sugar added a delicate sweetness.
Today, kisiel remains a staple in Polish households, served as a comforting dessert or even enjoyed as a refreshing chilled treat on warm summer days. Its enduring popularity is a testament to the timeless appeal of this simple, yet delicious, fruit pudding.
Recipe
Kisiel, also known as fruit pudding, is a traditional Polish dessert that combines the sweetness of cooked fruit with the creamy texture of a pudding. This delightful treat is a perfect way to celebrate the abundance of seasonal fruits.
The key to a successful kisiel is the perfect balance between the fruit's natural sweetness and the thickening properties of the starch used in the recipe. The result is a velvety, slightly gelatinous dessert that's both comforting and refreshing.
Ingredients:
- 3 cups fresh or frozen fruit (such as apples, pears, or berries)
- 1/2 cup granulated sugar
- 2 tablespoons cornstarch
- 1 cup water
- 1 teaspoon vanilla extract
Instructions:
In a saucepan, combine the fruit, sugar, and water. Bring the mixture to a boil, then reduce the heat and simmer for 10-15 minutes, or until the fruit is soft and the liquid is syrupy.
In a small bowl, whisk the cornstarch with a tablespoon of water to create a slurry. Slowly pour the slurry into the simmering fruit mixture, stirring constantly, until the mixture thickens to a pudding-like consistency. Remove from heat and stir in the vanilla extract.
Tips:
For a creamier consistency, you can substitute half of the water with milk or cream.
You can also experiment with different fruit combinations to create unique flavor profiles. Serve the kisiel chilled or at room temperature, and garnish with a dollop of whipped cream or a sprinkle of cinnamon for an extra touch of indulgence.
Cooking Steps
First, in a saucepan, combine the fruit, sugar, and water.
Bring the mixture to a boil, then let it simmer until the fruit is tender.
For added nutrition, consider incorporating ingredients like high protein and fiber to enhance the dish.
Step 1. Combine Fruit, Sugar, and Water
With the fruit, sugar, and water ready, you can now combine these key ingredients to start the cooking process.
Gently pour the fruit into a saucepan, making sure to include any juices that have accumulated. Sprinkle the sugar over the top, letting it settle evenly throughout the fruit.
Now, slowly pour in the measured water, being careful not to disturb the delicate fruit pieces.
Place the saucepan on the stovetop and turn the heat to medium. As the mixture begins to warm, you'll notice the sugar dissolving and the fruit softening.
Stir the kisiel gently with a wooden spoon, ensuring all the ingredients are well incorporated. Allow the mixture to simmer, stirring occasionally, until it thickens to your desired consistency, about 10-15 minutes.
The kisiel should have a smooth, pudding-like texture when ready. Remove from heat and let cool slightly before serving or chilling.
Step 2. Bring Mixture to a Boil
Once the fruit, sugar, and water are combined, place the saucepan on the stovetop over medium heat.
Let's bring this delightful mixture to a boil! You'll notice the liquid start to shimmer and bubble as it heats up. Keep a close eye on it, stirring occasionally, until it reaches a full, rolling boil. The sound of the bubbles popping and the steam rising will let you know it's ready.
Now, don't be tempted to crank up the heat – that could cause the mixture to boil over and make a mess. Maintain that medium heat setting, allowing the ingredients to slowly come together.
As the sugar dissolves, the liquid will become thicker and more syrupy. This is exactly what you want for the perfect kisiel texture. Once it reaches a full boil, let it continue cooking for about 5 minutes, stirring occasionally, until the mixture has thickened to your desired consistency.
Get ready for the next step!
Step 3. Simmer Until Fruit Is Tender
Now that the mixture has reached a boil, reduce the heat to low and let it simmer gently.
This slower cooking process will allow the fruit to become tender and release its natural sweetness. As the pot bubbles away, you'll start to notice the colors of the fruit deepening and the liquid thickening into a luscious, syrupy consistency.
Stir the mixture occasionally to prevent any sticking or burning on the bottom of the pan. Depending on the type of fruit you're using, the simmering may take anywhere from 10 to 20 minutes.
Keep a close eye on it, tasting the fruit periodically to check for doneness. You'll know it's ready when the fruit easily mashes against the side of the pot with the back of your spoon.
The kisiel should have a smooth, velvety texture at this stage. Once the fruit is perfectly tender, remove the pot from the heat and get ready to move on to the next step.
Step 4. Thicken With Cornstarch Slurry
To thicken the kisiel, you'll need to create a cornstarch slurry. In a small bowl, whisk together a couple of tablespoons of cornstarch with an equal amount of cold water until smooth and lump-free.
Slowly pour the slurry into the simmering fruit mixture, stirring constantly. As the slurry heats up, it will thicken the kisiel to your desired consistency. Keep stirring until the pudding has reached your preferred thickness.
The cornstarch will transform the thin, watery fruit juice into a delightfully creamy, velvety texture. You'll know it's ready when the kisiel coats the back of a spoon.
Adjust the amount of cornstarch slurry as needed to reach your ideal thickness. With a little patience and gentle stirring, you'll have a wonderfully smooth and pudding-like kisiel in no time.
Step 5. Serve Chilled or at Room Temperature
Once the kisiel has reached your desired thickness, you have a few options for serving it. You can serve the chilled fruit pudding straight from the refrigerator, allowing the cool, creamy texture to refresh and delight your taste buds.
Alternatively, you can let the kisiel come to room temperature, which will soften the consistency and allow the flavors to open up more fully.
Whether chilled or at room temperature, the kisiel is sure to be a hit. Scoop it into small bowls and garnish with a sprinkle of chopped nuts, a dollop of whipped cream, or a few fresh berries for a visually appealing presentation.
The cool, silky pudding pairs beautifully with the crunch of nuts or the burst of juicy berries. Serve the kisiel as a light and satisfying dessert, or enjoy it as a midday snack to fuel your day.
No matter how you choose to serve it, this classic Polish treat is sure to leave you feeling comforted and content.
Final Thoughts
Kisiel, a traditional Polish fruit pudding, offers a delightful and versatile dessert option. Whether you serve it chilled on a hot summer day or at room temperature during a cozy gathering, this simple yet satisfying treat is sure to delight.
The natural sweetness and vibrant colors of the fruit make it a visually appealing and healthy choice, while the creamy consistency provides a comforting texture. Experiment with different seasonal fruits to discover your favorite variations, or try topping it with a dollop of whipped cream, a sprinkle of cinnamon, or a handful of toasted nuts for an extra touch of elegance.
Kisiel's versatility allows you to adapt it to your personal taste and preferences, making it a crowd-pleasing dessert that can be enjoyed year-round. So, embrace the simplicity and charm of this traditional Polish delicacy and indulge in the delightful flavors of Kisiel.
Frequently Asked Questions
What Is the Origin of the Name "Kisiel"?
You know, the name "kisiel" has a really interesting origin!
It's believed to have come from the Slavic word "kisnuty," which means "to sour." This makes sense when you consider that traditional kisiel is a tart, thickened fruit drink.
The name likely evolved over time as the dish became more popular across Eastern Europe.
Isn't it cool how food names can give you a glimpse into the history and culture of a region? I find that kind of thing really fascinating.
What do you think about the origins of "kisiel"?
How Long Does Kisiel Typically Take to Prepare?
Preparing kisiel typically takes around 30 minutes to an hour, depending on the ingredients and method.
The active process is relatively straightforward, involving simmering a flavorful liquid and thickening it with a starch.
Once the base is ready, you'll simply need to let it cool and set before enjoying this delightful sweet pudding.
With a little hands-on time and minimal effort, you can whip up a batch of homemade kisiel in no time!
Is Kisiel a Traditional Polish Dessert or a Modern Creation?
Kisiel, a beloved Polish dessert, has been a part of the country's culinary tradition for centuries.
This sweet treat originated long ago, evolving over time to become a beloved classic.
With its unique blend of flavors and textures, kisiel has stood the test of time, remaining a cherished part of Polish culture.
Whether you're new to this delightful dessert or a lifelong fan, you're sure to appreciate its rich history and delicious taste.
Can Kisiel Be Made With Different Types of Fruit?
Absolutely! Kisiel can be made with all sorts of delicious fruits. You can use strawberries, blueberries, raspberries, apples, or even a mix of different fruits.
The possibilities are endless! The great thing about kisiel is that it's so versatile. You can get creative and experiment with different flavor combinations to find your personal favorite.
Why not try making it with a mix of berries for a vibrant, colorful treat?
How Long Does Kisiel Keep After It's Been Made?
You can keep homemade kisiel, or fruit pudding, in the fridge for 3-5 days after you make it.
The exact shelf life depends on the ingredients used and how you store it.
Make sure to keep it covered and chilled to maintain its fresh, jiggly texture.
With its vibrant color and sweet, fruity flavor, you'll want to enjoy your homemade kisiel quickly before it goes bad!
Just be mindful of the expiration date, and your tasty treat will be good to go.
-
Brazilian Cuisine3 months ago
Tacacá
-
Polish Comfort Food3 months ago
Krupnik (Barley Soup)
-
Brazilian Cuisine3 months ago
Caldeirada
-
Brazilian Cuisine3 months ago
Chicken in Brown Sauce
-
Southern Comfort Food3 months ago
Cheese Straws
-
African Cuisine3 months ago
Kedjenou (Ivory Coast)
-
Polish Comfort Food3 months ago
Vegetable Salad
-
American Diner Classics3 months ago
The Maillard Reaction: Understanding the Chemistry of Browning {Food Science and Cooking}