
Ethiopian Cuisine
Ye’timatim Fitfit (Tomato Fitfit)
Joyfully explore the vibrant and flavorful tomato-based dish, Ye’timatim Fitfit, a cherished part of Ethiopia’s culinary heritage that offers a meditative cooking experience.

Ye'timatim Fitfit, the vibrant and flavorful tomato-based dish, holds a cherished place in the culinary heritage of Ethiopia. This traditional dish originated in ancient Ethiopic civilizations, where it was prepared during the harvest season, fostering community gatherings. The process involves sun-drying ripe tomatoes, grinding them into a paste, and simmering with aromatic spices to create a nourishing staple. Ye'timatim Fitfit symbolizes unity and cultural heritage, representing a significant aspect of Ethiopian identity. As you'll discover, crafting this dish requires patience and attention to detail, offering a meditative cooking experience that strengthens community bonds and appreciation for simple pleasures.
Key Takeaways
- Ye'timatim Fitfit is a traditional Ethiopian dish made with sun-dried tomatoes, split peas, onions, and aromatic spices, often served with injera flatbread.
- It is a cultural preservation practice with roots in ancient Ethiopic civilizations, symbolizing unity and heritage within Ethiopian identity.
- Preparing Ye'timatim Fitfit requires a careful balance of ingredients and attention to detail, emphasizing the importance of patience and mindfulness.
- Cooking the dish promotes overall wellness and reduces stress, serving as a meditative experience that encourages living in the moment.
- Sharing Ye'timatim Fitfit strengthens community bonds and fosters appreciation for the simple pleasures of life, celebrating the beauty of natural ingredients.
History
The origins of Ye'timatim Fitfit can be traced back to the ancient Ethiopic civilizations, where this unique cultural practice first emerged as a means of preserving community traditions.
For centuries, families would gather during the harvest season to prepare this savory tomato-based dish, passed down through generations. The process involved carefully selecting and sun-drying the ripest tomatoes, then grinding them into a fragrant paste. This paste was then simmered with aromatic spices, creating a flavorful and nourishing staple.
Over time, Ye'timatim Fitfit became deeply intertwined with the fabric of Ethiopian identity, serving as a symbol of unity and cultural heritage.
Today, the dish continues to be celebrated, with communities coming together to share in the time-honored traditions and flavors that have defined this cherished culinary legacy for countless generations.
Recipe
Ye'timatim Fitfit is a traditional Ethiopian dish that combines the rich flavors of split peas, onions, and spices. This hearty stew is a beloved staple in many Ethiopian households and is often served with injera, a spongy, fermented flatbread.

At its core, Ye'timatim Fitfit is a simple, yet delicious dish that showcases the vibrant seasonings and textures of Ethiopian cuisine. The key to achieving the perfect balance of flavors lies in the careful selection and preparation of the ingredients.
- 1 cup split peas, rinsed
- 1 large onion, diced
- 3 cloves garlic, minced
- 1 tablespoon berbere spice mix
- 1 teaspoon ground cumin
- 1 teaspoon ground turmeric
- 1 teaspoon salt
- 4 cups vegetable or chicken broth
- 2 tablespoons tomato paste
- Chopped parsley for garnish (optional)
In a large pot, sauté the onions and garlic in a small amount of oil until the onions are translucent. Add the berbere spice mix, cumin, turmeric, and salt, and stir to coat the onions.
Pour in the broth and stir in the tomato paste until well combined. Bring the mixture to a boil, then reduce the heat and let the split peas simmer for 30-40 minutes, or until they're tender and the stew has thickened.
To ensure the best possible outcome, it's important to use high-quality berbere spice mix and to adjust the seasoning to your personal taste preferences. The stew can be served hot, garnished with chopped parsley, and accompanied by injera for a truly authentic Ethiopian dining experience.
Cooking Steps
First, wash and dice the tomatoes.
Next, sauté the onions, garlic, and spices until fragrant.
Then, add the tomatoes and let the mixture simmer.
Don't forget to season with salt and pepper.
Step 1. Wash and Dice Tomatoes
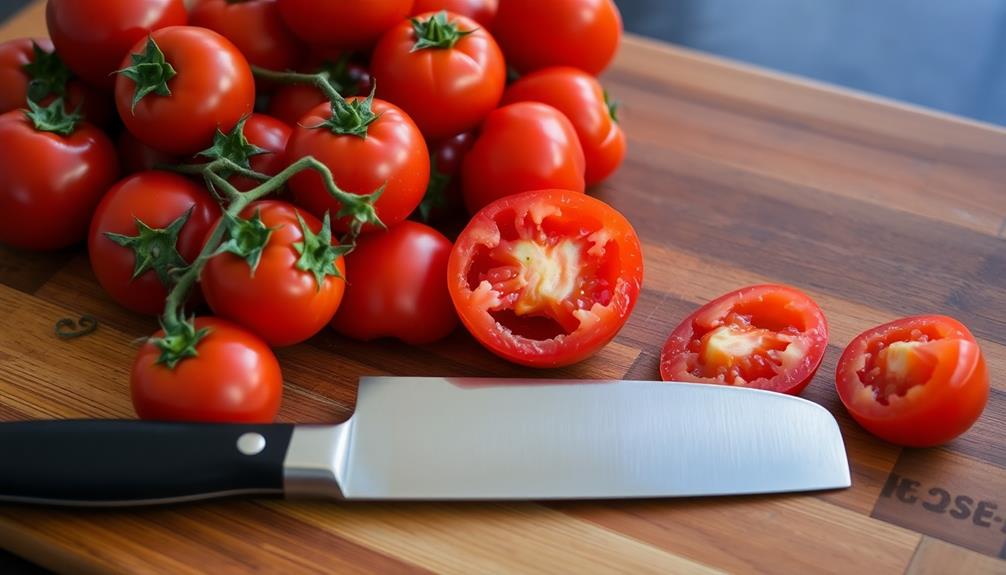
Rinse tomatoes thoroughly under cool running water, removing any dirt or debris.
Once clean, place them on a cutting board. Grab a sharp knife and carefully slice the tomatoes in half horizontally. Then, dice the tomato halves into small, even cubes, about 1/2 inch in size. This will help the tomatoes cook evenly and release their juices in the dish.
As you work, be mindful of your knife skills. Keep your fingers tucked under and use the tip of the blade to guide your cuts. Work slowly and deliberately to avoid any accidents.
Once all the tomatoes are diced, give the board a final rinse to clear away any stray seeds or skin. You're now ready to add the prepared tomatoes to the next step of the recipe. The vibrant red pieces will infuse the dish with their fresh, tangy flavor.
Step 2. Sauté Onions, Garlic, and Spices

Next, heat a large sauté pan over medium heat. Once it's hot, add a few tablespoons of olive oil. Toss in the diced onions and sauté for 3-5 minutes, stirring occasionally, until they're translucent and fragrant.
Staying hydrated is essential for skin health, and cooking with ingredients like tomatoes can contribute to your overall hydration and glow, which is vital for maintaining that salon-like radiance.
Effective hydration techniques can also enhance your cooking experience by ensuring you feel your best.
Now, add the minced garlic and continue cooking for another minute or two until the garlic becomes aromatic. Be careful not to let it burn!
Next, sprinkle in the ground cumin, coriander, and paprika. Stir everything together and let the spices toast for about a minute, infusing the oil with their bold flavors.
Step 3. Add Tomatoes and Simmer

Once the spices have had a chance to toast, add the diced tomatoes to the pan. The vibrant red hue of the tomatoes will instantly brighten up the dish.
Stir the tomatoes into the fragrant onion and garlic mixture, ensuring they're evenly distributed. Allow the tomatoes to simmer for about 10-15 minutes, or until they've softened and released their juices. This step helps to develop the flavors, allowing the spices to meld with the tomatoes.
As the tomatoes simmer, occasionally stir the pan to prevent anything from sticking. You'll know the tomatoes are ready when they've broken down and the mixture has thickened slightly.
The tangy tomatoes complement the warm spices beautifully, creating a flavorful base for the next steps. Once the tomatoes have finished simmering, you can move on to the next part of the recipe.
Get ready to add the meat and beans for a hearty and satisfying Ye'timatim Fitfit dish.
Step 4. Add Salt and Pepper
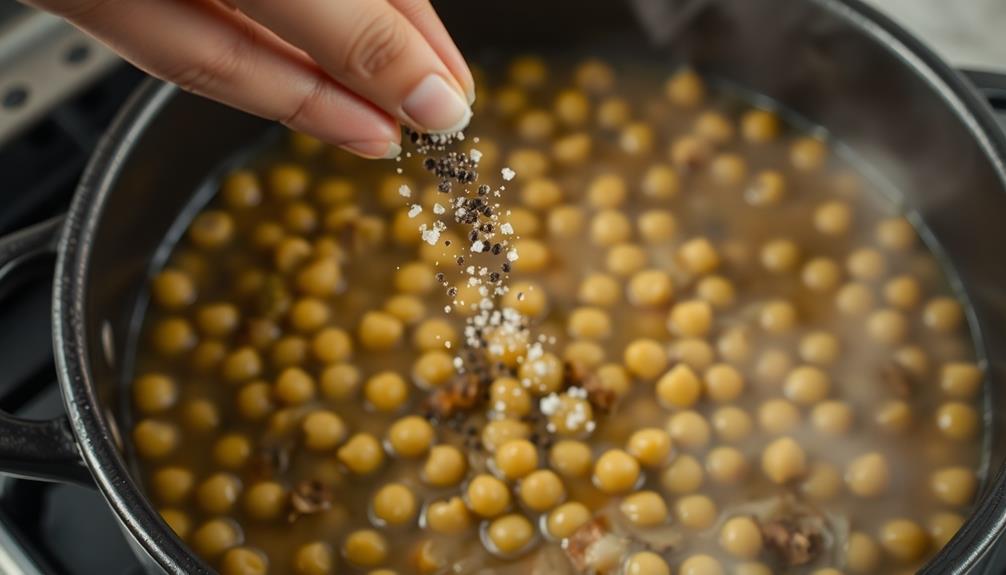
Season the simmered tomato mixture with a generous pinch of salt and a few grinds of black pepper. The salt will enhance the natural sweetness of the tomatoes, while the pepper adds a subtle warmth and complexity to the dish.
Stir the seasonings in gently, ensuring they're evenly distributed throughout the fitfit.
Taste the mixture and adjust the seasoning as needed. If it needs a bit more salt, add it a pinch at a time, stirring well between additions. Similarly, if you'd like a little more peppery kick, grind in some extra black pepper.
The goal is to find the perfect balance of flavors that tantalizes your taste buds.
Once the seasoning is just right, your tomato fitfit is ready to serve. Spoon it over injera bread or alongside your favorite Ethiopian dishes for a delightful and authentic dining experience.
Enjoy the perfect blend of sweet, savory, and subtly spicy flavors in every bite.
Step 5. Garnish With Fresh Herbs
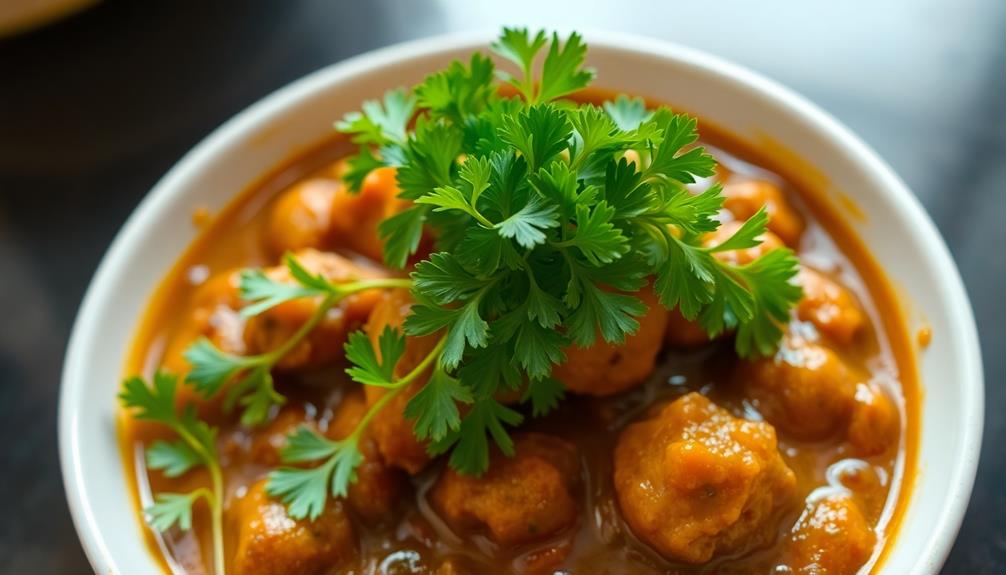
To finish the dish, garnish the tomato fitfit with a handful of fresh, fragrant herbs. This last step adds a burst of flavor and visual appeal to your creation.
Consider using a mix of herbs like parsley, cilantro, and mint. Their vibrant green hues and aromatic notes will complement the bright, tangy flavors of the fitfit. Adding fresh herbs enhances the meal experience, much like how educational toys promote learning through engaging play.
Gently tear or chop the herbs, then sprinkle them evenly over the top of the dish. Avoid using too much, as you don't want to overpower the other ingredients. A light, delicate touch is best. The herbs should accent the tomatoes, not dominate them.
Once the herbs are in place, your tomato fitfit is ready to serve. Invite your guests to dig in and enjoy the fresh, herbal notes that elevate this traditional Ethiopian dish.
The combination of textures and flavors is sure to delight the senses and leave everyone satisfied.
Final Thoughts
Reflecting on the journey we've undertaken, it's clear that the lessons of "Ye'timatim Fitfit" extend far beyond the realm of the story itself. The art of creating this delightful dish hasn't only filled our kitchens with the vibrant flavors of tomatoes, but it's also taught us valuable life lessons. In the process of cooking, we've also learned to embrace mindfulness and self-care, as the act of preparing food can be a meditative experience that promotes overall wellness and reduces stress Top Wellness Tips.
First and foremost, we've learned the importance of patience and attention to detail. Crafting the perfect fitfit requires a delicate balance of ingredients and a keen eye for timing. This translates to our personal lives, reminding us to slow down, savor the moment, and approach challenges with a meticulous mindset.
Additionally, the act of gathering with loved ones to share a meal has reinforced the power of community and connection. The kitchen has become a gathering place, where stories are shared, and bonds are strengthened. As you move forward, remember to nurture these meaningful relationships, for they're the true spice of life.
Lastly, the vibrant colors and tantalizing aromas of "Ye'timatim Fitfit" have awakened our senses, inspiring us to embrace the beauty that surrounds us. Whether it's the brilliant hues of a sunset or the melody of birdsong, let this dish be a reminder to pause, to appreciate, and to savor the simple pleasures that make life truly rich.
Frequently Asked Questions
What Is the Origin of the Name "Ye'timatim Fitfit"?
The origin of the name "ye'timatim fitfit" likely stems from the dish's key ingredient – the tomato. The word "ye'timatim" refers to the tomato, while "fitfit" describes the traditional preparation method of the dish.
How Does Ye'timatim Fitfit Differ From Regular Tomato Dishes?
Regular tomato dishes differ from ye'timatim fitfit in that they don't have the robust, savory flavors imparted by the spices and herbs used in the traditional Ethiopian preparation. Ye'timatim fitfit has a distinctly bold, complex taste.
Can Ye'timatim Fitfit Be Made With Other Types of Tomatoes?
Yes, you can make this dish with other types of tomatoes. The key is to use ripe, flavorful tomatoes that will hold their shape and texture when cooked. Experiment with different varieties to find your favorite version.
Is Ye'timatim Fitfit a Traditional Ethiopian Dish or a Modern Creation?
Well, ye'timatim fitfit's origins are actually quite debated. Some claim it's a traditional Ethiopian dish, while others argue it's a more modern creation. Without the context of the specific recipe, it's hard to definitively say which is true.
How Long Does Ye'timatim Fitfit Typically Take to Prepare?
Preparing a traditional Ethiopian dish takes time and effort. Depending on the complexity, it can range from 30 minutes to several hours. The key is to follow the recipe closely and allow the flavors to develop fully.

Alem is our Ethiopian cuisine specialist, bringing Ethiopia’s bold, aromatic flavors to Cook if Ya. From the spicy, earthy flavors of doro wat to the fragrant, spongy injera, Alem’s recipes showcase Ethiopian cuisine’s unique and flavorful dishes. His cooking emphasizes the communal nature of Ethiopian meals, perfect for sharing with friends and family.

Ethiopian Cuisine
Spris (Layered Fruit Juice)
A captivating layered fruit juice, Spris blends vibrant colors and refreshing flavors to elevate any festive gathering, as it offers a unique taste experience.

Spris, a captivating layered fruit juice, blends vibrant colors and refreshing flavors to elevate any festive gathering. You'll be wowed by its stunning visual appeal, as the intricate layering of juices creates a unique taste experience. Spris features a delightful balance of sweet and tart notes, with each sip offering a tropical journey. The icy cubes add a delightful textural contrast, while the customizable fruit combinations make it perfect for all palates. Serve Spris as a centerpiece or complement to your meals, and get ready to impress your guests with its remarkable presentation and unforgettable taste. Let's dive deeper into the history and preparation of this remarkable beverage.
Key Takeaways
- Spris is a vibrant, layered fruit juice known for its balanced sweet and tart flavors, offering a refreshing and visually appealing drinking experience.
- The intricate layering process with different fruit juices, such as orange, pineapple, cranberry, and grapefruit, creates distinct flavor profiles and a stunning presentation.
- Spris is versatile, suitable for various occasions, from casual gatherings to formal events, as a refreshing drink or a dessert alternative.
- The layering techniques involve pouring the denser juice first and then carefully adding lighter juices to maintain the distinct layers and visual appeal.
- Serving chilled spris over ice cubes enhances the refreshing qualities and contrasting textures, creating a sensory experience reminiscent of a tropical oasis.
History
When did the concept of layered fruit juice, known as Spris, first emerge?
Spris, the delightful layered fruit juice, has a fascinating history that dates back to the early 20th century. It all started in the vibrant streets of Europe, where local vendors began experimenting with different fruit juices, creating visually stunning and flavorful concoctions.
The key to Spris lies in its intricate layering process. By carefully pouring various fruit juices into a glass, the mixologists were able to achieve stunning color gradients and distinct flavor profiles in each sip. This innovative approach quickly captured the hearts and taste buds of locals and visitors alike, transforming Spris into a beloved beverage across the continent.
As the popularity of Spris grew, it became a staple at festivals, celebrations, and casual gatherings, adding a touch of vibrancy and excitement to any occasion.
Today, the legacy of Spris lives on, with people around the world embracing this delightful and visually captivating fruit juice.
Recipe
Spris, or layered fruit juice, is a refreshing and visually appealing treat that can be enjoyed on a warm day. This chilled beverage features vibrant layers of different fruit juices, creating a beautiful gradient effect.
The key to a successful Spris is carefully pouring each juice layer to avoid mixing. The order of the layers and the choice of fruits can be tailored to personal preferences, making this a versatile and customizable recipe.
Ingredients:
- 1 cup orange juice
- 1 cup pineapple juice
- 1 cup cranberry juice
- 1 cup grapefruit juice
- Ice cubes
Cooking Instructions:
Pour the orange juice into the bottom of a tall glass. Slowly pour the pineapple juice over the back of a spoon, allowing it to gently float on top of the orange juice.
Repeat this process with the cranberry and grapefruit juices, pouring them over the back of the spoon to create distinct layers. Add ice cubes to the glass to chill the Spris before serving.
When preparing Spris, it's important to use chilled juices and pour them slowly and carefully to maintain the layered effect.
Experiment with different fruit juice combinations to create your own unique variations of this refreshing and visually appealing drink.
Cooking Steps
Prepare the fruit juices separately, carefully layering each flavor to create a vibrant, visually stunning Spris.
Refrigerate the layered creation until it's fully set, then garnish with fresh fruit slices for a delightful touch.
Serve the chilled Spris with icy cubes to enjoy the refreshing, fruity delight.
Step 1. Prepare Fruit Juices Separately

First, select the juices you wish to use for your Spris creation. Typically, a mix of citrus, berry, and tropical fruit juices works well. Measure each juice accurately, as the layered effect depends on their relative densities.
Begin with the densest juice, such as pomegranate or grape, pouring it carefully into a clear glass or serving vessel.
Next, add the middle-density juices, such as orange or cranberry, pouring them gently down the side of the glass to create distinct layers.
Finish with the lightest juices, like pineapple or mango, again pouring them slowly down the side to maintain the layered appearance.
Between each juice addition, use a spoon to gently push the previous layer down, helping the new layer settle on top. This technique takes some practice, but the result is a beautifully layered, visually striking Spris.
Once all the juices are added, chill the drink before serving to enhance the vibrant colors and flavors.
Step 2. Layer the Juices

To layer the juices, begin by carefully pouring the densest juice, such as pomegranate or grape, into a clear glass or serving vessel.
It's worth noting that juices like cranberry are rich in antioxidants, which can add health benefits to your spris, but be mindful of potential gastrointestinal issues if consumed in excess antioxidant benefits.
Slowly and gently pour the next lightest juice, like orange or pineapple, over the back of a spoon to create a distinct layer on top of the first. Continue this process, adding layers of different fruit juices, from the densest to the lightest.
Be patient and pour each juice slowly to prevent the layers from blending together. You can use a variety of colors, like ruby red, sunny yellow, and deep purple, to create a beautiful, visually appealing display.
Once all the layers are in place, you can garnish the top with a slice of fruit or a sprig of mint for a stunning presentation.
Enjoy your layered fruit juice masterpiece, or "spris," as a refreshing and healthy treat. The vibrant colors and unique texture make it a delightful and impressive beverage to serve at parties or gatherings.
Step 3. Refrigerate Until Set

Once the layered juices are poured, refrigerate the spris until they're set, which typically takes around 30 minutes. This step is crucial to ensure the layers stay distinct and the spris hold their shape.
As the spris chill, the fruit juices will start to thicken and solidify. You'll know they're ready when the layers are firm to the touch and no longer appear liquid. This process helps the spris maintain their beautiful, vibrant colors and prevents the flavors from blending together.
Be patient during this step, as it's important not to rush the chilling process. Resist the temptation to peek or move the spris before they're fully set, as this could disrupt the layers.
Once the 30 minutes are up, give the spris a gentle shake to check if they're ready. If they still seem a bit wobbly, let them chill for a few more minutes until they've reached the desired consistency.
Step 4. Garnish With Fresh Fruit Slices

Once the spris have set, it's time to add the finishing touch. Garnishing your layered fruit juice creations with fresh fruit slices is the perfect way to elevate their presentation and make them even more irresistible.
Start by selecting a variety of colorful, ripe fruits that complement the flavors in your spris. Thin slices of citrus, such as orange or grapefruit, can add a bright, tangy accent. Kiwi, strawberry, or mango slices bring a vibrant pop of color.
Arrange the fruit slices in a decorative pattern on top of each spris, letting them drape elegantly over the edges.
For an extra special touch, consider adding a sprig of fresh mint or a light dusting of powdered sugar. These simple garnishes will make your spris look and taste like they came straight from a gourmet café.
Take your time arranging the fruit, and remember that the more creative and visually appealing your garnishes are, the more your guests will be delighted when they dig in.
Step 5. Serve Chilled Spris With Icy Cubes

For the ultimate refreshment, serve your chilled spris over icy cubes. The cool, crisp sensation will instantly revive your senses, making this layered fruit juice an irresistible treat.
Begin by filling your glasses or serving vessels with a generous amount of ice cubes. To enhance the flavor profile, consider incorporating fresh herbs like mint for an extra layer of freshness, as seen in exotic fruit blend inspirations.
Slowly pour the chilled spris over the ice, allowing the layers to gradually reveal their vibrant colors and flavors. As the ice melts, the fruit juices will mingle, creating a symphony of refreshing tastes.
Encourage your guests to stir the spris gently with a spoon, ensuring each sip includes a blend of the distinct fruit layers. The icy cubes not only chill the drink but also add a satisfying crunch, providing a delightful textural contrast.
Serve the spris immediately, as the ice will continue to melt, diluting the flavors over time. Enjoy the perfect balance of sweet and tart, with the icy cubes enhancing the overall experience.
Final Thoughts
Spris, the layered fruit juice, leaves a lasting impression. Its vibrant colors and refreshing flavors make it the perfect accompaniment to any festive occasion.
Whether you're hosting a lively backyard gathering or a cozy indoor celebration, the chilled Spris is sure to delight your guests.
The icy cubes add a delightful crunch, complementing the smooth, velvety layers of fruit-infused delight. As you sip, the flavors dance on your tongue, transporting you to a tropical oasis.
The versatility of Spris is truly remarkable – it can be the star of the show or a refreshing sidekick, seamlessly blending with your desired menu.
Elevate your next event with the captivating presentation of Spris. Its visually stunning appearance and thirst-quenching properties make it the perfect choice for any celebration.
Embrace the joyful experience of this layered fruit juice and create lasting memories with every sip.
Frequently Asked Questions
How Long Does Spris Last After Opening?
Once you open it, the product's shelf life is limited. You'll want to consume it within a few days for the best quality and flavor. Refer to the expiration date on the packaging for guidance on how long it'll stay fresh after opening.
Can Spris Be Frozen for Later Use?
You can definitely freeze the product for later use. Freezing helps extend its shelf life, though the texture and flavor may change slightly once thawed. Just be sure to store it in an airtight container.
What Is the Nutritional Value of Spris?
The nutritional value of a layered fruit juice depends on the specific fruits used, but it typically contains a good amount of vitamins, minerals, and antioxidants. Enjoy it as part of a balanced diet!
Can Spris Be Made With Different Fruit Juices?
Yes, you can make spris using different fruit juices. The versatile layered drink allows you to get creative and experiment with various fruit flavors to suit your taste preferences.
Is Spris Suitable for Vegans or Vegetarians?
Yes, Spris is suitable for vegans and vegetarians as it's made with fruit juices and doesn't contain any animal-derived ingredients. You can enjoy this refreshing beverage without worrying about its compatibility with your plant-based lifestyle.
Alem is our Ethiopian cuisine specialist, bringing Ethiopia’s bold, aromatic flavors to Cook if Ya. From the spicy, earthy flavors of doro wat to the fragrant, spongy injera, Alem’s recipes showcase Ethiopian cuisine’s unique and flavorful dishes. His cooking emphasizes the communal nature of Ethiopian meals, perfect for sharing with friends and family.
Ethiopian Cuisine
Buna (Coffee)
The captivating history of Ethiopia’s beloved coffee, buna, is a story of discovery, cultural significance, and a global phenomenon that continues to enchant, as the rich heritage…

Buna, the beloved coffee of Ethiopia, has a captivating history. Originating in the highlands, it was discovered by a curious goatherd who noticed energetic goats near coffee berries. Buna soon became integral to Ethiopian culture, spreading to the Arabian Peninsula where it was refined into a beverage. Today, it's one of the world's most widely consumed drinks. The coffee ceremony is a cherished tradition, fostering community and connection through nuanced preparation methods that honor the rich heritage. Every step, from grinding the beans to the precise pouring, holds deep cultural significance. Delve deeper into the enchanting world of buna and uncover its captivating traditions.
Key Takeaways
- Buna, or Ethiopian coffee, has its origins traced to the highlands of Ethiopia, where it became integral to the country's cultural heritage.
- The traditional Ethiopian coffee ceremony is a multi-step ritual that reflects the community, craftsmanship, and cultural significance of the beverage beyond just its consumption.
- Brewing buna involves a specific method of coarsely grinding coffee beans, adding hot water, and carefully straining the mixture to produce a smooth, refined cup.
- Sharing the experience of brewing and drinking buna fosters social interaction, strengthens communal bonds, and creates lasting memories among Ethiopians.
- Preserving the unique traditions and preparation methods of buna is crucial in order to maintain the rich cultural heritage associated with this iconic Ethiopian drink.
History
The origins of buna, the beloved coffee, can be traced back centuries to the highlands of Ethiopia.
Legend has it that a young goatherd named Kaldi discovered the energizing effects of coffee beans after observing his goats dancing excitedly near a bush with bright red berries.
Word of this miraculous discovery soon spread, and the cultivation and consumption of coffee became an integral part of Ethiopian culture.
As the popularity of coffee grew, it gradually made its way to the Arabian Peninsula, where it was carefully cultivated and transformed into a refined beverage.
From there, the love for coffee spread across the world, with European traders and colonists introducing it to new continents and cultures.
Today, coffee is one of the most widely consumed beverages globally, with countless varieties and preparation methods to delight the senses.
Recipe
Buna, or coffee, is a beloved beverage enjoyed worldwide. Originating from the coffee bean, it has a rich history and cultural significance, particularly in the regions where it's grown.
The process of brewing the perfect cup of coffee can be both an art and a science, requiring a delicate balance of ingredients and preparation methods. In fact, the nuances of different brewing methods, such as the contrast between lungo and espresso, can greatly affect the overall flavor and experience of coffee.
In this recipe, we'll explore the traditional way of preparing buna, a time-honored ritual that has been passed down through generations in various coffee-producing countries.
Ingredients:
- Fresh, whole coffee beans
- Water
- Spices (such as cardamom, cinnamon, or cloves)
- Optional: Honey or sugar
To prepare the perfect cup of buna:
Grind the coffee beans to a fine powder using a mortar and pestle or a spice grinder. Bring fresh, cold water to a boil in a traditional coffee pot or cezve.
Once the water is boiling, add the ground coffee and any desired spices. Reduce the heat and allow the mixture to simmer for 5-7 minutes, stirring occasionally.
Remove the pot from the heat and let the coffee grounds settle, about 2-3 minutes. Carefully pour the brew into small cups, ensuring to leave the sediment behind.
For an authentic buna experience, serve the coffee hot, accompanied by a small amount of honey or sugar, if desired.
The aroma and flavor of the freshly brewed buna will transport you to the heart of the coffee-growing regions, where this ritual has been cherished for centuries.
Cooking Steps
To brew a perfect cup of buna, start by coarsely grinding your coffee beans.
Bring some hot water to a boil, then pour it over the grounds and stir the mixture thoroughly.
Let the coffee brew undisturbed for a few minutes before straining it through a fine mesh to enjoy its rich, flavorful goodness.
Step 1. Grind Coffee Beans Coarsely

Grinding coffee beans coarsely is a crucial step in crafting a robust, flavorful cup of buna. Using a burr or blade grinder, pulse the whole beans several times until they achieve a consistency similar to coarse sea salt.
Avoid over-grinding, as this can result in a bitter, over-extracted brew. Aim for a grind size that's coarse enough to allow water to flow through the grounds at an optimal rate, extracting the full depth of flavors.
Too fine of a grind can lead to a muddy, over-extracted cup, while too coarse may result in a thin, under-extracted beverage. Experiment with different grind settings to find the sweet spot that suits your personal taste preferences and brewing method.
Regularly cleaning your grinder ensures consistent, quality grounds for each batch of buna. With the right coarse grind, you're well on your way to crafting a delightful Ethiopian coffee experience.
Step 2. Add Hot Water

With the coarsely ground coffee beans ready, it's time to add the hot water.
Bring a kettle of water to a boil, then carefully pour the steaming liquid over the grounds. The water should be around 195-205°F (91-96°C) for the best extraction. Stir the mixture gently to ensure all the coffee is saturated.
Let the coffee steep for about 4 minutes, allowing the flavors to fully develop. During this time, the grounds will sink to the bottom of the pot.
Once the time is up, slowly pour the coffee through a filter, separating the rich, aromatic liquid from the spent grounds. Be sure to pour the coffee into your favorite mug or cup, ready to enjoy the fruits of your labor.
The perfect cup of buna is now ready to savor!
Step 3. Stir Mixture Thoroughly

After pouring the hot water over the grounds, gently stir the mixture to ensure all the coffee is fully saturated. Use a clean spoon or stirrer to gently move the grounds around, making sure no dry pockets remain. Stir in a circular motion, working from the outside of the container toward the center. This will help evenly distribute the water and create a smooth, consistent brew.
Stirring the buna (coffee) mixture thoroughly is an important step, as it helps release the full flavor and aroma of the grounds. The agitation also helps the water penetrate the porous coffee particles, extracting all the delicious compounds.
Continue stirring for about 30 seconds to a minute, until the liquid appears uniform in color and consistency.
After stirring, let the buna (coffee) brew for the recommended time, typically 4-5 minutes. This final steep will ensure a robust, flavorful cup of coffee. Enjoy your freshly brewed buna (coffee)!
Step 4. Let Coffee Brew Undisturbed

Once you've thoroughly stirred the buna (coffee) mixture, it's time to let it brew undisturbed. This is a crucial step in the process, as it allows the flavors to fully develop and the coffee to reach its optimal strength.
Gently set the pot or carafe aside, ensuring it's on a level surface. Avoid any unnecessary movement or disturbance during this stage. The coffee needs time to steep, extracting all the delightful aromas and rich flavors from the grounds.
Let the buna brew for approximately 4-5 minutes, depending on your personal preference. Resist the temptation to peek or stir the mixture, as this can disrupt the brewing process.
Keep a close eye on the time, and when the timer goes off, your buna will be ready to serve. Pouring the coffee too soon can result in a weaker, less flavorful drink.
Step 5. Strain Coffee Through Fine Mesh

Grab a fine mesh strainer and position it over your serving vessel. Slowly pour the freshly brewed coffee through the strainer, allowing the liquid to drip down into the cup or carafe below. The fine mesh will catch any coffee grounds or sediment, ensuring a smooth, clean cup of coffee.
Take your time with this process, pouring slowly and steadily to get the most out of your brew. Be sure to tilt the pot or press gently on the grounds in the strainer to extract every last drop of that delicious coffee.
Once the liquid has finished dripping, remove the strainer and admire your perfectly strained cup of buna.
This simple step of straining the coffee through a fine mesh adds an extra level of refinement to your brew. Enjoy the rich, smooth flavor of your expertly prepared coffee, savoring each sip.
Final Thoughts
The journey through the fascinating world of buna, or Ethiopian coffee, has been an enlightening one. As you've discovered, the art of preparing and enjoying this cherished beverage is steeped in rich tradition and cultural significance.
From selecting the finest beans to meticulously roasting and brewing them, each step has its own unique charm.
Now, as you savor that final sip, let the flavors linger and the aroma envelop you. Reflect on the care and attention that went into creating this cup of buna.
Remember the smiles and laughter shared during the ritual, the sense of community and connection fostered by this shared experience.
Carry this appreciation for the traditions and nuances of Ethiopian coffee with you, and share the joy of buna with others whenever you can.
For in the end, it's not just about the coffee itself, but the rich tapestry of culture and tradition that it represents.
Frequently Asked Questions
What Is the Difference Between Buna and Regular Coffee?
You may not notice much difference between regular coffee and buna, as both are brewed from roasted coffee beans. However, buna often has a unique flavor profile, stemming from its Ethiopian origins and traditional preparation methods.
How Does the Buna Brewing Process Differ From Other Coffee Brewing Methods?
You'll notice the buna brewing process differs from other methods, as it involves roasting the beans over an open fire and using a clay pot to steep the grounds, resulting in a richer, more intense flavor profile.
Is Buna Coffee More Expensive Than Regular Coffee?
Is buna coffee more expensive than regular coffee? Generally, yes. Buna, a traditional Ethiopian coffee brewing method, often involves more labor-intensive processes, which can make the final product more costly than typical commercial coffee preparations.
Can Buna Coffee Be Purchased in Regular Grocery Stores?
Yes, you can typically find buna coffee in regular grocery stores, though the selection may be more limited compared to specialty coffee shops or online retailers. Prices can vary but are often higher than standard coffee options.
What Are the Health Benefits of Drinking Buna Coffee?
Drinking coffee can provide several health benefits. It's a good source of antioxidants, which can help reduce inflammation and protect against chronic diseases. Plus, it may boost your energy levels and improve cognitive function. Give it a try and see how it makes you feel!
Alem is our Ethiopian cuisine specialist, bringing Ethiopia’s bold, aromatic flavors to Cook if Ya. From the spicy, earthy flavors of doro wat to the fragrant, spongy injera, Alem’s recipes showcase Ethiopian cuisine’s unique and flavorful dishes. His cooking emphasizes the communal nature of Ethiopian meals, perfect for sharing with friends and family.
Ethiopian Cuisine
Tella (Traditional Beer)
Yearning to uncover the centuries-old secrets of Tella, Ethiopia’s traditional beer that connects the past to the present and reflects the resilience of local traditions.

Tella is Ethiopia's centuries-old traditional beer, a cultural treasure that connects the past to the present. This flavorful brew is crafted using local grains like barley, sorghum or millet, along with water, yeast, and optional sugar and spices. The brewing process requires patience, with the soaked grains boiled, strained, and cooled before adding yeast to start fermentation. Tella's unique character varies by region, reflecting the ingenuity and resilience of local traditions. More than just a beverage, Tella symbolizes the identity and values of Ethiopian communities, often shared during social gatherings and celebrations. Intrigued? There's more to discover about this captivating cultural treasure.
Key Takeaways
- Tella is a centuries-old traditional beer that is integral to the cultural heritage and identity of Ethiopia.
- The brewing process involves soaking, boiling, and fermenting local grains like barley, sorghum, or millet.
- Tella is often consumed during social gatherings, celebrations, and religious ceremonies, strengthening community bonds.
- The unique regional variations and artisanal production methods showcase the craftsmanship and cultural significance of Tella.
- Tella contains beneficial nutrients and may offer probiotic benefits, making it a healthier alternative to commercial beers.
History
Tella, the traditional beer of Ethiopia, traces its origins back centuries, woven into the very fabric of the country's cultural heritage. This beloved beverage has been a cherished part of social gatherings, celebrations, and religious ceremonies for generations.
The process of brewing tella is a time-honored tradition, passed down through the ages, with each family or community having their own unique recipes and techniques.
The ingredients for tella typically include barley, gesho (a type of buckthorn), and water, though the exact proportions and methods can vary. The fermentation process can take several days, creating a satisfyingly complex and flavorful brew.
Tella is often served in clay pots or traditional cups, adding to the authentic experience.
Today, tella remains an integral part of Ethiopian culture, a tangible link to the nation's rich history and traditions.
Whether enjoyed during a festive celebration or as a daily social ritual, this traditional beer continues to bring people together and celebrate the enduring spirit of Ethiopia.
Recipe
Tella, also known as Traditional Beer, is a popular beverage in parts of Africa. It's a fermented drink made from various grains, including sorghum, millet, or barley. The brewing process involves a unique combination of techniques and ingredients that have been passed down through generations.
The recipe for Tella can vary depending on the region and personal preferences, but the core method remains consistent. Crafting this traditional beer requires patience, attention to detail, and a deep understanding of the fermentation process.
- Sorghum or millet flour
- Water
- Yeast
- Sugar (optional)
- Spices (such as ginger, cinnamon, or cloves)
To prepare Tella, begin by mixing the sorghum or millet flour with water in a large pot. Bring the mixture to a boil, stirring constantly to prevent burning. Once the mixture has thickened, remove it from heat and allow it to cool.
Add the yeast and, if desired, a small amount of sugar. Cover the pot and let the mixture ferment for several days, stirring occasionally, until the desired level of fermentation is achieved.
When the Tella is ready, you may wish to strain it to remove any sediment or debris. The final product can be served chilled or at room temperature, and it can be enjoyed on its own or paired with traditional African dishes.
Keep in mind that the flavor and alcohol content of Tella can vary depending on the length of fermentation and the specific ingredients used.
Cooking Steps
To get started, you'll need to soak the grains in water overnight.
Then, bring the soaked grains to a boil and let them simmer.
After that, strain the boiled grains to collect the filtered mixture.
Step 1. Soak Grains Overnight in Water

Soaking the grains overnight in water is a crucial step in the tella-making process. This allows the grains to soften and swell, preparing them for the next stages of the fermentation.
Start by rinsing the grains, such as sorghum, barley, or wheat, in clean water. Then, place them in a large container and cover them completely with fresh water. Let the grains soak for at least 8 hours, or overnight, ensuring they've ample time to absorb the moisture.
After the soaking period, drain the excess water, leaving just the plump, hydrated grains. This step is essential for achieving the desired texture and flavor in your tella.
The softened grains will be easier to grind, extract the sugars, and ferment, resulting in a smooth, rich traditional beer. Remember to keep the soaked grains covered and in a cool, dark place until you're ready to move on to the next step in the tella-making process.
Step 2. Boil the Soaked Grains

Next, you'll want to boil the soaked grains to begin the cooking process. In a large pot, combine the soaked grains and enough fresh water to cover them by about an inch.
Bring the mixture to a rolling boil over high heat, then reduce the heat to low and let it simmer for 30-45 minutes, stirring occasionally. This will soften the grains and begin the process of breaking down the starches.
Keep an eye on the pot and add more water if the mixture starts to look too dry. You'll know the grains are ready when they're soft and easily mashable.
Once they've reached the desired texture, remove the pot from the heat and let the contents cool slightly before moving on to the next step. This gentle boiling helps prepare the grains for the fermentation that will create the signature flavors of your traditional tella beer.
Step 3. Strain the Boiled Grains

After the grains have been gently boiled, you'll need to strain them. Grab a large, clean colander or strainer and place it over a bowl or pot. Slowly pour the hot, boiled grains into the strainer, allowing the liquid to drain off. Be careful – the grains will be very hot!
Gently press down on the grains with a spoon to help release more of the liquid. You want to extract as much of the flavorful liquid as possible, while leaving the spent grains behind.
Once the grains have been fully strained, discard them or set them aside for another use, such as animal feed.
The strained liquid is now the wort, the foundation of your tella. Transfer the wort to a clean pot or container.
At this point, you can proceed to the next step of the tella brewing process – cooling the wort. With the grains strained, you're one step closer to enjoying a refreshing, traditional tella!
Step 4. Cool the Filtered Mixture

With the grains strained, the next step is to cool the wort. This is an important process, as the temperature of the liquid must be lowered before the yeast can be added.
First, place the filtered mixture into a large container or pot. Gently stir the liquid to help it cool more quickly. You can also set the container in a sink or tub filled with cold water, which will accelerate the cooling process.
Keep a close eye on the temperature, aiming for around 70-80°F (21-27°C). Once the wort has reached the desired temperature, it's time to add the yeast. This will kickstart the fermentation, transforming the sugars into alcohol and carbon dioxide.
Be sure to cover the container to prevent any unwanted particles from getting in. With the wort cooled and the yeast added, the tella is well on its way to becoming a delicious traditional beer.
Step 5. Add Yeast to Mixture

To kickstart the fermentation process, add the prepared yeast to the cooled wort. This living organism will convert the sugars in the mixture into alcohol and carbon dioxide, bringing your tella to life.
Sprinkle the yeast evenly over the surface of the liquid, then use a clean utensil to gently stir it in. Be careful not to over-agitate the mixture, as this can damage the delicate yeast cells.
Once the yeast is incorporated, cover the vessel and let it sit in a warm, dark place. The yeast will begin multiplying, consuming the sugars and producing the desired alcohol content.
Over the next few days, you'll notice bubbles forming and the mixture becoming more bubbly as fermentation takes hold. This is an exciting stage, as you're one step closer to enjoying your homemade tella!
Keep a close eye on the process, making any necessary adjustments to ensure a successful fermentation.
Final Thoughts
Tella, the traditional beer, holds a unique place in the cultural tapestry of many communities. As you've now added the yeast and allowed the mixture to ferment, it's time to consider the final thoughts.
The end result, a rich and flavorful libation, is well worth the effort. Savor the fruity notes and the satisfying fizz as you share this special drink with friends and family.
Remember, tella is more than just a beverage – it's a living link to the past, a tradition that connects generations. Each sip carries the weight of history, the stories of those who've come before. As you raise your glass, take a moment to appreciate the craftsmanship and the care that went into its creation.
Whether enjoyed during a festive celebration or as a leisurely accompaniment to a meal, tella is a testament to the ingenuity and resilience of your community.
Embrace this time-honored tradition, and let it inspire you to celebrate the enduring spirit of your cultural heritage.
Frequently Asked Questions
How Long Can Tella Be Stored Before It Spoils?
You should consume homemade fermented beverages within a few days to a week, as they don't preserve well and can spoil quickly without proper storage. Proper refrigeration may extend their shelf life slightly, but they're best enjoyed fresh.
What Are the Health Benefits of Drinking Tella?
Drinking a moderate amount of traditional fermented beverages can provide beneficial probiotic effects, aiding digestion and boosting your immune system. However, excessive consumption may lead to health issues, so it's important to enjoy these drinks in moderation as part of a balanced lifestyle.
Can Tella Be Made at Home With Modern Equipment?
You can make tella at home using modern equipment like a fermentation tank, grain mill, and temperature control. With the right ingredients and process, you can brew this traditional beer right in your own kitchen.
Is Tella Safe for Pregnant Women to Consume?
It's best to avoid drinking any alcoholic beverages during pregnancy, as they can potentially harm the developing fetus. Speak with your healthcare provider to determine the safest choices for you and your baby's wellbeing.
How Does the Taste of Tella Compare to Other Traditional Beers?
You'll find that the taste of tella, a traditional beer, differs from other regional brews. It has a distinctive, earthy flavor that's often described as richer and more robust compared to more mainstream beer varieties.
Alem is our Ethiopian cuisine specialist, bringing Ethiopia’s bold, aromatic flavors to Cook if Ya. From the spicy, earthy flavors of doro wat to the fragrant, spongy injera, Alem’s recipes showcase Ethiopian cuisine’s unique and flavorful dishes. His cooking emphasizes the communal nature of Ethiopian meals, perfect for sharing with friends and family.


Lemon Bars
Unlock the secrets to making the perfect lemon bars, a classic American dessert that combines a buttery crust with a...


Brownies
Joyful and decadent, the story of brownies dates back to a historic culinary mishap, unveiling a rich legacy of chocolate-infused...


Chocolate Chip Cookies
Homemade chocolate chip cookies with their buttery, crispy edges and soft, chewy centers have captivated taste buds for generations, but...


Sheet Cake
Discover the delectable world of sheet cake, a versatile and crowd-pleasing dessert that has captured the hearts of celebrations for...


Cupcakes
Baking cupcakes is a delightful endeavor that unveils a world of endless possibilities, from classic flavors to imaginative creations.


Egg Salad Sandwiches
Unlock the secrets to crafting the perfect egg salad sandwich, a timeless classic that delights the senses and satisfies the...


Caprese Sandwiches
Indulge in the irresistible blend of creamy mozzarella, juicy tomatoes, and fragrant basil that makes the Caprese sandwich a beloved...


Turkey and Avocado Wraps
Craving a quick, nutritious, and delicious lunch that satisfies your taste buds? Discover the irresistible combination of Turkey and Avocado...


Pita Pockets
Juicy fillings, crisp veggies, and savory grilled meats come together in these versatile pita pockets that are easy to prepare...


BLT Sandwiches
A timeless classic, the BLT sandwich captivates with its harmonious blend of crisp bacon, fresh lettuce, and juicy tomatoes, leaving...


Gourmet Grilled Cheese
Mouth-watering gourmet grilled cheese sandwiches with artisanal breads and premium cheeses that transform this lunchtime classic into an indulgent culinary...


Italian Sub Sandwiches
Perennially popular for their blend of savory Italian cured meats, creamy cheeses, and crisp veggies, Italian sub sandwiches are a...

-

 Southern Comfort Food22 hours ago
Cheese Straws
-

 African Cuisine1 day ago
Poulet DG (Cameroon)
-

 Southern Comfort Food24 hours ago
Creamed Corn
-

 Brazilian Cuisine1 day ago
Caldeirada
-

 Indian Meals21 hours ago
Gobi Manchurian
-

 Southern Comfort Food23 hours ago
Squash Casserole
-

 Farm-to-Table Cooking24 hours ago
Roasted Bone Marrow With Herb Salad
-

 Polish Comfort Food23 hours ago
Potatoes With Sour Milk