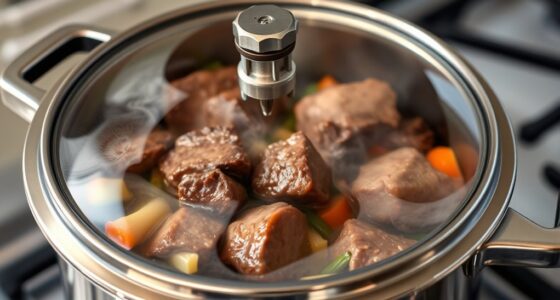
Mastering emulsification is the secret to creating rich, creamy sauces and dressings that won't separate! By whisking ingredients vigorously, you can bind fats and proteins together, trapping air to make your mixtures light and fluffy. Start with classic hollandaise, where you gently heat and continuously whisk egg yolks, lemon, and melted butter. Experiment with different oils, herbs, and seasonings to find your signature vinaigrette. Patience is key – chill your emulsion to enhance that velvety texture. Dive in and discover how easy it is to craft dazzling, stable sauces and dressings right at home.
Key Takeaways
- Emulsification is the process of combining oil and water-based ingredients to create a stable, creamy texture in sauces and dressings.
- Vigorous whisking and gradual addition of oil are essential techniques for building a successful emulsion that prevents separation or curdling.
- Ingredients like egg yolks, mustard, and lemon juice act as emulsifiers, binding the fat and water components together.
- Proper temperature control, such as gentle heat and chilling, helps maintain the stability and desired consistency of the emulsion.
- Experimentation with different ingredients and techniques allows for the development of unique and personalized emulsified recipes, like hollandaise sauce and creamy vinaigrettes.

KarDoL 2 Pack Stainless Steel Spring Coil & Flat Whisks – Scandinavian Handheld Design for Eggs, Cream, Sauces, Gravy – Spiral Whipper Blender Beater Cooking Tools
- Material: Stainless steel for durability and rust resistance
- Design: Scandinavian handheld style for comfortable grip
- Size: 10.8 x 2.55 inches, lightweight at 36g
As an affiliate, we earn on qualifying purchases.
As an affiliate, we earn on qualifying purchases.
History
The concept of emulsification has a long and storied history, dating back centuries. Ancient cooks and alchemists discovered that combining certain liquids, like oil and vinegar, could create a thick, creamy sauce. This was a game-changing discovery!
Over time, people learned more about the science behind emulsions. They realized that by whisking or blending ingredients together, the tiny droplets of one liquid get suspended in the other, forming a smooth, stable mixture.
Today, emulsification is used to make all sorts of delicious foods, from salad dressings to mayonnaise. Chefs and food scientists have perfected techniques to create rich, creamy emulsions that don't separate.
Whether you're making a vinaigrette or a hollandaise sauce, understanding emulsification is the key to success. With a little practice, you can master this essential cooking skill and impress your friends and family with your homemade sauces and dressings!
Recipe
Emulsification is a crucial technique in the culinary world, allowing the creation of smooth and stable mixtures of immiscible liquids, such as oil and water. This recipe showcases the principles of emulsification by guiding you through the process of making a classic hollandaise sauce, a rich and velvety emulsion commonly used to enhance dishes like eggs Benedict or grilled asparagus.
Hollandaise sauce is a testament to the power of emulsification. By carefully controlling the incorporation of egg yolks and melted butter, the recipe transforms these simple ingredients into a luxurious, creamy sauce. The key to success lies in maintaining a delicate balance and understanding the role of each component in the emulsification process.
Ingredients:
- 3 egg yolks
- 1 tbsp lemon juice
- 1/2 tsp Dijon mustard
- 1/2 cup (115g) unsalted butter, melted
- Salt and white pepper to taste
Directions:
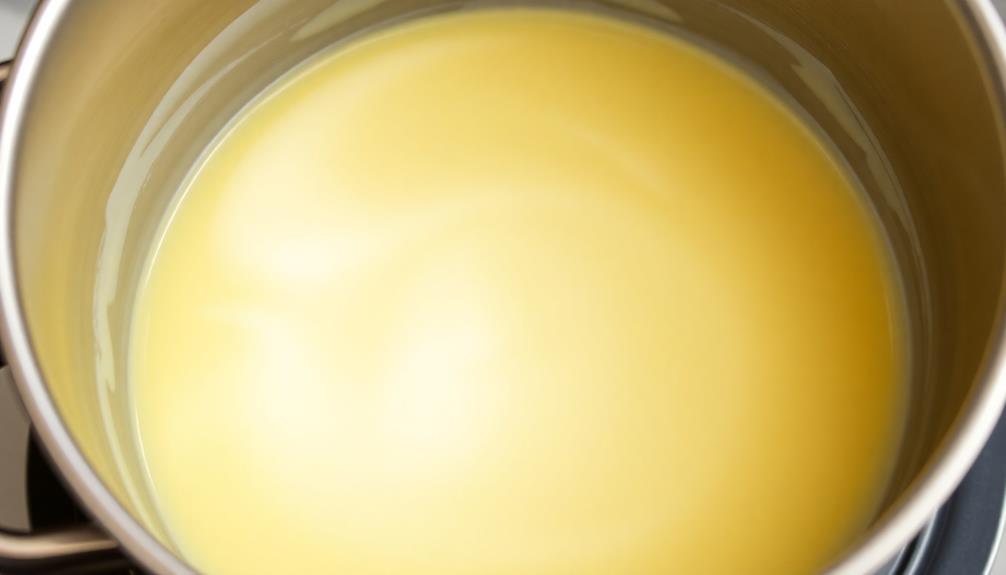
In a double boiler or a heatproof bowl placed over a saucepan of simmering water, whisk the egg yolks, lemon juice, and Dijon mustard until the mixture becomes thick and creamy. Gradually drizzle in the melted butter, whisking constantly to create a smooth and velvety emulsion. Season the mixture with a pinch of salt and pepper to taste, ensuring a perfect balance of flavors. Although this technique isn’t typically found in a Vietnamese tau hu ky recipe, mastering it can elevate a variety of dishes, showcasing your culinary versatility.
Gradually pour in the melted butter while continuously whisking to create a smooth and stable emulsion. Season with salt and white pepper to taste.
When making hollandaise sauce, it's important to maintain a gentle heat and whisk continuously to prevent the eggs from curdling. Additionally, be mindful of the temperature of the melted butter, as it shouldn't be too hot, as this can also disrupt the emulsion.
With a little practice, you'll be able to achieve the perfect hollandaise sauce, ready to elevate your culinary creations.
Cooking Steps
Whisk those ingredients vigorously to create a luscious emulsion!
Slowly add the oil in a thin stream, and watch as the mixture thickens.
Once it's the perfect consistency, pop it in the fridge to chill.
Don't forget to give it a taste and adjust the seasoning or flavor if needed.
Step 1. Whisk Ingredients Vigorously to Emulsify

Whisking vigorously is the key to achieving a stable emulsion. When you whisk the ingredients together, you're creating tiny droplets that are evenly dispersed throughout the mixture. This helps the ingredients bind together and prevents them from separating. For optimal results, ensure your workspace is free of excess dust and moisture, similar to how maintaining an air purifier can enhance its performance air purifier maintenance.
Start by placing your ingredients in a bowl. Use a whisk and move it in a circular motion, applying firm pressure. Don't be gentle – put some elbow grease into it! The faster you whisk, the better. Keep going until the mixture thickens and becomes creamy. This usually takes about a minute or two.
Whisking with vigor traps air, which gives the emulsion a light, fluffy texture. It also breaks down the fat molecules, allowing them to disperse evenly. This process creates a stable, cohesive sauce or dressing that won't separate or curdle.
With a little practice, you'll be whipping up delicious, emulsified recipes in no time!
Step 2. Slowly Add Oil in Thin Stream

After vigorously whisking the initial ingredients, the next step is to slowly add the oil in a thin stream. This gradual incorporation of the oil is crucial for creating a stable emulsion.
As you drizzle the oil, keep whisking steadily to allow the fat molecules to disperse evenly throughout the mixture. The slow, steady addition of oil ensures that the emulsifier (such as egg yolks or mustard) can properly bind the oil and water together, preventing them from separating.
Be patient and take your time with this step. Rushing the oil addition can cause the emulsion to break, leading to a thin, watery consistency.
Maintain a consistent, gentle stream of oil and continue whisking until the mixture thickens and becomes creamy. This technique takes a bit of practice, but with a little care and attention, you'll be able to create beautifully smooth and creamy emulsified sauces and dressings every time.
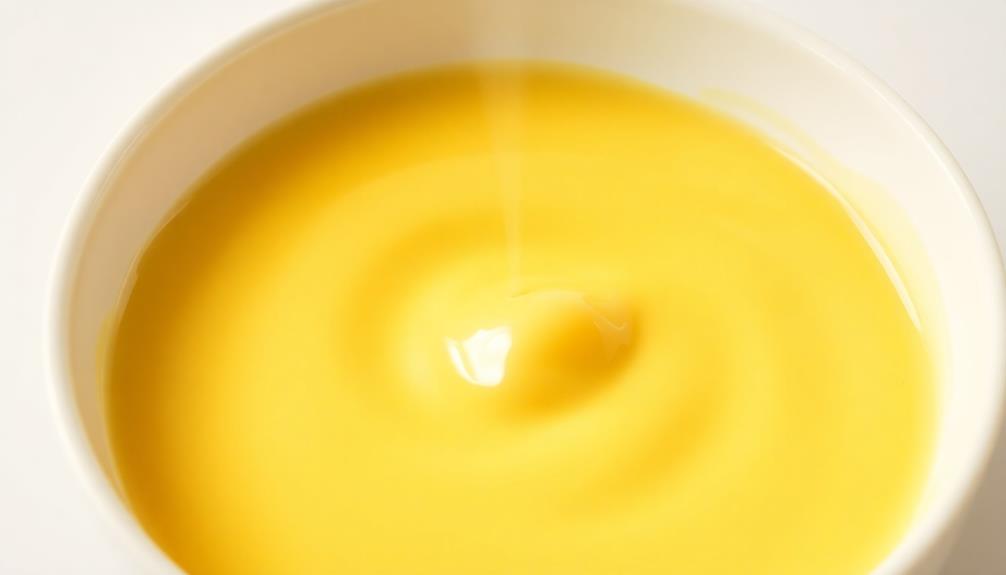
Step 3. Allow Emulsion to Thicken
As the oil is slowly incorporated, the emulsion will begin to thicken. This is a crucial step in creating a stable and creamy sauce or dressing.
Be patient and keep whisking – the emulsion will transform right before your eyes! The gentle agitation helps the proteins and fats to bind together, creating a smooth and velvety texture. You'll notice the mixture become more opaque and voluminous as it thickens.
Occasionally, you may need to add a bit more oil to keep the emulsion going. Just be sure to drizzle it in slowly, continuing to whisk vigorously.
The key is to maintain a steady, consistent pace. Don't worry if it seems to take a while – great things come to those who wait!
Once the emulsion reaches your desired consistency, you can move on to the next steps in your recipe. Enjoy the satisfaction of watching your homemade sauce or dressing come together with just a little time and effort.
Step 4. Refrigerate Emulsion for Desired Thickness
Once you've achieved the desired thickness through the emulsion process, you can chill the mixture in the refrigerator to further thicken it.
Placing the emulsion in the fridge allows the ingredients to cool and solidify, resulting in a richer, more velvety texture. While waiting, consider enjoying a cup of herbal tea for its calming effects, as some varieties can promote relaxation and reduce stress, making it a perfect accompaniment to your cooking process popular herbal teas.
As the emulsion chills, the fat molecules will tighten up, creating a thicker consistency. This is especially helpful if you want to use the emulsion as a dipping sauce or a spread. Just be sure to give it enough time, as the cooling process can take 30 minutes or more.
Once it's reached your preferred thickness, you can use the emulsion right away or store it in the fridge for later. Refrigerating the emulsion is an easy way to get the perfect consistency, whether you're making a creamy salad dressing or a silky smooth mayonnaise.
With a little patience, you'll have a delightfully thick and creamy emulsion in no time.
Step 5. Adjust Seasoning or Flavor as Needed
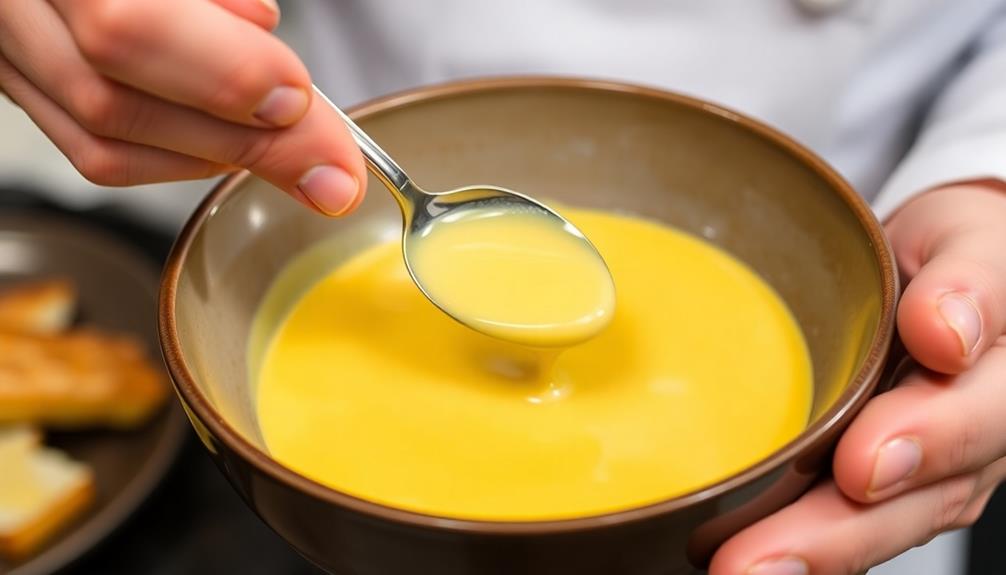
Having chilled the emulsion to the desired thickness, you can now adjust the seasoning or flavor as needed. This is an exciting part where you get to personalize your creation!
Taste the emulsion and think about what it's missing. Does it need a touch more salt to balance the richness? Or maybe a splash of citrus to brighten the flavors? Don't be afraid to experiment – this is where you get to put your own spin on things.
Start by adding small amounts of seasoning or other ingredients, tasting after each addition. This allows you to find the perfect balance without overpowering the dish. Maybe a sprinkle of dried herbs or a squeeze of lemon will do the trick.
You can also try stirring in a bit of honey or maple syrup for a hint of sweetness. Keep tasting and adjusting until the emulsion tastes exactly how you want it. It's all about finding that perfect harmony of flavors that will make your creation truly shine.
Final Thoughts
Emulsification techniques are essential for various industries, from food production to cosmetics. With the knowledge you've gained, you can whip up all sorts of tasty and visually appealing sauces, dressings, and more.
Mastering emulsification opens up a world of possibilities. You can experiment with different ingredients and flavor combinations to create unique and delightful recipes. Whether you're making a creamy vinaigrette or a rich hollandaise, the principles you've learned will help you achieve the perfect texture and consistency every time.
As you continue on your culinary journey, don't be afraid to get creative. Explore new techniques, challenge yourself, and have fun with the process.
Frequently Asked Questions
What Is the Difference Between Emulsions and Dispersions?
Emulsions and dispersions differ in their molecular structure. Emulsions blend two immiscible liquids, while dispersions distribute small particles throughout a fluid. Both are important for creating stable mixtures, but the formation process and final products differ.
How Do I Prevent My Emulsion From Breaking?
To prevent your emulsion from breaking, you should use the right emulsifier, control temperature, and avoid aggressive mixing. Gently incorporate ingredients and store your emulsion in a cool place to maintain its stability.
Can I Use Different Types of Emulsifiers Interchangeably?
You can't always use different types of emulsifiers interchangeably. Each emulsifier has unique properties, and they may not work the same way in a recipe. You'll need to experiment to see which emulsifier works best for your specific dish.
How Do I Adjust the Ph to Stabilize My Emulsion?
To stabilize your emulsion, you'll need to adjust the pH. This can be done by adding an acid or a base, depending on the desired pH level. Experiment with small amounts until you achieve the right balance.
What Factors Affect the Shelf Life of an Emulsified Product?
The shelf life of an emulsified product is affected by various factors, including pH, temperature, preservatives, and the ratio of oil to water. Maintaining the proper balance is key to ensuring your emulsion stays stable over time.