
You'll be amazed at how far gluten-free pizza crusts have come! Once dense and difficult, modern variations now deliver a crispy, chewy texture that satisfies. The key is blending the right gluten-free flours – from rice to corn and potato – and using just the right amount of binding agents and leavening. Follow the simple steps to knead, roll, and bake your way to a golden crust, then top it with your favorite cheeses and toppings for a truly indulgent experience. The perfect gluten-free pizza is within your reach – and there's more to discover about enhancing the flavor.
Key Takeaways
- Gluten-free pizza crust originated in the 1970s due to rising awareness of celiac disease, with early crusts utilizing flour substitutes like rice, corn, and potato.
- Modern gluten-free pizza crust recipes require a blend of gluten-free flours, xanthan gum, and active dry yeast for optimal flavor and structure.
- Proper preparation techniques, such as thorough mixing of dry ingredients, kneading the dough, and rolling it into a circular shape, are crucial for achieving a crispy and chewy crust.
- Baking the crust at 400°F (200°C) for 12-15 minutes until golden helps create the desired texture, followed by adding toppings and further baking for the final cooking.
- Gluten-free pizza crust offers a healthier alternative to traditional wheat crusts, suitable for those with gluten intolerance or celiac disease, while still achieving a crispy and chewy texture.
Top picks for "gluten free pizza"
Open Amazon search results for this keyword.
As an affiliate, we earn on qualifying purchases.
History
The history of gluten-free pizza crust dates back to the 1970s when individuals with celiac disease began seeking alternatives to traditional wheat-based crusts.
As awareness of gluten intolerance grew, bakers and food scientists started experimenting with various flour substitutes, like rice, corn, and potato. These early gluten-free pizzas were often dense and difficult to work with, but over time, recipes and techniques improved.
Today, gluten-free pizza crusts come in a wide variety of styles, from crispy thin-crust to soft and chewy Neapolitan-style.
Advances in gluten-free flour blends and baking methods have made it possible to create crusts that are both delicious and easy to prepare at home.
Whether you're following a gluten-free diet or simply prefer the taste and texture of these alternative pizzas, the history of gluten-free pizza crust is one of innovation, perseverance, and a growing appreciation for diverse dietary needs.
Recipe
Gluten-free pizza crust can be a delicious and healthy alternative to traditional wheat-based crusts. Crafting a gluten-free crust that's both flavorful and structurally sound can be a bit of a challenge, but with the right recipe and techniques, you can create a satisfying homemade pizza experience.
Understanding various IRA investment strategies can help you make informed decisions; similarly, mastering this recipe will empower you to enjoy delicious pizza at home.
This recipe combines a blend of gluten-free flours, along with a few key ingredients, to produce a crust that's crisp on the outside and tender on the inside. Whether you're catering to dietary restrictions or simply looking to explore new culinary horizons, this gluten-free pizza crust is sure to delight.
- 2 cups gluten-free all-purpose flour
- 1 teaspoon xanthan gum
- 1 teaspoon baking powder
- 1/2 teaspoon salt
- 1 tablespoon olive oil
- 1 cup warm water
- 1 teaspoon active dry yeast
Preheat your oven to 400°F (200°C). In a large mixing bowl, combine the gluten-free flour, xanthan gum, baking powder, and salt. Stir to blend the dry ingredients.
Create a well in the center and pour in the olive oil and warm water. Add the active dry yeast and mix until a smooth, pliable dough forms. Knead the dough for a few minutes, then cover and let it rest for 10 minutes.
Once rested, roll or press the dough into your desired pizza shape on a greased baking sheet or pizza stone. Bake for 12-15 minutes, or until the crust is lightly golden and crisp.
Remove from the oven, add your desired toppings, and return to the oven for an additional 10-12 minutes, or until the toppings are heated through and the crust is fully cooked.
When working with gluten-free dough, it's important to be gentle and avoid overworking the dough, as this can lead to a tough and dense crust. Additionally, be sure to let the dough rest before shaping and baking, as this allows the gluten-free flours to hydrate and develop their structure.
With a little practice, you'll be enjoying delicious, homemade gluten-free pizza in no time.
Cooking Steps
First, combine the dry gluten-free ingredients in a bowl and knead the dough thoroughly until it's smooth and pliable.
Next, roll the dough into a circle on a lightly floured surface, then transfer it to a baking sheet.
Step 1. Combine Dry Gluten-Free Ingredients

Grab a large mixing bowl and combine the gluten-free flour, baking powder, salt, and any other dry ingredients the recipe calls for. Once the dry ingredients are thoroughly mixed, make a well in the center and add the wet ingredients. Stir until just combined, being careful not to overmix. This recipe is perfect for creating delicious and allergen-friendly treats for children, especially those with dietary restrictions. If you’re looking for lowfodmap meal ideas for kids, this recipe is a great place to start.
Don't forget to whisk them together thoroughly to ensure even distribution. This step is crucial for creating a uniform, well-structured crust. You want all the dry components to be well-incorporated before adding the wet ingredients.
Take your time and make sure there are no clumps or pockets of unmixed flour. The better you combine the dry ingredients, the smoother and more cohesive your final dough will be.
Once you've got a nicely blended mixture, you're ready to move on to the next step. Just remember, the key to a successful gluten-free pizza crust is all in the preparation.
Pay close attention to how you mix those dry ingredients – it'll make a big difference in the final texture and flavor.
Step 2. Knead the Dough Thoroughly
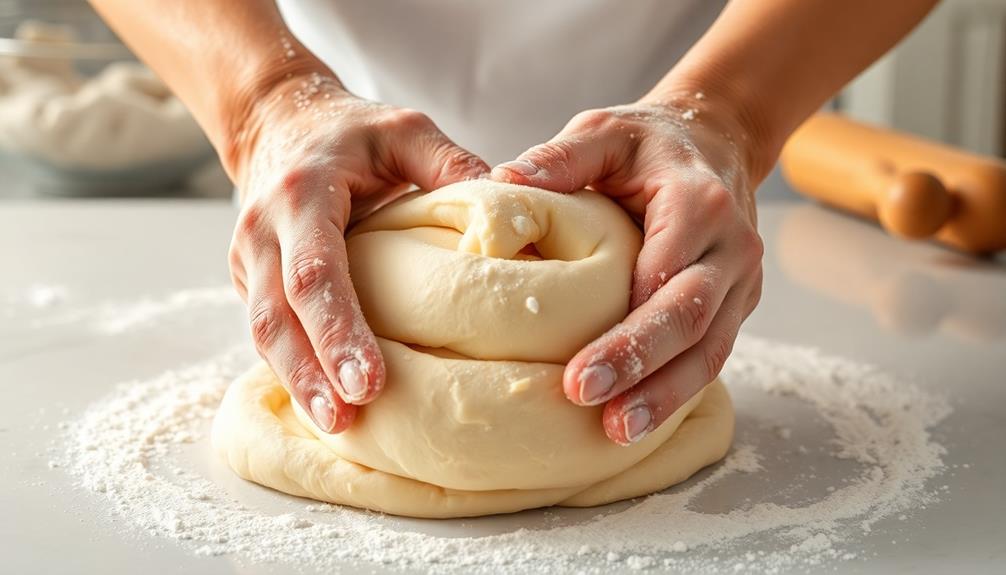
Next, you'll want to knead the dough thoroughly. This step is crucial for developing the gluten-free flours and binding them together into a smooth, pliable texture. Using your hands, press, fold, and stretch the dough for about 2-3 minutes. Don't be afraid to really work it! The more you knead, the better the texture will be. You'll know the dough is ready when it becomes less sticky and forms a cohesive ball.
Once the dough is kneaded, cover it and let it rest for 10-15 minutes. This resting period allows the gluten-free flours to fully hydrate, making the dough easier to roll and shape.
After the rest, you can proceed to roll out or press the dough into your desired pizza crust shape. Remember to be gentle and work the dough delicately, as gluten-free crusts can be more fragile than their wheat-based counterparts.
With a little care and attention, you'll have a perfectly kneaded and rested dough, ready to be transformed into a delicious gluten-free pizza.
Step 3. Roll Dough Into a Circle
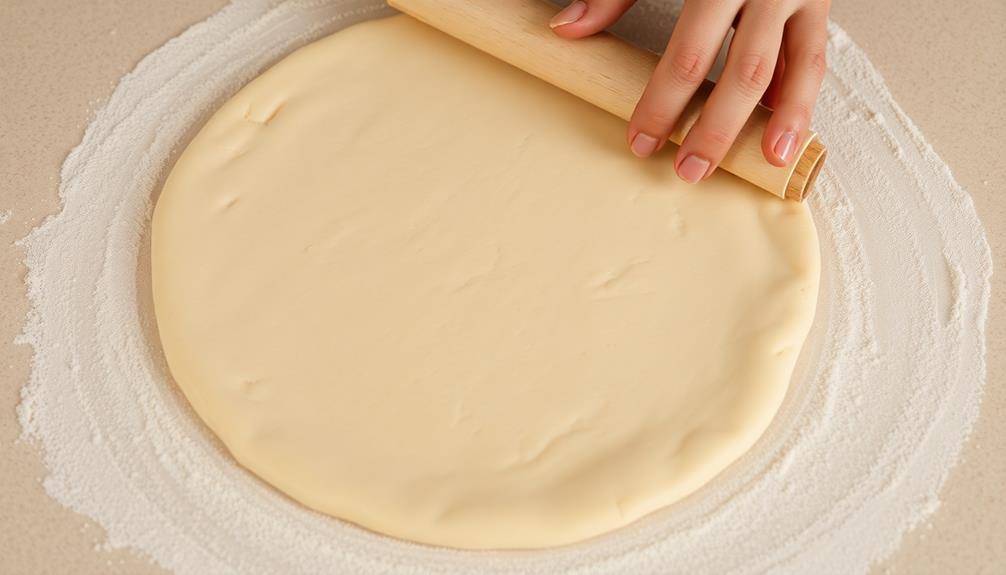
With the dough properly kneaded and rested, it's time to roll it out into a circular shape. First, lightly flour your work surface to prevent sticking. Gently place the dough in the center and use your hands to flatten it into a round disk.
Incorporating chia seeds in baking can enhance moisture and nutritional value, making your crust even healthier. Using a rolling pin, start rolling from the center outward, working your way around the dough. Apply even pressure and rotate the dough frequently to maintain a circular shape. Don't be afraid to add a dusting of flour if the dough begins to stick.
Keep rolling until the dough is about 1/4 inch thick and roughly the size of your pizza pan or baking sheet. Fold the dough in half, then in half again, and transfer it to your prepared pan. Unfold the dough and gently press it into the corners, creating a nice, even crust.
With your base ready, you can now add your favorite toppings and bake your delicious gluten-free pizza.
Step 4. Bake the Crust Until Golden Brown

Preheat your oven to 400°F (200°C). Once it's nice and hot, you'll want to carefully transfer your rolled-out crust onto a baking sheet.
Make sure to use a sheet with a little lip around the edges – this'll help contain any stray toppings later on.
Now, pop that crust in the oven and let it bake for 12-15 minutes. You'll know it's ready when the edges start turning a lovely golden brown.
Keep an eye on it, though, as oven temperatures can vary. You don't want to over-bake and end up with a dry, cracker-like crust.
Once that timer goes off, take a peek. If the center is still a bit soft, give it another 2-3 minutes.
But be careful not to let the edges burn. When it's perfectly golden all over, you're ready to top that baby and finish baking your gluten-free pizza.
Get ready for a crispy, chewy crust that'll have everyone coming back for seconds!
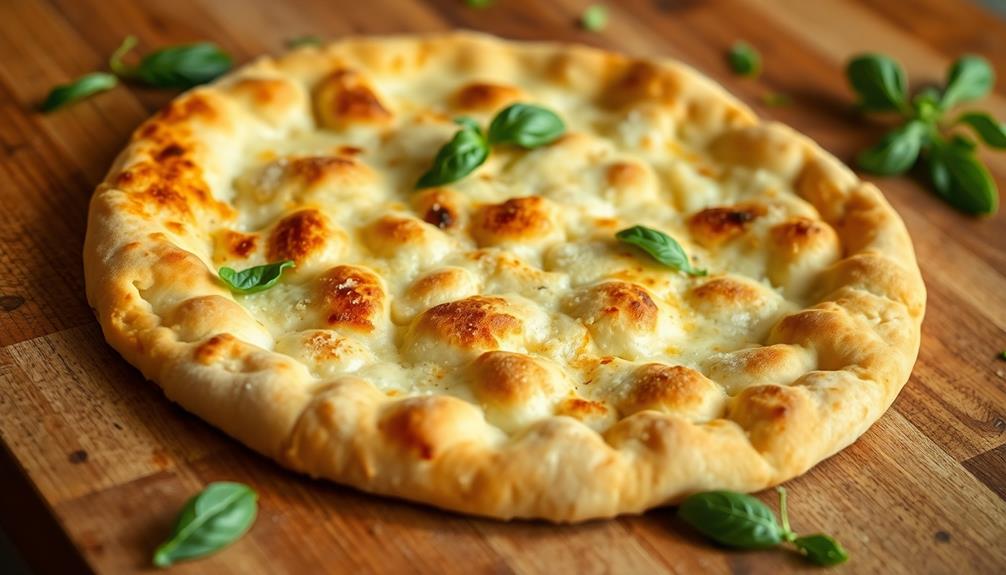
Step 5. Top With Desired Toppings

With the crust baked to perfection, it's time to unleash your culinary creativity.
Top your gluten-free pizza with your favorite toppings, letting your imagination run wild. Start by spreading a thin layer of your preferred sauce, whether it's classic tomato, pesto, or something more adventurous. Then, sprinkle on shredded cheese, making sure to cover the entire surface. Feel free to experiment with different cheese varieties, like mozzarella, cheddar, or even crumbled feta.
Next, add your desired toppings, layering them on evenly. Veggie lovers might opt for sliced mushrooms, bell peppers, and onions, while meat-eaters can indulge in pepperoni, sausage, or grilled chicken.
Don't be afraid to mix and match, creating a truly personalized pizza. Finally, a sprinkle of dried herbs, such as oregano or basil, can enhance the overall flavor.
With your toppings in place, your gluten-free pizza is ready to bake until the cheese is melted and bubbly, resulting in a delicious and satisfying meal.
Final Thoughts
Gluten-free pizza crust can be a fantastic option for those seeking a healthier alternative to traditional wheat-based crusts. With the right recipe and technique, you can achieve a crispy, chewy texture that rivals its gluten-filled counterpart. The key is finding the perfect balance of gluten-free flours, binders, and leavening agents.
While it may take some experimentation, the end result is well worth the effort.
Once you've mastered the crust, the possibilities for toppings are endless. Pile on your favorite veggies, meats, and cheeses to create a truly personalized pizza. Don't be afraid to get creative and try new flavor combinations.
Remember, the beauty of gluten-free pizza is that it allows you to indulge without the guilt.
With a little practice, you'll be whipping up delicious, gluten-free pizzas that will have your friends and family asking for seconds. Enjoy the journey and savor every bite of your homemade masterpiece. And not only will you be impressing your loved ones with your culinary skills, but you’ll also be able to cater to any gluten-free guests who may come to visit. In fact, why not take your newfound gluten-free expertise with you on your next adventure? Glutenfree travel tips can help make your vacation hassle-free, ensuring that you can still indulge in delicious meals without worrying about any gluten-related discomfort. So, embrace your newfound pizza-making abilities and bring a little taste of home with you wherever you go.
Frequently Asked Questions
Is Gluten-Free Pizza Crust Safe for People With Celiac Disease?
Yes, a gluten-free pizza crust is safe for people with celiac disease. It's made without the gluten protein found in wheat, rye, and barley, allowing those with celiac to enjoy pizza without triggering an autoimmune response.
How Does the Texture of Gluten-Free Crust Compare to Traditional Crust?
You'll find that gluten-free pizza crust has a distinct texture compared to traditional crust. It may be crispier on the outside yet chewier on the inside, offering a unique eating experience for those avoiding gluten.
Can I Use This Recipe to Make Other Gluten-Free Baked Goods?
You can use this recipe to make other gluten-free baked goods, as the ingredients and techniques can be adapted to create a variety of gluten-free breads, rolls, and even pizza crusts with a similar texture.
How Long Does Gluten-Free Pizza Crust Stay Fresh After Baking?
Gluten-free pizza crust can stay fresh for up to 3-4 days when stored properly. Keep it in an airtight container at room temperature, and you'll be able to enjoy its crispy, chewy texture for several days after baking.
Are There Any Specific Ingredients I Should Avoid in Gluten-Free Crust?
When making gluten-free pizza crust, you'll want to avoid ingredients like wheat, barley, and rye, as these contain gluten. Opt for gluten-free flours like rice, almond, or coconut flour instead for a safe and tasty crust.