Connect with us

Cooking for Special Diets

Traveling Gluten-Free: Tips for Safe Eating on the Go

Keeping your gluten-free diet on track while traveling can be a challenge, but these tips will ensure a worry-free journey and tasty discoveries along the way.

Published

on

gluten free travel eating tips

Traveling gluten-free doesn't have to be stressful. Do your research ahead of time – check restaurant menus, call ahead, and pack plenty of safe snacks. Clearly communicate your dietary needs to servers, and don't be afraid to ask questions. Avoid shared fryers and sauces to prevent cross-contamination. Carry a gluten-free dining card to assist with ordering. With a positive attitude, you can discover new gluten-free finds and embrace the adventure. Though navigating gluten-free travel takes some preparation, you'll be on your way to a fulfilling, worry-free journey.

Key Takeaways

  • Research gluten-free dining options at your travel destination beforehand to identify safe restaurants and grocery stores.
  • Clearly communicate your dietary needs to restaurant staff and request separate preparation to avoid cross-contamination.
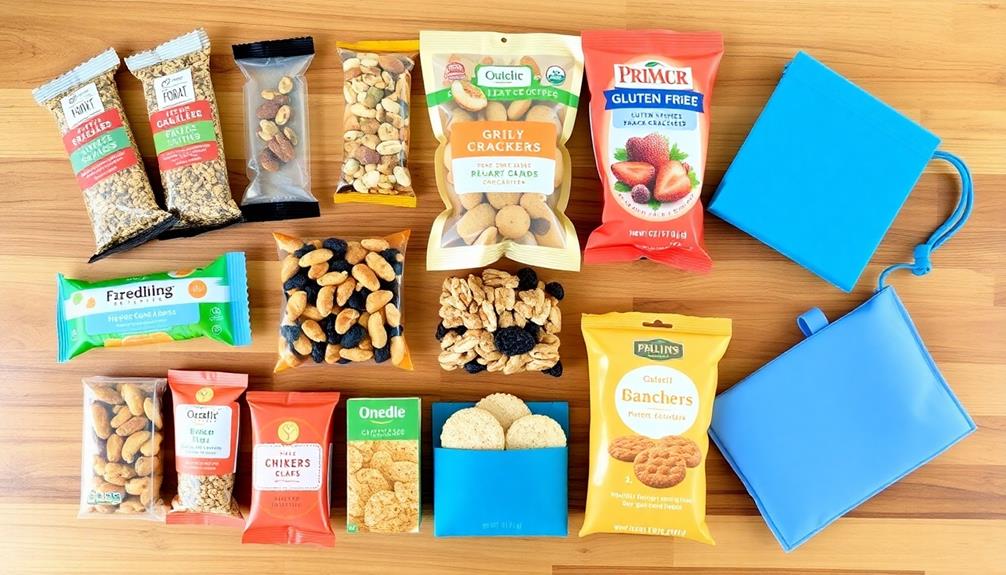
  • Pack portable, nutrient-dense gluten-free snacks and condiments to ensure you have access to safe food during your travels.
  • Embrace the opportunity to discover new gluten-free regional specialties and share your experiences with fellow travelers.
  • Maintain a flexible and positive mindset to adapt to unexpected situations and enjoy the journey, not just the destination.

History

The history of gluten-free travel can be traced back to the early 20th century, when celiac disease was first recognized as a medical condition.

As awareness of this autoimmune disorder grew, people with celiac disease had to find ways to manage their dietary needs while on the road.

In the 1940s, the first gluten-free cookbooks were published, providing recipes and advice for navigating restaurants and hotels.

Recipe

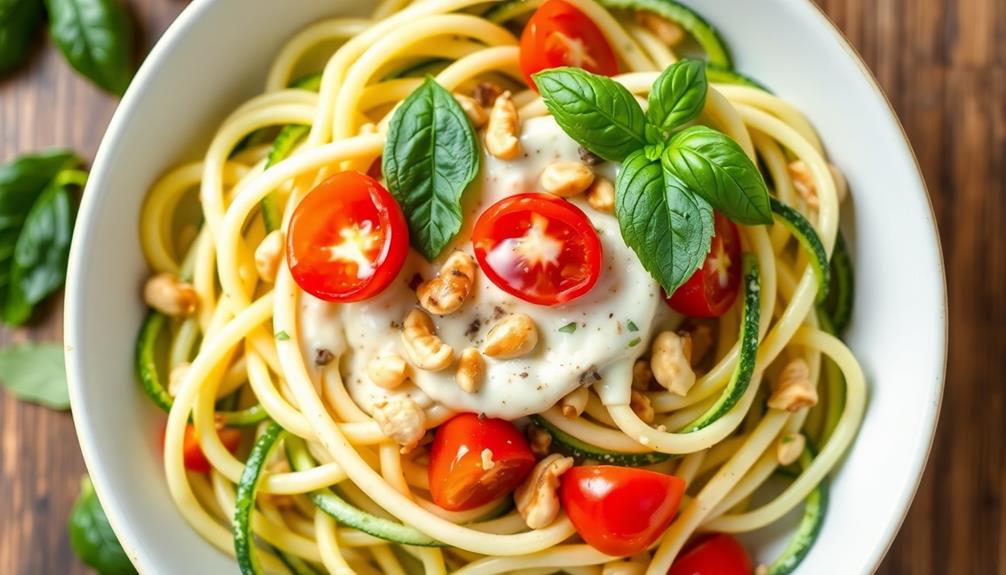
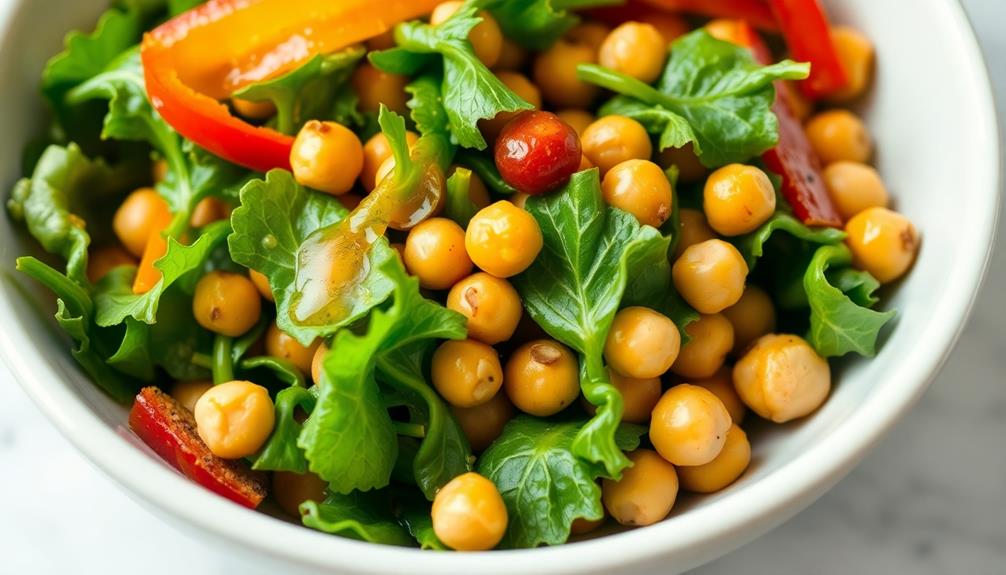
Gluten-free meals can be just as delicious and satisfying as their traditional counterparts. This gluten-free recipe for a hearty and flavorful dish is the perfect option for those with dietary restrictions who still want to enjoy a satisfying meal while traveling.

The key to a successful gluten-free dish is utilizing high-quality, naturally gluten-free ingredients. This recipe showcases the versatility of gluten-free cooking and proves that it's possible to create a tasty and nutritious meal without compromising on taste or texture.

Advertisement
  • 1 lb. gluten-free pasta
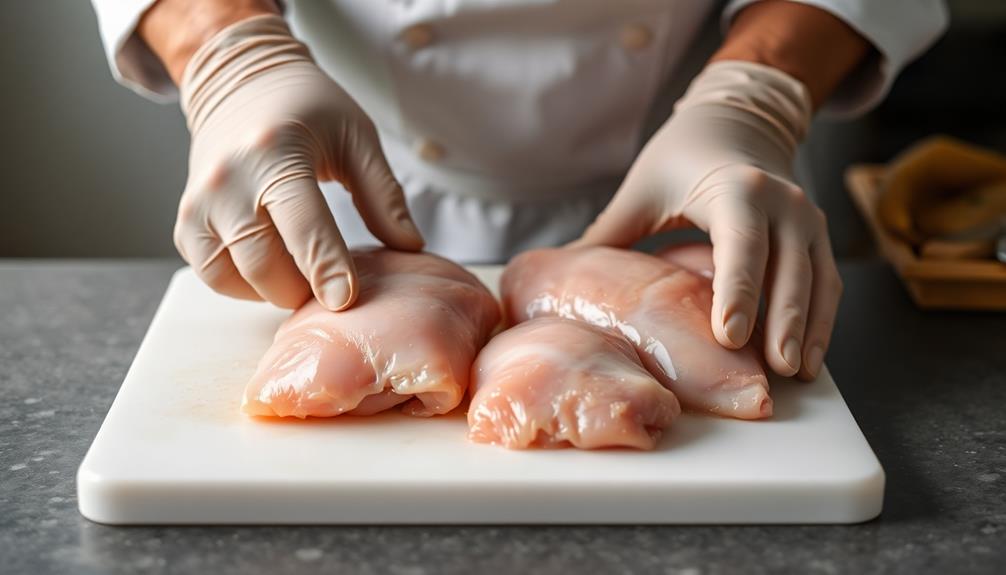
  • 2 boneless, skinless chicken breasts, cubed
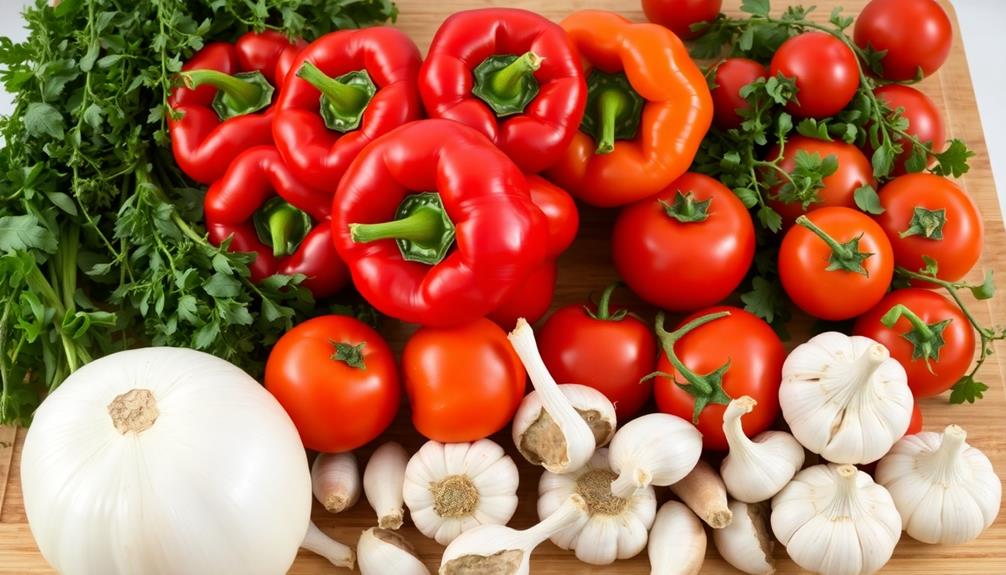
  • 1 red bell pepper, sliced
  • 1 yellow onion, diced
  • 2 cloves garlic, minced
  • 1 (14.5 oz) can diced tomatoes
  • 1 cup gluten-free chicken broth
  • 2 tsp. dried oregano
  • 1 tsp. dried basil
  • Salt and pepper to taste
  • 1/2 cup grated gluten-free Parmesan cheese (optional)

In a large skillet, sauté the chicken, bell pepper, onion, and garlic over medium-high heat until the chicken is cooked through and the vegetables are tender. Add the diced tomatoes, chicken broth, oregano, and basil. Simmer for 15-20 minutes, allowing the flavors to meld.

Meanwhile, cook the gluten-free pasta according to package instructions. Drain the pasta and add it to the skillet, tossing to combine. Season with salt and pepper to taste. If desired, top with grated gluten-free Parmesan cheese before serving.

When preparing this dish, be sure to use a high-quality gluten-free pasta that holds its shape and texture well. Additionally, be mindful of any hidden gluten in the canned diced tomatoes or chicken broth, and always read labels carefully. Enjoy this delicious and satisfying gluten-free meal during your travels!

Cooking Steps

Research gluten-free dining options before your trip so you know where to find safe meals.

Pack plenty of gluten-free snacks to have on hand in case you can't find suitable options.

Be sure to communicate your dietary needs clearly to restaurant staff to avoid any cross-contamination mishaps.

Advertisement

Step 1. Research Gluten-Free Dining Options

explore gluten free restaurant choices

When planning a gluten-free vacation, researching dining options is crucial. Start by checking online for gluten-free restaurant lists and reviews in your destination. Many cities and towns have dedicated gluten-free guides that'll point you to safe eateries. You can also search for dedicated gluten-free restaurants and bakeries.

Don't forget to check the websites and social media pages of local restaurants – they often list allergen information and gluten-free menu items. Additionally, it's important to be aware that certain foods, like grapes, can be toxic to dogs, so if you're traveling with pets, ensure you keep unsafe foods out of reach dogs and grapes.

Once you've compiled a list of potential places, call ahead to confirm their gluten-free offerings and preparation procedures. Ask detailed questions about cross-contamination risks and ingredient sourcing. This extra step ensures you find restaurants that can safely accommodate your dietary needs.

Additionally, familiarize yourself with local grocery stores and markets where you can purchase gluten-free snacks and ingredients to have on hand. Doing your research upfront means you can relax and enjoy your vacation, confident you'll find delicious and safe gluten-free meals.

Step 2. Pack Gluten-Free Snacks Beforehand

pack gluten free snacks ahead

Packing a few key gluten-free snacks beforehand can make all the difference when you're on the road. You never know what dining options you'll find, so it's smart to have some safe choices on hand.

Pack nutrient-dense snacks like trail mix, granola bars, rice cakes, and fresh fruit. Choose items that are individually wrapped and easy to eat, so you can quickly refuel between meals.

Don't forget to include condiments like gluten-free soy sauce or salad dressing, too. With your own snacks ready to go, you'll avoid the stress of finding suitable food options, especially in unfamiliar places.

Advertisement

This way, you can focus on enjoying your travels instead of worrying about what you'll eat. Throw a few extra snacks in your bag, just in case – you'll be glad you did when hunger strikes and gluten-free choices are limited.

Step 3. Avoid Cross-Contamination While Dining Out

prevent cross contamination while dining

To avoid cross-contamination while dining out, speak up and ask questions. Don't be afraid to inquire about the ingredients and preparation methods used for each dish. Many restaurants are happy to accommodate gluten-free diners, so take the time to explain your dietary needs.

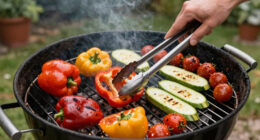
When ordering, request that your meal be prepared on a clean surface and with clean utensils to prevent contamination from other foods. Additionally, avoid fried foods, as the oil used can be shared with items containing gluten. Opt for grilled, baked, or steamed options instead.

Be wary of sauces, dressings, and condiments, as they may contain hidden gluten. Request that these be served on the side so you can control the portions.

Finally, when your meal arrives, do a quick inspection to ensure it looks as you ordered. If you have any concerns, politely notify your server.

With a little communication and vigilance, you can enjoy dining out without the worry of cross-contamination.

Advertisement

Step 4. Communicate Dietary Needs to Staff

inform staff dietary requirements

Communicating your dietary needs to restaurant staff is key to ensuring a successful gluten-free dining experience.

Don't be shy – speak up and let your server know that you have a gluten allergy or intolerance. Clearly explain what you can and can't eat, and ask them to double-check with the kitchen about any menu items you're considering.

It's also a good idea to request that your meal be prepared separately from other dishes to avoid cross-contamination. Feel free to ask questions if you're unsure about an ingredient or cooking method.

Restaurant staff should be happy to work with you to accommodate your dietary requirements. Be polite but firm in your requests, and thank the staff for their assistance.

With some advance planning and clear communication, you can enjoy a safe, gluten-free meal while dining out on your travels.

Step 5. Carry Gluten-Free Dining Card

gluten free dining card required

Alongside your travel essentials, be sure to pack a gluten-free dining card. These handy cards clearly state your dietary needs in the local language, ensuring you can communicate them easily to restaurant staff. You can find pre-made cards online or create your own, tailoring the message to your specific requirements.

When dining out, present the card to your server, explaining that you have a gluten intolerance and need to avoid any gluten-containing ingredients. The card will help the staff understand your needs and make appropriate menu recommendations or modifications.

Advertisement

Don't be afraid to ask questions if you're unsure about a dish – your health and safety are the top priority.

Carrying a gluten-free dining card takes the guesswork out of ordering, allowing you to enjoy your travels without worry. It's a simple yet effective way to navigate the food landscape and savor delicious, safe meals, no matter where your adventures take you.

Final Thoughts

As you begin your gluten-free travels, what final thoughts should you keep in mind?

First and foremost, remember to be patient and kind to yourself. Navigating the challenges of gluten-free dining on the go can be daunting, but with some preparation and a positive attitude, you'll be able to enjoy your travels worry-free.

Don't be afraid to ask questions and advocate for your dietary needs – restaurant staff are often happy to accommodate with a little guidance.

Advertisement

Additionally, try to embrace the adventure! Discovering new gluten-free foods and restaurants can be an exciting part of the journey.

Finally, don't forget to pack your gluten-free dining card and any necessary supplements.

With these essentials and a willingness to adapt, you'll be well on your way to a safe and satisfying gluten-free getaway.

Stay flexible, stay positive, and bon voyage!

Frequently Asked Questions

How Do I Find Gluten-Free Options at Restaurants While Traveling?

When dining out, you can find gluten-free options by checking the menu online, asking your server about available choices, and looking for restaurants that specialize in or clearly mark gluten-free dishes.

Advertisement

What Are Some Tips for Packing Gluten-Free Snacks for a Trip?

When packing gluten-free snacks for a trip, choose non-perishable options like nuts, seeds, dried fruit, and gluten-free crackers or bars. This'll ensure you've got safe, satisfying snacks on hand no matter where your travels take you.

How Can I Ensure My Hotel Room Is Safe for a Gluten-Free Diet?

When booking your hotel, request a gluten-free accommodation. Inform the staff about your dietary needs and ask them to thoroughly clean the room. Bring your own cooking supplies to ensure a safe and comfortable stay.

What Are Some Strategies for Navigating Airline Meals With Dietary Restrictions?

When flying, request a special meal upon booking your ticket. Inform the flight attendant of your dietary needs at the start of the flight. Bring gluten-free snacks in case the meal isn't safe.

How Do I Research Gluten-Free Dining Options Before Arriving at My Destination?

Before your trip, research gluten-free dining options at your destination. Check restaurant review sites, contact your hotel, and look for dedicated gluten-free guides to find safe and convenient meal options.

Advertisement

Advertisement

Cooking for Special Diets

Cooking for Food Allergies: Safe and Delicious Alternatives

Prepare delectable dishes that cater to various food allergies, unlocking a world of culinary exploration and satisfying meals that please every palate.

Published

on

allergy friendly cooking alternatives

Cooking for food allergies can be an exciting challenge! Rather than seeing dietary restrictions as limiting, you can discover delicious and nourishing alternatives. From ancient civilizations to modern science, understanding food allergies opens up a world of creative cooking. With careful preparation and techniques like sautéing veggies and using a food processor, you can craft satisfying meals free of common allergens. Artfully plating the final dish and experimenting with flavors makes mealtime truly special. By staying informed and engaged, you'll unlock a whole new appreciation for the joy of cooking for diverse dietary needs. There's more to discover when it comes to allergy-friendly cuisine.

Key Takeaways

  • Understand the underlying causes and symptoms of food allergies to identify safe and nourishing ingredient substitutions for allergy-friendly cooking.
  • Develop recipes using nutrient-dense, allergy-friendly ingredients like fresh vegetables, lentils, and spices to create satisfying and versatile meals.
  • Employ careful preparation techniques, such as thorough cleaning and ingredient separation, to prevent cross-contamination and ensure food safety.
  • Experiment with cooking methods and flavor profiles to craft delectable allergy-friendly dishes that cater to diverse dietary needs.
  • Stay informed on the latest research in food allergies and engage with the allergy-friendly cooking community to continuously enhance your culinary skills.

History

Food allergies have a long and complex history, tracing back to ancient civilizations. In those early days, people didn't fully understand what caused these reactions. They thought it might be curses, bad spirits, or something in the food itself.

Over time, scientists started to uncover the real reasons behind food allergies. They learned that the immune system plays a big role. When someone with a food allergy eats that food, their body goes into overdrive, trying to fight it off. This can cause all sorts of symptoms, from rashes to trouble breathing.

Nowadays, we know a lot more about food allergies. Doctors can test for them and help people figure out which foods to avoid.

And cooks have gotten really good at making delicious, allergy-friendly meals. They use special ingredients and techniques to make sure everyone can enjoy the food, no matter their allergies.

It's an exciting time, with so many tasty options for people with food allergies!

Advertisement

Recipe

Navigating the culinary world with food allergies can be a daunting task, but with the right recipes, you can create delicious and safe meals. This recipe for a gluten-free, dairy-free, and nut-free dish is a perfect example of how to cater to various dietary restrictions without compromising on flavor.

Incorporating nutrient-dense ingredients can help ensure that you're meeting your nutritional needs while avoiding allergens. This dish is a versatile and hearty meal that can be enjoyed for lunch or dinner. The combination of fresh vegetables, protein-packed lentils, and aromatic spices creates a satisfying and nutritious dish that's sure to please even the most discerning palate.

Ingredients:

  • 1 cup dried brown lentils, rinsed
  • 2 cups vegetable broth
  • 1 tablespoon olive oil
  • 1 onion, diced
  • 2 cloves garlic, minced
  • 1 red bell pepper, diced
  • 1 cup diced zucchini
  • 1 teaspoon cumin
  • 1 teaspoon paprika
  • 1/2 teaspoon dried oregano
  • 1/4 teaspoon cayenne pepper (optional, for a spicy kick)
  • Salt and black pepper to taste
  • Chopped fresh parsley for garnish (optional)

Instructions:

In a medium saucepan, combine the lentils and vegetable broth. Bring the mixture to a boil, then reduce the heat and simmer for 20-25 minutes, or until the lentils are tender and the liquid is absorbed. Set aside.

In a large skillet, heat the olive oil over medium heat. Add the onion and garlic, and sauté for 2-3 minutes, or until fragrant and translucent.

Advertisement

Add the bell pepper and zucchini, and continue cooking for an additional 5-7 minutes, or until the vegetables are tender. Stir in the cooked lentils, cumin, paprika, oregano, and cayenne pepper (if using).

Season with salt and black pepper to taste. Cook for an additional 2-3 minutes, or until the flavors are well combined.

Tips:

To make this dish even more filling, you can serve it over a bed of steamed quinoa or rice. Additionally, you can customize the vegetables to your liking, using a variety of seasonal produce.

For a boost of protein, you can also add a can of drained and rinsed chickpeas or kidney beans. Remember to always read labels carefully to ensure that all ingredients are suitable for your specific dietary needs.

Advertisement

Cooking Steps

First, gather all the necessary ingredients.

Next, chop the vegetables into bite-size pieces.

Then, sauté the vegetables in oil or butter, add your protein and seasonings, and serve the dish immediately on a warm plate.

Step 1. Gather All Necessary Ingredients

collect all required items

The first step in preparing a meal for those with food allergies is to gather all the necessary ingredients. This may seem obvious, but it's crucial to ensure you have everything you need before you start cooking. Checking your pantry and fridge to make sure you have all the allergy-friendly items on your recipe list can help you avoid surprises.

Additionally, consider incorporating calming beverages like herbal tea, which can complement your meal and provide health benefits. Don't forget to read the labels carefully, as some ingredients may contain hidden allergens.

Once you've gathered your ingredients, arrange them on your countertop or workspace. This will help you stay organized and keep track of what you've added to the dish.

Advertisement

If you're working with multiple allergens, it's a good idea to keep the ingredients separated to avoid cross-contamination. Remember to wash your hands and clean your work area thoroughly before you begin cooking.

Step 2. Chop All Vegetables Into Bite-Size Pieces

chop vegetables into pieces

Next, chop all the vegetables into bite-size pieces. This is an important step to ensure even cooking and make it easier for your guests to enjoy the meal.

Using a sharp knife, carefully slice the carrots, bell peppers, and zucchini into small, uniform cubes. For the onions, peel off the outer layers and chop them into small pieces. Remember to handle the knife with care and keep your fingers curled under to avoid any accidents.

If you have a food processor, you can use it to quickly and evenly chop the veggies. Just be sure not to over-process them, as you want them to maintain a nice texture. Incorporating fresh herbs like cilantro can also enhance the flavor and provide health benefits for dogs in moderation.

Once everything is chopped, give the vegetables a gentle toss to mix them together. This will help the flavors meld and create a visually appealing dish.

With the vegetables all prepped, you're one step closer to a delicious, allergy-friendly meal.

Advertisement

Step 3. Sauté Vegetables in Oil or Butter

saut vegetables in oil

Frequently, sauté the chopped vegetables in a small amount of high-quality oil or butter over medium heat. This method helps to soften and caramelize the vegetables, bringing out their natural flavors.

Be sure to stir the vegetables occasionally to ensure even cooking. If you're using butter, keep a close eye to prevent it from burning. The key is to cook the vegetables until they're tender but still have a slight bite. This usually takes around 5-7 minutes, depending on the size of the pieces.

For extra flavor, try adding a pinch of salt, pepper, or your favorite herbs and spices. Sautéing is a great way to prepare vegetables for a variety of dishes, from stir-fries to omelets.

Experiment with different oil and vegetable combinations to find your favorite flavors. Remember to always adjust the heat and cooking time to suit your personal preferences.

Step 4. Add Protein and Seasonings

incorporate protein and spices

After sautéing your vegetables to perfection, it's time to add protein and seasonings to create a well-rounded and flavorful dish. Choosing the right protein can make all the difference. Consider lean options like chicken, turkey, or tofu to keep your meal allergy-friendly.

Simply add your protein of choice and let it cook through, stirring occasionally.

Next, it's time to season your dish. Experiment with a variety of herbs and spices to find the flavors you enjoy. Garlic, onion, and a pinch of salt and pepper are classic starts.

Advertisement

For a little extra zing, try a squeeze of lemon or a sprinkle of paprika. Remember, the key is to build layers of flavor, so don't be afraid to get creative with your seasoning combinations.

As the aromas fill your kitchen, you'll know you're on your way to a delicious, allergy-safe meal.

Step 5. Serve Immediately on Warm Plate

serve immediately on plate

Dish up the prepared meal immediately onto a warmed plate for a professional presentation. This simple step makes all the difference! The hot dish will look and taste its best when served right away. Plus, it shows your guests you've taken the time to create a meal tailored just for them.

After all your hard work, you'll want to showcase the final product. Transferring the food to a heated plate helps it maintain the perfect temperature. This prevents the flavors from getting dull or the textures from becoming soggy. Your carefully crafted dish deserves to be savored at its peak!

When plating, arrange the components artfully. Drizzle sauces, sprinkle garnishes, and place items with intention. This elevates the presentation, making the meal feel more special. Your guests will appreciate the thoughtful touches.

Serve promptly for maximum enjoyment and to ensure those food allergies are properly avoided. With a warm plate and a beautiful display, you're ready to impress!

Advertisement

Final Thoughts

Cooking for those with food allergies can be a rewarding yet challenging endeavor. You've learned how to identify hidden ingredients, use safe substitutions, and serve food that's both allergy-friendly and delicious.

Remember, with a little creativity and resourcefulness, you can prepare meals that cater to everyone's needs. This can include exploring a variety of cuisines, trying new ingredients, or tailoring dishes to meet specific dietary preferences. For those managing high blood pressure, incorporating dash diet recipes for hypertension can be a delicious and effective way to promote heart health. By making simple swaps and focusing on fresh, nutrient-rich foods, you can create meals that are both satisfying and beneficial for your well-being.

Don't be discouraged if a recipe doesn't turn out exactly as planned. Embrace the process of experimentation and enjoy the journey of discovering new flavors. You might even find that your allergy-friendly dishes become family favorites.

As you continue your culinary adventures, stay informed about the latest research and trends in food allergies. This will help you adapt recipes and stay ahead of the curve.

Most importantly, have fun in the kitchen! Cooking for those with food allergies is an opportunity to showcase your skills and spread joy through nourishing meals.

Advertisement

Frequently Asked Questions

How Do I Identify Food Allergens in Recipes?

To identify food allergens in recipes, carefully read through the ingredient list and look for common allergens like nuts, dairy, eggs, wheat, soy, and seafood. Pay close attention to how ingredients are listed to spot potential allergens.

What Are the Best Substitutes for Common Allergens?

When substituting for common allergens, consider using alternatives like nut-free butters, dairy-free milk, and gluten-free flours. Experiment with recipes to find tasty replacements that work for your dietary needs.

How Can I Prevent Cross-Contamination in the Kitchen?

To prevent cross-contamination in the kitchen, use separate cutting boards, utensils, and cookware for different ingredients. Wash your hands and surfaces thoroughly between preparing different dishes. Thoroughly clean the kitchen before cooking for someone with food allergies.

Are There Any Tips for Dining Out With Food Allergies?

When dining out with food allergies, check the menu carefully, ask detailed questions about ingredients, and inform your server of your dietary needs. Bring your own condiments and be prepared to request modifications to menu items.

How Can I Make Recipes More Allergy-Friendly for Guests?

You can make recipes more allergy-friendly by substituting common allergens with safe alternatives, using fresh, whole-food ingredients, and clearly labeling dishes to avoid cross-contamination. Get creative with flavors and textures to satisfy everyone's dietary needs.

Advertisement

Continue Reading

Cooking for Special Diets

Anti-Inflammatory Diet: Foods to Combat Chronic Inflammation

Jumpstart your journey to better health with the anti-inflammatory diet, a flavorful approach that harnesses the power of whole foods to fight chronic inflammation.

Published

on

chronic inflammation combat foods

Looking to combat chronic inflammation and boost your overall health? The anti-inflammatory diet might be just what you need! This approach emphasizes delicious whole foods packed with nutrients that can help reduce inflammation. From omega-3 rich fish and antioxidant-filled fruits and veggies to soothing spices like turmeric, this diet offers a bounty of flavorful options. By incorporating these anti-inflammatory ingredients into your meals, you can not only manage various health conditions but also improve your digestion and mental clarity. Curious to learn more about the cooking steps and lifestyle changes involved? Keep reading to explore the ins and outs of this transformative dietary approach.

Key Takeaways

  • An anti-inflammatory diet focuses on whole, nutrient-dense foods rich in omega-3 fatty acids, antioxidants, and phytochemicals to reduce chronic inflammation.
  • Common anti-inflammatory ingredients include fish, flaxseeds, fruits, vegetables, olive oil, and spices like turmeric and ginger.
  • Adopting an anti-inflammatory diet can enhance overall health, support immune function, and lower the risk of chronic diseases.
  • Meal preparation for an anti-inflammatory diet emphasizes fresh produce, lean proteins, and mindful cooking techniques to preserve nutrient content.
  • Committing to an anti-inflammatory lifestyle requires patience, as the benefits often manifest gradually with consistent dietary changes.

History

The anti-inflammatory diet has its roots in ancient medicinal practices, with references to its principles found in traditional systems of healing across the globe. For centuries, people have recognized the power of certain foods to reduce inflammation in the body.

In ancient China, practitioners of traditional Chinese medicine used herbs and dietary changes to address inflammatory conditions. Similarly, Ayurvedic medicine from India has long emphasized the importance of a balanced, whole-foods-based diet to promote overall health and well-being.

As modern science has advanced, researchers have begun to uncover the mechanisms behind the anti-inflammatory properties of various foods. Studies have shown that compounds like omega-3 fatty acids, antioxidants, and phytochemicals can help to calm inflammation at the cellular level.

This growing body of evidence has led to the popularization of the anti-inflammatory diet in recent decades, as people seek natural ways to manage chronic inflammatory conditions and support their overall health.

Recipe

Eating an anti-inflammatory diet can help reduce chronic inflammation and improve overall health. Incorporating anti-inflammatory spices like turmeric and ginger not only enhances flavor but also provides significant health benefits; studies show Turmeric's potent effects can help reduce markers of inflammation.

Advertisement

This recipe for a delicious and nutritious anti-inflammatory meal is easy to prepare and packed with beneficial ingredients. The combination of fresh vegetables, lean protein, and anti-inflammatory spices creates a flavorful and satisfying dish that can be enjoyed any time of day.

This recipe is a great option for those looking to incorporate more anti-inflammatory foods into their diet. Packed with nutrient-dense ingredients like turmeric, ginger, and leafy greens, it not only helps reduce inflammation but also adds vibrant flavors to your meals. For those with special dietary needs, you can easily adapt this recipe by exploring cooking tips for food allergies to ensure it’s safe and enjoyable for everyone. Whether you’re meal-prepping or cooking for the family, this dish is both nourishing and versatile.

  • 4 boneless, skinless chicken breasts
  • 2 cups mixed greens (such as spinach, kale, and arugula)
  • 1 cup sliced bell peppers
  • 1 cup diced cucumbers
  • 1/4 cup sliced red onion
  • 2 tablespoons olive oil
  • 1 tablespoon balsamic vinegar
  • 1 teaspoon ground turmeric
  • 1/2 teaspoon ground ginger
  • Salt and pepper to taste

Preheat the oven to 375°F. Season the chicken breasts with the turmeric, ginger, salt, and pepper. Place the chicken on a baking sheet and bake for 25-30 minutes, or until the internal temperature reaches 165°F.

While the chicken is cooking, prepare the salad by combining the mixed greens, bell peppers, cucumbers, and red onion in a large bowl. Whisk together the olive oil and balsamic vinegar, then drizzle over the salad and toss to coat.

Once the chicken is cooked, slice it and add it to the salad. Serve immediately.

To enhance the anti-inflammatory properties of this dish, consider adding additional anti-inflammatory ingredients such as avocado, walnuts, or a sprinkle of ground cinnamon. Enjoy this flavorful and nourishing meal as part of a balanced anti-inflammatory diet.

Advertisement

Cooking Steps

First, gather your ingredients and chop them up.

Next, sauté the veggies in a bit of olive oil until they're nice and tender.

Then, add your spices and seasonings to give it all that delicious flavor.

Now, stir in the rice and let it simmer until it's perfectly cooked.

Step 1. Prepare and Chop the Ingredients

chop ingredients for preparation

To prepare the ingredients for your anti-inflammatory diet, begin by carefully chopping up the fresh vegetables and herbs.

You'll want to wash them thoroughly and pat them dry before cutting. Dice the onions, mince the garlic, and chop the leafy greens like spinach or kale into bite-sized pieces.

Advertisement

Remember to use a sharp knife to ensure clean, even cuts. For the fruits, such as berries or citrus, gently rinse and slice or dice them as needed.

Don't forget to zest the lemon or orange if the recipe calls for it. As you prepare each ingredient, place them in separate bowls so they're ready to go when you start cooking.

This step might take a little extra time, but it'll make the actual cooking process much smoother and quicker. Plus, having all your ingredients prepped and within reach will help you stay organized and focused while you cook.

Step 2. Sauté Vegetables in Olive Oil

saut vegetables with olive oil

Next, heat a large skillet or sauté pan over medium heat and add a tablespoon or two of high-quality extra virgin olive oil.

Once the oil is hot, carefully add the chopped vegetables to the pan. Be sure to spread them out in an even layer so they can sauté properly.

As the veggies cook, use a spatula to stir and flip them occasionally. This helps them brown evenly and absorb the delicious olive oil flavor.

Advertisement

Sauté the vegetables for about 5-7 minutes, or until they're tender and starting to caramelize around the edges.

Now, you can add any additional seasonings you'd like, such as garlic, herbs, or a pinch of salt and pepper.

Gently toss the veggies to coat them in the spices. Continue sautéing for another minute or two, until everything is fragrant and well-combined.

Once the vegetables are cooked to your liking, remove the pan from the heat.

You're now ready to build your anti-inflammatory meal by adding the sautéed veggies to your dish.

Advertisement

Step 3. Add Spices and Seasonings

incorporate spices and seasonings

Now that the vegetables have been sautéed, it's time to add any desired spices and seasonings. This is where you can really bring out the flavors and make the dish your own.

Reach for your favorite dried herbs like oregano, basil, or thyme. A sprinkle of garlic powder, onion powder, or paprika can also add delicious depth.

Don't be afraid to get a little adventurous – try a dash of cumin, chili powder, or curry powder for some warmth and complexity. Freshly ground black pepper is a must to finish it off.

Stir everything together and let the aromas fill your kitchen. The key is to start with a small amount of each spice and adjust to your taste. That way, you can find the perfect blend that tantalizes your taste buds.

Have fun experimenting and find the flavors that make this dish sing!

Step 4. Add Rice and Simmer

add rice simmer gently

Once the vegetables are seasoned, go ahead and add the rice. You'll want to use a long-grain white rice or brown rice for the best texture. Gently pour the rice into the pot, making sure to evenly distribute it throughout the vegetables. Give everything a good stir to combine the flavors.

Now, it's time to add the liquid. Pour in some broth or stock, enough to just cover the rice and veggies. Bring the mixture to a gentle simmer, then reduce the heat to low, cover the pot, and let it cook for about 20 minutes. Resist the urge to lift the lid and peek – you want to keep all that delicious steam trapped inside!

Advertisement

After 20 minutes, the rice should be tender and the vegetables will be nicely cooked through. Fluff the rice with a fork and serve hot. The combination of the aromatic spices, fresh vegetables, and hearty rice makes for a satisfying and nourishing anti-inflammatory meal.

Step 5. Garnish With Fresh Herbs

garnish with fresh herbs

To finish off your anti-inflammatory dish, you'll want to add a few fresh herbs as a garnish. These vibrant green leaves not only look beautiful, but they'll also infuse your meal with an extra burst of flavor. Try sprinkling some chopped parsley, basil, or cilantro over the top. The fresh, herbal notes will complement the other ingredients perfectly.

Additionally, many of these herbs possess their own anti-inflammatory properties, enhancing the health benefits of your meal.

Don't be afraid to get creative with your herb choices. Maybe you'll want to try something a little different, like rosemary or thyme. Just make sure to chop the herbs finely so they're evenly distributed.

You can even try tearing the leaves with your fingers for a more rustic look.

The herbs will add a lovely pop of color and a refreshing finish to your anti-inflammatory dish. Plus, many herbs are packed with their own anti-inflammatory properties, making them a wonderful addition to your healthy meal.

Advertisement

Final Thoughts

The anti-inflammatory diet's true power lies in its ability to transform your overall health and well-being. By choosing nutrient-rich, whole foods, you'll nourish your body and reduce inflammation.

This approach isn't a quick fix; it's a lifestyle change that takes time and commitment. But the rewards are immense. As you incorporate more anti-inflammatory ingredients into your meals, you may notice increased energy, improved digestion, and even a boost in your mood.

Don't be discouraged if change doesn't happen overnight. Stick with it, and you'll start to see the benefits. Savor the delicious flavors, and enjoy the process of preparing wholesome, healing meals.

Frequently Asked Questions

How Can I Modify This Diet for a Vegetarian Lifestyle?

To modify this diet for a vegetarian lifestyle, focus on incorporating more plant-based anti-inflammatory foods like leafy greens, berries, nuts, seeds, and whole grains. You can also include plant-based protein sources and healthy fats to support your dietary needs.

What Are the Potential Side Effects of an Anti-Inflammatory Diet?

While an anti-inflammatory diet can be beneficial, you may experience side effects like gastrointestinal discomfort, changes in bowel habits, and potential nutrient deficiencies if you don't properly plan your meals. Always consult a healthcare professional before making significant dietary changes.

Advertisement

Can I Combine This Diet With Other Dietary Restrictions?

You can certainly combine an anti-inflammatory diet with other dietary restrictions, but it's essential to consult a healthcare professional to ensure the combined approach meets your nutritional needs and doesn't interfere with any existing medical conditions or treatments.

How Long Should I Follow an Anti-Inflammatory Diet for Optimal Results?

You should follow an anti-inflammatory diet for at least 4-6 weeks to see optimal results. The duration can vary depending on your health condition and individual response, but consistent adherence is key for reducing inflammation effectively.

Are There Any Supplements That Can Complement This Dietary Approach?

Supplements like omega-3 fatty acids, turmeric, and ginger can complement an anti-inflammatory diet by providing additional anti-inflammatory benefits. However, it's best to consult your healthcare provider before starting any new supplement regimen.

Continue Reading

Cooking for Special Diets

DASH Diet Recipes: Cooking to Lower Blood Pressure

Your ultimate guide to delectable, blood-pressure-lowering meals with the DASH diet – discover the secret to nourishing your body and pleasing your palate.

Published

on

dash diet recipes collection

The DASH diet recipes are your secret weapon for lowering blood pressure through delectable, nutritious meals. This eating plan emphasizes fresh, whole-food ingredients like fruits, veggies, and lean proteins. Sauté your vegetables in olive oil, add a touch of tomato paste, then simmer until tender. Finish with a sprinkle of fragrant fresh herbs like parsley or basil – they'll uplift the flavors and provide extra health benefits. With the DASH diet, you can enjoy creative, satisfying dishes that nourish your body and please your palate. And there's more to discover about the benefits of this smart approach to cooking for special diets.

Key Takeaways

  • DASH diet recipes feature fresh, whole-food ingredients rich in nutrients, fiber, and antioxidants to promote heart health and lower blood pressure.
  • Sautéing vegetables in olive oil and adding tomato paste enhances flavors and achieves tenderness, creating a savory base for DASH diet recipes.
  • Incorporating fresh herbs like parsley, basil, or oregano at the end of cooking adds color, aroma, and complex flavor profiles to DASH diet dishes.
  • The DASH diet encourages creativity and experimentation with various ingredient combinations to develop healthy and satisfying recipes.
  • Following the DASH diet has been proven effective in lowering blood pressure and improving overall health, making it a suitable dietary choice for those with special health needs.

History

The DASH (Dietary Approaches to Stop Hypertension) diet was developed in the early 1990s by a team of researchers at the National Institutes of Health. They wanted to find a way to help people lower their blood pressure without relying on medication.

Through their studies, they discovered that eating certain foods, like fruits, vegetables, and whole grains, could make a big difference.

The DASH diet quickly became popular because it's easy to follow and doesn't require any special or expensive ingredients. It focuses on eating plenty of nutrient-rich foods and limiting sodium, fat, and sugar.

Over the years, the DASH diet has been shown to not only lower blood pressure but also improve heart health and reduce the risk of other chronic conditions, like diabetes and certain types of cancer.

Today, the DASH diet is one of the most recommended eating plans for people looking to improve their overall well-being.

Advertisement

With its delicious and healthy recipes, it's a great way to nourish your body and mind.

Recipe

The DASH (Dietary Approaches to Stop Hypertension) diet is a healthy eating plan designed to help lower blood pressure and improve overall cardiovascular health. This recipe for a delicious and nutritious dish is perfect for those following the DASH diet.

This dish is a flavorful and satisfying meal that can be enjoyed as a main course or a side. It features a variety of fresh, whole-food ingredients that are packed with essential nutrients, fiber, and antioxidants.

The combination of lean protein, complex carbohydrates, and healthy fats will help to keep you feeling full and satisfied.

Ingredients:

Advertisement
  • 1 cup quinoa, rinsed
  • 2 cups low-sodium vegetable broth
  • 1 cup diced tomatoes
  • 1 cup diced cucumber
  • 1/2 cup chopped red onion
  • 1/4 cup chopped fresh parsley
  • 2 tablespoons lemon juice
  • 1 tablespoon olive oil
  • 1/2 teaspoon ground cumin
  • 1/4 teaspoon salt
  • 1/4 teaspoon black pepper

Cooking Instructions:

In a medium saucepan, combine the quinoa and vegetable broth. Bring to a boil, then reduce heat to low, cover, and simmer for 15-20 minutes, or until the quinoa is tender and the liquid is absorbed.

Remove from heat and fluff with a fork. Allow to cool slightly.

In a large bowl, combine the cooked quinoa, diced tomatoes, diced cucumber, chopped red onion, and chopped parsley. Drizzle with lemon juice and olive oil, and season with cumin, salt, and black pepper. Toss gently to coat.

Extra Tips:

This dish can be served warm or chilled, making it a great option for a quick and easy lunch or a light dinner.

Advertisement

For added protein, you can top it with grilled chicken or shrimp. The quinoa can also be replaced with other whole grains, such as brown rice or farro, to change up the texture and flavor.

Cooking Steps

Start by rinsing and chopping your veggies.

Next, sauté them in a bit of olive oil until they're tender.

Then, stir in some tomato paste and let it all simmer until the vegetables are cooked through.

Don't forget to sprinkle on some fresh herbs at the end for extra flavor!

Advertisement

Step 1. Rinse and Chop Vegetables

rinse chop prepare vegetables

Begin by thoroughly rinsing all the vegetables you'll be using. This helps remove any dirt or debris that may be on them.

Once they're rinsed, place them on a clean cutting board. Grab your sharpest knife and carefully chop the vegetables into the sizes needed for your recipe.

Go slowly and pay close attention to ensure you don't cut yourself. If you're dicing an onion, for example, cut it in half first, then thinly slice each half before chopping across the slices. This creates uniform, bite-size pieces.

For leafy greens like spinach or kale, stack the leaves, roll them up, then slice through to create thin ribbons.

As you chop, try to keep the pieces similar in size so they cook evenly. Consistent cutting also makes for a more attractive final dish.

When you're done, you'll have all your veggies prepped and ready to cook! Just add them to your pot or pan and continue with the recipe.

Advertisement

Step 2. Sauté Veggies in Olive Oil

saut vegetables in olive oil

After chopping your veggies, it's time to sauté them in olive oil. This simple cooking technique brings out the natural flavors and adds a delicious, golden-brown color to your veggies.

Start by heating a large skillet over medium heat and add a tablespoon or two of olive oil. Once the oil is hot, carefully add your chopped veggies. Spread them out in a single layer so they've plenty of room to cook.

Let the veggies sauté for 5-7 minutes, stirring occasionally, until they're tender and slightly crispy. Be sure to keep an eye on them, as you don't want them to burn. Adjust the heat as needed to achieve the perfect sauté.

Once your veggies are done, you can season them with a pinch of salt, pepper, or your favorite herbs and spices.

Serve them as a side dish or incorporate them into your favorite DASH-friendly recipes. Sautéing is a quick and easy way to enjoy the fresh, crunchy texture of your vegetables.

Step 3. Add Tomato Paste

incorporate tomato paste now

With the sautéed vegetables ready, the next step is to incorporate tomato paste. Tomato paste is a concentrated form of tomatoes that adds a rich, savory flavor to your dish.

The addition of tomato paste can also enhance your emotional well-being, as engaging in the cooking process can serve as a calming practice, similar to the ritual of brewing tea.

Advertisement

Grab a spoonful of tomato paste and stir it into the sautéed veggies. As you mix it in, you'll notice the mixture start to thicken and take on a deeper, reddish-brown hue. The tomato paste will help to bind all the flavors together, creating a harmonious blend.

Keep stirring until the tomato paste is fully incorporated. This step enhances the overall taste and texture of the dish, preparing it for the next addition.

The combination of sautéed vegetables and tomato paste lays the foundation for a delicious and satisfying DASH-friendly meal. Continue following the recipe, adding the remaining ingredients to bring this healthy dish to life.

Step 4. Simmer Until Vegetables Are Tender

simmer vegetables until tender

Now that the tomato paste has been stirred in, it's time to let the flavors meld. Reduce the heat to medium-low and let the mixture simmer. This gentle heat will allow the vegetables to become tender and the flavors to blend together beautifully.

As the vegetables cook, consider enjoying a cup of herbal tea to enhance relaxation and complement your meal.

Stirring occasionally, let the mixture simmer for about 15-20 minutes. You'll know the vegetables are done when they're easily pierced with a fork. The carrots and celery should be soft, and the onions should be translucent. Keep an eye on the pot, adding a splash of broth or water if the mixture starts to look dry.

Advertisement

As the vegetables simmer, the aroma will fill your kitchen, making your mouth water in anticipation. The rich, savory flavors will meld together, creating a delightful and satisfying base for your DASH-friendly meal.

Patience is key here, as the slow simmering process allows the ingredients to truly come together.

Step 5. Sprinkle With Fresh Herbs

fresh herbs sprinkle added

Once the vegetables have simmered and reached the desired tenderness, it's time to introduce the bright, fresh flavors of herbs. Adding fresh herbs can't only enhance the taste but also provide nutritional benefits, like those found in celery juice and pregnancy, which are rich in vitamins beneficial for overall health.

Sprinkle a generous amount of your favorite fresh herbs over the top of the dish. Chopped parsley, basil, or oregano work beautifully, adding a pop of color and an aromatic boost. You can use just one herb or combine a few for a more complex flavor profile.

Gently stir the herbs into the vegetables, taking care not to mash or bruise them. This gentle incorporation allows the herbs' flavors to infuse the entire dish. The fresh herbs will instantly uplift the flavors, complementing the simmered vegetables perfectly.

Their fragrance will fill your kitchen, making your senses come alive. Enjoy the contrast of the tender vegetables and the vibrant, herbal notes. This simple step transforms the dish, elevating it from ordinary to extraordinary.

Advertisement

Final Thoughts

The DASH diet is a versatile and effective approach to healthy eating that can benefit individuals of all ages and dietary preferences.

By focusing on nutrient-dense foods like fruits, vegetables, whole grains, and lean proteins, the DASH diet provides a delicious and satisfying way to lower blood pressure and improve overall health.

As you've seen, the recipes in this article showcase the incredible flexibility of the DASH diet.

Whether you're looking for a hearty main dish, a flavorful side, or a sweet treat, there are endless options to explore.

Don't be afraid to get creative and try new combinations of ingredients – the DASH diet encourages experimentation and a love of good food. You might discover unexpected flavor pairings that not only excite your taste buds but also provide numerous health benefits. Incorporating items from the antiinflammatory diet foods list can further enhance your meals by including nutrient-rich options like leafy greens, colorful fruits, and omega-3-rich fish. By combining these foods with DASH diet principles, you can create satisfying dishes that support overall wellness and help reduce inflammation.

Advertisement

Frequently Asked Questions

What Is the Sodium Content in DASH Diet Recipes?

The sodium content in DASH diet recipes is generally low, as the focus is on including whole, unprocessed foods and limiting high-sodium ingredients. You'll find these recipes emphasize fresh produce, lean proteins, and low-sodium seasonings to help manage your blood pressure.

Can DASH Diet Recipes Be Modified for Vegetarians/Vegans?

Yes, you can easily modify DASH diet recipes to make them vegetarian or vegan-friendly. Swap out animal-based proteins with plant-based options, adjust seasonings, and focus on incorporating plenty of fruits, vegetables, whole grains, and legumes.

How Long Do DASH Diet Recipes Take to Prepare?

DASH diet recipes typically take 30-60 minutes to prepare. They emphasize whole, unprocessed ingredients which require some chopping and cooking, but most can be made in under an hour with a bit of planning and preparation.

Are DASH Diet Recipes Suitable for People With Diabetes?

Yes, DASH diet recipes are suitable for people with diabetes. The DASH diet emphasizes whole, nutrient-dense foods that are low in sodium and high in fiber, which can help manage blood sugar levels effectively.

Can DASH Diet Recipes Be Frozen for Later Use?

You can definitely freeze DASH diet recipes for later use. The key is to choose recipes that freeze well and follow proper food storage techniques to maintain quality and safety. This makes meal prep a breeze.

Advertisement

Continue Reading

Affiliate Disclaimer
As an affiliate, we may earn a commission from qualifying purchases. We get commissions for purchases made through links on this website from Amazon and other third parties.

Advertisement

Vetted

top local car washes top local car washes
Vetted2 months ago

14 Best Car Washes Near You for a Sparkling Clean Ride

I discovered the 14 best car washes near you that promise a sparkling clean ride, and you won't want to...

top mops for 2024 top mops for 2024
Vetted2 months ago

The 15 Best Mops of 2025 – Your Ultimate Guide to a Spotless Home

Find the perfect mop for your cleaning needs in 2025, and discover how these top choices can revolutionize your home...

top women s fragrances 2024 top women s fragrances 2024
Vetted2 months ago

15 Best Perfumes for Women in 2025 – A Fragrance Guide You Can’t Miss

Keen to discover the top 15 perfumes for women in 2025? Uncover unique scents that will elevate your fragrance game!

top local bars guide top local bars guide
Vetted2 months ago

14 Best Bars Near You for an Unforgettable Night Out

Looking for the perfect bar to elevate your night out? Discover the 14 best spots that promise unforgettable experiences!

luxurious beard oil selection luxurious beard oil selection
Vetted2 months ago

15 Best Beard Oils for a Luxurious Grooming Experience in 2025

Shop the 15 best beard oils for a luxurious grooming experience in 2025 and discover which ones will elevate your...

top college laptops 2024 top college laptops 2024
Vetted2 months ago

15 Best College Laptops of 2025: The Ultimate Guide for Students

With our guide to the 15 best college laptops of 2025, discover which powerful models will elevate your academic experience...

waterproof mascaras for tears waterproof mascaras for tears
Vetted2 months ago

15 Best Waterproof Mascaras That Will Survive Any Tear-Jerker

Outstanding waterproof mascaras await to keep your lashes flawless through any emotional moment; discover which ones made the top 15...

top flavorful disposable vapes top flavorful disposable vapes
Vetted2 months ago

15 Best Disposable Vapes of 2025: Top Picks for Flavor and Convenience

Prepare to discover the 15 best disposable vapes of 2025 that blend exceptional flavor and convenience, but which ones truly...

refreshing lunch salad ideas refreshing lunch salad ideas
Vetted2 months ago

15 Best Salads Near You That Will Freshen Up Your Lunch Routine

Transform your lunch with the 15 best salads nearby that will tantalize your taste buds and leave you craving more...

top convertible car seats top convertible car seats
Vetted2 months ago

15 Best Convertible Car Seats of 2025 – Safety and Comfort for Your Little One

Get ready to discover the top 15 convertible car seats of 2025 that blend safety and comfort—find out which models...

delicious fast food breakfast delicious fast food breakfast
Vetted2 months ago

15 Best Fast Food Breakfast Options That Will Make Your Mornings Delicious

Uncover the 15 best fast food breakfast options that will transform your mornings into a delicious experience you won't want...

stylish contacts for vision stylish contacts for vision
Vetted2 months ago

14 Best America’s Contacts for Clear Vision and Style

Browse through the 14 best contact lenses in America for clear vision and style, and discover which one perfectly complements...

Trending