Connect with us

Chinese Cuisine

Ma La Xiang Guo (Spicy Stir-fry)

Craving a Sichuan-inspired adventure? Ma La Xiang Guo, the iconic spicy stir-fry, promises a thrilling culinary journey that will leave your taste buds yearning for more.

Published

on

spicy stir fried dish

You're in for a real treat with Ma La Xiang Guo, the iconic spicy stir-fry from Sichuan, China! This dish packs a punch, combining the numbing sensation of Sichuan peppercorns with the fiery heat of dried chilies. You'll find a medley of fresh veggies like bell peppers, cabbage, and mushrooms, plus your choice of protein – chicken, beef, or even tofu. The key is balancing those bold flavors just right. Get ready to stir-fry your way to a delicious and satisfying meal that'll have your taste buds dancing. And there's more to discover about this beloved Sichuan specialty…

Key Takeaways

  • Ma La Xiang Guo is a popular Sichuan dish characterized by its bold, spicy, and numbing flavors, achieved through the use of Sichuan peppercorns and dried chilies.
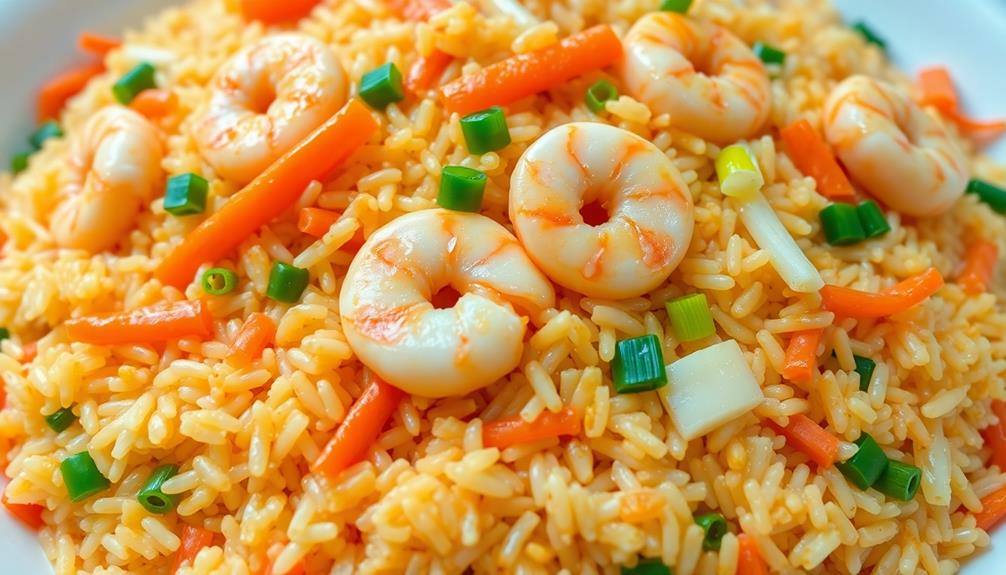
  • The dish features a variety of vegetables, such as bell peppers, cabbage, carrots, and mushrooms, along with protein options like beef, chicken, or tofu.
  • The cooking process involves stir-frying the ingredients at high heat, with a focus on balancing the spicy, salty, and umami flavors through the use of sauces and seasonings.
  • Customization is a key aspect of Ma La Xiang Guo, allowing for the incorporation of different proteins, vegetables, and spice blends to suit individual preferences.
  • Serving the dish immediately and garnishing with fresh herbs can enhance the aromatic and sensorial experience of this beloved Sichuan comfort food.

History

Ma La Xiang Guo's origins can be traced back to the Sichuan province of China, where the dish was first popularized. Sichuan is renowned for its bold, spicy flavors, and this stir-fry is no exception. The name "Ma La Xiang Guo" literally translates to "numbing and spicy fragrant pot," which perfectly captures the signature taste.

The key ingredients in this dish are Sichuan peppercorns, which create a tingling, numbing sensation, and a variety of dried chilies that add a fiery kick. These ingredients are combined with fresh vegetables, protein, and a savory sauce to create a harmonious blend of textures and flavors.

Over time, the dish has evolved, with different regions and households putting their own spin on the classic recipe.

Today, Ma La Xiang Guo has become a beloved comfort food across China and is enjoyed by people of all ages. Whether you're a spice enthusiast or looking to try something new, this dish is sure to tantalize your taste buds and leave you craving more.

Recipe

Ma La Xiang Guo is a spicy and aromatic Sichuan-style stir-fried dish that's immensely popular in China. This dish features a unique blend of Sichuan peppercorns, chili peppers, and a variety of fresh vegetables and proteins, creating a complex and addictive flavor profile.

Advertisement

The key to a delicious Ma La Xiang Guo lies in the careful preparation of the ingredients and the balance of flavors. The Sichuan peppercorns provide a numbing sensation, while the chili peppers bring heat and depth. The combination of these spices, along with the fresh vegetables and proteins, results in a harmonious and unforgettable dining experience.

  • Sichuan peppercorns
  • Dried chili peppers
  • Garlic
  • Ginger
  • Onion
  • Bell peppers
  • Cabbage
  • Carrots
  • Mushrooms
  • Protein (such as beef, chicken, or tofu)
  • Soy sauce
  • Rice vinegar
  • Sesame oil
  • Cornstarch
  • Vegetable oil

To prepare the Ma La Xiang Guo, first, toast the Sichuan peppercorns and dried chili peppers in a dry pan until fragrant. Grind the toasted spices into a powder using a spice grinder or mortar and pestle.

In a wok or large skillet, heat the vegetable oil over high heat. Add the garlic and ginger and stir-fry until fragrant, then add the onions and stir-fry until translucent. Add the bell peppers, cabbage, carrots, and mushrooms, and continue to stir-fry until the vegetables are tender-crisp.

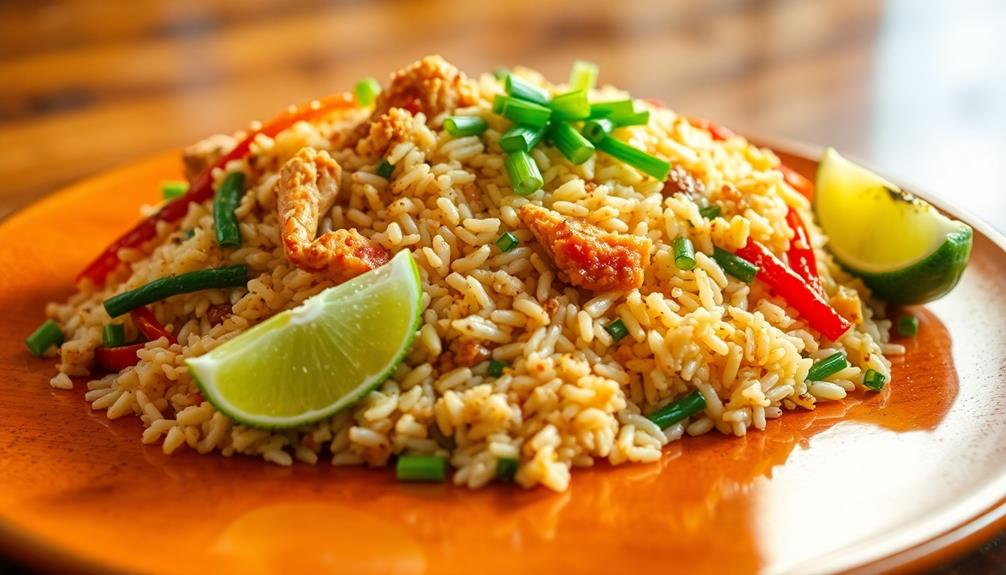
Add the protein and stir-fry until cooked through. Finally, add the soy sauce, rice vinegar, and the ground Sichuan peppercorn and chili powder. Toss everything together and sprinkle with a bit of cornstarch to thicken the sauce. Serve immediately over steamed rice.

When preparing this dish, it's important to have all the ingredients prepped and ready to go, as the cooking process happens quickly. Additionally, be cautious when handling the Sichuan peppercorns, as they can cause a tingling sensation on the tongue. Start with a smaller amount and adjust to your desired level of heat and numbing sensation.

Enjoy the complex and delightful flavors of Ma La Xiang Guo!

Advertisement

Cooking Steps

Soak those dried chili peppers in water to soften them up.

Slice your veggies on the diagonal for a fancier look.

Now it's time to stir-fry everything in the wok, adding that yummy seasoning blend.

Remember to adjust the heat as you go, and serve it all up nice and hot!

Step 1. Soak Dried Chili Peppers in Water

soak dried chili peppers

Soaking the dried chili peppers in water is a crucial step in preparing the Ma La Xiang Guo dish. You'll want to do this first before cooking, as it helps soften the peppers and infuses the water with their spicy flavor.

Simply take the dried chilies and place them in a bowl, then cover them with lukewarm water. Let them soak for about 15-20 minutes, or until the peppers have become pliable and the water has turned a vibrant red color.

Advertisement

This spicy-infused water will add an extra punch of heat and aroma to your final stir-fry. Don't forget to give the peppers a gentle squeeze before adding them to the wok – this helps release even more of their fiery essence.

With the dried chilies prepped and ready, you're one step closer to enjoying the mouth-numbing, tongue-tingling delight that's Ma La Xiang Guo!

Step 2. Slice Vegetables Diagonally

diagonally sliced vegetables preparation

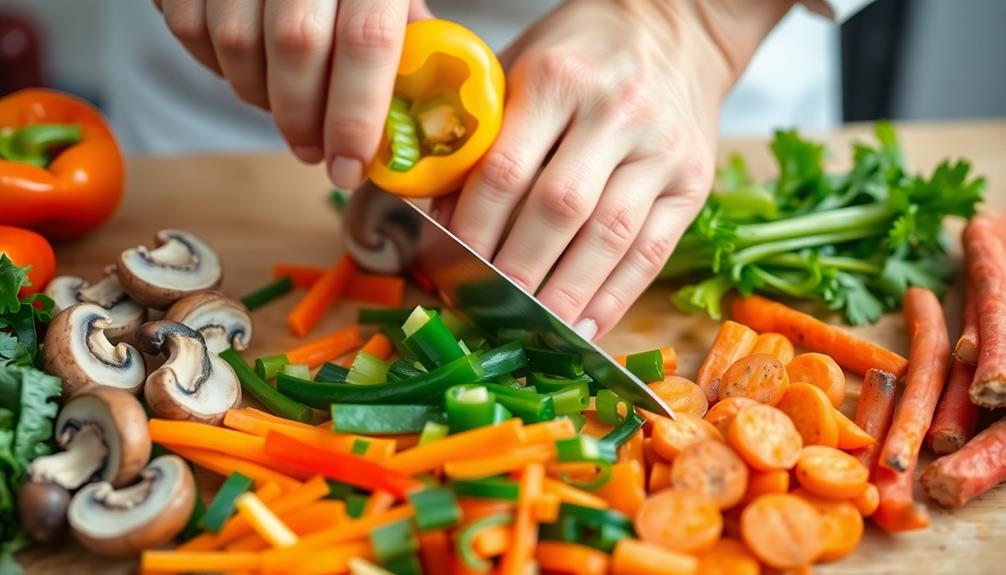
Next, slice the various vegetables diagonally. This cut creates longer, thinner pieces that'll cook up nice and quick. Plus, the diagonal slices look super fancy!

Start with your carrots – hold 'em at an angle and carefully slice through, making long, lean carrot coins. Then do the same with your zucchini and bok choy stems.

For the bok choy leaves, slice 'em crosswise into bite-sized strips. The onions get the diagonal treatment too – just peel, slice in half from top to bottom, and then slice each half at an angle. Easy peasy!

This diagonal cutting technique not only helps your veggies cook up fast, but it also makes your dish look extra impressive. Your friends will think you're a real pro chef.

Advertisement

Now that you've got all your veggies prepped, it's time to start stir-frying! Get ready for some serious flavor.

Step 3. Stir-Fry Ingredients in Wok

stir fry ingredients in wok

Fire up your wok over high heat and add a drizzle of oil. Once it's shimmering, toss in the spicy bean paste, garlic, and ginger. Stir-fry these fragrant ingredients until they release their mouthwatering aromas.

Now, it's time to add your sliced veggies. Sizzle the carrots, bell peppers, and leafy greens, giving them a good stir to coat them in the flavorful oil. Don't be afraid to crank up the heat – you want those veggies to get a nice char around the edges!

As they start to soften, pour in the hot chili oil and soy sauce. Toss everything together, making sure the flavors meld.

Step 4. Add Seasoning Blend

add seasoning blend now

Toss in the spicy bean paste, garlic, and ginger into the wok. Give it a good stir to release all those aromatic scents – it'll make your mouth water!

Next, add in the Sichuan peppercorns and dried red chili peppers. These ingredients pack a real punch of heat and tingling sensation. Don't be afraid, though – the other flavors will balance it out beautifully.

Now, pour in the soy sauce, rice vinegar, and a touch of sugar. The salty, sour, and sweet notes will marry together perfectly. Stir everything well so the seasonings coat all the ingredients evenly.

Advertisement

Finally, sprinkle in some ground Sichuan peppercorns and white pepper. These will add an extra layer of complexity and numbing spice.

Give the wok a final toss, and your Ma La Xiang Guo seasoning blend is ready to go! The combination of spices, aromatics, and umami flavors is sure to make your taste buds dance with delight.

Step 5. Adjust Heat and Serve Immediately

adjust heat serve immediately

Adjust the heat to high at this stage. You're almost done – just a few more steps to go! Crank up that heat to get everything nice and sizzling. This'll help the veggies and proteins get that delicious charred flavor.

Keep a close eye on things and stir constantly so nothing burns. The delightful aromas from the cooking ingredients can enhance your mood, similar to how aromatherapy can stimulate the limbic system and influence emotions.

Once everything is piping hot and the sauce has thickened up, you're ready to serve!

Grab a big ol' bowl and pile in all that spicy, fragrant goodness. The aromas are gonna have your mouth watering, for sure. Sprinkle on some extra Sichuan peppercorns or chili oil if you really wanna amp up the heat.

Advertisement

Don't forget to garnish with some fresh cilantro – it adds a lovely brightness to balance out the bold flavors.

Alright, time to dig in! Grab your chopsticks and get ready for an explosion of mouth-tingling deliciousness. This Ma La Xiang Guo is sure to wake up your taste buds in the best way. Enjoy!

Final Thoughts

Having explored the intricacies of Ma La Xiang Guo, it's time to reflect on the final thoughts.

You've learned how to balance the flavors, adjust the heat, and serve this dish immediately to enjoy its full glory.

Now, consider the versatility of Ma La Xiang Guo. You can easily customize it to suit your taste buds, adding your favorite veggies or proteins.

Advertisement

Don't be afraid to experiment! The beauty of this stir-fry lies in its ability to adapt to your preferences.

Remember, cooking is a journey of self-discovery. With each dish you prepare, you'll gain more confidence and develop your culinary skills.

So, the next time you crave a delightful, spicy adventure, don't hesitate to whip up a batch of Ma La Xiang Guo.

Embrace the challenge, have fun, and savor every bite.

After all, the true joy of cooking is in the journey, not just the destination.

Advertisement

Frequently Asked Questions

What Is the Best Protein to Use in Ma La Xiang Guo?

When it comes to the best protein for your dish, you can't go wrong with a lean cut of beef or pork. Chicken works well too, adding a delicious flavor and tender texture.

How Spicy Is Ma La Xiang Guo Typically?

Ma La Xiang Guo is typically quite spicy, with the level of heat depending on the chef's preference and the amount of Sichuan peppercorns and chili peppers used. It's a dish for those who enjoy bold, intense flavors.

Can Ma La Xiang Guo Be Made Vegetarian or Vegan?

Absolutely! You can easily make a vegetarian or vegan version of this dish by substituting the meat with tofu, mushrooms, or a mix of your favorite vegetables. The key is to maintain the signature ma la flavors.

How Long Do the Leftovers of Ma La Xiang Guo Last?

The leftovers of your dish should last 3-5 days in the fridge when stored properly. Make sure to place them in an airtight container and reheat thoroughly before enjoying the tasty leftovers.

Is Ma La Xiang Guo Suitable for People With Dietary Restrictions?

Whether a dish is suitable for people with dietary restrictions depends on its ingredients. You'll need to check if it contains any items that may conflict with your specific dietary needs.

Advertisement
Continue Reading
Advertisement

Chinese Cuisine

Yunnan Cross-Bridge Rice Noodles

Nestled in the heart of Yunnan, China, Yunnan cross-bridge rice noodles offer a mouthwatering journey through the province’s rich culinary heritage, leaving you craving for more.

Published

on

yunnan rice noodle dish

Yunnan cross-bridge rice noodles are a mouthwatering dish hailing from the vibrant province of Yunnan, China. Tracing their roots to the late Qing dynasty, these noodles were accidentally created by Yunnanese scholars crossing the Long Bridge over the Yangtze River. Today, this UNESCO-recognized culinary treasure features a unique cooking method – you'll assemble the ingredients, then pour in hot, flavorful broth to create an unforgettable dining experience. Get ready to dive into tender rice noodles, fresh veggies, and succulent proteins, all expertly blended for a true taste of Yunnan's rich heritage.

Key Takeaways

  • Yunnan Cross-Bridge Rice Noodles have their origins in the late Qing dynasty of Yunnan province, created by Yunnanese scholars crossing the Long Bridge over the Yangtze River.
  • This noodle dish is recognized as a UNESCO intangible cultural heritage, representing the rich heritage and culinary traditions of Yunnan province.
  • The unique cooking method involves assembling ingredients and pouring hot broth over them, creating a multi-textural dining experience with robust flavors.
  • Yunnan Cross-Bridge Rice Noodles are traditionally served at family gatherings and celebrations, reflecting the dish's cultural significance and symbolism of hospitality.
  • The dish features a flavorful broth, chewy rice noodles, fresh vegetables, and various proteins, offering a balanced and customizable nutritional profile.

History

The origins of Yunnan cross-bridge rice noodles can be traced back to the late Qing dynasty, when Yunnan province's diverse culinary traditions began to take shape.

This unique dish was created by a group of diligent Yunnanese scholars who'd often carry their lunch with them as they crossed the Long Bridge over the Yangtze River. One day, as they were eating, the noodles fell into the hot soup below – and a tasty new dish was born!

The scholars quickly realized that submerging the noodles in the hot broth was actually the key to the dish's delectable flavor. The heat softened the rice noodles while infusing them with the rich, aromatic broth.

Over time, cross-bridge noodles became a beloved specialty in Yunnan, known for their springy texture and mouthwatering savory notes.

Today, this centuries-old recipe is still prepared with care, using fresh regional ingredients that celebrate Yunnan's vibrant culinary heritage.

Advertisement

Recipe

Yunnan cross-bridge rice noodles, also known as "Crossing the Bridge" noodles, is a popular dish originating from the Yunnan province in China. This dish is renowned for its flavorful broth and chewy rice noodles. The unique cooking method involves carefully assembling the ingredients and pouring hot broth over them, creating a visually stunning and delicious meal.

The dish is typically served family-style, with the broth and noodles presented separately, allowing each diner to customize their bowl to their liking. The process of "crossing the bridge" refers to the tradition of the chef bringing the hot broth to the table, creating a sense of anticipation and theater.

Ingredients:

  • 8 oz rice noodles
  • 4 cups chicken or vegetable broth
  • 1 lb boneless, skinless chicken thighs, thinly sliced
  • 2 eggs, beaten
  • 1 cup thinly sliced cabbage
  • 1 cup bean sprouts
  • 1/2 cup thinly sliced green onions
  • 2 cloves garlic, minced
  • 1 tbsp soy sauce
  • 1 tsp sesame oil
  • 1/2 tsp white pepper

Cooking Instructions:

In a large pot, bring the broth to a boil. Reduce heat to low and keep the broth at a gentle simmer.

Arrange the chicken, eggs, cabbage, bean sprouts, and green onions on a serving platter. Serve the hot broth, noodles, and garnishes separately, allowing each diner to customize their bowl.

Advertisement

When cooking this dish, it's important to slice the ingredients thinly to ensure quick cooking and easy assembly. Additionally, make sure the broth is piping hot when served, as the contrast between the hot broth and the fresh, cool ingredients is a key part of the experience.

Enjoy your Yunnan cross-bridge rice noodles!

Cooking Steps

Soak those rice noodles in water until they're nice and soft.

Once the broth's bubbling away, you can start arranging everything – the noodles, the broth, and all the tasty toppings.

Don't forget to add your favorite fixings, then serve it up piping hot for the best slurping experience!

Advertisement

Step 1. Soak Rice Noodles in Water

soak rice noodles thoroughly

Grab a large bowl and fill it with lukewarm water. This is where you'll soak your rice noodles to get them nice and soft.

Make sure the water covers the noodles completely, as they'll expand as they soak. Give the noodles about 20-30 minutes to soak, stirring them occasionally to ensure even softening. You'll know they're ready when they've become pliable and easy to bend without breaking.

Once the noodles have soaked, drain them in a colander. Rinse them under cool running water to remove any excess starch.

This step helps prevent the noodles from sticking together later on. Gently squeeze out any excess water, being careful not to damage the delicate noodles.

Now they're all set to be added to your hot broth or stir-fried dishes! Get ready to enjoy the chewy, slurpable goodness of your Yunnan cross-bridge rice noodles.

Step 2. Bring Broth to a Boil

bring broth to boil

Next, bring a large pot of broth to a rolling boil. This'll be the key to unlocking the mouthwatering flavors of your Yunnan cross-bridge rice noodles.

Make sure to use a generous amount of broth – you want enough to fully submerge the noodles. As the broth heats up, you'll start to see those lively bubbles burst on the surface. That's your cue that it's ready!

Advertisement

Don't be afraid to crank up the heat to get it going. Once it's at a full boil, you can reduce the heat slightly to maintain that steady simmer.

Now, grab your soaked rice noodles and gently add them to the hot broth. Stir them around to make sure they're fully submerged and separated.

Let the noodles cook for just a minute or two until they're tender and pliable. You want them to have a nice bite, not be mushy.

With the broth boiling and the noodles ready, you're one step closer to slurping up a delicious bowl of Yunnan goodness!

Step 3. Arrange Noodles, Broth, and Toppings

arrange noodles broth toppings

With the broth at a rolling boil and the noodles ready, it's time to assemble your Yunnan cross-bridge rice noodle dish.

First, grab a large bowl and carefully pour in some of the steaming hot broth.

Advertisement

Now, use your chopsticks to gently lower the freshly cooked noodles into the broth. Arrange them neatly, making sure they're fully submerged.

Next, it's time for the fun part – adding your favorite toppings! You can load up your bowl with slices of tender beef, juicy chicken, or crisp veggies like baby bok choy.

Don't forget to sprinkle on some chopped scallions and cilantro for extra flavor and color.

Finally, give everything a gentle stir to combine the ingredients.

Your Yunnan cross-bridge rice noodle masterpiece is now ready to enjoy! The hot, fragrant broth, chewy noodles, and tasty toppings make for a truly delightful and satisfying meal.

Advertisement

Step 4. Add Desired Toppings

add toppings as desired

With the noodles and broth ready, you can now start adding your desired toppings. The fun part is choosing all the tasty treats to top off your bowl!

First, you'll want to add some fresh, crunchy vegetables like thinly sliced cabbage, carrot, and green onion. These add great texture and flavor.

Next, consider adding a protein like roasted chicken, beef, or even soft-boiled eggs for extra heartiness.

Don't forget the herbs – fresh cilantro, mint, and Thai basil will really make the dish pop with their aromatic flavors.

For a bit of crunch, try topping it off with crispy wonton strips or peanuts.

Finally, a drizzle of chili oil or sriracha will give it a delightful kick of heat.

Advertisement

Get creative and customize your bowl exactly how you like it! With all these amazing toppings, your Yunnan Cross-Bridge Rice Noodles are about to be taken to the next level of deliciousness.

Step 5. Serve Immediately, While Hot

serve hot immediately enjoy

Once the noodles and toppings are ready, serve the dish immediately while it's hot. The steaming broth, tender noodles, and aromatic toppings are at their best when enjoyed right away.

Don't let the food cool down – dive in and savor every delicious bite!

Transfer the noodles and toppings to a big bowl, then ladle the hot broth over the top. The noodles will soak up the flavorful liquid, creating a comforting and satisfying meal.

Make sure to include all your favorite toppings for the ultimate Cross-Bridge Rice Noodle experience.

As you take that first slurpy spoonful, you'll be transported to the bustling markets of Yunnan. The combination of textures and flavors is simply irresistible.

Advertisement

Final Thoughts

As you've explored the depths of Yunnan's renowned cross-bridge rice noodles, it's clear that this culinary delight offers a unique and captivating dining experience.

From the artful preparation to the robust flavors, every bite transports you to the heart of this vibrant region. What truly sets these noodles apart is the dedication and passion of the chefs who've perfected the craft over generations.

As you reflect on your journey through this culinary adventure, take a moment to savor the memories.

Picture the steaming bowls, the aromatic broth, and the interplay of textures that make each mouthful a delightful discovery.

This is more than just a meal – it's a cultural experience that celebrates the rich heritage of Yunnan and the enduring power of food to bring people together.

Advertisement

Frequently Asked Questions

Can the Noodles Be Made With Different Types of Rice?

You can certainly use different types of rice to make rice noodles. The choice of rice variety will affect the texture and flavor, so experiment to find the one that suits your preferences best.

How Long Do the Noodles Typically Last After Being Cooked?

How long do the cooked noodles typically last? Well, it depends on the type of noodles, but generally, they'll stay fresh for 3-5 days when stored properly in the fridge. Just be sure to keep 'em covered to prevent drying out.

Are There Any Dietary Restrictions Associated With This Dish?

Regarding dietary restrictions, the dish may not be suitable for individuals with gluten or nut allergies. It's always best to inquire about the specific ingredients used to ensure it aligns with your dietary needs.

Can the Toppings Be Customized to Individual Preferences?

You can customize the toppings to your individual preferences. The dish is highly versatile, allowing you to tailor the ingredients to your liking and dietary needs. You have the freedom to create a personalized version of this dish.

Are There Any Health Benefits to Consuming Yunnan Cross-Bridge Rice Noodles?

When you consume rice noodles, you can enjoy some health benefits. They're typically low in fat and calories, and provide complex carbs that can fuel your body. Plus, they're gluten-free, making them a great option for those with dietary restrictions.

Advertisement
Continue Reading

Chinese Cuisine

Red-Braised Pork Belly

A succulent Hunan classic, red-braised pork belly is a melt-in-your-mouth delight that has captivated generations, with its rich soy and brown sugar flavors. Discover the secrets behind this…

Published

on

savory chinese pork dish

Red-braised pork belly is a scrumptious Chinese dish from Hunan Province that's been passed down for generations. You'll start by searing the pork to get a mouthwatering crust, then simmer it in a rich soy and brown sugar sauce with fragrant spices like star anise and cinnamon. The long, slow cooking makes the pork belly melt-in-your-mouth tender. Garnish it with fresh green onions for a pop of color and crunch. Serve this comforting dish with steamed rice, and you'll see why it's considered a true culinary treasure. Want to learn more about the storied history and cooking techniques behind this irresistible dish?

Key Takeaways

  • Red-Braised Pork Belly is a traditional Chinese dish originating from Hunan province, known for its savory, sweet, and aromatic flavors.
  • The recipe features tender pork belly simmered in a rich sauce with key ingredients like soy sauce, rice wine, and brown sugar.
  • Cooking techniques such as blanching, searing, and long braising are essential for achieving the desired tenderness and flavor complexity.
  • The harmonious balance of flavors and textures, including the tender pork and the crunchy green onion garnish, creates an irresistible culinary experience.
  • Patience and skill development are crucial in preparing this dish, as it can be improved by allowing the flavors to meld over time.

History

The origins of red-braised pork belly can be traced back to the Hunan province of China, where this savory and aromatic dish has been a beloved regional delicacy for centuries.

The heart of this classic recipe lies in the slow-cooking process, which allows the pork's natural flavors to mingle with the rich, caramelized sauce. As the pork simmers away, the fat renders down, creating a melt-in-your-mouth texture that's simply irresistible.

Over time, the dish has become a beloved part of Chinese culinary heritage, with families passing down their cherished techniques and secret ingredients from generation to generation.

Whether enjoyed as a family meal or a special occasion feast, red-braised pork belly remains a beloved staple that continues to delight taste buds across China and beyond.

Its captivating combination of savory, sweet, and aromatic notes makes it a true culinary treasure, steeped in the rich traditions of Chinese cuisine.

Advertisement

Recipe

Red-Braised Pork Belly is a classic Chinese dish that features tender, flavorful pork belly slowly simmered in a rich, savory sauce. The long braising time allows the pork to become meltingly tender, while the aromatic spices and soy sauce infuse the meat with deep, complex flavors.

The key to the perfect red-braised pork belly is patience. The dish requires a bit of time and attention, but the results are well worth it. The pork belly is first seared to create a golden-brown crust, then simmered in a mixture of soy sauce, rice wine, and spices until the meat is fall-apart tender.

  • 2 lbs pork belly, cut into 1-inch cubes
  • 3 cloves garlic, minced
  • 1 inch ginger, peeled and sliced
  • 1/2 cup soy sauce
  • 1/4 cup rice wine or Shaoxing wine
  • 2 tablespoons brown sugar
  • 2 star anise
  • 2 cinnamon sticks
  • 4 cups chicken or beef stock

In a large Dutch oven or heavy-bottomed pot, sear the pork belly over medium-high heat until golden brown on all sides, about 5-7 minutes. Remove the pork from the pot and set aside.

Reduce the heat to medium, add the garlic and ginger to the pot, and cook for 1-2 minutes until fragrant. Pour in the soy sauce, rice wine, brown sugar, star anise, and cinnamon sticks, and stir to combine.

Add the seared pork belly and stock, and bring the mixture to a boil. Reduce the heat to low, cover the pot, and simmer for 2-3 hours, or until the pork is tender and the sauce has thickened. Adjust the seasoning to taste, and serve the red-braised pork belly with steamed rice, a side of vegetables, and your favorite condiments.

For the best results, be patient and let the pork braise for as long as possible. The longer it cooks, the more tender and flavorful the pork will become.

Advertisement

Additionally, you can prepare the dish a day in advance and let the flavors meld together overnight before reheating and serving.

Cooking Steps

Slice that pork belly into chunky pieces, then blanch them in boiling water to get rid of any impurities.

Next, you'll caramelize the pork in a skillet to lock in the flavor.

Step 1. Slice Pork Belly Into Chunks

slice pork belly chunks

Before you can begin cooking the pork belly, you'll need to slice it into bite-sized chunks. First, grab a sharp knife and a sturdy cutting board.

Carefully place the pork belly on the board, then use the knife to cut the meat into 1-inch pieces. Don't worry if they're not perfectly uniform – the irregular shapes will add to the rustic charm of the dish.

As you work, try to keep the pieces evenly sized so they cook at the same rate. Once you've sliced the entire pork belly, you can give the chunks a quick rinse under cold water to remove any stray bits of fat or skin.

Advertisement

Dry them off with some paper towels, and you're ready to move on to the next step! Cooking the pork belly low and slow is the key to achieving that melt-in-your-mouth texture, so take your time and enjoy the process.

Your patience will definitely pay off in the end.

Step 2. Blanch Pork Belly in Boiling Water

blanch pork belly boiling

The first step in the cooking process is to blanch the pork belly chunks in boiling water. This important step helps to remove any impurities or excess fat from the meat, giving you a cleaner, more refined flavor in the final dish.

Simply fill a large pot with water and bring it to a rolling boil over high heat. Once the water is bubbling vigorously, carefully add the sliced pork belly pieces. Let them soak for about 2 to 3 minutes, then use a slotted spoon to scoop them out and transfer them to a clean bowl or plate.

Don't worry if the pork looks a bit pale and bland at this stage – the real magic will happen during the next steps of the cooking process. With the pork belly now prepped and ready, you can move on to the next exciting phase of this delicious recipe!

Step 3. Caramelize Pork Belly in Skillet

caramelize pork belly skillet

With the pork belly now prepped and ready, grab a large, heavy-bottomed skillet and place it over medium-high heat.

Once the skillet is nice and hot, add a generous drizzle of oil and let it heat up for a minute or two.

Advertisement

Now, carefully add the blanched pork belly slices to the pan, making sure they don't overlap.

You'll want to let them sizzle and brown for about 2-3 minutes per side, turning them occasionally with tongs.

As the pork sears, you'll start to see the edges turn golden and crispy – that's exactly what you're going for!

Keep an eye on them, adjusting the heat as needed to prevent burning.

Once both sides are beautifully caramelized, transfer the pork to a plate and set it aside.

Advertisement

Don't worry, we're not done yet – there are still a few steps to go before this delicious pork belly is ready to enjoy!

Step 4. Simmer Pork in Aromatic Liquid

pork simmered in aromatics

Next, add the caramelized pork belly slices to a Dutch oven or large, heavy-bottomed pot.

Pour in enough water or broth to just cover the pork. Toss in some fragrant ingredients like star anise, cinnamon sticks, cloves, and ginger slices. The pungent aroma will make your mouth water!

To complement your meal, consider serving it with a soothing cup of herbal tea, as many varieties can aid in digestion and enhance your dining experience, such as herbal teas with digestion benefits.

Bring the liquid to a boil, then reduce the heat to a gentle simmer. Let the pork slowly braise for about an hour, or until it's meltingly tender. The longer you simmer it, the more the flavors will blend together.

Be patient – it's well worth the wait! Occasionally, skim any foam or fat that rises to the surface. This will keep your dish nice and clean.

Advertisement

When the pork is super soft, you're ready for the next step. Get ready to experience the deep, rich flavors of this classic Chinese dish!

Step 5. Garnish With Green Onions

garnish dish with onions

Finely slice some green onions to garnish the tender, red-braised pork belly. You'll want those vibrant, green slices to create a colorful contrast against the rich, caramelized meat. Sprinkle them generously over the top – the fresh, oniony flavor will perfectly complement the savory-sweet pork.

Don't be shy with the green onions! The more, the merrier. They'll add a lovely crunch and brightness to each bite. Plus, the pop of green makes the dish look extra appetizing. Imagine how nice those slender green onion pieces will look, nestled among the shiny, reddish-brown pork cubes.

Once you've added the green onions, your red-braised pork belly is ready to serve. Scoop it up and enjoy the delightful interplay of flavors and textures. The tender pork, the aromatic cooking liquid, and the crisp green onions – it's a harmony of yum that's sure to delight your taste buds.

Final Thoughts

Ultimately, the essence of this red-braised pork belly dish lies in its harmonious balance of flavors and textures. The tender, melt-in-your-mouth pork, combined with the rich, caramelized sauce, creates a truly irresistible experience.

The vibrant green onions you sprinkled on top not only add a pop of color but also a delightful crunch, complementing the dish perfectly.

Advertisement

As you savor the final bites, you can't help but feel a sense of accomplishment. This recipe has allowed you to explore the depths of Chinese cuisine and expand your culinary horizons.

The techniques you've learned, from searing the pork to expertly reducing the sauce, will undoubtedly serve you well in future culinary adventures.

Frequently Asked Questions

Is Red-Braised Pork Belly Suitable for Vegetarians?

No, red-braised pork belly is not suitable for vegetarians. Pork belly is a type of meat, and the dish is prepared using animal-based ingredients, making it unsuitable for those following a vegetarian diet.

Can I Substitute the Pork Belly With Another Cut of Meat?

You can absolutely substitute the pork belly with another cut of meat. Try using chicken thighs, beef brisket, or even tofu for a vegetarian option. The key is to adjust the cooking time accordingly.

How Long Can the Dish Be Stored in the Refrigerator?

Stored leftovers can typically last 3-4 days in the refrigerator. Be sure to refrigerate the dish in an airtight container as soon as it's cooled down. This will help preserve the flavors and prevent spoilage.

Advertisement

Can I Use a Slow Cooker Instead of a Stovetop?

You can absolutely use a slow cooker instead of a stovetop. The slow cooking process will infuse the flavors and tenderize the meat, just like on the stovetop. Give it a try and see how it turns out!

Does the Dish Contain Any Gluten or Nut Ingredients?

The dish does not contain any gluten or nut ingredients. It's a gluten-free and nut-free recipe, so you don't have to worry about those dietary restrictions when preparing it.

Continue Reading

Chinese Cuisine

Chicken Feet (Dim Sum Style)

You’ll be surprised at the umami flavor and satisfying texture of these Cantonese dim sum delicacies – learn how to prepare chicken feet like a pro.

Published

on

dim sum chicken feet

Chicken feet are a delightful Cantonese dim sum delicacy that have been enjoyed for centuries! These savory nuggets start with a good boiling to make them nice and tender. Then, you'll sauté some garlic and ginger, add soy sauce and spices, and braise the feet until they're fork-tender. The result is a flavorful, chewy treat that's high in collagen – perfect for your skin and joints. While they may seem daunting at first, chicken feet offer a unique eating experience that'll have you exploring more of the diverse culinary traditions across Asia. Want to learn how to prepare them like a pro?

Key Takeaways

  • Chicken feet have been a staple in Cantonese dim sum for centuries, showcasing resourcefulness and respect for ingredients in Cantonese culinary culture.
  • The dish involves simmering, braising, and sautéing chicken feet with key ingredients like chicken stock, soy sauce, and spices for a flavorful and tender result.
  • Chicken feet offer a unique texture with cartilage and skin, providing an interesting chewing experience and promoting shared dining experiences in dim sum settings.
  • Chicken feet are high in collagen, beneficial for skin and joint health, and low in calories compared to other meat options.
  • Chicken feet are increasingly available in Asian grocery stores and restaurants, gaining popularity among adventurous eaters and foodies as a delicacy.

History

Dim sum, the Cantonese culinary tradition, has long been intertwined with the humble chicken foot. This unassuming part of the bird has been a beloved component of the dim sum experience for centuries, with its unique texture and savory flavor contributing to the vibrant and diverse flavors of this shared dining style.

The origins of chicken feet in dim sum can be traced back to the Cantonese region of China, where resourcefulness and a reverence for all parts of the animal have long been hallmarks of the local cuisine.

As dim sum evolved from a simple teahouse snack into the elaborate, family-style feasts we know today, the chicken foot became an integral part of the experience, showcasing the ingenuity and respect for ingredients that define Cantonese culinary culture.

Today, the chicken foot remains a beloved and iconic dim sum dish, beloved by locals and visitors alike who relish the opportunity to savor this unique and flavorful delicacy.

Recipe

Chicken feet are a beloved delicacy in Chinese cuisine, particularly in the dim sum tradition. When cooked properly, these seemingly unassuming ingredients transform into a flavorful and textural delight. The key to succulent chicken feet lies in a careful preparation process that involves braising and simmering to tenderize the tough cartilage and skin.

Advertisement

Dim sum-style chicken feet are typically served as bite-sized morsels, often accompanied by a zesty dipping sauce that complements the savory, slightly gelatinous texture. The dish isn't only a culinary experience but also a cultural one, as it has been a staple of Cantonese cuisine for generations.

Ingredients:

  • 1 lb chicken feet, cleaned and trimmed
  • 2 cups chicken stock
  • 1/4 cup soy sauce
  • 2 tablespoons rice vinegar
  • 1 tablespoon brown sugar
  • 3 cloves garlic, minced
  • 1-inch piece fresh ginger, peeled and sliced
  • 2 green onions, sliced
  • 1 teaspoon sesame oil
  • 1/2 teaspoon white pepper

Instructions:

In a large pot, combine the chicken feet, chicken stock, soy sauce, rice vinegar, brown sugar, garlic, and ginger. Bring the mixture to a boil, then reduce the heat and simmer for 1-1.5 hours, or until the chicken feet are tender and the skin is gelatinous.

Remove the pot from heat, stir in the green onions and sesame oil, and season with white pepper. Serve the chicken feet warm, with the cooking liquid drizzled over the top, along with your desired dipping sauce.

Tips:

Advertisement

When selecting chicken feet, look for those that are plump and free of blemishes. It's important to clean and trim the feet thoroughly before cooking to remove any excess skin or debris.

Additionally, be patient during the simmering process, as it may take some time for the tough cartilage to become tender and the skin to develop the desired gelatinous texture.

Cooking Steps

Okay, let's get cooking!

First, you'll boil the chicken feet in water to tenderize them. After that, drain and rinse the feet to get rid of any gunk.

Next, you'll sauté some garlic and ginger in a pan, then add soy sauce and other seasonings.

Advertisement

Step 1. Boil Chicken Feet in Water

boil chicken feet preparation

To begin, start by placing the chicken feet in a large pot and covering them with an ample amount of water.

You'll want to make sure the water level is at least an inch above the chicken feet. Now, turn on the heat and bring the water to a boil.

Once it's bubbling away, let the chicken feet simmer for about 45 minutes to an hour. This lengthy boiling time helps to soften the tough, leathery skin and release the natural gelatin from the bones.

As the chicken feet cook, you'll notice the water turning a cloudy, opaque color. This is a good sign – it means all the collagen and nutrients are being drawn out of the feet and into the broth.

Feel free to skim off any foam or impurities that rise to the surface. When the time is up, carefully remove the pot from the heat and let the chicken feet cool slightly before handling.

They're now ready to be seasoned and served as part of your delicious dim sum feast!

Advertisement

Step 2. Drain and Rinse Chicken Feet

drain and rinse chicken

Once the chicken feet have finished simmering, carefully drain them in a colander.

You'll want to make sure all the water has gone, so gently shake the colander to help it along.

Next, rinse the chicken feet under cool running water. This will wash away any remaining scum or impurities.

As you run your fingers through the feet, you might notice some small, hard nubs – these are the toe nails, and you'll want to remove them.

Simply pinch each one and pull it off.

Now your chicken feet are ready for the next step! Aren't they looking cleaner already?

Advertisement

With the water drained and the feet rinsed, you're one step closer to enjoying delicious, authentic dim sum.

Keep up the good work – the tasty payoff is almost here!

Step 3. Sauté Garlic and Ginger

saut garlic and ginger

With the chicken feet now washed and ready, you'll want to start by sautéing the garlic and ginger. This is a crucial step that will infuse your dish with mouthwatering aromas and flavors.

Heat a large skillet or wok over medium heat and add a couple tablespoons of oil. Once the oil is shimmering, toss in the minced garlic and grated ginger. Stir-fry for about a minute, until the garlic becomes fragrant and starts to turn golden. Be careful not to let it burn, as that can make the flavor bitter.

Next, add the blanched chicken feet to the pan. Toss everything together, making sure the feet are well coated in the garlicky-ginger oil. Let them sizzle and brown for a few minutes, stirring occasionally.

This will help develop a delicious crust on the outside of the chicken feet. Soon, your kitchen will be filled with the most tantalizing scents, getting you excited for the flavorful dim sum dish to come.

Advertisement

Step 4. Add Soy Sauce and Seasonings

add soy sauce seasonings

After the chicken feet have had a chance to brown, it's time to add the soy sauce and other seasonings.

First, pour in a few tablespoons of soy sauce – this will give the chicken feet a lovely, deep brown color and a savory flavor. Don't be shy with the soy sauce, as it's a key ingredient that really makes the dish pop.

Next, sprinkle in a pinch or two of white pepper. The peppery kick will complement the salty soy sauce perfectly.

You can also add a dash of sesame oil, which will add a nutty aroma and a silky mouthfeel.

Step 5. Braise Chicken Feet Until Tender

braise chicken feet tenderly

Having added the soy sauce and seasonings, it's time to braise the chicken feet until they become fork-tender.

First, place the seasoned chicken feet in a large pot and cover with water. Bring the pot to a boil over high heat, then reduce the heat to medium-low and let the feet simmer for 45 minutes to an hour.

You'll know they're done when you can easily pierce them with a fork. The long cooking time helps break down the tough connective tissues, making the feet wonderfully soft and gelatinous.

Advertisement

Once they're tender, you can remove the feet from the pot and serve them up hot. Don't forget to provide plenty of napkins – these juicy chicken feet can get a bit messy to eat!

With their savory, umami-packed flavor, these braised chicken feet make a truly delightful dim sum treat. Enjoy exploring this unique and tasty part of the chicken.

Final Thoughts

Though chicken feet dim sum may not be for everyone, the unique flavors and textures it offers can be a delightful experience for those willing to try it. The braise process transforms the tough, rubbery texture into something surprisingly tender and succulent. The aromatic spices and sauces infuse the chicken feet with a robust, savory taste that's unlike anything else.

For those feeling adventurous, chicken feet dim sum is a fun way to expand your culinary horizons. The cartilage and skin provide an interesting chewing experience, and the subtle flavors make each bite an enjoyable discovery.

Don't be afraid to get your hands a little messy – that's part of the fun! With a bit of practice, you'll be expertly plucking the meat off the bones in no time.

Advertisement

Whether you're a seasoned dim sum enthusiast or a curious newcomer, chicken feet offer a unique and tasty addition to your culinary adventures. Give them a try and see for yourself the pleasures of this unique dim sum delicacy.

Frequently Asked Questions

Are Chicken Feet Considered a Delicacy?

You might consider chicken feet a delicacy, as they're a popular appetizer in certain Asian cuisines. While they may not be everyone's cup of tea, they're prized for their unique texture and flavor.

Can I Find Chicken Feet at Regular Grocery Stores?

You can usually find chicken feet at regular grocery stores, though their availability may vary by location. Check the poultry section or ask a store employee for assistance in locating them.

How Do I Clean and Prepare Chicken Feet?

You can clean and prepare chicken feet by rinsing them thoroughly, trimming any excess skin or nails, and boiling them for about 30 minutes to tenderize the texture. Then, you're ready to use them in your desired recipe.

What's the Difference Between Cantonese and Sichuan-Style Chicken Feet?

The key difference between Cantonese and Sichuan-style chicken feet lies in the flavor profile. Cantonese-style is typically more mild and savory, while Sichuan-style features a bold, spicy kick from the use of Sichuan peppercorns and chili peppers.

Advertisement

How Long Do I Need to Cook Chicken Feet?

You'll need to simmer the chicken feet for about 1-2 hours until they're tender and the cartilage can be easily chewed. The longer they cook, the more the tough connective tissues will break down.

Continue Reading
Advertisement

Affiliate Disclaimer
As an affiliate, we may earn a commission from qualifying purchases. We get commissions for purchases made through links on this website from Amazon and other third parties.

Advertisement

Latest

colorful rimmed beverages colorful rimmed beverages
Graduations/Birthdays2 mins ago

Sprinkle-Rimmed Drinks

Whimsical and visually captivating, sprinkle-rimmed drinks transport you to a world of playful flavors and enchanting presentations that will leave...

festive puppy chow treats festive puppy chow treats
Graduations/Birthdays7 mins ago

Birthday Cake Puppy Chow

Uncover the captivating blend of crunchy Chex, creamy white chocolate, and vibrant sprinkles that make Birthday Cake Puppy Chow an...

magical colorful chocolate beverage magical colorful chocolate beverage
Graduations/Birthdays13 mins ago

Unicorn Hot Chocolate

Otherworldly and whimsical, unicorn hot chocolate transports you to a realm of vibrant colors and sweet indulgence, where the possibilities...

colorful skewered fruit delights colorful skewered fruit delights
Graduations/Birthdays19 mins ago

Rainbow Fruit Kebabs

Tantalizing and refreshing, these rainbow fruit kebabs offer a delightful twist on a classic snack, with a vibrant array of...

colorful cheese filled tortillas colorful cheese filled tortillas
Graduations/Birthdays25 mins ago

Confetti Quesadillas

Heighten your taste buds with the vibrant burst of color and flavor in confetti quesadillas, a fusion of Mexican cuisine...

celebratory dessert beverage fusion celebratory dessert beverage fusion
Graduations/Birthdays31 mins ago

Birthday Cake Milkshake

Fulfill your childhood nostalgia with the irresistible Birthday Cake Milkshake, a creamy, indulgent treat that's a celebration in every sip....

colorful cake batter dip colorful cake batter dip
Graduations/Birthdays36 mins ago

Funfetti Dip

Celebrate the vibrant and creamy delight of Funfetti Dip, the ultimate party treat that will captivate your taste buds and...

celebratory sweet snack treat celebratory sweet snack treat
Graduations/Birthdays42 mins ago

Birthday Cake Flavored Popcorn

Outrageous and irresistibly sweet, this birthday cake flavored popcorn promises a flavor explosion that will leave you craving more. Discover...

graduation jewelry and snacks graduation jewelry and snacks
Graduations/Birthdays47 mins ago

Class Ring Onion Rings

Feast on the nostalgic delight of Class Ring Onion Rings, a crispy, golden-brown treat that will transport you back to...

breadsticks resembling pencils breadsticks resembling pencils
Graduations/Birthdays53 mins ago

Pencil-Shaped Breadsticks

Harnessing the rich history and versatility of pencil-shaped breadsticks, explore how to craft these unique and captivating snacks that will...

colorful candy dessert layers colorful candy dessert layers
Graduations/Birthdays59 mins ago

Smarties Candy Parfaits

Observe the vibrant layers of creamy yogurt, pudding, and whipped cream, elevated by the delightful crunch of classic Smarties candies...

noodle shaped letter pasta noodle shaped letter pasta
Graduations/Birthdays1 hour ago

Alphabet Soup

Alphabet soup, a whimsical culinary delight that transports you back to childhood, boasts a rich history and a community-fostering experience...

Advertisement

Trending