Connect with us

Chinese Cuisine

Yangzhou Fried Rice

Flavorful and fragrant, Yangzhou fried rice is a time-honored Chinese dish that combines rice, proteins, and veggies in a harmonious explosion of taste. Discover the secrets that make this beloved recipe a staple.

Published

on

delicious yangzhou rice dish

Get ready for a truly delightful Chinese dish – Yangzhou fried rice! This time-honored recipe combines fragrant long-grain rice, tender proteins, and vibrant veggies for a harmonious flavor explosion. The secret lies in expert preparation and stir-frying techniques that bring out the best in every ingredient. You'll love the savory, salty, and umami notes, plus the contrasting textures that'll make your taste buds dance. Customize it to your liking, and you'll understand why this beloved dish is a staple in Chinese cuisine enjoyed worldwide. Let's dive in and explore the fascinating history and cooking tips that make Yangzhou fried rice such a treat!

Key Takeaways

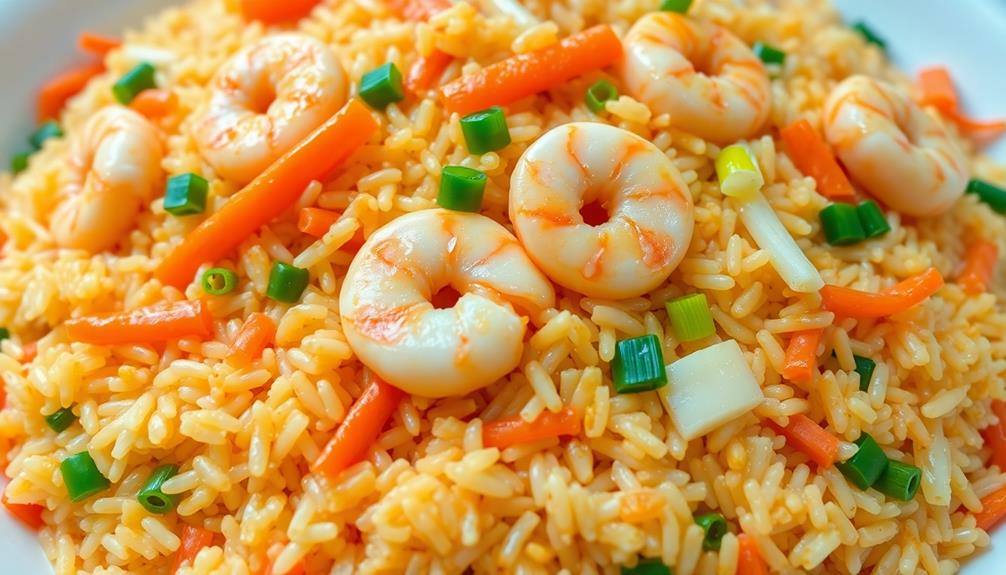
  • Yangzhou fried rice is a traditional Chinese dish that originated in Yangzhou, Jiangsu province, known for its vibrant colors, tender texture, and delightful taste.
  • The dish features a base of long-grain rice, eggs, and a variety of proteins such as diced ham, Chinese sausage, shrimp, or chicken, along with colorful vegetables.
  • Crucial cooking techniques include using day-old rice, scrambling the eggs separately, and stir-frying over high heat to develop the flavors and achieve a crispy texture.
  • The flavor profile of Yangzhou fried rice is a balance of savory, salty, and umami, with aromatic ingredients like scallions and garlic enhancing the overall taste.
  • Yangzhou fried rice is a versatile dish that can be served as a main course or a side, and it can be customized to accommodate various dietary preferences or restrictions.

History

Yangzhou fried rice has a rich history dating back centuries. This beloved Chinese dish originated in the city of Yangzhou, located in the eastern province of Jiangsu. The recipe was first developed by skilled chefs who combined fragrant rice, fresh vegetables, and savory proteins to create a harmonious blend of flavors.

Over time, the dish evolved, with each cook adding their own unique touch, whether it was a sprinkle of sesame oil or a pinch of white pepper.

Today, Yangzhou fried rice is renowned for its vibrant colors, tender texture, and delightful taste. The key to its success lies in the careful selection and preparation of the ingredients. The rice must be perfectly cooked, the vegetables crisply sautéed, and the proteins expertly seasoned.

The result is a satisfying and comforting meal that has become a staple in Chinese cuisine. Whether you're enjoying it at a family gathering or a festive celebration, Yangzhou fried rice is a time-honored tradition that continues to delight palates around the world.

Recipe

Yangzhou Fried Rice is a classic Chinese dish that originated in the city of Yangzhou, Jiangsu province. This flavorful and versatile rice dish is a beloved staple in households and restaurants across China.

Advertisement

The key to exceptional Yangzhou Fried Rice lies in the careful selection and preparation of ingredients. Each component, from the fragrant rice to the savory meats and crisp vegetables, must be handled with precision to achieve the perfect balance of textures and flavors.

  • Long-grain rice
  • Eggs
  • Diced ham or Chinese sausage
  • Frozen peas
  • Carrots, diced
  • Scallions, sliced
  • Garlic, minced
  • Soy sauce
  • Sesame oil
  • Salt and white pepper to taste

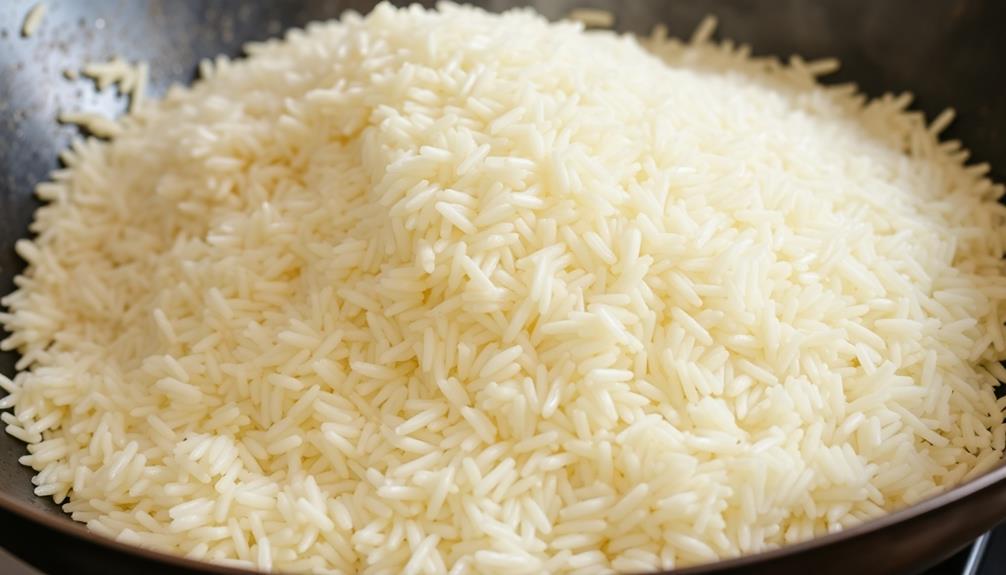
Begin by cooking the rice according to package instructions. Spread it out on a baking sheet and let it cool completely.

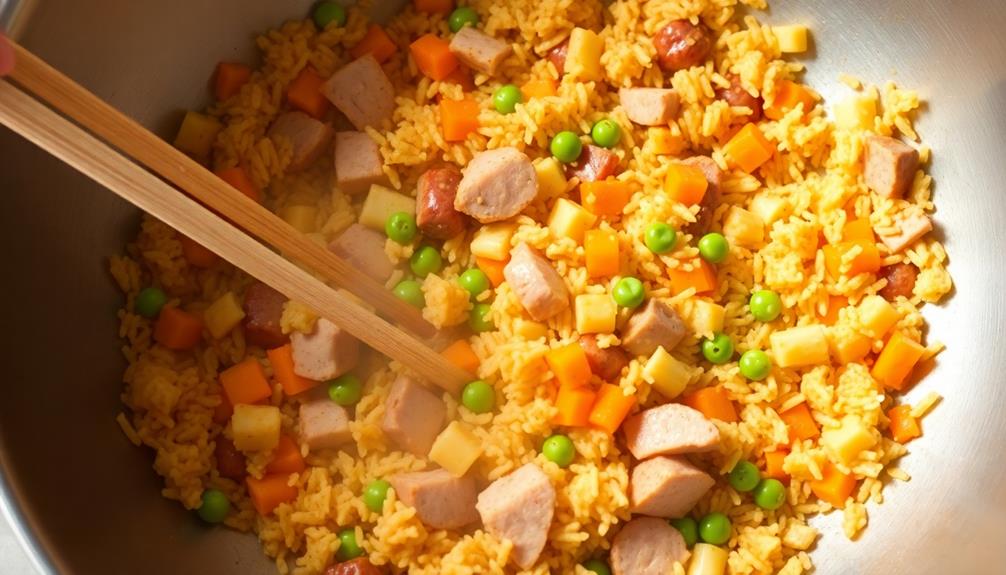
In a large wok or skillet, scramble the eggs and set them aside. In the same wok, sauté the garlic, ham or sausage, carrots, and peas until fragrant and slightly tender.

Add the cooled rice and toss everything together. Season with soy sauce, sesame oil, salt, and white pepper, adjusting the flavors to your taste.

Finally, stir in the scrambled eggs and scallions, ensuring the ingredients are evenly distributed.

To achieve the perfect Yangzhou Fried Rice, it's essential to use day-old rice, as the drier texture helps create the signature crispy edges. Additionally, be mindful not to overcrowd the wok, as this can result in steaming the rice rather than frying it.

Advertisement

With a little practice, you'll be able to create this delightful dish that captures the essence of Yangzhou's culinary heritage.

Cooking Steps

Heat up your wok over a blazing high flame.

Toss in the scrambled eggs and let them sizzle for a bit.

Now add the chopped scallions – they'll give your fried rice a wonderful pop of flavor!

Step 1. Heat Wok Over High Flame

high flame wok heating

The wok's sizzling dance commences as you crank up the heat, preparing to unleash the flavors of this iconic dish. You can almost hear the eager sizzle as the empty wok is placed over the scorching flames, eagerly awaiting your culinary magic.

Make sure the heat is blazing – you want that wok piping hot and ready to work its alchemy.

Advertisement

Now, give the wok a quick swirl to coat the surface with a thin layer of oil. This helps create that perfect golden-brown crust on the rice. When the oil starts to shimmer and dance, you know it's time to add your ingredients.

Toss in the onions first, letting them sizzle and soften for a minute or two. The aroma will start to fill your kitchen, making your mouth water in anticipation.

Next, add the rest of your veggies and proteins, stirring constantly to ensure everything cooks evenly. Keep that wok rocking and rolling until each morsel is hot, tender, and infused with flavor.

Step 2. Add Scrambled Eggs

incorporate scrambled eggs

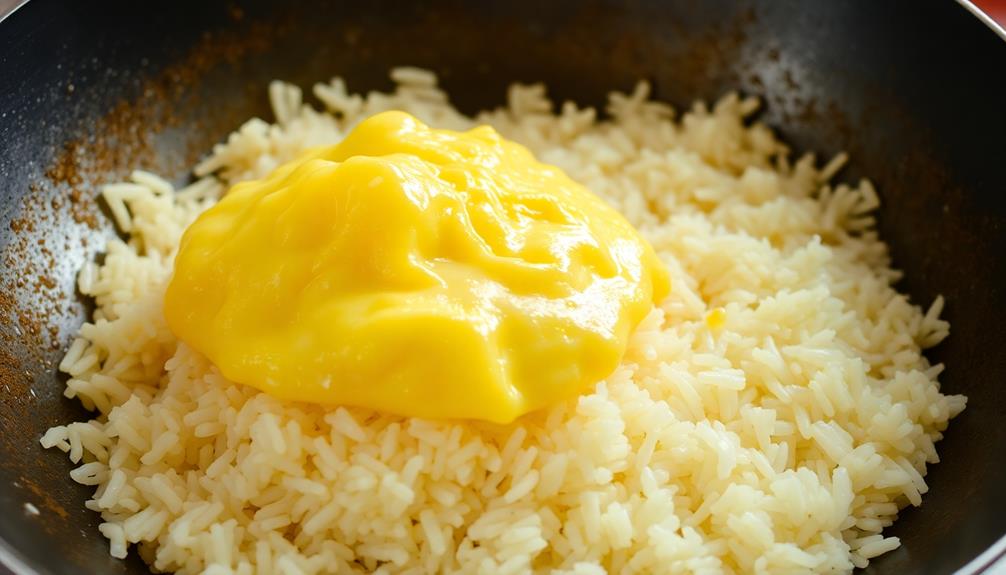
As the vegetables and proteins sizzle away, it's time to incorporate the scrambled eggs.

Crack a few fresh eggs into a small bowl and give them a good whisk with a fork until they're nicely beaten.

Now, create a well in the center of your wok and pour in the eggs. Let them sit for a moment, then use your spatula to gently push the eggs from the edges towards the center, folding and stirring as you go.

Advertisement

This will allow the uncooked egg to flow to the hot surface, ensuring your scramble turns out light and fluffy.

Keep a close eye and continue this folding motion until the eggs are just set but still moist. Be careful not to overcook!

Once the eggs are ready, give the whole mixture a final stir to evenly distribute them throughout the fried rice.

The contrast of the soft, creamy eggs with the other tasty ingredients is simply divine.

Step 3. Add Chopped Scallions

incorporate chopped scallions

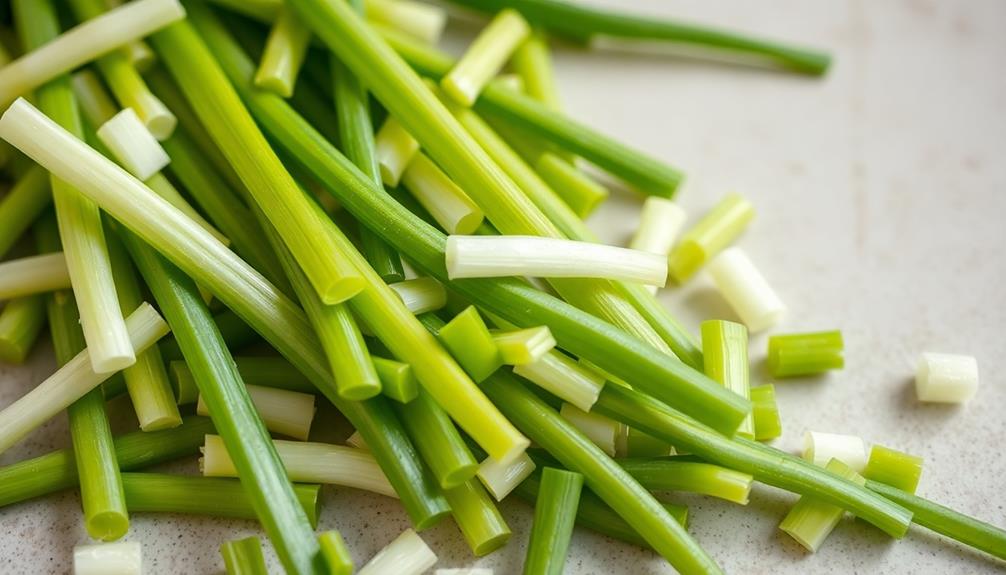
With the scrambled eggs now incorporated, it's time to add the chopped scallions. These vibrant green onions will add a lovely fragrance and subtle flavor to your Yangzhou fried rice.

Grab a bunch of scallions and give them a good wash. Trim off the root ends and the tough, dark green tops, leaving you with the bright, tender parts. Slice the scallions crosswise into small, thin pieces, about 1/2 inch long. This will ensure they cook quickly and distribute evenly throughout the dish.

Advertisement

Toss the chopped scallions into the wok or skillet, right on top of the eggs. Use your spatula to gently stir and incorporate them. The scallions will sizzle and become aromatic as they cook briefly with the other ingredients.

Their fresh, oniony taste will complement the savory eggs and rice perfectly. Keep stirring until the scallions are softened but still vibrant green, about 1 minute.

Now your Yangzhou fried rice is really coming together! Next, you'll add the cooked rice to finish the dish.

Step 4. Add Cooked Rice

add cooked rice now

Grab the cooked rice and toss it right into the wok or skillet. You want to get that rice moving and mixing with all the delicious ingredients already in there.

Don't be shy – really give it a good stir so every grain gets coated. The key is to keep the rice moving, not letting it sit in one spot and get soggy. As you stir, you'll see the rice start to sizzle and turn a beautiful golden color. That's exactly what you're going for!

Keep stirring for a minute or two until the rice is heated through and has a nice, even texture. Now it's time to add a splash of soy sauce. Just a drizzle will do – you don't want to overpower the other flavors.

Advertisement

Give it one more good toss, and your Yangzhou fried rice is ready to serve! Doesn't it smell amazing?

Step 5. Stir and Toss Until Fully Combined

mix thoroughly until combined

Vigorously stirring and tossing the rice ensures every grain is thoroughly coated with the delicious flavors.

Using your trusty spatula, give the rice a good mix, making sure to scrape up any bits stuck to the bottom of the pan.

Don't be shy – really work those grains, flipping and folding them over each other. You want to see the rice start to glisten as the oil and seasonings distribute evenly.

Keep at it for a minute or two, until you can't spot any clumps or dry patches.

The key is to handle the rice gently but with purpose, treating each grain like a precious jewel.

Advertisement

With the perfect balance of softness and separation, your Yangzhou fried rice is well on its way to greatness. The vibrant mix of fresh vegetables, tender proteins, and fragrant rice creates a delightful harmony in every bite. To complete the meal, you might consider ending on a sweet note with tangyuan traditional Chinese dessert—soft, glutinous rice balls filled with either sesame, peanut, or red bean paste, offering a rich contrast to the savory elements of the fried rice. This blend of textures and flavors brings a comforting sense of balance to the entire dining experience.

Just a little more effort, and you'll have a fragrant, flavor-packed dish that'll have everyone coming back for seconds!

Final Thoughts

Yangzhou fried rice is a delightful and versatile dish that can be enjoyed in a variety of ways. Whether you're serving it as a main course or a side, the combination of savory flavors and textures is sure to delight your taste buds.

Don't be afraid to get creative and experiment with different ingredients to suit your own preferences. The great thing about Yangzhou fried rice is that it's endlessly customizable, so you can make it your own! Add in some diced vegetables like bell peppers, carrots, and peas for added color and nutrition. For a protein boost, throw in some cooked chicken, shrimp, or tofu. With these simple additions, you can create a flavorful homemade fried rice that is completely unique to your tastes.

As you've learned, the key to making the perfect Yangzhou fried rice is in the technique. By stir-frying the ingredients and tossing the rice until it's fully combined, you'll end up with a dish that's bursting with flavor and perfectly cooked.

Advertisement

Frequently Asked Questions

Is Yangzhou Fried Rice Suitable for Vegetarians?

Yes, you can make Yangzhou fried rice suitable for vegetarians. Simply substitute the meat with your favorite vegetables and tofu. This versatile dish can easily be adapted to accommodate a vegetarian or vegan diet.

How Long Does It Take to Prepare Yangzhou Fried Rice?

Preparing Yangzhou fried rice typically takes around 30-45 minutes. You'll need to cook the rice, chop the vegetables, and sauté everything together to get that authentic flavor. It's a quick and delicious dish that's worth the effort.

Can I Make Yangzhou Fried Rice in Advance?

You can make the dish in advance, but it's best to cook the rice fresh and assemble the components right before serving. This will ensure the texture and flavors are at their peak when you enjoy your meal.

What Are the Common Variations of Yangzhou Fried Rice?

Common variations of this dish include using different proteins like shrimp, chicken, or beef. You can also add vegetables like peas, corn, or carrots. Some cooks even use leftover fried noodles for an extra crunch.

Where Can I Find the Best Yangzhou Fried Rice in Yangzhou?

To find the best Yangzhou fried rice in Yangzhou, you'll want to explore the city's local restaurants and street vendors. Ask locals for their recommendations, as they'll know the top spots for this signature regional dish.

Advertisement

Advertisement

Chinese Cuisine

Mian Bao Xia: Chinese Shrimp Toast You’ll Want to Try

With its irresistible crunch and tender shrimp filling, this authentic Chinese shrimp toast is a must-try delicacy that will transport your taste buds to the vibrant streets of Cantonese cuisine.

Published

on

delicious chinese shrimp toast

Get ready to indulge in a mouthwatering Chinese classic – mian bao xia, or shrimp toast! This crispy delight has graced Cantonese tables for centuries, and it's easy to see why. Start with fresh, finely chopped shrimp that's mixed with savory seasonings. Spread the mixture onto slices of bread, then fry them to golden-brown perfection. The result is a harmony of textures – the satisfying crunch of toast and the tender sweetness of shrimp. Serve these up hot, and you'll understand why this beloved snack has become a global favorite. Keep reading to discover the easy steps to recreate this authentic Chinese treat at home.

Key Takeaways

  • Shrimp toast is a classic Cantonese dish that has evolved over centuries, offering a delightful balance of flavors and textures.
  • Preparing shrimp toast involves finely chopping fresh shrimp, mixing it with seasonings, and coating bread slices before frying for a crispy exterior.
  • Spreading the shrimp mixture evenly on the bread and achieving the perfect golden-brown color are crucial steps for a successful shrimp toast.
  • Serving shrimp toast immediately after frying ensures the warmth and crunchiness are preserved, enhancing the overall eating experience.
  • Shrimp toast is a versatile and beloved snack that showcases the artistry of Cantonese cuisine and can be easily recreated at home.

History

historical events and contexts

Shrimp toast's origins can be traced back to the Cantonese cuisine of southern China. This tasty snack has been a beloved part of Chinese culinary tradition for centuries.

It's believed that shrimp toast first emerged during the Qing dynasty, when chefs experimented with creative ways to showcase the fresh seafood abundant in coastal regions.

Over time, the recipe evolved, with different variations developing across China. Some cooks added minced pork or other mix-ins to the shrimp filling, while others played with the shape and size of the toast.

Today, shrimp toast remains a staple in Cantonese restaurants and is cherished for its irresistible combination of crispy bread, savory shrimp, and aromatic seasonings.

Whether you're enjoying it as an appetizer or a snack, shrimp toast is a delightful taste of Chinese culinary history. Its popularity has even spread beyond China, making it a beloved dish around the world.

Advertisement

Cooking Steps

prepare measure cook serve

To begin the cooking process, gather all the necessary ingredients and equipment. You'll need shrimp, bread, egg, cornstarch, and oil for frying.

First, peel and devein the shrimp, then finely chop them into a paste. In a bowl, combine the shrimp, breadcrumbs, an egg, and a pinch of cornstarch. Mix everything together until it forms a sticky dough.

Next, take a slice of bread and spread the shrimp mixture evenly on one side. Gently press the mixture down to help it adhere.

In a skillet, heat up some oil over medium-high heat. Carefully place the shrimp toast, shrimp-side down, into the hot oil. Fry until golden brown, about 2-3 minutes per side. Drain the fried shrimp toast on a paper towel-lined plate.

Serve the crispy, golden shrimp toast warm, garnished with chopped scallions or sesame seeds if desired. Enjoy this delightful Chinese appetizer!

Step 1. Finely Chop Fresh Shrimp

chop fresh shrimp finely

First, take the fresh shrimp and finely chop them.

You'll want to make sure they're chopped into small, uniform pieces. Don't worry if it takes a little while – the key is to get them nice and fine so they'll blend perfectly into the toast mixture.

Advertisement

Use a sharp knife and take your time, making sure to mince the shrimp thoroughly.

Once they're all nicely chopped up, you can move on to the next step.

Don't be afraid to really get in there and chop away – the finer the shrimp, the better the toast will turn out.

Just be careful with your fingers!

With the shrimp all chopped up, you're one step closer to creating that delicious, authentic Chinese shrimp toast.

Advertisement

Keep going, you're doing great!

Step 2. Mix Shrimp With Seasonings

season shrimp with spices

With the shrimp finely chopped, you'll now want to mix them with a few key seasonings. In a medium bowl, combine the chopped shrimp with a teaspoon of soy sauce, a dash of toasted sesame oil, and a sprinkle of white pepper. Stir everything together until the shrimp is evenly coated.

Next, add a couple of tablespoons of cornstarch to the bowl. The cornstarch will help bind the shrimp mixture and create a lovely, creamy texture.

Using your clean hands, gently mix the cornstarch into the shrimp, being careful not to overmix and toughen the shrimp.

Step 3. Spread Shrimp Mixture on Bread

spread shrimp on bread

With the shrimp seasoning ready, you'll now want to spread it evenly atop slices of bread. Use a butter knife or the back of a spoon to gently distribute the savory mixture across the surface of each slice.

Make sure to cover the bread completely, getting those delightful shrimp bits all the way to the edges.

Once the shrimp is spread, you can start to get creative! Grab some sharp kitchen scissors and snip the bread into fun shapes – triangles, rectangles, or even little shrimp-inspired designs. This will make your finished shrimp toasts look extra appetizing.

Advertisement

Now, it's time to get those toasts into the oven. Bake them at a high temperature, around 400°F, for about 10-12 minutes.

Keep an eye on them, as you want the bread to turn golden brown and the shrimp to become lightly crispy. When they're done, you'll have a tray of perfectly toasted shrimp bites, ready to delight your family and friends.

Step 4. Fry Coated Bread Slices

fry coated bread slices

After spreading the shrimp mixture on the bread slices, you'll want to fry them to achieve that signature crispy texture.

Heat up a skillet or pan over medium-high heat and add a generous amount of oil. Carefully place the coated bread slices into the hot oil and let them sizzle for a minute or two on each side. Keep an eye on them, flipping gently, until they turn a beautiful golden-brown. The key is to fry them until they're crisp on the outside but still tender on the inside.

Once they're done, transfer the fried shrimp toast slices to a paper towel-lined plate to drain any excess oil. This helps create that delightful crunch that makes this dish so irresistible.

With the shrimp mixture sealed inside the crispy bread, you're well on your way to enjoying an authentic taste of Chinese cuisine right in your own kitchen. Get ready for the compliments to start rolling in!

Advertisement

Step 5. Serve Immediately While Hot

serve hot immediately enjoy

Once the shrimp toast slices have finished frying, don't let them sit around.

You'll want to serve them immediately while they're hot and crispy. The key is to enjoy these tasty bites at the peak of their flavor and texture.

As soon as they come out of the oil, transfer them to a paper towel-lined plate to drain off any excess grease. Then, waste no time getting them to the table.

Your guests will be eager to pop these little shrimp-filled toasts into their mouths. The combination of the crunchy bread, savory shrimp, and aromatic seasonings is simply irresistible when it's fresh off the stove.

Plus, the heat enhances the shrimp's natural sweetness and brings out the richness of the filling.

Don't let these shrimp toasts cool down – serve them up piping hot for the ultimate snacking experience.

Advertisement

Your family and friends will be delighted by this authentic Chinese appetizer.

Final Thoughts

concluding reflections and insights

Shrimp toast's timeless appeal lies in its perfect balance of flavors and textures.

Whether you're enjoying it as an appetizer or a snack, the warm, crispy bread combined with the savory, slightly sweet shrimp topping is simply irresistible.

What sets this dish apart is the care and attention to detail that goes into crafting it.

From the delicate shrimp mixture to the perfectly toasted bread, every component works together harmoniously.

And the best part? Shrimp toast is surprisingly easy to make at home, allowing you to savor its deliciousness anytime.

Advertisement

Frequently Asked Questions

What Is the Origin of the Name "Mian Bao Xia"?

The name "mian bao xia" refers to the Chinese dish of shrimp toast. It's a combination of the Mandarin words for "wheat bread" (mian bao) and "shrimp" (xia), reflecting the primary ingredients used in this popular snack.

Can I Use Other Types of Bread for the Toast?

You can certainly use other types of bread for the toast. White bread, sourdough, and even brioche would all work well. The key is to choose a bread that can hold up to the shrimp mixture.

How Long Can the Leftover Shrimp Toast Be Stored?

The leftover shrimp toast can be stored in the fridge for 2-3 days. Just make sure to keep it in an airtight container. You can reheat it in the oven or toaster before serving.

Can I Fry the Shrimp Toast Ahead of Time?

Yes, you can fry the shrimp toast ahead of time. Once fried, you can store it in the refrigerator for up to 3 days. Just reheat it in the oven or air fryer before serving to maintain its crispy texture.

Is There a Vegetarian or Vegan Version of This Dish?

You can easily make a vegetarian or vegan version of this dish by substituting the shrimp with finely chopped mushrooms, tofu, or a plant-based protein of your choice. Just follow the same cooking method for a delicious meatless alternative.

Advertisement

Continue Reading

Chinese Cuisine

Yunnan Cross-Bridge Rice Noodles

Nestled in the heart of Yunnan, China, Yunnan cross-bridge rice noodles offer a mouthwatering journey through the province’s rich culinary heritage, leaving you craving for more.

Published

on

yunnan rice noodle dish

Yunnan cross-bridge rice noodles are a mouthwatering dish hailing from the vibrant province of Yunnan, China. Tracing their roots to the late Qing dynasty, these noodles were accidentally created by Yunnanese scholars crossing the Long Bridge over the Yangtze River. Today, this UNESCO-recognized culinary treasure features a unique cooking method – you'll assemble the ingredients, then pour in hot, flavorful broth to create an unforgettable dining experience. Get ready to dive into tender rice noodles, fresh veggies, and succulent proteins, all expertly blended for a true taste of Yunnan's rich heritage. The versatility of Yunnan cross-bridge rice noodles reflects the region’s culinary diversity, with each bowl offering a comforting yet customizable experience. Much like **yangzhou fried rice ingredients**, which can vary but commonly include shrimp, char siu pork, peas, and eggs, the beauty of this dish lies in the freedom to choose your own medley of vegetables, meats, and toppings. Whether enjoyed in a local eatery or prepared at home, each bowl promises a delightful fusion of flavors, paying homage to Yunnan’s storied gastronomic traditions.

Key Takeaways

  • Yunnan Cross-Bridge Rice Noodles have their origins in the late Qing dynasty of Yunnan province, created by Yunnanese scholars crossing the Long Bridge over the Yangtze River.
  • This noodle dish is recognized as a UNESCO intangible cultural heritage, representing the rich heritage and culinary traditions of Yunnan province.
  • The unique cooking method involves assembling ingredients and pouring hot broth over them, creating a multi-textural dining experience with robust flavors.
  • Yunnan Cross-Bridge Rice Noodles are traditionally served at family gatherings and celebrations, reflecting the dish's cultural significance and symbolism of hospitality.
  • The dish features a flavorful broth, chewy rice noodles, fresh vegetables, and various proteins, offering a balanced and customizable nutritional profile.

History

The origins of Yunnan cross-bridge rice noodles can be traced back to the late Qing dynasty, when Yunnan province's diverse culinary traditions began to take shape.

This unique dish was created by a group of diligent Yunnanese scholars who'd often carry their lunch with them as they crossed the Long Bridge over the Yangtze River. One day, as they were eating, the noodles fell into the hot soup below – and a tasty new dish was born!

The scholars quickly realized that submerging the noodles in the hot broth was actually the key to the dish's delectable flavor. The heat softened the rice noodles while infusing them with the rich, aromatic broth.

Over time, cross-bridge noodles became a beloved specialty in Yunnan, known for their springy texture and mouthwatering savory notes.

Today, this centuries-old recipe is still prepared with care, using fresh regional ingredients that celebrate Yunnan's vibrant culinary heritage.

Advertisement

Recipe

Yunnan cross-bridge rice noodles, also known as "Crossing the Bridge" noodles, is a popular dish originating from the Yunnan province in China. This dish is renowned for its flavorful broth and chewy rice noodles. The unique cooking method involves carefully assembling the ingredients and pouring hot broth over them, creating a visually stunning and delicious meal.

The dish is typically served family-style, with the broth and noodles presented separately, allowing each diner to customize their bowl to their liking. The process of "crossing the bridge" refers to the tradition of the chef bringing the hot broth to the table, creating a sense of anticipation and theater.

Ingredients:

  • 8 oz rice noodles
  • 4 cups chicken or vegetable broth
  • 1 lb boneless, skinless chicken thighs, thinly sliced
  • 2 eggs, beaten
  • 1 cup thinly sliced cabbage
  • 1 cup bean sprouts
  • 1/2 cup thinly sliced green onions
  • 2 cloves garlic, minced
  • 1 tbsp soy sauce
  • 1 tsp sesame oil
  • 1/2 tsp white pepper

Cooking Instructions:

In a large pot, bring the broth to a boil. Reduce heat to low and keep the broth at a gentle simmer.

Arrange the chicken, eggs, cabbage, bean sprouts, and green onions on a serving platter. Serve the hot broth, noodles, and garnishes separately, allowing each diner to customize their bowl.

Advertisement

When cooking this dish, it's important to slice the ingredients thinly to ensure quick cooking and easy assembly. Additionally, make sure the broth is piping hot when served, as the contrast between the hot broth and the fresh, cool ingredients is a key part of the experience.

Enjoy your Yunnan cross-bridge rice noodles!

Cooking Steps

Soak those rice noodles in water until they're nice and soft.

Once the broth's bubbling away, you can start arranging everything – the noodles, the broth, and all the tasty toppings.

Don't forget to add your favorite fixings, then serve it up piping hot for the best slurping experience!

Advertisement

Step 1. Soak Rice Noodles in Water

soak rice noodles thoroughly

Grab a large bowl and fill it with lukewarm water. This is where you'll soak your rice noodles to get them nice and soft.

Make sure the water covers the noodles completely, as they'll expand as they soak. Give the noodles about 20-30 minutes to soak, stirring them occasionally to ensure even softening. You'll know they're ready when they've become pliable and easy to bend without breaking.

Once the noodles have soaked, drain them in a colander. Rinse them under cool running water to remove any excess starch.

This step helps prevent the noodles from sticking together later on. Gently squeeze out any excess water, being careful not to damage the delicate noodles.

Now they're all set to be added to your hot broth or stir-fried dishes! Get ready to enjoy the chewy, slurpable goodness of your Yunnan cross-bridge rice noodles.

Step 2. Bring Broth to a Boil

bring broth to boil

Next, bring a large pot of broth to a rolling boil. This'll be the key to unlocking the mouthwatering flavors of your Yunnan cross-bridge rice noodles.

Make sure to use a generous amount of broth – you want enough to fully submerge the noodles. As the broth heats up, you'll start to see those lively bubbles burst on the surface. That's your cue that it's ready!

Advertisement

Don't be afraid to crank up the heat to get it going. Once it's at a full boil, you can reduce the heat slightly to maintain that steady simmer.

Now, grab your soaked rice noodles and gently add them to the hot broth. Stir them around to make sure they're fully submerged and separated.

Let the noodles cook for just a minute or two until they're tender and pliable. You want them to have a nice bite, not be mushy.

With the broth boiling and the noodles ready, you're one step closer to slurping up a delicious bowl of Yunnan goodness!

Step 3. Arrange Noodles, Broth, and Toppings

arrange noodles broth toppings

With the broth at a rolling boil and the noodles ready, it's time to assemble your Yunnan cross-bridge rice noodle dish.

First, grab a large bowl and carefully pour in some of the steaming hot broth.

Advertisement

Now, use your chopsticks to gently lower the freshly cooked noodles into the broth. Arrange them neatly, making sure they're fully submerged.

Next, it's time for the fun part – adding your favorite toppings! You can load up your bowl with slices of tender beef, juicy chicken, or crisp veggies like baby bok choy.

Don't forget to sprinkle on some chopped scallions and cilantro for extra flavor and color.

Finally, give everything a gentle stir to combine the ingredients.

Your Yunnan cross-bridge rice noodle masterpiece is now ready to enjoy! The hot, fragrant broth, chewy noodles, and tasty toppings make for a truly delightful and satisfying meal.

Advertisement

Step 4. Add Desired Toppings

add toppings as desired

With the noodles and broth ready, you can now start adding your desired toppings. The fun part is choosing all the tasty treats to top off your bowl!

First, you'll want to add some fresh, crunchy vegetables like thinly sliced cabbage, carrot, and green onion. These add great texture and flavor.

Next, consider adding a protein like roasted chicken, beef, or even soft-boiled eggs for extra heartiness.

Don't forget the herbs – fresh cilantro, mint, and Thai basil will really make the dish pop with their aromatic flavors.

For a bit of crunch, try topping it off with crispy wonton strips or peanuts.

Finally, a drizzle of chili oil or sriracha will give it a delightful kick of heat.

Advertisement

Get creative and customize your bowl exactly how you like it! With all these amazing toppings, your Yunnan Cross-Bridge Rice Noodles are about to be taken to the next level of deliciousness.

Step 5. Serve Immediately, While Hot

serve hot immediately enjoy

Once the noodles and toppings are ready, serve the dish immediately while it's hot. The steaming broth, tender noodles, and aromatic toppings are at their best when enjoyed right away.

Don't let the food cool down – dive in and savor every delicious bite!

Transfer the noodles and toppings to a big bowl, then ladle the hot broth over the top. The noodles will soak up the flavorful liquid, creating a comforting and satisfying meal.

Make sure to include all your favorite toppings for the ultimate Cross-Bridge Rice Noodle experience.

As you take that first slurpy spoonful, you'll be transported to the bustling markets of Yunnan. The combination of textures and flavors is simply irresistible.

Advertisement

Final Thoughts

As you've explored the depths of Yunnan's renowned cross-bridge rice noodles, it's clear that this culinary delight offers a unique and captivating dining experience.

From the artful preparation to the robust flavors, every bite transports you to the heart of this vibrant region. What truly sets these noodles apart is the dedication and passion of the chefs who've perfected the craft over generations. The spicy dan dan noodles recipe is a shining example of their expertise, with its balance of heat and savory flavors. Each bowl is a homage to tradition, a testament to the artistry and skill passed down through the years. With every mouthful, you can taste the history and culture of this celebrated dish.

As you reflect on your journey through this culinary adventure, take a moment to savor the memories.

Picture the steaming bowls, the aromatic broth, and the interplay of textures that make each mouthful a delightful discovery.

This is more than just a meal – it's a cultural experience that celebrates the rich heritage of Yunnan and the enduring power of food to bring people together.

Advertisement

Frequently Asked Questions

Can the Noodles Be Made With Different Types of Rice?

You can certainly use different types of rice to make rice noodles. The choice of rice variety will affect the texture and flavor, so experiment to find the one that suits your preferences best.

How Long Do the Noodles Typically Last After Being Cooked?

How long do the cooked noodles typically last? Well, it depends on the type of noodles, but generally, they'll stay fresh for 3-5 days when stored properly in the fridge. Just be sure to keep 'em covered to prevent drying out.

Are There Any Dietary Restrictions Associated With This Dish?

Regarding dietary restrictions, the dish may not be suitable for individuals with gluten or nut allergies. It's always best to inquire about the specific ingredients used to ensure it aligns with your dietary needs.

Can the Toppings Be Customized to Individual Preferences?

You can customize the toppings to your individual preferences. The dish is highly versatile, allowing you to tailor the ingredients to your liking and dietary needs. You have the freedom to create a personalized version of this dish.

Are There Any Health Benefits to Consuming Yunnan Cross-Bridge Rice Noodles?

When you consume rice noodles, you can enjoy some health benefits. They're typically low in fat and calories, and provide complex carbs that can fuel your body. Plus, they're gluten-free, making them a great option for those with dietary restrictions.

Advertisement

Continue Reading

Chinese Cuisine

Red-Braised Pork Belly

A succulent Hunan classic, red-braised pork belly is a melt-in-your-mouth delight that has captivated generations, with its rich soy and brown sugar flavors. Discover the secrets behind this…

Published

on

savory chinese pork dish

Red-braised pork belly is a scrumptious Chinese dish from Hunan Province that's been passed down for generations. You'll start by searing the pork to get a mouthwatering crust, then simmer it in a rich soy and brown sugar sauce with fragrant spices like star anise and cinnamon. The long, slow cooking makes the pork belly melt-in-your-mouth tender. Garnish it with fresh green onions for a pop of color and crunch. Serve this comforting dish with steamed rice, and you'll see why it's considered a true culinary treasure. Want to learn more about the storied history and cooking techniques behind this irresistible dish?

Key Takeaways

  • Red-Braised Pork Belly is a traditional Chinese dish originating from Hunan province, known for its savory, sweet, and aromatic flavors.
  • The recipe features tender pork belly simmered in a rich sauce with key ingredients like soy sauce, rice wine, and brown sugar.
  • Cooking techniques such as blanching, searing, and long braising are essential for achieving the desired tenderness and flavor complexity.
  • The harmonious balance of flavors and textures, including the tender pork and the crunchy green onion garnish, creates an irresistible culinary experience.
  • Patience and skill development are crucial in preparing this dish, as it can be improved by allowing the flavors to meld over time.

History

The origins of red-braised pork belly can be traced back to the Hunan province of China, where this savory and aromatic dish has been a beloved regional delicacy for centuries.

The heart of this classic recipe lies in the slow-cooking process, which allows the pork's natural flavors to mingle with the rich, caramelized sauce. As the pork simmers away, the fat renders down, creating a melt-in-your-mouth texture that's simply irresistible.

Over time, the dish has become a beloved part of Chinese culinary heritage, with families passing down their cherished techniques and secret ingredients from generation to generation.

Whether enjoyed as a family meal or a special occasion feast, red-braised pork belly remains a beloved staple that continues to delight taste buds across China and beyond. Red-braised pork belly, also known as “hong shao rou” in Mandarin, is a classic Chinese cuisine delicacy that is characterized by its rich, savory flavor and melt-in-your-mouth tenderness. The dish is often prepared by braising thick slices of pork belly in a flavorful mixture of soy sauce, ginger, garlic, and spices until the meat is succulent and the sauce has thickened to a luxurious glaze. Its popularity extends beyond China, as food enthusiasts around the world are drawn to its irresistible combination of sweet, savory, and umami flavors.

Its captivating combination of savory, sweet, and aromatic notes makes it a true culinary treasure, steeped in the rich traditions of Chinese cuisine.

Advertisement

Recipe

Red-Braised Pork Belly is a classic Chinese dish that features tender, flavorful pork belly slowly simmered in a rich, savory sauce. The long braising time allows the pork to become meltingly tender, while the aromatic spices and soy sauce infuse the meat with deep, complex flavors.

The key to the perfect red-braised pork belly is patience. The dish requires a bit of time and attention, but the results are well worth it. The pork belly is first seared to create a golden-brown crust, then simmered in a mixture of soy sauce, rice wine, and spices until the meat is fall-apart tender.

  • 2 lbs pork belly, cut into 1-inch cubes
  • 3 cloves garlic, minced
  • 1 inch ginger, peeled and sliced
  • 1/2 cup soy sauce
  • 1/4 cup rice wine or Shaoxing wine
  • 2 tablespoons brown sugar
  • 2 star anise
  • 2 cinnamon sticks
  • 4 cups chicken or beef stock

In a large Dutch oven or heavy-bottomed pot, sear the pork belly over medium-high heat until golden brown on all sides, about 5-7 minutes. Remove the pork from the pot and set aside.

Reduce the heat to medium, add the garlic and ginger to the pot, and cook for 1-2 minutes until fragrant. Pour in the soy sauce, rice wine, brown sugar, star anise, and cinnamon sticks, and stir to combine.

Add the seared pork belly and stock, and bring the mixture to a boil. Reduce the heat to low, cover the pot, and simmer for 2-3 hours, or until the pork is tender and the sauce has thickened. Adjust the seasoning to taste, and serve the red-braised pork belly with steamed rice, a side of vegetables, and your favorite condiments.

For the best results, be patient and let the pork braise for as long as possible. The longer it cooks, the more tender and flavorful the pork will become.

Advertisement

Additionally, you can prepare the dish a day in advance and let the flavors meld together overnight before reheating and serving.

Cooking Steps

Slice that pork belly into chunky pieces, then blanch them in boiling water to get rid of any impurities.

Next, you'll caramelize the pork in a skillet to lock in the flavor.

Step 1. Slice Pork Belly Into Chunks

slice pork belly chunks

Before you can begin cooking the pork belly, you'll need to slice it into bite-sized chunks. First, grab a sharp knife and a sturdy cutting board.

Carefully place the pork belly on the board, then use the knife to cut the meat into 1-inch pieces. Don't worry if they're not perfectly uniform – the irregular shapes will add to the rustic charm of the dish.

As you work, try to keep the pieces evenly sized so they cook at the same rate. Once you've sliced the entire pork belly, you can give the chunks a quick rinse under cold water to remove any stray bits of fat or skin.

Advertisement

Dry them off with some paper towels, and you're ready to move on to the next step! Cooking the pork belly low and slow is the key to achieving that melt-in-your-mouth texture, so take your time and enjoy the process.

Your patience will definitely pay off in the end.

Step 2. Blanch Pork Belly in Boiling Water

blanch pork belly boiling

The first step in the cooking process is to blanch the pork belly chunks in boiling water. This important step helps to remove any impurities or excess fat from the meat, giving you a cleaner, more refined flavor in the final dish.

Simply fill a large pot with water and bring it to a rolling boil over high heat. Once the water is bubbling vigorously, carefully add the sliced pork belly pieces. Let them soak for about 2 to 3 minutes, then use a slotted spoon to scoop them out and transfer them to a clean bowl or plate.

Don't worry if the pork looks a bit pale and bland at this stage – the real magic will happen during the next steps of the cooking process. With the pork belly now prepped and ready, you can move on to the next exciting phase of this delicious recipe!

Step 3. Caramelize Pork Belly in Skillet

caramelize pork belly skillet

With the pork belly now prepped and ready, grab a large, heavy-bottomed skillet and place it over medium-high heat.

Once the skillet is nice and hot, add a generous drizzle of oil and let it heat up for a minute or two.

Advertisement

Now, carefully add the blanched pork belly slices to the pan, making sure they don't overlap.

You'll want to let them sizzle and brown for about 2-3 minutes per side, turning them occasionally with tongs.

As the pork sears, you'll start to see the edges turn golden and crispy – that's exactly what you're going for!

Keep an eye on them, adjusting the heat as needed to prevent burning.

Once both sides are beautifully caramelized, transfer the pork to a plate and set it aside.

Advertisement

Don't worry, we're not done yet – there are still a few steps to go before this delicious pork belly is ready to enjoy!

Step 4. Simmer Pork in Aromatic Liquid

pork simmered in aromatics

Next, add the caramelized pork belly slices to a Dutch oven or large, heavy-bottomed pot.

Pour in enough water or broth to just cover the pork. Toss in some fragrant ingredients like star anise, cinnamon sticks, cloves, and ginger slices. The pungent aroma will make your mouth water!

To complement your meal, consider serving it with a soothing cup of herbal tea, as many varieties can aid in digestion and enhance your dining experience, such as herbal teas with digestion benefits.

Bring the liquid to a boil, then reduce the heat to a gentle simmer. Let the pork slowly braise for about an hour, or until it's meltingly tender. The longer you simmer it, the more the flavors will blend together.

Be patient – it's well worth the wait! Occasionally, skim any foam or fat that rises to the surface. This will keep your dish nice and clean.

Advertisement

When the pork is super soft, you're ready for the next step. Get ready to experience the deep, rich flavors of this classic Chinese dish!

Step 5. Garnish With Green Onions

garnish dish with onions

Finely slice some green onions to garnish the tender, red-braised pork belly. You'll want those vibrant, green slices to create a colorful contrast against the rich, caramelized meat. Sprinkle them generously over the top – the fresh, oniony flavor will perfectly complement the savory-sweet pork.

Don't be shy with the green onions! The more, the merrier. They'll add a lovely crunch and brightness to each bite. Plus, the pop of green makes the dish look extra appetizing. Imagine how nice those slender green onion pieces will look, nestled among the shiny, reddish-brown pork cubes.

Once you've added the green onions, your red-braised pork belly is ready to serve. Scoop it up and enjoy the delightful interplay of flavors and textures. The tender pork, the aromatic cooking liquid, and the crisp green onions – it's a harmony of yum that's sure to delight your taste buds.

Final Thoughts

Ultimately, the essence of this red-braised pork belly dish lies in its harmonious balance of flavors and textures. The tender, melt-in-your-mouth pork, combined with the rich, caramelized sauce, creates a truly irresistible experience.

The vibrant green onions you sprinkled on top not only add a pop of color but also a delightful crunch, complementing the dish perfectly.

Advertisement

As you savor the final bites, you can't help but feel a sense of accomplishment. This recipe has allowed you to explore the depths of Chinese cuisine and expand your culinary horizons.

The techniques you've learned, from searing the pork to expertly reducing the sauce, will undoubtedly serve you well in future culinary adventures.

Frequently Asked Questions

Is Red-Braised Pork Belly Suitable for Vegetarians?

No, red-braised pork belly is not suitable for vegetarians. Pork belly is a type of meat, and the dish is prepared using animal-based ingredients, making it unsuitable for those following a vegetarian diet.

Can I Substitute the Pork Belly With Another Cut of Meat?

You can absolutely substitute the pork belly with another cut of meat. Try using chicken thighs, beef brisket, or even tofu for a vegetarian option. The key is to adjust the cooking time accordingly.

How Long Can the Dish Be Stored in the Refrigerator?

Stored leftovers can typically last 3-4 days in the refrigerator. Be sure to refrigerate the dish in an airtight container as soon as it's cooled down. This will help preserve the flavors and prevent spoilage.

Advertisement

Can I Use a Slow Cooker Instead of a Stovetop?

You can absolutely use a slow cooker instead of a stovetop. The slow cooking process will infuse the flavors and tenderize the meat, just like on the stovetop. Give it a try and see how it turns out!

Does the Dish Contain Any Gluten or Nut Ingredients?

The dish does not contain any gluten or nut ingredients. It's a gluten-free and nut-free recipe, so you don't have to worry about those dietary restrictions when preparing it.

Continue Reading

Affiliate Disclaimer
As an affiliate, we may earn a commission from qualifying purchases. We get commissions for purchases made through links on this website from Amazon and other third parties.

Advertisement

Vetted

top local car washes top local car washes
Vetted2 months ago

14 Best Car Washes Near You for a Sparkling Clean Ride

I discovered the 14 best car washes near you that promise a sparkling clean ride, and you won't want to...

top mops for 2024 top mops for 2024
Vetted2 months ago

The 15 Best Mops of 2025 – Your Ultimate Guide to a Spotless Home

Find the perfect mop for your cleaning needs in 2025, and discover how these top choices can revolutionize your home...

top women s fragrances 2024 top women s fragrances 2024
Vetted2 months ago

15 Best Perfumes for Women in 2025 – A Fragrance Guide You Can’t Miss

Keen to discover the top 15 perfumes for women in 2025? Uncover unique scents that will elevate your fragrance game!

top local bars guide top local bars guide
Vetted2 months ago

14 Best Bars Near You for an Unforgettable Night Out

Looking for the perfect bar to elevate your night out? Discover the 14 best spots that promise unforgettable experiences!

luxurious beard oil selection luxurious beard oil selection
Vetted2 months ago

15 Best Beard Oils for a Luxurious Grooming Experience in 2025

Shop the 15 best beard oils for a luxurious grooming experience in 2025 and discover which ones will elevate your...

top college laptops 2024 top college laptops 2024
Vetted2 months ago

15 Best College Laptops of 2025: The Ultimate Guide for Students

With our guide to the 15 best college laptops of 2025, discover which powerful models will elevate your academic experience...

waterproof mascaras for tears waterproof mascaras for tears
Vetted2 months ago

15 Best Waterproof Mascaras That Will Survive Any Tear-Jerker

Outstanding waterproof mascaras await to keep your lashes flawless through any emotional moment; discover which ones made the top 15...

top flavorful disposable vapes top flavorful disposable vapes
Vetted2 months ago

15 Best Disposable Vapes of 2025: Top Picks for Flavor and Convenience

Prepare to discover the 15 best disposable vapes of 2025 that blend exceptional flavor and convenience, but which ones truly...

refreshing lunch salad ideas refreshing lunch salad ideas
Vetted2 months ago

15 Best Salads Near You That Will Freshen Up Your Lunch Routine

Transform your lunch with the 15 best salads nearby that will tantalize your taste buds and leave you craving more...

top convertible car seats top convertible car seats
Vetted2 months ago

15 Best Convertible Car Seats of 2025 – Safety and Comfort for Your Little One

Get ready to discover the top 15 convertible car seats of 2025 that blend safety and comfort—find out which models...

delicious fast food breakfast delicious fast food breakfast
Vetted2 months ago

15 Best Fast Food Breakfast Options That Will Make Your Mornings Delicious

Uncover the 15 best fast food breakfast options that will transform your mornings into a delicious experience you won't want...

stylish contacts for vision stylish contacts for vision
Vetted2 months ago

14 Best America’s Contacts for Clear Vision and Style

Browse through the 14 best contact lenses in America for clear vision and style, and discover which one perfectly complements...

Trending