Vietnamese Cuisine
Celebrate Mid-Autumn With Delicious Banh Trung Thu
Prepare to be enchanted by the vibrant Banh Trung Thu, a beloved Vietnamese cake that celebrates the Mid-Autumn Festival with its captivating flavors and cultural significance.
Celebrate the vibrant Mid-Autumn Festival with the delightful Banh Trung Thu, a beloved Vietnamese cake that embodies the joy of family gatherings and the beauty of the harvest moon. This round, colorful treat symbolizes unity, prosperity, and the changing seasons. Crafted with love, Banh Trung Thu features a soft, glutinous rice base and a sweet, savory filling of mung bean paste and salted egg yolks. As you gather with loved ones to admire the luminous moon, indulge in the captivating aromas and flavors of this time-honored tradition. There's more to discover about this culturally significant delicacy.
Key Takeaways
- Banh Trung Thu is a traditional Vietnamese cake that embodies the spirit of the Mid-Autumn Festival, symbolizing unity, abundance, and cultural heritage.
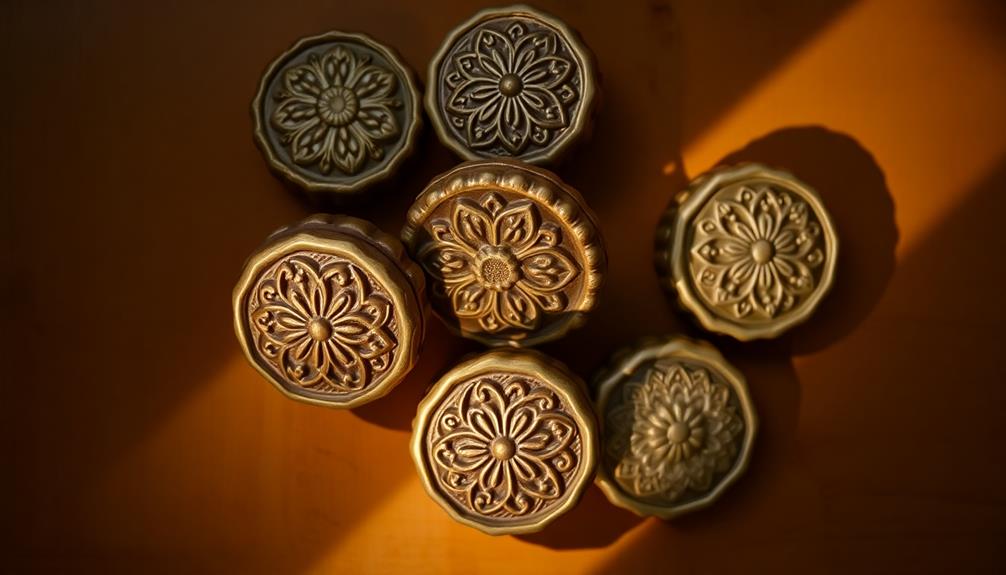
- The cake's round shape represents the full moon, while its vibrant colors signify prosperity and the changing seasons.
- Crafting Banh Trung Thu involves intricate techniques and culinary skills passed down through generations, showcasing Vietnam's rich gastronomic traditions.
- Sharing Banh Trung Thu with family and friends during the Mid-Autumn Festival strengthens bonds, creates lasting memories, and celebrates the importance of togetherness.
- The evolution of Banh Trung Thu reflects the resilience of Vietnamese cultural practices, as the cake continues to adapt while maintaining its core values of unity and harmony.
History
The origins of the Mid-Autumn Banh Trung Thu can be traced back to ancient Vietnamese traditions. For centuries, this beloved pastry has been a centerpiece of the Mid-Autumn Festival, a joyous celebration that honors the moon, family, and the changing of the seasons.
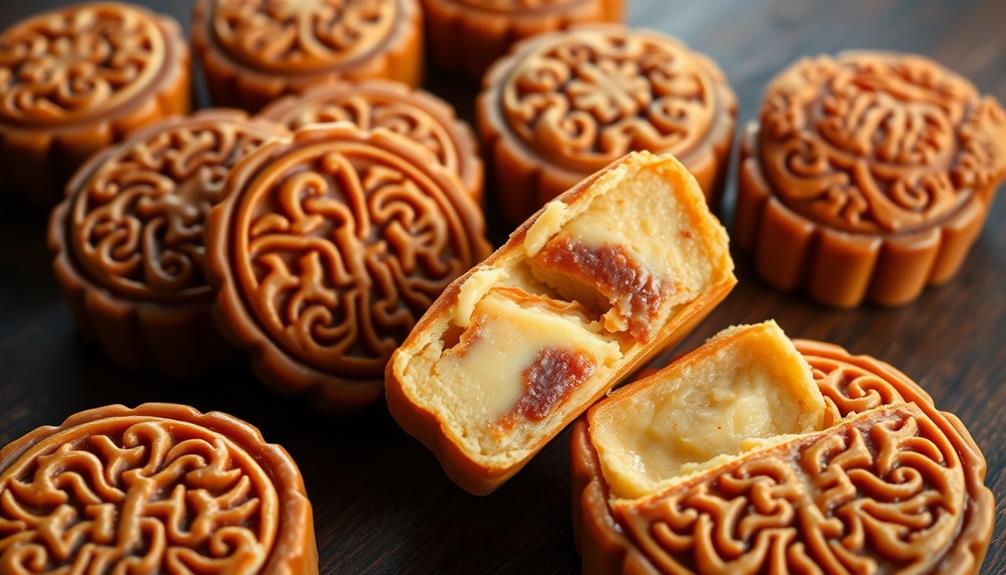
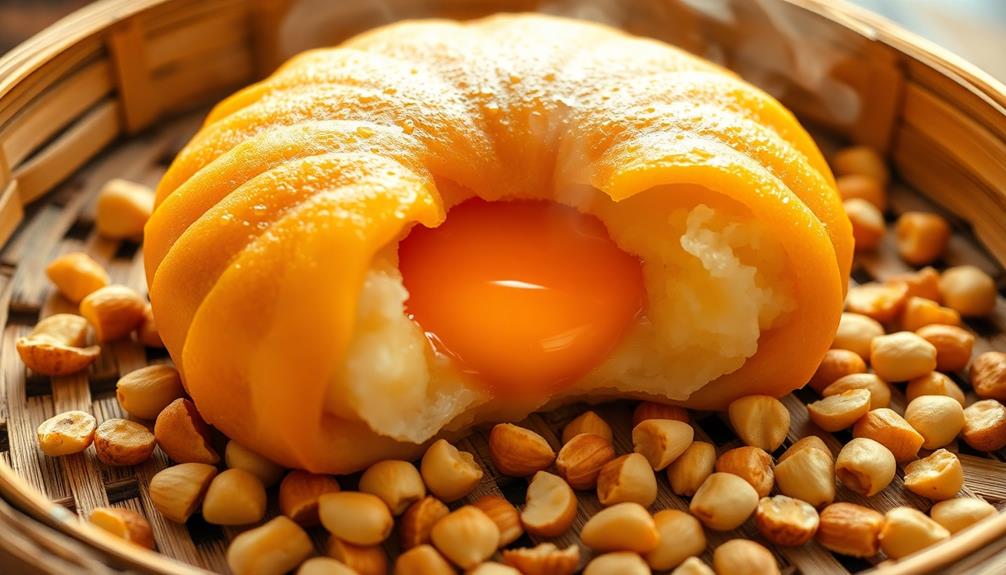
The name "Banh Trung Thu" translates to "Mid-Autumn Cake," reflecting the timing of this special treat. Traditionally, the cake is round, symbolizing the full moon and harmony. Its vibrant colors – golden-brown crust and a bright, vivid filling – represent the abundance and prosperity of the autumn harvest.
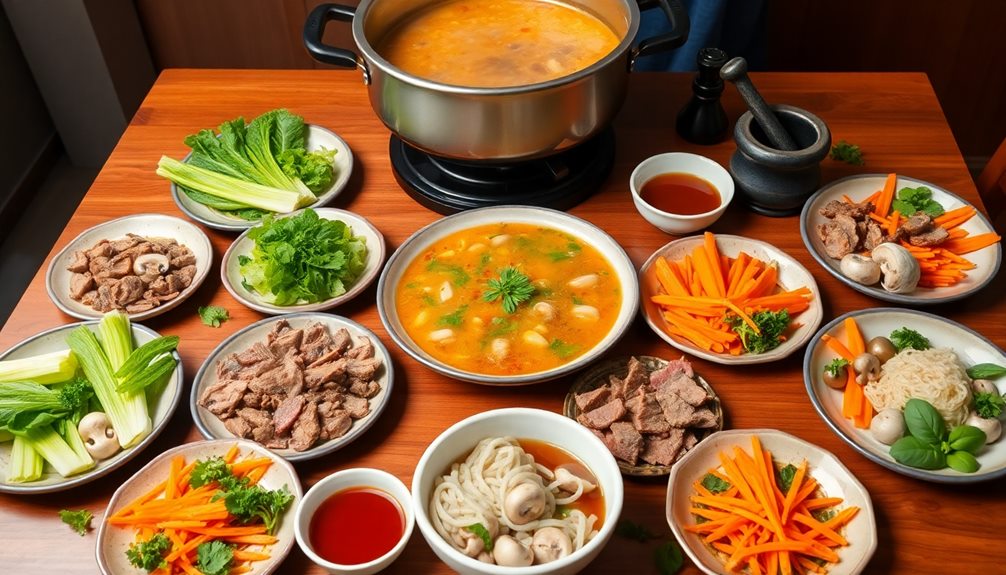
Preparing Banh Trung Thu is a time-honored ritual, passed down through generations. Families gather to mix the ingredients, shape the dough, and carefully fill each cake with a variety of sweet fillings, such as mung bean, lotus seed, or salted egg yolk.
This shared experience strengthens bonds and creates cherished memories during the Mid-Autumn festivities.
Recipe
Banh Trung Thu, also known as the Mid-Autumn Festival cake, is a beloved Vietnamese delicacy that holds deep cultural significance. This traditional treat is typically enjoyed during the Mid-Autumn Festival, a celebration of the harvest moon and family reunions.
The creation of Banh Trung Thu involves intricate techniques and the harmonious blending of various ingredients, resulting in a delightful and visually stunning dessert. The process of making this cake is a true labor of love, passed down through generations and reflecting the rich culinary heritage of Vietnam.
Ingredients:
- 2 cups glutinous rice flour
- 1/2 cup sugar
- 1/2 teaspoon salt
- 1 cup water
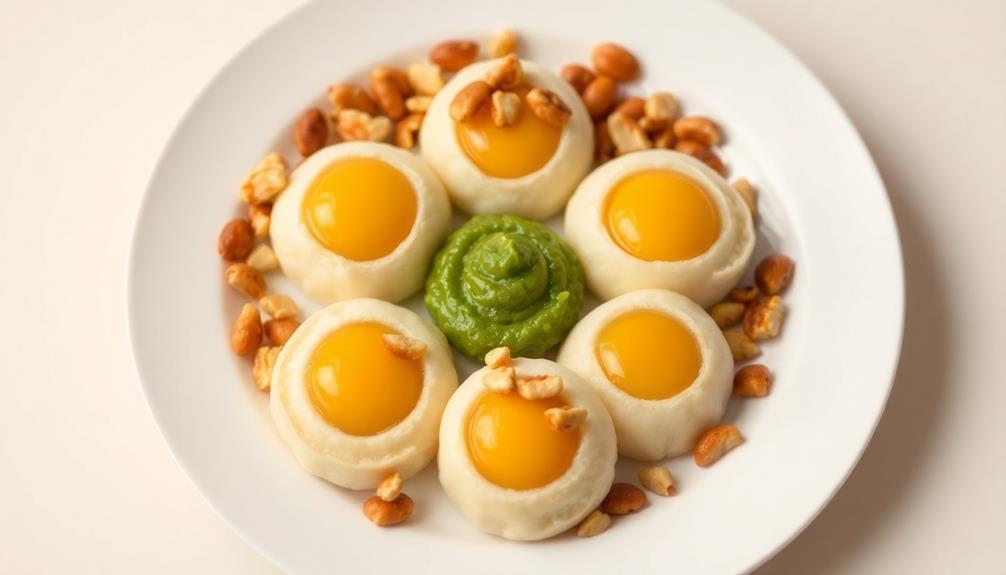
- 1 cup mung bean paste
- 4 salted egg yolks
- 1/2 cup roasted peanuts, chopped
Cooking Instructions:
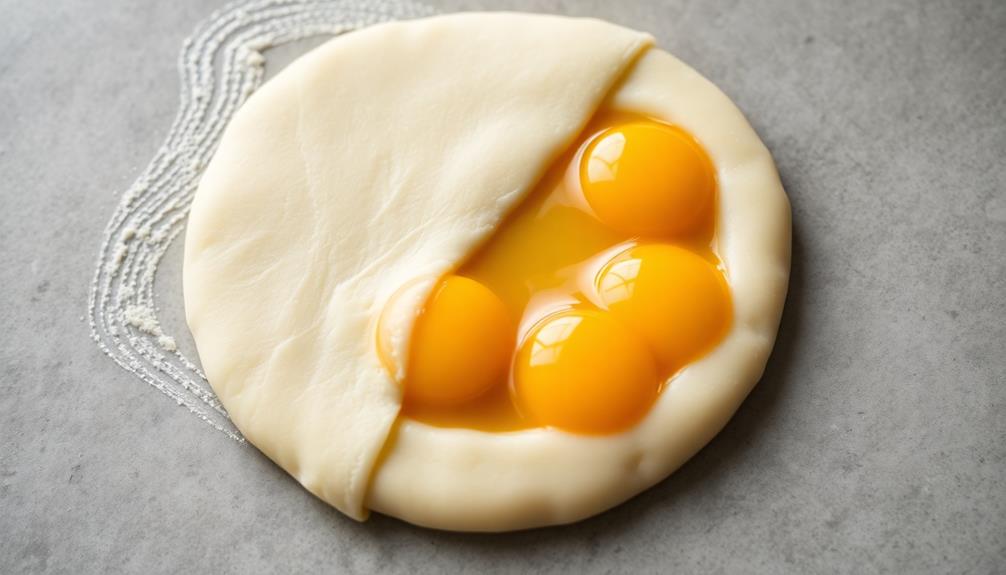
In a large bowl, mix the glutinous rice flour, sugar, and salt. Gradually add the water and knead the mixture until a smooth dough forms.
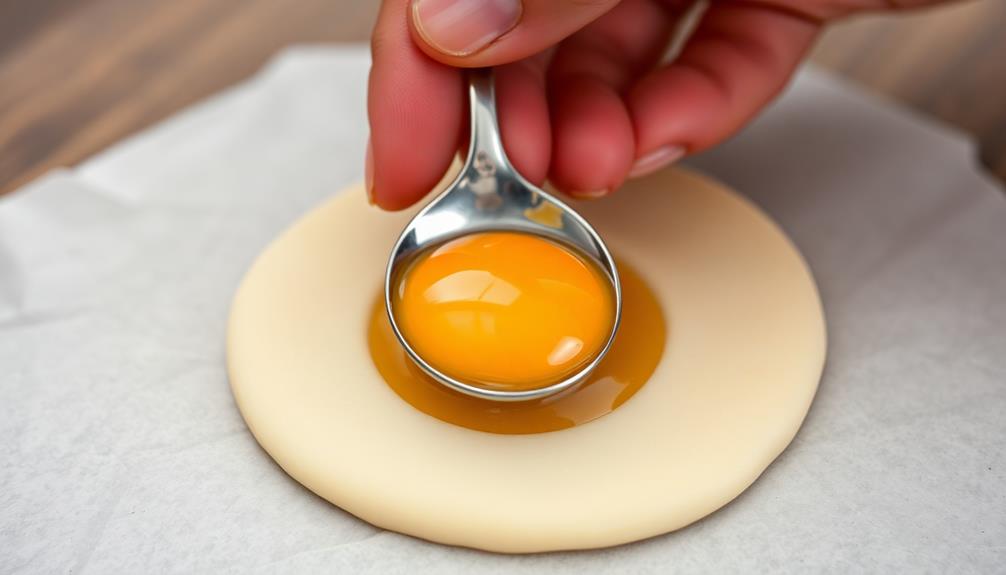
Divide the dough into equal portions and flatten each piece into a round disc. Place a tablespoon of mung bean paste in the center of each disc, followed by a salted egg yolk. Gather the edges of the dough and pinch them together to enclose the filling, creating a round, bun-like shape.
Arrange the filled Banh Trung Thu on a steamer basket and steam for 15-20 minutes, or until the dough is cooked through.
Tips:
When preparing the mung bean paste, ensure it's smooth and free of any lumps. Additionally, it's important to use high-quality salted egg yolks to achieve the perfect balance of savory and sweet flavors.
Cooking Steps
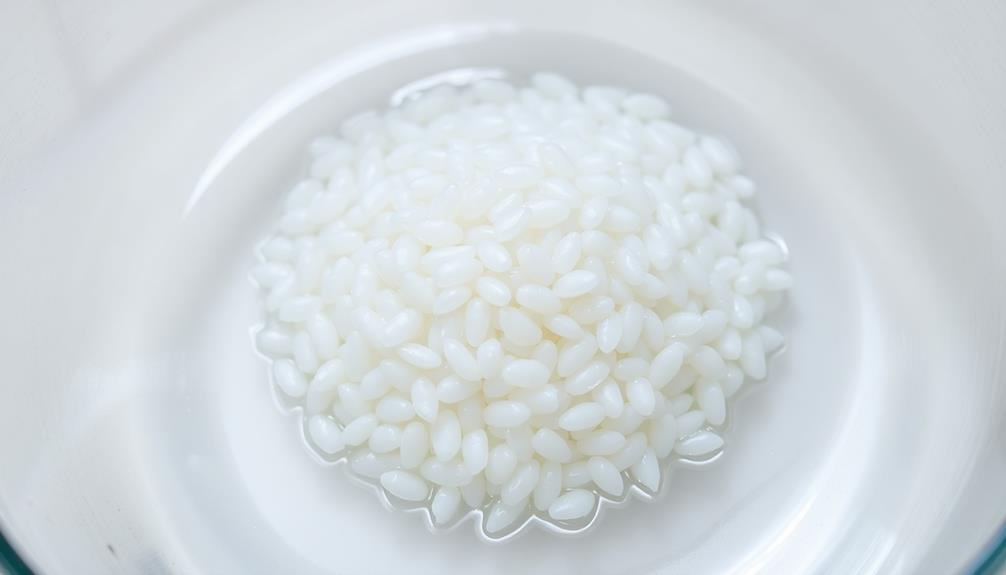
First, you'll need to soak the glutinous rice overnight and give it a good rinse.
Once that's done, steam the rice until it's nice and fluffy.
Then, it's time to add your tasty filling and wrap up those banh trung thu before steaming them one more time.
Step 1. Soak Glutinous Rice Overnight
Preparing the glutinous rice is the initial step in crafting the beloved Mid-Autumn banh trung thu.
You'll want to start by placing the glutinous rice in a large bowl and covering it with water. Let it soak overnight, allowing the rice to absorb the liquid and soften.
In the morning, drain the rice and give it a good rinse. This ensures the starches are washed away, preventing the banh from becoming too sticky.
Now, you're ready to move on to the next step – steaming the glutinous rice until it's perfectly cooked and pliable.
Soaking the rice overnight is a crucial part of the process, as it allows the grains to become tender and easier to work with.
With this foundation laid, you can confidently continue on your banh trung thu baking journey, knowing you've set the stage for a delicious and authentic Mid-Autumn treat.
Step 2. Drain and Rinse Glutinous Rice
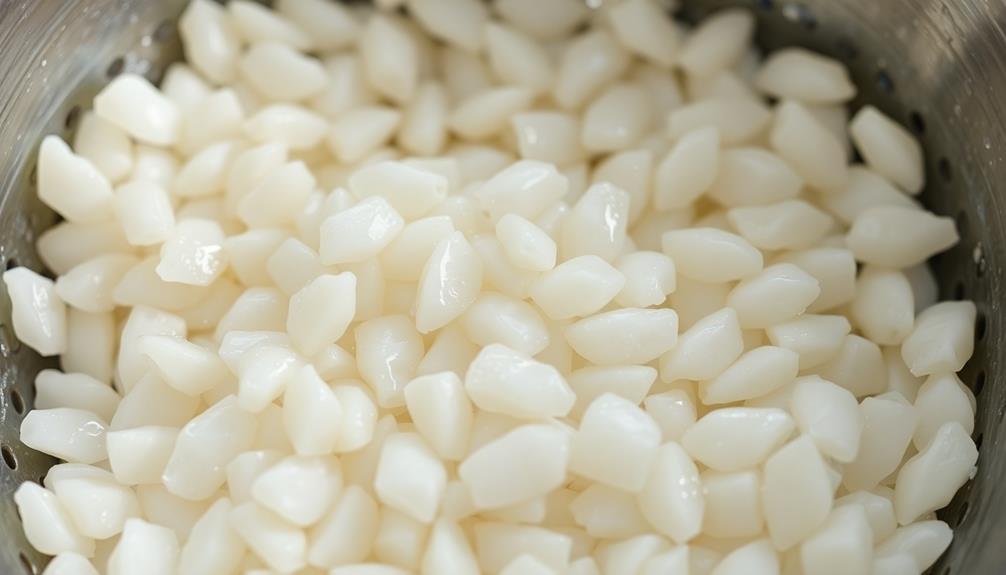
After letting the glutinous rice soak overnight, you'll want to drain it through a fine-mesh strainer. This helps remove any excess water, preparing the rice for the next step.
Gently shake the strainer to allow the water to drain completely. Once drained, give the rice a quick rinse under fresh, cool water. This helps wash away any remaining impurities or starch.
Be sure not to let the rice sit in the water, as you don't want it to become waterlogged. Quickly drain the rice again, shaking the strainer to remove as much moisture as possible.
Now, your glutinous rice is ready to be steamed! This simple yet essential step ensures your Banh Trung Thu filling has the perfect texture and consistency.
With the rice prepped, you're one step closer to enjoying the delicious flavors of this beloved Mid-Autumn Festival treat.
Step 3. Steam the Glutinous Rice
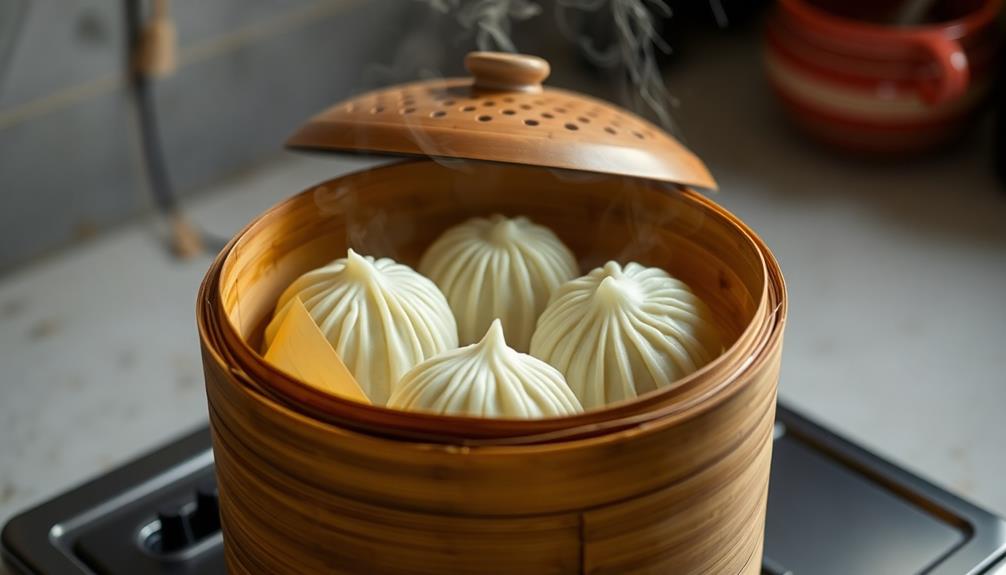
Having drained and rinsed the glutinous rice, you'll want to set up your steaming apparatus. Grab your trusty bamboo steamer and give it a quick wipe down. Line the bottom with fresh banana leaves or parchment paper to prevent sticking. Gently spoon the rinsed rice into the steamer, making sure to spread it out evenly.
Now, it's time to work your magic! Grab your wok or large pot and add a few inches of water, being careful not to let the water touch the bottom of the steamer. Bring the water to a gentle simmer over medium heat. Carefully place the steamer filled with rice on top, making sure it fits snugly.
Cover the whole setup with a tight-fitting lid and let the rice steam for about 30-40 minutes, until it's tender and translucent.
Keep an eye on the water level, topping it up if needed. Once the rice is perfectly cooked, it's ready to be transformed into delectable Banh Trung Thu!
Step 4. Add Filling
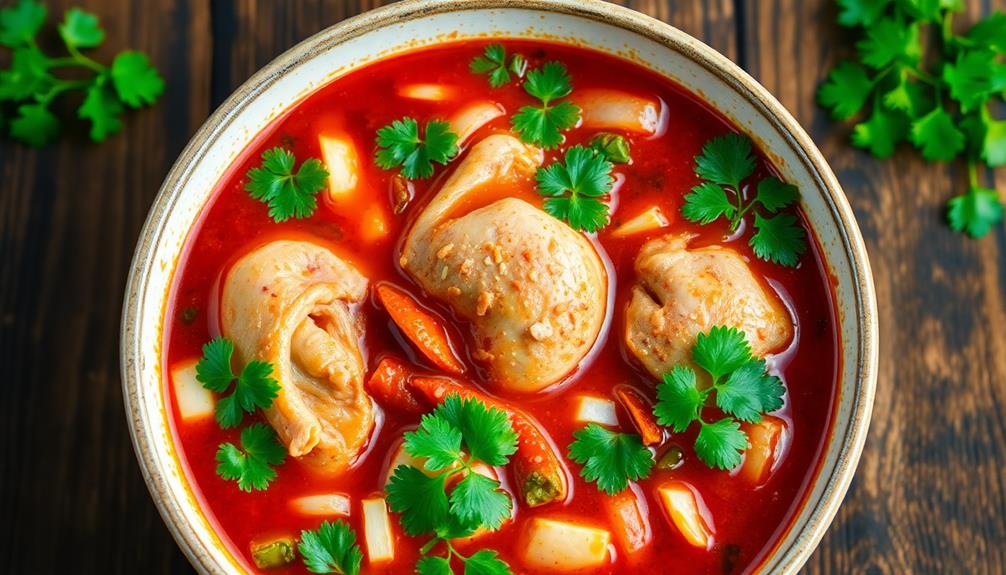
With the rice steamed to perfection, it's time to turn your attention to the filling. This is where you can get creative and add your own unique twist to your Banh Trung Thu.
Start by gathering your favorite ingredients – maybe some savory pork, sweet mung beans, or even a combination of both. Juices can also enhance your dish; for instance, a splash of detoxifying juices could bring a refreshing element to your filling.
Gently fold the filling into the warm, sticky rice, making sure it's evenly distributed. Don't be afraid to get your hands a little messy! The key is to work the filling in with care, so each bite is bursting with flavor.
Once the filling is perfectly incorporated, it's time to shape your Banh Trung Thu. Divide the rice mixture into equal portions and form them into round or crescent-shaped cakes.
Smooth the surfaces with a little water, then let them rest for a bit before steaming. This resting period helps the flavors meld and the shapes set.
Get ready for the delightful aroma to fill your kitchen as the Banh Trung Thu steam to perfection!
Step 5. Wrap and Steam the Filled Rice
To begin, take a small portion of the rice mixture and flatten it into a round or crescent shape in the palm of your hand.
Gently place a spoonful of the delicious filling into the center. Carefully fold the rice over the filling, ensuring it's completely enclosed. Continue this process until you've filled all the rice.
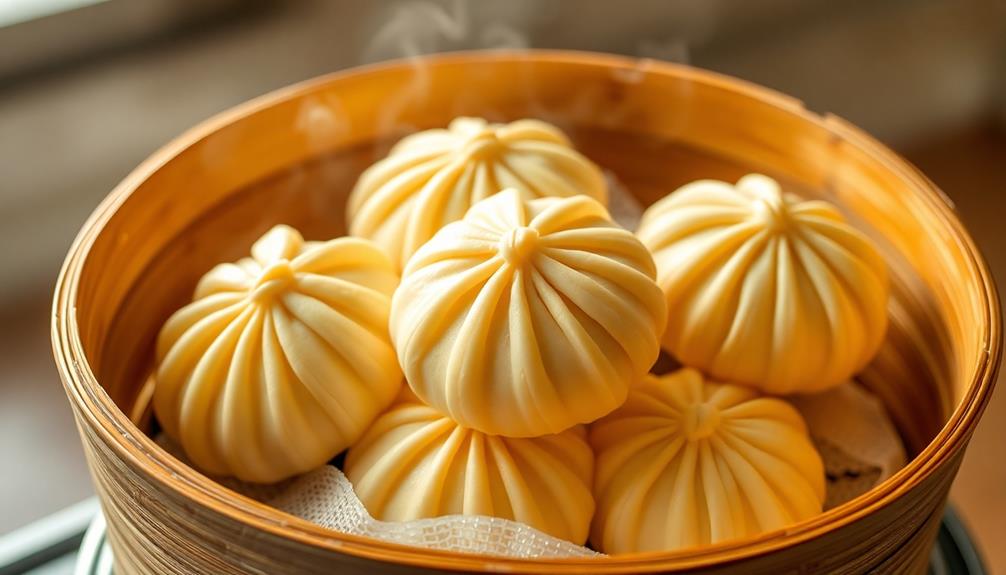
Next, line a steamer basket with banana leaves or parchment paper. Arrange the filled rice dumplings, seam-side up, in the steamer.
Cover and steam for 20-25 minutes, or until the rice is cooked through and fluffy.
Be sure to check the water level in the steamer occasionally, adding more as needed.
The aroma of these freshly steamed banh trung thu will fill your kitchen, making your mouth water in anticipation.
Serve these tasty dumplings warm, garnished with toasted sesame seeds or extra filling, if desired.
Enjoy the perfect balance of savory and sweet in every bite!
Final Thoughts
As the Mid-Autumn Festival approaches, you'll find that the enchanting Banh Trung Thu cakes hold a special place in the hearts of many.
These delectable treats, with their vibrant colors and delicate fillings, aren't just desserts – they're a symbol of unity, family, and the rich cultural heritage of Vietnam. Shared during festive celebrations and special gatherings, they bring loved ones together around the table, fostering an atmosphere of joy and togetherness. Their preparation is often a multi-generational activity, with recipes passed down through families, much like the beloved Vietnamese fried spring rolls recipe that holds a cherished place in Vietnamese cuisine. These treats, whether sweet or savory, serve as a reminder of the importance of tradition and the bonds that tie communities together.
Beyond their mouthwatering flavors, Banh Trung Thu cakes carry with them a profound significance. Each bite represents the unwavering bonds that connect loved ones, even during times of separation.
The shared experience of coming together to savor these treats creates cherished memories that transcend generations.
As you gather with family and friends to celebrate the Mid-Autumn Festival, let the Banh Trung Thu cakes be a reminder of the joy and harmony that this season brings.
Indulge in their captivating aromas, marvel at their intricate designs, and revel in the warmth of a tradition that has stood the test of time.
For in these delightful cakes, you'll find the heartbeat of a culture that celebrates the beauty of togetherness.
Frequently Asked Questions
What Is the Traditional Significance of Banh Trung Thu?
The traditional significance of banh trung thu is that it symbolizes family reunion and harmony. It's a cherished mooncake enjoyed during the Mid-Autumn Festival, a time to celebrate the harvest and spend quality time with loved ones.
How Long Can Banh Trung Thu Be Stored?
Banh trung thu can typically be stored for up to a week at room temperature. However, they'll stay fresh longer if you refrigerate them, lasting up to two weeks when properly stored.
Can Banh Trung Thu Be Frozen for Later Use?
Yes, you can freeze banh trung thu for later use. Simply wrap the cakes tightly in plastic wrap or aluminum foil, then place them in an airtight container or freezer bag. They'll stay fresh for up to 3 months.
What Are the Common Fillings Used in Banh Trung Thu?
Banh trung thu typically features sweet fillings like lotus seed paste, mung bean paste, or salted egg yolks. You'll also find variations with nuts, dried fruits, or even chocolate. The possibilities are endless!
Are There Any Vegetarian or Vegan Options for Banh Trung Thu?
Yes, there are vegetarian and vegan options for Banh Trung Thu. You can find fillings made with ingredients like mung bean, lotus seed, or even sweet potato to accommodate different dietary preferences.
Mai is a passionate chef specializing in Vietnamese cuisine. From fragrant pho to fresh spring rolls and banh mi, Mai’s dishes showcase the balance of sweet, salty, sour, and spicy that defines Vietnamese cooking. Her recipes emphasize fresh herbs, flavorful broths, and the light, vibrant ingredients that make Vietnamese food so special.
Vietnamese Cuisine
Savory, Tender, and Authentic: Vietnamese Thịt Kho Tàu
Gaze upon the captivating Vietnamese dish, Thịt Kho Tàu, a savory and tender pork belly delicacy that has been a cherished part of the country’s culinary traditions for centuries.
You're in for a real treat with Thịt Kho Tàu, the iconic Vietnamese braised pork belly dish! This savory, tender, and authentic recipe has been part of Vietnamese culinary traditions for centuries, bringing families together during celebratory Lunar New Year feasts. The pork belly simmers in a caramelized sauce packed with umami flavors from fish sauce and brown sugar, creating a mouthwatering balance of sweet, salty, and savory. Enjoy this cherished comfort food over fragrant jasmine rice, and get ready to dive deeper into the rich history and flavors of this Vietnamese culinary treasure.
Key Takeaways
- Thịt Kho Tàu is a treasured Vietnamese dish with a rich history, representing the country's culinary heritage and cultural significance.
- The dish features savory and tender pork belly braised in a caramelized sauce, creating a unique balance of sweet, salty, and umami flavors.
- The recipe involves marinating the pork, browning it, and simmering it in a sauce made with fish sauce, sugar, and coconut water until fork-tender.
- Thịt Kho Tàu is traditionally served with steamed rice, and its communal dining experience strengthens family and social bonds.
- The dish's enduring legacy as a culinary treasure ensures the continuation of Vietnamese culinary traditions for generations to come.
History
Originating from the rich culinary traditions of Vietnam, Thịt Kho Tàu has a storied history that dates back centuries. This beloved dish has been a cherished part of Vietnamese culture, passed down through generations and celebrated during important festivals and gatherings.
The name "Thịt Kho Tàu" literally translates to "braised pork in caramel sauce," reflecting the dish's iconic flavors. The technique of caramelizing the sauce was likely introduced centuries ago, adding a delightful sweetness and depth of flavor to the tender pork.
Over time, regional variations emerged, each showcasing the ingenuity and culinary artistry of Vietnamese cooks.
Today, Thịt Kho Tàu remains a beloved comfort food, bringing families and communities together through shared meals and memories. Whether enjoyed during Tết, the Vietnamese New Year, or savored on any ordinary day, this dish continues to be a cherished part of Vietnam's vibrant and evolving culinary heritage.
Recipe
Tết Kho Tàu, also known as Vietnamese Braised Pork Belly, is a beloved dish that graces many Vietnamese tables during the Lunar New Year celebration. This savory and tender pork dish is a true delight, featuring the rich, caramelized flavors of pork belly simmered in a flavorful sauce.
The key to a successful Tết Kho Tàu lies in the slow, gentle braising process that allows the pork to absorb the complex layers of sweetness, saltiness, and umami. The dish is a testament to the culinary ingenuity of the Vietnamese people, who've perfected the art of transforming humble ingredients into a gastronomic masterpiece.
- Pork belly, cut into 1-inch cubes
- Shallots, thinly sliced
- Garlic, minced
- Fish sauce
- Soy sauce
- Brown sugar
- Whole black peppercorns
- Star anise
- Water or chicken stock
In a large pot or Dutch oven, sauté the shallots and garlic until fragrant. Add the pork belly cubes and sear until browned on all sides. Stir in the fish sauce, soy sauce, brown sugar, peppercorns, and star anise. Pour in enough water or chicken stock to just cover the pork.
Bring the mixture to a boil, then reduce the heat to low, cover, and simmer for 1.5 to 2 hours, or until the pork is tender and the sauce has thickened.
When cooking Tết Kho Tàu, patience is key. The long, slow braising process is essential for developing the rich, caramelized flavors and ensuring the pork becomes meltingly tender.
Serve this dish with steamed rice, and enjoy the perfect balance of savory, sweet, and umami goodness that makes Tết Kho Tàu a true Vietnamese culinary treasure.
Cooking Steps
First, you'll need to marinate the pork in soy sauce to infuse it with flavor.
Then, brown the pork to get a nice sear on the outside.
Step 1. Marinate Pork in Soy Sauce
To begin the marinating process, you'll want to grab a mixing bowl and combine the pork with the soy sauce. Gently toss the meat until it's evenly coated, ensuring each piece is thoroughly seasoned. This simple step adds a rich, savory flavor that will permeate the pork as it simmers.
Next, cover the bowl and let the pork marinate for at least 30 minutes, or up to 2 hours if you have the time. The longer you can let it sit, the more the flavors will develop. Be sure to give the mixture a stir every so often to redistribute the sauce.
Now that your pork is nicely marinated, you're ready to move on to the next step in creating this authentic Vietnamese dish.
Get excited, because the aromas are about to fill your kitchen and have your taste buds tingling in anticipation!
Step 2. Brown the Pork
With the marinated pork ready, heat a large skillet or wok over medium-high heat.
Once the pan is nice and hot, add a splash of oil and let it heat up.
Now, carefully add the pork to the pan. You'll hear that sizzle – that's the sound of deliciousness!
Spread the pork out in an even layer and let it brown, stirring occasionally.
You'll know it's ready when the edges start to get nice and crispy. This should take about 5-7 minutes.
Be patient and let the pork do its thing – you don't want to overcrowd the pan or the meat won't get that perfect golden-brown color.
Once the pork is beautifully browned, transfer it to a plate.
Don't worry, we're not done yet! The next step is to make the savory sauce that will bring all the flavors together.
Get ready for some serious Vietnamese comfort food magic!
Step 3. Add Fish Sauce and Sugar
In the same pan, add the fish sauce and sugar. These two key ingredients will infuse the pork with a captivating blend of savory and sweet flavors. The fish sauce lends a umami depth, while the sugar helps to balance the saltiness and create a caramelized glaze.
Stir the mixture well, ensuring the pork is evenly coated. As the sauce simmers, it will thicken slightly, forming a sticky, appetizing coating on the meat. The aromas will fill your kitchen, making your mouth water in anticipation.
Once the pork has simmered for about 10 minutes, it's time to taste and adjust the seasoning. Add a bit more fish sauce if you'd like a stronger savory note, or sprinkle in some extra sugar for a sweeter touch.
Play with the flavors until they're perfectly balanced to your liking. The pork is now ready to be served, its tender chunks glistening with the delectable fish sauce-sugar glaze.
Get ready to enjoy the authentic, mouthwatering flavors of Vietnamese Thịt Kho Tàu!
Step 4. Add Coconut Water
After the pork has simmered in the flavorful fish sauce and sugar mixture, it's time to add the coconut water. This step infuses the dish with a delightful tropical twist. Simply pour in the refreshing coconut water and give it a gentle stir. The pork will immediately start to absorb the sweet and creamy coconut essence, creating an irresistible balance of savory and lightly sweet flavors.
As the coconut water simmers, you'll notice the sauce thickening and the pork becoming even more tender. This step is crucial for achieving the signature velvety texture of Thịt Kho Tàu. The coconut water also helps to tame any lingering fishiness from the sauce, resulting in a harmonious blend of tastes.
Keep a close eye on the pot, stirring occasionally, until the sauce has reached your desired consistency. The coconut water will work its magic, transforming this Vietnamese classic into an even more captivating and well-rounded dish.
Step 5. Simmer Until Pork Is Tender
Once the coconut water has been added, let the pork simmer gently until it becomes fork-tender. This can take about 30-40 minutes, so be patient.
As the pork simmers, the flavors will meld together beautifully, creating a rich, savory sauce.
Stir the pot occasionally to prevent sticking. You'll know the pork is ready when it easily separates with a fork. The meat should be incredibly tender and practically fall apart.
Breathe in the mouthwatering aroma – the combination of soy sauce, fish sauce, and spices is simply divine.
Now, it's time to adjust the seasonings. Taste the braising liquid and add a touch more fish sauce or sugar if needed, to balance the flavors perfectly.
The pork should be glazed in a thick, glossy sauce that coats each bite. Serve the Thịt Kho Tàu over steamed rice for a complete, satisfying meal.
Get ready for your family to devour this Vietnamese classic!
Final Thoughts
As you reflect on this delectable Vietnamese dish, Thet Kho Tau, it's clear that its rich, complex flavors and satisfying textures make it a true culinary delight.
The long, slow simmer allows the pork to become meltingly tender, while the caramelized sauce coats each bite with a delightful balance of sweet, salty, and savory notes.
Whether enjoyed on its own or served over fragrant jasmine rice, this hearty and comforting meal is sure to delight the senses.
The vibrant colors and aromas of Thet Kho Tau also make it a wonderful centerpiece for family gatherings and festive celebrations.
With its ability to bring people together around the table, this dish truly embodies the heart and soul of Vietnamese cuisine.
As you savor the final bites, you can't help but feel a sense of satisfaction and appreciation for the depth of flavor and the rich cultural heritage that this dish represents.
Thet Kho Tau is a true treasure, and one that should be savored and shared with loved ones for years to come.
Frequently Asked Questions
What Is the Ideal Ratio of Ingredients for ThịT Kho Tàu?
The ideal ratio of ingredients for thịt kho tàu is generally 1 part pork to 2 parts fish sauce, with adjustments to taste. You'll want a flavorful, tender pork that's complemented by the savory fish sauce.
How Long Can ThịT Kho Tàu Be Stored For?
You can store thit kho tau for up to 5 days in the refrigerator. After that, the flavors may start to deteriorate, and the dish won't taste as fresh. Make sure to keep it tightly covered to maintain its delicious taste.
Can ThịT Kho Tàu Be Made With Other Types of Meat?
Yes, you can make thịt kho tàu with other types of meat. Pork is commonly used, but you can experiment with beef, chicken, or even fish to create your own unique version of this classic Vietnamese dish.
What Are Some Common Accompaniments for ThịT Kho Tàu?
Common accompaniments for thịt kho tàu include steamed rice, pickled vegetables, and fresh herbs like cilantro or mint. You can also serve it with crusty bread or a fried egg on top for a complete meal.
Is ThịT Kho Tàu Gluten-Free or Suitable for Special Diets?
Thiết kho tàu can be gluten-free, making it suitable for those with gluten sensitivities. The dish's primary ingredients, like pork and vegetables, don't typically contain gluten, allowing you to enjoy this authentic Vietnamese meal.
Mai is a passionate chef specializing in Vietnamese cuisine. From fragrant pho to fresh spring rolls and banh mi, Mai’s dishes showcase the balance of sweet, salty, sour, and spicy that defines Vietnamese cooking. Her recipes emphasize fresh herbs, flavorful broths, and the light, vibrant ingredients that make Vietnamese food so special.
Vietnamese Cuisine
Nems: The French Take on Vietnamese Fried Spring Rolls
Fusing Vietnamese and French culinary traditions, nems offer a delightful balance of flavors and textures that will leave you craving more.
Nems – the beloved French take on Vietnamese fried spring rolls – blend delightful flavors and textures, showcasing the harmonious fusion of two distinct culinary traditions. Tracing back to the early 20th century during French colonization, nems evolved from Vietnamese spring rolls, incorporating local French ingredients like wheat flour and pork. Today, you'll enjoy the signature crunch as you bite into these golden-brown delights, savoring the perfect balance of crisp wrappers and flavorful fillings. From soaking the noodles to folding and frying, each step in the process contributes to the sensory experience. Discover the rich history and mouthwatering appeal of nems – a delectable treat that connects cultures.
Key Takeaways
- Nems originated from the Vietnamese spring roll "cha gio," adapted by the French during colonial times with local ingredients like wheat flour and pork.
- The dish blends Vietnamese and French culinary traditions, symbolizing the shared culinary history between the two cultures.
- Nems are prepared by folding a filling of noodles, vegetables, and protein into a spring roll wrapper, then deep-frying until golden brown.
- The careful handling of noodles, including soaking, draining, and squeezing, is crucial for achieving the desired crunchy texture of the final dish.
- Nems represent the harmony of flavors and textures, reflecting the creativity and cultural significance of Vietnamese cuisine through a French-influenced lens.
History
The origins of nems, the French Vietnamese fried spring rolls, can be traced back to the early 20th century. When the French colonized Vietnam, they were introduced to the delicious Vietnamese spring rolls known as "cha gio."
The French fell in love with these crispy, flavor-packed rolls and decided to put their own spin on them. They used French ingredients like wheat flour and pork, creating a unique twist on the traditional Vietnamese recipe.
Over time, these French-influenced nems became a beloved part of Vietnamese cuisine, blending the best of both cultures.
Today, nems are enjoyed all over France and Vietnam, a tasty testament to the shared culinary history between the two nations. Whether you're biting into a savory nem at a Parisian bistro or a family-owned Vietnamese restaurant, you'll savor the delicious fusion of flavors that makes these fried spring rolls so special.
Cooking Steps
Once you've gathered all the necessary ingredients, the fun part of preparing the nems begins.
First, take a small amount of the filling mixture and place it in the center of a spring roll wrapper. Carefully fold the bottom of the wrapper up over the filling, then fold in the sides and continue rolling until you have a neat little package. Make sure to keep the rolls tightly wrapped to prevent them from unraveling during frying.
Next, heat a few inches of oil in a large pot or Dutch oven to 350°F. Gently lower the nems into the hot oil and fry for 2-3 minutes, turning occasionally, until they're golden brown and crispy.
Drain the fried nems on a paper towel-lined plate to remove any excess oil.
Step 1. Soak Noodles in Warm Water
Soaking the noodles in warm water is the next crucial step. You'll want to do this before adding them to your spring roll filling.
Simply fill a bowl with warm water and gently submerge the dried noodles. Let them soak for about 10-15 minutes, until they become soft and pliable. This step helps the noodles absorb flavors more easily when you add them to the filling.
Once the noodles have softened, drain them in a colander and give them a quick rinse under cool water. This stops the cooking process and ensures the noodles don't get too soft.
Now they're ready to be cut into bite-sized pieces and mixed with the other delicious ingredients like shredded cabbage, carrots, bean sprouts, and herbs. The warm, soaked noodles will bind everything together perfectly, creating that classic spring roll texture you know and love.
Just remember to work quickly, as you don't want the noodles to dry out.
Step 2. Drain and Squeeze Noodles
After soaking the noodles, drain them thoroughly in a colander. Give them a good shake to remove any excess water.
Now, it's time to squeeze those noodles dry! Grab a handful and give them a good, firm squeeze. You want to get as much water out as possible. Keep squeezing until the noodles feel light and springy.
Don't worry, your hands won't get tired – this is an important step that will help your spring rolls stay crispy. Once all the noodles are squeezed, you can set them aside, ready for the next step.
Properly draining and squeezing the noodles is key to achieving that perfect, crunchy texture in your Vietnamese fried spring rolls. Take your time with this part, and you'll be well on your way to nailing this delicious French-Vietnamese dish.
Step 3. Add Vegetables and Protein
Now that you've thoroughly drained and squeezed the noodles, it's time to start building the filling. Grab a big bowl and let's add the veggies!
You'll want to chop up some cabbage, carrots, and bean sprouts into bite-sized pieces. These crunchy veggies will give your nems that satisfying texture.
Next, let's add the protein. You can use ground pork, shrimp, or a mix of both. Sauté the protein in a pan until it's cooked through, then toss it into the veggie-filled bowl. Mmm, can you smell that savory aroma already?
Now, it's time to season everything up. Sprinkle in some minced garlic, a dash of soy sauce, a pinch of sugar, and a squeeze of fresh lime juice.
Give it all a good stir to combine the flavors. Your filling is now ready to be wrapped up in those delicate rice paper wrappers. Get ready to roll up some tasty nems!
Step 4. Fold and Roll Nems Tightly
With your filling all set, it's time to start rolling up the nems.
First, take a rice paper wrapper and place it on a clean, damp surface. Dip your fingers in water and lightly moisten the wrapper to make it pliable.
Place a spoonful of the vegetable and protein filling near the bottom of the wrapper. Fold the bottom edge over the filling, then fold in the sides and continue rolling it up tightly.
Make sure to roll it snugly, without any gaps or air pockets. Once the nem is fully rolled, wet your fingertips and run them along the seam to seal it.
Repeat this process with the remaining wrappers and filling. Be gentle but firm as you roll, and watch out for any rips or tears in the paper.
With your nems all rolled up, they're ready to be fried to a golden-brown perfection!
Step 5. Fry Nems in Hot Oil
To fry the nems, heat about 2-3 inches of vegetable oil in a heavy-bottomed pot or Dutch oven over medium-high heat.
Once the oil is shimmering, it's time to add those delicious rolls! Gently lower the nems into the hot oil, being careful not to overcrowd the pot. Fry the nems for 2-3 minutes per side, or until they're golden brown and crispy.
Use a slotted spoon or tongs to transfer the fried nems to a paper towel-lined plate. This will help drain off any excess oil.
Repeat the process with the remaining nems, frying in batches to maintain the oil temperature.
Keep a close eye on the oil and adjust the heat as needed to prevent the nems from burning.
Once all the nems are fried, give them a final blot with paper towels to remove any lingering oil.
Now, you've got perfectly crispy, golden-brown nems ready to enjoy! Serve them hot and let the crunchy goodness delight your taste buds.
Final Thoughts
Why not take a moment to reflect on the joys of savoring these delectable Vietnamese fried spring rolls?
After all the careful preparation and frying, it's time to sit back, relax, and indulge. Imagine the satisfying crunch as you take that first bite, the filling bursting with vibrant flavors.
These nems are a true delight for the senses – the aroma, the texture, the taste. Each one is a little package of goodness, a testament to the culinary creativity of the Vietnamese people.
As you enjoy them, let your mind wander to the bustling streets of Saigon or the tranquil countryside. These fried spring rolls are more than just a snack; they're a cultural experience, a way to connect with a rich heritage.
Frequently Asked Questions
How Do Nems Differ From Traditional Vietnamese Spring Rolls?
Nems differ from traditional Vietnamese spring rolls as they're typically larger, heavier, and have a more crispy exterior due to the French influence in their preparation. The filling also tends to be more finely chopped and seasoned differently.
What Are the Typical Fillings Used in Nems?
The typical fillings used in nems often include minced pork, shredded cabbage, carrots, vermicelli noodles, and various seasonings. These ingredients are then wrapped in a thin, crispy rice paper or wheat-based wrapper before being fried to perfection.
How Do You Achieve the Perfect Crispy Texture in Nems?
To achieve the perfect crispy texture in nems, you'll need to use a combination of techniques. Make sure to fry the rolls at the right temperature, use a light and airy wrapper, and drain them well after cooking.
Can Nems Be Made in Advance for a Party or Event?
Yes, you can make nems in advance for a party or event. They can be fried, cooled, and stored in the fridge for up to 3 days. Just reheat them in the oven or air fryer before serving to ensure they're crispy.
Are There Any Variations or Regional Differences in Nems Recipes?
Absolutely! Nems can vary regionally in Vietnam, with different fillings, seasonings, and folding techniques. Some areas may use more pork, others emphasize shrimp or vegetables. Get creative and explore the diverse flavors of this classic Vietnamese dish.
Mai is a passionate chef specializing in Vietnamese cuisine. From fragrant pho to fresh spring rolls and banh mi, Mai’s dishes showcase the balance of sweet, salty, sour, and spicy that defines Vietnamese cooking. Her recipes emphasize fresh herbs, flavorful broths, and the light, vibrant ingredients that make Vietnamese food so special.
Vietnamese Cuisine
Creamy and Unique: Discovering Vietnamese Sweet Potatoes
Khoai môn, the vibrant and creamy Vietnamese sweet potatoes, hold a captivating history and a unique blend of flavors that will tantalize your taste buds.
Discover the vibrant, creamy world of Vietnamese sweet potatoes! These unique tubers, known as khoai môn, have a rich history woven into Vietnam's culinary tapestry. They're not only nutritious, packed with vitamins and minerals, but their delightful blend of sweet and savory flavors makes them a beloved staple. Whether roasted, steamed, or incorporated into traditional dishes, Vietnamese sweet potatoes lend a comforting warmth to family gatherings and celebrations. Their versatile nature allows them to shine, whether complementing grilled meats or starring in decadent desserts. Dive into the heart of Vietnamese cuisine and uncover the captivating story behind these delectable sweet potatoes.
Key Takeaways
- Vietnamese sweet potatoes, known as khoai mỏn, are prized for their unique balance of sweet and savory flavors and creamy, velvety texture.
- Originating in South America and embraced by Vietnamese farmers and home cooks, these sweet potatoes are an integral part of traditional celebrations and family gatherings.
- Packed with vitamins, minerals, fiber, and antioxidants, Vietnamese sweet potatoes offer a healthy and nutritious alternative to other sweet potato varieties.
- Versatile in culinary use, these sweet potatoes can be prepared in various ways, including roasting, steaming, and incorporation into traditional Vietnamese dishes.
- The subtle sweetness and creamy texture of Vietnamese sweet potatoes make them a comforting and delightful addition to meals, offering a distinct twist on the classic root vegetable.
History
Although the origins of the sweet potato can be traced back to South America, the crop made its way to Vietnam through various trade routes and cultural exchanges over the centuries.
Vietnamese farmers and home cooks have since embraced the versatile vegetable, incorporating it into a wide array of traditional dishes. Known as khoai mùn, the sweet potato has become a beloved staple, often featured in festive celebrations and family gatherings.
Its creamy texture and unique flavor profile have made it a cherished ingredient in Vietnamese cuisine. From steaming khoai mùn as a side dish to blending it into silky desserts, the sweet potato has become an integral part of the country's rich culinary heritage.
Whether roasted, boiled, or stir-fried, this humble yet remarkable vegetable continues to delight and nourish Vietnamese families across generations.
Recipe
Vietnamese Sweet Potatoes
Vietnamese sweet potatoes are a beloved and versatile ingredient in Southeast Asian cuisine. These vibrant tubers are prized for their sweet, creamy flesh and unique flavor profile that sets them apart from their American counterparts.
Whether roasted, steamed, or incorporated into desserts, Vietnamese sweet potatoes are a delightful addition to any meal. This recipe showcases the simple yet delicious nature of Vietnamese sweet potatoes. By highlighting their natural sweetness and pairing them with complementary seasonings, this dish allows the true essence of these root vegetables to shine.
Ingredients:
- 3 medium-sized Vietnamese sweet potatoes, peeled and cut into 1-inch cubes
- 2 tablespoons vegetable oil
- 1 teaspoon ground cinnamon
- 1/2 teaspoon ground nutmeg
- 1/4 teaspoon ground ginger
- 1/4 teaspoon salt
Instructions:
Preheat the oven to 400°F (200°C). In a large bowl, toss the cubed sweet potatoes with the vegetable oil, cinnamon, nutmeg, ginger, and salt until the potatoes are evenly coated.
Spread the seasoned sweet potato cubes in a single layer on a baking sheet. Roast for 25-30 minutes, or until the potatoes are tender and lightly caramelized, flipping halfway through the cooking time.
When cooking Vietnamese sweet potatoes, it's important to keep a close eye on them to prevent overcooking. The natural sugars in these tubers can cause them to brown quickly, so be sure to check them regularly and adjust the cooking time as needed.
Enjoy these delightful Vietnamese sweet potatoes as a side dish or as a versatile ingredient in a variety of recipes.
Cooking Steps
Peel and cube the taro, then boil the taro cubes until tender.
Drain the cooked taro and return it to the pot, ready to mash.
Add creamy coconut milk and your favorite seasonings to give this dish its authentic Vietnamese flavor.
Step 1. Peel and Cube the Taro
Begin by carefully peeling the taro with a sharp knife. Cut off the tough, outer skin, revealing the starchy, white flesh underneath. Be cautious as the taro can be quite firm and unyielding.
Next, place the peeled taro on a clean cutting board and, using a sturdy chef's knife, slice it into even 1-inch cubes.
Take your time and focus on making each cube uniform in size. This will ensure they cook evenly when added to the dish. As you work, be mindful of your fingers – taro can be a bit slippery, so grip the knife firmly and use your free hand to steadily hold the taro in place.
Once you've cubed the entire taro, give the pieces a quick rinse under cool water to remove any debris or starch.
Now you're ready to add the taro cubes to your recipe and experience the delightful flavors of this beloved Vietnamese ingredient!
Step 2. Boil the Taro Cubes
With the taro cubes prepped, it's time to get cooking! First, grab a large pot and fill it with enough water to cover the taro. Bring the water to a boil over high heat.
Once it's bubbling, carefully add the taro cubes. Let them cook for 15-20 minutes, until they're tender when poked with a fork.
Be sure to keep an eye on the pot – you don't want the taro to overcook and turn mushy! When they're done, drain the taro in a colander. Rinse the cubes with cool water to stop the cooking process.
Now they're ready for the next step in your Vietnamese feast. The boiled taro has a wonderfully creamy texture that pairs perfectly with the other flavors in this dish.
Get excited – the best is yet to come! With the taro cubes prepped, you're well on your way to creating an authentic and delicious Vietnamese meal.
Step 3. Drain and Return to Pot
Once the taro cubes are tender, carefully drain them in a colander.
Be sure to hold the colander over the pot so you can catch any of that delicious cooking liquid – you'll want to use it later!
Gently shake the colander to remove excess water, then carefully pour the drained taro cubes back into the pot.
They're ready for the next step!
Now, you'll want to mash the taro cubes right in the pot using a potato masher or the back of a wooden spoon.
Mash them until they're nice and smooth, with no lumps.
This creamy texture is just perfect for our Vietnamese dish.
As you mash, you can add a bit of that reserved cooking liquid to reach your desired consistency.
Once the taro is perfectly mashed, you're all set to move on to the next tasty ingredient.
Get ready to add in the sweet potatoes – this is where the unique Vietnamese flavor really starts to shine!
Step 4. Mash the Boiled Taro Cubes
Mashing the boiled taro cubes is the next crucial step. Simply grab a potato masher and get to work! You'll want to mash the cubes until they're nice and smooth, with no lumps remaining. This creamy, velvety texture is what makes Vietnamese khoai mủ so uniquely delightful.
As you mash, pay close attention to the consistency. You don't want it to be too thick or too thin – just right! Keep mashing until the mixture has a silky, spreadable quality. Feel free to add a splash of the cooking liquid if the mixture seems too dry. This will help achieve that perfect, luscious texture.
Once the taro is perfectly mashed, you're ready to move on to the next step. Get excited, because the best is yet to come!
This dish is about to take an amazing turn, transforming into a sweet, aromatic delight. With just a few more simple steps, you'll have an incredible Vietnamese dessert to share with family and friends.
Step 5. Add Coconut Milk and Seasonings
Now that you've perfectly mashed the taro, it's time to add the coconut milk and seasonings to take this dish to the next level. The rich and creamy coconut milk will infuse the taro with a delightful tropical flavor, while the seasonings will elevate the overall taste.
First, pour in the coconut milk and stir it in until the mixture is smooth and velvety. Next, add a pinch of salt, a dash of pepper, and a sprinkle of sugar to balance the flavors. Stir everything together until the seasonings are well incorporated.
For an extra burst of flavor, consider adding a teaspoon of vanilla extract or a pinch of cinnamon. These optional additions will complement the natural sweetness of the taro and coconut.
Taste the mixture and adjust the seasonings as needed, ensuring the perfect balance of sweet, savory, and creamy.
With the coconut milk and seasonings added, your Vietnamese taro dish is now ready to be enjoyed! Get ready for a truly unique and satisfying taste experience.
Final Thoughts
Vietnamese sweet potatoes offer a unique and delicious twist on a classic root vegetable. Their vibrant colors, creamy texture, and subtle sweetness make them a standout dish. The addition of coconut milk and aromatic spices elevates the flavors, creating a truly remarkable experience.
As you savor each bite, you'll be transported to the bustling markets of Vietnam, where these treasures are a beloved staple. The combination of sweet, savory, and comforting notes is sure to delight your taste buds and bring a smile to your face.
Whether you're serving them as a side dish or incorporating them into a larger meal, Vietnamese sweet potatoes are a versatile and crowd-pleasing ingredient. Their natural sweetness pairs beautifully with a variety of proteins, from grilled meats to sautéed tofu.
Embrace the unique flavors of Vietnamese cuisine and let these vibrant sweet potatoes become a new family favorite. Prepare to be captivated by their creamy, delectable goodness!
Frequently Asked Questions
Is Khoai Mỡ Suitable for Those With Lactose Intolerance?
As someone with lactose intolerance, you'll be pleased to know that khoai mỡ is dairy-free and suitable for your dietary needs. This versatile Vietnamese tuber can be enjoyed without worrying about any digestive issues.
What Is the Shelf Life of Freshly Made Khoai Mỡ?
The shelf life of freshly made khoai mo is typically 3-5 days when stored in the refrigerator. It's best to consume it within this time frame to enjoy its creamy texture and unique flavor.
Can Khoai Mỡ Be Frozen and Reheated Without Losing Its Texture?
Yes, you can freeze and reheat khoai mở without losing its texture. The key is to freeze it in an airtight container and reheat it gently, either on the stovetop or in the oven, until warmed through.
How Does Khoai Mỡ Compare to Other Vietnamese Desserts in Terms of Sweetness?
Compared to other Vietnamese desserts, khoai mỡ is less sweet. It has a subtle, delicate flavor that's not overpowering. You'll find it's a nice contrast to the more sugary treats in the Vietnamese dessert repertoire.
Is Khoai Mỡ a Traditional Dish or a Modern Invention?
Khoai mỡ is a traditional Vietnamese dish with a long history. It's not a modern invention but a beloved dessert that's been enjoyed for generations. The creamy texture and subtle sweetness make it a unique and beloved treat.
Mai is a passionate chef specializing in Vietnamese cuisine. From fragrant pho to fresh spring rolls and banh mi, Mai’s dishes showcase the balance of sweet, salty, sour, and spicy that defines Vietnamese cooking. Her recipes emphasize fresh herbs, flavorful broths, and the light, vibrant ingredients that make Vietnamese food so special.
-
Brazilian Cuisine3 months ago
Tacacá
-
Polish Comfort Food3 months ago
Krupnik (Barley Soup)
-
Brazilian Cuisine3 months ago
Caldeirada
-
Brazilian Cuisine3 months ago
Chicken in Brown Sauce
-
Southern Comfort Food3 months ago
Cheese Straws
-
African Cuisine3 months ago
Kedjenou (Ivory Coast)
-
Polish Comfort Food3 months ago
Vegetable Salad
-
American Diner Classics3 months ago
The Maillard Reaction: Understanding the Chemistry of Browning {Food Science and Cooking}