Vietnamese Cuisine
Bò Bía Rolls: Vietnamese Spring Rolls With Chinese Sausage
Savor the delightful blend of Chinese sausage and shrimp in Bò Bía rolls, but wait until you discover the secret to the perfect dipping sauce!
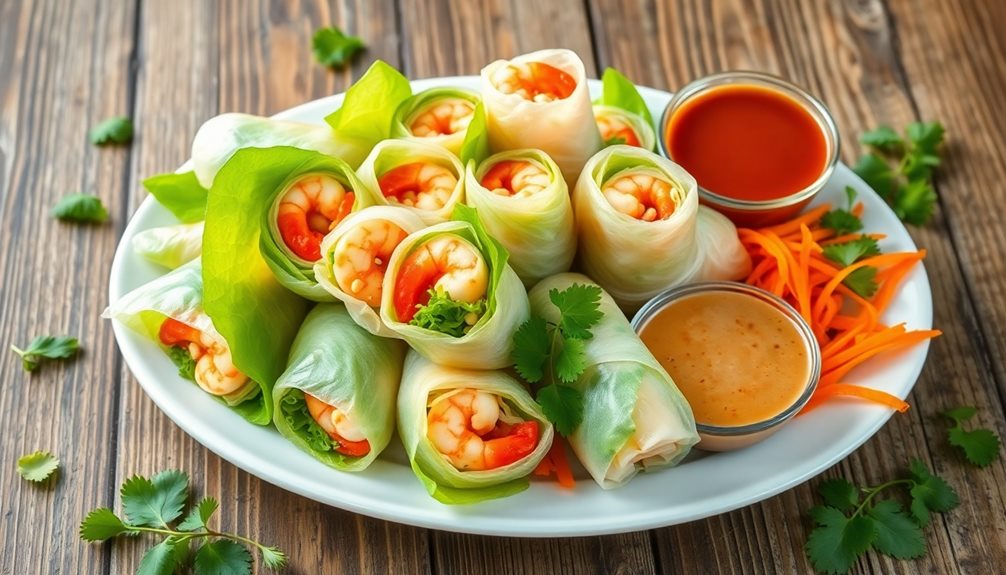
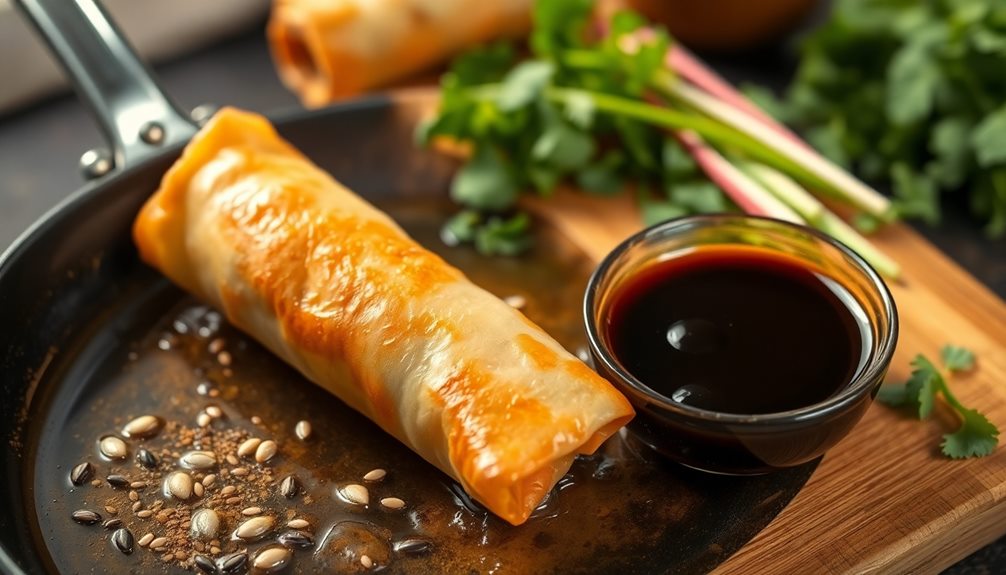
Bò Bía rolls are a yummy Vietnamese delight packed with Chinese sausage, succulent shrimp, and fresh veggies! These colorful rolls are fun to make and perfect for sharing with family and friends. You start by soaking rice paper in warm water until it's soft. Then, you fill it with the sausage, shrimp, and your choice of crunchy vegetables. Roll it up tightly and fry until golden brown for a crispy finish. Don't forget to whip up a sweet and spicy dipping sauce! With their bold flavors and vibrant colors, you'll love every bite, and there's so much more to discover!
Key Takeaways
- Bò bía rolls are Vietnamese spring rolls typically filled with Chinese sausage, shrimp, and a variety of fresh vegetables.
- The rice paper is soaked briefly in warm water to become pliable before filling and rolling.
- Dipping sauce, usually sweet and spicy, enhances the flavor of these delectable rolls.
- Chilling the rolls for 30 minutes before serving improves their texture and presentation.
- Bò bía rolls are a popular communal dish, perfect for celebrations and sharing with friends and family.
History
Vietnamese spring rolls, known as "gỏi cuốn," have a rich history that dates back centuries. These delicious treats originated in Vietnam, where families and friends gather to enjoy them together. The rolls became popular because they're fresh, colorful, and packed with yummy ingredients. You might find shrimp, pork, or even tofu wrapped in rice paper, along with crunchy veggies and fragrant herbs. They are typically served with a tangy dipping sauce that perfectly complements their vibrant flavors. While enjoying spring rolls, many also pair them with other traditional Vietnamese dishes, such as a hearty Vietnamese beef hot pot recipe, making for a truly communal and comforting meal. This combination highlights the diverse and delectable cuisine that Vietnam has to offer.
As you dig deeper into their history, you'll discover that they reflect the spirit of Vietnamese culture. People often make spring rolls for special occasions, like Tet, the Vietnamese New Year. It's a time for families to come together, share stories, and celebrate traditions. The art of wrapping spring rolls is even passed down through generations, making it a cherished family activity.
You might also find that these rolls aren't just a tasty snack; they tell a story about connection and sharing. Whether you're enjoying them at a street vendor or making them at home, each bite brings a taste of Vietnam's rich culinary heritage.
Cooking Steps
To make delicious spring rolls, you'll want to gather all your ingredients and prep them before you start cooking.
Begin by chopping up your veggies—carrots, cucumbers, and lettuce—into thin strips. Don't forget to slice your Chinese sausage too! It adds a lovely flavor.
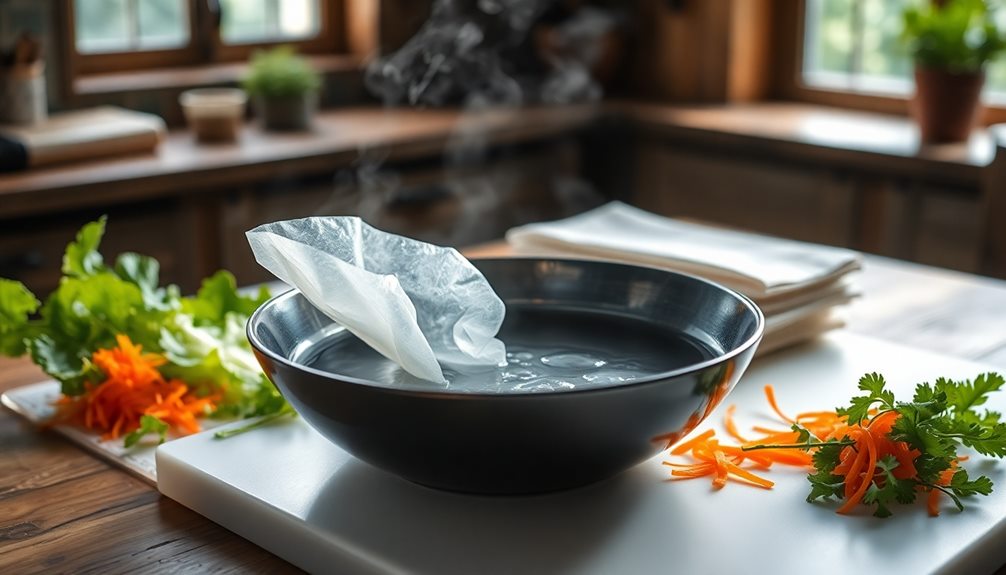
Next, fill a large bowl with warm water. Dip one rice paper wrapper into the water for about 10 seconds until it's soft and pliable. Carefully lay it on a clean surface.
Now, it's time to assemble! Place a small handful of veggies and a few slices of sausage in the center of the wrapper.
Fold the sides over the filling, then roll it up tightly, like wrapping a present. Keep going until you've made as many spring rolls as you can!
If you want, you can make a dipping sauce by mixing soy sauce, lime juice, and a little chili for some kick.
Once everything's ready, enjoy your homemade spring rolls with friends or family. They're perfect for sharing and will surely impress everyone with your cooking skills!
Happy rolling!
Step 1. Prepare the Rice Paper
When preparing rice paper for spring rolls, you'll want to work with care to ensure a perfect texture. First, gather all your supplies, including a clean workspace and a flat plate or cutting board. It's important to have everything ready, so you can focus on the rice paper.
Next, take a sheet of rice paper and lay it flat on your plate. You'll notice it's hard and stiff right now, but don't worry! The magic happens when you start to soften it. Make sure to keep a bowl of warm water nearby. The water should be warm but not too hot, as you don't want to burn your fingers.
With both hands, gently dip the rice paper into the warm water. Count to about five or six, then carefully lift it out. The rice paper should feel soft but not mushy.
Place it back on your plate and let it rest for a moment. This is where the fun begins! Once you've prepared the rice paper, you'll be ready to fill it with all those delicious ingredients for your spring rolls. Enjoy the process!
Step 2. Soak Rice Paper Sheets
Soaking rice paper sheets is crucial for achieving the right texture in your spring rolls. If you skip this step, your rolls might end up tough and hard to chew!
First, grab a shallow dish or a big plate and fill it with warm water. The water should be warm but not boiling; you want it just right!
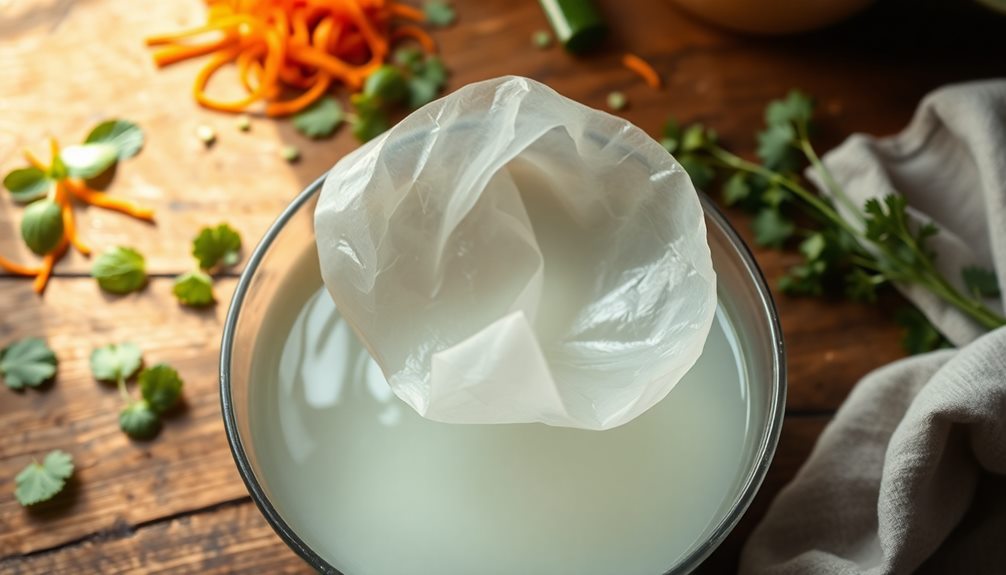
Now, take one rice paper sheet and gently place it in the water. Let it soak for about 10 to 15 seconds. You'll notice it starting to soften and become pliable. Don't rush this part—if you take it out too soon, it'll be too stiff to work with.
After it's soaked, carefully lift the sheet out of the water and let any excess water drip off.
Place the soaked rice paper on a clean, flat surface, like a cutting board or a clean kitchen towel. Make sure it's nice and smooth, so you have a perfect canvas for your filling later.
Repeat this process with the remaining sheets. And there you have it—your rice paper sheets are now ready for the next exciting step in making delicious spring rolls! Enjoy!
Step 3. Fill With Sausage Mixture
With your rice paper sheets ready, it's time to fill them with a savory sausage mixture that will elevate your spring rolls.
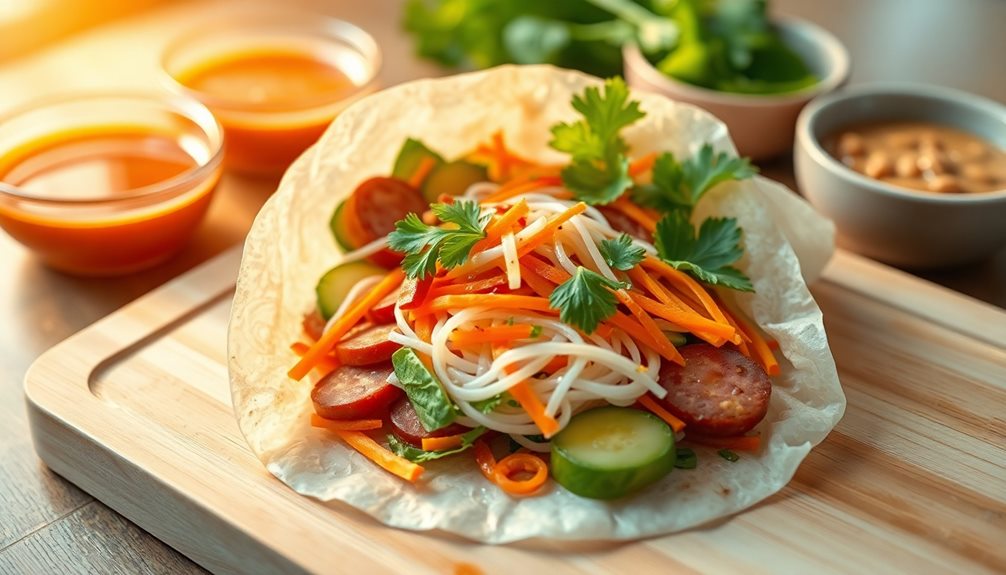
Start by taking a spoonful of the sausage mixture you prepared earlier. Place it near the center of the rice paper, but be sure to leave some space at the edges. You don't want to overfill, or your rolls might burst!
Next, sprinkle in some fresh herbs like mint or cilantro to add a pop of flavor. You can also add a few crunchy vegetables like shredded carrots or cucumbers for extra texture.
Once you've got your filling just right, it's time to fold. Carefully fold the bottom of the rice paper over the filling. Then, tuck in the sides and roll it up tightly, making sure everything stays snug inside.
Step 4. Roll the Spring Rolls
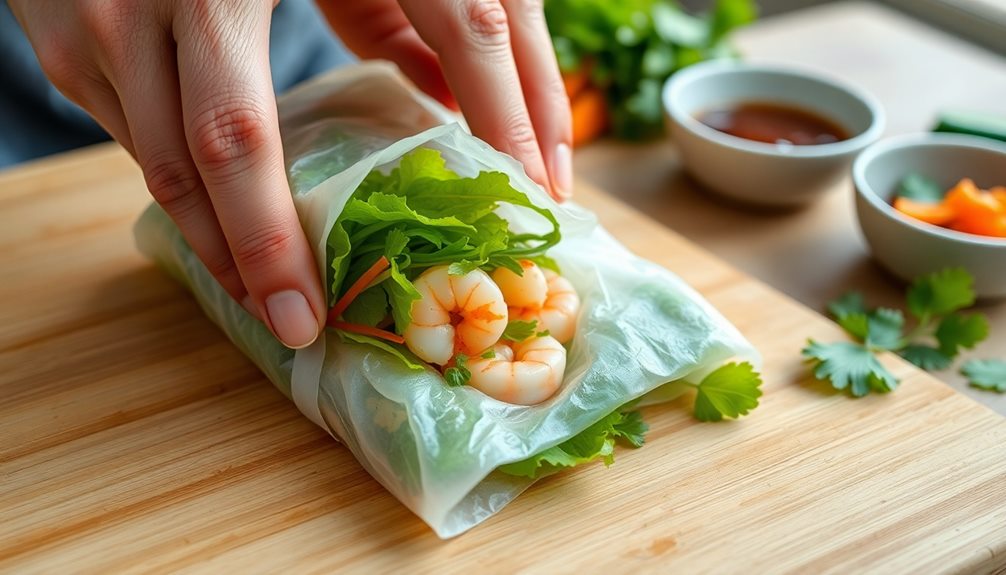
Now that you've filled your rice paper, it's time to roll the spring rolls up neatly. First, grab the edges of the rice paper closest to you and fold them over the filling. Make sure the filling is snug but not too tight. You don't want it to burst when you cook it later!
Next, fold the sides in toward the center. This helps keep everything inside and gives your rolls a nice shape.
Now, it's time to roll! Start from the edge where the filling is and roll away from you. Keep the roll tight, but don't squeeze too hard. You want a nice, even roll that looks great and holds all those yummy flavors inside.
When you reach the end of the rice paper, dab a little water on the edge to seal it. This will help it stick together so your spring rolls don't come apart.
Repeat this process for all your filling, and soon you'll have a plate full of deliciously rolled spring rolls. Isn't that exciting? You're just a few steps away from enjoying your tasty creation! Happy rolling!
Step 5. Fry Until Golden Brown
Once you've rolled your spring rolls, heat a generous amount of oil in a frying pan over medium-high heat. You want enough oil to cover the bottom of the pan, so your rolls can fry evenly.
When the oil shimmers, it's time to add your spring rolls! Gently place them in the hot oil, but be careful not to overcrowd the pan. This way, they can cook perfectly.
Let them fry for about 3 to 5 minutes on each side. You'll know they're ready to turn when they're a beautiful golden brown. Use tongs to flip them carefully, so they don't break apart. The sizzling sound means they're getting crispy and delicious.
Once both sides are golden, use a slotted spoon to lift the rolls out of the oil and let them drain on a paper towel. This helps soak up any extra oil, making them lighter to eat.
Now, you've got perfectly fried spring rolls! They're crispy, golden, and oh-so-yummy. Serve them warm with your favorite dipping sauce, and enjoy the tasty goodness you've created.
Happy cooking!
Final Thoughts
Why not take a moment to reflect on the delightful experience of making Vietnamese spring rolls? It's not just about the food; it's about the fun you have while preparing them!
Picture gathering fresh ingredients like crispy veggies, savory Chinese sausage, and those delicate rice papers. You get to roll them up, creating little bundles of joy. As you enjoy the process, you might think of the communal aspect of Italian meals, similar to sharing a traditional dish like Cacciucco, where everyone comes together to savor the flavors.
As you fry them until they're golden brown, your kitchen fills with mouthwatering aromas that make your tummy rumble.
And let's not forget the joy of sharing! Whether you're cooking alone or with family and friends, everyone can join in on the fun. You can dip those tasty rolls into sweet and spicy sauce, making every bite a burst of flavor.
Frequently Asked Questions
What Ingredients Are Essential for Bò Bía Rolls?
To make delicious spring rolls, you'll need rice paper, vermicelli noodles, fresh herbs like mint and cilantro, vegetables such as lettuce and carrots, and protein options like shrimp, tofu, or, in this case, Chinese sausage.
Can Bò Bía Rolls Be Made Vegetarian?
Yes, you can definitely make vegetarian versions of summer rolls! Substitute ingredients like Chinese sausage with tofu or mushrooms, and load them up with fresh vegetables and herbs for a delicious, satisfying alternative. Enjoy experimenting!
How Long Do Bò Bía Rolls Last in the Fridge?
Bò bía rolls can last about 3 to 5 days in the fridge when stored properly in an airtight container. Just make sure to check for any signs of spoilage before enjoying them.
What Dipping Sauce Pairs Well With Bò Bía Rolls?
When it comes to dipping sauces, you can't go wrong with hoisin sauce mixed with peanut butter for a creamy texture. You might also enjoy a spicy chili sauce for an extra kick to your rolls.
Are There Any Common Variations of Bò Bía Rolls?
When you explore spring roll variations, you'll find options like shrimp, tofu, or pork fillings. Some use rice paper, while others incorporate lettuce or herbs, enhancing flavor and texture for a delightful twist.
Mai is a passionate chef specializing in Vietnamese cuisine. From fragrant pho to fresh spring rolls and banh mi, Mai’s dishes showcase the balance of sweet, salty, sour, and spicy that defines Vietnamese cooking. Her recipes emphasize fresh herbs, flavorful broths, and the light, vibrant ingredients that make Vietnamese food so special.
Vietnamese Cuisine
Savory, Tender, and Authentic: Vietnamese Thịt Kho Tàu
Gaze upon the captivating Vietnamese dish, Thịt Kho Tàu, a savory and tender pork belly delicacy that has been a cherished part of the country’s culinary traditions for centuries.
You're in for a real treat with Thịt Kho Tàu, the iconic Vietnamese braised pork belly dish! This savory, tender, and authentic recipe has been part of Vietnamese culinary traditions for centuries, bringing families together during celebratory Lunar New Year feasts. The pork belly simmers in a caramelized sauce packed with umami flavors from fish sauce and brown sugar, creating a mouthwatering balance of sweet, salty, and savory. Enjoy this cherished comfort food over fragrant jasmine rice, and get ready to dive deeper into the rich history and flavors of this Vietnamese culinary treasure.
Key Takeaways
- Thịt Kho Tàu is a treasured Vietnamese dish with a rich history, representing the country's culinary heritage and cultural significance.
- The dish features savory and tender pork belly braised in a caramelized sauce, creating a unique balance of sweet, salty, and umami flavors.
- The recipe involves marinating the pork, browning it, and simmering it in a sauce made with fish sauce, sugar, and coconut water until fork-tender.
- Thịt Kho Tàu is traditionally served with steamed rice, and its communal dining experience strengthens family and social bonds.
- The dish's enduring legacy as a culinary treasure ensures the continuation of Vietnamese culinary traditions for generations to come.
History
Originating from the rich culinary traditions of Vietnam, Thịt Kho Tàu has a storied history that dates back centuries. This beloved dish has been a cherished part of Vietnamese culture, passed down through generations and celebrated during important festivals and gatherings.
The name "Thịt Kho Tàu" literally translates to "braised pork in caramel sauce," reflecting the dish's iconic flavors. The technique of caramelizing the sauce was likely introduced centuries ago, adding a delightful sweetness and depth of flavor to the tender pork.
Over time, regional variations emerged, each showcasing the ingenuity and culinary artistry of Vietnamese cooks.
Today, Thịt Kho Tàu remains a beloved comfort food, bringing families and communities together through shared meals and memories. Whether enjoyed during Tết, the Vietnamese New Year, or savored on any ordinary day, this dish continues to be a cherished part of Vietnam's vibrant and evolving culinary heritage.
Recipe
Tết Kho Tàu, also known as Vietnamese Braised Pork Belly, is a beloved dish that graces many Vietnamese tables during the Lunar New Year celebration. This savory and tender pork dish is a true delight, featuring the rich, caramelized flavors of pork belly simmered in a flavorful sauce.
The key to a successful Tết Kho Tàu lies in the slow, gentle braising process that allows the pork to absorb the complex layers of sweetness, saltiness, and umami. The dish is a testament to the culinary ingenuity of the Vietnamese people, who've perfected the art of transforming humble ingredients into a gastronomic masterpiece.
- Pork belly, cut into 1-inch cubes
- Shallots, thinly sliced
- Garlic, minced
- Fish sauce
- Soy sauce
- Brown sugar
- Whole black peppercorns
- Star anise
- Water or chicken stock
In a large pot or Dutch oven, sauté the shallots and garlic until fragrant. Add the pork belly cubes and sear until browned on all sides. Stir in the fish sauce, soy sauce, brown sugar, peppercorns, and star anise. Pour in enough water or chicken stock to just cover the pork.
Bring the mixture to a boil, then reduce the heat to low, cover, and simmer for 1.5 to 2 hours, or until the pork is tender and the sauce has thickened.
When cooking Tết Kho Tàu, patience is key. The long, slow braising process is essential for developing the rich, caramelized flavors and ensuring the pork becomes meltingly tender.
Serve this dish with steamed rice, and enjoy the perfect balance of savory, sweet, and umami goodness that makes Tết Kho Tàu a true Vietnamese culinary treasure.
Cooking Steps
First, you'll need to marinate the pork in soy sauce to infuse it with flavor.
Then, brown the pork to get a nice sear on the outside.
Step 1. Marinate Pork in Soy Sauce
To begin the marinating process, you'll want to grab a mixing bowl and combine the pork with the soy sauce. Gently toss the meat until it's evenly coated, ensuring each piece is thoroughly seasoned. This simple step adds a rich, savory flavor that will permeate the pork as it simmers.
Next, cover the bowl and let the pork marinate for at least 30 minutes, or up to 2 hours if you have the time. The longer you can let it sit, the more the flavors will develop. Be sure to give the mixture a stir every so often to redistribute the sauce.
Now that your pork is nicely marinated, you're ready to move on to the next step in creating this authentic Vietnamese dish.
Get excited, because the aromas are about to fill your kitchen and have your taste buds tingling in anticipation!
Step 2. Brown the Pork
With the marinated pork ready, heat a large skillet or wok over medium-high heat.
Once the pan is nice and hot, add a splash of oil and let it heat up.
Now, carefully add the pork to the pan. You'll hear that sizzle – that's the sound of deliciousness!
Spread the pork out in an even layer and let it brown, stirring occasionally.
You'll know it's ready when the edges start to get nice and crispy. This should take about 5-7 minutes.
Be patient and let the pork do its thing – you don't want to overcrowd the pan or the meat won't get that perfect golden-brown color.
Once the pork is beautifully browned, transfer it to a plate.
Don't worry, we're not done yet! The next step is to make the savory sauce that will bring all the flavors together.
Get ready for some serious Vietnamese comfort food magic!
Step 3. Add Fish Sauce and Sugar
In the same pan, add the fish sauce and sugar. These two key ingredients will infuse the pork with a captivating blend of savory and sweet flavors. The fish sauce lends a umami depth, while the sugar helps to balance the saltiness and create a caramelized glaze.
Stir the mixture well, ensuring the pork is evenly coated. As the sauce simmers, it will thicken slightly, forming a sticky, appetizing coating on the meat. The aromas will fill your kitchen, making your mouth water in anticipation.
Once the pork has simmered for about 10 minutes, it's time to taste and adjust the seasoning. Add a bit more fish sauce if you'd like a stronger savory note, or sprinkle in some extra sugar for a sweeter touch.
Play with the flavors until they're perfectly balanced to your liking. The pork is now ready to be served, its tender chunks glistening with the delectable fish sauce-sugar glaze.
Get ready to enjoy the authentic, mouthwatering flavors of Vietnamese Thịt Kho Tàu!
Step 4. Add Coconut Water
After the pork has simmered in the flavorful fish sauce and sugar mixture, it's time to add the coconut water. This step infuses the dish with a delightful tropical twist. Simply pour in the refreshing coconut water and give it a gentle stir. The pork will immediately start to absorb the sweet and creamy coconut essence, creating an irresistible balance of savory and lightly sweet flavors.
As the coconut water simmers, you'll notice the sauce thickening and the pork becoming even more tender. This step is crucial for achieving the signature velvety texture of Thịt Kho Tàu. The coconut water also helps to tame any lingering fishiness from the sauce, resulting in a harmonious blend of tastes.
Keep a close eye on the pot, stirring occasionally, until the sauce has reached your desired consistency. The coconut water will work its magic, transforming this Vietnamese classic into an even more captivating and well-rounded dish.
Step 5. Simmer Until Pork Is Tender
Once the coconut water has been added, let the pork simmer gently until it becomes fork-tender. This can take about 30-40 minutes, so be patient.
As the pork simmers, the flavors will meld together beautifully, creating a rich, savory sauce.
Stir the pot occasionally to prevent sticking. You'll know the pork is ready when it easily separates with a fork. The meat should be incredibly tender and practically fall apart.
Breathe in the mouthwatering aroma – the combination of soy sauce, fish sauce, and spices is simply divine.
Now, it's time to adjust the seasonings. Taste the braising liquid and add a touch more fish sauce or sugar if needed, to balance the flavors perfectly.
The pork should be glazed in a thick, glossy sauce that coats each bite. Serve the Thịt Kho Tàu over steamed rice for a complete, satisfying meal.
Get ready for your family to devour this Vietnamese classic!
Final Thoughts
As you reflect on this delectable Vietnamese dish, Thet Kho Tau, it's clear that its rich, complex flavors and satisfying textures make it a true culinary delight.
The long, slow simmer allows the pork to become meltingly tender, while the caramelized sauce coats each bite with a delightful balance of sweet, salty, and savory notes.
Whether enjoyed on its own or served over fragrant jasmine rice, this hearty and comforting meal is sure to delight the senses.
The vibrant colors and aromas of Thet Kho Tau also make it a wonderful centerpiece for family gatherings and festive celebrations.
With its ability to bring people together around the table, this dish truly embodies the heart and soul of Vietnamese cuisine.
As you savor the final bites, you can't help but feel a sense of satisfaction and appreciation for the depth of flavor and the rich cultural heritage that this dish represents.
Thet Kho Tau is a true treasure, and one that should be savored and shared with loved ones for years to come.
Frequently Asked Questions
What Is the Ideal Ratio of Ingredients for ThịT Kho Tàu?
The ideal ratio of ingredients for thịt kho tàu is generally 1 part pork to 2 parts fish sauce, with adjustments to taste. You'll want a flavorful, tender pork that's complemented by the savory fish sauce.
How Long Can ThịT Kho Tàu Be Stored For?
You can store thit kho tau for up to 5 days in the refrigerator. After that, the flavors may start to deteriorate, and the dish won't taste as fresh. Make sure to keep it tightly covered to maintain its delicious taste.
Can ThịT Kho Tàu Be Made With Other Types of Meat?
Yes, you can make thịt kho tàu with other types of meat. Pork is commonly used, but you can experiment with beef, chicken, or even fish to create your own unique version of this classic Vietnamese dish.
What Are Some Common Accompaniments for ThịT Kho Tàu?
Common accompaniments for thịt kho tàu include steamed rice, pickled vegetables, and fresh herbs like cilantro or mint. You can also serve it with crusty bread or a fried egg on top for a complete meal.
Is ThịT Kho Tàu Gluten-Free or Suitable for Special Diets?
Thiết kho tàu can be gluten-free, making it suitable for those with gluten sensitivities. The dish's primary ingredients, like pork and vegetables, don't typically contain gluten, allowing you to enjoy this authentic Vietnamese meal.
Mai is a passionate chef specializing in Vietnamese cuisine. From fragrant pho to fresh spring rolls and banh mi, Mai’s dishes showcase the balance of sweet, salty, sour, and spicy that defines Vietnamese cooking. Her recipes emphasize fresh herbs, flavorful broths, and the light, vibrant ingredients that make Vietnamese food so special.
Vietnamese Cuisine
Nems: The French Take on Vietnamese Fried Spring Rolls
Fusing Vietnamese and French culinary traditions, nems offer a delightful balance of flavors and textures that will leave you craving more.
Nems – the beloved French take on Vietnamese fried spring rolls – blend delightful flavors and textures, showcasing the harmonious fusion of two distinct culinary traditions. Tracing back to the early 20th century during French colonization, nems evolved from Vietnamese spring rolls, incorporating local French ingredients like wheat flour and pork. Today, you'll enjoy the signature crunch as you bite into these golden-brown delights, savoring the perfect balance of crisp wrappers and flavorful fillings. From soaking the noodles to folding and frying, each step in the process contributes to the sensory experience. Discover the rich history and mouthwatering appeal of nems – a delectable treat that connects cultures.
Key Takeaways
- Nems originated from the Vietnamese spring roll "cha gio," adapted by the French during colonial times with local ingredients like wheat flour and pork.
- The dish blends Vietnamese and French culinary traditions, symbolizing the shared culinary history between the two cultures.
- Nems are prepared by folding a filling of noodles, vegetables, and protein into a spring roll wrapper, then deep-frying until golden brown.
- The careful handling of noodles, including soaking, draining, and squeezing, is crucial for achieving the desired crunchy texture of the final dish.
- Nems represent the harmony of flavors and textures, reflecting the creativity and cultural significance of Vietnamese cuisine through a French-influenced lens.
History
The origins of nems, the French Vietnamese fried spring rolls, can be traced back to the early 20th century. When the French colonized Vietnam, they were introduced to the delicious Vietnamese spring rolls known as "cha gio."
The French fell in love with these crispy, flavor-packed rolls and decided to put their own spin on them. They used French ingredients like wheat flour and pork, creating a unique twist on the traditional Vietnamese recipe.
Over time, these French-influenced nems became a beloved part of Vietnamese cuisine, blending the best of both cultures.
Today, nems are enjoyed all over France and Vietnam, a tasty testament to the shared culinary history between the two nations. Whether you're biting into a savory nem at a Parisian bistro or a family-owned Vietnamese restaurant, you'll savor the delicious fusion of flavors that makes these fried spring rolls so special.
Cooking Steps
Once you've gathered all the necessary ingredients, the fun part of preparing the nems begins.
First, take a small amount of the filling mixture and place it in the center of a spring roll wrapper. Carefully fold the bottom of the wrapper up over the filling, then fold in the sides and continue rolling until you have a neat little package. Make sure to keep the rolls tightly wrapped to prevent them from unraveling during frying.
Next, heat a few inches of oil in a large pot or Dutch oven to 350°F. Gently lower the nems into the hot oil and fry for 2-3 minutes, turning occasionally, until they're golden brown and crispy.
Drain the fried nems on a paper towel-lined plate to remove any excess oil.
Step 1. Soak Noodles in Warm Water
Soaking the noodles in warm water is the next crucial step. You'll want to do this before adding them to your spring roll filling.
Simply fill a bowl with warm water and gently submerge the dried noodles. Let them soak for about 10-15 minutes, until they become soft and pliable. This step helps the noodles absorb flavors more easily when you add them to the filling.
Once the noodles have softened, drain them in a colander and give them a quick rinse under cool water. This stops the cooking process and ensures the noodles don't get too soft.
Now they're ready to be cut into bite-sized pieces and mixed with the other delicious ingredients like shredded cabbage, carrots, bean sprouts, and herbs. The warm, soaked noodles will bind everything together perfectly, creating that classic spring roll texture you know and love.
Just remember to work quickly, as you don't want the noodles to dry out.
Step 2. Drain and Squeeze Noodles
After soaking the noodles, drain them thoroughly in a colander. Give them a good shake to remove any excess water.
Now, it's time to squeeze those noodles dry! Grab a handful and give them a good, firm squeeze. You want to get as much water out as possible. Keep squeezing until the noodles feel light and springy.
Don't worry, your hands won't get tired – this is an important step that will help your spring rolls stay crispy. Once all the noodles are squeezed, you can set them aside, ready for the next step.
Properly draining and squeezing the noodles is key to achieving that perfect, crunchy texture in your Vietnamese fried spring rolls. Take your time with this part, and you'll be well on your way to nailing this delicious French-Vietnamese dish.
Step 3. Add Vegetables and Protein
Now that you've thoroughly drained and squeezed the noodles, it's time to start building the filling. Grab a big bowl and let's add the veggies!
You'll want to chop up some cabbage, carrots, and bean sprouts into bite-sized pieces. These crunchy veggies will give your nems that satisfying texture.
Next, let's add the protein. You can use ground pork, shrimp, or a mix of both. Sauté the protein in a pan until it's cooked through, then toss it into the veggie-filled bowl. Mmm, can you smell that savory aroma already?
Now, it's time to season everything up. Sprinkle in some minced garlic, a dash of soy sauce, a pinch of sugar, and a squeeze of fresh lime juice.
Give it all a good stir to combine the flavors. Your filling is now ready to be wrapped up in those delicate rice paper wrappers. Get ready to roll up some tasty nems!
Step 4. Fold and Roll Nems Tightly
With your filling all set, it's time to start rolling up the nems.
First, take a rice paper wrapper and place it on a clean, damp surface. Dip your fingers in water and lightly moisten the wrapper to make it pliable.
Place a spoonful of the vegetable and protein filling near the bottom of the wrapper. Fold the bottom edge over the filling, then fold in the sides and continue rolling it up tightly.
Make sure to roll it snugly, without any gaps or air pockets. Once the nem is fully rolled, wet your fingertips and run them along the seam to seal it.
Repeat this process with the remaining wrappers and filling. Be gentle but firm as you roll, and watch out for any rips or tears in the paper.
With your nems all rolled up, they're ready to be fried to a golden-brown perfection!
Step 5. Fry Nems in Hot Oil
To fry the nems, heat about 2-3 inches of vegetable oil in a heavy-bottomed pot or Dutch oven over medium-high heat.
Once the oil is shimmering, it's time to add those delicious rolls! Gently lower the nems into the hot oil, being careful not to overcrowd the pot. Fry the nems for 2-3 minutes per side, or until they're golden brown and crispy.
Use a slotted spoon or tongs to transfer the fried nems to a paper towel-lined plate. This will help drain off any excess oil.
Repeat the process with the remaining nems, frying in batches to maintain the oil temperature.
Keep a close eye on the oil and adjust the heat as needed to prevent the nems from burning.
Once all the nems are fried, give them a final blot with paper towels to remove any lingering oil.
Now, you've got perfectly crispy, golden-brown nems ready to enjoy! Serve them hot and let the crunchy goodness delight your taste buds.
Final Thoughts
Why not take a moment to reflect on the joys of savoring these delectable Vietnamese fried spring rolls?
After all the careful preparation and frying, it's time to sit back, relax, and indulge. Imagine the satisfying crunch as you take that first bite, the filling bursting with vibrant flavors.
These nems are a true delight for the senses – the aroma, the texture, the taste. Each one is a little package of goodness, a testament to the culinary creativity of the Vietnamese people.
As you enjoy them, let your mind wander to the bustling streets of Saigon or the tranquil countryside. These fried spring rolls are more than just a snack; they're a cultural experience, a way to connect with a rich heritage.
Frequently Asked Questions
How Do Nems Differ From Traditional Vietnamese Spring Rolls?
Nems differ from traditional Vietnamese spring rolls as they're typically larger, heavier, and have a more crispy exterior due to the French influence in their preparation. The filling also tends to be more finely chopped and seasoned differently.
What Are the Typical Fillings Used in Nems?
The typical fillings used in nems often include minced pork, shredded cabbage, carrots, vermicelli noodles, and various seasonings. These ingredients are then wrapped in a thin, crispy rice paper or wheat-based wrapper before being fried to perfection.
How Do You Achieve the Perfect Crispy Texture in Nems?
To achieve the perfect crispy texture in nems, you'll need to use a combination of techniques. Make sure to fry the rolls at the right temperature, use a light and airy wrapper, and drain them well after cooking.
Can Nems Be Made in Advance for a Party or Event?
Yes, you can make nems in advance for a party or event. They can be fried, cooled, and stored in the fridge for up to 3 days. Just reheat them in the oven or air fryer before serving to ensure they're crispy.
Are There Any Variations or Regional Differences in Nems Recipes?
Absolutely! Nems can vary regionally in Vietnam, with different fillings, seasonings, and folding techniques. Some areas may use more pork, others emphasize shrimp or vegetables. Get creative and explore the diverse flavors of this classic Vietnamese dish.
Mai is a passionate chef specializing in Vietnamese cuisine. From fragrant pho to fresh spring rolls and banh mi, Mai’s dishes showcase the balance of sweet, salty, sour, and spicy that defines Vietnamese cooking. Her recipes emphasize fresh herbs, flavorful broths, and the light, vibrant ingredients that make Vietnamese food so special.
Vietnamese Cuisine
Bê Thui: Discover Vietnam’s Smoky Grilled Veal Dish
Flavorful, fragrant, and deeply satisfying, bê thui is a Vietnamese grilled veal dish that will captivate your senses and leave you craving more.
Discover the smoky, tender delight of bê thui, a beloved grilled veal dish that's been captivating taste buds in Vietnam for centuries. Skilled cooks grill marinated veal over charcoal, infusing it with a delectable smoky flavor. Pair the succulent meat with fresh herbs, tangy pickled veggies, and sticky rice – it's a mouthwatering celebration of Vietnam's culinary heritage. Whether you're grilling at home or exploring a bustling Vietnamese market, bê thui offers a unique and unforgettable flavor experience that'll have you craving more. Dive deeper into this hidden gem of Vietnamese cuisine and uncover its rich history and delicious secrets.
Key Takeaways
- Bê Thui is a traditional Vietnamese dish dating back to the 18th century, featuring grilled veal with a smoky flavor from charcoal cooking.
- The dish showcases Vietnam's culinary heritage, with skilled cooks marinating veal in a flavorful mixture of fish sauce, garlic, shallots, sugar, and black pepper.
- Grilling the marinated veal over high heat results in a caramelized crust, while the meat remains tender and juicy on the inside.
- Bê Thui is often served with steamed jasmine rice, fresh herbs, and pickled vegetables, creating a harmonious balance of flavors and textures.
- The dish remains a beloved street food in Vietnam, reflecting the country's vibrant culinary culture and the evolution of local ingredients and preferences.
History
Bê thui, Vietnam's smoky grilled veal dish, has a rich history rooted in the country's culinary traditions. This beloved delicacy has been a part of Vietnamese cuisine for generations, with its origins dating back to the 18th century.
Back then, it was a common sight in open-air markets and street stalls, where skilled cooks would skillfully grill tender veal over charcoal fires, imparting a delicious smoky flavor.
Over the years, the recipe for bê thui has been passed down, evolving and adapting to local ingredients and preferences. Today, it remains a beloved staple, beloved by locals and travelers alike.
The dish's distinct aroma and mouthwatering taste have made it a must-try for anyone exploring the vibrant food scene of Vietnam. From the bustling streets of Hanoi to the coastal towns of the south, bê thui continues to delight and inspire, showcasing the rich culinary heritage of this captivating country.
Cooking Steps
Alright, let's dive into the cooking steps for Bê Thui, Vietnam's smoky grilled veal dish.
First, you'll need to marinate the veal in a savory blend of fish sauce, garlic, shallots, sugar, and black pepper. Let this sit for at least an hour, or up to 24 hours in the fridge for maximum flavor.
Next, fire up your grill to medium-high heat. Grill the marinated veal, turning occasionally, until it's nicely charred on the outside but still juicy on the inside. This should take around 10-12 minutes total.
Be sure to let the veal rest for a few minutes before slicing into it.
Serve the grilled veal with a side of steamed jasmine rice and some fresh herbs like mint, cilantro, and basil. Drizzle over a bit of the reserved marinade for extra zing.
Enjoy this smoky, flavorful Vietnamese classic!
Step 1. Soak Veal in Marinade Overnight
To start, let's soak the veal in the marinade overnight. This step is crucial to infusing the meat with the aromatic flavors of garlic, lemongrass, and fish sauce.
You'll want to use a large resealable bag or a shallow baking dish to hold the veal and the marinade. Gently massage the marinade into the veal, making sure every nook and cranny is coated.
Then, pop the veal into the fridge and let it soak up all those tasty Vietnamese flavors for at least 8 hours, or even better, overnight. This long soaking time allows the marinade to really work its magic, tenderizing the meat and imbuing it with a complex, smoky-sweet taste.
When you're ready to cook, the veal will be bursting with flavor, ready to be grilled to perfection. Just remember to reserve a bit of the marinade to baste the veal as it cooks for extra moisture and flavor.
Step 2. Grill Veal Over Charcoal
Preheat your charcoal grill to high heat, ensuring the coals are glowing red-hot.
Once the grill is scorching, carefully place the marinated veal steaks on the grate. Listen as they sizzle and watch the meat begin to char, creating that tantalizing smoky aroma.
Resist the urge to move the steaks too much – let them develop a nice crust on the first side before flipping. After about 3-4 minutes, use tongs to gently turn the veal over, allowing the other side to get that same delightful char.
Continue grilling, flipping occasionally, until the veal reaches your desired level of doneness, usually around 6-8 minutes total for medium-rare.
The key is to let the natural flavors shine through, allowing the marinade to caramelize and the smoke to infuse the meat.
Soon, you'll have tender, flavor-packed veal that's ready to transport your taste buds straight to the heart of Vietnam.
Step 3. Garnish With Fresh Herbs
After grilling the veal to perfection, garnish the dish with vibrant fresh herbs. The aromatic blend of cilantro, mint, and Thai basil will add a burst of flavor and a touch of elegance to your Bê Thui.
Gently tear the leaves and sprinkle them over the top of the smoky veal, allowing the flavors to mingle. The cool, herbal notes will balance the rich, charred meat, creating a symphony of tastes.
For an extra pop of color, consider adding thinly sliced red chilies or drizzling a fragrant fish sauce and lime dressing over the top. The contrast of the spicy, tangy elements with the tender veal will awaken your senses.
Finish with a light sprinkling of toasted peanuts or sesame seeds for a satisfying crunch. The combination of textures and flavors will transport you straight to the lively street markets of Vietnam.
Enjoy this vibrant, flavor-packed dish with your family and friends.
Step 4. Serve With Pickled Vegetables
Serving a plate of tangy pickled vegetables alongside the smoky grilled veal elevates this Vietnamese dish. The contrasting flavors and textures create a harmonious balance that will delight your taste buds.
To make the pickled veggies, simply thinly slice some crisp carrots, radishes, and cucumbers. Then, mix them in a bowl with a tangy vinegar dressing made from rice vinegar, a touch of sugar, and a pinch of salt. Let the vegetables marinate for about 30 minutes, allowing the flavors to meld.
The result is a refreshing, crunchy accompaniment that perfectly complements the rich, grilled veal. The cool, acidic notes of the pickled vegetables help cut through the meatiness of the bề thui, making each bite an exciting journey for your palate.
Serve the pickled veggies on the side, inviting your guests to build their own flavorful bites by combining the tender veal and the zesty, pickled crunch.
Step 5. Enjoy With Sticky Rice
To truly savor the depth of flavors in this Vietnamese dish, you'll want to serve the smoky grilled veal atop a bed of warm, sticky rice. The glutinous texture of the rice perfectly complements the tender, juicy meat, creating a harmonious balance in every bite.
The stickiness of the rice allows it to soak up all the delicious juices and seasonings from the veal, infusing each grain with the aromatic blend of lemongrass, garlic, and spices. As you take a forkful, the soft, sticky rice will cling to the charred edges of the veal, delivering an explosion of savory, smoky notes in your mouth.
Enjoy this satisfying pairing by scooping the veal and rice onto your plate, then using your hands to shape the mixture into small bites. The tactile experience of eating with your fingers will only heighten the immersive, traditional feel of this beloved Vietnamese meal.
Savor each morsel, allowing the interplay of textures and flavors to transport you to the bustling streets of Vietnam.
Final Thoughts
While Bê Thui may not be as widely known as other Vietnamese dishes, this smoky grilled veal delicacy is a true hidden gem.
You've learned about its unique preparation and how to enjoy it with sticky rice, but there's more to discover. This dish's rich, bold flavors and tender texture make it a must-try for any adventurous eater.
The smokiness from the charcoal grill adds an irresistible layer of complexity, complementing the succulent veal perfectly. And of course, the vibrant herbs and dipping sauce bring everything together in a harmonious burst of taste.
As you savor each bite, you'll be transported to the bustling markets of Vietnam, where this beloved specialty has been enjoyed for generations.
Frequently Asked Questions
Is Bê Thui Made With Beef or Veal?
Based on the Current Question, you can see that Bê Thui is made with veal, not beef. Veal is the meat of young calves, which is often used in Vietnamese cuisine for its tender and delicate flavor.
Does Bê Thui Use Any Special Marinades or Seasonings?
The grilled veal dish uses a unique marinade with aromatic herbs and spices to infuse it with bold, smoky flavors. It's typically seasoned with lemongrass, shallots, fish sauce, and other Vietnamese aromatics.
How Long Does the Grilling Process Typically Take?
The grilling process typically takes around 15-20 minutes. You'll want to grill the meat over high heat, turning it occasionally, until it's nicely charred and cooked through. This helps infuse the meat with that delicious smoky flavor.
Is Bê Thui a Common Dish Across All of Vietnam?
Is bê thui a common dish across all of Vietnam? No, it's not. This specialty dish is primarily found in the central region of the country, where the grilling and preparation techniques have been perfected over generations.
Can Bê Thui Be Made With Alternative Protein Sources?
You can certainly make bê thui with alternative protein sources. While veal is the traditional meat, you could experiment with other lean and tender cuts like beef, pork, or even chicken to create delicious variations.
Mai is a passionate chef specializing in Vietnamese cuisine. From fragrant pho to fresh spring rolls and banh mi, Mai’s dishes showcase the balance of sweet, salty, sour, and spicy that defines Vietnamese cooking. Her recipes emphasize fresh herbs, flavorful broths, and the light, vibrant ingredients that make Vietnamese food so special.
-
Brazilian Cuisine3 months ago
Tacacá
-
Polish Comfort Food3 months ago
Krupnik (Barley Soup)
-
Brazilian Cuisine3 months ago
Caldeirada
-
Brazilian Cuisine3 months ago
Chicken in Brown Sauce
-
Southern Comfort Food3 months ago
Cheese Straws
-
African Cuisine3 months ago
Kedjenou (Ivory Coast)
-
Polish Comfort Food3 months ago
Vegetable Salad
-
American Diner Classics3 months ago
The Maillard Reaction: Understanding the Chemistry of Browning {Food Science and Cooking}