Vietnamese Cuisine
Bánh Ram: Vietnamese Fried Rice Cakes for a Crispy Treat
Savor the crispy delight of Bánh Ram, a Vietnamese treat that promises warm, savory flavors—discover the secrets behind making these delicious rice cakes!
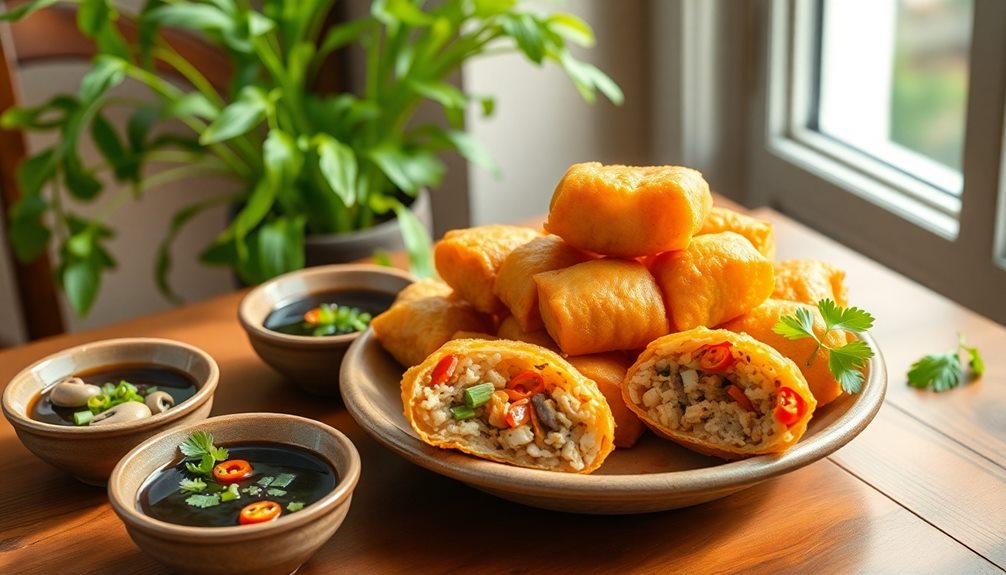
Bánh Ram are scrumptious Vietnamese fried rice cakes that you're sure to love! These delightful treats are made from glutinous rice flour, mixed with water and seasoning, to create a soft dough. You shape this dough into flat cakes and fry them until they're golden brown and crispy. With each bite, you can enjoy the warm, savory flavors that come from fillings like pork or shrimp. Plus, making Bánh Ram is a fun activity for family gatherings! So, if you're excited to learn how to cook these tasty cakes and share joyful moments, there's more to discover!
Key Takeaways
- Bánh Ram are traditional Vietnamese fried rice cakes, often made during festivals and celebrations, symbolizing joy and family traditions.
- The main ingredients include glutinous rice flour, water, salt, and optional seasonings like garlic and chili flakes for added flavor.
- The dough is shaped into small, flat cakes before being fried until golden brown and crispy, creating a delightful texture.
- Fillings can vary, ranging from pork to shrimp, allowing for diverse flavors tailored to personal preferences.
- Bánh Ram can be enjoyed as snacks or meal components, making them versatile and appealing to a wide audience.
History
The history of Vietnamese fried rice cakes is a rich tapestry woven from cultural influences and culinary traditions. These delightful treats, known as bánh ram, have roots that stretch back centuries.
Imagine families gathering to make these crispy snacks during festivals and celebrations! They often used leftover rice, making it a smart and tasty way to reduce waste.
In Vietnam, bánh ram is often enjoyed during special occasions, like the Lunar New Year. The recipe varies across regions, showcasing local ingredients and flavors. You might find them filled with everything from pork to shrimp, making each bite a surprise. Isn't that exciting?
As you explore the history, you'll see how these rice cakes reflect the heart and soul of Vietnamese culture. They represent the joy of sharing food with loved ones, the creativity of using simple ingredients, and the warmth of family traditions.
Today, bánh ram continues to be a beloved snack, found at street vendors and local restaurants.
Ingredients:
- 2 cups of rice flour
- 1 cup of water
- 1 teaspoon of salt
- 1 cup of minced pork (or your choice of protein)
- 1 cup of diced mushrooms
- 1 cup of shredded carrots
- 2 green onions, chopped
- 2 tablespoons of soy sauce
- 1 tablespoon of fish sauce (optional)
- Vegetable oil for frying
Cooking Instructions:
In a mixing bowl, combine the rice flour, water, and salt to form a smooth batter.
In a separate pan, sauté the minced pork until browned, then add the mushrooms, shredded carrots, and green onions. Season this filling mixture with soy sauce and fish sauce, allowing it to cook for a few more minutes until the vegetables are tender.
Once the filling is ready, take a spoonful of the batter and flatten it in your palm, placing a spoonful of the filling in the center. Fold the batter over the filling to form a cake and seal the edges.
Heat vegetable oil in a frying pan over medium heat, and fry the rice cakes until they turn golden brown and crispy on both sides.
Extra Tips:
For the best texture, ensure that the oil is hot enough before adding the rice cakes to prevent them from becoming soggy.
You can also experiment with different fillings like shrimp, tofu, or a mix of vegetables to suit your dietary preferences.
Serve the fried rice cakes with a side of dipping sauce made from soy sauce, vinegar, and chili for an extra kick of flavor! To make the dipping sauce, simply mix together equal parts of soy sauce and vinegar, then add a pinch of chili flakes for some heat. The tangy and spicy flavors of the dipping sauce will complement the slight sweetness and savory notes of the fried rice cakes, giving each bite an extra punch of flavor. For a complete meal, consider serving this dish alongside a fluffy Nigerian pancake recipe for a satisfying and delicious culinary experience.
Cooking Steps
To create delicious fried rice cakes, you'll want to gather all your ingredients and tools before diving in. Start with glutinous rice flour, water, and a pinch of salt. You'll also need a mixing bowl, a spoon, and a frying pan.
Once you have everything ready, it's time to mix! In your bowl, combine the glutinous rice flour and salt. Slowly add water while stirring until you get a smooth dough. Don't worry if it's a little sticky; that's just right!
Next, shape the dough into small, flat cakes, about the size of your palm. Heat some oil in your frying pan over medium heat. When the oil's hot, gently place your rice cakes in the pan. Fry them for about 3 to 4 minutes on each side, or until they're golden brown and crispy. Flip them carefully so they don't break!
Once they're cooked, let the cakes drain on a paper towel to remove excess oil. Now, you can serve your crispy fried rice cakes with a sweet sauce or enjoy them plain. Get ready to impress your friends and family with this tasty treat!
Step 1. Prepare Rice Flour Mixture
Start by gathering your ingredients for the rice flour mixture, which will form the base of your fried rice cakes. You'll need rice flour, tapioca flour, and a pinch of salt. The rice flour gives the cakes their unique flavor, while the tapioca flour helps create that delightful crispy texture we all love.
In a large mixing bowl, combine the rice flour and tapioca flour together. Make sure to mix them well so they blend evenly. Add the pinch of salt; this will enhance the flavor of your rice cakes, making them even tastier!
It's important to use the right proportions, as this will affect the texture and taste of your final dish.
Once you've mixed everything, take a moment to admire your work! The flour mixture is a blank canvas, ready to transform into something delicious.
Step 2. Add Water Gradually
Now that you've prepared the rice flour mixture, it's time to add water gradually. This step is super important because it helps bring everything together and makes your dough smooth.
Start by pouring a little water into the mixture. You don't want to add it all at once, or it might get too watery! So, take your time and mix gently.
Use a spoon or your hands to stir everything together. You'll notice the dough starting to form.
Keep adding a small amount of water and mixing until you achieve a nice, soft consistency. It should be moldable but not sticky. If it feels too dry, just add a tiny bit more water.
Step 3. Incorporate Seasoning Blend
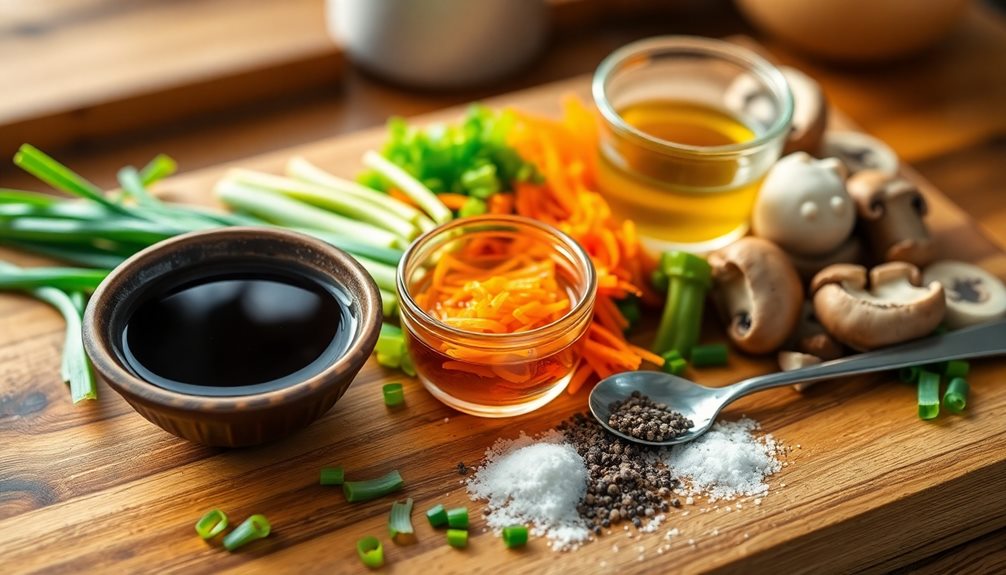
Once your dough reaches that perfect soft consistency, it's time to incorporate the seasoning blend! This step is super important because it adds flavor and makes your rice cakes really yummy. Grab your favorite spices—like salt, pepper, and maybe a little garlic powder. You can even add some chopped green onions for a fresh twist!
Start by sprinkling the seasoning evenly over your dough. Now, use your hands to mix everything together gently. You want the spices to spread throughout the dough, so take your time. As you mix, feel the texture change slightly; it should become fragrant and even more inviting!
If you like a bit of heat, consider adding a pinch of chili flakes. Just a little can go a long way! Keep tasting the dough as you mix in the spices. Remember, you can always add more, but it's hard to take it out once it's in.
Once you're happy with the flavor, your dough is ready for the next step. You're one step closer to making those delicious fried rice cakes that are sure to impress everyone! Get excited; you're doing great!
Step 4. Shape the Rice Cakes
Shaping your rice cakes is a fun and creative step that really brings your dish to life. First, take your seasoned rice mixture and grab a handful. You want to form it into a small ball, about the size of a golf ball. Press it gently between your palms to flatten it slightly. This gives your rice cake a nice, round shape.
Now, you can get a little artistic! If you want to make them look extra special, try using a cookie cutter or even your hands to shape the rice cakes into fun designs like hearts or stars. Just remember to keep them about half an inch thick. This thickness helps them crisp up perfectly when you fry them later.
Don't forget to line a plate or tray with parchment paper. As you shape each rice cake, place it on the paper to keep them from sticking together.
Once you've shaped all your rice cakes, take a moment to admire your beautiful creations! You've put in the effort, and now it's time to get ready for the next exciting step in your cooking adventure. Happy shaping!
Step 5. Fry Until Golden Brown
To achieve that perfect crispy exterior, heat a generous amount of oil in a frying pan over medium heat. You want enough oil so that the rice cakes can float a little as they cook.
Once the oil's hot, carefully place your shaped rice cakes into the pan. Make sure not to crowd them; give each cake some space to sizzle and get that lovely golden color.
Now, let them fry! Watch closely, as they can go from golden to burnt quickly. After about three to four minutes, it's time to flip them over. Use a spatula to turn them gently, ensuring they cook evenly on both sides.
You'll know they're ready when they're beautifully golden brown and crispy all around.
When both sides are done, take the rice cakes out of the oil and let them rest on a plate lined with paper towels. This helps soak up any extra oil, keeping your treats light and crispy.
Now, you're ready to enjoy your delicious bánh ram! Share them with friends or family, and watch everyone smile as they taste your tasty creation!
Final Thoughts
Vietnamese fried rice cakes offer a delightful blend of flavors and textures that can elevate any meal. These crispy treats aren't just tasty; they bring a fun twist to your dining experience.
Imagine biting into a warm, crunchy cake filled with soft rice and savory ingredients. It's sure to make your mouth water!
When you make bánh ram, you're not just cooking; you're creating something special. You can share these delicious cakes with family and friends, making any gathering feel festive.
Whether you enjoy them as a snack or a part of a meal, they're a real crowd-pleaser. Plus, you can customize the fillings to suit your taste. Want something spicy? Go for it! Prefer a milder flavor? You can do that, too!
Frequently Asked Questions
What Ingredients Are Typically Used in Bánh Ram?
When you think about traditional Vietnamese dishes, you'll find ingredients like rice flour, mung beans, and salt. These create a unique texture and flavor, making your culinary experience delightful and memorable. Don't forget the dipping sauce!
Can I Make Bánh Ram Gluten-Free?
Yes, you can definitely make it gluten-free! Substitute regular flour with rice flour or a gluten-free flour blend. Just ensure all other ingredients are also gluten-free, and you'll enjoy a delicious, crispy treat without worry!
How Should I Store Leftover Bánh Ram?
To store leftovers, let them cool completely, then place them in an airtight container. Keep them in the fridge for up to three days. Reheat before serving to enjoy their crispy texture again!
What Dipping Sauces Pair Well With Bánh Ram?
When enjoying crispy rice cakes, you'll love pairing them with sweet chili sauce, hoisin sauce, or a tangy fish sauce mix. These dips enhance the flavors and add a delightful kick to your snack!
Is Bánh Ram Suitable for Vegetarians?
Yes, bánh ram can be suitable for vegetarians, depending on the ingredients used. If you ensure the rice cakes are made without meat-based broths or fillings, you've got a tasty, vegetarian-friendly option. Enjoy!
Mai is a passionate chef specializing in Vietnamese cuisine. From fragrant pho to fresh spring rolls and banh mi, Mai’s dishes showcase the balance of sweet, salty, sour, and spicy that defines Vietnamese cooking. Her recipes emphasize fresh herbs, flavorful broths, and the light, vibrant ingredients that make Vietnamese food so special.
Vietnamese Cuisine
Soup Cua: Vietnamese Crab Soup With a Rich Broth
Just imagine the rich, aromatic broth and the tender crab meat that come together in this Vietnamese culinary delight. Discover the secrets of Soup Cua.
Dive into a flavorful journey through Vietnamese culinary heritage with the rich and aromatic Soup Cua – a Vietnamese crab soup that's been perfected over centuries by resourceful cooks along the country's vibrant coastlines. You'll start by sautéing aromatic onions, garlic, and ginger in oil, then gently fold in lump crab meat and simmer it all in a savory broth. As the soup simmers, you'll add fresh mushrooms and seasonings, creating a well-balanced dish. Finally, you'll garnish it with a vibrant array of herbs, like cilantro and scallions, for an authentic taste of Vietnam. If you continue exploring, you'll uncover even more delicious secrets of this beloved soup.
Key Takeaways
- Vietnamese crab soup, known as "Soup Cua," originates from the coastal regions of Vietnam, where seafood is a staple in the local cuisine.
- The dish is made by simmering whole crabs in an aromatic broth, often enhanced with fresh herbs and vegetables for a well-balanced flavor profile.
- The cooking process involves sautéing onions, garlic, and ginger to build a rich, savory foundation, followed by the addition of crab meat and seasonings.
- Eggs are sometimes incorporated into the broth, creating a slightly thickened consistency and adding a creamy, luxurious texture to the soup.
- Fresh herbs, such as cilantro, scallions, and Thai basil, are used as garnishes, providing a burst of flavor and visual appeal to the dish.
History
The origins of Vietnamese crab soup can be traced back to the coastal regions of Vietnam, where seafood has long been a staple in the local diet.
Over the centuries, resourceful Vietnamese cooks have perfected the art of blending fresh crabs with a rich, flavorful broth. This hearty soup has become a beloved dish, reflecting the country's culinary heritage and the ingenuity of its people.
Traditionally, the soup was made using whole crabs, which were carefully cleaned and simmered in an aromatic broth. The resulting liquid was then strained, creating a delicate and complex base for the soup.
Cooks would then add the crab meat back into the broth, along with a variety of fresh herbs and vegetables to create a well-balanced and satisfying dish.
Today, Vietnamese crab soup continues to be a popular menu item, enjoyed by people across the country and around the world.
Its rich history and enduring popularity make it a true culinary treasure.
Cooking Steps
Begin by gathering all the necessary ingredients for the Vietnamese crab soup.
You'll need a large pot, some crab meat, chicken or vegetable broth, ginger, garlic, onion, mushrooms, and a few other key seasonings.
Once you have everything ready, start by sautéing the onion, garlic, and ginger in a bit of oil until they're fragrant and softened.
Next, pour in the broth and bring it to a simmer.
Add the crab meat and let it cook for a few minutes until heated through.
Toss in the sliced mushrooms and let them cook for another minute or two.
Season the soup with a dash of fish sauce, a sprinkle of white pepper, and a squeeze of fresh lime juice.
Taste and adjust the seasoning as needed.
Step 1. Sauté Aromatics in Oil
Sautéing the aromatic ingredients in oil is the first step in crafting this delectable Vietnamese crab soup.
First, you'll need to heat a couple tablespoons of oil in a large pot over medium heat. Once the oil is hot, add the thinly sliced onions and let them sizzle for a minute or two until they start to soften and become fragrant.
Next, toss in the minced garlic and ginger. Stir everything together and let the flavors meld for another minute or so, being careful not to let the garlic burn.
This simple sauté process is essential for building the foundation of the soup's rich, savory broth. The aromatic vegetables will infuse the oil with their natural sweetness and spice, setting the stage for the crab and other ingredients to shine.
With the aromatics prepped, you're now ready to move on to the next step in creating this authentic Vietnamese delicacy.
Step 2. Add Crab Meat
With the aromatic foundation laid, you can now begin adding the star of the show – the crab meat. Gently fold the lump crab meat into the simmering broth. Be careful not to break up the delicate chunks as you incorporate them. The sweet, slightly briny flavor of the crab will instantly elevate the soup, creating a luxurious texture and depth of flavor.
Next, you'll want to taste the soup and adjust the seasoning as needed. Add a pinch more salt or a splash of fish sauce to balance the flavors. The crab meat should shine, so you don't want to overpower it.
Finish the soup by stirring in a handful of fresh cilantro leaves, adding a vibrant, herbal note that complements the crab beautifully.
Ladle the Vietnamese crab soup into bowls, making sure each portion gets an ample amount of succulent crab meat. Serve it piping hot, allowing your guests to savor the rich, satisfying broth and the tender bites of crab in every spoonful.
Step 3. Add Stock and Simmer
Next, you'll want to add the stock to the pot. This is where the magic really starts to happen! Grab your prepared stock and carefully pour it in, making sure to get every last drop. The stock is going to infuse the soup with an incredible depth of flavor.
Once the stock is in, give everything a good stir. You'll start to see the liquid come together and take on a rich, golden hue.
Now, it's time to let the soup simmer. Turn the heat down to medium-low and let it gently bubble away for about 15-20 minutes. This allows all the flavors to meld together perfectly.
As the soup simmers, you'll notice the delightful aroma start to fill your kitchen. It's a scent that just can't be beat!
Keep an eye on it, stirring occasionally, until the broth has thickened slightly and the flavors have truly melded. Then, you're ready for the next step!
Step 4. Add Egg to Soup
To add the egg to the soup, crack the eggs directly into the simmering broth.
You'll want to do this gently, one at a time, allowing each egg to cook before adding the next. The eggs will poach right in the flavorful broth, creating soft, pillowy clouds that are so satisfying.
As the eggs cook, they'll release their rich, golden yolks, which will blend into the broth, thickening it ever so slightly and adding a luxurious texture.
Be sure to keep the heat at a gentle simmer – you don't want the eggs to overcook and become rubbery.
Once all the eggs are in, give the soup a gentle stir to incorporate the egg.
The finished dish will have delicate strands of egg floating in the aromatic broth, creating a truly comforting and nourishing meal.
Serve the Vietnamese crab soup hot, garnished with fresh herbs and a squeeze of lime juice for the perfect balance of flavors.
Step 5. Garnish With Fresh Herbs
Finish garnishing the Vietnamese crab soup with a generous sprinkling of fresh herbs.
You'll want to add a mix of fragrant cilantro, bright green scallions, and lively Thai basil. The herbs will instantly elevate the soup, bringing a burst of fresh flavor and vibrant color.
Gently tear the leaves and scatter them over the top of the steaming broth. Their delicate aromas will waft up, enticing your senses.
Don't be shy – layer on those herbs! They'll complement the richness of the crab and balance out the soup's savory notes.
For the final touch, add a squeeze of fresh lime juice. The bright acidity will cut through the soup's creaminess, leaving you with a perfectly balanced and incredibly appetizing dish.
Now, ladle the Vietnamese crab soup into bowls and enjoy it with family and friends. The fresh herbs will make every spoonful a delight.
Final Thoughts
After exploring the flavors and preparations of Vietnamese crab soup, you can appreciate its complexity and versatility. This dish offers a unique culinary journey, blending the richness of crab with the aromatic depth of herbs and spices.
The final touch of garnishing with fresh herbs adds a delightful burst of flavor and visual appeal, making it a true feast for the senses.
Whether you're a seasoned soup enthusiast or new to Vietnamese cuisine, this crab soup is sure to become a new favorite. Its comforting warmth and complex flavors make it a perfect choice for any occasion, from a cozy family dinner to an elegant gathering with friends.
As you savor each sip, you'll be transported to the vibrant streets of Vietnam, where this beloved dish has its origins.
Frequently Asked Questions
What Is the Typical Serving Size for Soup Cua?
The typical serving size for this type of soup is usually around 8-12 ounces. It's meant to be a hearty, comforting dish, so you'll want to enjoy a full bowl to get the full flavor experience.
Can Soup Cua Be Made in Advance and Reheated?
Yes, you can make this soup in advance and reheat it. The broth will keep well in the fridge for up to 5 days, and the soup can be reheated on the stovetop or in the microwave when you're ready to serve it.
What Types of Crab Are Commonly Used in Soup Cua?
The most commonly used crabs in this type of soup are blue crab, dungeness crab, and lump crabmeat. They provide the rich, sweet flavor that makes this dish so delicious.
How Long Can Soup Cua Be Stored in the Refrigerator?
Soup can be stored in the refrigerator for 3-4 days. The richness of the broth and the delicate nature of the crab mean it's best to consume it within a few days for optimal freshness and flavor.
Is Soup Cua Suitable for Vegetarians or Vegans?
No, this soup wouldn't be suitable for vegetarians or vegans, as it's made with crab. The broth and other ingredients likely contain animal products, so it's not an option for those following plant-based diets.
Mai is a passionate chef specializing in Vietnamese cuisine. From fragrant pho to fresh spring rolls and banh mi, Mai’s dishes showcase the balance of sweet, salty, sour, and spicy that defines Vietnamese cooking. Her recipes emphasize fresh herbs, flavorful broths, and the light, vibrant ingredients that make Vietnamese food so special.
Vietnamese Cuisine
Celebrate With Bánh ChưNg: Vietnam’S Traditional Rice Cake
Bask in the rich cultural heritage of Vietnam with Bánh Chưng, a beloved rice cake that has graced Lunar New Year festivities for centuries. Discover the fascinating history and mouthwatering preparation of this iconic delight.
Celebrate Vietnam's cultural heritage by enjoying the beloved Bánh Chưng, a traditional rice cake that's been gracing Lunar New Year festivities for centuries. This legendary dish has roots dating back to the 6th century BC, symbolizing the harmony of earth and sky. Today, families come together to carefully craft these tasty bundles, wrapping glutinous rice, mung beans, and pork in fragrant banana leaves. Preparing Bánh Chưng is a labor of love, but the result is a delicious treat that brings people closer and preserves cherished traditions. Keep reading to discover the fascinating history and mouthwatering preparation of this iconic Vietnamese delight.
Key Takeaways
- Bánh Chưng is a traditional Vietnamese rice cake deeply rooted in the country's cultural heritage, dating back to the 6th century BC.
- The dish symbolizes the harmony and balance of nature, with its square shape representing the earth and sky.
- Preparing Bánh Chưng involves family collaboration, reflecting the agricultural lifestyle and seasonal cycles of Vietnam.
- Bánh Chưng serves as a symbol of family unity and shared memories, particularly during the Lunar New Year celebrations.
- Contemporary adaptations of Bánh Chưng maintain traditional methods while embracing innovation, ensuring the dish's cultural significance endures.
History
Bánh Chưng, Vietnam's iconic rice cake, has its roots firmly planted in the nation's rich cultural heritage. This beloved delicacy has been a cherished part of Vietnamese celebrations for centuries, with its origins tracing back to the legendary story of Vương Thế Bửu.
During the Hùng Kings era, Vương Thế Bửu created the square-shaped Bánh Chưng to represent the earth, and the round Bánh Tết to symbolize the sky. These cakes became symbols of harmony and balance, reflecting the deep connection between the Vietnamese people and their natural world.
Today, the preparation of Bánh Chưng remains a labor of love, with families coming together to meticulously wrap the glutinous rice, mung bean, and pork filling in fragrant banana leaves.
The intricate folding and tying techniques have been passed down through generations, preserving the traditions that make this rice cake so special.
Recipe
Bánh Chưng, a traditional Vietnamese rice cake, has been a beloved part of Vietnamese culture for centuries. This savory and filling dish is typically made during the Lunar New Year, or Tết, celebration, but can be enjoyed year-round.
The process of making Bánh Chưng is a labor of love, requiring patience and attention to detail. The end result, however, is a delectable treat that perfectly encapsulates the flavors and traditions of Vietnam.
Ingredients:
- 2 cups glutinous rice
- 1 pound pork shoulder, cubed
- 1 cup mung bean, soaked and peeled
- 2 tablespoons fish sauce
- 1 teaspoon black pepper
- 1 teaspoon salt
- 4 banana leaves, cut into 12-inch squares
- Twine or bamboo skewers
Cooking Instructions:
Mix the glutinous rice, pork, mung bean, fish sauce, black pepper, and salt in a large bowl until well combined.
Place a banana leaf square shiny-side down on a flat surface. Scoop a portion of the rice mixture onto the center of the leaf and fold the sides over the filling, then fold the top and bottom to create a square packet. Secure the packet with twine or bamboo skewers.
Extra Tips:
It's important to soak the banana leaves in water for 30 minutes before using to make them pliable and easy to work with.
Additionally, the Bánh Chưng should be steamed for at least 12 hours to ensure the rice is cooked through and the flavors have fully developed. Enjoy this traditional Vietnamese delicacy with family and friends.
Cooking Steps
Soak the glutinous rice overnight to soften it up.
Then, wrap the rice in fragrant leaves and tie the bundles with bamboo strings.
Step 1. Soak Glutinous Rice Overnight
Soaking the glutinous rice overnight is a crucial first step in crafting the beloved Bánh Chưng. This simple yet vital process allows the rice to absorb water, softening it in preparation for the next stages.
Start by rinsing the rice thoroughly, removing any impurities. Then, place the rice in a large bowl and cover it with clean water. Let it sit overnight, giving the grains ample time to soak up the moisture.
Come morning, you'll notice the rice has expanded, becoming plump and hydrated – perfect for the next steps in Bánh Chưng assembly.
Soaking the rice is an essential foundation, ensuring the cake holds together beautifully and cooks evenly. With this simple task complete, you're one step closer to enjoying the festive flavor and texture of this cherished Vietnamese delicacy.
Step 2. Wrap Glutinous Rice Bundles in Leaves
With the glutinous rice soaked and ready, you can now move on to wrapping the rice bundles in leaves.
First, take a large, sturdy leaf, such as banana or bamboo leaves. Place a handful of the soaked glutinous rice in the center of the leaf. Fold the sides of the leaf over the rice, then roll it up tightly, creating a compact, rectangular bundle. Secure the bundle with twine or thin strips of the leaf.
Repeat this process until you've used up all the rice.
The leaves not only hold the rice together but also impart a lovely, earthy flavor as the bundles steam. As you wrap each one, be sure to press the rice firmly to avoid any gaps or air pockets. This will help the cakes hold their shape during the cooking process.
With your rice bundles all wrapped up, you're now ready to cook them to perfection!
Step 3. Tie Bundles With Bamboo Strings
Once your glutinous rice bundles are wrapped in the leaves, you'll need to tie them up securely with bamboo strings. This step is crucial to ensure the banh chung holds its shape during the long cooking process.
First, take a length of flexible bamboo string and wrap it around the center of the leaf-wrapped bundle. Tie the string tightly, creating a secure knot. Then, continue wrapping the string around the bundle, crisscrossing it to form an "X" pattern. Make sure to cover the entire surface, tying the string at the ends to keep everything in place.
Next, you can add additional layers of string if needed, criss-crossing in different directions to reinforce the bundle. The goal is to create a tight, sturdy package that won't unravel during boiling.
With the bundles securely tied, they're ready to be cooked and transformed into the beloved banh chung.
Step 4. Cook the Bundles
The bundles, now securely tied, are ready to be cooked. First, choose a large pot or wok and fill it with water, making sure the water level is high enough to fully submerge the rice bundles. Bring the water to a boil over high heat.
Carefully lower the tied bundles into the boiling water, ensuring they're completely submerged. Reduce the heat to maintain a gentle simmer. Cover the pot with a lid and let the bundles cook for 4-5 hours, turning them occasionally to ensure even cooking.
As the bundles cook, the sticky rice will become soft and aromatic. The bamboo leaves will also infuse the rice with a subtle, earthy flavor. Keep an eye on the water level, adding more as needed to prevent the bundles from drying out.
Once the bundles are thoroughly cooked, use tongs or a slotted spoon to carefully remove them from the pot. Allow them to cool slightly before serving. The delicious bánh chưng is now ready to be enjoyed!
Step 5. Unwrap and Serve Bánh ChưNg
After the rice bundles have finished cooking, it's time to unwrap and serve the delicious bánh chưng. Gather your family and friends, as this is a joyous occasion!
Carefully remove the leaves, revealing the green-tinged rice cakes inside. The aroma of savory pork, mung beans, and fragrant leaves will fill the air, making mouths water in anticipation.
Slice the bánh chưng into thick, satisfying pieces. The sticky rice should have a soft, pillowy texture, while the fillings provide a delightful contrast of flavors. Serve the slices on a platter, garnished with fresh herbs if desired.
Don't forget the accompanying dipping sauces – the sweet and salty flavors will complement the bánh chưng perfectly.
As you gather around the table, share stories and laughter while savoring this beloved Vietnamese tradition. Celebrate the new year or any special occasion with the comforting and nourishing bánh chưng.
Enjoy every bite, for this is a truly special moment to cherish.
Final Thoughts
Ultimately, banh chung remains a treasured part of Vietnamese culinary heritage, transcending mere sustenance to embody cultural identity and cherished traditions.
This delightful rice cake, wrapped in fragrant banana leaves, is the centerpiece of Lunar New Year celebrations, bringing families together to savor its rich flavors and bask in the warmth of shared memories.
Whether served hot off the steamer or enjoyed as a snack throughout the year, banh chung represents the ingenuity and resilience of the Vietnamese people.
Its layers of sticky rice, savory pork, and mung bean evoke the harmony of nature and the enduring spirit of the nation.
As you unwrap this edible embodiment of Vietnamese culture, let it inspire a renewed appreciation for the timeless traditions that continue to shape and nourish the hearts of the people.
Banh chung, a delicious bridge between past and present, is a true celebration of Vietnam's vibrant heritage.
Frequently Asked Questions
How Long Does It Take to Make Bánh ChưNg?
Making bánh chưng takes time and effort, as it's a labor-intensive process. Typically, it can take around 8-12 hours to prepare and cook the rice cake, depending on your experience and the scale of production.
Where Can I Buy the Ingredients for Bánh ChưNg?
You can find the ingredients for bánh chưng at Asian grocery stores or specialty Vietnamese markets. Look for sticky rice, mung beans, pork, and banana leaves. Many stores now sell pre-made bánh chưng for convenience.
Is Bánh ChưNg Gluten-Free?
Yes, bánh chưng is gluten-free. This traditional Vietnamese rice cake is made from glutinous rice, mung beans, and pork, without any wheat flour or other gluten-containing ingredients. It's a safe option for those following a gluten-free diet.
How Do You Store Leftover Bánh ChưNg?
To store leftover bánh chưng, you can wrap it in plastic or store it in an airtight container in the fridge for up to a week. Reheat it before serving to enjoy its fresh flavor.
Can I Make Bánh ChưNg With Instant Rice?
You can't make bánh chưng with instant rice. The traditional rice cake requires glutinous rice, which has a different texture and binding properties than instant rice. Trying to use instant rice won't give you the authentic bánh chưng experience.
Mai is a passionate chef specializing in Vietnamese cuisine. From fragrant pho to fresh spring rolls and banh mi, Mai’s dishes showcase the balance of sweet, salty, sour, and spicy that defines Vietnamese cooking. Her recipes emphasize fresh herbs, flavorful broths, and the light, vibrant ingredients that make Vietnamese food so special.
Vietnamese Cuisine
Vietnamese Nem Chua: The Savory Fermented Snack You’ll Love
Acaptivating blend of sweet, sour, and umami flavors, Nem Chua is a beloved Vietnamese fermented pork snack that’ll have your taste buds craving more. Learn the steps to craft this Vietnamese treasure at home.
Get ready to dive into the savory world of Nem Chua, a beloved Vietnamese culinary delight! This fermented pork snack boasts a tantalizing blend of sweet, sour, and umami flavors that'll have your taste buds dancing. Originating in northern Vietnam centuries ago, Nem Chua has become a cultural staple, often shared during festive gatherings. The key lies in the meticulous fermentation process, where the pork develops its signature chewy texture and captivating aroma. Wrap it in banana leaves, pair it with pickled veggies, and prepare to embark on a flavor adventure that'll leave you craving more. Want to learn the steps to craft this Vietnamese treasure at home?
Key Takeaways
- Nem Chua is a traditional Vietnamese fermented pork snack with a unique savory, sour, and umami flavor profile.
- The fermentation process is essential for developing the distinct taste and chewy texture of Nem Chua.
- Nem Chua is often served with pickled vegetables, enhancing the contrast of flavors and textures.
- Nem Chua is a culturally significant dish, widely enjoyed during festive occasions and family gatherings in Vietnam.
- Preparing Nem Chua at home involves a straightforward process, allowing for customization to personal taste preferences.
History
Nem Chua, the beloved Vietnamese fermented pork sausage, traces its roots back to the northern regions of the country. This savory snack has been a beloved part of Vietnamese cuisine for centuries, passed down through generations.
The origins of Nem Chua can be traced to the 15th century, when the dish was first mentioned in historical records. Back then, it was a simple affair – just pork, salt, and rice bran. As the dish evolved, additional ingredients like chilies, garlic, and fish sauce were added, creating the distinct flavor profile we know and love today.
Traditionally, Nem Chua was a staple food for farmers and laborers, providing a protein-packed and portable snack. Over time, it became a beloved part of Vietnamese culture, often served at festivals, celebrations, and family gatherings.
Today, Nem Chua remains a cherished treat, enjoyed by people of all ages across the country.
Recipe
Nem Chua, also known as Vietnamese cured meat, is a popular snack food in Vietnam. It's a fermented meat product that has a unique and complex flavor profile, combining the savory, salty, and slightly sour notes of the cured meat with the crunch of vegetables and the heat of chili peppers.
The traditional method of making Nem Chua involves carefully selecting and preparing the ingredients, followed by a meticulous curing process that can take several days. While it may seem like a laborious task, the resulting flavor and texture of the finished product make it well worth the effort.
Ingredients:
- 2 lbs ground pork
- 1 tbsp salt
- 1 tbsp sugar
- 1 tbsp fish sauce
- 1 tsp ground black pepper
- 2 cloves garlic, minced
- 2 Thai chili peppers, finely chopped
- 1 cup shredded carrots
- 1 cup shredded daikon radish
- 1 cup finely chopped green onions
- Banana leaves or rice paper wrappers, for serving
Instructions:
In a large bowl, combine the ground pork, salt, sugar, fish sauce, black pepper, garlic, and Thai chili peppers. Mix well until all the ingredients are evenly distributed.
Cover the bowl and refrigerate for at least 24 hours, or up to 48 hours, to allow the flavors to develop.
After the curing process, add the shredded carrots, daikon radish, and green onions to the pork mixture. Stir to combine.
Divide the mixture into small portions and wrap them in banana leaves or rice paper wrappers. Secure with toothpicks or string.
Tips:
For best results, let the wrapped Nem Chua ferment at room temperature for an additional 2-3 days before serving. This will further enhance the flavor and texture of the cured meat.
Serve Nem Chua as a snack or appetizer, accompanied by fresh herbs, vegetables, and dipping sauces like fish sauce, chili sauce, or nuoc cham.
Cooking Steps
Combine the juicy pork, fragrant herbs, and zesty spices in a bowl.
Wrap the pork mixture tightly in banana leaves and let it ferment for 3 to 5 days.
Once it's ready, slice the flavorful, fermented pork and serve it alongside tasty pickled veggies.
Step 1. Combine Pork, Herbs, and Spices
With the pork, herbs, and spices at the ready, you can now bring them together to craft the quintessential filling for the Vietnamese nem chua. First, dice the pork into small, bite-sized pieces, ensuring even cooking and texture.
Next, chop the fragrant cilantro, savory garlic, and zesty lime leaves, blending their flavors to create a delightful aroma. Don't forget the warm spices – a pinch of ground black pepper and a dash of chili powder will add a subtle kick to the mixture.
Now, combine all the ingredients in a large bowl, using your hands to thoroughly mix them together. Knead the mixture, working the flavors into the pork until it's well-incorporated.
You'll want the filling to be cohesive, with the herbs and spices evenly distributed. Taste as you go, adjusting the seasoning to your liking. With the perfect balance of salty, sour, and spicy, you're ready to stuff the nem chua and begin the fermentation process.
Step 2. Wrap Pork Mixture in Banana Leaf
Grab a clean banana leaf and gently lay it flat on your work surface. This large, green leaf will act as the wrapping for your savory pork mixture.
Spoon a generous portion of the seasoned pork onto the center of the leaf. Fold the sides of the leaf over the pork, then roll it up tightly, creating a neat little package. Secure the roll with a toothpick or a thin strip of the leaf.
Now, repeat this process with the remaining pork mixture and leaves. Line them up neatly as you go. These handheld wraps are perfect for sharing with friends and family at your next gathering.
The fragrant banana leaf adds an extra layer of flavor and aroma. Once your nem chua are all wrapped up, you're ready for the final step – fermentation! Get ready to enjoy this delicious Vietnamese specialty.
Step 3. Ferment Wrapped Pork for 3-5 Days
To ferment the wrapped pork, place the neatly arranged nem chua packages in a large, clean container. Cover them completely with a brine solution made from salt and water. Be sure the pork is fully submerged.
Now, let the container sit in a warm spot for 3-5 days. As the pork ferments, you'll notice a tantalizing sour aroma. This is a good sign – the flavors are developing!
During this time, you'll need to check on the container daily. Skim off any foam or scum that rises to the surface. This helps keep the fermentation process healthy.
When the 3-5 day mark arrives, your nem chua is ready! The pork should have a firm, chewy texture and a delightful sour-savory taste. Unwrap the leaves and enjoy this classic Vietnamese snack. The fermentation process has transformed the pork into a delectable treat!
Step 4. Slice Fermented Pork Before Serving
The fermented pork's firm, chewy texture and delightful sour-savory flavor are ready to be enjoyed. Before serving, you'll want to slice the pork into thin, bite-sized pieces. This allows everyone to easily pick up and savor each delectable morsel.
First, grab a sharp knife and carefully slice the fermented pork log into discs about 1/4-inch thick. Try to make the slices as even as possible for a neat, uniform presentation. If the pork seems a bit stubborn, don't be afraid to apply a gentle rocking motion to the knife as you cut through.
Once sliced, arrange the pork pieces on a serving platter or plate. You can garnish them with:
- Thinly sliced chilies for a pop of color and heat
- Chopped cilantro or mint leaves for a fresh, herbal note
- Crushed peanuts for a satisfying crunch
Now your Vietnamese nem chua is ready to be shared and savored by all! The combination of flavors and textures is truly irresistible.
Step 5. Serve With Pickled Vegetables
Pairing your sliced Vietnamese nem chua with a selection of pickled vegetables takes the dish to new flavor heights. The tangy, crunchy veggies provide a perfect foil to the rich, savory pork. Try thinly sliced carrots, daikon radish, and cucumbers – they'll add a refreshing zing that balances the bold fermented taste of the nem chua.
Prepare the pickled vegetables in advance for maximum flavor. Simply mix the sliced veggies with a brine of vinegar, sugar, and salt. Let them sit for at least 30 minutes, or up to a few days in the fridge. The longer they pickle, the more intense the flavors will become.
Arrange the pickled veggies on a platter alongside your sliced nem chua. Encourage your guests to build their own little bites, layering the pork and crunchy veggies on a crisp lettuce leaf or rice paper wrap.
The contrasting textures and tastes will delight your senses and have everyone coming back for more.
Final Thoughts
Ultimately, Nem Chua's versatility and captivating flavors make it a Vietnamese culinary gem. You can enjoy this savory fermented snack any time, whether as an appetizer, a quick bite, or even a meal accompaniment.
Its complex taste is sure to delight your senses – the perfect balance of sweet, sour, and umami.
What's more, Nem Chua is incredibly easy to prepare at home. With a bit of patience and the right ingredients, you can recreate this beloved treat and share it with family and friends.
Imagine the joy of gathering around a table, dipping into the tangy pork, and savoring each flavorful bite. It's a moment of pure Vietnamese culinary bliss.
Frequently Asked Questions
How Long Does It Take to Ferment Vietnamese Nem Chua?
It typically takes 2-3 days to ferment Vietnamese nem chua. The fermentation process allows the flavors to develop and the texture to become firm. Be patient, as rushing it won't give you the same authentic taste.
What Are the Health Benefits of Eating Vietnamese Nem Chua?
Eating Vietnamese nem chua can provide you with beneficial probiotics, boost your immune system, and aid digestion. It's also a good source of protein and may even help reduce inflammation in your body.
Can I Store Leftover Vietnamese Nem Chua, and if So, How?
Yes, you can store leftover Vietnamese nem chua. Keep it in an airtight container in the refrigerator for up to a week. The fermentation process will continue, so the flavor may change slightly, but it'll still be tasty.
Is Vietnamese Nem Chua Safe for Pregnant Women to Consume?
Consuming fermented foods like Vietnamese nem chua during pregnancy is generally safe, but it's best to consult your doctor. They can provide personalized guidance on any potential risks or precautions you should consider.
Where Can I Purchase the Necessary Ingredients to Make Vietnamese Nem Chua?
To make Vietnamese nem chua, you can purchase the necessary ingredients like ground pork, rice paper, and spices from Asian grocery stores or online specialty retailers. Be sure to follow proper food safety guidelines when handling raw meat.
Mai is a passionate chef specializing in Vietnamese cuisine. From fragrant pho to fresh spring rolls and banh mi, Mai’s dishes showcase the balance of sweet, salty, sour, and spicy that defines Vietnamese cooking. Her recipes emphasize fresh herbs, flavorful broths, and the light, vibrant ingredients that make Vietnamese food so special.
-
Brazilian Cuisine3 months ago
Tacacá
-
Brazilian Cuisine3 months ago
Caldeirada
-
Polish Comfort Food3 months ago
Krupnik (Barley Soup)
-
Southern Comfort Food3 months ago
Cheese Straws
-
Brazilian Cuisine3 months ago
Chicken in Brown Sauce
-
Polish Comfort Food3 months ago
Vegetable Salad
-
African Cuisine3 months ago
Kedjenou (Ivory Coast)
-
American Diner Classics3 months ago
The Maillard Reaction: Understanding the Chemistry of Browning {Food Science and Cooking}