Connect with us

Vietnamese Cuisine

Banh Chung (Sticky Rice Cake)

Intricately wrapped in banana leaves, the Banh Chung sticky rice cake holds a rich history and tradition, inviting you to uncover its captivating story.

Published

on

traditional vietnamese sticky cake

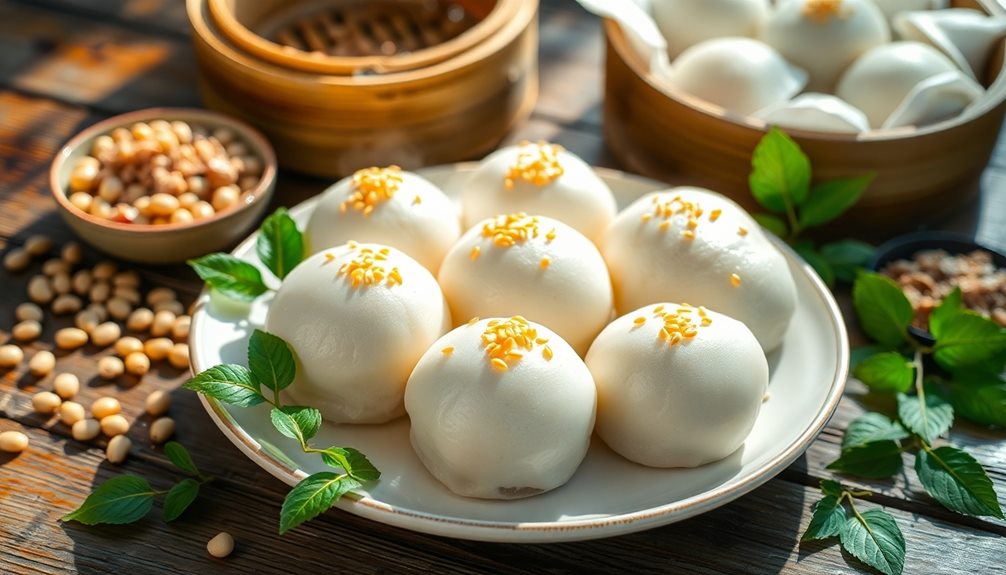
Over 2,000 years ago, the beloved Banh Chung sticky rice cake was created as a special offering during the Lunar New Year festival. This culinary masterpiece reflects Vietnam's rich tradition and heritage. You'll find it's made with soaked sticky rice, savory pork belly, and fragrant spices, all wrapped in banana leaves and boiled for hours to achieve its signature soft, chewy texture. Banh Chung symbolizes prosperity, good fortune, and family togetherness, often gifted to express warm wishes. It's a true delight to prepare and enjoy, especially during festive gatherings. Let's dive deeper into the fascinating history and preparation of this beloved Vietnamese delicacy.

Key Takeaways

  • Banh Chung is a traditional Vietnamese sticky rice cake that originates over 2,000 years ago during the Hung King dynasty.
  • It is a culinary masterpiece that symbolizes Vietnamese tradition, heritage, and cultural significance, often enjoyed during Tet (Lunar New Year) celebrations.
  • The recipe involves a labor-intensive process of layering soaked sticky rice with mung bean and pork, wrapped in banana leaves and boiled for several hours.
  • Banh Chung offers a unique flavor profile with a balance of savory pork and fragrant spices, complemented by the chewy texture of the sticky rice.
  • It is widely recognized as a staple in Vietnamese cuisine, with various regional adaptations and increasing popularity worldwide.

History

Banh Chung, the iconic Vietnamese sticky rice cake, has its roots firmly planted in the country's rich cultural heritage. This beloved delicacy is said to have been created over 2,000 years ago during the Hung King dynasty.

Legend has it that the king asked his sons to create a special offering for the Lunar New Year festival, and the youngest son, Prince Lang Lieu, came up with the idea of Banh Chung. He meticulously wrapped sticky rice, mung beans, and pork in banana leaves, creating a square-shaped cake that symbolized the earth.

Today, Banh Chung remains a cherished tradition, with families gathering to prepare the labor-intensive dish together. The process involves soaking the rice, assembling the ingredients, and carefully wrapping the cake in its distinctive square shape.

As it steams, the aroma of the savory fillings and fragrant leaves fills the air, making mouths water in anticipation. Biting into a warm slice of Banh Chung is a true taste of Vietnam's rich cultural heritage.

Recipe

Banh Chung, or sticky rice cake, is a traditional Vietnamese dish that has been enjoyed for centuries. This savory and satisfying cake is a staple during the Lunar New Year celebration, but it can be enjoyed year-round.

Advertisement

The process of making Banh Chung is a labor of love, as it requires carefully wrapping the rice and fillings in banana leaves and boiling the packages for several hours. However, the end result is well worth the effort, as the fragrant, sticky rice and flavorful fillings come together in a delightful and comforting treat.

Ingredients:

  • 2 cups glutinous rice
  • 1 cup mung bean, soaked and peeled
  • 1 lb pork belly, cut into thin slices
  • 2 tbsp soy sauce
  • 1 tsp salt
  • 1 tsp ground black pepper
  • Banana leaves, cut into 8-inch squares
  • Cooking twine

Instructions:

In a large bowl, soak the glutinous rice in water for at least 6 hours or overnight. Drain and set aside.

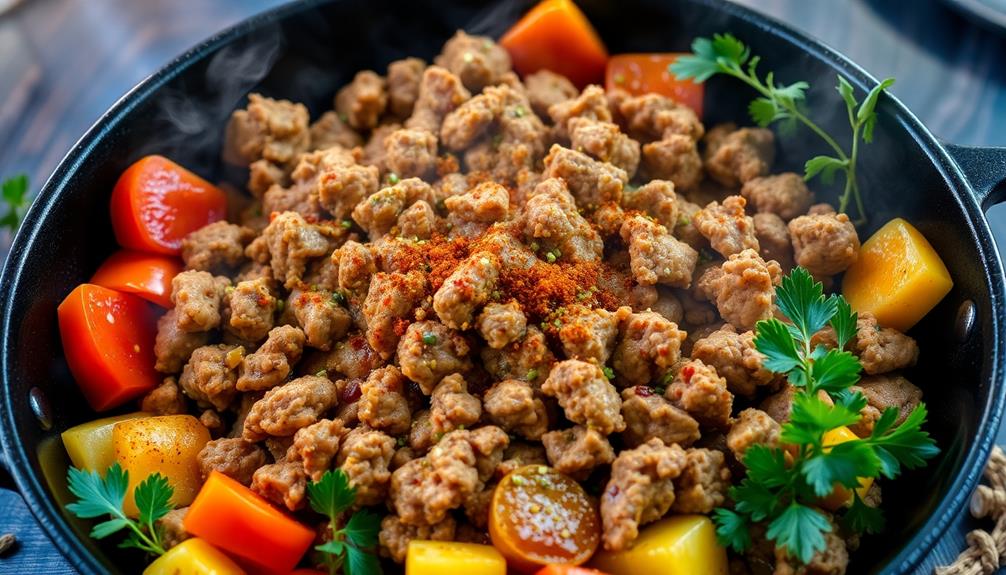
In a separate bowl, mix the mung bean, pork belly, soy sauce, salt, and black pepper.

Place a banana leaf square shiny-side down, and place a handful of soaked rice in the center. Top with a spoonful of the mung bean and pork mixture, then fold the leaf over to create a square package. Tie the package securely with cooking twine.

Advertisement

Repeat with the remaining ingredients.

Place the wrapped packages in a large pot and cover with water. Bring to a boil, then reduce heat and simmer for 6-8 hours, adding more water as needed to keep the packages submerged.

When cooking Banh Chung, it's important to be patient and allow the rice to fully cook through. The long simmering time is necessary to create the desired texture and flavor.

Additionally, be sure to use fresh, high-quality banana leaves for the best aroma and presentation.

Cooking Steps

First, you'll need to soak the sticky rice overnight to get it nice and soft.

Advertisement

Then, you'll wrap up the rice in a special package and boil it for several hours.

Step 1. Soak the Sticky Rice Overnight

soak sticky rice overnight

Preparation is the key to crafting the perfect Banh Chung. Start by soaking the sticky rice overnight. This important first step ensures the rice will be perfectly soft and pliable for stuffing and wrapping.

Find a large bowl and fill it with cool water. Gently pour in the sticky rice, making sure all the grains are submerged. Cover the bowl and let it sit for at least 8 hours, or overnight.

The rice will absorb the water, becoming plump and tender. When you're ready to continue, drain the rice in a colander. Rinse it with fresh water to remove any excess starch.

The rice should now be soft and ready for the next steps of filling and wrapping the Banh Chung. Proper soaking is crucial for the cake's signature chewy texture, so don't skip this important preparation!

With the rice soaked and ready, you're on your way to creating a delicious, authentic Banh Chung.

Advertisement

Step 2. Wrap the Sticky Rice Package

wrap sticky rice package

With the sticky rice soaked and ready, it's time to start wrapping the Banh Chung.

First, take a large sheet of banana leaves and place it shiny-side down on a flat surface. Spoon a layer of the soaked sticky rice onto the center of the leaf, leaving a few inches of space around the edges.

Next, add a layer of the mung bean filling, followed by another layer of sticky rice. Fold the sides of the banana leaf over the rice, then roll it up tightly, securing the ends with twine or bamboo skewers.

Repeat this process until you've used up all the rice and filling. Be sure to wrap the packages snugly so the Banh Chung hold their shape as they cook.

Once they're all wrapped, it's time to boil the Banh Chung and let the flavors meld together. Get ready for a delicious Vietnamese treat!

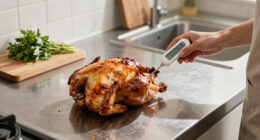
Step 3. Boil Wrapped Package for Several Hours

boil package for hours

After securely wrapping the Banh Chung packages, you'll need to boil them for several hours to fully cook the sticky rice and mung bean filling. This is an important step that ensures the flavors meld together and the textures become delightfully soft and chewy.

Grab a large pot and fill it with water, then gently lower the wrapped packages inside. Bring the water to a boil, then reduce the heat to maintain a gentle simmer.

Advertisement

Let the packages bubble away for 5 to 6 hours, flipping them occasionally to ensure even cooking. The water should stay at a steady simmer the entire time.

Once the time is up, carefully remove the hot packages from the pot. The rice will be cooked through, and the bean filling will be soft and creamy.

Unwrap the packages and slice the fragrant Banh Chung into squares. Serve warm, or let them cool completely before enjoying the classic Vietnamese treat.

Step 4. Unwrap and Remove the Package

unwrap and discard packaging

Having boiled the Banh Chung packages for several hours, you can now carefully remove them from the pot.

Use your tongs to gently lift each package out of the hot water, being cautious not to tear the leaves. The package should feel soft and pliable, a sign that the sticky rice inside has cooked through.

Unwrap the leaves, revealing the steaming hot Banh Chung. The sweet aroma of the rice and savory fillings will instantly make your mouth water.

Advertisement

Peel away the layers of leaves to expose the vibrant green cake. Notice how the rice has a delightfully sticky and chewy texture.

Use a knife to slice into the Banh Chung, admiring the beautiful cross-section of the distinct layers.

Scoop out a portion and enjoy the harmonious flavors of the pork, mung bean, and fragrant herbs. Savor each bite of this traditional Vietnamese delicacy!

Step 5. Serve and Enjoy the Banh Chung

serve and enjoy banh chung

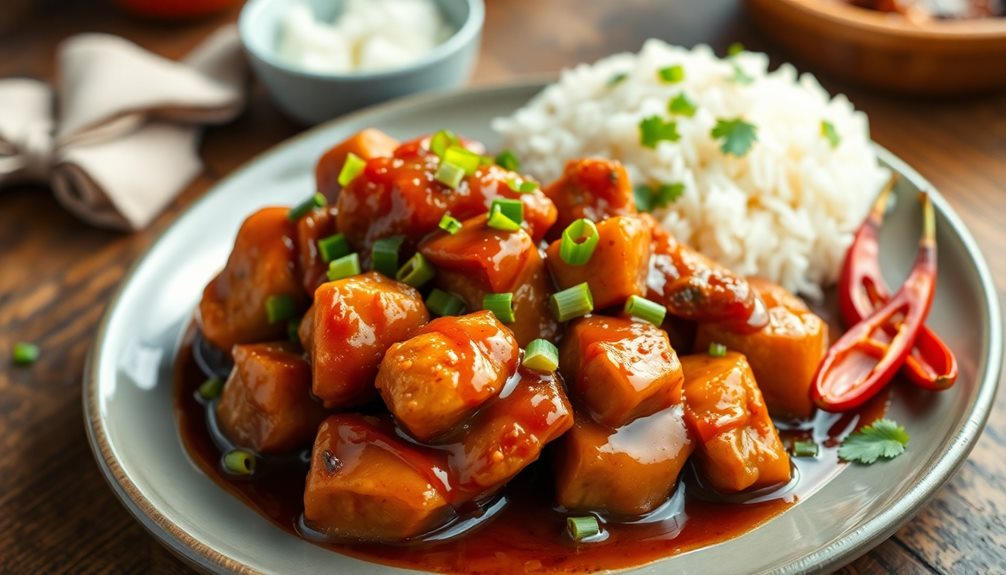
Serve the steaming Banh Chung on a large platter or plate. The fragrant, golden-brown cakes are ready to be enjoyed! Carefully unwrap each one, revealing the soft, sticky rice and savory filling inside.

Grab a piece and give it a try – the flavors will melt in your mouth. Dip it in a bit of fish sauce or chili sauce for an extra kick. Don't be shy; the more Banh Chung you eat, the better!

Gather your friends and family around the table. Savor the warm, comforting texture as you take each delightful bite. The sticky rice provides a satisfying chew, while the pork and mung bean filling adds a delicious salty-sweet taste.

Advertisement

Pair it with some steamed vegetables or a fresh salad for a complete and nourishing meal.

Indulge in the authentic flavors of Vietnam with every mouthful of this beloved Banh Chung. Celebrate the moment and create lasting memories around the table with loved ones.

Final Thoughts

Ultimately, banh chung is a timeless Vietnamese delicacy that embodies the spirit of tradition and family.

This sticky rice cake is a true culinary masterpiece, with its aromatic filling of mung beans, pork, and fragrant spices all wrapped up in a soft, chewy exterior. The lengthy process of preparing banh chung is a labor of love, passed down through generations, and the end result is well worth the effort.

Whether you're enjoying a slice with a piping hot cup of tea or savoring it as a special treat, banh chung is a true taste of Vietnamese culture.

Advertisement

Its unique texture and flavors will delight your senses and leave you craving more.

Frequently Asked Questions

What Is the Symbolism Behind the Square Shape of Banh Chung?

The square shape symbolizes the earth itself, representing the four cardinal directions and the harmonious union of heaven and earth. This symbolic form conveys a deeper meaning beyond the physical presentation of the dish.

How Long Can Banh Chung Be Stored For?

You can store banh chung for up to a week at room temperature or up to two weeks in the refrigerator. Proper storage techniques, like wrapping it tightly, can help maintain its freshness and texture.

Can Banh Chung Be Frozen for Later Use?

Yes, you can freeze banh chung for later use. It'll keep for several months in the freezer. Just be sure to wrap it tightly to prevent freezer burn.

Is Banh Chung Suitable for Vegetarians or Vegans?

Yes, banh chung can be suitable for vegetarians and vegans. It's typically made with glutinous rice, mung beans, and seasoning. Just be sure to check the specific recipe and ingredients to ensure it meets your dietary requirements.

Advertisement

What Are the Common Fillings Used in Banh Chung?

The most common fillings used in this dish are cooked mung beans, pork, and black pepper. You can find vegetarian or vegan versions that use mushrooms or other plant-based ingredients instead of meat.

Continue Reading
Advertisement

Vietnamese Cuisine

Sugarcane Juice

You’ll be surprised by the refreshing, naturally sweet taste of homemade sugarcane juice, packed with essential vitamins and minerals.

Published

on

sweet refreshing tropical beverage

Sugarcane juice is a refreshing, naturally sweet beverage that's been cherished around the world for centuries. You can make it yourself by simply washing, peeling, and juicing fresh sugarcane – it's delightfully hydrating on a hot day! Packed with vitamins, minerals, and antioxidants, sugarcane juice is a healthy alternative to sugary sodas. While it's tasty on its own, you can also add a squeeze of lemon or lime for extra zing. Enjoyed by people of all ages, sugarcane juice is a beloved part of many cultures – and you're about to discover why it's such a celebrated drink.

Key Takeaways

  • Sugarcane juice is a popular and refreshing beverage derived from the sugarcane plant, primarily Saccharum officinarum, found in tropical and subtropical regions worldwide.
  • It is known for its natural sweetness and has been cultivated for thousands of years, transitioning from a luxury item to a widely enjoyed drink.
  • Sugarcane juice is rich in essential vitamins, minerals, and antioxidants, making it a healthier alternative to processed sugary drinks.
  • While sugarcane juice can provide hydration and energy, its high sugar content may not be suitable for individuals with diabetes without consultation.
  • The juice is typically prepared by washing, peeling, and juicing the fresh sugarcane, either using a juicer or a blender, and can be served over ice or flavored with ingredients like lemon, lime, or ginger.

History

Sugarcane, a tall, tropical grass, has a long and storied history that dates back thousands of years. From the rainforests of Southeast Asia to the sun-drenched fields of the Caribbean, this versatile plant has been cultivated and celebrated by cultures around the world.

You can imagine the sweet, earthy aroma of freshly pressed sugarcane juice, its amber liquid sparkling in the sunlight. Once a prized commodity traded along ancient trade routes, sugarcane has evolved from a luxury item to a beloved refreshment enjoyed by people of all ages.

Whether sipped straight from the cane or mixed into vibrant cocktails, this natural elixir has a way of transporting you to far-flung, exotic lands.

Marveling at its rich history, you can't help but feel a deep appreciation for the story of sugarcane and the countless generations who've cultivated and celebrated this remarkable plant.

Recipe

Sugarcane juice is a refreshing and healthy beverage enjoyed in many tropical and subtropical regions around the world. It's made by extracting the sweet juice from freshly harvested sugarcane stalks. This juice isn't only delicious but also offers a range of nutritional benefits, including vitamins, minerals, and antioxidants.

Advertisement

Preparing sugarcane juice at home is a simple process that allows you to enjoy this natural elixir in the comfort of your own kitchen. With just a few basic ingredients and a little bit of effort, you can create a glass of pure, unadulterated sugarcane goodness.

  • Fresh sugarcane stalks
  • Water
  • Ice (optional)
  • Lemon or lime (optional)

To make sugarcane juice, first, wash the sugarcane stalks thoroughly to remove any dirt or debris. Cut the stalks into manageable pieces and feed them through a juicer or sugarcane press. If you don't have either of these, you can use a blender and then strain the mixture through a fine-mesh sieve or cheesecloth to extract the juice.

Once you have the fresh sugarcane juice, you can serve it immediately over ice or add a squeeze of lemon or lime to enhance the flavor. Sugarcane juice is best consumed immediately, as it can quickly lose its freshness and sweetness.

If you have any leftover juice, store it in an airtight container in the refrigerator and consume it within a day or two.

Remember that the quality and sweetness of the sugarcane will vary depending on the variety, growing conditions, and time of harvest. Experiment with different types of sugarcane to find the one that best suits your taste preferences.

Enjoy your homemade sugarcane juice and revel in the refreshing and nourishing properties of this natural delight.

Advertisement

Cooking Steps

First, you'll want to wash and peel the sugarcane, then cut it into smaller pieces.

Next, pass the sugarcane through a juicer to extract that sweet, refreshing juice.

Step 1. Wash and Peel Sugarcane

prepare sugarcane for processing

Before you begin juicing the sugarcane, it's important to properly prepare it. First, give the sugarcane a good rinse under cool, running water. This will wash away any dirt or debris that might be clinging to the surface.

Next, use a sharp knife to peel off the tough, outer skin. Take your time and be careful, as the sugarcane can be quite fibrous. Try to remove as much of the skin as possible, as this will help the juice flow more freely.

Once the sugarcane is peeled, it's ready to be cut into manageable pieces. Slice the cane into 6-inch segments, making sure each piece is straight and even. This will help the sugarcane feed smoothly through your juicer.

With the cane prepped and ready, you can now start juicing and enjoy the sweet, refreshing taste of homemade sugarcane juice!

Advertisement

Step 2. Cut Sugarcane Into Smaller Pieces

cut sugarcane into pieces

With the sugarcane peeled and ready, you can now start cutting it into smaller pieces.

Grab a sharp knife and place the sugarcane on a sturdy cutting board. Carefully slice the sugarcane into 2-inch or 3-inch pieces, making sure to keep your fingers safe.

You'll want to create evenly-sized chunks so they can all cook at the same rate later on. As you work, you might notice the sweet, earthy aroma of the sugarcane filling the air. It's an exciting sign of the delicious juice to come!

Keep slicing until you've cut up the entire stalk. Once you have a pile of sugarcane pieces, you're ready for the next step – feeding them through the juicer.

Get ready to extract that amazing, nutrient-packed liquid gold! With a little effort, you'll have fresh, homemade sugarcane juice in no time.

Step 3. Pass the Sugarcane Through Juicer

juicing sugarcane process step

You'll need to have your juicer ready to go. Once you've cut the sugarcane into smaller pieces, it's time to get that sweet juice flowing!

Carefully place the prepared cane into the juicer's feeding chute. As the blades start spinning, the juice will begin to pour out, filling the container below.

Advertisement

Don't be afraid to push the cane down gently with the tamper to help the juicer extract every last drop. The fragrant, golden liquid will have a slightly thick, syrupy consistency that's absolutely heavenly.

Be sure to position the container close by to catch all that delicious nectar. The juicing process goes by quickly, so have your cups ready to fill up.

Once you've gotten all the juice out, you can set the leftover sugarcane pulp aside to use for other recipes.

With just a few simple steps, you'll have a refreshing glass of homemade sugarcane juice to enjoy!

Step 4. Add Ice

add ice to beverage

Once you have your freshly extracted sugarcane juice, it's time to add some ice. This is the perfect way to cool down and refresh on a hot day.

Grab a handful of ice cubes and gently drop them into the tall glass of vibrant, golden juice. Watch as the ice cubes sink and begin to melt, creating a slightly fizzy and chilly sensation.

Advertisement

The cold ice will instantly chill the juice, making it even more refreshing and delightful to sip. You'll love the way the icy coldness contrasts with the sweet, earthy flavor of the sugarcane. It's like taking a refreshing dip on a summer day, but in a glass!

As the ice melts, it will also slightly dilute the juice, creating the perfect balance of sweetness and coolness.

Stir the mixture gently with a spoon to distribute the ice evenly. Now, you're ready to enjoy this delightful and thirst-quenching treat!

Step 5. Serve Over Ice

serve chilled over ice

Serving sugarcane juice over ice is a refreshing way to enjoy this sweet treat. The cool, crisp ice perfectly complements the rich, tropical flavor of the sugarcane.

Simply fill a glass with plenty of ice cubes, then slowly pour the freshly extracted sugarcane juice over the top. The juice will cascade over the ice, creating a mesmerizing display of amber liquid and glistening ice crystals.

As you sip the chilled beverage, you'll be greeted with a burst of sweetness that quenches your thirst. The ice helps to mellow the intensity of the sugarcane, making it an incredibly refreshing and satisfying drink on a hot day.

Advertisement

The combination of cold and sweet is simply irresistible. Serve over ice and let the flavors of the tropics transport you to a peaceful oasis. This is the perfect way to savor the natural goodness of sugarcane juice.

Final Thoughts

While sugarcane juice may not be the most practical choice for everyday consumption, it's a refreshing and health-conscious alternative that's worth exploring.

The sweet, golden elixir offers a unique and flavorful experience, transporting you to tropical beaches and lush, verdant fields. Imagine the satisfying crunch as you bite into the fresh, vibrant green stalks, the aromatic scent of the juice filling the air.

As the cool, refreshing liquid touches your lips, you'll be treated to a burst of natural sweetness that invigorates the senses. Whether you're seeking a pick-me-up on a hot day or simply want to try something new, sugarcane juice is a delightful option that brings a touch of the exotic to your everyday.

Frequently Asked Questions

Is Sugarcane Juice Healthy for Diabetics?

You should be cautious about drinking sugarcane juice if you have diabetes, as it's high in natural sugars that can spike your blood sugar levels. It's best to consult your doctor before incorporating it into your diet.

Advertisement

Can I Store Leftover Sugarcane Juice?

You can store the leftover sugarcane juice, but it's best to consume it as soon as possible. Refrigerate it in an airtight container and it'll last for up to 3 days. Don't let it sit at room temperature.

How Long Does Sugarcane Juice Last?

Freshly squeezed sugarcane juice typically lasts 1-2 days when stored in the refrigerator. However, its shelf life can be extended to 3-5 days by immediately refrigerating it and keeping it tightly sealed. Proper storage is key to enjoying its refreshing flavor.

Can I Add Other Fruits to Sugarcane Juice?

You can certainly add other fruits to your sugarcane juice. It's a great way to enhance the flavor and nutritional value of your drink. Just be mindful of the sweetness levels when incorporating additional fruits.

Is Sugarcane Juice Good for Weight Loss?

Sugarcane juice can be a healthy part of a weight loss plan. It's low in calories and contains natural sugars and nutrients that may boost metabolism. However, it's important to consume it in moderation as part of a balanced diet.

Advertisement
Continue Reading

Vietnamese Cuisine

Iced Coffee With Condensed Milk

Opulent and indulgent, this Vietnamese iced coffee blends bold java with luscious condensed milk, creating a heavenly sip that will leave you craving more.

Published

on

sweetened iced coffee delight

Ah, a refreshing iced coffee with creamy condensed milk – what a delight! This Vietnamese classic blends bold coffee and sweet, velvety goodness, creating a heavenly sip that's perfect on a warm day. First, you brew the coffee using a special Vietnamese filter for a rich, intense flavor. Then, you stir in the luscious condensed milk, which adds a dreamy creaminess and pleasant sweetness. Finally, you top it off with plenty of ice cubes for a cool, satisfying crunch. It's a harmonious fusion of flavors that's sure to brighten your day. And there's so much more to explore about this beloved beverage!

Key Takeaways

  • Iced coffee with condensed milk is a popular Vietnamese beverage that combines brewed coffee, ice, and sweetened condensed milk for a rich, creamy, and refreshing taste.
  • The drink's origins can be traced back to the late 19th century during the French colonial era in Vietnam, reflecting the fusion of coffee traditions and local flavors.
  • The preparation involves brewing coffee using a traditional phin filter, adding sweetened condensed milk to taste, and then chilling the mixture with ice for a satisfying and balanced flavor profile.
  • Iced coffee with condensed milk is a versatile beverage that can be customized with additional flavors, such as vanilla or chocolate, to cater to diverse taste preferences.
  • While the drink offers a boost of caffeine, the high sugar content from the condensed milk should be considered, especially for those monitoring their sugar intake.

History

The origin of iced coffee with condensed milk can be traced back to Vietnam, where it has been a beloved beverage for decades. Known as "ca phe sua da," this delightful drink was first popularized in the late 19th century, during the French colonial era.

Back then, Vietnamese coffee growers needed a way to preserve their harvest, so they started mixing the freshly brewed coffee with sweetened condensed milk. This not only extended the shelf life of the coffee, but also created a rich, creamy, and refreshing taste that quickly became a local favorite.

Over the years, the recipe has remained largely unchanged, with the exception of serving it over ice to beat the tropical heat.

Today, ca phe sua da is a quintessential part of Vietnamese culture, enjoyed by people of all ages throughout the country. Whether sipped leisurely or gulped down quickly, this iced coffee delight remains a timeless treat that brings joy to all who try it.

Recipe

Iced coffee with condensed milk is a delightful Vietnamese-inspired treat that combines the rich creaminess of sweetened condensed milk with the refreshing bitterness of strong brewed coffee.

Advertisement

This simple yet indulgent beverage is the perfect pick-me-up on a hot day. The key to this recipe is to use a high-quality dark-roast coffee that can stand up to the bold flavors of the condensed milk.

The brewing method is also important, as the coffee needs to be strong enough to balance the sweetness of the milk.

Ingredients:

  • 1/2 cup strong brewed coffee, cooled
  • 1/4 cup sweetened condensed milk
  • Ice cubes

Directions:

Brew a strong batch of dark-roast coffee and allow it to cool completely. In a tall glass, combine the cooled coffee and sweetened condensed milk.

Stir well to combine. Add ice cubes and stir again to chill the drink. Serve immediately.

Advertisement

For best results, use freshly brewed coffee that has been allowed to cool to room temperature. The coffee should be strong and bold in flavor to provide a counterpoint to the rich, sweet condensed milk.

Adjust the ratio of coffee to condensed milk to suit your personal taste preferences.

Cooking Steps

Brew up a bold and flavorful cup of coffee using a traditional Vietnamese phin filter.

Then, stir in a generous helping of sweet and creamy condensed milk.

Finally, add some ice and give it all a good mix.

Advertisement

You're now ready to sip on this refreshing iced coffee treat!

Step 1. Brew Coffee Using a Phin Filter

brew coffee with phin

Brewing coffee with a phin filter is a straightforward process that yields a rich, aromatic result.

First, you'll place the metal filter into the phin's base, then add a couple of tablespoons of ground coffee. Gently tap the filter to level the grounds.

Next, slowly pour hot water over the coffee, making sure to wet all the grounds. Let it steep for about 2-3 minutes, then watch as the flavorful brew drips down into your waiting cup.

The phin filter creates a thick, concentrated coffee that's simply delightful. You can adjust the amount of coffee and steeping time to suit your personal taste preferences.

Whether you enjoy your iced coffee with a splash of condensed milk or black, the phin method delivers a wonderfully robust and smooth flavor in every sip.

Advertisement

Get ready to savor the authentic taste of Vietnamese-style iced coffee at home!

Step 2. Add Condensed Milk

add condensed milk now

Once you've brewed your coffee using the phin filter, it's time to add the signature ingredient that transforms it into authentic Vietnamese-style iced coffee – condensed milk.

This thick, sweet, and creamy milk is the secret to the rich and indulgent flavor of Ca Phe Sua Da. Grab your can of sweetened condensed milk and get ready to pour it in.

Slowly drizzle the condensed milk into your freshly brewed coffee, stirring gently to combine. Watch as the milk swirls and blends, creating a smooth and velvety texture. The sweet aroma will fill the air, making your mouth water in anticipation.

Once the condensed milk is fully incorporated, give your coffee a final stir to ensure everything is well-mixed.

Now, all that's left is to add ice and enjoy the perfect balance of bold coffee and decadent sweetness. Sip and savor this heavenly Vietnamese iced coffee creation!

Advertisement

Step 3. Add Ice

chill beverage with ice

After stirring in the condensed milk, it's time to add the ice.

You'll want to use plenty of ice cubes to get that nice, chilled iced coffee. Scoop a generous amount of ice into your glass, filling it up almost to the top. The cold, crunchy ice cubes will instantly cool down your freshly-brewed coffee, creating that perfect icy-cold beverage.

As the ice melts, it will dilute the coffee just a bit, balancing out the sweetness of the condensed milk. You'll end up with a smooth, refreshing iced coffee that's not too strong or too sweet.

The ice also adds a satisfying crunch with each sip, making the experience even more delightful.

Be sure to stir the iced coffee one more time before taking your first sip. This will ensure all the flavors are evenly distributed.

Now you can sit back, relax, and enjoy your perfectly chilled Ca Phe Sua Da!

Advertisement

Step 4. Stir to Combine Ingredients

combine ingredients by stirring

With the condensed milk added, give the iced coffee a good stir to fully incorporate all the ingredients.

You'll notice the liquid transform from a light, watery brown to a luscious, creamy tan color as the sweet, concentrated milk blends in.

The satisfying swish of the spoon against the glass creates a soothing, rhythmic sound, almost like a gentle rain shower.

As you stir, the aroma of the freshly brewed coffee grows stronger, mingling with the rich, decadent scent of the condensed milk.

Keep stirring until the mixture is thoroughly combined – no streaks or pockets of milk should remain.

Now, the iced coffee is ready to be enjoyed!

Advertisement

The smooth, velvety texture and perfect balance of coffee and sweetness will make each sip pure bliss.

Sit back, take a refreshing sip, and savor the delightful flavors of this classic Vietnamese iced coffee treat.

Step 5. Enjoy the Refreshing Beverage

savor your refreshing drink

Now that the ingredients are thoroughly combined, it's time to enjoy this refreshing Vietnamese iced coffee! Grab your glass and take a sip – the sweet, creamy condensed milk perfectly balances the bold, slightly bitter coffee. Mmm, can you taste the caramelized notes?

The ice cubes clink against the sides of the glass, creating a satisfying sound as the chilled liquid cools you down on a hot day. As you savor each sip, notice how the coffee's aroma wafts up, filling your nose with its enticing scent.

The smooth texture glides across your tongue, leaving behind a delightful aftertaste that'll have you reaching for another sip. This iced coffee is truly a taste of Vietnamese culture – a beloved tradition that's both refreshing and comforting.

Take your time and enjoy every moment of this delightful beverage. It's the perfect pick-me-up or afternoon treat. Sip, savor, and relax – you deserve this moment of pure refreshment!

Advertisement

Final Thoughts

Ultimately, the iced coffee with condensed milk stands as a delightful pick-me-up, a cool respite from the day's heat. Its rich, creamy texture and sweetness melt together in perfect harmony, creating a refreshing sensation that dances across your taste buds.

With each sip, you're transported to a quaint Vietnamese cafe, the bustling sounds of the city fading away as you savor the moment.

The contrasting temperatures of the iced coffee and the silky-smooth condensed milk make for a truly unique and satisfying experience. It's a beverage that can be enjoyed any time of day, whether you're seeking a morning boost or an afternoon pick-me-up.

The versatility of this drink is truly remarkable, appealing to a wide range of palates and preferences.

As you savor the final drops, you can't help but feel a sense of contentment and delight. The iced coffee with condensed milk is more than just a drink – it's a cultural experience that you'll want to revisit time and time again.

Advertisement

Frequently Asked Questions

How Do I Store Leftover Condensed Milk?

To store leftover condensed milk, keep it in the can or transfer it to an airtight container. Store it in the refrigerator for up to 2 weeks. Avoid leaving it at room temperature for extended periods to prevent spoilage.

Can I Use Other Types of Milk Besides Condensed Milk?

Yes, you can use other types of milk besides condensed milk. Try using regular milk, almond milk, or even coconut milk to create your own unique coffee beverage. Experiment with different flavors and see what you prefer.

What Is the Best Ratio of Coffee to Condensed Milk?

The best ratio of coffee to condensed milk depends on your personal taste preferences. Start with a 1:1 ratio and adjust to your desired level of sweetness and creaminess from there. Experiment until you find the perfect balance.

How Long Can the Iced Coffee Stay Fresh?

The iced coffee can stay fresh for up to 3-4 days when stored in an airtight container in the refrigerator. However, the flavor and quality may begin to degrade after 2 days, so it's best to consume it within that timeframe.

Can I Use Brewed Coffee Instead of Instant Coffee?

You can certainly use brewed coffee instead of instant coffee. The brewed coffee will have a richer, more robust flavor compared to instant. Just be sure to let the coffee cool before adding the condensed milk and ice.

Advertisement
Continue Reading

Vietnamese Cuisine

Tra Da (Iced Tea)

With its perfect balance of bold tea and creamy sweetness, Tra Da (Iced Tea) is a Vietnamese delight that will leave you craving more. Discover the captivating history behind this cherished beverage.

Published

on

refreshing iced tea beverage

You'll love sipping on the refreshing Vietnamese iced tea, known as tra da! This chilled delight blends bold black tea leaves with sweet and creamy condensed milk, creating a delightful flavor that's perfect for hot summer days. It's been a beloved beverage for generations, originating in the late 1800s and quickly spreading around the world. To make your own, simply steep the tea, chill it, and stir in the milk – easy as can be! And if you're curious to learn more about the rich history and diverse cultural traditions behind this thirst-quenching drink, there's plenty more to discover.

Key Takeaways

  • Tra Da, or Vietnamese iced tea, is a popular beverage made by combining strong black tea with sweetened condensed milk.
  • The brewing process involves steeping black tea leaves in hot water for 3-5 minutes, then chilling the tea before serving over ice.
  • Customization options for Tra Da include adjusting the tea strength and the amount of sweetened condensed milk to suit individual preferences.
  • Tra Da is a versatile drink that can be enjoyed year-round, often served at social gatherings and celebrations in Vietnam.
  • Iced tea, including Tra Da, offers potential health benefits such as providing hydration and containing antioxidants.

History

The origins of iced tea can be traced back to the late 19th century, when a pioneering entrepreneur introduced the refreshing beverage at the 1904 World's Fair in St. Louis, Missouri.

Visitors from all over the country were captivated by the cool, sweet taste of this unexpected delight, and the popularity of iced tea quickly spread across the United States.

Today, iced tea is a beloved summertime staple, enjoyed by people of all ages.

The crisp, invigorating flavor comes from steeping black or green tea leaves in cool water, then adding a touch of sugar or lemon to enhance the natural sweetness.

Whether you prefer it plain or with a twist, iced tea is the perfect way to quench your thirst on a hot, sunny day.

Advertisement

Its refreshing qualities have made it a fixture at picnics, barbecues, and outdoor gatherings, where friends and families can come together to savor the delicious taste of this timeless beverage.

Recipe

Tra Da, or Vietnamese Iced Tea, is a refreshing and popular beverage enjoyed throughout Vietnam. Its distinct flavor profile combines the robust taste of strong black tea with the sweetness of condensed milk, creating a delightful balance that's perfect for quenching thirst on a hot day.

The traditional method of preparing Tra Da involves steeping the tea leaves in boiling water to extract their full flavor. The resulting tea is then chilled and combined with sweetened condensed milk, creating a creamy and indulgent drink that's sure to delight the senses.

Ingredients:

  • 4 cups water
  • 4 teaspoons black tea leaves
  • 1/2 cup sweetened condensed milk

Instructions:

Bring the water to a boil in a saucepan. Remove from heat and add the tea leaves. Let the tea steep for 5-7 minutes, or until it reaches your desired strength. Strain the tea into a pitcher and refrigerate until completely chilled, about 2 hours.

Advertisement

When ready to serve, fill a glass with ice cubes. Pour the chilled tea over the ice and stir in the sweetened condensed milk until fully incorporated. Enjoy the refreshing and delightful flavor of Tra Da.

Additional Tips:

For a stronger tea flavor, use more tea leaves or steep the tea for a longer duration. Adjust the amount of condensed milk to suit your personal taste preferences. To make the drink extra creamy, consider using half-and-half or evaporated milk instead of condensed milk.

Cooking Steps

First, you'll need to boil some water for your tea leaves.

Once the water's nice and hot, go ahead and add those fragrant leaves.

Advertisement

Let 'em steep for 3 to 5 minutes, then strain the tea and transfer it to a pitcher.

Step 1. Boil Water for Tea Leaves

boil water for tea

Bring a pot of fresh, cold water to a rapid boil.

Once the water starts bubbling furiously, turn down the heat to maintain a gentle simmer. This is the perfect temperature to steep your fragrant tea leaves.

Carefully pour the hot water over the delicate leaves, filling your teapot to the brim. Cover the pot with a lid to trap the heat and let the tea steep for 3-5 minutes.

Breathe in the soothing aroma as the tea infuses the water with its rich flavor.

When the time is up, slowly pour the vibrant, amber-colored tea into your favorite glass or pitcher.

Advertisement

Add ice cubes to instantly chill the tea, making it refreshingly cool and perfect for a hot day.

Sip and savor the balanced, complex taste of your homemade iced tea. Enjoy!

Step 2. Add Tea Leaves

add tea leaves now

Once the water is at the perfect temperature, add 1-2 teaspoons of your preferred tea leaves directly to the hot water.

The choice of tea can significantly impact the flavor profile of your iced tea; for instance, brewing the perfect cup of tea can help you achieve the ideal taste.

Watch as the leaves dance and swirl, releasing their aromatic essence into the steaming liquid. The delicate tea leaves will slowly steep, infusing the water with their rich, bold flavor.

Gently stir the mixture to help the leaves fully submerge and distribute their taste throughout. As the tea steeps, the water will gradually deepen in color, transforming from a pale yellow to a vibrant amber hue.

Advertisement

Take a deep breath and savor the soothing, fragrant aroma wafting through the air. Allow the tea to steep for 3-5 minutes, depending on your desired strength.

When the tea has reached your preferred intensity, it's time to remove the leaves and prepare your refreshing glass of iced tea.

Step 3. Steep Tea Leaves for 3-5 Minutes

steep tea leaves minutes

After adding the tea leaves to the hot water, allow the mixture to steep for 3-5 minutes, depending on your desired strength. The longer you let it steep, the more intense the flavor will become.

You'll know it's ready when the water takes on a deep, rich color and the aroma of the tea fills the air. Gently lift the tea bag or strainer and watch as the liquid flows through, revealing the vibrant hues of the tea leaves. Inhale the inviting scent – it's almost time to enjoy your refreshing Tra Da!

As the tea steeps, the flavors and aromas will blossom, creating a truly delightful experience.

Feel free to adjust the steeping time to suit your personal preference. Some like it strong and bold, while others prefer a more delicate, nuanced flavor. Experiment and find the perfect balance that tantalizes your taste buds.

Advertisement

Get ready to savor the perfect cup of Tra Da, bursting with natural goodness.

Step 4. Strain and Transfer to Pitcher

strain and transfer pitcher

Once the tea has finished steeping, it's time to strain and transfer it to a pitcher. Carefully pour the fragrant, golden liquid through a fine mesh strainer, leaving behind those used tea leaves. Ah, doesn't the aroma just fill the air?

Now, you'll want to pour the freshly strained tea into a clean pitcher. Be sure to hold the strainer securely over the pitcher to catch every last drop of that delightful, flavorful tea.

With the tea now in the pitcher, it's ready to be chilled and enjoyed. Pop the pitcher into the fridge for about 30 minutes, or until it's nice and cold. Mmm, can you already imagine the refreshing sip of that icy, aromatic tea?

Once it's properly chilled, pour it over some ice and get ready to savor the perfect iced tea. Your thirst is about to be quenched in the most delightful way!

Step 5. Add Ice Cubes

add ice cubes now

Fill up your glass with the freshly brewed and chilled iced tea, then generously top it with crisp ice cubes.

Watch as the ice cubes clink against the sides of the glass, creating a refreshing melody. As the ice melts, it'll slowly dilute the tea, making it the perfect temperature to sip on a hot day.

Advertisement

The transparent ice cubes will also add a beautiful, sparkling effect to your beverage, making it look as tempting as it tastes.

Feel free to add as many ice cubes as you'd like – the more the merrier! The cold ice will perfectly complement the bold, flavorful tea, creating a delightful harmony of tastes and temperatures.

Enjoy taking that first, cool sip, savoring the refreshing blend of iced tea and ice.

It's the perfect way to quench your thirst and cool down on a warm afternoon. With the ice cubes in place, your homemade iced tea is now ready to be served and savored.

Final Thoughts

Although iced tea is a refreshing and versatile beverage that can be enjoyed year-round, it's important to consider a few final thoughts before savoring your next glass.

Advertisement

Remember, the beauty of iced tea is its customizability – you can experiment with different tea varieties, flavors, and sweeteners to find your perfect blend.

Why not try adding a twist of citrus or a sprig of mint for a burst of refreshing flavor?

And don't forget to share your creations with friends and family – iced tea is the perfect drink for making memories and creating special moments together.

So, the next time you pour yourself a glass of this delightful drink, take a moment to appreciate the art of iced tea and all the joy it can bring.

Cheers!

Advertisement

Frequently Asked Questions

How Long Does Tra Da Last Before Spoiling?

Iced tea will typically last 3-5 days when refrigerated. However, its shelf life can vary depending on factors like the ingredients, preparation method, and storage conditions. It's best to consume it within a few days for optimal freshness and safety.

Can Tra Da Be Made With Different Tea Types?

Yes, you can make iced tea with different tea types. Black tea, green tea, herbal tea – they all work well for creating refreshing iced tea. Experiment to find your favorite flavor profile.

What Are the Health Benefits of Drinking Tra Da?

Drinking iced tea offers several health benefits. It's packed with antioxidants that can boost your immune system, reduce inflammation, and even lower your risk of chronic diseases. Plus, it's a refreshing and hydrating beverage.

How Much Sugar Should Be Added to Tra Da?

You don't necessarily need to add a lot of sugar to your beverage. Start with a small amount and adjust to your taste preferences. Too much added sugar can negate the potential health benefits.

Can Tra Da Be Served Warm Instead of Iced?

Absolutely! You can certainly serve the beverage warm instead of iced. Simply heat it up to your desired temperature and enjoy the warm, flavorful drink. The choice is yours – iced or warm, it's a delightful refreshment either way.

Advertisement
Continue Reading
Advertisement

Affiliate Disclaimer
As an affiliate, we may earn a commission from qualifying purchases. We get commissions for purchases made through links on this website from Amazon and other third parties.

Advertisement

Latest

colorful rimmed beverages colorful rimmed beverages
Graduations/Birthdays5 mins ago

Sprinkle-Rimmed Drinks

Whimsical and visually captivating, sprinkle-rimmed drinks transport you to a world of playful flavors and enchanting presentations that will leave...

festive puppy chow treats festive puppy chow treats
Graduations/Birthdays11 mins ago

Birthday Cake Puppy Chow

Uncover the captivating blend of crunchy Chex, creamy white chocolate, and vibrant sprinkles that make Birthday Cake Puppy Chow an...

magical colorful chocolate beverage magical colorful chocolate beverage
Graduations/Birthdays17 mins ago

Unicorn Hot Chocolate

Otherworldly and whimsical, unicorn hot chocolate transports you to a realm of vibrant colors and sweet indulgence, where the possibilities...

colorful skewered fruit delights colorful skewered fruit delights
Graduations/Birthdays23 mins ago

Rainbow Fruit Kebabs

Tantalizing and refreshing, these rainbow fruit kebabs offer a delightful twist on a classic snack, with a vibrant array of...

colorful cheese filled tortillas colorful cheese filled tortillas
Graduations/Birthdays28 mins ago

Confetti Quesadillas

Heighten your taste buds with the vibrant burst of color and flavor in confetti quesadillas, a fusion of Mexican cuisine...

celebratory dessert beverage fusion celebratory dessert beverage fusion
Graduations/Birthdays34 mins ago

Birthday Cake Milkshake

Fulfill your childhood nostalgia with the irresistible Birthday Cake Milkshake, a creamy, indulgent treat that's a celebration in every sip....

colorful cake batter dip colorful cake batter dip
Graduations/Birthdays40 mins ago

Funfetti Dip

Celebrate the vibrant and creamy delight of Funfetti Dip, the ultimate party treat that will captivate your taste buds and...

celebratory sweet snack treat celebratory sweet snack treat
Graduations/Birthdays45 mins ago

Birthday Cake Flavored Popcorn

Outrageous and irresistibly sweet, this birthday cake flavored popcorn promises a flavor explosion that will leave you craving more. Discover...

graduation jewelry and snacks graduation jewelry and snacks
Graduations/Birthdays51 mins ago

Class Ring Onion Rings

Feast on the nostalgic delight of Class Ring Onion Rings, a crispy, golden-brown treat that will transport you back to...

breadsticks resembling pencils breadsticks resembling pencils
Graduations/Birthdays57 mins ago

Pencil-Shaped Breadsticks

Harnessing the rich history and versatility of pencil-shaped breadsticks, explore how to craft these unique and captivating snacks that will...

colorful candy dessert layers colorful candy dessert layers
Graduations/Birthdays1 hour ago

Smarties Candy Parfaits

Observe the vibrant layers of creamy yogurt, pudding, and whipped cream, elevated by the delightful crunch of classic Smarties candies...

noodle shaped letter pasta noodle shaped letter pasta
Graduations/Birthdays1 hour ago

Alphabet Soup

Alphabet soup, a whimsical culinary delight that transports you back to childhood, boasts a rich history and a community-fostering experience...

Advertisement

Trending