Connect with us

Thanksgiving

Pumpkin Roll

Discover the secret to mastering the iconic pumpkin roll, a crowd-pleasing dessert that perfectly blends moist spiced cake and creamy filling.

Published

on

delicious fall dessert recipe

The pumpkin roll is a cherished American classic that dates back to the early 20th century, initially enjoyed during autumn harvests with fresh pumpkins. Over time, the recipe evolved to include a rich cream cheese filling, becoming a beloved holiday staple. Its popularity surged in the 1970s thanks to canned pumpkin puree and pre-made cake mixes, making it an accessible yet impressive dessert. Today, the pumpkin roll combines a moist, spiced cake with a creamy, perfectly-balanced filling – a delightful balance of flavors and textures that continues to enchant home bakers and guests alike. If you'd like to learn more about the step-by-step process for crafting this autumn delight, keep reading. If you’d like to learn more about the step-by-step process for crafting this autumn delight, keep reading. Additionally, if you’re a fan of the pumpkin roll, you might also enjoy trying out a delicious pumpkin cheesecake recipe that incorporates similar flavors and ingredients. With its creamy filling and spiced cake base, it’s sure to be a hit at your next holiday gathering.

Key Takeaways

  • Pumpkin roll is a traditional American dessert, dating back to the early 20th century, that has gained popularity as a holiday staple.
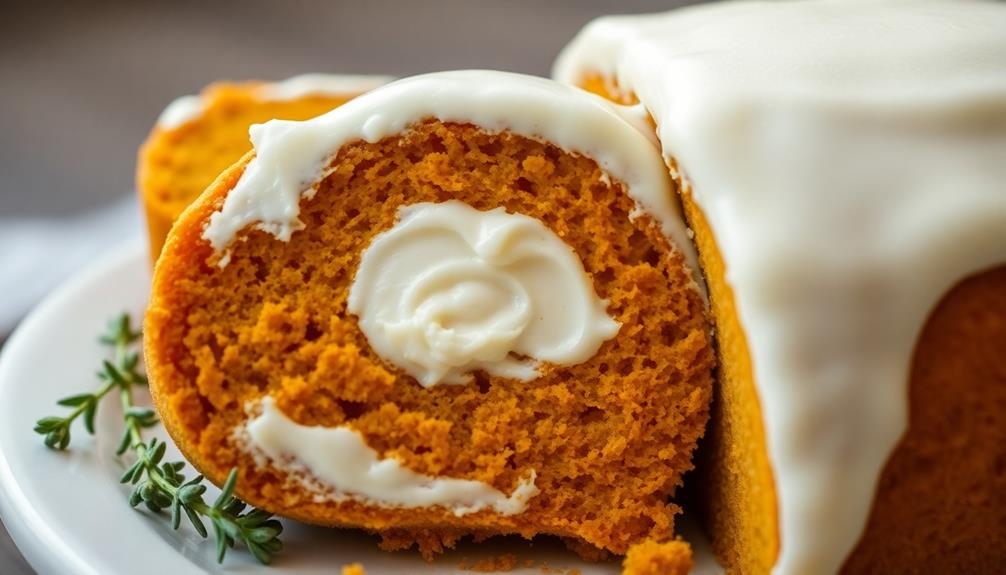
  • The recipe combines rich pumpkin flavor with a light, spongy cake texture and a smooth cream cheese filling.
  • The key to success is achieving a balance of flavors and textures, with a delicate and moist cake and a perfectly spiced filling.
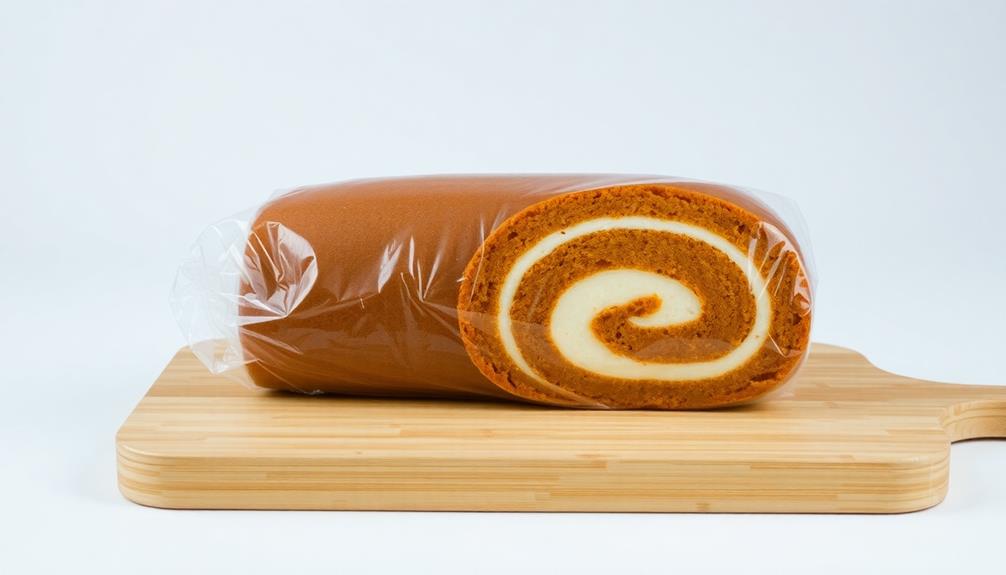
  • Pumpkin roll is suitable for various occasions, from holiday gatherings to cozy evenings, and offers an impressive presentation with its spiral design.
  • Proper storage techniques, such as refrigeration and freezing, allow the pumpkin roll to retain its flavor and texture for extended periods.

History

For generations, pumpkin roll has been a cherished fall dessert. This delectable treat has its roots in traditional American baking, with recipes dating back to the early 20th century. Initially, pumpkin rolls were often served during the autumn harvest season, when fresh pumpkins were readily available.

Over time, the recipe evolved, incorporating cream cheese frosting and becoming a staple at holiday gatherings and family celebrations.

The pumpkin roll's popularity soared in the 1970s, thanks to the convenience of canned pumpkin puree and the rise of pre-made cake mixes. Homemakers across the country began experimenting with the recipe, adding their own unique twists and variations.

Today, the pumpkin roll remains a beloved autumn classic, a sweet and spicy indulgence that evokes the cozy comforts of the season. Whether served as a dessert or a festive snack, this iconic rolled cake continues to delight taste buds and create cherished memories.

Recipe

Pumpkin roll is a classic dessert that combines the rich, creamy flavor of pumpkin with the light, spongy texture of a cake. This recipe is perfect for any occasion, from festive holiday gatherings to cozy autumn evenings.

Advertisement

The key to a successful pumpkin roll is achieving the right balance of flavors and textures. The cake must be delicate and moist, while the filling should be smooth and perfectly spiced. With a few simple steps, you can create a dessert that will impress your guests and satisfy your sweet tooth.

Ingredients:

  • 3 large eggs
  • 1 cup granulated sugar
  • 2/3 cup pumpkin puree
  • 3/4 cup all-purpose flour
  • 1 teaspoon baking powder
  • 1/2 teaspoon ground cinnamon
  • 1/4 teaspoon ground ginger
  • 1/4 teaspoon ground nutmeg
  • 1/4 teaspoon salt
  • Cream cheese filling:
  • 8 ounces cream cheese, softened
  • 1 cup confectioners' sugar
  • 6 tablespoons unsalted butter, softened
  • 1 teaspoon vanilla extract

Instructions:

Preheat your oven to 375°F (190°C). Line a 15×10-inch jelly roll pan with parchment paper and grease the sides.

In a large bowl, beat the eggs and granulated sugar until light and fluffy. Stir in the pumpkin puree.

In a separate bowl, whisk together the flour, baking powder, cinnamon, ginger, nutmeg, and salt. Gradually fold the dry ingredients into the wet mixture until just combined.

Advertisement

Spread the batter evenly into the prepared pan. Bake for 13-15 minutes, or until the cake is lightly golden and springs back when touched.

Immediately invert the cake onto a clean kitchen towel dusted with confectioners' sugar. Carefully peel off the parchment paper.

Starting from the short side, tightly roll the cake up with the towel. Allow it to cool completely.

For the filling, beat the cream cheese, confectioners' sugar, butter, and vanilla extract until smooth and creamy.

Unroll the cooled cake and spread the filling evenly over the surface. Carefully re-roll the cake without the towel.

Advertisement

Wrap the pumpkin roll in plastic wrap and refrigerate for at least 1 hour before serving. This allows the flavors to meld and the filling to set.

Enjoy your delicious pumpkin roll!

Cooking Steps

Unroll the pumpkin cake and spread the delectable filling evenly onto the surface.

Carefully roll the filled cake back up, then chill the rolled creation until it's time to slice and serve this chilled pumpkin delight.

Step 1. Unroll the Pumpkin Cake

unroll pumpkin cake step

Gently slide a knife under the pumpkin cake, working your way along the length of the roll to loosen it from the towel. As you peel back the towel, the cake should unroll smoothly, revealing the luscious pumpkin filling.

Be patient and take your time, avoiding any sudden or jerky movements that could tear the delicate cake.

Advertisement

Once the cake is fully unrolled, inspect it for any cracks or imperfections. If you notice any, don't worry – a few minor flaws won't affect the overall taste or appearance.

Gently smooth out the cake with your hands, ensuring an even surface.

Now, it's time to spread the creamy pumpkin filling evenly over the surface of the cake. Use a butter knife or offset spatula to create a smooth, even layer, taking care not to overfill or undercut the edges.

Step 2. Spread Filling Onto Pumpkin Cake

spread filling on cake

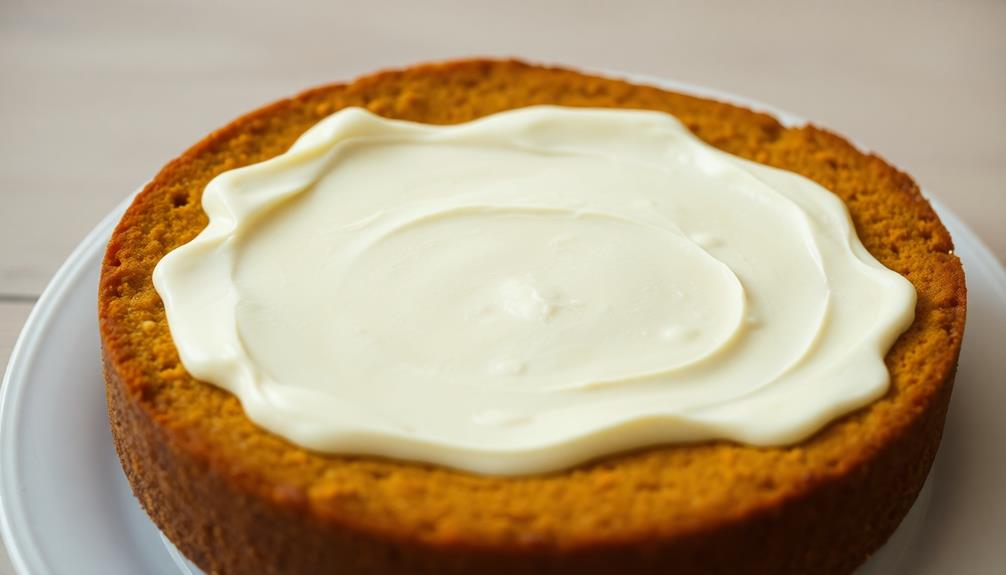
Take a generous amount of the pumpkin filling and spread it evenly across the surface of the unrolled cake.

Using an offset spatula or the back of a spoon, gently smooth the filling from one end of the cake to the other, ensuring it reaches the edges. This creamy, aromatic filling provides a delightful contrast to the spongy pumpkin cake.

Next, carefully re-roll the cake, keeping the seam side down. As you roll, apply gentle pressure to help the filling distribute evenly within the cake.

Advertisement

Roll the pumpkin roll tightly, but be mindful not to crack or tear the delicate cake. Once fully rolled, use a serrated knife to trim the uneven ends, creating a clean, uniform shape.

Step 3. Roll the Pumpkin Cake

rolling the pumpkin cake

Now that the filling is evenly spread, you'll want to carefully re-roll the cake. Gently lift the damp towel and begin to roll the cake, using the towel to guide it. Roll the cake tightly, making sure not to squeeze too hard and disturb the filling.

Once fully rolled, carefully transfer the pumpkin roll to a serving platter or baking sheet. To achieve a perfect spiral, make sure to roll the cake as tightly as possible, using the towel to assist you. If the cake cracks or breaks, don't worry – simply press the pieces back together gently.

Once rolled, you can trim the ends to create a clean, even shape. After rolling, chill the pumpkin roll in the refrigerator for at least 30 minutes to help it hold its shape. This will also allow the filling to set.

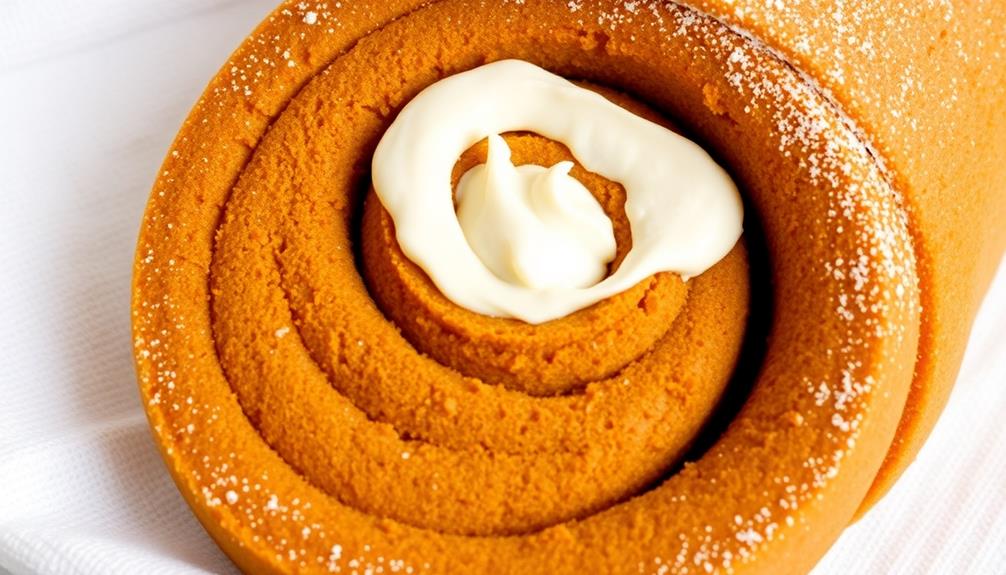
When ready to serve, dust the top with powdered sugar for a classic pumpkin roll presentation.

Step 4. Chill the Rolled Cake

refrigerate the rolled cake

After rolling the pumpkin cake, it's crucial to chill it in the refrigerator for at least 30 minutes. This allows the cake to set and the filling to firm up, making it easier to slice and serve without the cake unraveling.

Chilling the rolled cake also helps prevent the filling from oozing out when you cut into it. During the chilling time, the cake will become more compact and the flavors will meld together.

Advertisement

This step is essential for achieving that classic pumpkin roll look and texture. Be sure to place the rolled cake on a flat surface, such as a baking sheet or plate, to ensure it chills evenly.

Once the 30 minutes are up, you can remove the cake from the fridge and get ready to slice and serve your delicious pumpkin roll.

Step 5. Slice and Serve Chilled Pumpkin Roll

chilled pumpkin roll slices

Once the pumpkin roll has chilled, carefully unwrap it from the towel or parchment paper.

With a sharp knife, gently slice the roll into 1-inch pieces, taking care to cut cleanly through the filling without tearing the cake.

Arrange the slices on a serving platter or individual plates.

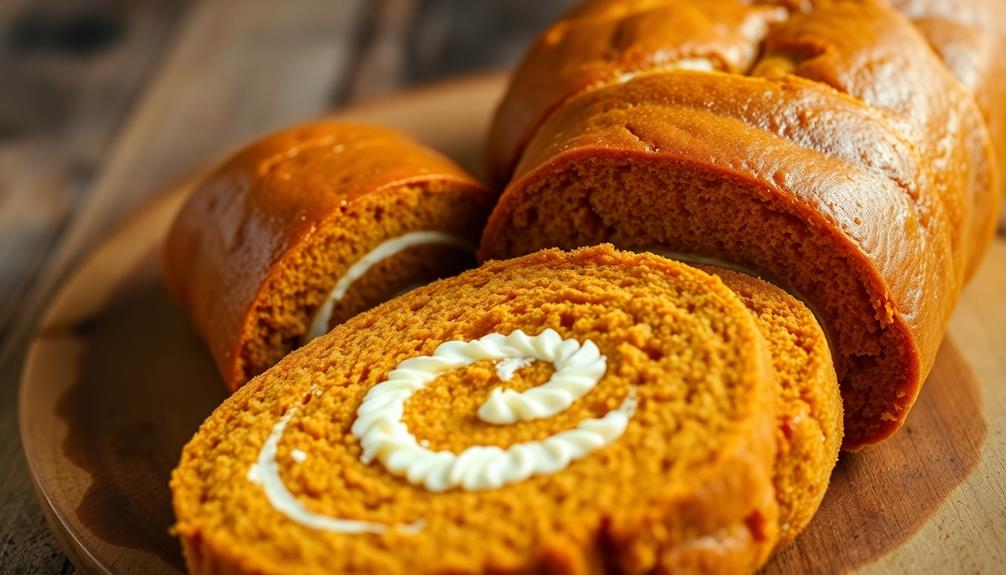
For the best presentation, position the slices so the spiral design is visible.

Advertisement

If the roll has cracked or split during chilling, don't worry – the slices will still look and taste delicious.

Just try to neatly arrange them.

Serve the chilled pumpkin roll slices as is or with a dollop of whipped cream, vanilla ice cream, or a light dusting of powdered sugar.

The cool, creamy filling pairs beautifully with the moist pumpkin cake.

Savor each bite and enjoy the perfect balance of fall flavors.

Advertisement

Your guests are sure to be impressed by this elegant and tasty dessert.

Final Thoughts

A pumpkin roll can be a delightful dessert to enjoy year-round, not just during the autumn months.

While it may seem like a seasonal treat, this versatile cake roll can be a crowd-pleasing option for any occasion.

The combination of moist pumpkin spice cake and creamy filling is sure to satisfy, whether served as a festive dessert or an indulgent snack.

Frequently Asked Questions

How Long Does a Pumpkin Roll Last Before It Goes Stale?

Your pumpkin roll will stay fresh for 3-5 days when stored properly in the refrigerator. To maintain its texture and flavor, make sure to wrap it tightly in plastic or foil.

Advertisement

Can I Freeze a Pumpkin Roll and How Long Does It Keep?

You can freeze a pumpkin roll, and it'll keep for up to 3 months. Just be sure to wrap it tightly in plastic or foil to prevent freezer burn. When ready to enjoy, thaw it in the refrigerator overnight.

What Is the Best Way to Slice and Serve a Pumpkin Roll?

To slice and serve a pumpkin roll, you should first let it thaw completely. Then, use a sharp knife to make clean, even cuts. Serve each slice on its own or with a dollop of whipped cream or ice cream.

Can I Use a Different Type of Cream Cheese for the Filling?

You can certainly use a different type of cream cheese for the filling. Just keep in mind that the flavor and texture may vary, so you'll want to taste and adjust the recipe accordingly.

How Do I Prevent the Pumpkin Roll From Cracking When I Roll It?

To prevent cracking when rolling the dessert, gently roll it up while it's still warm, using a clean towel to help guide and support the roll. Take your time and go slowly to ensure a smooth, intact roll.

Advertisement

Advertisement

Thanksgiving

Thanksgiving Turkey: Brining Secrets

With a simple brining technique, transform your Thanksgiving turkey into a mouthwatering centerpiece that will leave your guests craving for more.

Published

on

brining secrets for turkey

Brining is the secret to transforming your Thanksgiving turkey into a mouthwatering centerpiece! It all started way back in the colonial days when folks used it to keep their turkeys juicy and flavorful. Today, brining is a recognized technique that infuses the meat with moisture and savory seasonings. You'll need to soak the turkey in a saltwater brine, then rinse and pat it dry before roasting. This tenderizes the meat and creates a crispy, golden-brown skin that'll have your guests asking for seconds. Brining is the key to a truly memorable Thanksgiving feast – and there's more where that came from!

Key Takeaways

  • Brining turkey origins trace back to early American colonial period and helps keep turkey moist and flavorful for Thanksgiving.
  • Essential brining ingredients include kosher salt, brown sugar, water, herbs, peppercorns, and bay leaves, with a 12-24 hour brining duration.
  • Brining breaks down proteins and infuses turkey with savory seasonings, resulting in a juicy, tender, and delicious Thanksgiving centerpiece.
  • Rinsing and patting dry the turkey after brining, then rubbing with herb butter, enables crispy skin during roasting for maximum flavor.
  • Brining transforms a plain turkey into a mouthwatering delight, ensuring juices flow when sliced and creating a memorable Thanksgiving dining experience.

History

Tracing the origins of brining, the practice of soaking a turkey in a saltwater solution before cooking, can be found in the early American colonial period.

Back then, resourceful cooks used this technique to help keep their hard-earned birds moist and flavorful. As the years passed, the tradition of brining turkeys for Thanksgiving gained popularity, becoming a beloved part of many families' holiday celebrations.

Today, brining is a widely recognized method for preparing the perfect Thanksgiving turkey. By submerging the bird in a salty brine, the meat absorbs moisture and seasoning, resulting in a juicy, tender, and delicious centerpiece for your feast.

Whether you prefer a simple salt-and-water mixture or a more complex blend of herbs and spices, brining is a foolproof way to ensure your turkey is the star of the show.

Recipe

Brining is a crucial step in achieving a juicy and flavorful Thanksgiving turkey. The process of submerging the turkey in a salt-water solution helps to break down the proteins, resulting in a more tender and moist final product. Additionally, the brine can be infused with aromatic herbs and spices, providing a delightful depth of flavor to the bird.

Advertisement

Before diving into the recipe, it's important to allocate sufficient time for the brining process. Depending on the size of your turkey, the recommended brining duration can range from 12 to 24 hours. This allows the brine to fully penetrate the meat and work its magic.

  • 1 (12-16 lb) whole turkey, thawed if frozen
  • 1 cup kosher salt
  • 1/2 cup brown sugar
  • 2 gallons water
  • 4 sprigs fresh thyme
  • 2 sprigs fresh rosemary
  • 1 tablespoon whole black peppercorns
  • 3 bay leaves

In a large stockpot or clean bucket, combine the salt, brown sugar, and water, stirring until the salt and sugar have dissolved. Add the thyme, rosemary, peppercorns, and bay leaves.

Submerge the turkey, making sure it's fully covered by the brine. Cover and refrigerate for 12-24 hours, depending on the size of the turkey.

After the brining process, remove the turkey from the brine, rinse it under cold water, and pat it dry with paper towels. Proceed with your desired roasting method, ensuring the turkey is cooked to an internal temperature of 165°F.

The brined turkey will result in a juicy, flavorful, and perfectly seasoned centerpiece for your Thanksgiving feast.

Cooking Steps

Soak that turkey in a saltwater brine to lock in moisture and flavor.

Advertisement

After brining, rinse the bird and pat it dry.

Now, rub that turkey all over with a delicious herb butter – this'll give it a beautiful golden-brown skin when you roast it at 325°F.

Get ready for the juiciest, most flavorful Thanksgiving turkey ever!

Step 1. Soak Turkey in Saltwater Brine

brine turkey in saltwater

With a saltwater brine, you'll infuse your turkey with exceptional moisture and flavor.

First, in a large pot or bucket, combine one gallon of water with a cup of salt. Stir until the salt fully dissolves, creating a brine.

Then, gently lower your turkey into the solution, making sure it's fully submerged. Cover and refrigerate for 12 to 24 hours, allowing the brine to work its magic.

Advertisement

The salt will help the turkey retain its natural juices, while also adding a delightful savory undertone.

When it's time to roast, simply remove the turkey, pat it dry, and get cooking!

Your brined bird will turn out tender, juicy, and overflowing with mouthwatering flavor in every bite.

Brining is the secret to the best Thanksgiving turkey ever – your friends and family will be amazed. First, you’ll need to create a brine by combining water, salt, sugar, herbs, and spices. Then, place your turkey in the brine and let it soak for at least 24 hours. The result? A juicy, flavorful bird that will have everyone coming back for seconds. And don’t forget to save the turkey giblets, as they can be used to make a delicious gravy or stock for soup. Understanding turkey giblets and their uses can take your Thanksgiving meal to the next level.

Step 2. Rinse Turkey After Brining

rinse turkey post brining

After the turkey has finished its brine, you'll want to thoroughly rinse it under cool running water. This will help remove any excess salt and brine that's still clinging to the skin.

You can even use your hands to gently rub the surface, making sure you get into all the nooks and crannies. It's important to rinse the turkey well, as any leftover brine could make the meat overly salty.

Advertisement

Once it's rinsed, you can pat the turkey dry with some paper towels. This will help the skin get nice and crispy when you roast it later.

Don't forget to rinse the cavity too – you want to make sure all that briny goodness is washed away.

With a clean, dry turkey, you're one step closer to the perfect Thanksgiving feast. Get ready for the juiciest, most flavorful turkey your family has ever tasted!

Step 3. Pat Turkey Dry

pat turkey dry

After thoroughly rinsing the turkey, you'll want to pat it completely dry using some clean paper towels. This is a crucial step that helps ensure the skin gets nice and crispy when you roast the bird.

Gently blot and press the paper towels against the turkey, soaking up any excess moisture. You might need to go through a few batches of towels to get the job done, but don't worry – it'll be worth it!

With the turkey nice and dry, the oven heat can work its magic, crisping up that delicious skin to golden perfection. Plus, a dry bird means the seasonings and herbs you add will stick better, infusing every bite with mouthwatering flavor.

Advertisement

Step 4. Rub Turkey With Herb Butter

herb butter turkey preparation

Your next step is to create a delectable herb butter to coat the turkey. This easy-to-make mixture will infuse your bird with mouthwatering flavors!

Start by gathering a few simple ingredients – butter, fresh herbs, garlic, and a pinch of salt and pepper. In a bowl, let the butter soften at room temperature.

Then, finely chop the herbs, such as rosemary, thyme, and sage. Mince the garlic and add it to the butter, along with the chopped herbs and a sprinkle of salt and pepper.

Use a fork to mash and mix everything together until it's nice and smooth. Gently lift the skin of the turkey and spread the herb butter all over the meat, making sure to get it into every nook and cranny.

This will create a deliciously crispy and flavorful skin as your turkey roasts. With the herb butter in place, your turkey is ready for the oven!

Get ready for the amazing aroma to fill your kitchen as it bakes to perfection.

Advertisement

Step 5. Roast Turkey at 325°F

roast turkey at 325 f

Preheat your oven to 325°F. This is the perfect temperature to roast your Thanksgiving turkey to perfection!

Gently place the brined turkey onto a sturdy roasting rack inside a large roasting pan. Make sure the turkey's legs are facing the front of the oven. This will help the thighs cook evenly.

Slide the pan into the preheated oven and set a timer for 2 to 2 1/2 hours. As the turkey roasts, the delicious aroma will fill your kitchen.

Baste the turkey every 30 minutes with the flavorful juices in the bottom of the pan. This will help create a beautiful, golden-brown skin.

Use a meat thermometer to check that the thickest part of the turkey breast reaches 165°F.

Once it's done, take the turkey out of the oven and let it rest for 20 minutes before carving. This allows the juices to redistribute, making your turkey extra moist and flavorful.

Advertisement

Now you're ready to serve up a delicious Thanksgiving feast!

Final Thoughts

Ultimately, brining your turkey is one of the best ways to ensure a juicy, flavorful Thanksgiving centerpiece. The salty brine infuses the meat with moisture and savory seasonings, transforming a plain bird into a mouthwatering delight.

Imagine slicing into that golden-brown skin and watching the juices flow – it's a moment that'll have your guests reaching for seconds (and maybe thirds!).

But the benefits of brining don't stop there. The process also helps tenderize the meat, making each bite a pleasure to chew. Additionally, brining adds flavor to the meat, ensuring that each bite is not only tender but also packed with delicious taste. Another benefit of brining is that it helps to lock in moisture, preventing the meat from drying out during the cooking process. This is where the benefits of beef broth come into play, as it can be used as a key ingredient in the brining solution to further enhance the flavor and juiciness of the meat.

And let's not forget the aromatic herbs and spices you can add to the brine, which will fill your kitchen with the tantalizing scents of the holiday season.

Advertisement

Frequently Asked Questions

How Long Should I Brine the Turkey for Best Results?

You should brine the turkey for 12 to 24 hours for the best results. The longer you brine, the more flavorful and moist the turkey will be. Just be sure not to brine it for too long, as it can become overly salty.

Can I Use a Dry Brine Instead of a Wet Brine?

Absolutely, you can use a dry brine instead of a wet brine. Dry brining is a simple and effective way to season and tenderize your turkey. It's a great alternative if you don't want to deal with the hassle of a wet brine.

What Type of Herbs and Spices Work Best in the Brine?

You can experiment with various herbs and spices in your brine to add flavor. Popular choices include rosemary, thyme, sage, garlic, peppercorns, and bay leaves. Use them fresh or dried, adjusting the amounts to suit your taste preferences.

How Do I Ensure the Turkey Stays Moist During Roasting?

To ensure your turkey stays moist during roasting, baste it frequently with the pan juices and consider using a meat thermometer to monitor the internal temperature. Avoid overcooking, and let the turkey rest before carving to lock in the moisture.

Can I Brine a Frozen Turkey, or Does It Need to Be Thawed?

You can brine a frozen turkey, but it'll take longer. The turkey needs to be completely thawed before brining to ensure the brine penetrates evenly. Don't try to brine a partially frozen bird – it won't work well.

Advertisement

Continue Reading

Thanksgiving

Leftover Turkey Casserole

Indulge in a cozy and comforting way to repurpose your leftover Thanksgiving turkey with this easy-to-make casserole that’s sure to impress your family and friends.

Published

on

thanksgiving turkey casserole recipe

Turn that leftover Thanksgiving turkey into a hearty and comforting casserole! This crowd-pleasing dish combines tender turkey with a creamy sauce, veggies, cheese, and a crunchy topping. It's easy to prepare, using simple ingredients you likely already have on hand. Just mix everything together, bake until bubbly and golden, and enjoy a delicious second-day meal. The casserole's versatility allows you to customize the flavors, making it a creative way to repurpose leftovers. Plus, it's cost-effective and minimizes food waste – a win-win. Keep reading to discover the full recipe and cooking steps for this beloved post-holiday classic. Simply shred or chop the leftover turkey and mix it with the creamy sauce, vegetables, and cheese. Feel free to add in any extra seasonings or spices to elevate the flavors and make it your own. If you’re looking for a juicy roast turkey recipe, be sure to check out our website for step-by-step instructions. With just a few simple steps, you can transform your Thanksgiving leftovers into a delicious and satisfying meal that the whole family will love.

Key Takeaways

  • The leftover turkey casserole is a popular dish that transforms tender turkey into a hearty and comforting meal, often combining it with a creamy sauce and a crunchy topping.
  • The recipe typically includes cooked turkey, cream of mushroom soup, vegetables, shredded cheddar cheese, and breadcrumbs, making it a convenient and versatile dish.
  • The casserole offers quick preparation, minimizing food waste by utilizing leftover turkey, and serves as an economical alternative to dining out or ordering in.
  • The dish can be customized with various ingredients and flavors, allowing for personal preferences and dietary restrictions, while promoting sustainable cooking practices.
  • The leftover turkey casserole not only provides a balanced meal but also encourages culinary creativity, inspiring experimentation with different flavor combinations and serving as a foundation for future meal ideas.

History

Turkey has been a staple of the American Thanksgiving feast for centuries. The origins of this beloved tradition can be traced back to the early days of the Plymouth Colony, where the Pilgrims and the Wampanoag people celebrated their first successful harvest in 1621. This shared feast, often referred to as the "First Thanksgiving," featured turkey as a centerpiece, alongside other wild game and locally grown produce.

Over time, the tradition of serving turkey on Thanksgiving evolved, becoming an integral part of the holiday's culinary landscape. As families gathered to give thanks, the leftover turkey became a practical and delicious way to continue the celebration.

Casseroles emerged as a popular method of utilizing these leftovers, allowing families to create new and satisfying dishes that could feed a crowd. Today, the leftover turkey casserole remains a beloved post-Thanksgiving staple, a testament to the enduring legacy of this cherished American tradition.

Recipe

Leftover turkey is a delightful ingredient that can be transformed into a hearty and comforting casserole. This dish isn't only a great way to use up any remaining turkey from your holiday feast but also a satisfying meal that the whole family can enjoy.

Similar to how bread pudding transforms stale bread, this casserole uses leftover turkey to create something truly special. The combination of tender turkey, creamy sauce, and a crunchy topping makes this casserole a true crowd-pleaser. It's perfect for a cozy weeknight dinner or as a simple yet impressive dish to share with guests.

Advertisement
  • 3 cups cooked turkey, shredded or diced
  • 1 can (10.5 oz) cream of mushroom soup
  • 1 cup milk
  • 1 cup frozen peas
  • 1 cup cooked, diced carrots
  • 1 cup cooked, diced potatoes
  • 1 cup shredded cheddar cheese
  • 1 cup breadcrumbs or crushed crackers
  • 2 tablespoons butter, melted

Preheat your oven to 375°F (190°C). In a large bowl, combine the shredded or diced turkey, cream of mushroom soup, milk, peas, carrots, and potatoes. Mix well until all the ingredients are evenly distributed.

Transfer the mixture to a greased 9×13-inch baking dish. Sprinkle the shredded cheddar cheese on top, followed by the breadcrumbs or crushed crackers. Drizzle the melted butter over the top.

Bake the casserole for 30-35 minutes, or until the top is golden brown and the filling is bubbly. Allow the casserole to cool for a few minutes before serving.

This dish can be paired with a fresh salad or your favorite sides for a complete and satisfying meal. Enjoy your delicious leftover turkey casserole!

Cooking Steps

Preheat your oven to 350°F.

In a large bowl, mix together the leftover turkey, vegetables, and seasonings.

Advertisement

Pour the mixture into a baking dish and bake for 30-40 minutes.

Once cooked, let the casserole stand for 5 minutes before serving.

Step 1. Preheat Oven to 350°F

preheat oven to 350 f

To get the oven ready for the casserole, you'll want to preheat it to 350°F. This temperature is perfect for baking the dish, ensuring it cooks through evenly without burning the top or leaving the center underdone.

It's important to give the oven time to fully heat up before adding the casserole. This typically takes around 15-20 minutes, depending on your oven. You can use this time to gather the remaining ingredients and prepare the baking dish.

Once the oven has reached 350°F, you're ready to assemble and bake the casserole. This step-by-step process will help the dish turn out perfectly every time.

Be sure to keep a close eye on the oven to prevent overcooking, and enjoy the delicious aroma as the casserole bakes to golden brown perfection.

Advertisement

Step 2. In a Large Bowl, Mix Ingredients

mix ingredients in bowl

In a large bowl, combine the cooked turkey, cooked stuffing, cream of mushroom soup, milk, frozen vegetables, and seasonings. Stir everything together until it's well-mixed.

This casserole is a great way to use up your leftover Thanksgiving turkey and stuffing. The cream of mushroom soup and milk create a rich, creamy base, while the frozen veggies add color and nutrition.

Feel free to adjust the ingredient amounts to your taste. For example, if you have a lot of extra turkey, you can add a bit more. Or if you prefer more veggies, toss in an extra handful or two. Just be sure to mix everything thoroughly so the flavors meld together.

Once the ingredients are combined, transfer the mixture to a greased baking dish. Smooth the top with a spatula to create an even layer.

Now you're ready to bake the casserole and enjoy a delicious, comforting meal made with your leftover turkey.

Step 3. Pour Into Baking Dish

pour mixture into dish

Once the ingredients are combined in the large bowl, transfer the mixture to a greased baking dish. This 9×13-inch dish should be lightly coated with cooking spray or butter to prevent sticking.

Gently pour the turkey and vegetable blend into the prepared dish, smoothing the top with a spatula to create an even layer.

Advertisement

Next, top the casserole with the cubed bread, ensuring the entire surface is covered. This layer of bread will soak up the delicious flavors as the dish bakes.

If desired, you can lightly press the bread cubes into the filling to help them adhere.

Step 4. Bake for 30-40 Minutes

bake for 30 40 minutes

Slide the baking dish into the preheated oven and let the turkey casserole bake for 30 to 40 minutes. This step allows the flavors to meld together and the dish to develop a golden-brown crust on top.

Keep an eye on it, as oven temperatures can vary. You'll know it's done when the edges are bubbling, and the center is hot and bubbly.

Once the timer goes off, carefully remove the casserole from the oven. Let it rest for about 5 minutes before serving. This resting period allows the casserole to set up and makes it easier to portion out.

When ready to serve, scoop portions onto plates or bowls. The turkey casserole pairs well with a fresh salad or steamed vegetables for a complete and satisfying meal.

Advertisement

Enjoy your delicious use of leftover turkey!

Step 5. Let Stand 5 Minutes Before Serving

let stand before serving

After removing the casserole from the oven, let it stand for about 5 minutes before serving. This resting period allows the flavors to meld together and the casserole to set up slightly. During this time, the hot, bubbly filling will thicken, making it easier to scoop out neat servings.

While you wait, this is a great opportunity to prepare any additional sides or garnishes. Perhaps you'd like to toss together a simple salad or warm up some dinner rolls to accompany the casserole. You could also take this time to set the table and gather any necessary serving utensils.

Once the 5 minutes are up, the casserole should be ready to serve. Scoop out portions using a large spoon or spatula, being careful not to disturb the layers too much.

Serve the casserole hot, garnished with a sprinkle of fresh parsley or a dollop of cranberry sauce, if desired. Enjoy this delicious way to use up your leftover turkey!

Final Thoughts

The Leftover Turkey Casserole is a delightful way to repurpose your holiday leftovers. This hearty dish not only saves you time and money but also reduces food waste, making it an eco-friendly option.

Advertisement

By incorporating the remaining turkey, vegetables, and stuffing into a creamy casserole, you've created a well-balanced meal that's sure to satisfy.

The best part? This recipe is incredibly versatile, allowing you to customize it based on your personal preferences or the ingredients you have on hand.

Feel free to experiment with different types of cheese, add extra veggies, or even switch up the protein. The key is to have fun and get creative with your leftovers.

As you savor the final bites of this comforting casserole, take a moment to appreciate the convenience and cost-effectiveness of this dish.

The Leftover Turkey Casserole not only provides a delicious second act for your holiday meal but also serves as a reminder that with a little creativity, you can transform your leftovers into something truly special.

Advertisement

Frequently Asked Questions

Can I Use Rotisserie Chicken Instead of Turkey?

Absolutely, you can use rotisserie chicken instead of turkey. The flavors and textures will be similar, and it'll make for a quick and easy meal. Just be sure to adjust the cooking time accordingly.

How Long Does the Casserole Last in the Fridge?

The casserole will usually last 3-4 days in the fridge. Be sure to store it in an airtight container and reheat it thoroughly before serving. Enjoy your delicious leftovers!

Can I Freeze the Leftover Casserole?

Yes, you can freeze the leftover casserole. Freezing is a great way to extend the shelf life of your meal. Simply portion it into airtight containers and store in the freezer for up to 3 months.

Is the Casserole Suitable for Vegetarians or Vegans?

The casserole may not be suitable for vegetarians or vegans, as it likely contains meat-based ingredients. It's best to check the recipe and adjust it accordingly if you want a plant-based version that meets your dietary needs.

Can I Add Additional Vegetables to the Recipe?

You can absolutely add additional vegetables to the recipe! Vegetables are a great way to boost the nutrition and flavor of any dish. Feel free to experiment with your favorite veggies to enhance the overall dish.

Advertisement

Continue Reading

Thanksgiving

Turkey Sandwich (For Leftovers)

Hanker for a tasty and portable lunch? Transform your Thanksgiving or holiday leftovers into a classic turkey sandwich. Read on to learn the secret to perfecting this versatile meal.

Published

on

leftover turkey sandwich recipe

Transform your Thanksgiving or holiday leftovers into a tasty and portable lunch with a classic turkey sandwich. This versatile meal originated in the early 20th century and gained popularity as industrialization made turkey more widely available. The secret to a delicious turkey sandwich lies in using fresh, high-quality ingredients – think freshly sliced turkey, your choice of bread, creamy condiments, and crunchy vegetables. Customize it to your liking, then enjoy the satisfying blend of savory, creamy, and fresh flavors in each bite. For more details on perfecting your turkey sandwich, keep reading.

Key Takeaways

  • Utilize leftover turkey to create a versatile and flavorful sandwich, featuring fresh bread, condiments, and customizable toppings.
  • Ensure quality ingredients like sliced turkey and preferred bread to enhance the overall taste and texture of the sandwich.
  • Experiment with various condiments and toppings, such as mayonnaise, mustard, lettuce, and tomato, to personalize the sandwich to your liking.
  • Assemble the sandwich with a balanced distribution of ingredients, considering the flavor profile, texture, and visual appeal.
  • Enjoy the nutritional benefits of the turkey sandwich, which provides lean protein, fiber, and essential vitamins and minerals.

History

The origins of the turkey sandwich can be traced back to the early 20th century, when the rise of industrialized food production and growing affluence in urban centers paved the way for its popularity.

As more Americans began to work in offices and factories, the need for a portable, filling meal arose. The turkey sandwich, with its combination of savory meat, bread, and often complementary condiments, emerged as a convenient and satisfying lunch option.

Driven by the expansion of commercial poultry farming, the availability of pre-sliced bread, and the increasing popularity of sandwich shops, the turkey sandwich quickly gained traction.

By the mid-20th century, it had become a staple in lunchboxes and diner menus nationwide.

The versatility of the turkey sandwich, allowing for creative ingredient combinations and adaptations, has contributed to its enduring appeal over the decades.

Advertisement

Today, the turkey sandwich remains a beloved classic, a testament to its enduring place in American culinary history.

Recipe

A classic turkey sandwich is a delightful and versatile meal that can be enjoyed any time of the day. Whether you're looking for a quick lunch or a satisfying snack, this simple recipe will guide you through the steps to create a delicious and satisfying sandwich.

The key to a great turkey sandwich lies in the quality of the ingredients. Start with freshly sliced turkey, preferably roasted or smoked for maximum flavor. Pair it with your choice of bread, from hearty whole-grain to soft and pillowy white, and don't forget the condiments and toppings that will bring the flavors together.

Ingredients:

  • 4 slices of bread
  • 6 ounces of sliced turkey
  • 2 slices of cheese (such as cheddar or swiss)
  • 2 tablespoons of mayonnaise
  • 1 tablespoon of Dijon mustard
  • 2 slices of tomato
  • 2 leaves of lettuce

Instructions:

Spread the mayonnaise and Dijon mustard on the four slices of bread. Layer the turkey, cheese, tomato, and lettuce on two of the slices. Top with the remaining two slices of bread to create the sandwiches.

Advertisement

When preparing this dish, consider toasting the bread for added crunch and warmth. You can also experiment with different types of cheese, vegetables, or condiments to personalize the flavor profile.

Remember to slice the tomatoes thinly to ensure a balanced texture in the sandwich.

Cooking Steps

Slice the bread to your desired thickness.

Spread your favorite condiments onto the bread slices.

Layer the turkey slices, add cheese slices, and top with any additional toppings you'd like.

Advertisement

Step 1. Slice Bread to Desired Thickness

slice bread to thickness

Slicing the bread to your preferred thickness is a crucial step in crafting the perfect turkey sandwich. The thickness of the bread can significantly impact the overall texture and balance of the sandwich, so it's essential to get it just right.

Using a sharp serrated knife, gently saw back and forth to slice the bread into even, uniform pieces. Aim for a thickness that's substantial enough to support the filling, yet not so thick that it overwhelms the other ingredients.

A good rule of thumb is to slice the bread between 1/4 to 1/2 inch thick. This range provides the optimal ratio of bread to turkey, cheese, and any other toppings you choose to include.

Take your time and pay attention to the thickness, adjusting as needed, to ensure each slice is cut precisely. Properly sliced bread lays the foundation for a well-balanced and delightful turkey sandwich.

Step 2. Spread Condiments on Bread Slices

spread condiments on bread

With your bread slices ready, you can now move on to spreading the condiments. The choice of condiments is entirely up to you, but classic options include mayonnaise, mustard, and/or a flavorful spread like pesto or hummus.

It's important to note that while some human foods are safe for dogs, others, like grapes, can be harmful; always consider your furry friends when preparing meals and feeding safe treats.

If using mayonnaise, start by applying a thin, even layer across the surface of each bread slice. This will help create a smooth, creamy base for the other ingredients.

Advertisement

For mustard, you can either spread it directly on the bread or mix it with a bit of mayonnaise to create a tangy, zesty blend.

Alternatively, if you prefer a more robust flavor, consider using a pesto or hummus. Spoon a small amount onto the bread and use the back of a knife to gently spread it, taking care not to tear the delicate surface.

The key is to ensure an even distribution of the condiment, providing maximum flavor in every bite.

Once the condiments are applied, you're ready to assemble the turkey sandwich!

Step 3. Layer Turkey Slices

layer turkey slices evenly

Now that you've prepared the bread with your choice of condiments, it's time to layer the turkey slices. This is a crucial step in crafting the perfect turkey sandwich, as the arrangement and placement of the turkey can make or break the overall experience.

Begin by selecting high-quality, thinly sliced turkey. Deli-style turkey works best, as it's delicate enough to layer neatly without overwhelming the other ingredients.

Advertisement

Arrange the turkey slices in a slightly overlapping pattern, ensuring that each slice covers the majority of the bread's surface area. This creates a uniform and visually appealing layer of turkey.

When layering, be mindful of the placement and distribution. You want to achieve a balance, with the turkey covering the bread evenly from edge to edge.

Avoid clustering the slices in the center, as this can create an uneven texture and make it challenging to take a satisfying bite.

Step 4. Add Cheese Slices

add cheese slices now

After you've carefully layered the turkey slices, it's time to add the cheese. Selecting the right cheese can truly elevate your turkey sandwich. Consider classic options like cheddar or Swiss, or get creative with pepper jack or provolone.

Slice the cheese into thin, even pieces, ensuring it covers the turkey completely. You want the cheese to melt seamlessly, creating a cohesive and flavorful layer.

When arranging the cheese, be mindful of overlapping the slices slightly to prevent gaps. Gently press the cheese down to help it adhere to the turkey. This will create a sturdy foundation for the rest of your sandwich.

Advertisement

Feel free to use as much or as little cheese as you prefer, depending on your personal taste preferences.

Step 5. Add Any Desired Toppings

add desired toppings now

Next, you can add any desired toppings to your turkey sandwich. The possibilities are endless when it comes to customizing your sandwich with tasty toppings.

Some popular options include:

  • Crisp lettuce leaves or fresh spinach to add a crunchy, nutritious element.
  • Juicy tomato slices or roasted red peppers for a burst of tangy flavor.
  • Thinly sliced onions, whether red, white, or shallots, for a subtle bite.
  • Crunchy pickle chips or relish to provide a tangy, briny contrast.
  • Creamy avocado slices or a smear of guacamole for a rich, creamy texture.
  • Crispy bacon strips to add a salty, smoky note.

Feel free to experiment with various combinations to find your perfect flavor profile.

Final Thoughts

The preparation of a satisfying turkey sandwich shouldn't be taken lightly. As the final step in your culinary journey, the choices you make regarding the finishing touches can truly elevate the entire experience.

Consider adding a sprinkle of salt and pepper to enhance the flavors, or a drizzle of your favorite condiment to provide a delightful contrast. Remember, the beauty of the turkey sandwich lies in its simplicity – don't overpower the natural goodness of the ingredients.

Once you've assembled your masterpiece, take a moment to admire your handiwork. Savor the aroma, the textures, and the harmonious blend of flavors.

Advertisement

Then, with a sense of pride and anticipation, take that first bite, allowing the flavors to dance across your palate. Enjoy every morsel, savoring the satisfaction of a job well done.

The turkey sandwich, a testament to your culinary skills, is now ready to be relished and shared with loved ones. Once the sandwich is made, you place it on a decorative platter and garnish it with a sprinkle of parsley for that final touch. As you bring it to the table, your friends and family gather around, eager to taste your masterpiece. As you all enjoy the delicious meal together, you start thinking about what to do with the remaining turkey. Perhaps it’s time to try out that leftover turkey casserole recipe you’ve been eyeing for a while.

Frequently Asked Questions

How Long Can the Turkey Sandwich Be Stored in the Fridge?

You can store the sandwich in the fridge for 3-4 days. Keep it in an airtight container or wrap it tightly to prevent it from drying out. Consume it within that timeframe for the best quality and food safety.

Can I Use Different Types of Bread for the Sandwich?

You can definitely use different types of bread for your sandwich. The flavor and texture of the bread can change the overall taste and experience, so feel free to experiment with options like whole wheat, sourdough, or even croissants.

Is It Possible to Make the Sandwich Ahead of Time?

Yes, you can certainly make the sandwich ahead of time. Prepare it and store it in an airtight container in the fridge. Just be sure to eat it within a few days for best quality and freshness.

Advertisement

How Can I Make the Sandwich More Flavorful?

To make your sandwich more flavorful, you can try adding herbs, spices, or a flavor-packed condiment like pesto or roasted garlic aioli. Experiment with different combinations to find your perfect flavor profile.

Can I Add Any Extra Toppings or Condiments to the Sandwich?

You can definitely add more toppings and condiments to make your sandwich more flavorful. Consider adding crisp lettuce, juicy tomatoes, creamy avocado, or even a tangy pickle or two. Don't be afraid to experiment with different flavors!

Continue Reading

Affiliate Disclaimer
As an affiliate, we may earn a commission from qualifying purchases. We get commissions for purchases made through links on this website from Amazon and other third parties.

Advertisement

Vetted

top local car washes top local car washes
Vetted2 months ago

14 Best Car Washes Near You for a Sparkling Clean Ride

I discovered the 14 best car washes near you that promise a sparkling clean ride, and you won't want to...

top mops for 2024 top mops for 2024
Vetted2 months ago

The 15 Best Mops of 2025 – Your Ultimate Guide to a Spotless Home

Find the perfect mop for your cleaning needs in 2025, and discover how these top choices can revolutionize your home...

top women s fragrances 2024 top women s fragrances 2024
Vetted2 months ago

15 Best Perfumes for Women in 2025 – A Fragrance Guide You Can’t Miss

Keen to discover the top 15 perfumes for women in 2025? Uncover unique scents that will elevate your fragrance game!

top local bars guide top local bars guide
Vetted2 months ago

14 Best Bars Near You for an Unforgettable Night Out

Looking for the perfect bar to elevate your night out? Discover the 14 best spots that promise unforgettable experiences!

luxurious beard oil selection luxurious beard oil selection
Vetted2 months ago

15 Best Beard Oils for a Luxurious Grooming Experience in 2025

Shop the 15 best beard oils for a luxurious grooming experience in 2025 and discover which ones will elevate your...

top college laptops 2024 top college laptops 2024
Vetted2 months ago

15 Best College Laptops of 2025: The Ultimate Guide for Students

With our guide to the 15 best college laptops of 2025, discover which powerful models will elevate your academic experience...

waterproof mascaras for tears waterproof mascaras for tears
Vetted2 months ago

15 Best Waterproof Mascaras That Will Survive Any Tear-Jerker

Outstanding waterproof mascaras await to keep your lashes flawless through any emotional moment; discover which ones made the top 15...

top flavorful disposable vapes top flavorful disposable vapes
Vetted2 months ago

15 Best Disposable Vapes of 2025: Top Picks for Flavor and Convenience

Prepare to discover the 15 best disposable vapes of 2025 that blend exceptional flavor and convenience, but which ones truly...

refreshing lunch salad ideas refreshing lunch salad ideas
Vetted2 months ago

15 Best Salads Near You That Will Freshen Up Your Lunch Routine

Transform your lunch with the 15 best salads nearby that will tantalize your taste buds and leave you craving more...

top convertible car seats top convertible car seats
Vetted2 months ago

15 Best Convertible Car Seats of 2025 – Safety and Comfort for Your Little One

Get ready to discover the top 15 convertible car seats of 2025 that blend safety and comfort—find out which models...

delicious fast food breakfast delicious fast food breakfast
Vetted2 months ago

15 Best Fast Food Breakfast Options That Will Make Your Mornings Delicious

Uncover the 15 best fast food breakfast options that will transform your mornings into a delicious experience you won't want...

stylish contacts for vision stylish contacts for vision
Vetted2 months ago

14 Best America’s Contacts for Clear Vision and Style

Browse through the 14 best contact lenses in America for clear vision and style, and discover which one perfectly complements...

Trending