Honey-glazed ham is a time-honored holiday tradition with roots dating back thousands of years to ancient civilizations. This beloved dish combines the sweet, caramelized notes of honey with the savory richness of cured pork, creating a harmonious balance of flavors. To prepare a delectable honey-glazed ham, you'll need to score the meat, apply a flavorful glaze, and bake it to perfection, basting periodically for maximum flavor. The end result is a mouthwatering centerpiece that's sure to impress your guests. If you'd like to learn more about the intriguing history and preparation of this culinary delight, continue reading for a more detailed exploration.
Key Takeaways
- Honey-glazed ham is a classic holiday dish with a sweet and savory flavor profile, originating from ancient civilizations and gaining popularity in Europe and colonial America.
- Preparing a honey-glazed ham involves scoring the surface, applying a honey-based glaze, and baking at 325°F until the internal temperature reaches 140°F.
- Basting the ham with the glaze during the baking process enhances the flavor and appearance, creating a beautiful golden-brown caramelized finish.
- Allowing the ham to rest for 10-15 minutes before serving ensures the juices redistribute, resulting in a moist and flavorful final product.
- Attention to detail throughout the preparation process, from selecting the right cut of meat to monitoring the cooking temperature, is crucial for achieving a successful honey-glazed ham.
Top picks for "honey glaz"
Open Amazon search results for this keyword.
As an affiliate, we earn on qualifying purchases.
History
Tracing the roots of honey-glazed ham, this delectable dish has long been a cherished part of culinary traditions across the globe. While the exact origins are unclear, evidence suggests that the art of glazing meats with honey dates back thousands of years, with ancient civilizations like the Egyptians and Chinese incorporating this sweet and savory technique into their cooking.
The process of preserving meats through methods like glazing can be compared to the principles of heat transfer seen in modern technologies such as heat pumps, which efficiently manage temperature and energy. Over time, the honey-glazing process evolved, with the addition of spices, vinegars, and other flavorful ingredients to create a well-balanced glaze.
The popularity of honey-glazed ham particularly grew in Europe during the Middle Ages, where it became a staple at royal feasts and holiday celebrations. This tradition then carried over to colonial America, where it became a beloved part of many families' holiday menus.
Today, honey-glazed ham continues to be a beloved dish, cherished for its mouthwatering combination of salty, sweet, and savory flavors. Whether served as the centerpiece of a holiday meal or as a delicious everyday dish, this timeless recipe remains a culinary treasure.
Recipe
Honey-Glazed Ham is a classic holiday dish that combines the sweetness of honey with the savory flavor of cured ham. This recipe is perfect for feeding a crowd or as the centerpiece of a special occasion meal.
To prepare this delicious ham, you'll need to start with a pre-cooked, bone-in ham. This will ensure that the ham is fully cooked and tender, while the glaze adds a beautiful sheen and extra flavor.
Ingredients:
- 1 (8-10 lb) fully cooked, bone-in ham
- 1/2 cup honey
- 1/4 cup brown sugar
- 2 tbsp Dijon mustard
- 1 tsp ground cinnamon
- 1/2 tsp ground cloves
- 1/4 tsp ground nutmeg
Preheat your oven to 325°F. Place the ham in a large roasting pan and score the surface in a diamond pattern, making cuts about 1/2 inch deep.
In a small bowl, whisk together the honey, brown sugar, Dijon mustard, cinnamon, cloves, and nutmeg. Brush the glaze mixture over the entire surface of the ham, making sure to get it into the scored grooves.
Cover the ham loosely with aluminum foil and bake for 1 to 1 1/2 hours, or until the internal temperature reaches 140°F. During the last 30 minutes of baking, remove the foil to allow the glaze to caramelize and create a beautiful sheen.
Once the ham is cooked, let it rest for 15 minutes before slicing and serving.
For best results, use a high-quality, fully cooked ham and be sure to baste the ham with the glaze a few times during the cooking process. This will ensure the ham is evenly coated and the glaze is perfectly caramelized.
Cooking Steps
Preheat your oven to 325°F to get started.
Next, score the surface of the ham in a criss-cross pattern, which will help the glaze penetrate.
Then, generously brush the ham all over with a sweet and sticky honey glaze.
Step 1. Preheat Oven to 325°F
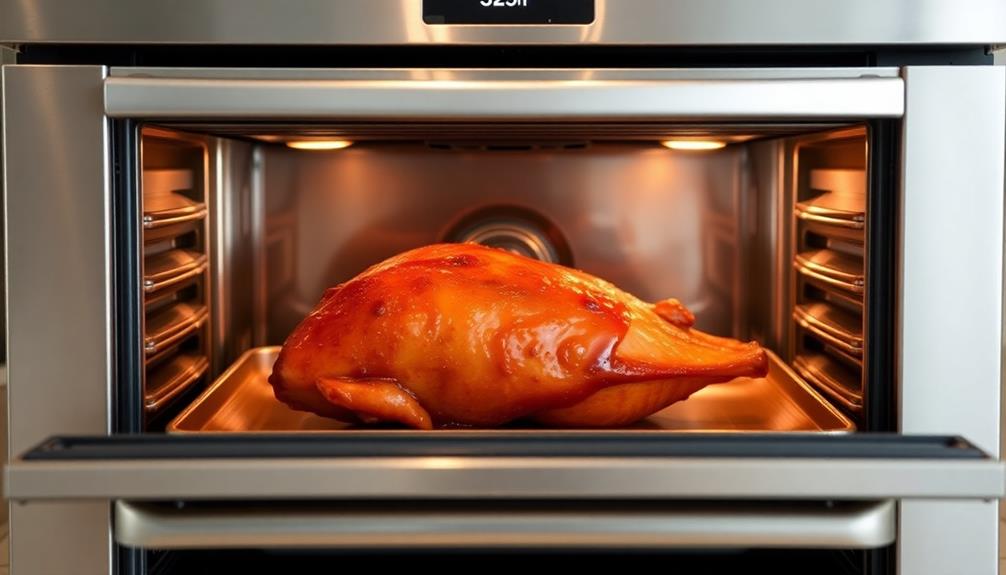
First, set your oven to 325°F. This temperature is ideal for ensuring the ham cooks through evenly and develops a delectable caramelized glaze on the exterior.
Preheating the oven is a crucial step, as it allows the oven to reach the desired temperature before you add the ham. This helps the ham start cooking immediately, rather than having to wait for the oven to heat up.
Once the oven is preheated, you'll be ready to prepare the ham for roasting. Make sure to have all your other ingredients and equipment ready to go, as the ham will need your full attention during the cooking process.
Proper temperature control is key to achieving that perfect honey-glazed finish, so don't skip this initial step. With the oven heated and ready, you can move on to the next phase of the recipe with confidence.
Step 2. Score Ham
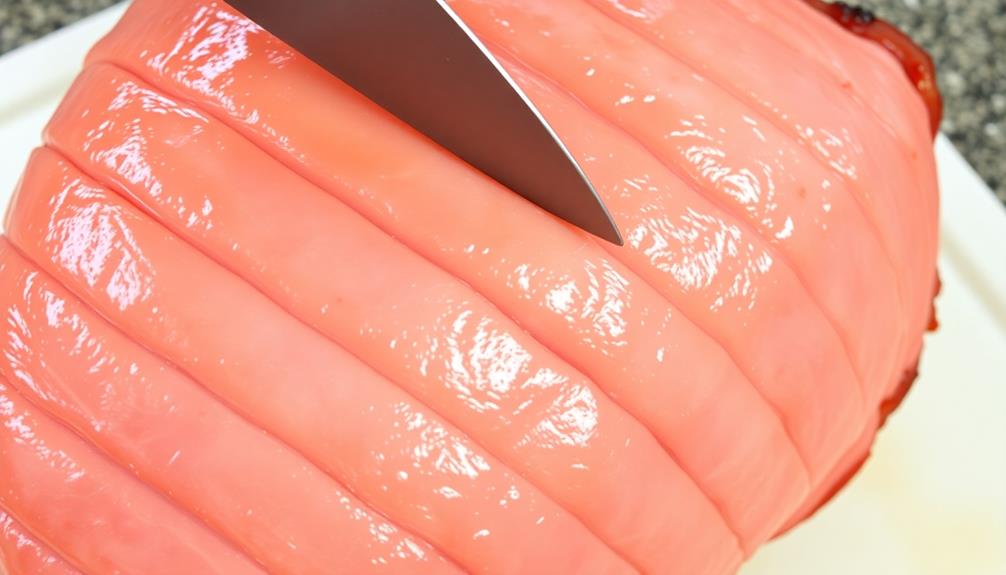
Scoring the ham is a crucial step that sets the stage for the honey-glazed perfection to come. With a sharp knife, gently score the surface of the ham in a crosshatch pattern, creating a series of shallow cuts about 1/4-inch deep and 1-inch apart. This technique not only allows the glaze to better penetrate the meat but also creates an eye-catching presentation once the ham is cooked.
Be sure to score the entire surface of the ham, including the sides. This will help the glaze caramelize and create a beautiful, shiny crust. Take your time and make clean, even cuts, being careful not to slice too deeply and compromise the integrity of the meat.
Once the ham is scored, you're ready to move on to the next step: applying the honey-based glaze. This simple yet impactful technique will transform your ham into a showstopping centerpiece that your guests are sure to rave about.
Step 3. Brush Ham With Honey Glaze
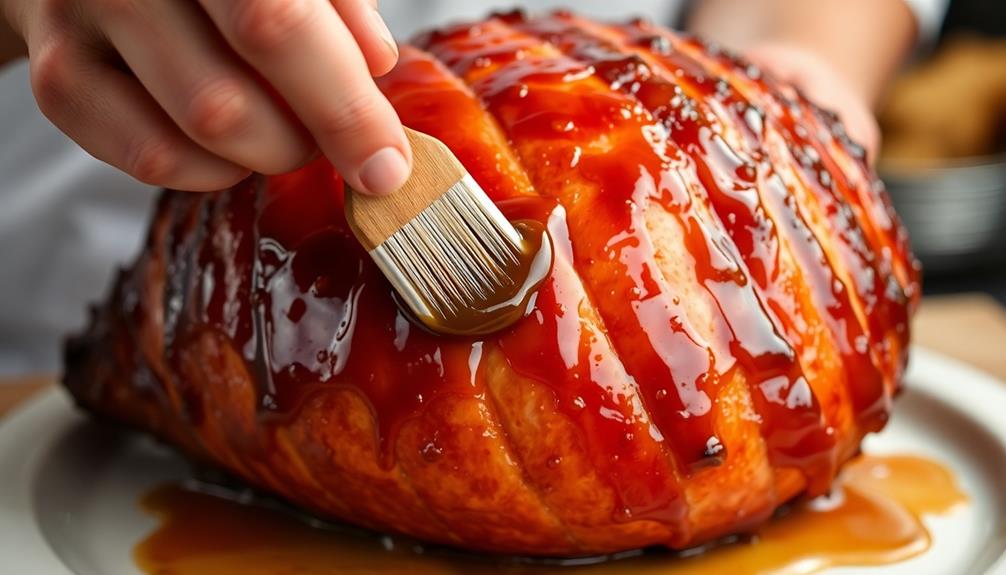
Drizzle the honey glaze evenly over the scored surface of the ham, ensuring it seeps into the cuts and covers the entire exterior.
Use a pastry brush to gently spread the glaze, making sure to coat every nook and cranny. The sugary sweetness of the honey will caramelize in the oven, creating a beautiful, shiny sheen.
Next, place the ham in the preheated oven and bake according to the recipe instructions, typically around 15-20 minutes per pound.
Baste the ham with the drippings every 30 minutes, reapplying the honey glaze as needed. This will help build up the glossy, golden-brown crust that makes honey-glazed ham so irresistible.
When the internal temperature reaches 140°F, remove the ham from the oven.
Allow it to rest for 15-20 minutes before slicing and serving. The resting period helps the juices redistribute, ensuring each slice is moist and flavorful.
Enjoy the sweet, sticky goodness of your perfectly glazed ham!
Step 4. Bake Ham for 1.5-2 Hours
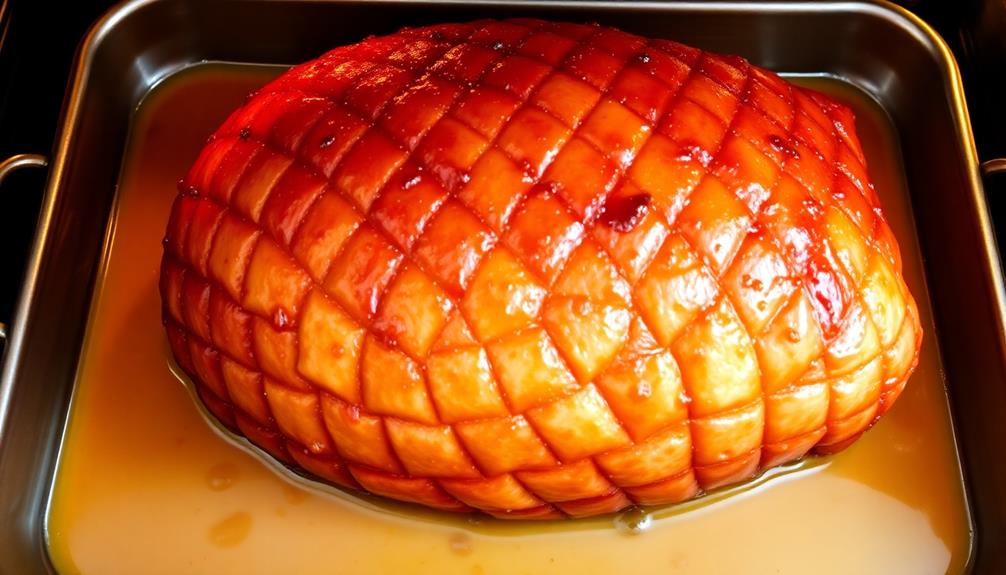
Place the honey-glazed ham in the preheated oven and bake for 1.5 to 2 hours. This extended cooking time ensures the ham is heated through and the glaze has a chance to caramelize, creating a delightful sweet and savory flavor.
Keep a close eye on the ham, basting it every 20-30 minutes with the juices in the pan. This helps the glaze adhere to the surface and prevents it from burning.
The internal temperature of the ham should reach 140°F when it's fully cooked. Use a meat thermometer to check this – it's the best way to ensure the ham is safe to eat.
Once it's reached the right temperature, remove the ham from the oven and let it rest for 10-15 minutes before slicing. This resting period allows the juices to redistribute throughout the meat, resulting in a more flavorful and tender final dish.
Step 5. Let Ham Rest Before Serving
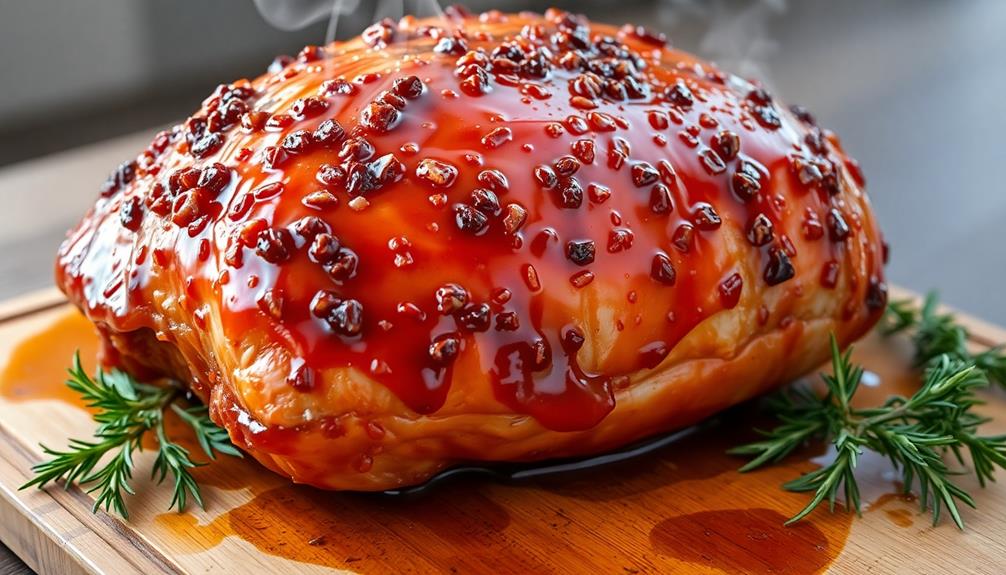
Once the honey-glazed ham has finished baking, you'll want to let it rest for 10-15 minutes before slicing. This resting period is crucial for allowing the juices to redistribute throughout the meat, ensuring your ham is moist and flavorful.
During this time, the internal temperature of the ham will continue to rise, reaching its optimal temperature of 140-145°F. Allowing the ham to rest also makes it easier to slice. The proteins in the meat will have time to relax, making clean, even slices much simpler.
Be sure to place the ham on a cutting board or serving platter before letting it rest, as this will prevent any juices from dripping onto your counter or table.
Once the resting time is up, you can begin slicing the ham. Start by cutting off the skin and any tough outer layer. Then, slice the ham into 1/4-inch to 1/2-inch thick pieces, cutting across the grain of the meat.
Serve the honey-glazed ham warm, alongside your favorite sides, and enjoy the delicious results of your patience.
Final Thoughts
With the honey-glazed ham now resting and ready to serve, it's time to reflect on the journey of creating this mouthwatering dish.
You've put in the effort to carefully prepare the ham, baste it with the sweet and tangy glaze, and allow it to develop its irresistible flavor. As you admire the glistening, golden-brown ham, you can take pride in your culinary accomplishment.
Just as in financial planning, attention to detail is essential for success, whether you're crafting a delicious meal or managing a budget effectively creating a personal budget.
Remember, the key to a successful honey-glazed ham lies in the attention to detail throughout the process. From selecting the right cut of meat to monitoring the cooking temperature, each step has contributed to the final result.
The resting period is just as crucial, allowing the juices to redistribute and the flavors to meld together harmoniously.
Now, it's time to slice into the ham and savor the fruits of your labor. Share this dish with family and friends, and enjoy the compliments that are sure to follow. If you’re looking to elevate this dish even more, consider pairing it with a side of sweet potatoes or a fresh green salad. And don’t forget to share your delicious chestnut stuffing recipe with anyone who asks – it’s sure to become a new favorite among your loved ones. Happy dining!
Your honey-glazed ham is a true masterpiece, a testament to your skills in the kitchen.
Frequently Asked Questions
How Long Does Honey-Glazed Ham Last in the Fridge?
Properly stored, cooked ham can last 3-4 days in the fridge. Check the expiration date, and ensure it's kept at 40°F or below. Once opened, consume within 3-5 days for optimal freshness and food safety.
Can I Freeze Honey-Glazed Ham?
Yes, you can freeze honey-glazed ham. Freezing is a great way to extend the shelf life of cooked ham. Just make sure to wrap it tightly in plastic wrap or aluminum foil to prevent freezer burn.
What Side Dishes Pair Well With Honey-Glazed Ham?
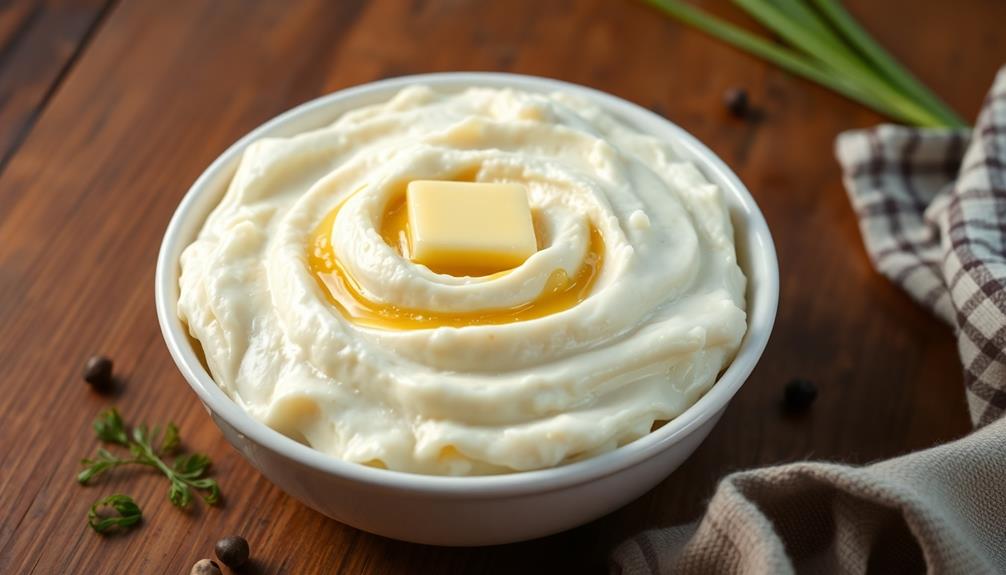
Roasted sweet potatoes, macaroni and cheese, and a fresh green salad would all complement the sweetness of a honey-glazed ham nicely. You could also serve it with dinner rolls or cranberry sauce for a classic pairing.
Can I Use a Different Type of Glaze?
Absolutely, you can use a different type of glaze for your dish. The beauty of cooking lies in your ability to experiment and find flavors that suit your preferences. Feel free to get creative with the glaze!
How Do I Reheat Leftover Honey-Glazed Ham?
To reheat your leftover ham, simply place it in a baking dish, cover with foil, and heat in a 325°F oven until warmed through, usually 10-15 minutes. This gentle method will prevent the ham from drying out.