Dinner rolls have a rich history, tracing back to ancient civilizations where flatbreads and leavened breads were staples. Over time, the development of ovens and yeast availability led to the modern dinner roll. Today, these rolls are a beloved part of culinary traditions, with a simple homemade recipe that allows for endless customization. Using fresh yeast, quality flour, and a few other basic ingredients, you can create soft, fluffy dinner rolls in your own kitchen. Proper kneading, rising, and baking techniques are key, but the process is highly rewarding. And if you continue exploring, you'll discover even more about the delightful world of homemade dinner rolls.
Key Takeaways
- Dinner rolls have a long history, tracing back to ancient civilizations, and transformed from luxury items to everyday staples in culinary traditions.
- The basic ingredients for dinner rolls include active dry yeast, warm water, sugar, butter, salt, and all-purpose flour.
- Simple to make at home, the key to success lies in proper dough kneading and rising for a soft, fluffy texture.
- Baking techniques like kneading, proofing, shaping, and temperature control are crucial for optimal roll quality.
- Homemade dinner rolls offer freshness, customization, and cost-effectiveness compared to store-bought options.
History
The humble dinner roll has a rich history that can be traced back to ancient civilizations. Throughout the centuries, bread-making techniques have evolved, but the beloved dinner roll has remained a staple on tables around the world.
In ancient Egypt, flatbreads were a dietary staple, while the Greeks and Romans enjoyed more leavened, yeast-based breads. As these cultures spread, so too did their bread-making traditions.
During the Middle Ages, the development of ovens and the increased availability of yeast led to the rise of the dinner roll as we know it today.
In the 19th century, the industrial revolution brought about mass production and the standardization of baking. This allowed dinner rolls to become more accessible to the general public, transforming them from a luxury item to a beloved everyday accompaniment to meals.
Today, the dinner roll continues to be a cherished part of many culinary traditions, reflecting the enduring appeal of this simple yet delightful baked good.
Recipe
Dinner rolls are a beloved classic, a warm and comforting addition to any meal. They're surprisingly simple to make at home, allowing you to control the ingredients and bake them fresh to your liking. With just a few basic ingredients and a little bit of patience, you can create delicious homemade dinner rolls that will impress your family and friends. The smell of freshly baked bread filling your kitchen will create a cozy and inviting atmosphere for your meal. Whether served alongside a hearty stew or a holiday feast, these delicious homemade dinner rolls are sure to be a hit.
The key to delicious dinner rolls is in the dough. By kneading the dough thoroughly and allowing it to rise properly, you'll achieve a soft, fluffy texture that melts in your mouth. The process may seem daunting, but with a little time and patience, you'll be rewarded with the satisfying aroma of homemade bread filling your kitchen.
Ingredients:
- 2 1/4 teaspoons active dry yeast
- 1 cup warm water
- 1/4 cup granulated sugar
- 1/4 cup unsalted butter, melted
- 1 teaspoon salt
- 3 1/2 cups all-purpose flour, plus more for dusting
Instructions:
In a large bowl, combine the warm water, yeast, and sugar. Let the mixture sit for 5-10 minutes until foamy.
Add the melted butter, salt, and 3 cups of the flour. Using a wooden spoon, mix until a shaggy dough forms.
Turn the dough out onto a lightly floured surface and knead for about 5 minutes, adding more flour as needed, until the dough becomes smooth and elastic.
Place the dough in a greased bowl, cover, and let rise for 1 hour or until doubled in size.
Punch down the dough and divide it into 12 equal pieces. Shape each piece into a smooth ball and place them in a greased 9×13 inch baking dish.
Cover and let rise for another 30 minutes. Preheat the oven to 350°F.
Bake the rolls for 20-25 minutes, or until golden brown. Serve warm.
For best results, remember to allow the dough to rise properly, as this is crucial for achieving the desired soft, fluffy texture.
Additionally, be mindful not to overwork the dough, as this can result in tough, dense rolls. With a little practice, you'll be creating bakery-worthy dinner rolls in no time.
Cooking Steps
First, you'll need to proof the yeast mixture to ensure it's active and bubbly.
Then, knead the dough until it's smooth and elastic.
Step 1. Proof the Yeast Mixture
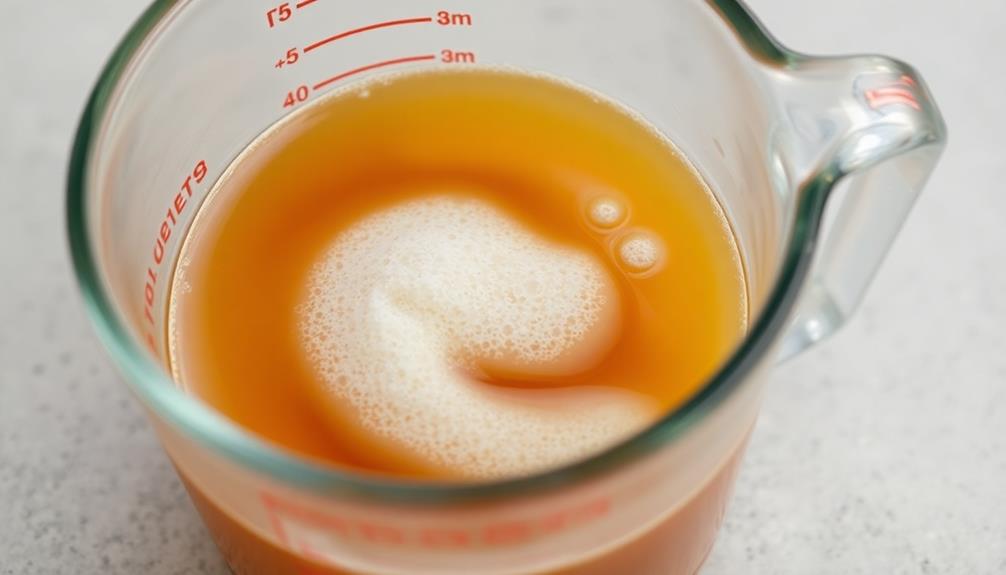
To begin the proofing process, simply combine the yeast mixture you prepared earlier with the warm water and milk in a large, clean bowl.
Gently stir the ingredients until they're well incorporated, then cover the bowl with a clean, damp towel or plastic wrap.
This step is crucial for activating the yeast and allowing the dough to rise. Place the bowl in a warm, draft-free area, such as the oven with the light turned on or near a sunny window.
Allow the mixture to proof for 10-15 minutes, or until it becomes bubbly and doubled in size.
During this time, the yeast will consume the sugars in the mixture, producing carbon dioxide and causing the dough to rise.
Once the yeast mixture has proofed, you're ready to move on to the next step of the recipe – kneading the dough.
Be sure to keep a close eye on the proofing process, as overproofing can result in a dense, heavy texture in your final dinner rolls.
Step 2. Knead the Dough Until Smooth
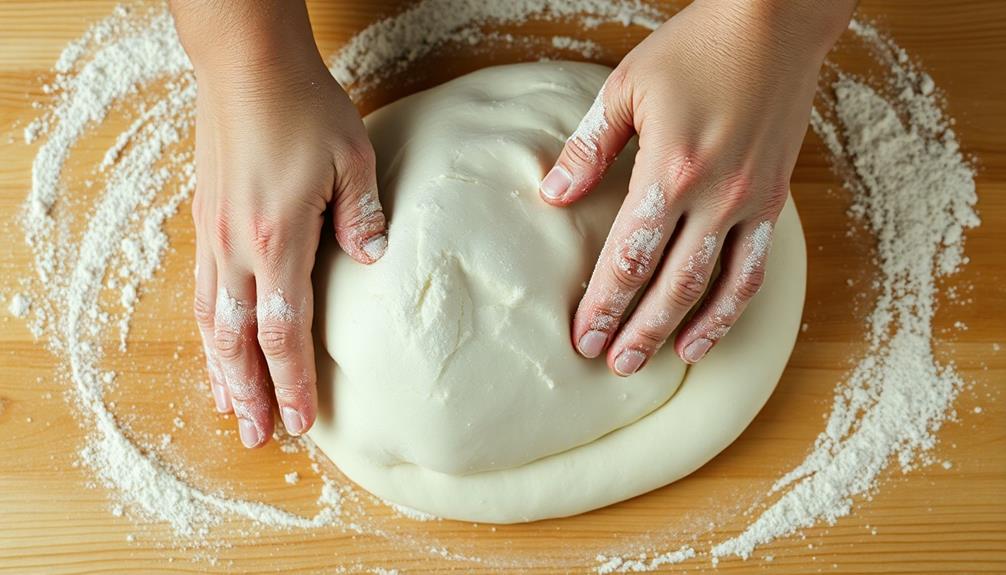
With the proofed yeast mixture ready, you can now begin kneading the dough until it's smooth and elastic. This process helps develop the gluten structure, trapping air bubbles and creating the perfect texture for your dinner rolls.
Start by transferring the dough to a lightly floured surface. Use the heel of your hand to push the dough away from you, then fold it back towards you. Repeat this motion, rotating the dough as you go, for about 5-10 minutes. You'll know the dough is ready when it becomes smooth, supple, and refuses to tear when stretched.
During kneading, be sure to add just a sprinkle of flour as needed to prevent sticking. Avoid over-flouring, as this can result in dense, dry rolls. The dough should feel slightly tacky but not overly sticky.
Knead with confidence, using the weight of your body to really work the dough. This process may seem tedious, but it's essential for achieving the perfect dinner roll texture.
Step 3. Divide Dough Into Equal Portions
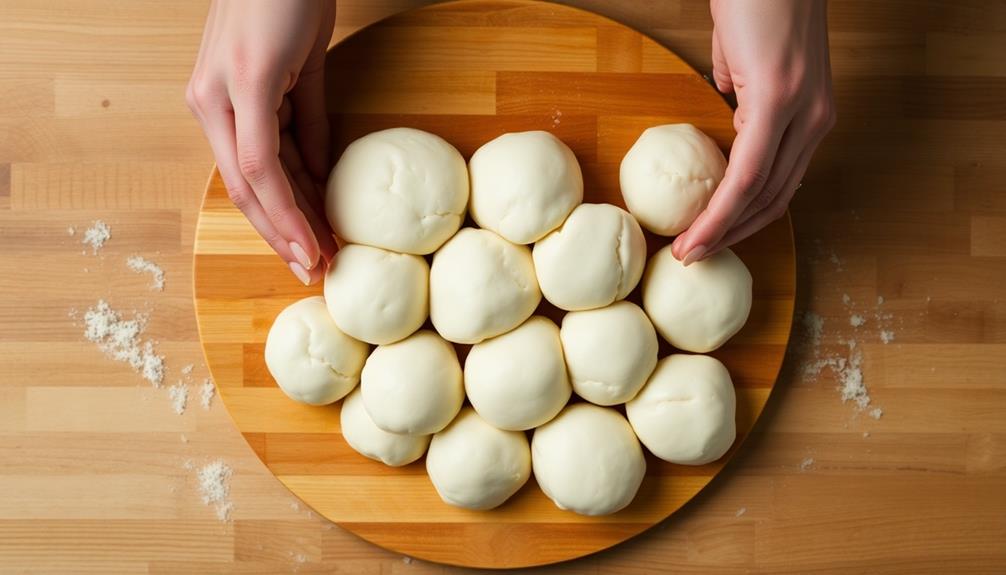
Once you've kneaded the dough to the right consistency, it's time to divide it into equal portions for shaping your dinner rolls. This step is crucial to ensure your rolls bake evenly and have a consistent look and texture.
First, lightly flour your work surface. Then, use your hands or a bench scraper to gently transfer the dough onto the floured surface. Avoid kneading the dough further at this stage, as you don't want to overwork it.
Next, divide the dough into equal pieces. The number of portions you create will depend on the size of rolls you prefer. For standard dinner rolls, aim for 12-16 equal pieces. Use a knife or bench scraper to carefully divide the dough. Try to make the portions as even as possible for consistent baking.
Once you've divided the dough, gently shape each piece into a smooth ball, tucking the edges underneath. This will help the rolls maintain their shape during the final proofing and baking stages.
Step 4. Shape the Dough Portions

Shaping the dough portions is an essential step in creating perfectly baked dinner rolls. Once you've divided your dough into equal pieces, it's time to transform them into smooth, evenly-sized rolls.
Begin by lightly dusting your work surface with flour. Gently pick up one dough portion and use your hands to shape it into a smooth, round ball. To do this, cup your hands around the dough and use your thumbs to push the dough down while rotating it in a circular motion. This helps to create a taut, even surface on top.
Repeat this process with the remaining dough portions, taking care to handle them gently to avoid deflating the dough.
Arrange the shaped rolls in your prepared baking pan, spacing them apart to allow for expansion during the final rise. Cover the pan and let the rolls rise until they've doubled in size, about 30 minutes.
This final shaping step ensures your dinner rolls will bake up light, fluffy, and perfectly uniform.
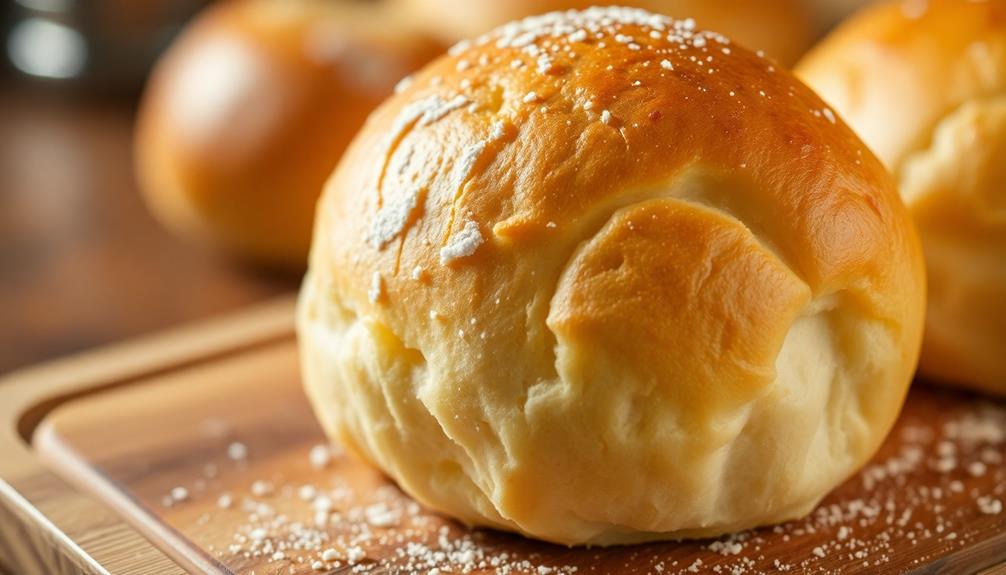
Step 5. Bake Rolls Until Golden Brown
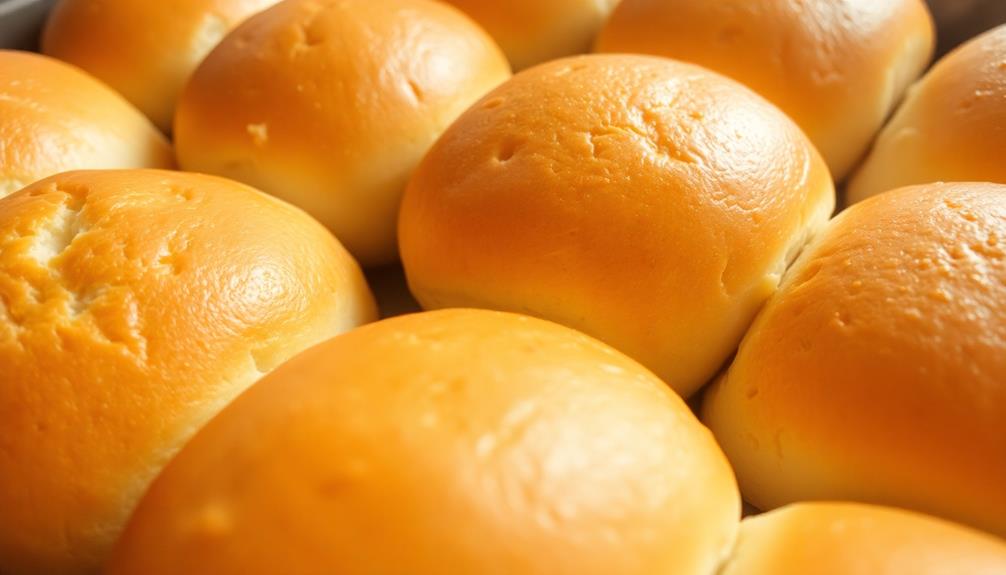
After the rolls have risen, preheat your oven to 375°F (190°C). This temperature is perfect for baking the rolls until they're golden brown and delightfully fluffy.
Once the oven is ready, carefully transfer the risen dough portions onto a lightly greased baking sheet, spacing them about 2 inches apart to allow for expansion.
Bake the rolls for 12-15 minutes, keeping a close eye on them. The rolls are done when they've achieved a beautiful, even golden-brown color. To ensure they're thoroughly baked, you can use a thermometer to check that the internal temperature reaches 190°F (88°C).
Let the baked rolls cool on the baking sheet for a few minutes before transferring them to a wire rack. This allows the exterior to set and prevents them from becoming soggy.
Serve the warm, freshly baked dinner rolls with your favorite accompaniments, such as butter, jam, or soup. Enjoy the irresistible aroma and taste of homemade perfection!
Final Thoughts
Making dinner rolls from scratch may seem like a daunting task, but with the right techniques, you'll find it's a rewarding process. The smell of freshly baked rolls wafting through your kitchen is unbeatable, and serving them warm to your family or guests is sure to impress.
While the steps may take some time, the end result is well worth the effort. Enjoy the satisfaction of creating something delicious and homemade. With a little practice, you'll become a master of dinner roll baking in no time.
Consider experimenting with different flavor profiles, such as adding herbs, cheese, or even a touch of sweetness. The possibilities are endless!
Ultimately, baking dinner rolls is a labor of love, and you can take pride in the fact that you made them yourself. So, don't be intimidated – dive in and enjoy the process.
Frequently Asked Questions
Can I Use a Bread Machine to Make Dinner Rolls?
Absolutely! You can use a bread machine to make delicious dinner rolls. The machine will mix, knead, and proof the dough for you, making the process effortless. Give it a try and enjoy freshly baked rolls.
How Long Do Dinner Rolls Stay Fresh?
That depends on how you store them. Properly stored, your dinner rolls can stay fresh for 3-4 days at room temperature or up to a week in the fridge. Make sure to wrap them tightly to prevent drying out.
Can I Freeze Leftover Dinner Rolls?
You can certainly freeze leftover dinner rolls. Just wrap them tightly in plastic wrap or foil, and they'll keep for up to 3 months in the freezer. When you're ready to enjoy them, simply thaw at room temperature before serving.
What's the Best Way to Reheat Dinner Rolls?
To reheat dinner rolls, you can do it in the oven. Preheat the oven to 350°F, place the rolls on a baking sheet, and heat them for 5-10 minutes until warmed through. This will help bring back their freshly-baked texture.
Can I Use Whole Wheat Flour for Dinner Rolls?
You absolutely can use whole wheat flour for your dinner rolls. The texture and flavor will be a bit different, but it's a great way to add more whole grains to your meal. Experiment with different ratios of whole wheat to all-purpose flour to find your perfect balance.