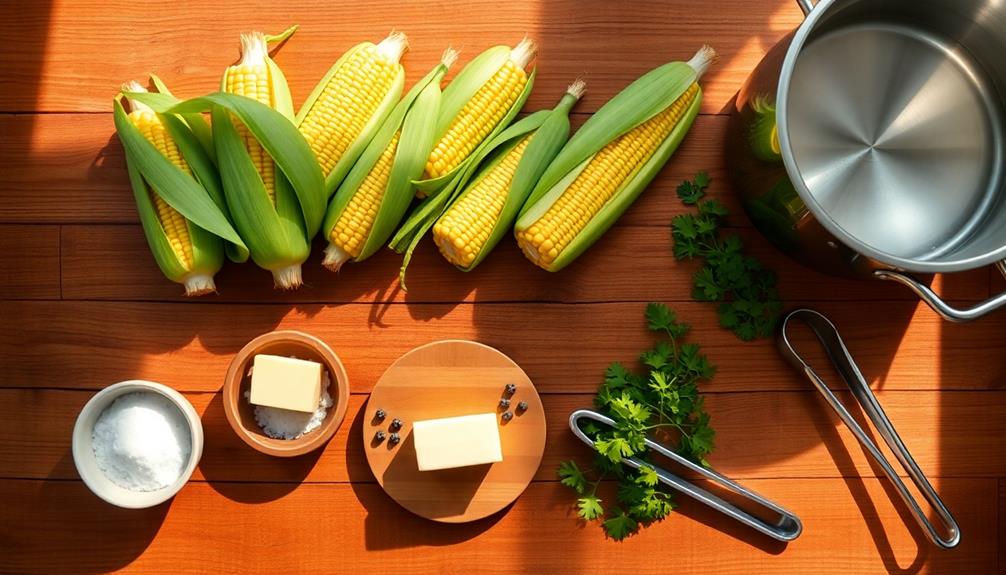
Corn on the cob is a classic summer treat that's easy to prepare and enjoy. You'll start by selecting fresh ears of corn with bright green husks and silky tassels. After husking and cleaning the corn, you'll boil it in salted water for 5-7 minutes until the kernels are tender. Once cooked, you'll slather the hot corn with butter and sprinkle it with salt to taste. This simple preparation lets the corn's natural sweetness shine through. While boiling is a popular method, you can also grill, roast, or steam your corn for different flavors. The key to perfect corn on the cob lies in its freshness and proper cooking technique.
Key Takeaways
- Corn on the cob is a popular summer dish made by boiling or grilling fresh corn ears.
- Cooking time for boiled corn is typically 5-7 minutes until kernels are tender when pierced.
- Traditional seasoning includes butter and salt, but various spices can be added for different flavors.
- Fresh corn should be chosen based on bright green husks and silky tassels for best quality.
- Proper preparation involves removing husks and silk, then cooking promptly to maintain peak flavor.

Purina Fancy Feast Seafood Classic Pate Collection Grain Free Wet Cat Food Variety Pack - (Pack of 30) 3 oz. Cans
- Artificial Color and Preservative-Free: Made without artificial colors or preservatives
- High-Quality Ingredients: Crafted with real, premium ingredients
- Complete and Balanced Nutrition: Provides 100% complete and balanced nutrition
As an affiliate, we earn on qualifying purchases.
History
Corn's journey from ancient Mesoamerica to modern dinner tables is a fascinating tale. You might be surprised to learn that corn, or maize, was first domesticated by indigenous peoples in Mexico about 10,000 years ago. They selectively bred teosinte, a wild grass, into the plump, juicy kernels we enjoy today.
As civilizations grew, corn became a staple crop, spreading throughout the Americas. When European explorers arrived in the New World, they were introduced to this versatile grain and quickly recognized its value. They brought corn back to Europe, where it spread rapidly across the continent and beyond.
The tradition of eating corn on the cob, however, is believed to have originated with Native American tribes. They'd roast or boil whole ears of corn, savoring the sweet kernels right off the cob. This practice was adopted by European settlers and has remained popular ever since.
Today, you'll find corn on the cob at summer barbecues, state fairs, and dinner tables around the world. It's a testament to corn's enduring appeal and the ingenuity of ancient farmers.
Recipe
Corn on the cob is a classic summer staple that brings back memories of backyard barbecues and family gatherings. This simple yet delicious dish showcases the natural sweetness of fresh corn, enhanced by a touch of butter and seasoning.
While there are various methods to prepare corn on the cob, boiling is one of the most straightforward and foolproof techniques. This recipe will guide you through the process of cooking perfectly tender and flavorful corn on the cob that will delight your taste buds and impress your guests.
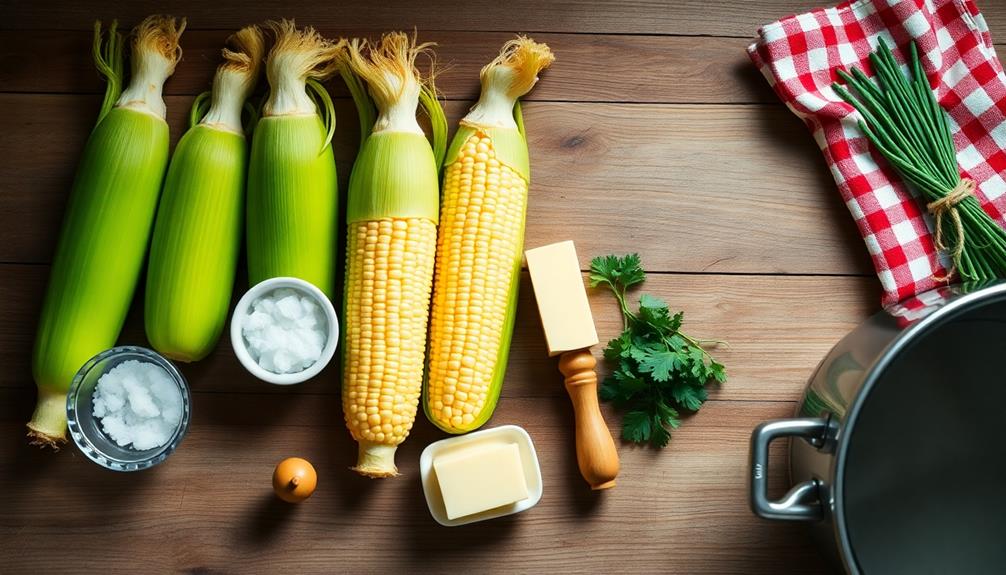
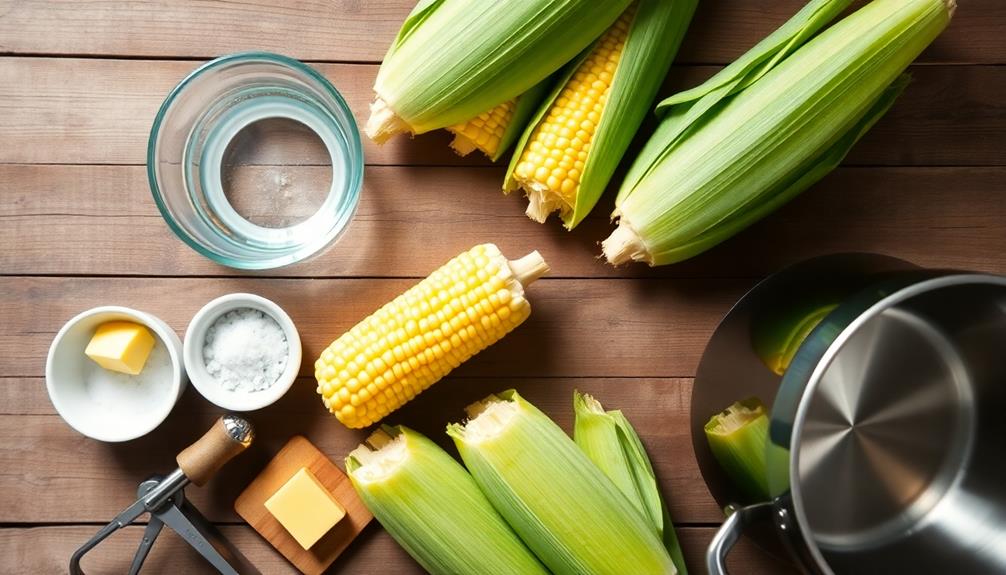
- 4 ears of fresh corn
- Water
- 1 tablespoon salt
- 4 tablespoons butter
- Salt and pepper to taste
Fill a large pot with enough water to cover the corn and add 1 tablespoon of salt. Bring the water to a boil over high heat. Carefully add the husked corn to the pot and reduce the heat to medium. Cook for 5-7 minutes or until the kernels are tender when pierced with a fork.
Remove the corn from the water using tongs and place on a serving platter. Spread butter over each ear of corn while still hot and season with salt and pepper to taste.
For the best results, choose fresh corn with bright green husks and silky tassels. If possible, cook the corn immediately after purchasing or husking to preserve its natural sweetness.
To add variety, experiment with different seasonings such as chili powder, garlic, or herbs. You can also try grilling the corn for a smoky flavor or steaming it for a healthier option. Remember to let the corn cool slightly before serving to prevent burns.
Cooking Steps
You'll want to start by husking and cleaning your corn, removing any silk strands.
Next, bring a large pot of water to a boil and carefully place your cleaned corn cobs into the water.
After about 5 minutes, remove the corn from the boiling water and season it with butter and salt to taste.
Step 1. Husk and Clean Corn
Before diving into the cooking process, you'll need to prep your corn on the cob. Start by gently pulling back the husks, revealing the golden kernels beneath. Don't remove the husks entirely; they'll help protect the corn during cooking.
As you peel back the layers, you'll notice silky strands clinging to the cob. These are the corn's silk, and you'll want to remove them completely.
To clean the corn effectively:
- Hold the cob at an angle, with the tip pointing downward.
- Use a soft brush or your fingers to gently brush away the silk strands.
- Work from top to bottom, ensuring you've removed all the silk.
- Rinse the corn under cool running water to wash away any remaining debris.
Once you've cleaned your corn, give it a quick inspection. Look for any blemishes or damaged kernels, and remove them if necessary.
Your corn is now ready for cooking! Remember, freshly husked corn is at its peak flavor, so try to clean it just before you're ready to cook. This process ensures that your corn on the cob will be delicious and free from unwanted fibrous strands when it reaches your plate.
Step 2. Boil Water in Pot
With your corn now prepped and ready, it's time to start cooking. The first step is to boil water in a pot large enough to accommodate your corn. Here's how to do it:
- Choose a pot: Select a pot that's big enough to hold your corn cobs without overcrowding. A stockpot or large saucepan works well.
- Add water: Fill the pot about 2/3 full with cold water. You'll want enough to cover the corn completely.
- Salt the water: Add about 1 tablespoon of salt per quart of water. This will enhance the corn's flavor.
- Heat the water: Place the pot on your stove's largest burner and turn the heat to high.
- Bring to a boil: Wait for the water to reach a rolling boil. You'll see large bubbles rapidly rising to the surface.
- Maintain the boil: Once boiling, you can reduce the heat slightly to maintain a steady boil without overflowing.
Step 3. Place Corn in Boiling Water

The moment of truth has arrived. It's time to introduce your corn to its steamy bath. With your pot of water at a rolling boil, carefully lower the corn into the water using tongs. Don't just toss it in—you'll risk splashing hot water on yourself.
Here's what you need to know:
- Submerge the corn fully: Make sure each ear is completely covered by water.
- Don't overcrowd: Leave some space between ears for even cooking.
- Set your timer: Cook for 3-5 minutes for crisp-tender corn, or 7-10 minutes for softer kernels.
- Keep the lid off: This helps maintain the corn's bright color.
As the corn cooks, you'll notice its color intensifying to a vibrant yellow. The kernels will plump up slightly, becoming more defined. You might even catch a whiff of that sweet corn aroma wafting from the pot.
It's a good idea to gently turn the ears halfway through cooking to ensure even heat distribution. Remember, fresher corn will cook faster, so keep an eye on it. You're just minutes away from perfectly cooked corn on the cob!
Step 4. Remove Corn After 5 Minutes
Time's up! It's time to retrieve your perfectly cooked corn on the cob from the boiling water. After 5 minutes of cooking, your corn should be tender and ready to enjoy. Here's what you'll need to do:
- Turn off the heat source to stop the boiling process.
- Use tongs or a slotted spoon to carefully remove each ear of corn from the pot.
- Gently shake off excess water to prevent scalding.
- Place the hot corn on a clean plate or platter.
Be cautious when handling the corn, as it'll be very hot. You'll notice that the kernels have brightened in color and appear plumper. This visual change indicates that the corn has absorbed enough moisture and heat to become tender and flavorful.
If you prefer your corn slightly firmer, you can remove it after 4 minutes. For softer kernels, leave it in for up to 7 minutes.
However, avoid overcooking, as this can lead to tough, chewy corn. Once you've removed all the ears, you're ready to add your favorite toppings and dig in!
Step 5. Season With Butter and Salt

Simplicity reigns supreme when seasoning corn on the cob. After removing your perfectly cooked ears from the water, it's time to add that classic, mouthwatering flavor.
You'll want to start with butter, the quintessential companion to sweet corn. While the corn is still hot, take a stick of butter and run it along the length of the cob, allowing it to melt and coat the kernels evenly. As the butter melts, it'll seep into the spaces between the kernels, infusing them with rich, creamy goodness.
Next, sprinkle salt over the buttered corn. You can use regular table salt, but many corn enthusiasts swear by kosher or sea salt for its coarser texture and more pronounced flavor. Don't be shy – a generous pinch will do the trick. As you rotate the cob, make sure the salt is evenly distributed.
For those looking to elevate their corn game, consider these variations:
- Sprinkle with chili powder or paprika for a spicy kick
- Add freshly ground black pepper for extra zing
- Squeeze a wedge of lime over the corn for a zesty twist
Final Thoughts
Wrapping up our journey through the world of corn on the cob, it's clear that this summer staple offers more than just a tasty side dish. Along with being a delicious and versatile addition to any meal, corn on the cob also provides essential nutrients like fiber, vitamin C, and folate. Plus, if you’re looking for more ways to incorporate corn into your cooking repertoire, consider trying out an easy cornbread recipe. This simple yet savory dish will complement any summer barbecue or cozy family dinner.
It's a versatile vegetable that brings people together, whether at backyard barbecues or family dinners. You've learned various methods to prepare and enjoy this golden treat, from boiling to grilling, and even microwaving for a quick fix.
Remember, the key to perfect corn on the cob lies in its freshness and proper cooking. Don't be afraid to experiment with different seasonings and toppings to find your favorite combination.
Whether you prefer the classic butter and salt or want to try something more adventurous, there's a flavor profile for everyone.
As you bite into your next ear of corn, appreciate the simple pleasure it brings. It's not just about the taste, but also the experience of holding that warm, buttery cob in your hands.
Frequently Asked Questions
Can Corn on the Cob Be Frozen for Later Use?
Yes, you can definitely freeze corn on the cob for later use! It's a great way to preserve the sweet taste of summer corn throughout the year.
Here's how you can do it:
- Husk and clean the corn
- Blanch the ears in boiling water for 4-6 minutes
- Cool them quickly in ice water
- Dry thoroughly
- Wrap each ear in plastic wrap or foil
- Place in freezer bags, removing as much air as possible
- Label and date the bags
- Freeze for up to 12 months
How Long Does Cooked Corn on the Cob Stay Fresh in the Refrigerator?
When you've cooked up some delicious corn on the cob, you'll want to know how long it'll stay fresh in the fridge.
Generally, you can expect your cooked corn to remain good for 3-5 days when stored properly. To maximize freshness, let it cool completely, then wrap it tightly in plastic wrap or aluminum foil before refrigerating.
For best quality, try to consume it within the first 2-3 days. Always check for any signs of spoilage before eating.
Is It Safe to Eat Raw Corn on the Cob?
Yes, it's safe to eat raw corn on the cob! You'll find it's sweet, crisp, and surprisingly delicious. Raw corn is nutritious, packed with fiber, vitamins, and minerals.
However, some people might find it harder to digest than cooked corn. If you're worried about pesticides, wash the corn thoroughly before eating.
For the best flavor, choose fresh, young corn with plump kernels. You can enjoy it as is or add it to salads for a refreshing crunch.
Are There Any Health Benefits to Eating Corn on the Cob?
Yes, there are several health benefits to eating corn on the cob!
You'll get a good dose of fiber, which aids digestion and helps you feel full.
It's also packed with vitamins and minerals, including B vitamins, vitamin C, and potassium.
Corn contains antioxidants that support eye health and may reduce the risk of certain diseases.
Plus, it's a whole grain, which can contribute to heart health.
Can Corn on the Cob Be Grilled Without Removing the Husk?
Yes, you can absolutely grill corn on the cob without removing the husk!
It's actually a great way to cook corn. Here's how:
- Soak the corn in water for about 15 minutes
- Place the corn, husk and all, directly on the grill
- Cook for 15-20 minutes, turning occasionally
The husk will char, but the corn inside will steam perfectly.
When it's done, carefully peel back the husk and enjoy your smoky, tender corn!