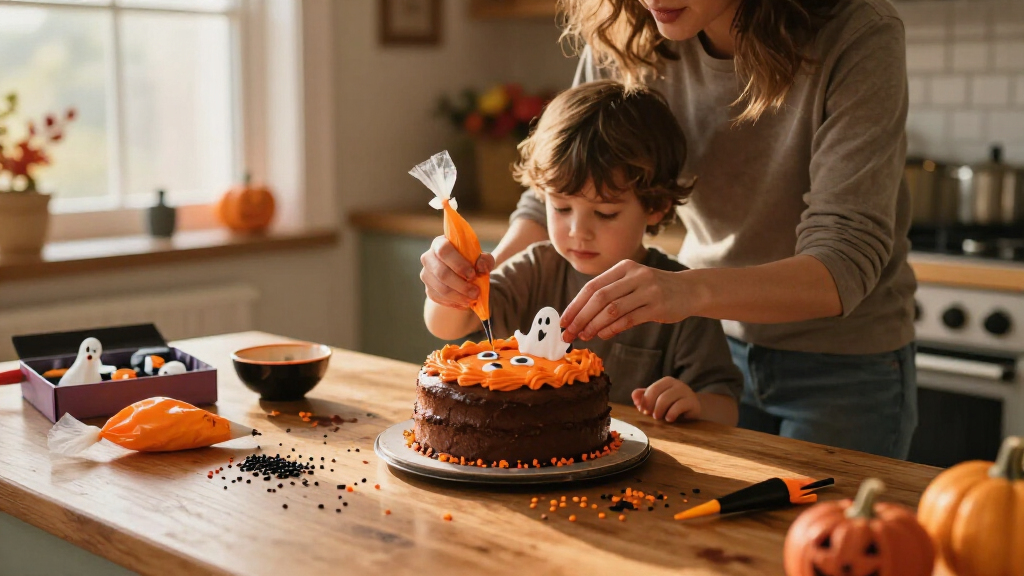

Use this guide to decorate a cooled cake with a Halloween-themed cake decorating kit, from checking the kit contents to placing the final decorations. It is for beginner bakers and anyone decorating a cake for a Halloween party. Plan for about 1½–2½ hours, including time to cool the cake; the decorating itself usually takes 30–60 minutes.

Get kitchen staples and gadgets delivered free with Prime
- Fast, free delivery on millions of items
- Prime Video, Amazon Music and more included
- Member-only deals all year

Sweets Indeed Halloween Frosting Decorating Kit with Sprinkles
- ✔ Frosting tubes: 3 tubes, 3 oz each
- ✔ Frosting colors: Orange, black, and white
- ✔ Decorating nozzles: 4

Halloween Cookie Decorating Kit with Frosting Tubes, Icing Tips, Cookie Cutters and Sprinkles
- ✔ Brand: Twinkle Bites
- ✔ Frosting tubes: 3
- ✔ Frosting colors: Orange, black, and white

PhilaeEC Halloween Edible Sprinkle Mix for Cakes and Desserts
- ✔ Product type: Edible Halloween sprinkle mix
- ✔ Weight: 90 g (3.2 oz)
- ✔ Gluten: Described as gluten-free
Difficulty: Beginner | Time: 1½–2½ hours, including cooling and decorating
What You’ll Need
Tools & Materials:
- Halloween cake decorating kit with edible decorations or food-safe toppers
- Cooled cake, baked in a size suitable for the decorations
- Frosting or icing
- Offset spatula or butter knife
- Mixing bowl and spoon, if the frosting needs preparation
- Serving plate or cake board
- Clean, dry hands or food-safe gloves
Knowledge:
- Basic cake handling
- How to spread frosting with a spatula or butter knife
Read the kit packaging before opening it. Check serving size, storage instructions, allergen information, and whether decorations are edible or intended only as food-safe toppers. Allow the cake to cool fully before frosting; warm cake can soften icing and make decorations slide.
Sweets Indeed Halloween Frosting Decorating Kit with Sprinkles
Sweets Indeed is our best overall choice because it bundles the core pieces we need to decorate a Halloween cake: orange, black, and white frosting, four nozzles, and a sprinkle mix with candy eyeballs. The three tubes are listed as 3 ounces each, which gives us a clearer sense of the frosting supply than Twinkle Bites provides. Candy eyes also add a recognizable Halloween detail without requiring elaborate piping skills.Compared with Twinkle Bites, this kit puts more emphasis on frosting and edible decorations than on shaping dough: it has candy-eye sprinkles but no listed cookie cutters. That makes it a more direct fit for topping cakes and cupcakes, while Twinkle Bites may suit a baking session where cookies are part of the plan. The listing also describes the squeeze tubes as easy to use, a practical advantage for group decorating. Still, the Halloween palette makes the set less useful for other occasions, and we should not assume the included quantity will cover a large cake or multiple batches without checking our plans.
Pros:
- Three frosting tubes in orange, black, and white
- Four decorating nozzles for varied lines and shapes
- Two-ounce sprinkle mix includes candy eyeballs
- Intended for cakes, cupcakes, cookies, and other treats
Cons:
- Does not list cookie cutters, unlike Twinkle Bites
- Halloween-specific colors and decorations have limited use beyond the season
Best for: Home bakers who want frosting, piping nozzles, and Halloween sprinkles in one kit for cakes, cupcakes, or a small decorating party.
Not ideal for: Bakers who need cookie cutters, a neutral decorating set for year-round use, or a clearly stated supply for decorating several large cakes.
Bottom line: Choose Sweets Indeed when we want the most balanced frosting-and-topping setup for Halloween cakes and cupcakes.
“Choose Sweets Indeed when we want the most balanced frosting-and-topping setup for Halloween cakes and cupcakes.”
Halloween Cookie Decorating Kit with Frosting Tubes, Icing Tips, Cookie Cutters and Sprinkles
Twinkle Bites earns its place for variety: it is the only option here that includes pumpkin, bat, and ghost cookie cutters alongside frosting tubes, tips, and sprinkles. That makes it especially appealing when our Halloween cake is part of a wider decorating table with cookies or brownies. The classic orange, black, and white palette keeps the finished treats coordinated without requiring us to find separate themed decorations.Compared with Sweets Indeed, Twinkle Bites trades a more clearly specified frosting amount and candy eyes for the three cutters. Those shapes can make a family baking activity feel more hands-on, but they matter less if we are only decorating a finished cake. The listing says it includes three tubes and four tips, yet the supplied weight information is unusually small and does not clearly establish how much frosting is in each tube. We should verify package details if frosting quantity is central to our plans. For a cake-only job, Sweets Indeed is the more straightforward pick; for a mixed cookie-and-cake session, Twinkle Bites brings the broader activity mix.
Pros:
- Includes pumpkin, bat, and ghost cookie cutters
- Three frosting tubes in classic Halloween colors
- Four icing tips and a sprinkle bag are included
- Suitable for cookies, cupcakes, cakes, and brownies
Cons:
- Frosting quantity is unclear from the listed weight details
- Cookie cutters add less value for a cake-only decorating plan
- Halloween-specific shapes and colors limit year-round flexibility
Best for: Families or hosts planning to decorate cookies as well as cakes and who value themed cutters as part of the activity.
Not ideal for: Anyone focused on decorating one cake, or shoppers who need a confidently specified frosting quantity before buying.
Bottom line: Pick Twinkle Bites when cutters and a shared cookie-decorating activity matter as much as the cake itself.
“Pick Twinkle Bites when cutters and a shared cookie-decorating activity matter as much as the cake itself.”
PhilaeEC Halloween Edible Sprinkle Mix for Cakes and Desserts
PhilaeEC is a focused finishing option, not a complete decorating kit. Its 90-gram bottle of Halloween sprinkles can add seasonal color to a frosted cake, cupcakes, cookies, candy, or ice cream, and we can apply it selectively if we want more control over the final look. The listed gluten-free, nut-free, egg-free, and dairy-free attributes may also make it worth considering for households managing those ingredients, though we should check the package and suitability for our specific needs.Unlike Sweets Indeed and Twinkle Bites, PhilaeEC supplies no frosting, piping tips, cutters, or other tools. That keeps the choice simple if our kitchen already has the basics, but means it cannot get a plain cake from undecorated to finished on its own. We also have less information to compare about the specific sprinkle shapes or mix composition. The listing says production and expiration dates are printed on the bottle but does not provide the dates, so we cannot assess freshness from the supplied details. Choose it for a topping, not as a substitute for the two fuller kits.
Pros:
- 90 g bottle is suitable for several types of desserts
- Can be sprinkled broadly or applied selectively
- Listing describes it as gluten-free, nut-free, egg-free, and dairy-free
Cons:
- No frosting, piping tips, or cookie cutters are included
- Specific sprinkle shapes and mix composition are not detailed
- Production and expiration dates are not provided in the listing
Best for: Bakers with frosting and decorating tools on hand who want a Halloween sprinkle topping and value the listed dietary attributes.
Not ideal for: Beginners seeking an all-in-one kit, or anyone who needs piping tools, frosting, cutters, or clearly stated date details.
Bottom line: Choose PhilaeEC when we only need seasonal sprinkles and already have the rest of our decorating setup.
“Choose PhilaeEC when we only need seasonal sprinkles and already have the rest of our decorating setup.”
As an Amazon Associate we earn from qualifying purchases.
Before You Start
Clear a flat work surface and keep pets, children, and non-food items away from the decorating area. Wash and dry your hands, then check that the cake, frosting, and decorations are suitable for the people who will eat them. If the kit includes small plastic pieces, candles, picks, or other non-edible toppers, plan to remove them before serving and tell guests they are not edible.
Keep the kit’s packaging or instructions nearby. Some decorations need to stay dry, be added just before serving, or be stored in a particular way. Follow the product label when it differs from general guidance here.
Step-by-Step Instructions
Step 1: Check the kit and cake
Open the kit and lay out its contents on a clean, dry surface. Compare the pieces with the package list and look for damage, missing items, broken decorations, or unclear labels. Separate edible decorations from toppers that are only for display. Check the kit’s serving size and recommended cake dimensions, then compare them with your cake.
Tip:Keep tiny pieces in their wrappers or a small bowl until you are ready to place them. This makes them easier to handle and less likely to get lost.
Check: You know which pieces are edible, which need removal before serving, and whether the kit has enough decorations for your cake.
Step 2: Prepare the workspace and frosting
Set the serving plate or cake board on a stable work surface. Prepare the frosting according to its label, or stir ready-made frosting until it spreads smoothly. Keep a small amount aside for attaching decorations if needed. If the frosting is too firm to spread, let it soften briefly at room temperature; do not heat it unless its instructions allow that.
Tip:Use a plate or board large enough to leave room around the cake. This gives you space to work and helps prevent decorations from falling off the edge.
Check: The frosting spreads without tearing the cake, and the cake board stays level when you press lightly on it.
Step 3: Level and position the cake
Place the fully cooled cake on the board. If the top is very domed, trim it carefully with a serrated knife so the cake sits level; skip trimming if the cake is already flat. Brush away loose crumbs with clean fingers or a pastry brush. Turn the cake so its best-looking side faces forward.
Tip:Work slowly when trimming, and keep the knife on a stable surface. Save the cut-off cake for snacking rather than pressing it back onto the cake.
Check: The cake sits securely without rocking, and loose crumbs are not covering the surface you plan to frost.
Step 4: Apply a thin crumb coat
Spread a thin layer of frosting over the top and sides of the cake. This first layer traps loose crumbs. It does not need to look perfect. Refrigerate the cake for about 15–30 minutes, or follow the frosting label, until the surface feels firm enough to frost without pulling up crumbs.
Tip:Use a clean spatula for the final frosting layer. Crumbs from the first coat can leave dark specks in pale frosting.
Check: The crumb coat looks thin and even, and the surface is firm to a gentle touch before you continue.
Step 5: Add the final frosting layer
Spread a thicker layer of frosting over the top and sides. Smooth it with the spatula or create simple ridges and swirls for texture. Wipe frosting from the board’s edge with a clean, slightly damp cloth. Keep the top area clear enough to arrange the kit decorations.
Tip:If you plan to use flat decorations, leave the top fairly level so they sit securely. Avoid adding a very thick layer beneath tall or heavy toppers.
Check: The cake is covered, the frosting holds its shape, and there is enough open space to place the decorations.
Step 6: Arrange the Halloween decorations
Place the largest decorations first, then arrange smaller pieces around them. Try the layout before pressing pieces into the frosting. Position decorations so the design can be seen from the serving side, and leave a clear cutting area if the cake will be sliced at the table. Press edible decorations gently into the frosting; attach pieces that need support with a small dab of reserved frosting.
Tip:Keep decorations away from the cake’s edge if they might slide. Follow the kit instructions for delicate, chocolate, or color-transfer-prone pieces.
Check: The decorations stay in place when the board is moved gently, and the main design is visible from the front and above.
Step 7: Store and prepare to serve
Check the frosting and kit labels for storage directions. Refrigerate the cake if the frosting or other ingredients require it, and protect it from contact with a lid or wrap that could smear the decorations. Before serving, remove non-edible toppers and any sticks, picks, or supports as directed by the kit. Tell guests about any decorations that are not edible.
Tip:For the cleanest appearance, add decorations that may soften or lose color as close to serving time as the packaging recommends.
Check: The cake has been stored as directed, non-edible pieces are identified or removed, and the cake is ready to display or cut.
Common Mistakes to Avoid
- Frosting a warm cake — Wait until the cake is fully cool throughout. Warm cake can melt frosting, loosen crumbs, and cause toppers to slide.
- Assuming every kit piece is edible — Read labels and sort edible decorations from plastic, wire, picks, and other display pieces before decorating.
- Pressing decorations into soft or wet frosting too early — Let the frosting set slightly when the kit calls for it, and add delicate decorations at the time stated on the package.
- Overloading the cake with heavy toppers — Plan the layout first, spread heavy pieces across the cake, and use a small amount of frosting to secure them.
Troubleshooting
Problem: Frosting pulls crumbs off the cake
Solution: Stop smoothing, chill the cake until the frosting firms, and apply a thin crumb coat. Add the final layer after the crumb coat has set.
Problem: A decoration slides down the side
Solution: Lift it off, chill the cake briefly if the frosting is soft, then reattach it with a small dab of thicker frosting. Keep heavy pieces on the top or near the base.
Problem: The decoration colors stain or bleed into the frosting
Solution: Remove the affected piece if possible. Check the package for contact or storage directions, and add color-prone decorations shortly before serving next time.
Problem: There are not enough decorations to cover the cake
Solution: Use the kit pieces as focal points and fill open areas with piped frosting, sprinkles, or other labeled edible decorations that suit the cake and guest dietary needs.
What Success Looks Like
The finished cake has an even frosting layer, a clear Halloween design, and decorations that remain in place when the cake is moved gently. You have checked the labels, stored the cake according to the product directions, and removed or identified every non-edible topper before serving.
Next Steps
Keep the cake refrigerated or at room temperature as directed by the frosting and decoration labels. Use a clean knife to cut it, and remove toppers as you reach them. Store leftovers in a covered container under the same conditions stated for the cake’s ingredients. Discard decorations that are damaged, unlabeled, or past their stated use-by date.
Frequently Asked Questions
Do I need to bake the cake before using a decorating kit?
Most kits provide decorations rather than a cake, so you need a baked, fully cooled cake and frosting. Check the package contents to confirm what the kit includes.
Can I decorate the cake the day before a party?
Usually, but storage needs depend on the frosting and decorations. Follow their labels, and add any pieces that can soften, bleed color, or lose their shape closer to serving time if the kit directs.
How can I tell if a topper is edible?
Check its packaging or the kit instructions. Do not assume that a piece is edible because it touches the cake. Treat unlabeled plastic, wire, picks, and supports as non-edible.
Can I use a kit on cupcakes instead of a cake?
Yes, if the decoration size and quantity suit cupcakes. Check the package for its intended use and divide the pieces across the cupcakes before placing them.
Halloween Picks
halloween
As an affiliate, we earn on qualifying purchases.