Connect with us

Graduations/Birthdays

Turkey Lettuce Wraps

Mouth-watering turkey lettuce wraps are a delightful dish that’s both healthy and customizable, perfect for…

Published

on

healthy turkey lettuce wraps

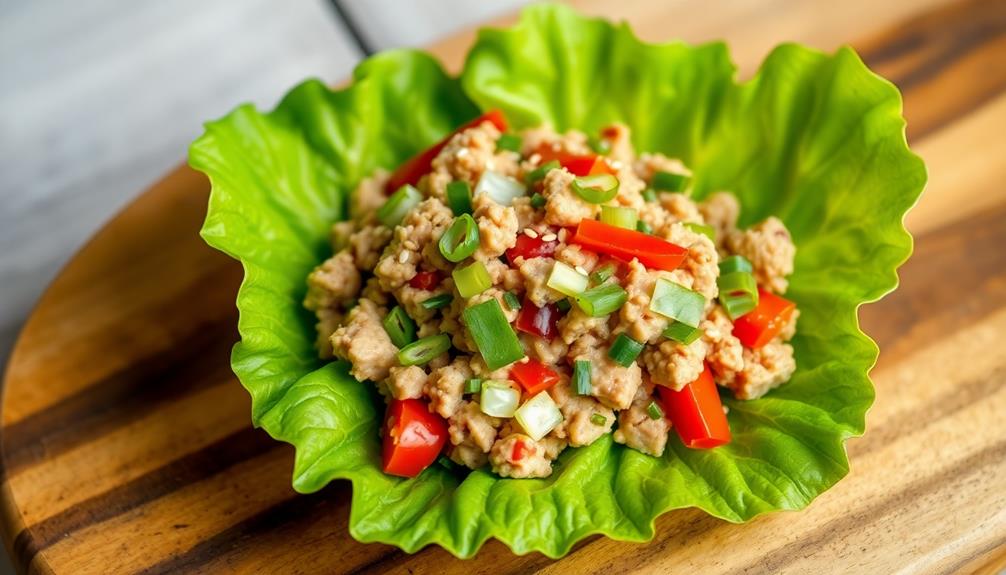
Turkey lettuce wraps are a lively, delicious meal you'll love to make. They've been a favorite for ages, with savory ground turkey nestled in crisp lettuce leaves. You can customize the fillings to your liking, adding juicy tomatoes, crunchy carrots, or creamy avocado. It's a well-balanced dish that's perfect for quick lunches or light dinners. The recipe's versatility means the whole family can enjoy crafting their own wraps. Plus, the lean turkey and veggie-packed filling make this a healthy option. You'll find the steps to whip up this satisfying meal right here.

Key Takeaways

  • Turkey lettuce wraps are a healthy and versatile meal option, featuring ground turkey seasoned with spices and wrapped in crisp lettuce leaves.
  • The dish has evolved from its early 20th-century origins, with various fillings and flavor combinations becoming popular over time.
  • Turkey lettuce wraps are suitable for quick lunches or light dinners, and can be customized with a range of toppings and vegetables.
  • This low-carb dish provides high-protein from the lean turkey, while the lettuce offers essential vitamins and hydration.
  • Turkey lettuce wraps are easy to prepare, making them an ideal choice for busy weeknights, and they appeal to various age groups and dietary preferences.

History

The origins of turkey lettuce wraps can be traced back to the early 20th century, when resourceful home cooks sought to create satisfying meals using readily available ingredients.

As the popularity of ground turkey grew, clever chefs began wrapping the savory meat in crisp, fresh lettuce leaves – a simple yet delicious solution to satisfy hunger. This innovative dish quickly gained traction, becoming a beloved staple in households across the country.

Over the decades, the recipe evolved, with home cooks experimenting with various seasonings and flavor combinations to suit their tastes.

From classic seasonings like garlic and onion to more adventurous spices, the versatility of turkey lettuce wraps allowed families to put their own unique spin on the dish.

Today, this beloved classic continues to delight palates, offering a healthy and satisfying meal option that's easy to prepare and even easier to enjoy.

Advertisement

Recipe

Turkey Lettuce Wraps

Turkey Lettuce Wraps are a delicious and healthy alternative to traditional tacos or sandwiches. This recipe features ground turkey seasoned with a blend of spices, nestled in crisp lettuce leaves for a refreshing and satisfying meal.

The combination of savory turkey, crunchy lettuce, and flavorful toppings creates a well-balanced dish that's perfect for a quick lunch or a light dinner. This recipe is also versatile, allowing you to customize the fillings to your taste.

  • 1 lb ground turkey
  • 1 tbsp olive oil
  • 1 onion, diced
  • 3 cloves garlic, minced
  • 1 tsp ground cumin
  • 1 tsp chili powder
  • 1/2 tsp smoked paprika
  • Salt and pepper to taste
  • 12 large lettuce leaves (such as romaine or butter lettuce)
  • Toppings (e.g., diced tomatoes, shredded carrots, sliced avocado, chopped cilantro)

In a large skillet, heat the olive oil over medium heat. Add the onion and sauté until translucent, about 5 minutes. Add the garlic and cook for an additional minute, until fragrant.

Add the ground turkey and break it up with a spatula or wooden spoon. Season with cumin, chili powder, smoked paprika, salt, and pepper. Cook, stirring occasionally, until the turkey is cooked through, about 8-10 minutes.

For best results, serve the turkey mixture warm in the lettuce leaves, allowing your guests to customize their wraps with their preferred toppings. The cool, crisp lettuce provides a refreshing contrast to the savory turkey, making this dish a delightful and satisfying meal.

Advertisement

Cooking Steps

First, grab a skillet and sauté that ground turkey until it's nice and browned.

Next, toss in your veggies and stir in those tasty seasonings.

Step 1. In a Skillet, Sauté Turkey

saut turkey in skillet

Sizzling the ground turkey in a skillet, you'll coax out its savory essence, preparing the foundation for the delectable lettuce wraps.

First, heat a large skillet over medium-high heat. Once it's nice and hot, add the ground turkey. Using a wooden spoon, break up the meat as it cooks, ensuring it browns evenly.

The turkey will sizzle and spit, releasing a mouthwatering aroma that'll have your taste buds tingling in anticipation. As the meat cooks through, about 5-7 minutes, it'll take on a beautiful golden-brown hue.

Be sure to stir the turkey frequently to prevent any burning. Once it's cooked all the way through, it's ready to be combined with the other tasty ingredients that'll transform these wraps into a flavor sensation.

Advertisement

Get ready to assemble the best lettuce wraps you've ever tried!

Step 2. Add Vegetables

incorporate fresh vegetables

With the turkey now cooked to perfection, it's time to add the veggie component that'll truly bring these wraps to life.

Grab a fresh head of crisp, green lettuce and carefully separate the leaves, creating the perfect little cups to hold your tasty filling. For a protein-rich start to your day, consider adding some diced avocados or even a sprinkle of cheese, reminiscent of a Fried Egg Quesadilla Toast.

Next, dice up some juicy tomatoes, crunchy carrots, and crisp bell peppers. Toss these vibrant veggies into the skillet with the seasoned turkey and give it all a good stir. The colors and textures will complement each other beautifully.

Don't forget to add a sprinkle of salt and pepper to really make the flavors pop.

Now, it's time to start assembling your lettuce wraps. Scoop a generous amount of the turkey and veggie mixture into each lettuce leaf, being careful not to overstuff.

Advertisement

Fold the sides of the lettuce over the filling, then take a bite and savor the fresh, crunchy goodness. Get ready for your taste buds to dance with delight!

Step 3. Stir in Seasonings

incorporate spices and flavorings

Next, stir in a generous pinch of salt and a few grinds of black pepper. This simple seasoning will enhance the flavor of the turkey filling.

Be sure to taste as you go, adding more salt and pepper if needed. You want the seasoning to really make the turkey shine!

Now, let's kick things up a notch with some dried herbs. Sprinkle in a teaspoon of dried oregano and a half-teaspoon of dried basil.

The earthy, slightly sweet notes of these herbs will complement the savory turkey perfectly. Give everything a good stir to distribute the seasonings evenly.

Step 4. Spoon Mixture Into Lettuce Leaves

spoon mixture into lettuce

Now that you've perfectly seasoned the turkey filling, it's time to start building your lettuce wraps.

Grab a crisp, fresh lettuce leaf and hold it in the palm of your hand. Scoop a generous amount of the turkey mixture onto the center of the leaf. Be careful not to overfill, as you want to be able to wrap the lettuce around the filling easily.

Advertisement

Gently fold the sides of the leaf over the filling, then roll it up from the bottom to the top, creating a neat little package. Continue this process, filling and wrapping each lettuce leaf, until you've used up all the turkey mixture.

Arrange the completed lettuce wraps on a serving platter. Your healthy, flavorful turkey lettuce wraps are now ready to enjoy!

Take a moment to appreciate the vibrant colors and fresh crunch of the lettuce combined with the savory turkey. Go ahead and dig in – these wraps are sure to please.

Step 5. Garnish With Chopped Cilantro

garnish with chopped cilantro

To finish off your turkey lettuce wraps, simply chop up a handful of fresh cilantro and sprinkle it over the filled lettuce leaves. The bright, herbal flavor of the cilantro will add a wonderful contrast to the savory turkey and crunchy lettuce. You'll love how the cilantro's fragrant aroma enhances the whole dish.

Just take a sharp knife and give the cilantro a quick chop, making sure to include both the leaves and the stems. The stems have lots of flavor, too!

Then, generously sprinkle the chopped cilantro over the top of your lettuce wraps. You can add as much or as little as you like, depending on your personal taste preferences.

Advertisement

The cilantro garnish not only looks beautiful, but it also ties all the flavors together, making each bite even more delicious. Get ready to enjoy a burst of freshness in every single lettuce wrap!

Final Thoughts

This turkey lettuce wrap recipe is a delightful and healthy option for a light meal. You'll love how the crisp lettuce leaves perfectly complement the savory ground turkey filling. It's a wonderful balance of flavors and textures that's sure to satisfy.

The best part? These wraps come together in a snap, making them an ideal choice for busy weeknights or casual gatherings. Simply brown the turkey, stir in the flavorful seasonings, and spoon the mixture into fresh lettuce leaves.

Top with your favorite garnishes, like juicy tomatoes, crunchy carrots, or tangy feta cheese, and you've got a wholesome and delicious meal.

These turkey lettuce wraps aren't only tasty but also incredibly versatile. You can easily adjust the fillings to suit your personal preferences or dietary needs.

Advertisement

It's a recipe the whole family will enjoy, from the little ones to the adults. So, why not give it a try and experience the joy of a healthy and satisfying meal?

Frequently Asked Questions

What Type of Lettuce Is Best for Turkey Wraps?

For a delicious turkey wrap, you'll want to choose a crisp, sturdy lettuce that can hold the filling without getting soggy. Romaine or Boston lettuce are excellent options that will provide the perfect vessel for your turkey.

Can I Use Ground Chicken Instead of Ground Turkey?

You can absolutely use ground chicken instead of ground turkey. The flavors will be slightly different, but chicken makes a great substitute and will work just as well in your wrap recipe.

How Long Do the Wraps Last in the Refrigerator?

The turkey lettuce wraps should last 3-4 days refrigerated when stored properly in an airtight container. Just be sure to consume them within that timeframe for the best quality and food safety.

Can I Make the Filling Ahead of Time?

You can definitely make the filling ahead of time. Just store it in an airtight container in the fridge for up to 3-4 days. When you're ready to serve, simply assemble the wraps with the pre-made filling.

Advertisement

Is There a Vegetarian Version of This Recipe?

Yes, you can definitely create a delicious vegetarian version of this recipe. Simply substitute the turkey with plant-based proteins like tofu, tempeh, or your favorite veggie crumbles, and enjoy a flavorful and healthy meatless option.

Conclusion

You'll love these tasty turkey lettuce wraps! They're quick, easy, and packed with flavor. The crisp lettuce leaves make the perfect vehicle for the juicy turkey and fresh veggies. Wrap 'em up and enjoy a delicious, healthy meal that's sure to satisfy. These wraps are a crowd-pleaser, so give them a try – you won't be disappointed!

Continue Reading
Advertisement

Graduations/Birthdays

Fruit-Infused Water

Alluring and hydrating, fruit-infused water offers a refreshing twist on plain H2O, providing a delightful blend of flavors and health benefits. Discover how to create your own unique concoction.

Published

on

refreshing flavored hydration drink

Fruit-infused water is a delightful and healthy beverage that's captivated health-conscious folks for ages. Ancient Egyptians added citrus slices to their water, while Greeks steeped herbs and flowers for fragrant drinks. Over time, the introduction of new fruits from global trade routes expanded the flavor possibilities. Today, fruit-infused water is loved for its refreshing taste, vibrant colors, and impressive wellness benefits – it promotes hydration, provides vitamins and antioxidants, and even aids digestion. All you need is some fresh fruit, cold water, and a little patience to create your own custom thirst-quenching treat. Keep reading to discover more tasty details!

Key Takeaways

  • Fruit-infused water is a beverage made by steeping sliced fresh fruits in water, providing a flavorful and hydrating alternative to plain water.
  • The history of fruit-infused water dates back to ancient civilizations, where it was used for refreshment and showcasing wealth.
  • Fruit-infused water can be prepared by combining sliced fruits with cold water, refrigerating for 2-24 hours, and serving chilled over ice.
  • Fruit-infused water offers a variety of flavor profiles, allowing for creative combinations of citrus, berries, herbs, and tropical fruits.
  • Consuming fruit-infused water can promote hydration, provide vitamins and antioxidants, and support weight management by reducing the intake of sugary beverages.

History

The concept of infusing water with fresh fruit dates back centuries, with various cultures around the world incorporating this practice into their culinary traditions.

In ancient Egypt, people would add slices of citrus fruits to their drinking water to make it more refreshing. Similarly, in ancient Greece, they'd steep herbs and flowers in water to create fragrant and flavorful beverages.

Moving forward, the popularity of fruit-infused water grew, particularly in Europe during the Middle Ages. Nobles would often serve these infusions at elaborate feasts, showcasing their wealth and sophistication.

As trade routes expanded, new fruits and flavors were introduced, allowing people to experiment and create unique infusions.

Today, fruit-infused water remains a beloved and versatile drink, enjoyed for its health benefits, refreshing taste, and beautiful presentation.

Advertisement

Whether you're looking to stay hydrated, add a touch of natural sweetness, or simply enjoy a colorful and aromatic beverage, the history of fruit-infused water is sure to inspire your next glass.

Recipe

Fruit-infused water is a refreshing and healthy way to stay hydrated throughout the day. The natural sweetness of the fruit combined with the crisp taste of water creates a delightful flavor profile that can be customized to suit individual preferences.

Preparing fruit-infused water is a simple and straightforward process that allows for endless flavor combinations. Whether you prefer a citrusy blend or a more subtle, floral infusion, the versatility of this beverage makes it a perfect choice for any occasion.

  • 1 pitcher or large water bottle (approximately 64 oz)
  • 2-3 cups of mixed fruit (e.g., sliced strawberries, lemon or lime wedges, orange slices, cucumber, mint leaves)
  • 8 cups of cold water

In a pitcher or large water bottle, combine the desired fruit and water. Gently stir to ensure the fruit is evenly distributed. Refrigerate for at least 2 hours, or up to 24 hours, to allow the flavors to infuse. The longer the water infuses, the more pronounced the fruit flavors will be. Serve chilled and enjoy the refreshing, naturally flavored water.

When making fruit-infused water, it's important to use fresh, ripe fruit for the best flavor. Experiment with different fruit combinations to find your personal favorite. Remember to replenish the water as needed and to enjoy your creation within 2-3 days for maximum freshness.

Cooking Steps

Slice your favorite fruits and add them to a pitcher of water.

Advertisement

Pop it in the fridge for at least 2 hours so the flavors can blend.

Don't forget to give it a stir every so often!

Serve the refreshing fruit-infused water over ice and enjoy the delightful, infused taste.

Step 1. Slice Fruit and Add to Water

slice fruit add water

Gather your choice of fresh, vibrant fruit and a pitcher or large jar. Decide on the flavors you'd like to create, whether it's a combination of citrus, berries, or tropical fruits.

Grab a cutting board and a sharp knife, and start slicing your fruit into thin, even pieces. Take care to avoid any bruising or damage to the delicate flesh.

As you add the sliced fruit to the water, be mindful of the proportions. A good rule of thumb is to use about 2 cups of fruit per 1 quart of water.

Advertisement

Gently stir the mixture, ensuring the fruit is fully submerged. Cover the pitcher or jar and let it sit in the refrigerator for at least 2 hours, allowing the flavors to infuse the water. The longer it steeps, the more pronounced the flavor will be.

When ready to serve, use a ladle to pour the fruit-infused water into glasses, making sure to include a few slices of fruit in each pour.

Enjoy this refreshing and healthy beverage throughout the day, and feel free to experiment with different fruit combinations to find your perfect blend.

Step 2. Refrigerate for at Least 2 Hours

chill for two hours

Once you've added the sliced fruit to the water, it's time to let the flavors infuse. Place the pitcher or container in the refrigerator and let it chill for at least 2 hours. This time is crucial for the fruit's natural sweetness and aroma to permeate the water, creating a refreshing and delightful beverage.

As the water chills, the fruit slowly releases its oils and juices, infusing the water with a vibrant and natural flavor. The longer you let it sit, the more intense the fruit flavor will become. Two hours is the minimum, but you can leave it in the fridge for up to 8 hours or even overnight for a stronger taste.

Be patient and resist the temptation to pour a glass right away. The wait is worth it, as the fruit-infused water will be bursting with flavor and perfectly chilled, ready to quench your thirst and delight your taste buds.

Advertisement

Enjoy the refreshing and healthy treat you've created!

Step 3. Stir Periodically for Flavors to Blend

stir occasionally for flavor

After letting the fruit-infused water chill in the fridge for at least 2 hours, it's time to give it a gentle stir. This simple step helps the flavors blend together, creating a more harmonious and delightful taste. Grab a spoon and give the pitcher or jar a few slow, easy stirs.

You'll notice the water taking on a deeper, more intense fruit flavor as the ingredients mingle and infuse. Stirring periodically is key to ensuring all the fruit's essences fully infuse into the water. This brings out the best possible flavor.

Don't be afraid to give it a good stir every 30 minutes or so while it's chilling. The more you stir, the more robust the fruit flavors will become. After a couple hours, the water should be beautifully flavored and ready to serve.

Enjoy your refreshing, homemade fruit-infused water!

Step 4. Serve Chilled Over Ice

chill and serve over ice

Once the fruit-infused water has been properly stirred, it's time to serve it chilled over ice.

You'll want to grab some ice cubes and fill up a tall glass or pitcher. Carefully pour the colorful, fragrant water over the ice, letting it chill to the perfect temperature. The ice will help to lock in all those amazing fruit flavors, creating a refreshing and invigorating drink.

Advertisement

Additionally, staying hydrated with delicious beverages like fruit-infused water can enhance your overall wellness, as hydration plays a key role in maintaining cognitive function and mood enhancement, as noted in coffee's health benefits.

Serve the fruit-infused water immediately, while it's nice and cold. You can even add a few extra slices of fruit to the glass for a beautiful presentation.

The chilled water will be incredibly thirst-quenching and perfect for a hot day. Sip slowly and savor the sweet, fruity notes. This easy-to-make beverage is sure to delight your taste buds and keep you hydrated.

Enjoy your delicious, homemade fruit-infused water!

Step 5. Enjoy Refreshing Fruit-Infused Water

refreshing fruit infused hydration

Enjoy the refreshing fruit-infused water you've created. Take a sip and savor the burst of fruity flavors. The combination of fresh fruits, herbs, and water creates a delightful and healthy beverage that's perfect for any time of day.

Whether you're relaxing on a warm afternoon or need a pick-me-up, this fruit-infused water is sure to quench your thirst and delight your taste buds.

Advertisement

The vibrant colors and natural sweetness of the fruits make this drink visually appealing and incredibly refreshing. Experiment with different fruit combinations to find your favorite blend.

Try adding a squeeze of citrus, a few sprigs of mint, or even some sliced cucumber for an extra layer of flavor. The possibilities are endless, so have fun and get creative!

Sip slowly and savor each refreshing gulp. The fruit-infused water is a simple yet impressive way to stay hydrated and enjoy the natural flavors of the season.

Enjoy this wholesome and flavorful beverage anytime, anywhere.

Final Thoughts

Fruit-infused water is a refreshing and healthy way to stay hydrated. With its vibrant colors and delightful flavors, it's no wonder why so many people are falling in love with this tasty trend.

Advertisement

Whether you're looking to switch up your daily hydration routine or simply want to enjoy a delightful treat, fruit-infused water is a fantastic option.

As you continue on your journey of exploring the world of fruit-infused water, remember to have fun and get creative.

Try different combinations of fruits, herbs, and even vegetables to find your perfect blend. Don't be afraid to experiment and discover new favorite flavors.

The beauty of this refreshing drink is that the possibilities are endless.

Frequently Asked Questions

How Long Does Fruit-Infused Water Last in the Refrigerator?

The shelf life of fruit-infused water depends on the ingredients. It'll typically last 3-5 days in the fridge, but some fruits may cause it to spoil faster. Be sure to discard it if it smells or looks off.

Advertisement

Can I Use Frozen Fruit for Fruit-Infused Water?

Yes, you can use frozen fruit for your infused water. Frozen fruit can provide similar flavors and benefits as fresh fruit. Just add it directly to your water and let it infuse for best results.

Is Fruit-Infused Water Good for Weight Loss?

Drinking fruit-infused water can support weight loss, as it provides hydration without added sugars or calories found in other beverages. The fruit adds natural sweetness and flavor, making it a healthy alternative to sugary drinks.

What Are the Best Fruits to Use for Infused Water?

The best fruits for infused water are ones that are crisp, lightly sweet, and low in sugar. Citrus fruits like lemon, lime, and orange work well, as do berries and melons. Experiment to find your favorite flavor combinations.

Can I Reuse the Fruit in My Infused Water?

You can reuse the fruit in your infused water, but the flavor will become weaker with each use. To maintain the best flavor, it's generally recommended to replace the fruit after one or two uses.

Conclusion

You'll love sipping on this refreshing fruit-infused water! It's a delightful and healthy way to enjoy the natural flavors of your favorite fruits. Whether you're relaxing on a warm day or looking for a tasty beverage, this recipe is sure to satisfy. Give it a try, and you'll be hooked on this vibrant and invigorating drink!

Advertisement
Continue Reading

Graduations/Birthdays

Roasted Chickpeas

Nutritious and delightfully crunchy, roasted chickpeas are a must-try snack that’ll leave you craving more. Discover the endless possibilities of this versatile ingredient.

Published

on

crispy flavorful roasted legumes

Roasted chickpeas are a must-try snack that'll have your taste buds dancing! Did you know these delightful little legumes have been around for over 7,000 years? Originating in the Middle East, they're a staple in cuisines worldwide. Packed with protein and fiber, they make a nutritious alternative to typical salty snacks. Simply toss chickpeas in olive oil and your favorite spices, then roast until perfectly crispy. The possibilities are endless – try sweet and spicy variations or use them to add crunch to salads and soups. Once you try homemade roasted chickpeas, you'll be hooked! And there's more to discover about this versatile ingredient…

Key Takeaways

  • Roasted chickpeas are a high-protein, low-calorie snack that can be prepared by tossing chickpeas in oil and seasonings, then baking until crisp.
  • Chickpeas are a nutrient-dense ingredient, providing fiber, protein, and essential vitamins and minerals, making them a healthy snacking option.
  • The roasting process enhances the natural nutty flavor of chickpeas and creates a satisfying crunchy texture, making them a versatile ingredient.
  • Roasted chickpeas can be customized with various spice blends and flavor profiles, from savory to sweet, to suit personal taste preferences.
  • Roasted chickpeas can be enjoyed as a standalone snack, or incorporated into salads, soups, and grain bowls for added texture and nutrition.

History

Chickpeas, also known as garbanzo beans, have been a staple in Middle Eastern and Mediterranean cuisines for over 7,000 years. These nutritious legumes were first cultivated in the Middle East, with evidence of their use found in ancient Egyptian and Mesopotamian settlements.

Over time, they spread throughout the region, becoming a beloved ingredient in traditional dishes like hummus, falafel, and curries.

Roasting chickpeas is a simple and delicious way to enjoy their nutty flavor and crunchy texture. This preparation method has been practiced for centuries, with variations emerging across different cultures.

In the Middle East, roasted chickpeas are often seasoned with spices like cumin, paprika, or coriander, while in the Mediterranean, they may be flavored with herbs like rosemary or thyme.

The popularity of roasted chickpeas has continued to grow, as people around the world discover the joy of this versatile and healthy snack.

Advertisement

Whether enjoyed on their own or incorporated into salads, soups, or other dishes, roasted chickpeas offer a satisfying and nutritious culinary experience.

Recipe

Roasted chickpeas make for a delightful and nutritious snack or addition to salads and bowls. With a simple preparation, you can enjoy the satisfying crunch and bold flavors of this versatile legume. The process of roasting chickpeas brings out their natural nuttiness and unlocks a range of culinary possibilities. Incorporating chickpeas into your diet can also provide a great source of protein and fiber, making them an excellent choice for a low carb high protein breakfast option.

Roasting chickpeas is an easy and straightforward task that can be tailored to suit your taste preferences. Whether you prefer a touch of spice, a hint of herbs, or a classic seasoning blend, the following recipe provides a solid foundation to explore the world of roasted chickpeas.

  • 1 (15-ounce) can chickpeas, drained and rinsed
  • 1 tablespoon olive oil
  • 1 teaspoon ground cumin
  • 1/2 teaspoon paprika
  • 1/4 teaspoon garlic powder
  • 1/4 teaspoon salt
  • 1/8 teaspoon black pepper

Preheat your oven to 400°F (200°C). Drain and rinse the chickpeas, then pat them dry with a paper towel or clean kitchen towel. In a mixing bowl, toss the chickpeas with the olive oil, cumin, paprika, garlic powder, salt, and black pepper until evenly coated.

Spread the seasoned chickpeas in a single layer on a baking sheet lined with parchment paper. Roast for 20-25 minutes, stirring halfway, until the chickpeas are golden brown and crispy.

Once the roasted chickpeas have cooled slightly, you can enjoy them as a snack or incorporate them into your favorite dishes. The crunchy texture and bold flavors make them a versatile ingredient that can elevate a simple salad, add a satisfying crunch to grain bowls, or even be enjoyed on their own as a guilt-free treat.

Advertisement

Experiment with different spice blends and seasonings to find your perfect roasted chickpea flavor profile.

Cooking Steps

First, you'll need to drain the chickpeas and pat them dry with a paper towel.

Next, toss the chickpeas with a bit of oil and your favorite seasonings.

Then, spread the seasoned chickpeas out evenly on a baking sheet.

Bake them at 400°F for 20 minutes, flip them, and bake for an additional 10 minutes.

Advertisement

Get ready for deliciously crispy roasted chickpeas!

Step 1. Drain and Pat Chickpeas Dry

drain and dry chickpeas

After opening the can, drain the chickpeas in a colander. Make sure to let any excess liquid drip off.

Next, grab a clean paper towel or cloth and gently pat the chickpeas dry. You want to remove as much moisture as possible. This step is crucial for ensuring your chickpeas get nice and crispy when you roast them.

Once the chickpeas are dry, transfer them to a baking sheet. Spread them out in a single layer so they've plenty of room to roast evenly. Resist the urge to overcrowd the pan – you want hot air to circulate around each chickpea.

Now they're ready for the next step: tossing them in oil and seasonings! This will bring out their delicious nutty flavor.

Get excited, because roasted chickpeas make a fantastic crunchy snack or tasty topping for salads and soups. With just a little prep work, you're on your way to enjoying these crispy, flavorful bites.

Advertisement

Step 2. Toss With Oil and Seasonings

toss ingredients with oil

With the chickpeas now dried, it's time to toss them with oil and seasonings. You'll want to add just enough oil to lightly coat the chickpeas, usually around 1-2 tablespoons.

Then, sprinkle on your favorite spices and herbs. Try a mix of garlic powder, paprika, cumin, and a pinch of salt and pepper. The key is to use spices you love to create a flavor profile you enjoy.

Once the oil and seasonings are added, use your hands or a spoon to toss the chickpeas until they're evenly coated. Make sure each chickpea gets a little bit of the delicious seasoning mixture.

This step is important because it's what'll give your roasted chickpeas that amazing flavor. Take your time and thoroughly mix everything together.

With the chickpeas now seasoned and ready, it's time to pop them in the oven and let the roasting begin!

Step 3. Spread Evenly on Baking Sheet

spread mixture on sheet

To begin the cooking steps, spread the seasoned chickpeas out in a single layer on a large baking sheet.

You'll want to make sure the chickpeas are spaced apart, not piled on top of each other. This will help them roast evenly and get nice and crispy.

Advertisement

Next, pop the baking sheet into your preheated oven. Roast the chickpeas for 15-20 minutes, giving the pan a gentle shake halfway through.

Keep an eye on them, as you don't want the chickpeas to burn. They're ready when they're golden brown and slightly shrunken in size.

Once they're perfectly roasted, carefully remove the baking sheet from the oven.

Allow the chickpeas to cool for a few minutes before giving them a taste. You'll be amazed at how flavorful and crunchy they are!

Now, you can enjoy your homemade roasted chickpeas as a tasty, healthy snack. They're great on their own or tossed into salads and other dishes.

Advertisement

Step 4. Bake at 400°F for 20 Minutes

bake 400 f for 20 minutes

Next, preheat your oven to 400°F. Once your oven is ready, it's time to bake those delicious chickpeas! Carefully spread the chickpeas out in a single layer on the prepared baking sheet. This will ensure they cook evenly.

Now, pop the sheet into the preheated oven. Set a timer for 20 minutes and let the chickpeas work their magic. The high heat will transform the chickpeas, making them crispy and golden brown.

As they bake, the aroma will fill your kitchen, teasing your senses. Keep an eye on the chickpeas towards the end of the baking time. You want them to be crispy, but not burnt.

Once the timer goes off, use oven mitts to remove the baking sheet from the oven. Allow the chickpeas to cool slightly before enjoying their delightful crunch.

These roasted chickpeas make a fantastic snack or addition to salads and other dishes. Get ready for a tasty treat!

Step 5. Flip Chickpeas and Bake Additional 10 Minutes

flip and bake chickpeas

After the first 20 minutes, carefully remove the baking sheet from the oven. The chickpeas should be starting to turn golden brown.

Now, it's time to flip them over to ensure they cook evenly. Using a spatula, gently turn each chickpea so the uncooked side is facing up. Take care not to let any chickpeas fall off the baking sheet.

Advertisement

Once all the chickpeas are flipped, slide the baking sheet back into the oven. Set the timer for an additional 10 minutes. During this time, the chickpeas will continue to roast and develop a delicious, crispy texture.

Keep a close eye on them to prevent burning. The chickpeas are ready when they're golden brown all over and slightly shrunken in size.

Remove the baking sheet from the oven and let the chickpeas cool for a few minutes before serving.

Now, you have a tasty, crunchy snack to enjoy! The flipping and additional baking time ensures your roasted chickpeas are perfectly cooked.

Final Thoughts

Roasted chickpeas make for a fantastic snack or addition to meals. They're crunchy, flavorful, and oh-so-satisfying!

Advertisement

Now that you've mastered the art of roasting these little legumes to perfection, you can experiment with all sorts of seasonings and spices. Try a sprinkle of smoked paprika for a savory kick, or a dash of cinnamon and a pinch of sugar for a sweet and spicy twist. You can even mix things up by tossing the roasted chickpeas into salads, soups, or grain bowls for added texture and nutrition. The possibilities are endless!

The best part is that roasted chickpeas are super easy to make and incredibly versatile. Whether you're looking for a healthy snack to fuel your day or a tasty topping to elevate your meals, these little gems are sure to become a staple in your kitchen.

Frequently Asked Questions

How Long Do Roasted Chickpeas Last?

You can enjoy the roasted chickpeas for up to a week when stored properly in an airtight container at room temperature. Their shelf-life may vary depending on the ingredients and storage conditions, so it's best to keep an eye on their freshness.

Can I Use Canned Chickpeas for This Recipe?

Yes, you can use canned chickpeas for this recipe. Canned chickpeas are already cooked, so you don't need to soak or boil them before roasting. Just drain and pat them dry before tossing with oil and seasonings.

Are Roasted Chickpeas Good for Weight Loss?

Roasted chickpeas can be a great snack for weight loss. They're high in protein and fiber, which can help keep you feeling full. Just be mindful of portion sizes, as they're still a source of calories.

Advertisement

Can I Make Roasted Chickpeas in an Air Fryer?

You can definitely make roasted chickpeas in an air fryer. The air fryer's high heat and circulating air will give the chickpeas a crispy texture without the need for excess oil. It's a healthy and convenient way to enjoy this snack.

How Can I Make Roasted Chickpeas More Flavorful?

To make your roasted chickpeas more flavorful, try adding spices like cumin, garlic powder, or paprika. You can also toss them in a bit of olive oil and seasonings before air frying for extra flavor.

Conclusion

Roasted chickpeas are a delightful, crunchy snack that'll have you coming back for more! They're a cinch to make, and you can customize the flavors to your taste. Pop 'em in your mouth, and let the satisfying crunch and savory spices transport you to snack heaven. Trust us, once you start, you won't be able to stop. So, what are you waiting for? Get roasting and enjoy the deliciousness!

Continue Reading

Graduations/Birthdays

Cucumber Sandwiches

Timeless and sophisticated, cucumber sandwiches have graced the tables of the British elite for generations, offering a delightful and refreshing culinary experience. Discover their rich history and how to perfect this classic treat.

Published

on

delicate cucumber finger sandwiches

You'll love the rich history behind cucumber sandwiches! These dainty treats have been beloved by the British upper class for centuries, symbolizing refined sophistication at afternoon teas and garden parties. To make them, you'll need fresh white bread, crisp cucumber slices, and a creamy spread. Layer the ingredients neatly, then cut the sandwiches into quarters for an elegant presentation. Chilling them before serving enhances their refreshing flavor. Cucumber sandwiches make a delightful and healthy snack, perfect for any gathering. Keep reading to discover more about their cultural significance and how to prepare them perfectly.

Key Takeaways

  • Cucumber sandwiches have origins in British aristocratic culture and were popularized in the 19th century as a symbol of refinement and leisure.
  • Cucumber sandwiches are a staple in British afternoon tea traditions, often associated with social events and gatherings.
  • The recipe includes fresh white bread, thinly sliced cucumbers, and optional ingredients like cream cheese, herbs, and seasonings.
  • Proper preparation involves evenly spreading cream cheese on the bread, neatly layering cucumber slices, and cutting the sandwiches into quarters or triangles.
  • Cucumber sandwiches offer a light and refreshing option, providing nutritional benefits from the low-calorie cucumber and potential whole grain bread.

History

Although the precise origins of cucumber sandwiches remain uncertain, they've long been associated with British aristocratic culture.

These delicate finger sandwiches were once a staple at high tea and garden parties, enjoyed by the upper class as a refreshing treat. The cool, crisp cucumber perfectly complemented the soft, pillowy bread, creating a delightful contrast in both texture and flavor.

Cucumber sandwiches gained popularity in the 19th century, when the upper echelons of society embraced this simple yet elegant dish. It became a symbol of refinement and leisure, a way for the privileged to showcase their discerning tastes.

As the trend spread, these sandwiches became a hallmark of polite socializing, gracing the tables of grand country estates and elegant drawing rooms.

Today, cucumber sandwiches continue to evoke a sense of timeless sophistication, reminding us of a bygone era of gentility and proper etiquette.

Advertisement

While their origins may remain a mystery, their enduring appeal is undeniable.

Recipe

Cucumber sandwiches are a classic British tea-time treat. These delicate, refreshing sandwiches are perfect for a summer garden party or an afternoon of relaxation. The key to making the perfect cucumber sandwich lies in the selection and preparation of the ingredients.

First and foremost, choose the freshest and crispest cucumbers you can find. Avoid watery or overly mature cucumbers, as they can make the sandwiches soggy. Additionally, it's important to slice the cucumbers thinly and evenly to ensure a delicate texture.

  • 8 slices of fresh white bread
  • 1 large cucumber, peeled and thinly sliced
  • 2 tablespoons unsalted butter, softened
  • 2 tablespoons cream cheese, softened
  • 1 tablespoon chopped fresh dill (optional)
  • Salt and white pepper to taste

To assemble the sandwiches, lightly butter the bread slices. Spread a thin layer of cream cheese on half of the slices, and arrange the cucumber slices on top. Sprinkle with a pinch of salt, white pepper, and fresh dill (if using). Top with the remaining bread slices to create the sandwiches.

When serving, it's essential to remove the crusts from the sandwiches for a delicate, traditional presentation. Additionally, consider cutting the sandwiches into quarters or triangles to make them bite-sized and easy to enjoy.

Serve the cucumber sandwiches chilled and accompany them with a refreshing beverage, such as iced tea or lemonade, for a perfect afternoon delight.

Advertisement

Cooking Steps

First, you'll need to thinly slice the cucumber using a sharp knife or a mandoline slicer.

Next, spread the bread with a generous layer of creamy, tangy cream cheese.

Then, neatly arrange the cucumber slices on top of the cream cheese, and finish it off with a sprinkle of your favorite seasoning.

Step 1. Thinly Slice the Cucumber

thinly slice cucumber slices

To thinly slice the cucumber, you'll want to use a sharp knife or a mandoline slicer. This is an important step, as you'll want the cucumber slices to be thin and even, so they'll fit nicely on your sandwich.

Start by rinsing the cucumber under cool water and patting it dry with a paper towel. Then, place it on a cutting board and hold it steady with one hand.

Using your other hand, carefully slide the knife or mandoline slicer down the length of the cucumber, creating thin, uniform slices. Try to keep the slices around 1/8 inch thick, as this will give you the perfect texture for your cucumber sandwiches.

Advertisement

Be sure to work slowly and safely, keeping your fingers tucked back to avoid any accidental cuts. With a little practice, you'll be slicing cucumbers like a pro in no time!

Step 2. Spread Bread With Cream Cheese

spread cream cheese evenly

Next, spread a layer of cream cheese onto the slices of bread. Use a butter knife to evenly coat each slice, from corner to corner.

The cool, creamy texture of the cheese will provide a perfect contrast to the crisp, fresh cucumber slices. Be generous with the amount of cream cheese, as it'll help hold the sandwich together and add a delightful creaminess in every bite.

Take care to spread the cream cheese all the way to the edges of the bread. This ensures the cucumber slices will be fully supported and won't slide around.

Plus, it creates a neat, professional-looking sandwich. Once both slices are coated, you're ready to start assembling your cucumber sandwiches.

The cream cheese acts as the "glue" to hold everything in place, so the cucumbers stay put between the bread.

Advertisement

Step 3. Layer Cucumber Slices

layer cucumber slices now

With the cream cheese spread evenly across the bread, it's time to start assembling the cucumber sandwiches.

Grab the fresh cucumber and slice it into thin, even pieces. Make sure the slices aren't too thick, as you want them to layer nicely on the bread.

Arrange the cucumber slices in a single layer, overlapping slightly, covering the entire surface of the cream cheese. Be careful not to let the slices hang over the edges, as you want a neat, tidy presentation.

Once the cucumber is layered, gently press down on the slices to help them adhere to the cream cheese. This will prevent the slices from sliding around when you take a bite.

If you have any gaps or spaces, simply add a few more slices to fill them in.

Step 4. Top With Seasoning

add your favorite spices

Seasoning the cucumber slices is the final touch that elevates these delightful sandwiches. Start by sprinkling a light layer of salt and pepper over the slices. The salt brings out the natural flavors of the cucumber, while the pepper adds a subtle kick.

If you prefer a little extra zing, try a sprinkle of dried dill or a squeeze of fresh lemon juice.

Advertisement

Next, consider adding a pinch of garlic powder or onion powder for an extra layer of flavor. These seasonings complement the cool, refreshing cucumber perfectly.

Be careful not to overdo it, though – you want the cucumber to shine, not be overpowered.

Once you've seasoned the slices to your liking, give them a gentle pat to help the seasonings adhere.

Now they're ready to be assembled into your delectable cucumber sandwiches! The combination of cool, crisp cucumber and flavorful seasonings is sure to delight your taste buds.

Step 5. Cut Diagonally in Half

cut diagonally in half

After seasoning the cucumber slices, it's time to cut them diagonally in half. This simple step will create a lovely presentation for your cucumber sandwiches.

Grab a sharp knife and gently place a cucumber slice on your cutting board. Carefully slide the knife through the center of the slice, angling it slightly to create two triangular halves. Repeat this process with each cucumber slice, working slowly and deliberately to ensure clean, even cuts.

Advertisement

The diagonal halves not only look beautiful, but they also make the cucumber slices easier to handle when assembling your sandwiches. The triangle shape allows the cucumber to nestle perfectly onto the bread, creating a visually appealing and delicious result.

Be sure to cut all the slices in the same direction for a consistent look. With the cucumbers neatly halved, you're one step closer to enjoying your freshly made cucumber sandwiches.

Get ready to impress your guests with this simple yet elegant presentation.

Final Thoughts

Ultimately, cucumber sandwiches are a delightful and refreshing option for any occasion. These crisp, cool bites offer a burst of flavor and a satisfying crunch that's perfect for summer gatherings or light lunches.

Whether you prefer them cut into triangles or pinwheels, the simplicity of the cucumber, paired with a creamy spread, creates a harmonious blend of textures and tastes.

Advertisement

Beyond their taste, cucumber sandwiches are also a versatile choice. They can be easily customized to suit different dietary needs or personal preferences.

Swap out the traditional cream cheese for a vegan or dairy-free alternative, or experiment with various herbs and seasonings to add a unique twist.

Most importantly, cucumber sandwiches bring a sense of joy and relaxation to any eating experience. Their refreshing nature and delicate presentation make them the perfect accompaniment to a leisurely afternoon or a casual get-together with friends.

Indulge in the simple pleasures of this timeless treat and savor the delightful flavors of the cucumber sandwich.

Frequently Asked Questions

What Is the Best Bread to Use for Cucumber Sandwiches?

You'll want a light, soft, and delicate bread for cucumber sandwiches. Avoid dense or hearty breads that could overwhelm the cucumber's flavor. Opt for thinly sliced white, whole wheat, or brioche bread to create the perfect bite-sized snack.

Advertisement

Can I Make Cucumber Sandwiches in Advance?

You can make cucumber sandwiches in advance, but they won't stay crisp for long. To keep them fresh, assemble them just before serving or line the bread with a thin layer of butter or cream cheese to create a barrier.

Do I Need to Peel the Cucumbers?

You don't necessarily need to peel the cucumbers, but it's a matter of personal preference. Some people prefer the texture and flavor of peeled cucumbers, while others enjoy the added crunch and nutrients from leaving the skin on.

How Do I Prevent the Bread From Getting Soggy?

To prevent the bread from getting soggy, you can lightly toast the bread, spread a thin layer of butter or cream cheese on the bread, and assemble the sandwich just before serving.

Can I Add Other Vegetables to Cucumber Sandwiches?

Yes, you can add other vegetables to your sandwiches. Experiment with thinly sliced tomatoes, bell peppers, or radishes for extra crunch and flavor. Just be sure not to overload the bread, or it may become soggy.

Conclusion

Cucumber sandwiches are a timeless classic that'll delight your senses. The cool, crisp veggies and soft, pillowy bread create a harmonious balance of flavors and textures. Whether you're hosting a garden party or simply craving a refreshing snack, these sandwiches are sure to hit the spot. Go on, give 'em a try – you won't be disappointed!

Advertisement
Continue Reading
Advertisement

Affiliate Disclaimer
As an affiliate, we may earn a commission from qualifying purchases. We get commissions for purchases made through links on this website from Amazon and other third parties.

Advertisement

Latest

tender prime rib delight tender prime rib delight
Christmas Recipes45 seconds ago

Prime Rib Roast With Au Jus

You'll be swept away by the mouthwatering prime rib roast with its irresistible au jus, a savory and tender masterpiece...

refreshing flavored hydration drink refreshing flavored hydration drink
Graduations/Birthdays3 hours ago

Fruit-Infused Water

Alluring and hydrating, fruit-infused water offers a refreshing twist on plain H2O, providing a delightful blend of flavors and health...

crispy flavorful roasted legumes crispy flavorful roasted legumes
Graduations/Birthdays3 hours ago

Roasted Chickpeas

Nutritious and delightfully crunchy, roasted chickpeas are a must-try snack that'll leave you craving more. Discover the endless possibilities of...

delicate cucumber finger sandwiches delicate cucumber finger sandwiches
Graduations/Birthdays3 hours ago

Cucumber Sandwiches

Timeless and sophisticated, cucumber sandwiches have graced the tables of the British elite for generations, offering a delightful and refreshing...

nutritious vegetable muffins recipe nutritious vegetable muffins recipe
Graduations/Birthdays3 hours ago

Veggie-Packed Muffins

Yield to the temptation of these nutrient-dense veggie-packed muffins, a delightful way to sneak more greens and goodness into your...

layered greek yogurt dessert layered greek yogurt dessert
Graduations/Birthdays3 hours ago

Greek Yogurt Parfaits

Your taste buds will be tantalized by the layers of creamy Greek yogurt, sweet berries, and crunchy granola in these...

crispy oven baked sweet potatoes crispy oven baked sweet potatoes
Graduations/Birthdays3 hours ago

Baked Sweet Potato Chips

Guilt-free and nutritious, baked sweet potato chips trace their roots back over 5,000 years and offer a mouthwatering alternative to...

healthy turkey lettuce wraps healthy turkey lettuce wraps
Graduations/Birthdays3 hours ago

Turkey Lettuce Wraps

Mouth-watering turkey lettuce wraps are a delightful dish that's both healthy and customizable, perfect for...

spicy cauliflower chicken alternative spicy cauliflower chicken alternative
Graduations/Birthdays4 hours ago

Cauliflower Buffalo “Wings”

Savor the spicy, crispy cauliflower "wings" that deliver big on flavor while keeping things guilt-free. Discover this modern take on...

healthy zucchini pizza bites healthy zucchini pizza bites
Graduations/Birthdays4 hours ago

Zucchini Pizza Bites

Nourish your pizza cravings guilt-free with zucchini pizza bites - a low-carb, veggie-packed twist on a classic that will have...

vegetarian sushi roll delights vegetarian sushi roll delights
Graduations/Birthdays4 hours ago

Veggie Sushi Rolls

Achieving sushi heaven with crunchy, colorful veggies in these homemade veggie sushi rolls - a delightful twist on traditional Japanese...

sweet dessert hummus recipe sweet dessert hummus recipe
Graduations/Birthdays4 hours ago

Birthday Cake Batter Hummus

Knowing the secret behind this one-of-a-kind birthday cake-inspired hummus will have your taste buds doing cartwheels.

Advertisement

Trending