
Banana pudding is a delightful Southern classic that's been around since the 19th century! Cooks used abundant local bananas to craft this creamy, comforting dessert that quickly became a staple at family gatherings and community celebrations. The main ingredients include sliced bananas, sweetened condensed milk, whole milk, flour, and egg yolks. You layer these with vanilla wafers, then top it all off with whipped cream for an irresistible texture and flavor. Chilling the pudding brings out the best in this nostalgic treat. If you're curious to learn more about this beloved dessert, keep reading!
Key Takeaways
- Banana pudding is a classic Southern dessert originating in the 19th century, featuring layers of bananas, custard, and vanilla wafers.
- The dish became popular for its comforting flavors and creamy texture, often associated with family gatherings and celebrations.
- The main ingredients include ripe bananas, sweetened condensed milk, whole milk, flour, and egg yolks, resulting in a silky custard.
- Banana pudding can be garnished with toppings like toasted coconut, crunchy granola, or whipped cream for added texture and flavor.
- The dish holds cultural significance as a beloved American dessert, particularly in Southern cuisine and traditions.
Top picks for "banana pudd"
Open Amazon search results for this keyword.
As an affiliate, we earn on qualifying purchases.
History
According to historical accounts, banana pudding has its origins in the southern United States during the 19th century. This classic dessert was likely created by resourceful cooks who sought to make the most of the bountiful banana harvests in the region.
As bananas became more widely available, clever homemakers began incorporating them into beloved recipes, including the now-famous banana pudding.
The dish's popularity quickly spread, as families treasured the comforting flavors and creamy texture. Banana pudding became a staple at church potlucks, family gatherings, and community celebrations.
Over time, variations emerged, with some cooks adding meringue or incorporating vanilla wafers for a delightful crunch. Regardless of the specific recipe, banana pudding has remained a beloved southern tradition, a sweet reminder of simpler times and the joy of sharing food with loved ones.
Recipe
Banana pudding is a classic Southern dessert that combines the sweetness of ripe bananas, the creaminess of vanilla pudding, and the crunchiness of vanilla wafers. This timeless treat isn't only delicious but also easy to make, making it a perfect choice for any occasion.
Preparing banana pudding is a simple yet rewarding process that can be enjoyed by both novice and experienced home cooks. This dish is a versatile dessert that can be served chilled or at room temperature, making it a refreshing option during the warmer months or a comforting indulgence in the cooler seasons.
Ingredients:
- 5 medium-sized ripe bananas, sliced
- 1 (14 oz) can sweetened condensed milk
- 2 cups whole milk
- 2 tablespoons all-purpose flour
- 3 large egg yolks
- 1 teaspoon vanilla extract
- 1 (11 oz) box vanilla wafers
Cooking Instructions:
In a medium saucepan, whisk together the sweetened condensed milk, whole milk, flour, and egg yolks. Cook over medium heat, stirring constantly, until the mixture thickens and comes to a boil, about 8-10 minutes.
Remove from heat and stir in the vanilla extract. Allow the pudding to cool slightly.
Extra Tips:
For best results, layer the vanilla wafers, banana slices, and pudding in a serving dish, repeating the layers until all the ingredients are used.
Refrigerate the banana pudding for at least 2 hours before serving to allow the flavors to meld and the pudding to set. Top with additional vanilla wafers or a dollop of whipped cream, if desired. Enjoy this timeless Southern classic!
Cooking Steps
First, you'll need to mix up the sugar, cornstarch, and salt in a bowl.
Then, go ahead and add those sliced bananas right in.
Finally, pour in the milk and heat the whole mixture on the stove until it thickens.
Don't forget to chill the pudding before serving – it'll be even more delicious that way!
Step 1. Combine Sugar, Cornstarch, and Salt

Once you've gathered your ingredients, you'll need to combine the sugar, cornstarch, and salt in a medium saucepan. This step helps thicken the pudding and gives it a smooth, creamy texture.
Be sure to use a whisk to mix the dry ingredients together thoroughly. This ensures there are no lumps, and the cornstarch can do its job properly.
Next, you'll want to gradually whisk in the milk. Start by adding a little milk at a time, whisking constantly to prevent any clumps from forming.
Once all the milk is incorporated, place the saucepan over medium heat and continue whisking until the mixture thickens and starts to bubble. This should take around 5-7 minutes.
Patience is key here – don't be tempted to turn up the heat, as that can cause the pudding to curdle.
Keep whisking gently until you reach the perfect, velvety consistency. Then, you're ready for the next step!
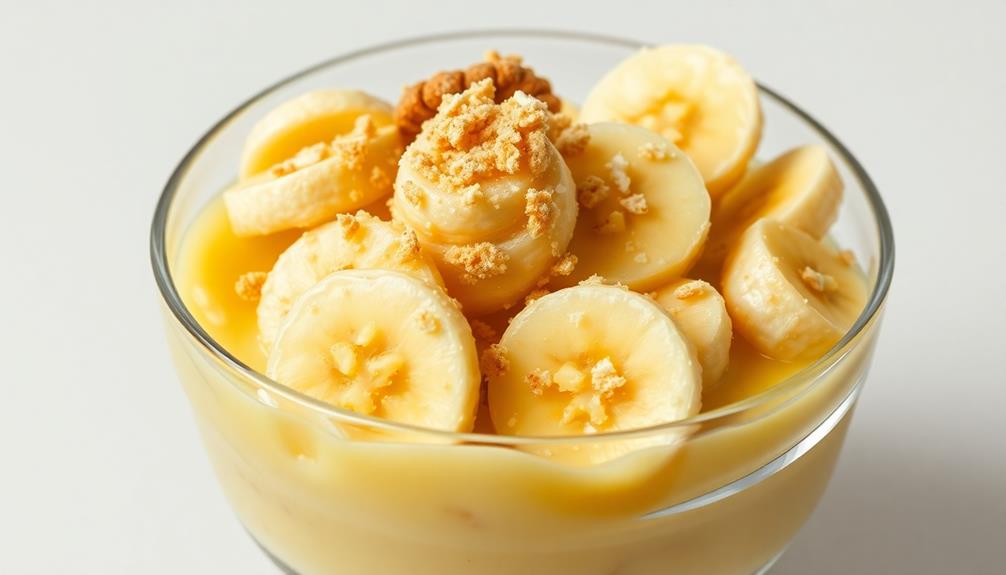
Step 2. Add Sliced Bananas

With the creamy pudding base ready, it's time to add the star of the show – sliced bananas.
Grab your freshest, ripest bananas and slice them into bite-sized rounds. The golden hue and sweet flavor of the bananas will be the perfect complement to the rich, vanilla-tinged pudding.
For an added twist, consider pairing your banana pudding with a creamy pasta dish to enhance the overall meal experience.
Gently fold the sliced bananas into the pudding, taking care not to mash them. You want to preserve the lovely banana shape and texture.
Evenly distribute the banana slices throughout the pudding, ensuring each spoonful has the perfect balance of banana and custard.
As the bananas mingle with the pudding, they'll lend their natural sweetness and create a heavenly fusion of flavors. To take this dessert to the next level, you can also add some diced strawberries and crushed pineapple to the mix. This will give the pudding a refreshing twist and enhance the overall taste. You can even use the leftover fruits to make a delicious fruit punch recipe for a complete and satisfying after-dinner treat.
The combination of silky pudding and tender banana slices is what makes this classic Southern dessert so irresistible.
Get ready to enjoy the ultimate in creamy, banana-y bliss!
Step 3. Pour in Milk
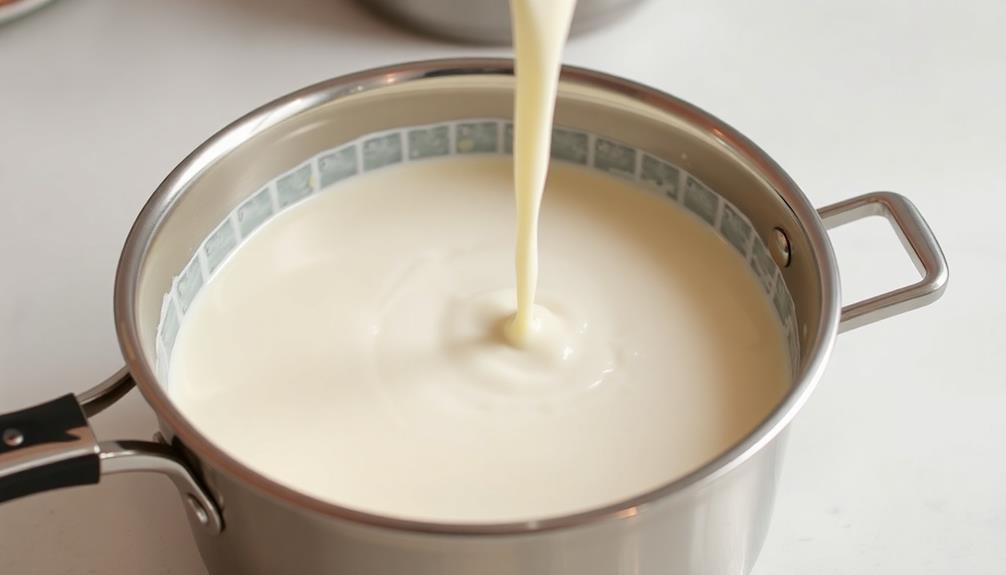
Next, pour in the milk, a crucial step in creating the perfect banana pudding base. Gently pour the cool, creamy milk into the bowl, stirring it into the sweetened condensed milk.
The milk helps to thin out the mixture, creating a smooth, velvety texture. Be sure to pour slowly, incorporating the milk bit by bit, until the consistency is just right. You want the pudding to be thick enough to coat the back of a spoon, but not too thick that it's difficult to stir.
Continue mixing until all the ingredients are well blended and the pudding has a uniform, creamy appearance. This step is essential for building the foundation of your delicious banana pudding.
Once the milk is incorporated, you're one step closer to enjoying the rich, indulgent flavors of this classic dessert.
Step 4. Heat Mixture on Stove

Now that you've incorporated the milk into the sweetened condensed milk, it's time to heat the mixture on the stove.
Place a medium saucepan on the stovetop over medium heat. Carefully pour the milk mixture into the pan, stirring constantly with a wooden spoon or whisk. As the mixture heats up, you'll notice it start to thicken. Keep stirring to prevent any lumps from forming.
The key is to heat the mixture gently, allowing it to come to a gentle simmer. This will help the flavors blend together and create a smooth, creamy texture. Be patient and keep a close eye on the pan, adjusting the heat as needed to maintain a gentle simmer.
Once the mixture has thickened to your desired consistency, remove the pan from the heat.
You're now ready to move on to the next step in creating your delicious banana pudding. Get ready to layer the custard with fresh banana slices and vanilla wafers!
Step 5. Chill Pudding Mixture Before Serving
After the pudding mixture has thickened on the stove, you'll want to chill it before assembling the final banana pudding. This helps the pudding set up and become the perfect creamy texture.
Simply pour the hot pudding into a large bowl and place it in the refrigerator. Let it cool for at least 2 hours, or until it's completely chilled. You can even make the pudding the day before and refrigerate it overnight. This makes assembling the banana pudding a breeze when you're ready to serve it.
Once the pudding is nice and cold, you can start layering it with bananas and vanilla wafers in a serving dish. Spread a layer of pudding in the bottom, then add a layer of sliced bananas and crushed vanilla wafers.
Repeat these layers until you reach the top of the dish. Finally, top it all off with a layer of the reserved whipped cream. Pop it back in the fridge until you're ready to enjoy this delicious, chilled banana pudding!
Final Thoughts
As you've mastered the art of crafting a delectable banana pudding, consider the countless ways you can savor its delightful flavors.
Whether you're hosting a gathering or treating yourself to a comforting dessert, this classic dish is sure to delight. Don't be afraid to experiment with different toppings, like toasted coconut or crunchy granola, to add a unique twist.
And, of course, don't forget the essential whipped cream – it's the perfect finishing touch to this creamy, indulgent treat.
As you dive into your freshly chilled banana pudding, let the flavors dance on your tongue.
Appreciate the contrast between the silky custard, the soft bananas, and the buttery wafers. Each bite is a symphony of textures and tastes, transporting you to a happy, nostalgic place.
Savor every spoonful and revel in the joy of homemade goodness. With this recipe in your repertoire, you'll be the talk of the town – or at least the star of your next family gathering.
Frequently Asked Questions
Is Banana Pudding Gluten-Free?
Whether banana pudding is gluten-free depends on the ingredients used. If it's made without any gluten-containing ingredients like flour, it can be a gluten-free dessert option. However, you'll want to check the recipe carefully to ensure all components are gluten-free.
Can I Substitute Other Fruits in Banana Pudding?
Absolutely! You can substitute other fruits in place of bananas in your pudding. Try using peaches, mangoes, or even berries for a delicious twist on the classic recipe. The possibilities are endless when it comes to customizing your banana pudding.
How Long Does Homemade Banana Pudding Last?
Homemade banana pudding will typically last 3-4 days when stored in the refrigerator. Be sure to keep it covered to prevent it from drying out or absorbing other flavors. Enjoy your pudding while it's fresh for the best taste and texture.
Can I Make Banana Pudding Ahead of Time?
You certainly can make banana pudding ahead of time. It'll last in the fridge for up to 3-4 days, so it's a great make-ahead dessert option. Just be sure to store it properly to prevent spoilage.
Is Banana Pudding Suitable for Vegetarians?
Yes, banana pudding can be suitable for vegetarians. You can make it with non-dairy whipped topping and substitute the traditional custard with a plant-based pudding mix. Just be sure to check the ingredients carefully.
Conclusion
You've gotta try this banana pudding! It's the perfect sweet treat – creamy, dreamy, and oh-so-banana-y. The homemade custard is the star of the show, but the vanilla wafers and fresh bananas really make it shine. Trust us, one bite and you'll be hooked. This classic dessert is sure to bring a smile to your face and warmth to your heart. Go on, give it a go – you won't regret it!