
A classic dessert that's perfect for any celebration, sheet cake is the crowd-pleasing treat you didn't know you needed. Its simple preparation and versatile design make it a favorite for large gatherings, whether you're feeding a hungry family or hosting a party. With endless flavors and customization options, this enduring favorite is sure to delight guests of all ages. From its humble beginnings in the early 20th century to its modern-day popularity, the history and art of sheet cake baking is truly fascinating – and you can discover more about it right here.
Key Takeaways
- Sheet cakes originated in the early 20th century as an efficient way to feed growing families with their larger, easier-to-slice design.
- Sheet cakes are a popular choice for celebrations and potlucks due to their versatile design and ability to be customized with various flavors and toppings.
- The classic sheet cake recipe is simple to prepare, making it a favorite for large gatherings, and results in a tender, moist cake.
- Proper baking techniques, such as preheating the oven, greasing and flouring the pan, and allowing the cake to cool completely, are crucial for achieving the best texture and flavor.
- The art of sheet cake baking involves mastering the science of baking, experimenting with unique flavor combinations, and paying attention to the details in presentation to elevate the overall enjoyment.
History
The origins of the sheet cake can be traced back to the early 20th century, when homemakers sought efficient ways to feed growing families. As kitchens became more modern, these clever cooks discovered that baking cakes in sheet pans – rather than round cake pans – allowed them to cut generous slices and serve a crowd with ease.
Soon, sheet cakes became a popular choice for celebrations, potlucks, and other gatherings. Their simple, rectangular shape made them easy to transport and slice. Bakers could frost the entire surface, creating a canvas for creative decorations. Whether frosted with buttercream or topped with sprinkles, sheet cakes brought joy to parties and special occasions.
Over the decades, sheet cakes evolved, with bakers experimenting with flavors, fillings, and frostings. From classic chocolate to fruity varieties, these versatile cakes remained a beloved staple in American homes.
Their convenience and crowd-pleasing appeal ensure the sheet cake's enduring popularity to this day. In addition to being easy to serve to a large group, sheet cakes can be customized with different flavors and decorations to suit any occasion. Whether it’s a classic chocolate or vanilla with buttercream frosting, or a more extravagant red velvet or carrot cake with cream cheese icing, there’s a sheet cake for everyone. For a more individualized dessert option, consider serving a variety of desserts like the delicious tiramisu cups recipe, to cater to different tastes and dietary restrictions. Whether at a birthday party, office celebration, or family gathering, the enduring popularity of sheet cakes proves that they are a reliable crowd-pleaser for any event.
Recipe
Sheet Cake
Recipe
A sheet cake is a classic and versatile dessert that can be enjoyed for any occasion. Its simple, yet delicious, nature makes it a crowd-pleasing favorite. The ease of preparation and the ability to feed a large number of people make it a go-to choice for potlucks, parties, and family gatherings.
Whether you prefer a rich chocolate variation or a light and fruity iteration, the sheet cake is a canvas waiting to be transformed into a masterpiece of your own creation. With the right ingredients and a little bit of care, you can create a Sheet Cake that will have your guests coming back for seconds.
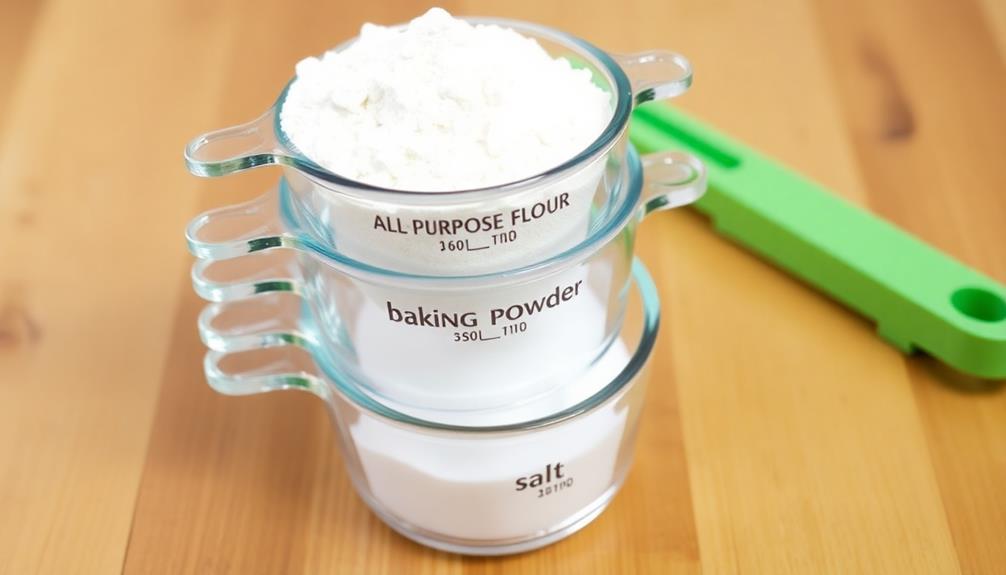
Ingredients:
- 2 cups all-purpose flour
- 2 teaspoons baking powder
- 1/2 teaspoon salt
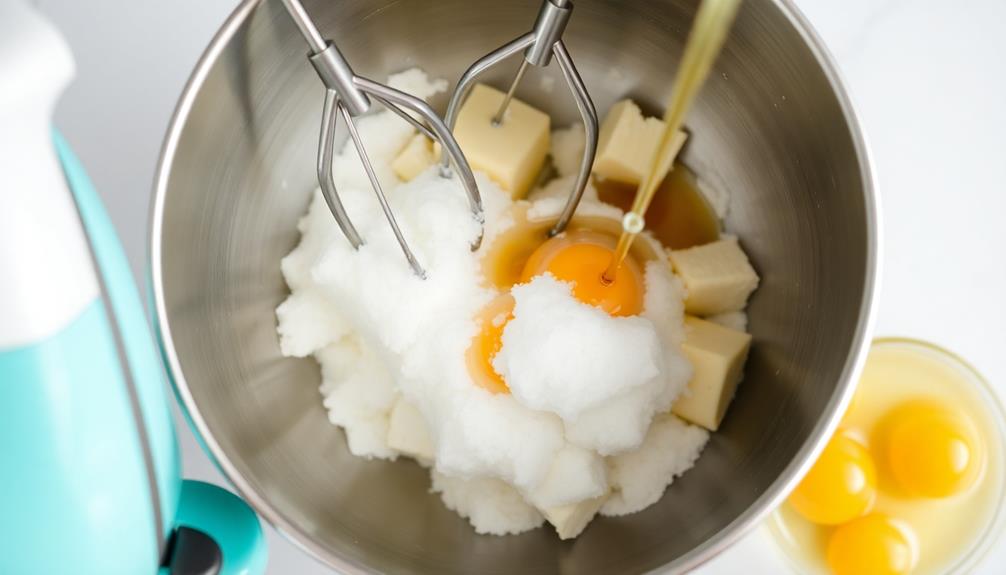
- 1/2 cup unsalted butter, softened
- 1 1/2 cups granulated sugar
- 3 large eggs
- 1 teaspoon vanilla extract
- 1 cup milk
Directions:
Preheat the oven to 350°F. Grease a 9×13 inch baking pan and set aside. In a medium bowl, whisk together the flour, baking powder, and salt.
In a large bowl, cream the butter and sugar until light and fluffy. Beat in the eggs one at a time, then stir in the vanilla. Alternately add the dry ingredients and milk to the butter mixture, mixing just until incorporated.
Pour the batter into the prepared pan and smooth the top. Bake for 30-35 minutes, or until a toothpick inserted in the center comes out clean. Allow the cake to cool completely before frosting and serving.
For best results, be sure to use room temperature ingredients and avoid overmixing the batter. This will ensure a tender and moist Sheet Cake that your guests will love.
Cooking Steps
Preheat your oven to 350°F.
Next, you'll want to grease and flour your baking sheet to prevent sticking.
Then, mix up the dry ingredients in one bowl before adding the wet ingredients and giving it all a good stir.
Step 1. Preheat Oven to 350°F
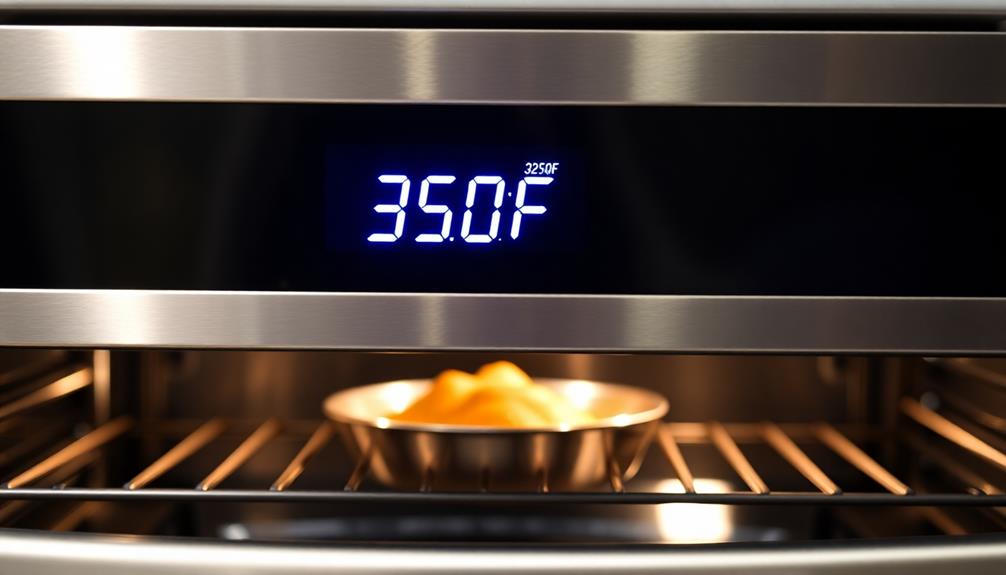
Preheating the oven to 350°F is a crucial first step in baking a delectable sheet cake. This temperature ensures the cake bakes evenly, with a perfectly golden-brown crust.
Start by locating your oven's temperature dial and turning it to the 350°F setting. You'll hear a click as the oven begins heating up.
While the oven preheats, gather your other ingredients and prepare your baking pan. This allows the oven to reach the desired temperature by the time you're ready to pop the cake in.
It's important to wait until the oven is fully preheated, as this helps the cake rise properly and bake through.
Once the oven signals it's reached 350°F, you're ready to begin mixing your cake batter. The preheating process usually takes around 10-15 minutes, so use this time wisely to set yourself up for baking success.
With the oven ready, you can now confidently move on to the next steps of your sheet cake adventure.
Step 2. Grease and Flour Baking Sheet
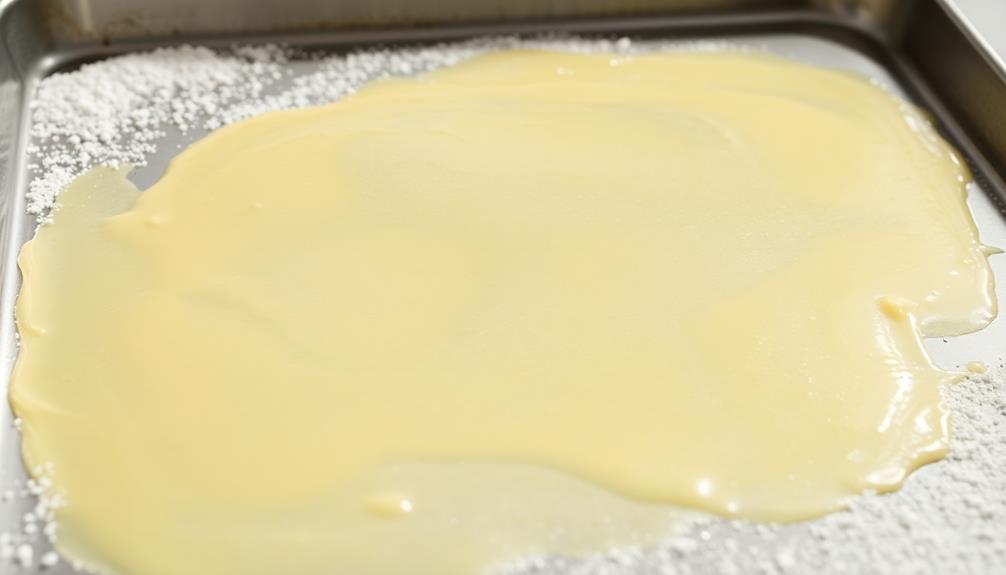
Grab your 9×13-inch baking sheet and coat it thoroughly with a thin layer of butter or nonstick cooking spray. Use a paper towel or your fingers to spread it evenly across the entire surface. This will help prevent the cake from sticking to the pan and make it easier to remove once it's baked.
Next, sprinkle a light dusting of flour over the greased pan. Tap and tilt the pan to ensure the flour covers the bottom and sides. This extra step creates a barrier, so the cake doesn't cling to the pan.
Be sure to shake out any excess flour – you don't want a thick layer that could affect the texture of your sheet cake.
With the baking sheet prepped, you're ready to pour in your cake batter and slide it into the preheated oven. The greasing and flouring process may seem like a small detail, but it makes a big difference in the final outcome.
Take the time to do it right, and you'll be rewarded with a perfectly baked sheet cake that releases easily from the pan.
Step 3. Mix Dry Ingredients
Next, you'll want to combine the dry ingredients in a separate bowl. Start by measuring out the all-purpose flour and adding it to the bowl. Be sure to spoon the flour into the measuring cup and level it off with a knife – this helps prevent the cake from turning out too dense.
Next, add the granulated sugar. Give the bowl a quick whisk to blend the flour and sugar together.
Now it's time for the baking powder and salt. Measure out the baking powder and gently sprinkle it over the flour mixture. A small pinch of salt will add just the right amount of flavor, so be sure to include that too.
Give the dry ingredients one final stir until they're evenly combined.
With the dry ingredients ready to go, you can move on to mixing the wet ingredients. This is an important step, so don't forget to read through the next set of instructions carefully!
Step 4. Add Wet Ingredients
Now that the dry ingredients are ready, let's turn our attention to the wet ones. In a separate bowl, you'll combine the milk, vegetable oil, and vanilla extract. Stir these together until they're fully incorporated. This wet mixture will add moisture and richness to the cake batter.
Next, crack the eggs into the bowl and use a whisk to beat them lightly. The eggs will act as a binder, helping to hold the cake together. Be sure to break up the yolks as you whisk so they blend evenly.
Step 5. Bake for 30-35 Minutes

Preheating the oven to 350°F (177°C) is crucial before pouring the batter into a greased and floured 9×13 inch baking pan.
Once the oven is ready, carefully slide the pan onto the middle rack, ensuring it's centered. Bake the sheet cake for 30 to 35 minutes, keeping a close eye on it. The cake is done when a toothpick inserted into the center comes out clean.
Don't open the oven door too often, as this can cause the cake to fall. If the top starts to brown too quickly, you can loosely cover it with aluminum foil to prevent over-browning.
Be patient and resist the temptation to check the cake too soon – the timing is important for achieving that perfect texture.
When the time is up, use oven mitts to remove the pan from the oven. Allow the cake to cool completely on a wire rack before frosting or serving.
This resting period helps the cake set and prevents it from crumbling when you slice into it.
Final Thoughts
As you've reached the end of this sheet cake journey, take a moment to reflect on the delectable creation you've mastered. Be proud of your accomplishments!
With each slice, your guests will delight in the soft, moist texture and the perfect balance of flavors. This sheet cake is sure to impress, whether served at a family gathering or a special occasion.
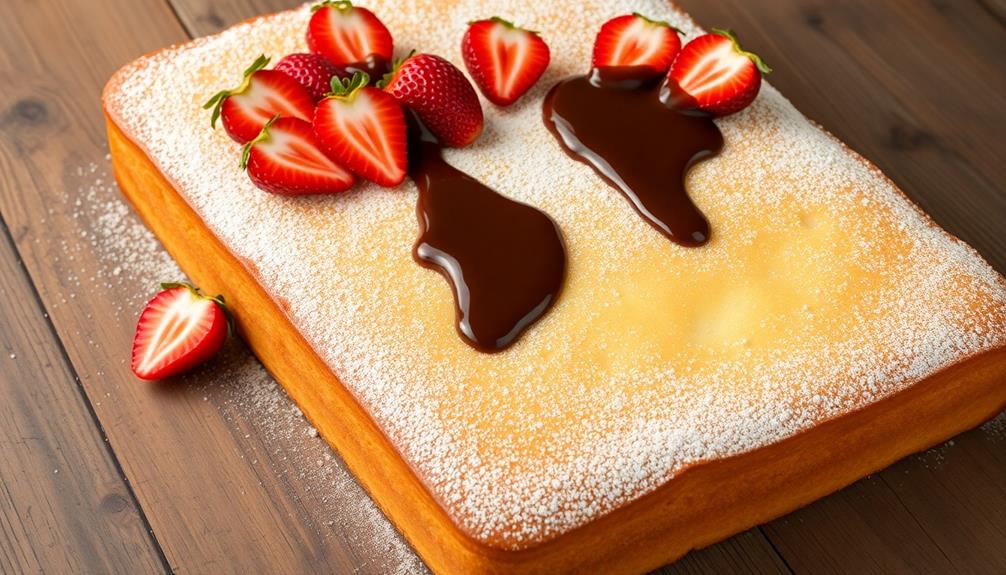
Consider garnishing with a dusting of powdered sugar or a drizzle of chocolate for an extra-special touch. The possibilities are endless when it comes to customizing your sheet cake to suit your preferences and the needs of your event.
Feel confident in your baking skills – you've navigated the recipe with precision and patience, resulting in a truly impressive dessert.
Savor this moment, for you've conquered the art of sheet cake baking.
Frequently Asked Questions
How Long Can Sheet Cake Stay Fresh?
Properly stored, your sheet cake can stay fresh for 3-4 days at room temperature or up to a week in the refrigerator. Factors like frosting, decorations, and ingredients affect the cake's shelf life. Keep an eye on its freshness to enjoy it at its best.
Can I Freeze a Sheet Cake?
You can absolutely freeze a sheet cake! Proper storage techniques, like wrapping it tightly and minimizing air exposure, will help preserve its freshness for months. Just be sure to thaw it slowly in the refrigerator before serving.
What Type of Frosting Pairs Best With Sheet Cake?
When it comes to frosting, you'll want something that complements the cake's texture and flavor. Creamy buttercream or rich chocolate ganache are classic choices that'll pair beautifully with a sheet cake.
Is It Possible to Make a Sheet Cake Without Eggs?
Yes, you can make a sheet cake without eggs. Many delicious vegan and egg-free recipes use alternative ingredients like applesauce, bananas, or commercial egg replacers to achieve a moist and flavorful cake without the need for eggs.
How Do I Transport a Large Sheet Cake Safely?
To transport a large cake safely, use a sturdy cardboard box or cake carrier. Secure the cake with plastic wrap or parchment paper, and avoid stacking items on top of it. Handle the box carefully and avoid sudden movements during transport.
Conclusion
You've gotta try this sheet cake! It's so moist, fluffy, and delicious. The ingredients are simple, but the end result is truly impressive. Once you see how easy it is to make, you'll be baking this tasty treat all the time. Trust me, your family and friends will love it. What are you waiting for? Get in the kitchen and whip up this amazing sheet cake!