Italian sub sandwiches are a beloved American classic that blends the rich flavors of Italian cured meats, cheeses, and fresh veggies on a hearty sub roll. These versatile sandwiches have roots in the culinary traditions of Italian immigrants, who crafted them as portable and filling meals for the working class. From the iconic hoagies of Philadelphia to the signature mortadella and capicola subs of New York, each regional variation showcases the fusion of Italian and American influences that have made the Italian sub a staple in households across the country. Let's explore the history, recipe, and preparation of this delicious sandwich. To create the perfect Italian sub, it’s important to find the perfect balance of flavors and textures. The sub roll should be sturdy enough to hold all the fillings without getting soggy, but also soft enough to easily bite through. Additionally, achieving the perfect bread to bacon ratio is essential – the saltiness and smokiness of the bacon should complement the mildness of the bread without overpowering the other ingredients. Mastering these elements will ensure a truly delicious Italian sub experience.
Key Takeaways
- Italian sub sandwiches originated from Italian immigrants in the early 20th century United States, reflecting a fusion of Italian and American culinary traditions.
- These sandwiches feature a variety of cured meats, cheeses, and fresh vegetables on long Italian bread, and are popular for their hearty and flavorful appeal.
- Different regions have developed unique variations, such as Philadelphia's provolone and salami or New York's mortadella and capicola.
- Proper assembly, including the choice of bread and layering of ingredients, is crucial for achieving a well-balanced flavor profile.
- Italian sub sandwiches are versatile, suitable for various occasions, and can be customized based on dietary preferences.
Top picks for "italian sandwich"
Open Amazon search results for this keyword.
As an affiliate, we earn on qualifying purchases.
History
The Italian sub sandwich traces its origins to the early 20th century, when Italian immigrants in the United States began combining staple ingredients like cured meats, cheeses, and tangy vinaigrettes on long rolls.
These sandwiches became popular among working-class communities, offering a hearty and flavorful meal. As the tradition spread, local variations emerged, with different regions adding their own unique touches.
In Philadelphia, for instance, the classic Italian sub features provolone cheese, salami, and sharp peppers, while in New York, you'll find a version piled high with mortadella, capicola, and fresh mozzarella. When it comes to Italian cuisine, regional variations are heavily emphasized, leading to a wide array of flavors and ingredients. The same can be said for customizable pizza options, where different cities and regions have their own unique toppings and styles. Whether it’s the classic Margherita pizza in Naples or the Chicago deep-dish loaded with meats and cheeses, the world of customizable pizza options is as diverse as it is delicious.
Over time, the Italian sub has become a beloved American classic, enjoyed for its perfect balance of savory, tangy, and sometimes spicy flavors.
Whether you call it a hoagie, a grinder, or a sub, this iconic sandwich continues to delight taste buds across the country.
Recipe
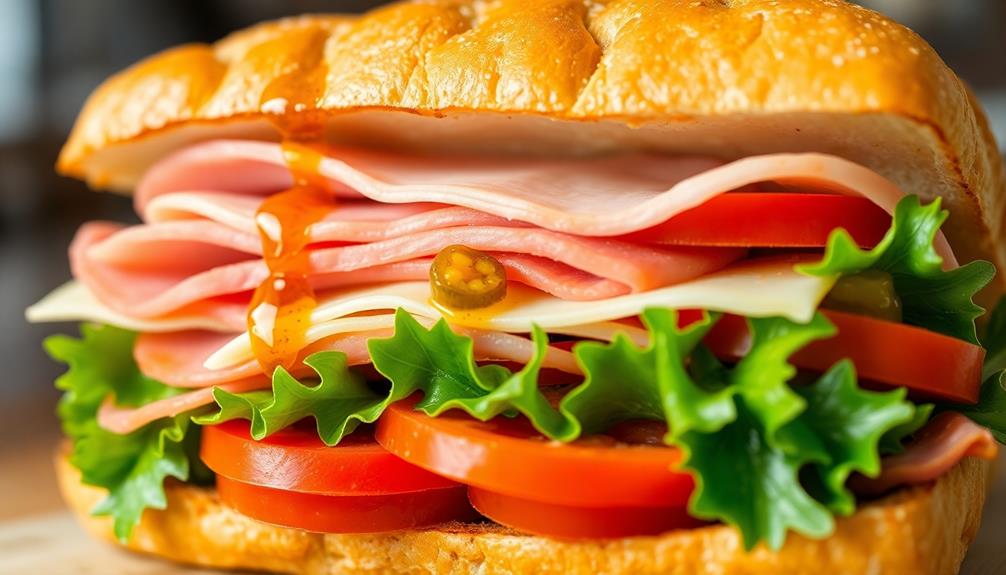
An Italian sub sandwich is a classic deli favorite, featuring a flavorful combination of cured meats, tangy cheese, and crisp vegetables. The key to a delicious Italian sub lies in the perfect balance of ingredients and the proper assembly technique.
To start, the bread plays a crucial role. A soft, freshly baked Italian or French bread, with a slightly chewy crust, provides the ideal foundation for this sandwich. Selecting high-quality deli meats, such as salami, prosciutto, and capicola, ensures the authentic Italian flavor.
- 1 loaf of Italian or French bread, sliced lengthwise
- 4 ounces of sliced salami
- 4 ounces of sliced prosciutto
- 4 ounces of sliced capicola
- 2 ounces of provolone cheese, sliced
- 1/2 cup of shredded iceberg lettuce
- 1/4 cup of sliced tomatoes
- 1/4 cup of sliced red onions
- 2 tablespoons of olive oil
- 2 tablespoons of red wine vinegar
- Salt and pepper to taste
To assemble the Italian sub, start by drizzling the bottom half of the bread with olive oil and vinegar. Layer the deli meats, followed by the provolone cheese, lettuce, tomatoes, and onions. Season with salt and pepper to taste.
Finally, close the sandwich with the top half of the bread, pressing gently to secure the ingredients.
For optimal flavor and texture, it's recommended to let the sandwich sit for a few minutes before serving, allowing the flavors to meld together. Additionally, consider wrapping the sandwich in deli paper or foil to maintain its shape and prevent the bread from becoming soggy during transportation or storage.
Cooking Steps
Slice the bread lengthwise and spread some tasty mayonnaise on each half.
Next, layer on the savory meats and cheeses.
Top it off with your favorite veggies like crisp lettuce and juicy tomatoes.
Wrap the whole sandwich in foil to keep it fresh and ready to enjoy!
Step 1. Slice Bread Lengthwise

To begin, slice the bread lengthwise using a sharp serrated knife. Carefully run the blade down the center of the loaf, applying even pressure to create two equal halves. Take your time and saw gently to get a clean, straight cut.
Once sliced, you'll have a top and bottom piece ready to be filled with all the delicious Italian sub ingredients.
Next, inspect the cut surfaces. If they're a bit uneven or ragged, you can give them a quick trim to neaten them up. Just place the bread halves cut-side down and slice off any uneven edges. This step ensures your sandwich will have a tidy, professional appearance when it's all assembled.
Now that the bread is sliced lengthwise, you can start building your Italian sub. Layer on the meats, cheeses, veggies, and condiments, getting ready to enjoy a perfectly proportioned handheld meal.
Step 2. Spread Mayonnaise on Bread Halves

Next, spread a thin layer of mayonnaise on the cut sides of both the top and bottom bread halves. This creamy condiment will add a delightful flavor and help hold the ingredients in place.
Go slowly and evenly distribute the mayonnaise, making sure to cover the entire surface of the bread. You don't want any dry spots! The mayonnaise will act as a tasty adhesive, binding the fillings to the bread and preventing your Italian sub from becoming a sloppy mess.
Feel free to add a bit more if you're a mayonnaise lover – just don't overdo it. A light coating is all you need.
Now that the bread is prepped, you're ready to start building your Italian sub sandwich!
Step 3. Layer Meats and Cheeses

With the bread now prepped, you can start layering the meats and cheeses. First, take the salami and carefully arrange the slices in an even layer on one of the bread halves.
Next, add the pepperoni in the same manner, making sure to cover the entire surface.
For the cheeses, you'll want to alternate between provolone and mozzarella. Lay the provolone slices down first, then top them with the mozzarella.
Be generous with the cheese, as it will add a delicious creaminess to the sandwich.
Once the meats and cheeses are in place, you can start building the other half of the sandwich. Repeat the layering process, placing the salami, pepperoni, and cheeses in the same order.
Take your time to ensure an even distribution of all the ingredients. With the meats and cheeses neatly stacked, your Italian sub is starting to take shape!
Step 4. Add Vegetable Toppings

After layering the meats and cheeses, you'll want to add some fresh vegetable toppings. Crisp lettuce, juicy tomatoes, and crunchy onions are classic choices that will give your Italian sub a satisfying crunch and a burst of flavor.
You can also try adding shredded carrots, sliced cucumber, or even a few pepperoncini for a little kick.
Be sure to wash and dry the vegetables thoroughly before adding them. This will help prevent any unwanted moisture from making your bread soggy.
Arrange the toppings evenly across the surface of the sub, making sure each bite contains a delightful mix of flavors and textures.
Don't be afraid to get creative and experiment with different vegetable combinations to find your personal favorite.
With the meats, cheeses, and vegetables all in place, your Italian sub is well on its way to becoming a delicious masterpiece.
Get ready to take a big bite and savor the satisfying blend of flavors and textures in every mouthful.
Step 5. Wrap Sandwich in Foil

Once you've loaded up your Italian sub with all the delectable meats, cheeses, and veggies, it's time to wrap it up to enjoy later or take on the go.
Grab a sheet of aluminum foil large enough to fully cover your sandwich. Gently place the sub in the center of the foil. Fold one long side of the foil over the sandwich, then fold the other long side over to create a tight seal.
Next, take the two short ends of the foil and fold them over the sandwich, creating a compact, rectangular package. Be sure to fold the edges tightly to prevent any leaks or spills.
This foil wrap will help keep your Italian sub fresh and protected until you're ready to dive in. Whether you're packing it for lunch or enjoying it at home, the foil wrapping makes it easy to transport and serve your delicious creation.
With the sandwich securely wrapped, you can savor every flavorful bite without any messy mishaps.
Final Thoughts
Crafting the perfect Italian sub sandwich is a labor of love, one that rewards the patient and discerning palate.
As you've learned, the keys to a delicious Italian sub lie in the quality of the ingredients, the perfect bread, and the careful assembly.
Don't be afraid to experiment with different meats, cheeses, and veggies to find your personal favorite combination.
And remember, the joy is in the journey – the process of creating a mouthwatering masterpiece.
Whether you're feeding a crowd or treating yourself, the Italian sub is a true culinary delight.
So, roll up your sleeves, dive in, and savor every bite.
With a little practice and a whole lot of passion, you'll be whipping up Italian subs that'll have your taste buds doing cartwheels.
Buon appetito!
Frequently Asked Questions
What's the Best Type of Bread for an Italian Sub?
When it comes to the best type of bread for an Italian sub, you can't go wrong with a soft, chewy Italian or French bread. Its light texture and subtle flavor let the fillings shine through.
How Long Should an Italian Sub Be Refrigerated?
You should refrigerate your sandwich for 3-5 days. This will help keep the ingredients fresh and prevent them from spoiling. Be sure to store it in an airtight container or wrap it tightly in plastic to maintain its freshness.
Can I Use Deli Meat Instead of Homemade?
You can absolutely use deli meat instead of homemade. In fact, deli meats are a convenient and tasty alternative, offering a wide variety of flavors to choose from for your sandwich. Just be sure to store it properly once assembled.
What's the Best Way to Keep an Italian Sub Fresh?
To keep your sandwich fresh, wrap it tightly in plastic wrap or foil. Store it in the fridge, and enjoy within 2-3 days. The bread will stay crisp, and the fillings will retain their flavor and texture.
Can I Customize the Toppings on an Italian Sub?
Absolutely, you can customize the toppings on an Italian sub. Most sandwich shops are happy to accommodate your preferences, allowing you to add or omit ingredients to create your perfect sandwich.
Conclusion
You've just got to try these Italian sub sandwiches! They're so tasty and easy to make at home. The combination of savory meats, tangy veggies, and zesty dressing is simply irresistible. Plus, you can customize them exactly how you like. Whether you're feeding a crowd or enjoying one for lunch, these subs are sure to become a new favorite. So, what are you waiting for? Dive in and savor the deliciousness!