Connect with us

Spanish Cuisine

Padrón Peppers

Not your average pepper, Padrón peppers from Spain’s Galicia region offer a tantalizing flavor journey, from sweet to spicy – explore their captivating story.

Published

on

padr n peppers specialty dish

Padrón peppers are a beloved Spanish delicacy hailing from the Galician region. These small, green peppers boast a captivating flavor profile – sometimes mild and sweet, other times pleasantly spicy. Traditionally, they're lightly fried in olive oil and sprinkled with coarse sea salt, which enhances their natural sweetness. Beyond their distinctive taste, Padrón peppers are low in calories and rich in vitamins, making them a healthy snack option. Whether you're grilling, sautéing, or frying them, these versatile peppers pair perfectly with a variety of dishes. Their growing global popularity reflects an appreciation for their unique character. If you're intrigued to learn more, keep reading to discover the full story behind these captivating Galician gems.

Key Takeaways

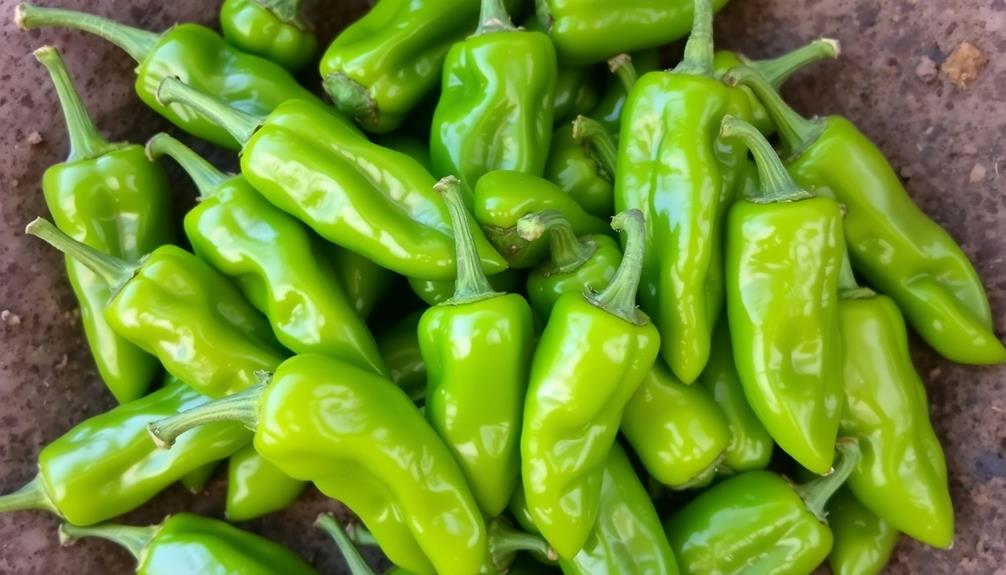
  • Padrón peppers are small, green peppers originating from Padrón, Spain, with a unique flavor profile ranging from mild to occasionally spicy.
  • They are traditionally enjoyed fried in olive oil and sprinkled with coarse sea salt, serving as a popular tapas dish in Spanish cuisine.
  • Padrón peppers are rich in vitamins A and C, providing antioxidants and dietary fiber, making them a healthy snack option.
  • The peppers' versatility allows them to be used in various culinary applications, from grilling and sautéing to enhancing the flavor of main dishes.
  • Padrón peppers have gained global popularity, reflecting their culinary significance and appeal to food enthusiasts worldwide.

History

The origins of Padrón peppers can be traced back to the small town of Padrón, located in the northwestern region of Spain. These diminutive green peppers have been a local delicacy for centuries, cultivated by generations of farmers in the Galicia province.

Padrón peppers thrive in the mild, maritime climate of this coastal region, where the cool Atlantic air and frequent rainfall create the perfect growing conditions. The plants are relatively hardy, producing an abundance of small, wrinkled pods that turn from green to golden brown as they mature.

Traditionally, Padrón peppers were enjoyed as a simple, rustic snack, lightly fried in olive oil and sprinkled with coarse sea salt. This preparation allowed the peppers' distinct, slightly smoky flavor to shine, making them a beloved staple in the local cuisine.

Today, the popularity of Padrón peppers has spread far beyond their humble Galician origins, with gourmets around the world seeking out this unique and flavorful variety.

Recipe

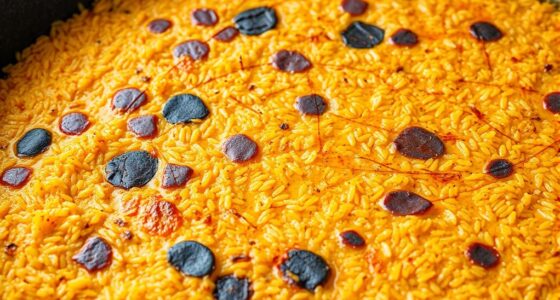
Padrón peppers are a specialty of the Galicia region in northwestern Spain. These small, green peppers have a delightfully mild and slightly sweet flavor, with an occasional spicy kick. When cooked properly, they develop a delicate, blistered skin that contrasts beautifully with the tender, juicy flesh inside.

Advertisement

The simplicity of this dish allows the natural flavors of the peppers to shine. It's a perfect appetizer or side dish that pairs wonderfully with a glass of chilled white wine or a crisp lager. If you’re new to cooking or just looking for a quick and easy dish to impress your guests, this delicious stuffed pepper recipe is a must-try. The combination of sweet and savory flavors will tantalize your taste buds, and the vibrant colors of the peppers will add a pop of brightness to your table. Whether you’re hosting a dinner party or simply craving a flavorful snack, these stuffed peppers are sure to be a hit.

  • Padrón peppers
  • Olive oil
  • Flaky sea salt

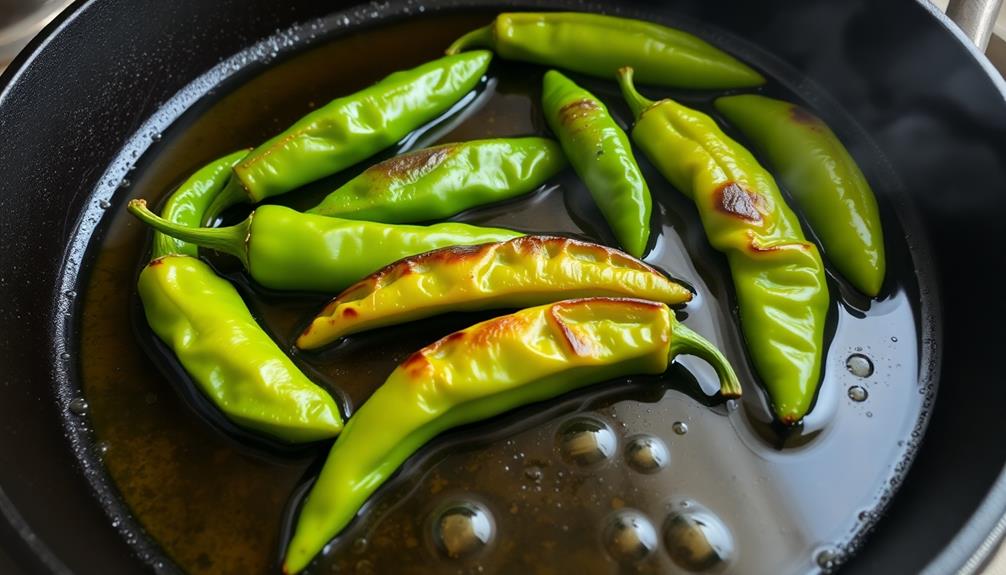
Heat a large skillet or cast-iron pan over high heat. Add a generous amount of olive oil, enough to lightly coat the bottom of the pan. Once the oil is shimmering, add the Padrón peppers in a single layer. Cook, turning occasionally, until the peppers are blistered and lightly charred on all sides, about 5-7 minutes.

Immediately transfer the hot peppers to a serving plate and sprinkle generously with flaky sea salt. Serve hot, encouraging your guests to pick up the peppers by the stem and enjoy the delightful contrast of the crisp exterior and tender interior.

Be cautious, as an occasional Padrón pepper may be spicier than the rest.

Cooking Steps

Rinse and pat the Padrón peppers dry with a clean towel.

Heat a generous amount of oil in a large skillet over medium-high heat.

Advertisement

Carefully add the peppers to the hot oil and cook, turning occasionally, until they're nicely blistered all over.

Finish by sprinkling the roasted peppers with a hefty pinch of coarse salt.

Step 1. Rinse and Pat Dry Peppers

rinse and dry peppers

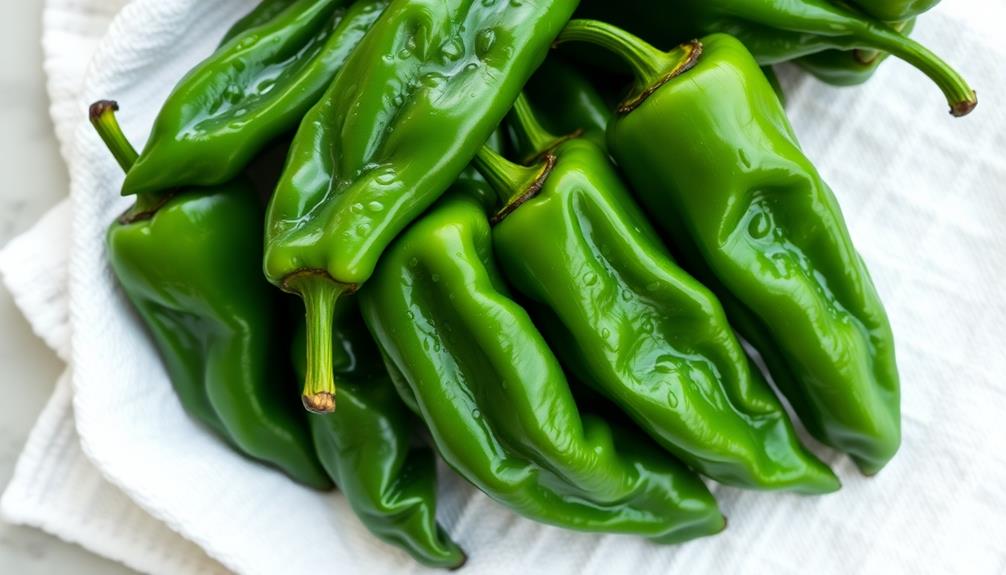
Gently rinse the peppers under cool, running water to remove any dirt or debris.

Once rinsed, use a clean paper towel or kitchen cloth to pat the peppers dry. This step is crucial to ensure the peppers cook evenly and develop a nice char or blister on the skin.

Be sure to handle the peppers carefully, as they can be delicate. Lay the dried peppers on a clean work surface or baking sheet, ready for the next step in the cooking process.

Removing any excess moisture from the peppers will help them sear and blister beautifully when you cook them.

Advertisement

Take the time to thoroughly pat them dry, ensuring every inch of the pepper's surface is free of water.

With the peppers prepped and ready, you're now one step closer to enjoying the incredible flavor of these unique and delightful pimientos de Padrón.

Step 2. Heat Oil in Pan

heat oil in pan

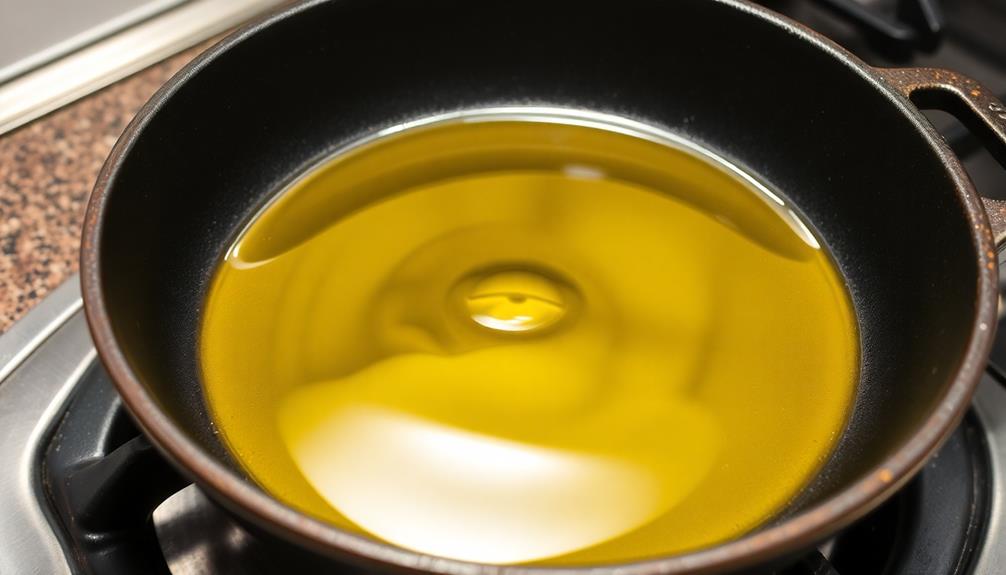
Next, heat a large, heavy-bottomed pan or skillet over medium-high heat.

Once it's nice and hot, add a few tablespoons of high-quality olive oil. Swirl the pan to coat the bottom evenly. You'll know the oil is ready when it starts to shimmer and release its aroma.

Carefully add the rinsed and dried Padrón peppers to the hot oil, arranging them in a single layer. They'll sizzle enthusiastically as they hit the pan.

Let them cook for 2-3 minutes, or until the undersides start to blister and turn golden-brown. Shake the pan occasionally to ensure even cooking.

Advertisement

Once the first side is nicely charred, use tongs to flip the peppers over and cook for another 2-3 minutes on the other side. The goal is to achieve an even, flavorful char all over the peppers.

Keep a close eye on them to prevent burning. When they're done, transfer the Padrón peppers to a serving plate or bowl, ready to be seasoned and enjoyed.

Step 3. Add Peppers to Hot Oil

add peppers to oil

Carefully add the rinsed and dried Padrón peppers to the hot oil, arranging them in a single layer. Hear the satisfying sizzle as the peppers hit the pan – it's time to work your culinary magic!

Gently toss the peppers, ensuring each one gets a chance to brown and blister. Keep a close eye, as these peppers can go from perfect to charred in the blink of an eye. After a minute or two, when the peppers have developed a gorgeous, blistered exterior, give them a gentle stir.

Be mindful of any popping or splattering – these little guys pack a punch! Continue cooking, turning the peppers occasionally, until they're tender and slightly softened, about 3-5 minutes total.

Resist the urge to overcrowd the pan, as you want the peppers to have enough space to cook evenly. Once they're perfectly cooked, transfer the Padrón peppers to a serving dish and get ready to enjoy their bold, vibrant flavor.

Advertisement

Step 4. Cook Until Blistered

cook until blistered stage

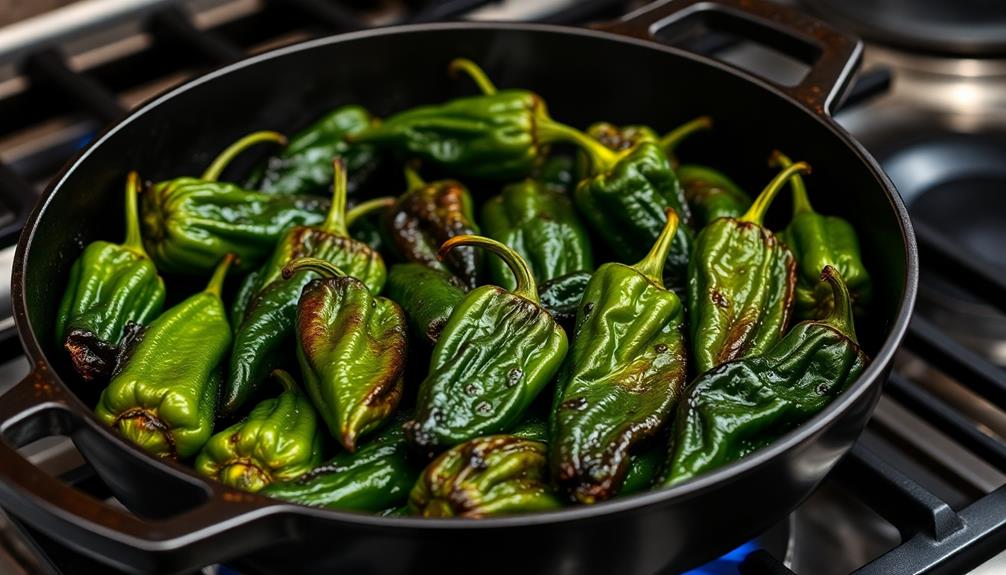
The peppers' sizzle as they hit the hot oil signals the start of the cooking process.

You'll want to keep a close eye on them, stirring frequently, as they blister and char. This is where the magic happens – the peppers' natural sugars caramelize, creating a delightful depth of flavor.

Don't be afraid to let them get a little blackened in spots. That's exactly what you're going for! The charring adds a wonderful smoky note that balances the peppers' bright, fresh taste. Just be sure to keep them moving, so they don't burn.

As the peppers cook, you'll notice the skin starting to pucker and blister. This is a good sign – it means the peppers are transforming into something truly special.

Once they've reached your desired level of blistering, remove them from the heat and transfer them to a serving dish.

Get ready to enjoy the bold, smoky-sweet flavor of perfectly cooked Padrón peppers.

Advertisement

Step 5. Sprinkle With Coarse Salt

coarse salt sprinkle step

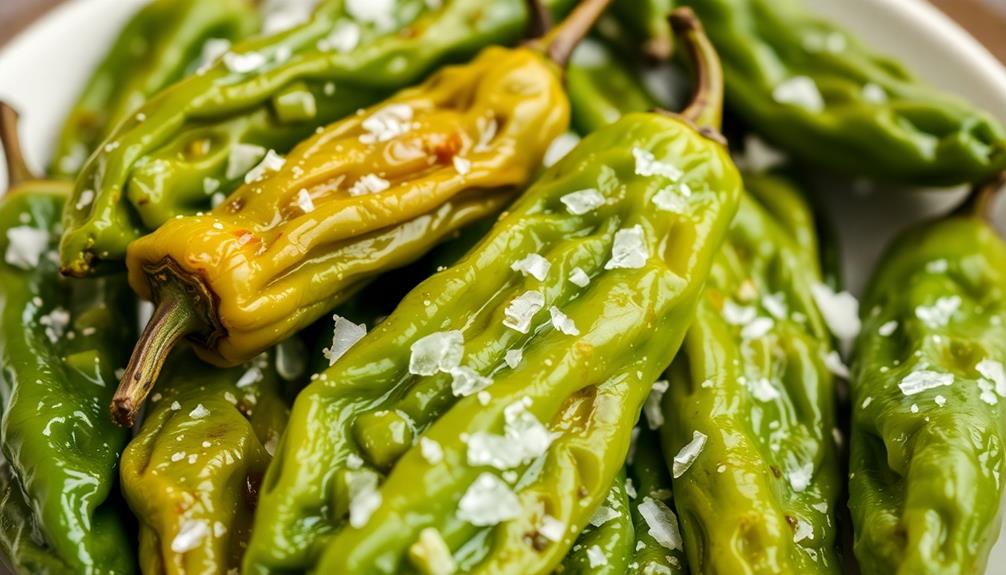
As the charred Padrón peppers rest on the serving dish, it's time to add the finishing touch – a sprinkle of coarse salt. This simple step enhances the natural sweetness and brings out the roasted flavors of the peppers.

Reach for a high-quality, crunchy sea salt or Maldon salt. Pinch the salt between your fingers and let it gently fall over the peppers, covering them evenly. The large, flaky crystals will create a delightful contrast to the soft, blistered skin of the peppers.

The salt not only seasons the dish, but also provides a satisfying texture. As you take a bite, the crunch of the salt gives way to the juicy, slightly spicy pepper. It's a perfect balance of flavors and sensations, making each bite a delightful experience.

Don't be shy – be generous with the salt. The Padrón peppers can handle a healthy dose, so sprinkle until the dish glistens.

Now, dig in and enjoy the perfect pairing of charred peppers and crunchy salt.

Final Thoughts

Padrón peppers are a versatile and delightful addition to any culinary adventure. Whether you're grilling, sautéing, or enjoying them straight from the pan, these small green peppers offer a unique flavor profile that can elevate any dish. The subtle sweetness, with a hint of bitterness, makes them a crowd-pleasing favorite.

Advertisement

As you savor the final moments of your Padrón pepper experience, remember that these dynamic little peppers can be enjoyed in countless ways. Experiment with different cooking techniques, pair them with a variety of proteins and sides, or simply relish them as a tasty snack.

The possibilities are endless, and the joy they bring to the table is unparalleled. So, the next time you encounter these captivating peppers, embrace the adventure and let your culinary creativity shine. Padrón peppers are a delicious reminder that the most remarkable flavors can often be found in the simplest of ingredients.

Frequently Asked Questions

Where Can I Buy Pimientos De Padrón Peppers?

You can find pimientos de padrón peppers at specialty grocery stores, farmers' markets, or online retailers that sell gourmet and hard-to-find ingredients. They're a popular Spanish pepper with a unique flavor profile.

How Spicy Are Pimientos De Padrón Peppers?

Pimientos de Padrón peppers can range from mild to quite spicy, with about one in ten being much hotter than the rest. You never know what you're going to get, which is part of their appeal.

Can I Substitute Other Peppers for Pimientos De Padrón?

You can substitute other peppers for pimientos de padrón, but the flavor and heat level won't be quite the same. Try using shishito or Cubanelle peppers, which have a similar mild, sweet taste.

Advertisement

How Long Do Pimientos De Padrón Last After Harvesting?

Freshly harvested peppers typically last about 3-5 days when stored in the refrigerator. However, their shelf life can vary depending on factors like storage conditions and handling. Proper storage is key to maximizing the freshness of these delicate peppers.

Are Pimientos De Padrón High in Any Specific Nutrients?

Yes, pimientos de padrón are high in certain nutrients. They're a good source of vitamin C, vitamin A, and antioxidants. Enjoying these flavorful peppers can provide a nice nutritional boost to your diet.

Advertisement

Spanish Cuisine

Paella Valenciana: Spanish Seafood Rice

Hypnotizing with its vibrant hues and irresistible flavors, Paella Valenciana is the quintessential Spanish seafood rice dish that transports you to the sun-drenched coasts of Valencia.

Published

on

seafood rice dish spain

Paella Valenciana, the iconic Spanish seafood rice dish, transports you to the sun-drenched coasts of Valencia with its vibrant golden hue, fragrant aromas, and irresistible flavors. This communal dish combines juicy chicken, succulent shrimp, aromatic saffron, and fresh vegetables like onions, peppers, and peas. The key is using high-quality short-grain Spanish rice that soaks up the rich broth, creating a satisfying and comforting meal. Paella Valenciana is a beloved classic that brings families and friends together, and as you'll soon discover, there's so much more to explore about this culinary delight.

Key Takeaways

  • Paella Valenciana is a traditional Spanish rice dish originating from the Valencia region, known for its vibrant golden color and diverse ingredients.
  • The dish combines short-grain Spanish rice with a flavorful broth, chicken, shrimp, and fresh vegetables like onions, garlic, bell peppers, and tomatoes.
  • Saffron threads are an essential ingredient, providing the signature aroma and color that distinguishes Paella Valenciana from other rice dishes.
  • Proper preparation techniques, such as soaking the saffron, sautéing the aromatics, and allowing the rice to absorb the flavors, are crucial for achieving an authentic paella.
  • Paella Valenciana is often enjoyed as a communal dish, fostering sharing and connection among diners and transporting them to the coastal regions of Spain.

History

The origins of Paella Valenciana can be traced back to the 19th century, when Spanish farmers near the city of Valencia began experimenting with cooking rice over an open fire.

They'd toss in whatever ingredients they'd on hand – chicken, rabbit, green beans, and of course, the all-important saffron. Over time, this dish evolved into the classic Paella Valenciana we know and love today. The dish became a symbol of communal gatherings, with each region of Spain adding its own touch based on local ingredients and traditions. Just as Paella has deep roots in Spanish culture, other iconic foods also reflect the spirit and history of their origins. For example, the history of vada pav reveals its humble beginnings as street food in Mumbai, born out of necessity and now cherished by millions, much like the regional pride associated with paella.

You can just imagine the aroma wafting through the air as those early chefs stirred and simmered their creation. The saffron lent a vibrant, golden hue, while the tender meats and crisp veggies added texture and flavor.

It wasn't long before Paella Valenciana became a staple of Spanish cuisine, enjoyed by families and friends gathered around the table.

Whether you're scooping up a hearty bite or simply admiring its beautiful presentation, this historical dish is a true taste of Spain's rich culinary heritage.

Advertisement

Get ready to be transported back in time with every delicious mouthful!

Recipe

Paella Valenciana is a classic Spanish dish that originates from the Valencia region. It's a rice-based dish that's typically made with a variety of meats, seafood, and vegetables. This recipe will guide you through the steps to create an authentic Paella Valenciana at home.

Paella is a communal dish that's often served family-style. The preparation and cooking process can take some time, but the end result is a flavorful and satisfying meal that's sure to impress your guests.

Ingredients:

  • 1 cup short-grain Spanish rice
  • 4 cups chicken or vegetable stock
  • 1 onion, diced
  • 3 cloves garlic, minced
  • 1 red bell pepper, diced
  • 1 tomato, diced
  • 1 teaspoon smoked paprika
  • 1/4 teaspoon saffron threads
  • 1 pound chicken thighs, cut into bite-sized pieces
  • 1 pound shrimp, peeled and deveined
  • 1 cup green peas
  • Salt and pepper to taste
  • Lemon wedges for serving

Instructions:

In a large paella pan or heavy-bottomed skillet, heat a few tablespoons of olive oil over medium-high heat. Add the chicken and cook until lightly browned, about 5-7 minutes. Remove the chicken from the pan and set aside.

Advertisement

In the same pan, sauté the onion and garlic until fragrant, about 2-3 minutes. Add the bell pepper and tomato, and continue cooking for an additional 3-4 minutes.

Stir in the rice, smoked paprika, and saffron, and toast the rice for 1-2 minutes, stirring constantly. Pour in the stock and bring the mixture to a boil. Reduce the heat to low, cover, and simmer for 15-20 minutes, or until the rice is tender and has absorbed most of the liquid.

Nestle the chicken, shrimp, and peas into the rice. Cover and continue cooking for an additional 10-15 minutes, or until the shrimp are opaque and cooked through.

Once the paella is cooked, remove from heat and let it rest for 5-10 minutes before serving. Garnish with lemon wedges and enjoy!

Tips:

Advertisement
  • Use the highest quality, freshest ingredients you can find for the best flavor.
  • Be sure to use a large enough pan to accommodate all the ingredients and prevent overcrowding.
  • Saffron is an essential ingredient in authentic Paella Valenciana, so don't skip it if possible.
  • Experiment with different types of seafood or meats to suit your personal preferences.

Cooking Steps

First, you'll want to soak those saffron threads in some hot water to let the flavor really shine.

Next, sauté the onion and garlic until they're fragrant and softened.

Then, add the rice and broth, followed by the delicious seafood, juicy tomatoes, and sweet peas.

Get ready for an incredible flavor explosion!

Step 1. Soak Saffron Threads in Hot Water

soak saffron in water

Saffron's vibrant hue and distinct aroma are the hallmark of authentic Paella Valenciana. To capture this essential flavor, you'll need to soak the saffron threads in hot water. Simply place the delicate threads in a small bowl and pour in just enough hot water to cover them.

Let the saffron steep for about 10 minutes, allowing the water to become a beautiful golden yellow. This infusion will imbue your paella with that signature sunny color and warm, earthy taste.

Don't be tempted to rush this step – patience is key. As the saffron soaks, its oils and aromas will gradually release, creating a fragrant base for your dish.

Advertisement

When the time's up, the saffron-infused water will be ready to add to your paella, bringing everything together in a symphony of flavors. With this simple preparation, you're well on your way to crafting an authentic Paella Valenciana that'll transport your taste buds straight to the sun-drenched fields of Spain.

Step 2. Sauté Onion and Garlic

saut onion and garlic

Next, sauté the onion and garlic to build the flavor foundation of your paella.

Grab a large skillet and heat it over medium heat. Add a splash of olive oil and let it shimmer. Toss in the diced onion and minced garlic. Stir them around with a wooden spoon, letting the aromas fill your kitchen.

The onion will start to soften and turn golden brown, while the garlic will become fragrant and nutty. Don't let the garlic burn – keep it moving! After about 5 minutes, your onion and garlic will be perfectly sautéed, ready to infuse the rest of your paella with their savory goodness.

This is an essential step that adds so much flavor to the dish. Keep an eye on the heat and stir frequently to prevent anything from sticking or burning.

With the onion and garlic sizzling away, you're well on your way to an authentic, mouthwatering Paella Valenciana!

Advertisement

Step 3. Add Rice and Broth

add rice and broth

With the aromatic onion and garlic ready, it's time to add the rice and broth to your paella.

Grab your trusty paella pan and pour in the short-grain Spanish rice. Give it a gentle stir, making sure the grains are evenly distributed.

Now, it's time for the star of the show – the flavorful broth! Slowly pour in the hot chicken or seafood broth, taking care not to splash.

As the liquid simmers, you'll see the rice start to plump up and release its starchy goodness. The aroma will fill your kitchen, making your mouth water in anticipation.

Stir the mixture occasionally, allowing the rice to absorb all the rich flavors. Be patient, as this process takes time, but the end result will be worth it – a perfectly cooked, aromatic base for your delectable paella Valenciana.

Get ready to add the rest of your ingredients and create a true Spanish feast!

Advertisement

Step 4. Add Seafood

incorporate seafood ingredients

Once the rice has had a chance to absorb the broth, it's time to add the seafood! This is where the dish really comes to life, as the delicious flavors of the sea mingle with the aromatic rice.

Gently place your shrimp, mussels, and calamari right into the pan. Watch as they sizzle and turn a beautiful pink color. The mussels will start to open up, letting you know they're cooked to perfection.

Give everything a gentle stir to make sure the seafood is evenly distributed throughout the rice.

Now, take a deep breath and savor the aroma – the briny scent of the ocean, the warmth of the saffron, and the subtle sweetness of the peppers. This is a feast for the senses!

Let the seafood cook for just a few minutes until tender, then remove the pan from the heat. Your paella Valenciana is almost ready to serve.

Get ready to enjoy a taste of the Mediterranean right in your own home!

Advertisement

Step 5. Add Tomatoes and Peas

incorporate tomatoes and peas

After you've added the seafood, it's time to stir in the tomatoes and peas. These colorful veggies will bring a delightful pop of flavor and texture to your paella.

First, grab a few ripe tomatoes and dice them up. The juicy, tangy tomatoes will mingle with the savory rice and seafood, creating a harmonious balance of tastes.

Next, it's time for the peas. Frozen peas work wonderfully here, as their sweet, tender nature complements the other ingredients. Sprinkle them in, and watch them sizzle and turn a vibrant green.

Stir everything together gently, so the peas and tomatoes are evenly distributed throughout the dish.

As the tomatoes and peas cook, they'll release their natural sugars, adding a touch of sweetness to balance the saltiness of the seafood. The colors will become even more vivid, making your paella a true feast for the eyes.

Get ready to enjoy the fresh, summery flavors that the tomatoes and peas bring to this classic Spanish dish.

Advertisement

Final Thoughts

Paella Valenciana is a beloved Spanish dish that has captivated the hearts and palates of people around the world.

After carefully preparing the rice, simmering the broth, and adding the delightful ingredients, you're now ready to sit back, relax, and savor the masterpiece you've created.

The vibrant colors, the tantalizing aromas, and the burst of flavors in every bite make this dish a true culinary delight.

As you take your first forkful, you'll be transported to the sun-drenched coasts of Valencia, where this iconic dish was born.

Whether you're sharing it with family or enjoying it on your own, Paella Valenciana is a meal that will leave you feeling satisfied and content.

Advertisement

So, go ahead, dive in, and let the flavors of Spain dance on your taste buds.

This is a dish that's sure to become a cherished part of your culinary repertoire.

Frequently Asked Questions

How Long Does It Take to Prepare Paella Valenciana?

To prepare Paella Valenciana, it'll take you around 1-2 hours. The exact time may vary depending on your experience and the complexity of the dish, but it's generally a time-consuming process that requires patience and attention to detail.

What Type of Rice Is Best for Making Paella?

You'll want to use a short-grain rice when making paella. Arborio or Bomba rice are the best choices, as they'll release starch and create the signature creamy, slightly sticky texture that paella is known for.

Can I Substitute Chicken for Seafood in Paella Valenciana?

Absolutely, you can substitute chicken for seafood in paella. The dish will have a different flavor profile, but the cooking method and rice will remain the same. Feel free to experiment and find what you enjoy most.

Advertisement

How Many People Can a Typical Paella Valenciana Serve?

A typical paella valenciana can usually serve 4-6 people, depending on their appetites and whether it's the main course or part of a larger meal. The size of the pan and ingredients used will also affect the serving size.

Is Paella Valenciana Difficult to Make at Home?

Is paella valenciana difficult to make at home? While it may seem complex, with a bit of practice, you can absolutely make an authentic paella valenciana in your own kitchen. The key is to get the rice and seafood cooked just right.

Continue Reading

Spanish Cuisine

Cava (Sparkling Wine)

Lovers of Spanish sparkling wine can discover the captivating story and versatile pairings of Cava, a Catalonian delight that effortlessly elevates any occasion.

Published

on

sparkling spanish wine cava

Cava is a beloved Spanish sparkling wine that originates from the Penedès region of Catalonia. Made using the traditional Champagne method, Cava captivates with its effervescence, crisp acidity, and delightful flavors of apple, pear, and citrus. The production process involves a secondary fermentation in the bottle, which enhances the wine's complexity and character. Cava's versatility makes it a refined choice for celebrations and casual gatherings alike, pairing beautifully with seafood, tapas, and even desserts. Whether served chilled as an aperitif or incorporated into creative cocktails, Cava's sophisticated style is sure to impress. To discover more about this enchanting Spanish sparkling wine, keep reading.

Key Takeaways

  • Cava is a Spanish sparkling wine originating from the Catalonia region, primarily made from indigenous grape varieties like Macabeo, Xarel-lo, and Parellada.
  • The production process involves secondary fermentation in the bottle, aging on lees, and manual disgorging, contributing to Cava's distinctive crisp and refreshing profile.
  • Cava is recognized for its balanced flavors, ranging from apple, pear, and citrus to toasty and nutty notes, and varying sweetness levels from brut nature to semi-seco.
  • Cava is versatile in pairing with a wide range of cuisines, from seafood and tapas to desserts, and can also be used as a base for creative cocktails.
  • Cava has gained global recognition and popularity as a sophisticated sparkling wine option, often associated with Spanish celebrations, traditions, and a lifestyle of elegance.

History

Cava, the renowned Spanish sparkling wine, traces its roots back to the late 19th century. It all started when a Catalan winemaker, Josep Raventós, visited the Champagne region of France and was inspired to create his own version of the famous French bubbly.

Raventós returned home and began experimenting with the traditional Champagne method, using local grape varieties like Macabeo, Parellada, and Xarel-lo. The first bottles of Cava were produced in 1872, and over the next few decades, the industry grew steadily.

Today, Cava is produced in various regions of Spain, with the Penedès area in Catalonia being the most famous. Cava's production method, which involves a second fermentation in the bottle, gives it a distinctive taste and aroma, often described as crisp, dry, and refreshing.

Whether you're celebrating a special occasion or simply enjoying a casual moment, a glass of Cava is sure to add a touch of Spanish flair to your festivities.

Recipe

Cava, the sparkling wine from Spain, is a versatile beverage that can be enjoyed on its own or incorporated into a variety of recipes. Whether you're hosting a special occasion or looking to add a touch of elegance to your everyday dining experience, a Cava-based recipe can be a delightful addition to your culinary repertoire.

Advertisement

One classic way to showcase the refreshing and lively character of Cava is in a Cava Cocktail. This simple yet sophisticated drink is perfect for setting the tone for any gathering or as a pre-dinner aperitif.

  • 1 bottle of Cava
  • 2 ounces of your preferred fruit juice (such as orange, grapefruit, or cranberry)
  • 1 ounce of a liqueur (such as Cointreau or St-Germain)
  • Fresh fruit or a twist of citrus for garnish

To prepare the Cava Cocktail, simply combine the Cava, fruit juice, and liqueur in a chilled champagne flute or coupe glass. Gently stir to combine and garnish with a slice of fresh fruit or a twist of citrus. The effervescence of the Cava, coupled with the sweetness of the fruit and the subtle complexity of the liqueur, creates a delightful and refreshing beverage.

When preparing a Cava Cocktail, it's important to use a high-quality Cava to ensure the best possible flavor and aroma. Additionally, be mindful of the proportions to achieve the perfect balance of flavors.

Experimenting with different juice and liqueur combinations can also be a fun way to explore the versatility of Cava in cocktail-making.

Cooking Steps

Manually cap each bottle's cork to seal in the fizz.

Allow the bottles to chill, then gently shake them to distribute the bubbles.

Advertisement

Uncork the bottles carefully, and pour the bubbly Cava into your glasses, ready to enjoy!

Step 1. Manually Cap Each Bottle's Cork

manually cap each bottle

Capping each bottle's cork manually is the final step in the Cava production process. This delicate task is carried out with great care to ensure the perfect seal and presentation of the sparkling wine.

First, you'll need to carefully place the cork into the bottle's neck, ensuring it's centered and snug. Then, using a specialized capping tool, you'll gently press down on the cork, securing it in place. Be sure to apply even pressure to avoid any tilting or misalignment.

Once the cork is firmly in position, you'll add the metal cage that helps hold it securely. Finally, you'll tuck the wire cage's ends neatly under the bottle's lip, completing the process.

This meticulous manual capping preserves the Cava's carbonation and quality, allowing you to enjoy the perfect glass of sparkling delight. With each bottle sealed with care, the Cava is ready to be enjoyed.

Step 2. Allow the Bottles to Chill

chill the bottles now

After carefully capping each bottle, the next step is to allow the Cava to chill. Chilling the sparkling wine is crucial to achieve the perfect serving temperature and enhance its refreshing flavors.

Place the bottles in the refrigerator, making sure they're positioned upright to prevent any loss of carbonation. Depending on the size of your fridge, you may need to rearrange other items to fit the Cava bottles comfortably.

Advertisement

Allow the Cava to chill for at least 2 hours, but no more than 4 hours. This will bring the temperature down to the recommended range of 45-50°F (7-10°C), which is ideal for serving.

You can check the temperature by gently placing your hand on the bottles. If they feel chilled but not icy cold, they're ready to be enjoyed.

Step 3. Gently Shake the Bottles

gently shake the bottles

Gently shaking the chilled bottles helps to distribute the yeast sediment evenly throughout the Cava. This step is essential for achieving the perfect balance of flavors and textures.

First, hold the bottle at a 45-degree angle, with the label facing up. Using both hands, gently rotate the bottle back and forth about 10-15 times. This circular motion ensures the sediment integrates without creating too much agitation.

Next, return the bottle to an upright position and give it a gentle side-to-side shimmy 5-7 times. This final motion helps settle any remaining particles.

Be careful not to shake the bottle vigorously, as this can cause the Cava to become overly foamy. The goal is a delicate, controlled movement that evenly distributes the yeast without excessive effervescence.

Advertisement

Once shaken, your Cava is ready to be served and enjoyed!

Step 4. Uncork the Bottles Carefully

uncork bottles with caution

With the Cava gently shaken, it's time to carefully uncork the bottles.

Hold the bottle at a 45-degree angle, pointing it away from yourself and any guests. Use your thumb to slowly release the wire cage around the cork. Gently twist the bottle while maintaining steady pressure on the cork.

As it begins to release, keep a firm grip and allow the cork to come out smoothly and quietly. Don't let the cork pop! Popping corks can cause the wine to spray, wasting precious bubbles.

Once the cork is out, pour the Cava into chilled glasses, filling them about three-quarters full. This allows room for the wine to expand and release its delightful effervescence.

Serve immediately and enjoy the crisp, refreshing flavor of your perfectly uncorked Cava.

Advertisement

Step 5. Pour Into Glasses

pour liquid into glasses

Once the cork is out, you can pour the Cava into the chilled glasses.

Hold each glass at an angle and slowly tilt it back upright as you fill it. This helps the sparkling wine cascade down the side, creating a lovely, foamy head. Fill the glasses about three-quarters full to leave room for the bubbles to form.

Be gentle when pouring to avoid excessive frothing. The ideal pour should produce a thin, steady stream of Cava.

As the glasses fill, you'll see the bubbles begin to dance and rise to the surface, adding a festive sparkle.

Once all the glasses are filled, you can admire the golden hue and delicate effervescence of the Cava before taking your first sip.

Enjoy the crisp, refreshing flavor and the celebratory mood the sparkling wine brings to any occasion.

Advertisement

Final Thoughts

As you've explored the world of cava, the Spanish sparkling wine, you've likely gained a deeper appreciation for its unique qualities and the craftsmanship behind its production.

From its traditional method of fermentation to the diverse range of styles and flavors, cava has proven itself to be a versatile and delightful beverage.

When selecting a cava, consider the occasion and your personal preferences.

Brut cavas with their crisp, dry profiles make for excellent aperitifs, while more full-bodied reserva or gran reserva cavas can complement a wide array of foods.

Don't be afraid to experiment and discover your favorite cava pairings.

Advertisement

Whether you're hosting a celebratory gathering or simply enjoying a quiet moment, cava is the perfect choice to elevate the experience.

Its effervescence and balanced flavors make it a refreshing and sophisticated option that's sure to delight your senses.

Embrace the art of cava and let it become a cherished part of your culinary and social experiences.

Frequently Asked Questions

What Is the Difference Between Cava and Champagne?

The key difference between cava and champagne is their region of origin. Champagne can only be produced in the Champagne region of France, while cava is a Spanish sparkling wine made using the traditional method as in Champagne.

How Long Does Cava Typically Need to Age?

Typically, cava needs to age for a minimum of 9 months, though some producers may age it for up to 24 months to develop more complex flavors and a creamier texture. The longer the aging, the richer the final sparkling wine.

Advertisement

What Are the Most Common Cava Grape Varieties?

Typically, the most common cava grape varieties are Macabeo, Parellada, and Xarel-lo. These Spanish white grapes provide the base for this sparkling wine, creating a balanced and lively final product. This traditional blend of grapes delivers a crisp and refreshing flavor profile that pairs perfectly with a variety of dishes. The combination of these grape varieties is also used to create the renowned white wine from Txakoli, a regional specialty in the Basque Country of Spain. The unique characteristics of these grapes add depth and complexity to both cava and Txakoli, making them distinct and beloved choices for wine enthusiasts.

Is Cava a Good Option for Special Occasions?

Absolutely, sparkling wine is a fantastic option for special occasions. Its vibrant bubbles and crisp, refreshing flavors make it the perfect celebratory drink, whether you're toasting a milestone or ringing in the new year.

How Does the Production Process of Cava Differ From Other Sparkling Wines?

The production process of cava differs from other sparkling wines in that it undergoes a secondary fermentation in the bottle, resulting in a more complex and refined flavor profile. This traditional method gives cava its distinct character.

Continue Reading

Spanish Cuisine

Txakoli (White Wine)

Unlock the secrets of Txakoli, a captivating Basque white wine renowned for its crisp acidity and effervescent charm, as you delve into its rich history and production.

Published

on

refreshing basque white wine

Txakoli is a crisp and effervescent white wine hailing from the Basque Country of Northern Spain. For centuries, the region's rich viticultural heritage has refined traditional production methods, resulting in Txakoli's distinct flavor profile. Grapes are cultivated on steep coastal slopes, thriving in the ideal microclimate. This unique white wine boasts a tart acidity and subtle effervescence, making it a perfect pairing for local seafood and tapas. Txakoli is typically enjoyed young and vibrant, with its ability to cleanse the palate often celebrated. If you'd like to learn more about Txakoli's history, characteristics, and the process behind its production, keep reading.

Key Takeaways

  • Txakoli is a unique white wine originating from the Basque Country in Northern Spain, known for its tart acidity and subtle effervescence.
  • Txakoli has a long viticultural heritage, with traditional production methods refined over time to create its distinct flavor profile.
  • Txakoli is typically enjoyed young and vibrant, pairing beautifully with local seafood and tapas to cleanse the palate.
  • The production of Txakoli involves gentle pressing of grapes, controlled fermentation, and clarification to preserve its crisp and refreshing character.
  • Txakoli is celebrated for its ability to enhance dining experiences, with its low alcohol content and zesty acidity making it a versatile and popular choice.

History

Txakoli's origins can be traced back to the Basque Country of Northern Spain, where it has been produced for centuries. This unique white wine is deeply rooted in the region's rich viticultural heritage.

Over time, the traditional methods of Txakoli production have been refined, resulting in a distinct, lively, and refreshing beverage.

The vineyards that cultivate the grapes for Txakoli are often located on steep, coastal slopes, which provide the ideal microclimate for the indigenous grape varieties. The cool, Atlantic-influenced weather and mineral-rich soils impart the wine with its characteristic tart acidity and subtle effervescence.

Txakoli is typically enjoyed as a young, vibrant wine, celebrated for its ability to pair beautifully with the local seafood and tapas of the Basque region.

Today, Txakoli continues to be an integral part of the cultural fabric of Northern Spain, with its production and consumption deeply intertwined with the region's rich gastronomic traditions.

Advertisement

Recipe

Txakoli is a light, acidic white wine that originates from the Basque region of Spain. Its crisp, refreshing character makes it an excellent pairing for a variety of seafood dishes. Crafting a simple, yet flavorful Txakoli-based recipe can be a delightful way to enjoy this unique wine.

To begin, let's explore how to create a vibrant Txakoli-infused dish that celebrates the wine's distinctive qualities. This recipe will highlight the wine's natural acidity, while complementing it with fresh, seasonal ingredients.

  • Txakoli white wine
  • Shrimp, peeled and deveined
  • Lemon juice
  • Olive oil
  • Garlic, minced
  • Cherry tomatoes, halved
  • Fresh parsley, chopped
  • Salt and pepper to taste

In a large skillet, sauté the shrimp in a combination of olive oil and minced garlic over medium-high heat until the shrimp are pink and opaque. Add the halved cherry tomatoes and continue cooking for an additional 2-3 minutes, or until the tomatoes begin to soften.

Deglaze the pan with a generous splash of Txakoli, allowing the wine to simmer and reduce for a minute or two. Finally, stir in a squeeze of fresh lemon juice and a handful of chopped parsley. Season with salt and pepper to taste. This flavorful sauce will perfectly complement the tender and flaky fish. It’s a simple finishing touch that will elevate the dish to new heights. You can also use this sauce as a dressing for a variety of seafood dishes, or even incorporate it into a Russian salad recipe for a refreshing and tangy twist.

When serving this Txakoli-infused dish, be sure to have additional chilled Txakoli on hand to enjoy alongside the meal. The wine's bright acidity and subtle effervescence will help to cleanse the palate and enhance the overall dining experience.

Cooking Steps

Crush and destem the grapes, then gently press them to extract the juice.

Advertisement

Next, ferment the grape juice to create the Txakoli wine.

Step 1. Crush and Destem the Grapes

crush and destem grapes

Once the grapes are harvested, it's time to begin the process of crushing and destemming them. First, you'll need to gather your equipment – a large container, a sturdy press, and a destemming tool.

Carefully place the grapes into the container, making sure to remove any leaves or stems that may have come along for the ride.

Next, it's time to get your hands dirty! Using the press, gently crush the grapes, being careful not to over-crush and release too many tannins. This step is crucial, as it helps to release the juice and start the fermentation process.

Once the grapes are sufficiently crushed, you can use the destemming tool to remove the stems, leaving behind only the flavorful grape pulp.

Step 2. Gently Press the Grapes

gently press the grapes

With the grapes now crushed, it's time to gently press them. This step is crucial for extracting the precious Txakoli wine juice.

Grab your wine press and carefully place the crushed grapes inside. Slowly turn the handle, applying gentle pressure to the grapes. The juice will begin to flow out, collecting in the catch basin below.

Advertisement

Be patient and resist the urge to press too hard. Overly aggressive pressing can release bitter tannins and undesirable flavors. Your goal is a delicate, light-bodied Txakoli.

Once the juice flow slows to a trickle, you're done. Carefully remove the pressed grape pomace.

Now, it's time to move on to the next step: clarifying the raw Txakoli wine. This involves allowing the juice to settle and removing any sediment.

With your gentle pressing complete, you're well on your way to crafting a refreshing, authentic Txakoli.

Step 3. Ferment the Grape Juice

fermenting grape juice process

After gently pressing the grapes, you'll transfer the raw Txakoli wine juice to a fermentation vessel. This is where the magic of fermentation begins!

You'll carefully add your chosen yeast strain, which will feast on the natural sugars in the juice, converting them into alcohol and carbon dioxide.

Advertisement

As the yeast works its wonders, you'll need to monitor the temperature and specific gravity of the fermenting Txakoli. The ideal temperature range is between 60-70°F, which helps the yeast thrive.

You'll use a hydrometer to track the specific gravity, watching as it gradually decreases over time. This indicates the yeast is successfully converting the sugars into alcohol.

Patience is key during this fermentation process, as it can take several weeks or even months to reach the desired alcohol content and flavor profile.

But don't worry, the end result will be a delightfully crisp, slightly effervescent Txakoli wine that's well worth the wait!

Step 4. Clarify and Stabilize the Wine

clarify and stabilize wine

As the fermentation winds down, it's time to clarify and stabilize your Txakoli wine. This process helps remove any sediment and ensures the wine is crystal clear and ready to enjoy.

First, you'll need to rack the wine, which means carefully transferring it to a clean container, leaving behind the sediment that has accumulated at the bottom. This helps clarify the wine and prepares it for the next step.

Advertisement

Next, you'll add a fining agent, such as bentonite clay or gelatin, to help remove any remaining particles. Gently stir the agent into the wine and let it work its magic.

Over time, the fining agent will bind to the particles, causing them to sink to the bottom, leaving you with a perfectly clear Txakoli.

Step 5. Bottle and Age the Wine

bottle and age wine

Once the wine is clarified and stabilized, you can proceed to bottle your Txakoli. Carefully transfer the wine into clean, sterilized bottles, leaving a small amount of headspace at the top. This space allows the wine to develop its signature effervescence.

Next, seal the bottles with high-quality corks or screw caps. Corks are the traditional choice, but screw caps are becoming more popular for their convenience and ability to maintain the wine's freshness.

After bottling, it's time to age your Txakoli. These wines are typically meant to be enjoyed young, within a year or two of bottling. However, you can cellar them for up to 3-5 years to allow the flavors to evolve and the carbonation to gently integrate.

Store the bottles in a cool, dark place, away from direct light and vibration, to preserve the wine's delicate character.

Advertisement

When ready to serve, chill the Txakoli to around 46-50°F (8-10°C) to bring out its refreshing acidity and delicate aromas. Enjoy this lively, food-friendly white wine with tapas, seafood, or light dishes that complement its crisp, slightly tart profile.

Final Thoughts

Txakoli, a unique Basque wine, offers a delightful experience that transcends the ordinary.

As you savor the final sips, you'll appreciate the care and tradition that went into crafting this vibrant, refreshing beverage.

Whether you're enjoying Txakoli on a sun-dappled patio or pairing it with a lively tapas spread, this wine's zesty acidity and low alcohol content make it a perfect companion for any occasion.

Frequently Asked Questions

What Is the Recommended Serving Temperature for Txakoli?

The recommended serving temperature for this wine is around 8-12°C (46-54°F). You'll want to chill it before serving to bring out its vibrant acidity and fresh, crisp flavors. Enjoy this wine well-chilled for the best drinking experience.

Advertisement

How Long Can a Bottle of Txakoli Be Stored?

You can generally store a bottle of txakoli for up to 2 years. However, it's best enjoyed fresh, so it's recommended to drink it within the first year of purchase for the most vibrant and lively flavors.

Is Txakoli Suitable for Those With Gluten Intolerance?

Yes, txakoli is suitable for those with gluten intolerance. As a wine made from grapes, it's naturally gluten-free, making it a safe and enjoyable option for those who need to avoid gluten in their diet.

What Is the Typical Alcohol Content of Txakoli?

The typical alcohol content of txakoli is generally around 11-12% ABV. As a light, crisp white wine, it's a refreshing option that won't overwhelm you with a high alcohol content. Give it a try if you enjoy such wines!

Can Txakoli Be Used in Cocktails or Mixed Drinks?

Sure, you can use txakoli in cocktails and mixed drinks. Its light, crisp, and slightly fizzy profile makes it a versatile ingredient that can complement a variety of mixers and spirits. Get creative and experiment with txakoli-based cocktails.

Advertisement

Continue Reading

Affiliate Disclaimer
As an affiliate, we may earn a commission from qualifying purchases. We get commissions for purchases made through links on this website from Amazon and other third parties.

Advertisement

Vetted

top local car washes top local car washes
Vetted2 months ago

14 Best Car Washes Near You for a Sparkling Clean Ride

I discovered the 14 best car washes near you that promise a sparkling clean ride, and you won't want to...

top mops for 2024 top mops for 2024
Vetted2 months ago

The 15 Best Mops of 2025 – Your Ultimate Guide to a Spotless Home

Find the perfect mop for your cleaning needs in 2025, and discover how these top choices can revolutionize your home...

top women s fragrances 2024 top women s fragrances 2024
Vetted2 months ago

15 Best Perfumes for Women in 2025 – A Fragrance Guide You Can’t Miss

Keen to discover the top 15 perfumes for women in 2025? Uncover unique scents that will elevate your fragrance game!

top local bars guide top local bars guide
Vetted2 months ago

14 Best Bars Near You for an Unforgettable Night Out

Looking for the perfect bar to elevate your night out? Discover the 14 best spots that promise unforgettable experiences!

luxurious beard oil selection luxurious beard oil selection
Vetted2 months ago

15 Best Beard Oils for a Luxurious Grooming Experience in 2025

Shop the 15 best beard oils for a luxurious grooming experience in 2025 and discover which ones will elevate your...

top college laptops 2024 top college laptops 2024
Vetted2 months ago

15 Best College Laptops of 2025: The Ultimate Guide for Students

With our guide to the 15 best college laptops of 2025, discover which powerful models will elevate your academic experience...

waterproof mascaras for tears waterproof mascaras for tears
Vetted2 months ago

15 Best Waterproof Mascaras That Will Survive Any Tear-Jerker

Outstanding waterproof mascaras await to keep your lashes flawless through any emotional moment; discover which ones made the top 15...

top flavorful disposable vapes top flavorful disposable vapes
Vetted2 months ago

15 Best Disposable Vapes of 2025: Top Picks for Flavor and Convenience

Prepare to discover the 15 best disposable vapes of 2025 that blend exceptional flavor and convenience, but which ones truly...

refreshing lunch salad ideas refreshing lunch salad ideas
Vetted2 months ago

15 Best Salads Near You That Will Freshen Up Your Lunch Routine

Transform your lunch with the 15 best salads nearby that will tantalize your taste buds and leave you craving more...

top convertible car seats top convertible car seats
Vetted2 months ago

15 Best Convertible Car Seats of 2025 – Safety and Comfort for Your Little One

Get ready to discover the top 15 convertible car seats of 2025 that blend safety and comfort—find out which models...

delicious fast food breakfast delicious fast food breakfast
Vetted2 months ago

15 Best Fast Food Breakfast Options That Will Make Your Mornings Delicious

Uncover the 15 best fast food breakfast options that will transform your mornings into a delicious experience you won't want...

stylish contacts for vision stylish contacts for vision
Vetted2 months ago

14 Best America’s Contacts for Clear Vision and Style

Browse through the 14 best contact lenses in America for clear vision and style, and discover which one perfectly complements...

Trending