Connect with us

Lebanese Cuisine

Balila (Warm Chickpea Dish)

A comforting Levantine classic, balila’s rich history and distinctive flavors make it a must-try dish for anyone seeking a glimpse into the vibrant culinary world of the Levant.

Published

on

warm chickpea dish delight

Balila, a beloved warm chickpea dish, has its roots in the rich culinary heritage of the Levant region. You'll find ancient civilizations used chickpeas as a dietary staple, and the recipe has evolved over time with unique family variations. Today, this comforting dish is enjoyed globally, symbolizing the vibrant flavors of Lebanon, Syria, Palestine, and Jordan. To make it, you'll start by soaking chickpeas overnight, then sautéing them in olive oil with fragrant spices before simmering until tender. Garnished with fresh herbs and a squeeze of lemon, balila offers a satisfying and heartwarming experience. Intrigued? Let's dive deeper into this beloved Levantine classic.

Key Takeaways

  • Balila is a traditional warm chickpea dish originating from the Levant region, including countries like Lebanon, Syria, Palestine, and Jordan.
  • The recipe has evolved over time with unique regional and family variations, reflecting the rich culinary heritage of the Levant.
  • Preparation of balila involves soaking, boiling, and seasoning chickpeas with a blend of spices such as cumin, coriander, and cayenne pepper.
  • Balila is commonly served warm, often garnished with fresh herbs, olive oil, and a squeeze of lemon juice for enhanced flavor.
  • Balila is a comforting and satisfying dish that is enjoyed globally, symbolizing the culinary traditions and shared experiences of the Levantine people.

History

Balila, a beloved warmth-inducing chickpea dish, has its roots firmly planted in the rich culinary traditions of the Levant region. For centuries, this comforting dish has been a staple in the homes and hearts of people across the Levant, including Lebanon, Syria, Palestine, and Jordan.

The origins of balila can be traced back to the ancient civilizations that once flourished in this part of the world, where chickpeas were a dietary mainstay. Over time, the recipe has evolved, with each region and family putting their own unique spin on the classic ingredients.

Today, balila is enjoyed not just in the Levant, but around the world, as people discover the delicious simplicity and soothing comfort of this timeless dish. Whether it's a chilly winter day or a time to gather with loved ones, balila remains a beloved symbol of the region's rich culinary heritage.

Cooking Steps

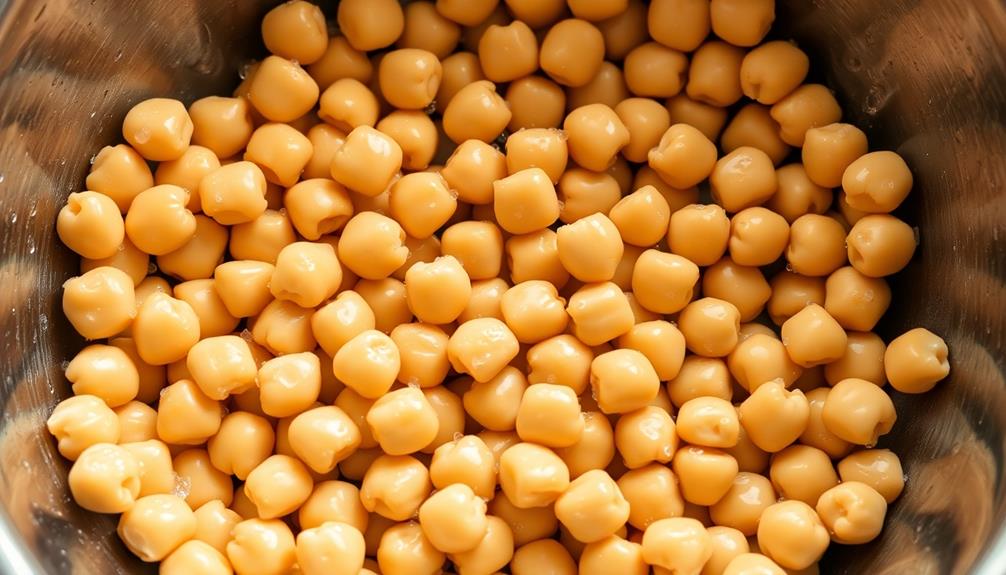
How do you begin preparing the Balila, the warm chickpea dish? First, you'll need to gather your ingredients. Grab a can of chickpeas, also known as garbanzo beans, and drain and rinse them.

Next, heat some olive oil in a skillet over medium heat. Once the oil is hot, add the chickpeas and sauté them for a few minutes, stirring frequently, until they're lightly browned.

Advertisement

Now, it's time to add the seasonings. Sprinkle in some cumin, coriander, and a pinch of cayenne pepper. Stir everything together and let the flavors meld for a minute or two.

Then, pour in a bit of lemon juice and water. Bring the mixture to a gentle simmer and let it cook for about 10 minutes, until the chickpeas are tender and the flavors have melded together.

Step 1. Soak Chickpeas Overnight

soak chickpeas overnight

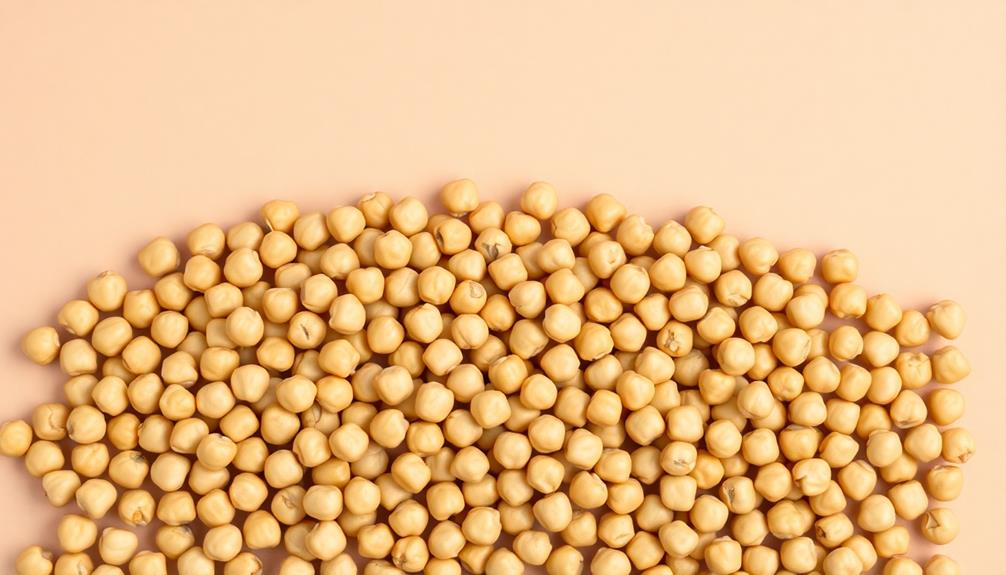
Before you can begin cooking the Balila, you'll need to soak the chickpeas overnight. This crucial first step helps soften the chickpeas, making them easier to cook and digest.

Simply place the dried chickpeas in a large bowl and cover them with plenty of water. Let them sit at room temperature for at least 8 hours, or overnight.

When you're ready to start cooking, drain and rinse the soaked chickpeas. They should have plumped up and become more tender.

This process helps break down the complex starches, unlocking the full flavor and nutritional benefits of the chickpeas.

Advertisement

With the hard work done, you can now move on to the next steps of the Balila recipe. Get excited – the warm, comforting dish is about to come together!

Step 2. Drain and Rinse Chickpeas

drain and rinse chickpeas

After soaking the chickpeas overnight, drain and rinse them thoroughly. This step is crucial to remove any impurities and prepare the chickpeas for cooking.

Place a colander in the sink and pour the soaked chickpeas into it. Run cold water over the chickpeas, gently stirring them with your hands to dislodge any remaining dirt or debris. Continue rinsing until the water runs clear.

Once the chickpeas are thoroughly rinsed, give the colander a few shakes to allow any excess water to drain off. It's important to make sure the chickpeas are as dry as possible before moving on to the next step. This will help them cook evenly and develop a nice, creamy texture.

With the chickpeas drained and rinsed, you're now ready to move on to the next part of the balila recipe. Get excited, because the warm, flavorful dish is just a few steps away!

Step 3. Add Spices

incorporate seasonings into dish

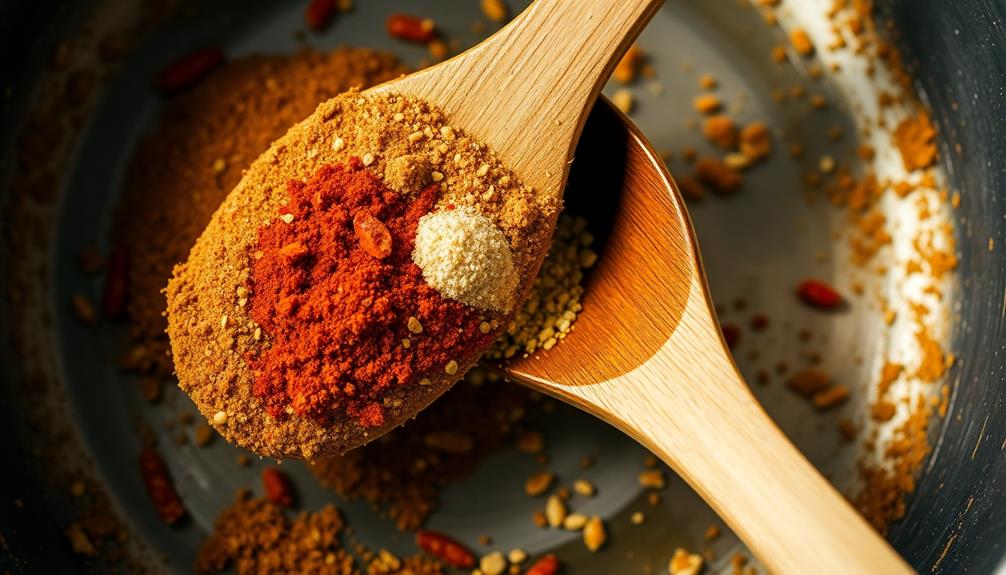
With the chickpeas drained and rinsed, you'll now season them with a delightful blend of spices. First, add a teaspoon of cumin, which will give the dish a warm, earthy flavor.

Chia seeds, known for their nutritional benefits, can complement this dish if you choose to sprinkle some on top for added texture and health perks. Next, sprinkle in a pinch of paprika for a touch of smokiness and a vibrant red color.

Advertisement

Don't forget the garlic powder – just a half-teaspoon will do! This will add a savory depth to the dish. Now, it's time to bring in some heat with a quarter-teaspoon of cayenne pepper. Go easy on this one, as a little goes a long way.

Finally, a pinch of salt and a grind of black pepper will help balance all the flavors. Stir everything together until the chickpeas are evenly coated. The spices will create a delicious aroma that's sure to make your mouth water.

Get ready for a flavor explosion in every bite!

Step 4. Boil Chickpeas Until Tender

boil chickpeas until tender

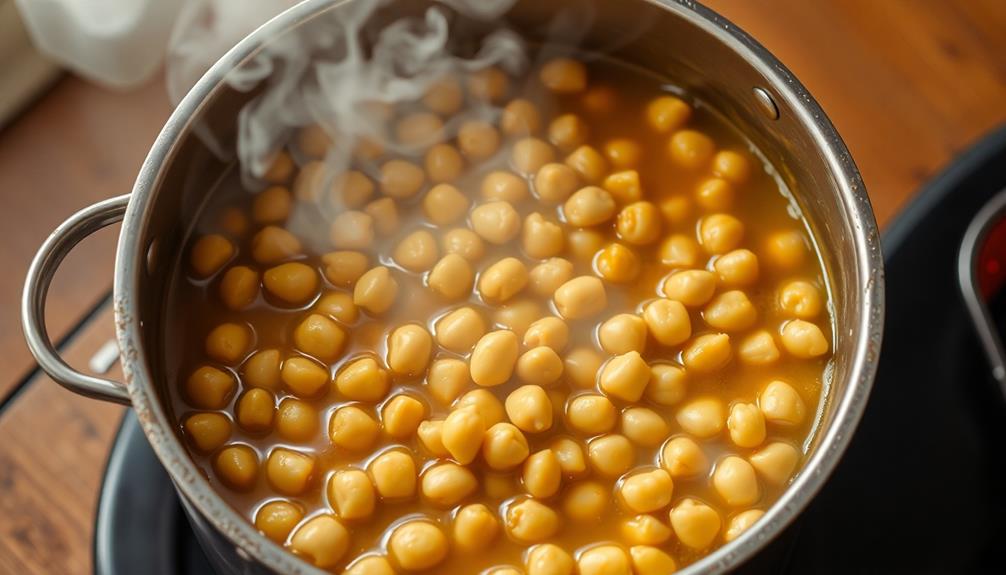
Grab a large pot and fill it with water, submerging the drained chickpeas. Turn the heat to high and bring the pot to a boil.

Once it's bubbling, reduce the heat to medium-low and let the chickpeas simmer. You'll want to keep a close eye on them, gently stirring every so often, until they're nice and tender – this should take around 30-40 minutes.

As the chickpeas cook, you'll notice the water starting to change color. That's a good thing! It means the chickpeas are releasing their natural starches, which will help thicken up the dish.

Advertisement

When the chickpeas are soft and easily mashed with a fork, they're ready to move on to the next step. Drain the chickpeas, reserving about a cup of the cooking liquid. You'll need that liquid later to adjust the texture of the dish.

Now your chickpeas are prepped and ready to be transformed into the warm, comforting Balila you've been craving.

Step 5. Serve Warm With Garnishes

serve warm add garnishes

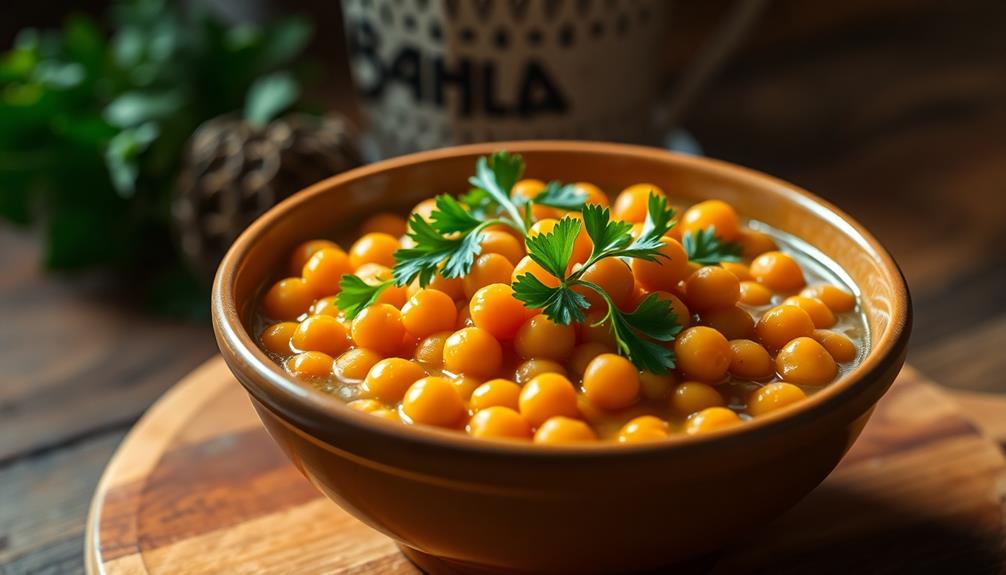
Now that your chickpeas are perfectly cooked and tender, it's time to start assembling the Balila. Grab a serving bowl and transfer the warm chickpeas into it. They should still be hot and bursting with flavor.

Next, drizzle the chickpeas with a generous amount of good-quality olive oil. The oil will help coat and cling to the chickpeas, adding richness and depth of flavor. Sprinkle in a pinch or two of salt, to taste, and give everything a gentle stir to combine.

For the finishing touches, you'll want to add some vibrant garnishes. Finely chop some fresh parsley or cilantro and scatter it over the top. The herbs will add a wonderful freshness and aroma.

You can also sprinkle on a bit of paprika or ground cumin for an extra layer of flavor. Finally, a squeeze of lemon juice just before serving will brighten up the dish. Serve the Balila warm, and enjoy the comforting and delicious results of your efforts!

Advertisement

Final Thoughts

Balila, this warm chickpea dish, offers a satisfying and comforting culinary experience. The final thoughts on this delightful recipe are just as heartwarming as the dish itself.

The aroma of the spices, the creamy texture of the chickpeas, and the garnishes that add a touch of freshness – it all comes together to create a truly remarkable meal.

As you savor the last bites, you can't help but feel a sense of contentment and joy. The warmth and nourishment it provides make it the perfect dish for a cozy evening or a gathering with loved ones.

Balila isn't just a recipe, but a celebration of simple, wholesome ingredients and the joy of home-cooked meals.

Whether you're introducing this dish to your family for the first time or it's a beloved staple in your household, Balila is sure to leave a lasting impression.

Advertisement

Embrace the flavors, the memories, and the comfort that this warm chickpea dish brings to your table.

Frequently Asked Questions

What Is the Best Type of Chickpeas to Use?

When it comes to chickpeas, you'll want to use the best type for your dish. Canned chickpeas are a super easy option – they're already cooked and ready to go.

But for an extra special flavor, try using dried chickpeas that you soak and cook yourself. They've a richer, nuttier taste that's perfect for recipes like Balila.

No matter which type you choose, you'll end up with a delicious, protein-packed dish the whole family will love!

Can I Use Canned Chickpeas Instead of Dried?

You sure can use canned chickpeas for this dish! They'll work just as well as dried ones.

Advertisement

In fact, canned chickpeas are super convenientno soaking or cooking required. Just drain and rinse them, and you're good to go.

The texture and flavor will be a bit different from dried, but it'll still be super tasty.

Give it a try and see what you think – I bet you'll love it!

How Can I Make the Dish Spicier?

Eager to spice things up? No problem!

To make your dish extra zesty, try adding a pinch or two of chili powder or crushed red pepper flakes. You can even dice up a fresh jalapeño or serrano pepper and toss it in.

Advertisement

Start with a small amount, then add more to suit your taste buds. Don't be afraid to experiment – the perfect spice level is just a sprinkle away!

Can I Add Other Vegetables to the Recipe?

Sure, you can definitely add other veggies to this dish!

The great thing about recipes is that you can customize them to your liking. Some tasty options could be diced tomatoes, sautéed spinach or kale, roasted bell peppers, or even some cubed zucchini. If you’re feeling adventurous, you could also add some spicy chorizo or a sprinkle of feta cheese for an extra kick of flavor. The possibilities are truly endless when it comes to making a delicious and unique dish. For example, you could take a traditional batata harra recipe and add your own twist by incorporating different herbs and spices or experimenting with various types of potatoes. The beauty of cooking is that you have the freedom to make a recipe your own.

Just toss them in with the chickpeas and seasonings. Get creative and have fun experimenting – that's the best part of cooking!

The more veggies you add, the heartier and more nutritious your dish will be.

Advertisement

Is There a Vegetarian/Vegan Version of Balila?

Absolutely! There's a delicious vegetarian and vegan version of the classic Balila dish that's just as tasty.

Instead of using chicken, you can swap in extra chickpeas or even roasted veggies like eggplant, bell peppers, or zucchini.

The savory flavors from the garlic, lemon, and Middle Eastern spices will still shine through, making it a satisfying meatless meal.

It's a great way to add more plant-based options to your menu.

Advertisement

Advertisement

Lebanese Cuisine

Bazella W Riz (Peas and Rice)

Latent with history and flavor, Bazella W Riz is a comforting peas and rice dish that transcends cultures and leaves you craving more.

Published

on

peas and rice delight

Bazella W Riz, an age-old blend of peas and rice, is a beloved comfort food that's cherished across many cultures. This hearty dish has a rich history, emerging as a way to stretch limited resources into tasty, nutritious meals. To make it, you'll first soak the peas overnight to soften them up. Then, you'll sauté onions and garlic, add tomatoes, peas, rice, broth, and spices, and let it all simmer until the rice is tender. The result is a fragrant, creamy dish that's sure to warm your soul. And if you keep reading, you'll discover even more about this delightful culinary tradition.

Key Takeaways

  • Bazella W Riz is a traditional dish with a distinct culinary tradition that combines the staple ingredients of peas and rice.
  • The dish emerged as a way to stretch limited resources into nutritious meals, with regional variations in spices, techniques, and serving styles.
  • Proper preparation techniques, such as soaking peas overnight and adding spices, contribute to the dish's creamy texture and enhanced flavor.
  • Simmering the rice and peas in broth allows the flavors to meld together, resulting in a tender and fragrant final dish.
  • Bazella W Riz is cherished as a comfort food and cultural touchstone in many communities, reflecting a unique cultural experience and rich blend of flavors.

History

Although the origins of Bazella W Riz can be traced back centuries, its history as a distinct culinary tradition is relatively recent. The dish's core ingredients – peas and rice – have been staple foods in many cultures for millennia.

However, the specific combination and preparation method that defines Bazella W Riz emerged more recently, likely within the last few centuries. Historians believe the dish developed as a way to stretch limited resources and create a satisfying, nutritious meal.

By pairing the protein-rich peas with the starchy rice, cooks could feed more people with fewer ingredients. Over time, regional variations arose, with different spices, cooking techniques, and serving styles.

Today, Bazella W Riz is cherished as a beloved comfort food and cultural touchstone in many communities. Its enduring popularity speaks to the timeless appeal of simple, wholesome ingredients expertly combined to create a truly delectable dish.

Cooking Steps

To begin the cooking process, gather the necessary ingredients and equipment.

Advertisement

You'll need a large pot, a wooden spoon, and a cutting board. Start by chopping the onions, garlic, and tomatoes into small pieces.

In the pot, sauté the onions and garlic in some olive oil until they're fragrant and tender.

Next, add the tomatoes, peas, and rice to the pot. Pour in the broth and season with salt, pepper, and your favorite herbs.

Bring the mixture to a boil, then reduce the heat and let it simmer for about 20 minutes, or until the rice is cooked through and the peas are tender.

Stir the pot occasionally to prevent sticking.

Advertisement

Once it's done, remove the pot from the heat and let it sit for a few minutes. Fluff the rice with a fork and serve hot, garnished with fresh parsley or green onions if desired.

Enjoy your delicious Bazella w Riz!

Step 1. Soak Peas Overnight Before Cooking

soak peas overnight first

Soaking the peas overnight before cooking is a simple yet essential step that can greatly improve their texture and flavor. When you soak the peas, you're allowing them to absorb water, which softens their tough outer shell and makes them easier to cook through.

This extra time also helps break down the complex starches and sugars within the peas, resulting in a creamier, more tender final dish.

Don't worry, the soaking process is easy! Just place the peas in a large bowl, cover them with water, and let them sit at room temperature overnight.

In the morning, you'll see the peas have plumped up and are ready to be drained and added to your recipe. This simple step ensures your peas will cook evenly and develop a delightful, creamy consistency.

Advertisement

Trust us, the extra time is well worth it for the delicious results!

Step 2. Drain and Rinse Soaked Peas

drain and rinse peas

After letting the peas soak overnight, you'll want to drain and rinse them before cooking. This step is crucial to remove any excess starch and impurities that may have accumulated during the soaking process.

Simply place a colander in your sink and pour the soaked peas into it. Give them a good rinse under cool, running water, gently stirring the peas with your hand to ensure they're all getting a thorough cleaning.

Once they're nice and clean, you can shake the colander to help remove any excess water. This extra step may seem small, but it can make a big difference in the overall texture and flavor of your Bazella w Riz dish.

With the peas prepped and ready to go, you can now move on to the next stage of the recipe – cooking the rice and combining it with the drained and rinsed peas.

Get excited, because you're one step closer to enjoying a delicious, homemade Bazella w Riz!

Advertisement

Step 3. Add Spices to Peas

spice infusion for peas

With the peas drained and rinsed, you're ready to start adding some flavor. First, gather your spices – you'll need cumin, coriander, and a pinch of cayenne pepper. Measure out a teaspoon of each spice and add them to the peas.

Consider enhancing the flavor profile with a touch of essential oils for respiratory health, which can also support your overall well-being while cooking. Give everything a good stir to coat the peas evenly.

The cumin will bring an earthy, warm aroma, while the coriander adds a bright, citrusy note. The cayenne pepper will give the dish a subtle kick of heat. Go easy on the cayenne at first – you can always add more later if you want a spicier flavor.

As you stir the spices into the peas, take a moment to inhale the tantalizing scent. The aroma of the spices will start to fill your kitchen, getting your taste buds excited for the delicious meal to come.

With the spices added, your peas are now ready for the next step – cooking them up with the rice.

Step 4. Add Rice and Peas

incorporate rice and peas

Grabbing the rinsed rice, combine it with the spice-coated peas in a large saucepan. Turn the heat to medium and let the flavors mingle. Stir occasionally as the rice starts to soak up the aromatic spices. Before long, the fragrance will fill the kitchen, making your mouth water.

Now, pour in the broth and bring the mixture to a gentle simmer. Cover the pan and let the rice cook, about 15-20 minutes, until it's tender and the liquid is absorbed. Remember to check it periodically, giving it a stir to prevent sticking.

Advertisement

Once the rice is cooked through, remove the pan from the heat. Fluff the rice and peas with a fork, then season with a pinch of salt and pepper to taste.

This simple, one-pot dish is bursting with delicious Middle Eastern flavors that are sure to satisfy. Serve it warm, and enjoy!

Step 5. Simmer Until Rice Is Tender

simmer rice until tender

Next, gently pour in the broth and bring the mixture to a gentle simmer. You'll want to let it simmer for about 20-25 minutes, or until the rice is nice and tender. Be sure to stir it occasionally to prevent any sticking or burning. The rice should soak up all that delicious broth, making it extra flavorful.

For a truly delightful meal, consider pairing this with the right side dishes or even exploring best vacuums for dust removal to keep your kitchen clean while you cook.

Once the rice is cooked through, you can give it a taste test. If it's still a bit crunchy, just let it simmer for a few more minutes. You'll know it's ready when the grains are soft and fluffy. Don't forget to season with a pinch of salt and pepper to really bring out all the flavors.

Simmering the rice slowly is the key to getting that perfect texture. It may take a bit of patience, but trust us, it's so worth it! Soon, you'll have a pot of fragrant, tender rice ready to serve alongside the peas. Get ready for a mouthwatering dish that's sure to satisfy.

Advertisement

Final Thoughts

Reflecting on the Bazella W Riz journey, you're left with a deeper appreciation for the nuances of this unique cultural experience. The rich blend of flavors, the time-honored techniques, and the sense of community woven into each bite – it all comes together to create a truly memorable dish.

As you savor the last morsel, you can't help but feel a renewed connection to the culinary traditions of this region. The simmering rice, the tender peas, and the harmonious spices have transported you to a different time and place, inviting you to slow down and truly savor the moment. As you sit back and reflect on the meal, you can’t help but think about the rich history of hummus in this region. The creamy blend of chickpeas, tahini, and olive oil has been a staple in the diets of people here for centuries. Understanding the history of hummus adds an extra layer of appreciation for the flavors and traditions of this culture.

Looking ahead, you're excited to share this recipe with friends and family, passing on the legacy of Bazella W Riz. Perhaps you'll even experiment with your own twist, adding a personal flair while still honoring the essence of this beloved dish.

The possibilities are endless, and the joy of discovery is half the fun.

Frequently Asked Questions

What Is the Ideal Ratio of Peas to Rice?

The ideal ratio of peas to rice can vary, but a good rule of thumb is a 1:2 ratio.

Advertisement

This means for every one part peas, you'll want two parts rice. This balance allows the flavors to complement each other perfectly, with the peas providing a pop of sweetness and the rice offering a hearty, filling base.

Feel free to adjust the ratio to suit your personal taste preferences!

Can I Use Frozen Peas Instead of Fresh?

Absolutely! You can definitely use frozen peas instead of fresh ones in your recipe.

Frozen peas are just as nutritious and flavorful as fresh, and they're super convenient too. Plus, they'll save you the time and effort of shelling and prepping fresh peas.

Just toss the frozen peas right in – they'll cook up perfectly and blend beautifully with the rice.

Advertisement

It's an easy swap that'll make your dish even quicker to prepare. Go for it and enjoy your delicious meal!

How Long Can the Cooked Dish Be Stored?

You can definitely store that tasty dish for a few days! The cooked peas and rice will last 3-4 days in the fridge.

Just make sure to pop it in an airtight container. That way, you can enjoy those delicious flavors again and again throughout the week.

And hey, the best part is you can use frozen peas – no need to worry about fresh ones going bad. Isn't that convenient?

Get ready to savor that comforting, homemade meal all over again!

Advertisement

Can I Substitute Other Types of Rice?

Absolutely! You can substitute other types of rice in this dish.

Basmati, jasmine, or long-grain white rice would all work great. Just keep in mind that different rices may have slightly different cooking times, so you might need to adjust the recipe a bit.

But don't worry – it's easy to experiment and find the perfect rice for your taste buds!

Have fun exploring all the delicious possibilities.

Is There a Vegetarian Alternative to the Meat?

Absolutely! There are lots of tasty vegetarian alternatives you can use in place of meat.

Advertisement

One great option is sautéed mushrooms – they've a meaty texture and rich, savory flavor that works perfectly.

You could also try crumbled tofu or tempeh, which are plant-based proteins that can mimic the consistency of ground meat.

Whatever you choose, the key is to season it well and let the flavors shine through.

Get creative and have fun experimenting!

Advertisement

Continue Reading

Lebanese Cuisine

Kawarma (Preserved Meat)

Fascinating preserved meat dish with ancient roots in the Middle East, where people developed ingenious techniques to make it last longer. Discover the art of making kawarma.

Published

on

preserved meat delicacy kawarma

Kawarma is a delectable preserved meat dish with ancient roots in the Middle East. Over centuries, people in this region developed ingenious techniques to preserve meat during times of scarcity. They'd dry and salt the meat, seasoning it with a blend of aromatic spices and herbs. This not only helped the meat last longer, but also infused it with rich, mouthwatering flavors. Today, kawarma remains an integral part of the region's culinary heritage, showcasing the resilience and ingenuity of its people. Crafting this captivating dish involves a multi-step process, from trimming the meat to smoking it to storing it just right. Want to learn more about the art of making kawarma?

Key Takeaways

  • Kawarma is a traditional preserved meat dish with origins in the Middle East, developed to ensure long-term meat storage during times of scarcity.
  • The preparation involves drying, salting, and seasoning the meat with spices and herbs, which enhances the flavor and aids in preservation.
  • Kawarma is an integral part of the Middle Eastern culinary heritage, with regional variations that showcase the resilience and ingenuity of the people.
  • The cooking process includes marinating the meat, searing it in hot oil, and simmering it to achieve a tender, flavorful result.
  • Kawarma is celebrated as a link to the past and a testament to the resourcefulness of Middle Eastern communities in the face of limited resources.

History

Kawarma, a traditional preserved meat dish, has a rich history rooted in the Middle Eastern region. For centuries, people in this area have used ingenious techniques to store meat for long periods, ensuring a reliable food source during times of scarcity.

The process of making kawarma involves meticulously drying and salting the meat, often using spices and herbs to enhance the flavor. This preservation method not only extends the meat's shelf life but also imbues it with a unique, intensely savory taste.

As communities in the Middle East faced environmental challenges and limited access to refrigeration, kawarma became an integral part of their culinary heritage. The dish evolved, with different regions developing their own variations, each reflecting local ingredients and cultural traditions.

Today, kawarma remains a beloved staple, enjoyed not only for its practical benefits but also as a cherished link to the past, celebrating the ingenuity and resilience of the people who perfected this remarkable food preservation technique.

Cooking Steps

Once the meat is prepared, you can begin the cooking process. First, you'll want to gather your ingredients – the marinated meat, some oil, and any spices or herbs you'd like to add.

Advertisement

Heat the oil in a large pan over medium-high heat. When the oil is hot, carefully add the meat. Be cautious, as the hot oil may splatter! Let the meat sear for a few minutes, giving it a nice golden-brown color on all sides.

Next, reduce the heat to low and cover the pan with a lid. This will help the meat cook through without burning the outside. Let it simmer for about an hour, stirring occasionally, until the meat is incredibly tender. The long, slow cooking is what gives kawarma its signature texture and flavor.

Once the meat is cooked through, you can remove the lid and let any excess liquid evaporate. This will help create a thick, rich sauce coating the meat.

And there you have it – perfectly cooked kawarma, ready to enjoy!

Step 1. Trim Meat Into Thin Strips

thinly sliced meat strips

Begin by trimming the meat into thin, even strips, about 1/4 inch thick and 2-3 inches long.

You'll want to use a sharp knife for this task, carefully slicing the meat against the grain. Take your time and focus on creating uniform pieces, as this will help them cook evenly later on.

Advertisement

Once you've got all the meat sliced, it's time to give them a quick rinse under cold water. This helps remove any impurities or excess fat.

After rinsing, pat the strips dry with a clean kitchen towel or paper towels. Ensuring the meat is dry is crucial for the next steps in the preservation process.

With your perfectly portioned meat strips ready, you can now move on to the next phase of making delicious kawarma.

Step 2. Soak Meat in Brine Solution

soaking meat in brine

With the meat strips neatly prepared, you'll now create a brine solution to soak them in. In a large bowl, combine water, salt, and any desired spices. Stir the mixture until the salt fully dissolves, creating a flavorful brine.

Gently place the meat strips into the brine, ensuring they're fully submerged. Cover the bowl and let it rest in the refrigerator for several hours, or even overnight. This brining process infuses the meat with delicious seasoning and helps preserve it.

As the meat soaks, the brine will draw out excess moisture, concentrating the flavors. The salt in the solution also inhibits the growth of harmful bacteria, making the meat safer to consume.

Advertisement

Once the brining is complete, remove the meat strips from the brine and pat them dry with paper towels. They're now ready for the next step in the kawarma preservation process. Get excited, because your homemade kawarma is well on its way!

Step 3. Air Dry Meat Strips

air drying meat strips

After the meat strips have finished brining, it's time to air-dry them. This stage is crucial for creating that classic kawarma texture – chewy, but not too tough.

Grab your meat strips and hang them up in a well-ventilated area, away from direct sunlight. You want a gentle breeze to circulate around them as they dry. It'll take a few hours, so be patient!

Keep an eye on them, making sure they're not getting too dry or crispy. Once they've developed a leathery, slightly shriveled appearance, you're ready for the next step.

Be careful when handling the strips – you don't want to break them. Gently transfer them to a clean surface, ready for the final touches.

Air-drying is a delicate process, but it's worth it to achieve that authentic kawarma flavor and texture. With a little TLC, your meat will be primed for the next phase of preservation.

Advertisement

Step 4. Smoke Meat Strips Over Wood

smoke meat strips wood

Once the air-dried meat strips have acquired the desired leathery texture, it's time to smoke them over wood. This step adds a delightful, smoky flavor that'll have your taste buds dancing.

First, gather some hardwood chips or chunks – oak, hickory, or mesquite work great. Soak the wood in water for at least 30 minutes to create a nice, steady smoke.

Next, set up your smoker or grill for indirect heat. Place the soaked wood over the heat source, then arrange the meat strips on the grates, making sure they don't touch. Close the lid and let the magic happen!

Smoke the meat for 2-4 hours, depending on the thickness of the strips, until they've acquired that irresistible, deep-smoked aroma. Keep an eye on the temperature, ensuring it stays between 200-225°F for best results.

Once the meat is perfectly smoked, remove it from the heat and let it cool slightly. Now, you're ready to enjoy the savory, smoky goodness of your homemade kawarma!

Step 5. Store in Airtight Container

airtight container storage method

To store your homemade kawarma properly, you'll need an airtight container. This will keep your delicious preserved meat fresh and flavorful for weeks.

Simply place the smoked meat strips into the container, making sure there's no air pockets. Seal the lid tightly, locking in that smoky goodness.

Advertisement

Now, where should you store your kawarma? The best spot is in a cool, dry place, like a pantry or cupboard. Avoid the fridge or freezer, as the fluctuating temperatures can dry out the meat.

Your kawarma will stay perfectly preserved at room temperature in its airtight home.

When you're ready to enjoy a tasty piece, just open the container and grab a strip. The kawarma will be bursting with that irresistible blend of spices and smoke.

Store it this way, and your homemade kawarma will stay fresh for up to two months. Easy peasy! Now you can savor the fruits of your labor for weeks to come.

Final Thoughts

Kawarma, the preserved meat delicacy, has undoubtedly captured the hearts and palates of many. As you've learned, the process of creating this unique food is both fascinating and intricate. From the careful selection of meats to the precise curing and drying techniques, every step is crucial in producing the rich, savory flavors and melt-in-your-mouth texture that make kawarma so special. If you’re a fan of kawarma, you may also be interested in learning how to make homemade sujuk. This Middle Eastern sausage is another popular cured meat delicacy that requires skill and patience to create. From grinding the meat and mixing in the perfect blend of spices to the careful process of stuffing and drying, mastering how to make homemade sujuk is a rewarding endeavor for any food enthusiast.

Advertisement

Looking ahead, the future of kawarma is bright. As more people discover this traditional gem, the demand for its authentic, handcrafted version is sure to grow.

Whether you enjoy it as a snack, an ingredient in your favorite dishes, or a centerpiece of a festive spread, kawarma offers a delightful taste of history and culture.

So, the next time you savor a bite of this preserved meat, take a moment to appreciate the skill and dedication that went into its creation.

Kawarma is truly a culinary treasure worth savoring and sharing with loved ones.

Frequently Asked Questions

How Long Can Kawarma Be Stored For?

You'll be amazed at how long kawarma, a type of preserved meat, can be stored!

Advertisement

Properly stored, it can last an incredible 6 to 12 months.

That's right, you can enjoy the delicious flavor of this special meat for up to a year.

Isn't that wild?

With the right storage techniques, kawarma is a fantastic long-lasting option.

Get ready to savor its unique taste for months on end!

Advertisement

What Are the Health Benefits of Eating Kawarma?

Eating kawarma can be a real treat for your body! This preserved meat is packed with all sorts of amazing health benefits.

It's a great source of protein, which helps build and repair your muscles. Plus, it's got lots of vitamins and minerals that keep your bones strong and your immune system healthy.

Can Kawarma Be Used in Other Dishes?

Yes, you can absolutely use kawarma in other dishes! Kawarma's rich, savory flavor makes it a versatile ingredient.

You can chop it up and add it to soups, stews, or rice dishes. Or try frying it up and serving it over a salad for a tasty protein boost.

The possibilities are endless! Kawarma's unique taste and texture can really elevate all kinds of meals.

Advertisement

How Does the Taste of Kawarma Differ From Fresh Meat?

The taste of kawarma differs quite a bit from fresh meat. While fresh meat is juicy and tender, kawarma has a richer, more intense flavor.

It's been preserved and dried, so it has a chewier texture and a deeper, smokier taste. Don't worry – that doesn't mean it's tough or unpleasant.

It's just got a unique character that makes it perfect for adding big flavor to your favorite dishes.

Is Kawarma Only Made in Certain Regions?

Kawarma, a savory preserved meat, isn't just found in one region – it's enjoyed all around the world!

While the preparation may vary, the rich, concentrated flavor sets it apart from fresh meat.

Advertisement

Whether you're in the Middle East, Asia, or even parts of Europe, you'll likely find locals who've perfected their own unique kawarma recipe passed down through generations.

It's a truly global delicacy that brings communities together through its shared love of preserved meats.

Continue Reading

Lebanese Cuisine

Harisseh (Semolina Cake)

With its captivating texture and comforting flavors, Harisseh, a semolina cake with ancient roots in the Middle East, is a cherished symbol of the region’s rich culinary heritage. Discover more about this delightful treat.

Published

on

delicious semolina cake recipe

Harisseh, a semolina cake with ancient roots in the Middle East, will captivate your taste buds. Its unique texture and comforting flavors have delighted people for centuries. First, you'll sift the semolina and flour to create a smooth, fluffy crumb. Then, you'll slowly add melted butter, milk, and sugar, blending them into a batter. Once baked, the cake's mouthwatering aroma will fill the air. Finish with a sprinkle of crushed pistachios for a beautiful presentation and delightful contrast of flavors. With a few simple steps, you'll be enjoying this cherished symbol of the region's rich culinary heritage. And there's more to discover about this delightful treat. For a truly authentic experience, pair your harisseh with a traditional Middle Eastern tea or coffee to complement the sweet pastry dessert. Whether enjoyed on a peaceful afternoon or shared with loved ones, harisseh is sure to become a cherished part of your culinary repertoire. Its timeless appeal and simple yet satisfying ingredients make it a beloved treat worth savoring.

Key Takeaways

  • Harisseh is a cherished semolina-based cake with origins tracing back to ancient culinary traditions of the Middle East, particularly Mesopotamia and the Levant region.
  • The recipe involves sifting semolina and all-purpose flour, incorporating melted butter, milk, and sugar, and baking in a preheated oven for 30-35 minutes.
  • Sifting the flours is crucial for achieving a light and fluffy crumb, while the addition of melted butter and milk contributes to the cake's rich and creamy texture.
  • Garnishing the warm cake with crushed pistachios adds a delightful crunch and nutty flavor, enhancing the overall appeal and taste of the dish.
  • Harisseh is a versatile cake suitable for special occasions or as a comforting snack, representing the rich culinary heritage of the Middle Eastern region.

History

The origins of harisseh, a semolina-based cake, can be traced back to the ancient culinary traditions of the Middle East. Over centuries, this delightful treat has evolved, with each region and culture adding their own unique flair.

Harisseh's roots lie in the kitchens of ancient Mesopotamia, where cooks first experimented with the versatile semolina flour. As the recipe spread throughout the region, it found a special home in the Levant, where it became a beloved part of the local cuisine.

Today, harisseh is enjoyed across the Middle East, from Egypt to Iran, each country and community putting their own spin on the classic recipe. Some add fragrant spices like cinnamon or cardamom, while others incorporate nuts or dried fruit.

No matter the variation, harisseh remains a cherished symbol of the region's rich culinary heritage, a timeless delight that connects generations and cultures.

Cooking Steps

To begin the cooking process, preheat your oven to 350°F (175°C). Grease and flour a 9-inch round cake pan or an 8-inch square baking dish.

Advertisement

Now, in a large bowl, whisk together the semolina, sugar, baking powder, and salt until well combined.

In a separate bowl, beat the eggs, milk, and melted butter until smooth. Slowly pour the wet ingredients into the dry ingredients, mixing until you have a thick, pourable batter.

Pour the batter into the prepared pan, smoothing the top with a spatula.

Bake the harisseh for 35-40 minutes, or until a toothpick inserted in the center comes out clean.

Allow the cake to cool in the pan for 10 minutes before inverting it onto a wire rack to cool completely.

Advertisement

Once cooled, serve the delicious semolina cake and enjoy its delightful texture and flavor.

Step 1. Sift Semolina and All-Purpose Flour

sift semolina and flour

Sifting the semolina and all-purpose flour is a crucial step in preparing the Harisseh. By sifting, you'll remove any lumps or impurities, ensuring a smooth and consistent texture in your cake.

Start by placing a fine-mesh sieve over a large bowl. Gently pour the semolina into the sieve and shake it back and forth, allowing the fine grains to fall through into the bowl below. Repeat this process with the all-purpose flour.

Don't be tempted to skip this step – sifting aerates the flours, which helps create a light and fluffy crumb in the final cake. Plus, it's a satisfying process that only takes a minute.

Once you've sifted both the semolina and flour, give them a quick stir to combine. You're now ready to move on to the next step in crafting your delicious Harisseh.

Sifting may seem small, but it makes a big difference in the quality of your homemade semolina cake.

Advertisement

Step 2. Add Melted Butter

incorporate melted butter

Next, add the melted butter to the sifted flours. You'll want to pour it in slowly, stirring as you go. This helps the butter incorporate evenly throughout the mixture. The butter will add a lovely richness and moisture to your harisseh cake.

Be sure to use real, unsalted butter for the best flavor. Melt it gently over low heat, watching closely so it doesn't burn. Once it's liquid, let it cool slightly before adding it to the dry ingredients.

Stir the butter in with a wooden spoon or sturdy spatula, making sure to scrape the sides and bottom of the bowl. Keep mixing until you have a smooth, well-blended batter. The butter should be fully incorporated, with no visible pockets or streaks remaining.

Now that the butter is in, you're ready for the next step! Grab your mixing bowl and let's keep going.

Step 3. Add Milk and Sugar

add milk and sugar

The addition of milk and sugar is a crucial step in crafting the perfect harisseh cake. This sweet combination brings a lovely creaminess and richness to the semolina base.

First, you'll want to pour in some whole milk, gently stirring it into the melted butter until the mixture is smooth and well-combined. The milk adds a delightful moistness that balances the slightly grainy texture of the semolina.

Next, it's time to sprinkle in the granulated sugar. Start with a quarter cup and give it a good stir, tasting as you go to achieve your desired sweetness level. The sugar will dissolve beautifully, lending a comforting, homey flavor to the cake.

Advertisement

Feel free to add a bit more if you'd like an extra-sweet treat.

With the milk and sugar incorporated, the batter is ready for the next step. Keep stirring to ensure everything is evenly distributed, then prepare to bake your aromatic and delectable harisseh cake.

Step 4. Bake in Preheated Oven

bake in preheated oven

Preheating the oven to the specified temperature is essential for baking the harisseh cake to perfection. Set your oven to 350°F (175°C) and let it heat up completely. This even heat distribution is crucial for the cake to rise evenly and develop a beautiful golden-brown crust.

Once the oven is ready, carefully pour the batter into a greased baking pan. Spread it out evenly, making sure to reach the edges. This will help the cake bake consistently throughout.

Pop the pan into the preheated oven and let the magic happen!

Bake the harisseh for 30-35 minutes, or until a toothpick inserted into the center comes out clean. The aroma wafting through your kitchen will be absolutely mouthwatering.

Advertisement

Keep an eye on the cake, and if the top starts to brown too quickly, simply cover it with a sheet of aluminum foil to prevent overbrowning.

Step 5. Garnish With Crushed Pistachios

garnish with crushed pistachios

Once the harisseh has finished baking to perfection, it's time to add the finishing touch – a sprinkle of crushed pistachios. This simple garnish elevates the cake, bringing a delightful crunch and a pop of vibrant green color.

Gather a handful of shelled pistachios and place them in a small plastic bag. Use a rolling pin or the back of a spoon to gently crush the nuts into small, irregularly shaped pieces. You don't want them too finely ground – just enough to create a lovely texture.

Carefully remove the baked harisseh from the oven and let it cool slightly. While it's still warm, generously sprinkle the crushed pistachios over the top of the cake. The warm semolina will help the nuts stick, creating a beautiful, nutty topping.

Serve the harisseh immediately, allowing your guests to admire the tempting display of golden cake and vibrant green pistachios. The contrasting flavors and textures will delight the senses and have everyone reaching for seconds.

Final Thoughts

Ultimately, you should feel confident in your ability to create this delectable semolina cake, Harisseh. The process may seem daunting at first, but with a little practice, you'll be whipping up these fragrant and indulgent treats in no time.

Advertisement

Remember, the key is to take your time and follow the instructions carefully. Don't be afraid to experiment with different garnishes or flavors to make the dish your own.

Whether you're serving it at a special occasion or enjoying it as a comforting snack, Harisseh is sure to delight your taste buds and impress your friends and family.

Frequently Asked Questions

Can I Substitute Regular Flour for Semolina in This Recipe?

You can certainly try substituting regular flour for semolina in this recipe, but it won't give you quite the same texture.

Semolina has a coarser, grittier texture that adds a unique crumb to baked goods. If you use regular flour, your cake might turn out a bit more fine and delicate.

But hey, why not give it a shot? You might discover a whole new flavor and texture that you love!

Advertisement

How Long Can the Harisseh Cake Be Stored?

You'll be excited to hear that the delicious harisseh cake can be stored for up to a week!

Just keep it in an airtight container at room temperature, and it'll stay fresh and moist. Isn't that great news?

You can enjoy the soft, sweetness of this traditional semolina cake for days.

Just be sure to savor every bite – it's too good to let it go to waste!

Is Harisseh a Traditional Dessert From a Specific Region?

Ooh, you're in for a real treat! Harisseh is a delightful traditional dessert that originated in the Middle East.

Advertisement

It's a semolina-based cake with a mouthwatering, dense texture and a unique flavor profile. Depending on the region, it can be flavored with rose water, orange blossom water, or even spices like cinnamon.

No matter where it's from, this sweet treat is sure to delight your taste buds and transport you to a world of rich, cultural history.

Can I Use a Different Type of Sweetener Instead of Sugar?

Sure, you can absolutely use a different sweetener instead of sugar in your recipe!

Honey, maple syrup, or even agave nectar would work great. The key is to adjust the amount you use, as these alternative sweeteners can be more intense than regular sugar.

Have fun experimenting and find the flavor that suits your taste buds best.

Advertisement

Just be sure to keep a close eye on the texture and consistency as you make the switch.

Happy baking!

What Is the Purpose of the Rose Water in This Recipe?

Rose water adds a lovely, delicate floral flavor to many Middle Eastern desserts. When you use it in your baking, it transports you to a fragrant, exotic world.

The gentle rose scent in your dish creates a sense of warmth and comfort, elevating the overall experience. Plus, the rose water pairs beautifully with the rich, nutty flavors of the semolina in this recipe.

Just a touch goes a long way, so you'll enjoy the subtle yet captivating essence it brings to your dessert.

Advertisement

Continue Reading

Affiliate Disclaimer
As an affiliate, we may earn a commission from qualifying purchases. We get commissions for purchases made through links on this website from Amazon and other third parties.

Advertisement

Vetted

top local car washes top local car washes
Vetted2 months ago

14 Best Car Washes Near You for a Sparkling Clean Ride

I discovered the 14 best car washes near you that promise a sparkling clean ride, and you won't want to...

top mops for 2024 top mops for 2024
Vetted2 months ago

The 15 Best Mops of 2025 – Your Ultimate Guide to a Spotless Home

Find the perfect mop for your cleaning needs in 2025, and discover how these top choices can revolutionize your home...

top women s fragrances 2024 top women s fragrances 2024
Vetted2 months ago

15 Best Perfumes for Women in 2025 – A Fragrance Guide You Can’t Miss

Keen to discover the top 15 perfumes for women in 2025? Uncover unique scents that will elevate your fragrance game!

top local bars guide top local bars guide
Vetted2 months ago

14 Best Bars Near You for an Unforgettable Night Out

Looking for the perfect bar to elevate your night out? Discover the 14 best spots that promise unforgettable experiences!

luxurious beard oil selection luxurious beard oil selection
Vetted2 months ago

15 Best Beard Oils for a Luxurious Grooming Experience in 2025

Shop the 15 best beard oils for a luxurious grooming experience in 2025 and discover which ones will elevate your...

top college laptops 2024 top college laptops 2024
Vetted2 months ago

15 Best College Laptops of 2025: The Ultimate Guide for Students

With our guide to the 15 best college laptops of 2025, discover which powerful models will elevate your academic experience...

waterproof mascaras for tears waterproof mascaras for tears
Vetted2 months ago

15 Best Waterproof Mascaras That Will Survive Any Tear-Jerker

Outstanding waterproof mascaras await to keep your lashes flawless through any emotional moment; discover which ones made the top 15...

top flavorful disposable vapes top flavorful disposable vapes
Vetted2 months ago

15 Best Disposable Vapes of 2025: Top Picks for Flavor and Convenience

Prepare to discover the 15 best disposable vapes of 2025 that blend exceptional flavor and convenience, but which ones truly...

refreshing lunch salad ideas refreshing lunch salad ideas
Vetted2 months ago

15 Best Salads Near You That Will Freshen Up Your Lunch Routine

Transform your lunch with the 15 best salads nearby that will tantalize your taste buds and leave you craving more...

top convertible car seats top convertible car seats
Vetted2 months ago

15 Best Convertible Car Seats of 2025 – Safety and Comfort for Your Little One

Get ready to discover the top 15 convertible car seats of 2025 that blend safety and comfort—find out which models...

delicious fast food breakfast delicious fast food breakfast
Vetted2 months ago

15 Best Fast Food Breakfast Options That Will Make Your Mornings Delicious

Uncover the 15 best fast food breakfast options that will transform your mornings into a delicious experience you won't want...

stylish contacts for vision stylish contacts for vision
Vetted2 months ago

14 Best America’s Contacts for Clear Vision and Style

Browse through the 14 best contact lenses in America for clear vision and style, and discover which one perfectly complements...

Trending