Southern Comfort Food
Chess Pie
Wondering about the Southern dessert that’s as sweet as it is mysterious? Chess pie’s allure goes beyond its simple ingredients…
![sweet custard pie recipe](https://cookifya.com/wp-content/uploads/2024/10/sweet_custard_pie_recipe.jpg)
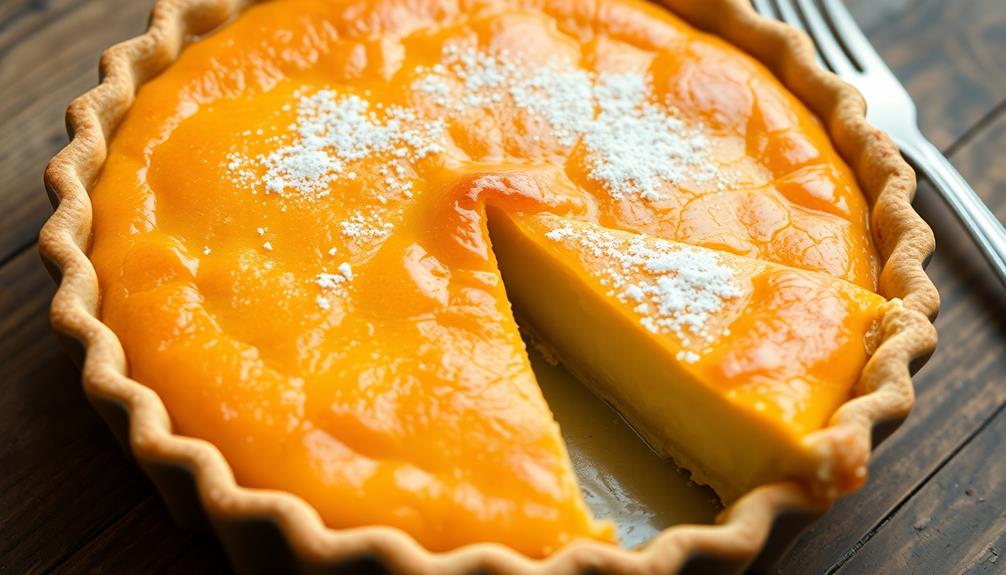
Chess pie is a classic Southern dessert with a rich history. You'll love its simple ingredients: eggs, butter, sugar, and cornmeal or flour. This sweet treat has been warming hearts since the 18th century. It's easy to make and perfect for any occasion. The creamy, custard-like filling bakes up golden brown in about an hour. You can enjoy it plain or add your own twist with lemon or chocolate. Chess pie is comfort food at its finest, bringing smiles to faces young and old. There's so much more to discover about this beloved pie's story and preparation.
Key Takeaways
- Chess pie is a classic Southern dessert with a rich, custard-like filling made from simple ingredients.
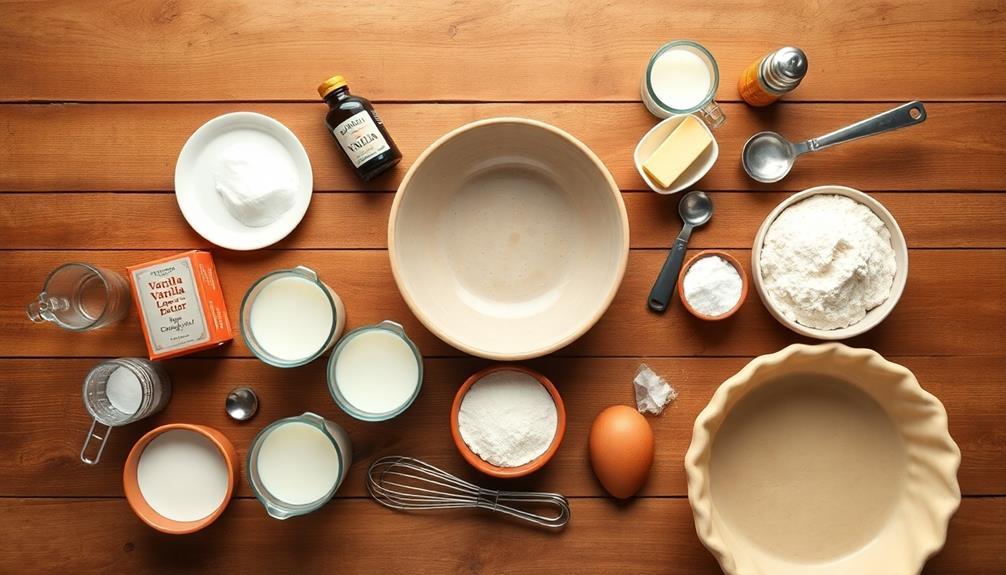
- Key ingredients include sugar, butter, eggs, cornmeal, vanilla extract, and vinegar.
- The pie originated in England during the 18th century and became popular in Southern kitchens during the 1800s.
- Baking time is typically 50-60 minutes at 350°F (175°C) until golden brown and slightly jiggly in the center.
- Chess pie is known for its sweet flavor, creamy texture, and versatility in allowing various flavor adaptations.
History
Chess pie, a beloved Southern dessert, has roots stretching back to England in the 18th century. You might wonder how it got its name. Well, there are a few theories! Some say it's because the pie was stored in a chest, which sounds like "chess" in a Southern accent. Others think it's a mispronunciation of "cheese pie," since it has a texture similar to cheesecake.
When English settlers came to America, they brought their love for custard pies with them. In the South, these pies evolved into what we now call chess pie. It became popular because it used simple ingredients that were easy to find. You could make it with just eggs, butter, sugar, and a little cornmeal or flour.
Chess pie became a staple in Southern kitchens during the 1800s. It was a go-to dessert for many families, especially during tough times when fancy ingredients were hard to come by.
Today, you'll find many variations of chess pie, like lemon, chocolate, and even buttermilk versions. It's a tasty piece of history that's still enjoyed at family gatherings and holidays across the South!
Recipe
Chess pie is a classic Southern dessert known for its rich, custard-like filling and characteristic crisp top layer. This simple yet decadent pie has been a staple in Southern households for generations, with its origins dating back to the 18th century. The name "chess pie" is shrouded in mystery, with various theories attempting to explain its curious moniker.
This recipe for chess pie yields a delightfully sweet and creamy dessert that's perfect for any occasion. The filling is made with basic pantry ingredients, including sugar, butter, eggs, and cornmeal, which gives the pie its signature texture. The addition of vanilla extract and a touch of vinegar helps to balance the sweetness and adds depth to the flavor profile.
- 1 unbaked 9-inch pie crust
- 2 cups granulated sugar
- 2 tablespoons cornmeal
- 1 tablespoon all-purpose flour
- 1/4 teaspoon salt
- 1/2 cup unsalted butter, melted and cooled
- 1/4 cup milk
- 1 tablespoon white vinegar
- 1 teaspoon vanilla extract
- 4 large eggs, lightly beaten
Preheat the oven to 350°F (175°C). In a large bowl, whisk together the sugar, cornmeal, flour, and salt. Add the melted butter, milk, vinegar, and vanilla extract, stirring until well combined. Gradually add the beaten eggs, mixing until the filling is smooth.
Pour the filling into the unbaked pie crust and bake for 50-60 minutes, or until the top is golden brown and the center is set but still slightly jiggly. Allow the pie to cool completely before serving.
For best results, use room temperature ingredients when preparing the filling. This ensures a smooth, well-incorporated mixture. If the edges of the crust begin to brown too quickly during baking, cover them with aluminum foil to prevent burning.
Chess pie is typically served at room temperature or slightly chilled, and it pairs wonderfully with a dollop of whipped cream or a scoop of vanilla ice cream.
Cooking Steps
Get ready to bake a delicious chess pie with these simple steps!
You'll start by preheating your oven to 375°F and mixing the dry ingredients together.
Next, you'll add the wet ingredients and blend them well, then pour the mixture into a pie crust and bake it for 50 minutes.
Step 1. Preheat Oven to 375°F
![preheat oven to 375 f](https://cookifya.com/wp-content/uploads/2024/10/preheat_oven_to_375_f-4.jpg)
Begin by preheating your oven to 375°F (190°C). This step is crucial for ensuring your chess pie bakes evenly and achieves that perfect golden-brown top.
While the oven is heating up, you'll have time to prepare the other ingredients and mix your pie filling.
Don't rush this process! It's important to give your oven enough time to reach the right temperature. Most ovens take about 15 to 20 minutes to preheat fully. If you have an older oven, it might take a bit longer.
You can use this time wisely by gathering your ingredients, measuring them out, and getting your mixing bowl ready.
Step 2. Mix Dry Ingredients Together
![combine dry ingredients thoroughly](https://cookifya.com/wp-content/uploads/2024/10/combine_dry_ingredients_thoroughly-6.jpg)
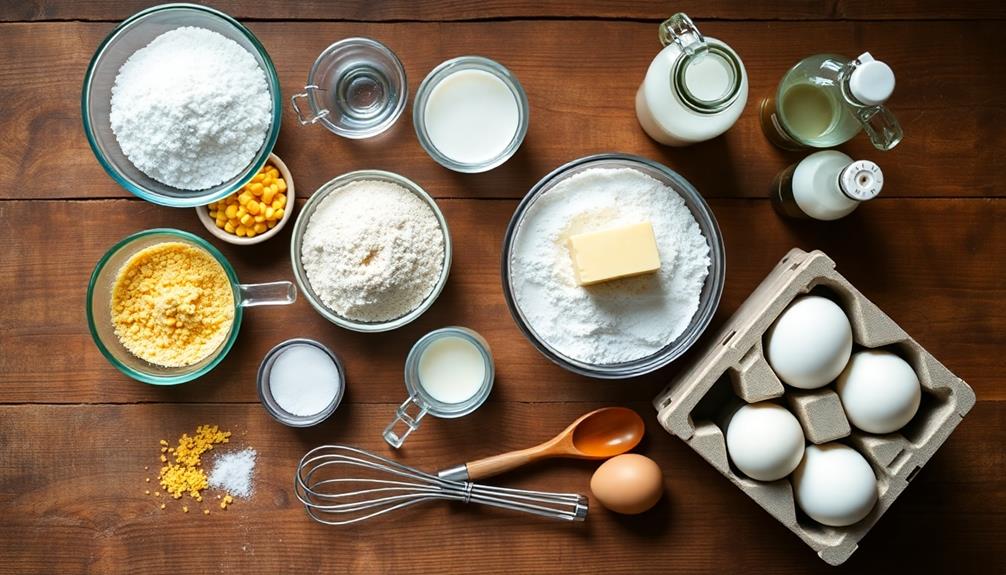
For the next step, you'll need to combine the dry ingredients. Grab a medium-sized bowl and get ready to mix! You'll be using flour, sugar, and cornmeal for this classic chess pie recipe.
Start by measuring out 1 cup of all-purpose flour. Pour it into the bowl, making sure to level it off with a knife for accuracy. Next, add 1 cup of granulated sugar. This sweetness is what gives chess pie its signature flavor.
Finally, sprinkle in 2 tablespoons of yellow cornmeal. The cornmeal adds a subtle texture and helps create that delicious golden crust.
Now it's time to blend these ingredients together. You can use a whisk or a fork to mix them thoroughly. Stir in a circular motion, making sure to break up any clumps of flour or sugar.
Keep mixing until the dry ingredients are well combined and have a uniform appearance. This step is important because it ensures that your pie filling will be smooth and evenly flavored.
Once you're done mixing, set the bowl aside. You'll be ready to move on to the wet ingredients soon! After setting the bowl aside, it’s time to gather the wet ingredients for the classic ambrosia salad recipe. Start by mixing together the sour cream, pineapple juice, and mini marshmallows in a separate bowl. Once these ingredients are combined, gently fold them into the fruit and coconut mixture. This will give the salad its signature creamy, sweet flavor.
Step 3. Add Wet Ingredients; Blend
![combine and mix ingredients](https://cookifya.com/wp-content/uploads/2024/10/combine_and_mix_ingredients.jpg)
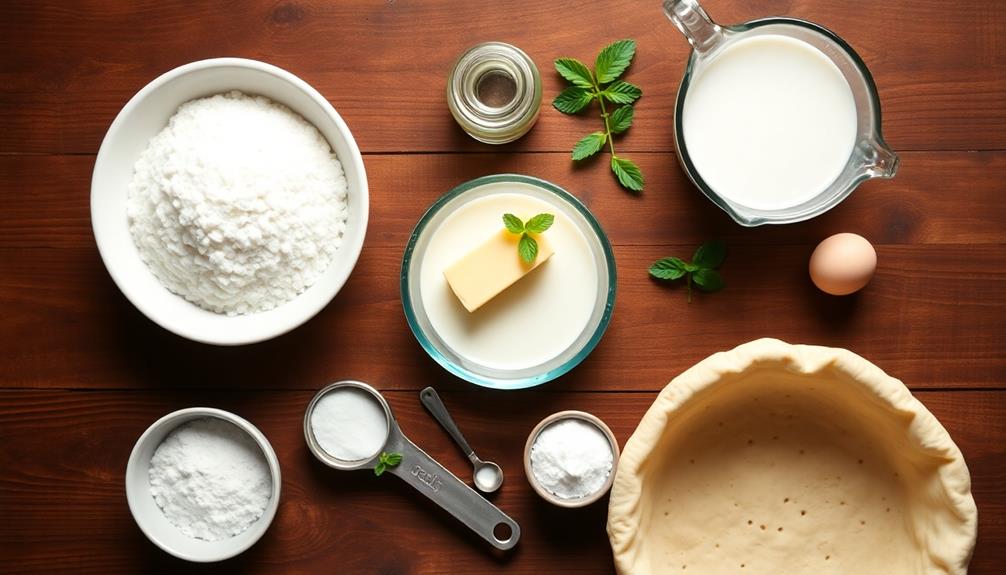
Now that your dry ingredients are perfectly mixed, it's time to introduce the wet components. Grab your eggs, milk, melted butter, and vanilla extract. You'll want to add these one at a time, making sure each is well incorporated before moving on to the next.
Start by cracking the eggs into a separate bowl. This way, you can easily remove any shell pieces that might fall in. Pour the eggs into your dry mixture and stir gently.
Next, add the milk and continue mixing. As you blend, you'll notice the batter becoming smoother and more liquid-like.
Now, it's time for the melted butter. Pour it in slowly while stirring to prevent any clumps from forming. Finally, add a splash of vanilla extract for that extra touch of flavor.
Keep blending until all the ingredients are evenly distributed throughout the batter. Your chess pie filling should now have a silky, smooth consistency.
If you see any lumps, don't worry! Just keep stirring until they disappear. You're now ready to move on to the next exciting step in creating your delicious chess pie.
Step 4. Pour Mixture Into Pie Crust
![pour mixture into crust](https://cookifya.com/wp-content/uploads/2024/10/pour_mixture_into_crust-1.jpg)
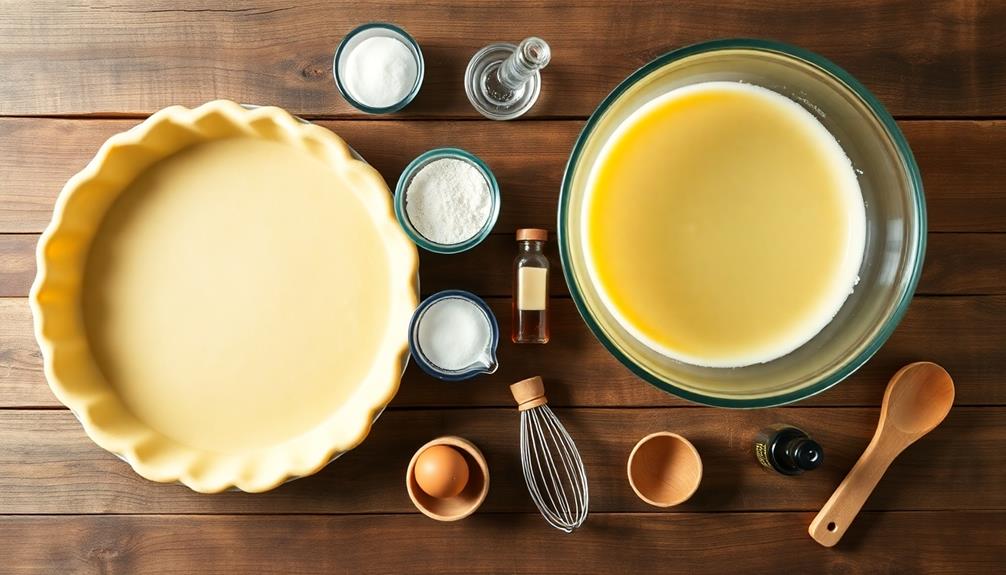
The moment of truth has arrived! It's time to pour your chess pie mixture into the waiting pie crust.
Grab your mixing bowl and give the filling one last stir to make sure everything's well combined. Now, carefully pick up the bowl and tilt it over your pie crust.
Slowly pour the mixture into the crust, starting from the center and moving outward in a spiral pattern. This helps distribute the filling evenly. Don't worry if you spill a little; it happens to everyone! Keep pouring until all the mixture is in the crust. You'll notice it fills the crust almost to the top.
Once you've poured everything in, gently tap the pie plate on the counter a few times. This helps release any air bubbles trapped in the filling. If you see any bubbles on the surface, you can use a toothpick to pop them.
Step 5. Bake for 50 Minutes
![bake for fifty minutes](https://cookifya.com/wp-content/uploads/2024/10/bake_for_fifty_minutes.jpg)
With your chess pie prepared and ready, it's time to bake it to perfection. Preheat your oven to 350°F (175°C) and place the rack in the center position. This ensures even heating throughout the baking process.
Carefully slide your pie into the preheated oven. Set a timer for 50 minutes, but don't wander too far! You'll want to keep an eye on your pie as it bakes. The delicious aroma will soon fill your kitchen, making your mouth water in anticipation.
As the pie bakes, you'll notice the filling start to puff up and turn a beautiful golden brown. This is exactly what you want to see! The edges might brown faster than the center, so if this happens, cover them with strips of aluminum foil to prevent burning.
After 50 minutes, check your pie. It should be set around the edges but still slightly jiggly in the center. If it needs more time, give it an extra 5-10 minutes.
Once done, remove it from the oven and let it cool completely before slicing. Your chess pie is ready to enjoy!
Final Thoughts
Chess pie's enduring popularity stems from three key factors: its simplicity, versatility, and comforting familiarity. You'll find that this classic dessert is a true crowd-pleaser, perfect for gatherings or a cozy night at home. Its rich, sweet flavor and creamy texture make it a favorite among pie lovers of all ages.
Don't be afraid to experiment with different variations of chess pie. You can add lemon zest for a tangy twist or sprinkle in some cocoa powder for a chocolate version. The possibilities are endless! Remember, the beauty of chess pie lies in its adaptability to your tastes and preferences.
As you enjoy your homemade chess pie, take a moment to appreciate its history and cultural significance. This Southern staple has been bringing joy to families for generations.
Whether you're savoring a slice on a warm summer evening or cozying up with it on a chilly winter day, chess pie is sure to bring a smile to your face. So go ahead, indulge in this delightful treat and share it with your loved ones.
You've just mastered a beloved dessert that will continue to delight for years to come.
Frequently Asked Questions
Can Chess Pie Be Frozen for Later Consumption?
Yes, you can freeze chess pie for later enjoyment. It's best to wrap it tightly in plastic wrap and aluminum foil before freezing. When you're ready to eat, thaw it in the refrigerator overnight for optimal taste and texture.
Is Chess Pie Suitable for People With Nut Allergies?
You'll be glad to know that most chess pie recipes don't include nuts. However, it's always best to check the specific recipe or ask the baker, as some variations might incorporate nuts for added flavor or texture.
What Are Some Popular Variations of Chess Pie?
You'll find several delicious variations of this classic dessert. Try lemon chess pie for a citrusy twist, or chocolate chess pie for a rich indulgence. Don't forget buttermilk chess pie and vinegar pie for unique flavors.
How Long Does Chess Pie Stay Fresh at Room Temperature?
You can safely keep your pie at room temperature for about 2-3 days. It's best to cover it loosely with plastic wrap or foil. After that, you'll want to refrigerate it to extend its freshness.
Can Chess Pie Be Made With Alternative Sweeteners Instead of Sugar?
You can definitely use alternative sweeteners in your pie recipe. Try honey, maple syrup, or artificial sweeteners like stevia. However, be aware that this may change the texture and flavor slightly. Experiment to find your preferred substitute.
Southern Comfort Food
Chicken Fried Steak: Southern Comfort
Satisfy your craving for Southern comfort with the ultimate chicken fried steak, a savory dish that’s been delighting diners for generations; learn more about this iconic recipe.
![southern comfort chicken fried](https://cookifya.com/wp-content/uploads/2024/10/southern_comfort_chicken_fried.jpg)
Chicken fried steak is the ultimate Southern comfort food that's been delighting diners for generations! This savory dish starts with tender beef that's tenderized, breaded, and fried to golden perfection. Topped with a rich, creamy gravy, it's then served alongside fluffy mashed potatoes for a truly mouthwatering meal. The origins of this classic trace back to early 20th century ranchers who sought to make the most of tougher cuts of beef. Today, it remains a beloved staple in Southern cuisine, filling hungry bellies with its hearty, soul-satisfying flavors. Want to learn more about the history and techniques behind this iconic dish?
Key Takeaways
- Chicken fried steak is a beloved classic dish originating from the American South in the early 20th century, known for its soul-satisfying qualities.
- The dish features tenderized beef steak that is breaded and fried, often served with a creamy gravy and mashed potatoes.
- The key ingredients include round or cube steak, all-purpose flour, panko breadcrumbs, beaten eggs, milk or cream, and various seasonings.
- The cooking method involves pounding the steak thin, dredging it in flour, frying until golden brown, and preparing a gravy from the pan drippings.
- Chicken fried steak represents comfort food in Southern cuisine and is often associated with family gatherings and celebrations, featuring in diners and regional food festivals.
History
According to culinary historians, chicken fried steak originated in the American South, where it became a popular dish in the early 20th century. The story goes that enterprising ranchers, looking to make the most of their tough cuts of beef, came up with a clever solution – they'd tenderize the meat, coat it in a crispy batter, and fry it to golden perfection.
This simple yet delicious dish quickly gained a loyal following, with families gathering around the table to savor the comforting flavors of tender steak and crunchy breading.
As the years passed, chicken fried steak became a staple of Southern cuisine, with each region and household developing their own unique variations. Some added a creamy gravy, while others topped it with a fried egg for an extra hearty meal.
No matter the preparation, one thing remained constant: the comforting, soul-satisfying qualities that made chicken fried steak a beloved classic.
Recipe
Chicken fried steak is a classic Southern dish that combines the savory flavors of tender beef with a crispy, golden-brown coating. This comfort food favorite is a satisfying meal that can be enjoyed any time of the year.
To create the perfect chicken fried steak, it's important to start with high-quality ingredients and follow a tried-and-true recipe. The key to achieving the perfect texture and flavor lies in the preparation process, which involves a series of dipping and breading steps.
- 1 pound beef cube steak, pounded thin
- 1 cup all-purpose flour
- 1 teaspoon salt
- 1/2 teaspoon black pepper
- 1/2 teaspoon garlic powder
- 2 large eggs, beaten
- 1 cup panko breadcrumbs
- Vegetable oil for frying
Begin by seasoning the pounded cube steak with salt, pepper, and garlic powder. Dredge the steak in the all-purpose flour, shaking off any excess. Dip the floured steak into the beaten eggs, then coat it evenly with the panko breadcrumbs.
Heat approximately 1/2 inch of vegetable oil in a large skillet over medium-high heat. Fry the breaded steak for 3-4 minutes per side, or until golden brown and crispy. Drain the chicken fried steak on a paper towel-lined plate before serving. While the steaks are draining, you can prepare a quick side like mashed potatoes or steamed vegetables to round out the meal. With skillet suppers ready in 30 minutes, this hearty and comforting dish is perfect for a weeknight dinner. Serve hot with creamy gravy for an authentic chicken fried steak experience.
To ensure the best results, it's important to keep the oil at the optimal temperature and to avoid overcrowding the pan. Serve the chicken fried steak hot, with your favorite sides like mashed potatoes and gravy, for a truly satisfying and comforting meal.
Cooking Steps
Let's get started on making some tasty chicken fried steak!
First, you'll need to pound the steak nice and thin so it cooks up crispy.
Next, dredge the steak in some flour – this will give it a delicious golden crust when you fry it up.
Once it's all fried to perfection, you can whip up a yummy gravy to serve it with, and don't forget the mashed potatoes on the side!
Step 1. Pound the Steak Thin
![pound steak until thin](https://cookifya.com/wp-content/uploads/2024/10/pound_steak_until_thin.jpg)
Pounding the steak is a crucial step in preparing chicken fried steak. You'll want to use a meat mallet or the bottom of a heavy pan to carefully flatten the steak. This helps tenderize the meat and ensures it cooks evenly.
Start by placing the steak between two sheets of plastic wrap or parchment paper. This prevents the meat from sticking to the surface and makes cleanup a breeze.
Now, gently but firmly, pound the steak, working from the center outward. Apply even pressure, flattening the steak to about 1/4 inch thickness. This will help the steak cook quickly and develop that delicious crispy coating.
As you pound, you'll feel the steak becoming more tender and pliable. Take your time and enjoy the rhythmic motion – it's like a culinary massage for your meat!
With the steak perfectly pounded, you're one step closer to serving up a classic chicken fried steak that will have your taste buds doing a happy dance.
Step 2. Dredge the Steak in Flour
![dredge steak in flour](https://cookifya.com/wp-content/uploads/2024/10/dredge_steak_in_flour-1.jpg)
With the steak now pounded to the perfect thickness, it's time to move on to the next crucial step – dredging it in flour.
You'll want to set up a little flour station on your counter, filling a shallow bowl or plate with all-purpose flour.
Grab the steak, coating both sides thoroughly in the flour. Don't be shy – really press that flour into the meat so it sticks nicely.
The flour will create a delicious crunchy coating when the steak hits the hot oil.
Once both sides are evenly coated, give the steak a little shake to dust off any excess flour.
You're now ready to fry up that chicken fried steak to golden, crispy perfection!
The flour is the key to achieving that signature crunchy texture, so be sure to get an even layer all over before moving on.
With the steak prepped and ready, let's fire up that skillet and get frying!
Step 3. Fry the Steak Until Golden
![fry steak until golden](https://cookifya.com/wp-content/uploads/2024/10/fry_steak_until_golden.jpg)
Next, heat a generous amount of oil in a large skillet over medium-high heat. Once the oil is shimmering, it's time to fry up those tender steaks!
Carefully lower the floured steaks into the hot oil and let them sizzle away. The sound of the steak hitting the oil will make your mouth water in anticipation.
As the steaks cook, watch them turn a beautiful golden brown. Flip them every few minutes to ensure even cooking. The outside should get crispy and delicious, while the inside stays juicy and tender. Mmm, can you just imagine that first bite?
When the steaks are cooked through, about 3-4 minutes per side, remove them from the oil and place them on a paper towel-lined plate. This will help absorb any excess oil and keep your chicken fried steak perfectly crispy.
Now you're ready to serve up this Southern classic with some mashed potatoes and gravy. Get ready for smiles all around!
Step 4. Make Gravy
![prepare and serve gravy](https://cookifya.com/wp-content/uploads/2024/10/prepare_and_serve_gravy.jpg)
Now that your crispy chicken fried steaks are ready, it's time to whip up an irresistible gravy to serve alongside. Don't worry, making the gravy is a breeze!
Start by pouring the delicious pan drippings from frying the steaks into a saucepan. Yum, can you smell that savory aroma?
Next, whisk in some all-purpose flour to create a roux. Keep stirring until the flour is nicely browned, about 2-3 minutes.
Slowly pour in some warm milk, whisking constantly to prevent lumps. As the gravy thickens, season it with salt, pepper, and a pinch of garlic powder. Mmm, doesn't that smell incredible?
Let the gravy simmer for a few minutes, allowing the flavors to meld together. The final step is to taste and adjust the seasoning as needed.
Your homemade gravy is now ready to drizzle over those golden chicken fried steaks. Get ready for the ultimate comfort food experience!
Step 5. Serve Hot With Mashed Potatoes
![serve hot with potatoes](https://cookifya.com/wp-content/uploads/2024/10/serve_hot_with_potatoes.jpg)
Serve the piping hot chicken fried steaks alongside fluffy mashed potatoes for the ultimate comfort food feast.
The tender, golden-brown steak, fresh from the skillet, pairs perfectly with the creamy, cloud-like potatoes. Spoon the savory, pepper-flecked gravy over the top, letting it soak into the mashed potatoes and steak for maximum flavor in every bite.
Enjoy the comforting aroma as the steam rises, beckoning you to dig in. With each forkful, you'll savor the contrast of the crispy exterior and the juicy interior of the steak, complemented by the smooth, buttery potatoes.
This classic Southern meal is sure to fill your belly and warm your soul. Don't forget to have extra napkins on hand – you won't want to miss a single drop of that delicious gravy!
Final Thoughts
Chicken fried steak is a classic Southern dish that has stood the test of time. Whether you're enjoying it with your family on a cozy Sunday evening or serving it up at a community potluck, this comforting meal is sure to bring a smile to everyone's face.
The crispy, golden breading and tender, juicy steak, all smothered in a rich, creamy gravy, create a flavor combination that's simply irresistible. As you take that first bite, the savory goodness explodes in your mouth, leaving you eager for more.
The mashed potatoes on the side soak up every last drop of the flavorful gravy, making each forkful a delightful experience. This dish is a true celebration of the simple pleasures in life – good food, good company, and the satisfaction of a hearty, homemade meal.
Frequently Asked Questions
What Is the Difference Between Chicken Fried Steak and Country Fried Steak?
You may think chicken fried steak and country fried steak are the same, but they're not. Chicken fried steak is breaded and fried like fried chicken, while country fried steak is simply pan-fried without any breading. The preparation method sets them apart.
Can I Use a Different Type of Meat Instead of Beef?
You can definitely use a different type of meat instead of beef for your dish. Chicken, pork, or even turkey would work well, though the flavor profile may vary. Feel free to experiment and find your preferred version.
How Long Can Leftover Chicken Fried Steak Be Stored?
Leftover chicken fried steak can be stored for up to 3-4 days in the refrigerator when properly sealed in an airtight container. For best quality and food safety, you should consume the leftovers within this timeframe.
Is It Possible to Make a Gluten-Free Version of This Dish?
You can absolutely make a gluten-free version of chicken fried steak. Simply substitute the all-purpose flour with a gluten-free flour blend or cornstarch. The result will be a crispy, delicious dish that's safe for those with gluten sensitivities.
What Are Some Unique Serving Suggestions for Chicken Fried Steak?
When serving chicken fried steak, you can get creative. Try topping it with spicy gravy, crispy onion straws, or a fried egg for a savory twist. You can also serve it alongside mashed potatoes, collard greens, or a fresh salad.
Southern Comfort Food
Cheese Straws
Delightful and deeply rooted in history, these savory cheese straws offer a tantalizing journey through the art of homemade snacking. Discover the secrets to crafting these irresistible treats.
![savory baked cheese snacks](https://cookifya.com/wp-content/uploads/2024/10/savory_baked_cheese_snacks.jpg)
Cheese straws are a delightful savory snack with a rich history dating back to 17th century England. These buttery, crunchy treats were originally created to use up leftover cheese and pastry dough. Over time, they gained popularity among the aristocracy as a sophisticated appetizer. Today, cheese straws are enjoyed globally, from casual gatherings to elegant cocktail parties. The classic recipe features simple ingredients like flour, butter, and cheddar cheese, resulting in a mouthwatering flavor profile. With a few key tips, you can easily master the art of crafting these impressive homemade snacks. And if you keep reading, you’ll discover even more about the intriguing world of cheese straws.
Key Takeaways
- Cheese straws are a savory snack that originated in 17th century England and gained popularity among the aristocracy as a sophisticated hors d’oeuvre.
- The classic recipe involves simple ingredients like flour, butter, cheddar cheese, and spices, with attention to detail being crucial for achieving the perfect texture and flavor.
- Cheese straws are made by rolling out the dough into strips, twisting them, and baking until golden brown, resulting in a crunchy texture and rich, cheesy taste.
- Homemade cheese straws are visually appealing, add elegance to any setting, and showcase the maker’s culinary skills, making them a popular choice for parties and gatherings.
- Cheese straws are versatile and can be customized with different cheeses and spices, catering to a wide range of palates and serving as a satisfying snack or appetizer option.
History
Cheese straws have a rich and storied history, dating back centuries to the kitchens of Europe. These delightful snacks were first created as a way to use up leftover bits of cheese and pastry dough. Over time, bakers and cooks perfected the recipe, creating the crisp, buttery treats we know and love today.
The earliest known cheese straws were made in England during the 17th century. They quickly became a favorite among the aristocracy, who often served them as a sophisticated hors d’oeuvre.
As the popularity of cheese straws spread, they made their way to other parts of Europe, including France and Italy.
Today, cheese straws are enjoyed all over the world, from small bakeries to elegant dinner parties. Whether you prefer them plain or with a sprinkling of herbs and spices, these classic snacks are a delicious reminder of their long and flavorful history.
Recipe
Cheese straws are a classic savory snack that can be enjoyed at any time of the day. These flaky, buttery treats are made with a simple dough that can be easily customized to suit your taste buds. Whether you prefer them spicy, tangy, or just plain cheesy, cheese straws are sure to satisfy your craving.
The key to making delicious cheese straws is to use high-quality ingredients and to handle the dough gently. This ensures that the straws come out of the oven with a crisp, golden-brown exterior and a tender, flaky interior.
Ingredients:
- 2 cups all-purpose flour
- 1 teaspoon salt
- 1/2 teaspoon cayenne pepper (optional)
- 1 cup unsalted butter, chilled and cubed
- 1 1/2 cups shredded cheddar cheese
- 2-3 tablespoons ice water
Instructions:
In a food processor, combine the flour, salt, and cayenne pepper (if using). Add the chilled butter and pulse until the mixture resembles coarse crumbs.
Add the shredded cheese and pulse until just combined. Gradually add the ice water, 1 tablespoon at a time, and pulse until the dough just begins to come together. Don’t overmix.
Shape the dough into a disc, wrap in plastic wrap, and refrigerate for at least 30 minutes.
Tips:
When rolling out the dough, be sure to work quickly and use as little flour as possible to prevent the dough from becoming tough.
Baking the cheese straws at a high temperature (400°F) will help them achieve that perfect crispy texture.
Cooking Steps
First, you’ll preheat your oven to a toasty 375°F.
Then, roll that dough into long, thin strips and twist them into fun, spiraling shapes.
Finally, pop them in the oven until they’re golden brown.
Can’t wait to see how they turn out!
Step 1. Preheat Oven to 375°F
![preheat oven 375 f](https://cookifya.com/wp-content/uploads/2024/10/preheat_oven_375_f-3.jpg)
Preheating the oven to 375°F is a crucial first step in crafting delectable cheese straws. This temperature ensures the dough bakes to a perfect golden-brown hue, with a delightfully crisp exterior and a tender, flaky interior.
Take a moment to adjust your oven rack to the middle position, then press the buttons to set the temperature. Listen as the oven whirs to life, its internal mechanisms heating up to the ideal baking temperature.
While you wait for the oven to preheat, gather your baking sheet and line it with parchment paper. This simple step will prevent the cheese straws from sticking and make for easy cleanup later.
As the minutes tick by, you’ll notice the oven indicator light illuminating, signaling it has reached the desired temperature. Now, you’re ready to begin shaping and baking your homemade cheese straws, infusing your kitchen with the tantalizing aroma of melted cheese and buttery pastry.
Step 2. Roll Dough Into Long Strips
![roll dough into strips](https://cookifya.com/wp-content/uploads/2024/10/roll_dough_into_strips-1.jpg)
Once the oven is preheated, take the chilled dough and divide it into equal portions.
On a lightly floured surface, roll each piece of dough into long, thin strips about 1/4 inch thick. You’ll want to roll the dough to be about 6 inches long. Don’t worry if the strips aren’t perfectly straight – the rustic look is part of the charm!
As you roll the dough, be gentle and take your time. You don’t want to overwork the dough, or it could become tough. If the dough starts to stick, simply dust the surface with a bit more flour.
Once all the dough is rolled, arrange the strips in a single layer on the prepared baking sheets. Make sure to leave a bit of space between each one so they’ve room to bake evenly.
With the dough rolled and ready, it’s time to transfer the trays to the oven and start baking those delicious cheese straws!
Step 3. Twist Strips Into Spirals
![twist strips into spirals](https://cookifya.com/wp-content/uploads/2024/10/twist_strips_into_spirals.jpg)
After rolling the dough into long strips, it’s time to twist them into spirals. This step adds a fun, playful shape to your cheese straws.
To begin, take one of the dough strips and hold it at both ends. Gently start twisting the strip, turning it into a spiral shape. As you twist, be careful not to overwork the dough. You want it to maintain its light, flaky texture.
Once the strip is fully twisted, carefully transfer it to your baking sheet. Repeat this process with the remaining dough strips, placing them about an inch apart on the sheet. Try to make each spiral the same size for an even, consistent look.
When all the strips are twisted, you’re ready to bake your cheese straws. The spirals will hold their shape beautifully as they cook, creating a unique and visually appealing final product.
Get ready to enjoy the delicious savory flavor and fun, twisted appearance of your homemade cheese straws!
Step 4. Bake Until Golden Brown
![bake until golden brown](https://cookifya.com/wp-content/uploads/2024/10/bake_until_golden_brown-15.jpg)
With the cheese straws twisted into their spiraled shapes, it’s time to bake them to golden-brown perfection. Preheat your oven to 375°F (190°C) and line a baking sheet with parchment paper.
Carefully transfer the twisted cheese straws onto the prepared baking sheet, making sure they’re spaced apart. This will allow the hot air to circulate around each straw, ensuring even baking.
Pop the baking sheet into the preheated oven and set a timer for 12 to 15 minutes. Keep a close eye on the cheese straws, as you want them to turn a beautiful golden-brown color, but not burn. The delicious aroma of the baking cheese will start to fill your kitchen, making your mouth water in anticipation.
Once the timer goes off, use oven mitts to carefully remove the baking sheet from the oven. The cheese straws should be crisp and perfectly cooked.
Allow them to cool for a few minutes before serving. These flaky, cheesy treats are now ready to be enjoyed!
Step 5. Allow to Cool Before Serving
![cool before serving step](https://cookifya.com/wp-content/uploads/2024/10/cool_before_serving_step.jpg)
After removing the cheese straws from the oven, let them cool on the baking sheet for a few minutes. This will allow the cheese to set and the straws to firm up. You don’t want to bite into piping hot cheese straws – that would burn your mouth! Be patient and let them cool down to a comfortable temperature.
Once the cheese straws have cooled for 5-10 minutes, you can transfer them to a serving plate or platter. This gives them a chance to lose some of that intense heat while maintaining their delicious cheesy goodness.
The straws should feel slightly warm to the touch, but not scalding hot.
Now your cheese straws are ready to enjoy! Serve them up with friends and family, or save them for a tasty snack later. The aroma of the baked cheese is sure to have everyone eager to dig in.
Just be sure to let them cool first – you don’t want anyone to get hurt.
Final Thoughts
Ultimately, cheese straws provide a delightful snacking experience that can be easily incorporated into various social gatherings or enjoyed as a satisfying solo treat.
These buttery, cheesy delights make for the perfect accompaniment to any occasion, whether it’s a casual movie night, a lively cocktail party, or a relaxing afternoon with friends.
Beyond their undeniable taste, cheese straws also offer a touch of elegance and sophistication to any setting.
The process of creating these bite-sized morsels may seem daunting, but the end result is well worth the effort.
With a little patience and attention to detail, you can impress your guests or indulge in a delectable homemade snack.
So, the next time you’re in the mood for something savory and irresistible, consider whipping up a batch of these cheese-filled delights.
Your taste buds won’t be disappointed!
Frequently Asked Questions
How Long Do Cheese Straws Last Once Baked?
You can enjoy those freshly baked cheese straws for quite a while!
Once they’ve cooled, you can store them in an airtight container at room temperature for up to 5 days. They’ll stay nice and crispy, perfect for snacking.
But don’t worry if you can’t finish them all – they also freeze well for up to 3 months.
Can I Use Different Types of Cheese in the Recipe?
Absolutely! You can use different types of cheese in your recipe.
Get creative and experiment with various cheeses like cheddar, parmesan, or even a blend. Each cheese will give your straws a unique flavor and texture.
Just be sure to grate or finely chop the cheese so it incorporates seamlessly into the dough.
Have fun exploring different cheese combinations – the possibilities are endless! The key is finding the flavors you and your family enjoy most.
Do Cheese Straws Need to Be Refrigerated?
Do cheese straws need to be refrigerated? No, they typically don’t!
Cheese straws are a crispy, savory snack that can be stored at room temperature. As long as you keep them in an airtight container, they’ll stay fresh and delicious for several days.
You don’t have to worry about refrigerating them – just enjoy your cheesy treats whenever the craving strikes!
The cheese and other ingredients in cheese straws are shelf-stable, so they’re perfect for snacking anytime.
Can I Freeze Baked Cheese Straws?
Absolutely! You can definitely freeze your baked cheese straws.
Just let them cool completely, then pop them in an airtight container or freezer bag. They’ll stay fresh for up to 3 months.
When you’re ready to enjoy them, simply take them out and let them thaw at room temperature.
It’s an easy way to have tasty snacks on hand whenever you need them. Isn’t that great? Freezing is a super convenient option for your cheese straws.
How Can I Make Cheese Straws Gluten-Free?
To make cheese straws gluten-free, you’ll want to substitute the all-purpose flour with a gluten-free flour blend. Many options are available, like almond, rice, or even a pre-made gluten-free flour mix.
Just follow the recipe instructions, swapping the regular flour for an equal amount of your chosen gluten-free flour.
With a few simple tweaks, you can enjoy delicious, gluten-free cheese straws that everyone can enjoy. It’s an easy way to make this tasty treat accessible to all!
Southern Comfort Food
Squash Casserole
You’ll love squash casserole’s creamy, cheesy goodness and crunchy breadcrumb topping – but that’s just the beginning of this comforting dish’s story.
![delicious squash casserole recipe](https://cookifya.com/wp-content/uploads/2024/10/delicious_squash_casserole_recipe-1.jpg)
You’ll love squash casserole! It’s a super tasty way to enjoy all that fresh, garden-grown squash. The squash gets sautéed until nice and tender, then mixed with a creamy, cheesy sauce. Folks love how the golden breadcrumb topping adds a delightful crunch. It’s hearty enough for a main dish, or makes an amazing side to grilled meats. What’s more, it’s packed with vitamins and fiber, so you can feel good about digging in. Once you try this comforting casserole, you’ll be craving it again and again. There’s even more to discover about squash casserole’s history and variations!
Key Takeaways
- Squash casserole is a savory dish that combines summer squash with a creamy, cheesy sauce.
- It originated from Native American cultures and has evolved through regional and familial adaptations over time.
- The recipe typically includes ingredients like squash, onions, cheese, breadcrumbs, and various seasonings.
- Squash casserole can be served as a main dish or a side, and it pairs well with proteins or salads.
- The dish is high in vitamins, protein, and fiber, making it a nutritious and satisfying option.
History
Squash casserole has a rich history that stretches back centuries. This classic dish has its origins in the culinary traditions of Native American cultures, who were among the first to cultivate and cook with various squash varieties.
As European settlers arrived in the Americas, they quickly embraced squash and incorporated it into their own recipes, leading to the development of the squash casserole we know and love today.
Over time, the recipe has evolved, with different regions and families adding their own unique twists and ingredients. Some versions might include cheese, breadcrumbs, or even a touch of sweetness, while others focus on the natural flavors of the squash itself.
No matter the specific ingredients, the enduring appeal of squash casserole lies in its ability to bring people together and celebrate the bounty of the season. Whether made with yellow squash, zucchini, or a combination of both, the dish is a beloved staple at any potluck or family gathering. And with a simple internet search, you can easily find an easy squash casserole recipe to whip up in no time. The warm, comforting flavors of squash and cheese, combined with the simplicity of the dish, make it a favorite among both cooks and diners.
Recipe
Squash Casserole is a delightful dish that combines the sweetness of summer squash with a creamy, cheesy sauce. This casserole is a perfect way to showcase the abundance of fresh produce during the summer months.
The combination of tender squash and a flavorful topping creates a comforting and satisfying meal. Whether you’re looking to use up a surplus of garden-fresh squash or simply want to enjoy a delicious and easy-to-prepare dish, this Squash Casserole recipe is sure to please.
Ingredients:
- 3 pounds yellow squash, sliced
- 1 onion, diced
- 2 cloves garlic, minced
- 2 eggs, beaten
- 1 cup sour cream
- 1 cup shredded cheddar cheese
- 1/2 cup breadcrumbs
- 2 tablespoons butter, melted
- Salt and pepper to taste
Instructions:
Preheat the oven to 350°F. In a large skillet, sauté the sliced squash and diced onion until tender, about 10-15 minutes.
Add the minced garlic and cook for an additional 2 minutes. In a separate bowl, mix the beaten eggs, sour cream, and 1/2 cup of the shredded cheddar cheese.
Combine the squash mixture with the egg mixture and transfer to a greased 9×13 inch baking dish. Top with the remaining 1/2 cup of shredded cheddar cheese, breadcrumbs, and drizzle with melted butter.
Bake for 30-35 minutes, or until the casserole is golden brown and bubbly. Allow the casserole to cool for 5-10 minutes before serving.
This Squash Casserole can be enjoyed as a main dish or a side, and pairs well with a variety of proteins or alongside a fresh salad.
Cooking Steps
First, preheat your oven to 375°F.
Next, slice the squash into half-inch pieces.
Then, sauté the squash in butter until it’s tender.
Step 1. Preheat Oven to 375°F
![preheat oven 375 f](https://cookifya.com/wp-content/uploads/2024/10/preheat_oven_375_f-2.jpg)
Preheat your oven to 375°F. This crucial first step gets your oven ready to bake the delicious squash casserole. It’s important to preheat the oven, as this ensures even cooking and helps the casserole develop a beautiful golden-brown top.
Once your oven reaches 375°F, you can move on to the next steps. Preheating usually takes 10-15 minutes, so use this time to gather the rest of your ingredients and prepare your baking dish.
Having everything ready to go makes the cooking process smooth and efficient.
Step 2. Slice Squash Into Half-Inch Pieces
![slice squash into pieces](https://cookifya.com/wp-content/uploads/2024/10/slice_squash_into_pieces.jpg)
Slice the squash into even half-inch pieces, ensuring a consistent thickness throughout. This will help the squash cook evenly in the casserole. Use a sharp knife or a mandoline slicer to make the task quick and easy. Cut the squash lengthwise first, then slice each half crosswise into those perfect half-inch slices.
Try to keep the pieces uniform in size so they bake at the same rate.
Arrange the sliced squash in a single layer on a baking sheet. This will make it simpler to transfer the pieces to the casserole dish later. If any of the slices seem thicker than the others, gently press down on them to flatten them out a bit. You want everything to cook through at the same time.
Once all the squash is sliced, you’re ready to start building the casserole. The even, half-inch thickness you’ve achieved will ensure the squash bakes up tender and delicious.
Step 3. Sauté Squash in Butter
![saut squash in butter](https://cookifya.com/wp-content/uploads/2024/10/saut_squash_in_butter.jpg)
With the squash sliced to an even thickness, you can now move on to sautéing it in butter.
In a large skillet, melt a few tablespoons of butter over medium-high heat. Once the butter is melted and bubbly, carefully add the sliced squash, arranging the pieces in a single layer.
Let the squash sizzle and cook for 2-3 minutes, until the underside begins to turn golden brown. Then, use a spatula to gently flip the pieces, allowing the other side to sauté for an additional 2-3 minutes.
As the squash cooks, you’ll notice the pieces becoming tender and starting to caramelize around the edges. This is exactly what you want!
The butter will infuse the squash with a rich, nutty flavor. Be sure to keep an eye on the pan, adjusting the heat if the squash is browning too quickly.
Once the squash is tender-crisp, it’s ready to be added to your casserole dish. Get ready for the wonderful aroma to fill your kitchen!
Step 4. Add Cheese
![add cheese to dish](https://cookifya.com/wp-content/uploads/2024/10/add_cheese_to_dish.jpg)
Next, add a generous layer of shredded cheese over the sautéed squash. Cheddar or Monterey Jack work great, but you can use any cheese you like. Spread the cheese evenly, making sure to cover the entire surface.
The warm squash will start to melt the cheese, creating a gooey and delicious layer. For even more flavor, try sprinkling some dried herbs, like thyme or oregano, over the cheese. This will add a nice aromatic touch to the casserole.
If you want to get really fancy, you can also mix in some crumbled bacon or diced onions before adding the cheese. Once the cheese is in place, it’s time to pop the casserole in the oven.
Bake it until the cheese is melted and bubbly, about 20-25 minutes. Keep an eye on it to make sure the top doesn’t get too browned. When it’s done, you’ll have a rich, cheesy squash casserole that’s sure to satisfy.
Step 5. Bake Casserole Until Golden Brown
![bake casserole until golden](https://cookifya.com/wp-content/uploads/2024/10/bake_casserole_until_golden.jpg)
Preheat your oven to 375°F (190°C). Once your oven is nice and toasty, grab that delicious squash casserole you just assembled.
Carefully transfer it to the oven, making sure to use oven mitts to protect your hands. Now, let’s bake this beauty until it’s golden brown and irresistible!
The baking time can take around 30-40 minutes, but keep a close eye on it. You’ll know it’s ready when the top is lightly browned and the edges are crispy.
The squash should be tender, and the cheese should be melted and bubbly. Give it a gentle jiggle – if the center is set, you’re good to go!
Once it’s perfectly baked, remove the casserole from the oven using your trusty oven mitts.
Let it cool for a few minutes before serving. This will allow the flavors to meld and the casserole to set up nicely.
Now, get ready to enjoy the delightful combination of tender squash, gooey cheese, and a crispy golden-brown topping!
Final Thoughts
The squash casserole is a delightful dish that’s sure to satisfy your taste buds. With its golden-brown top and tender, flavorful squash, this casserole is a true joy to behold. You’ll love the way the creamy sauce complements the savory vegetables, creating a harmonious blend of textures and flavors.
Once the casserole has finished baking, take a moment to admire its beautiful presentation. The combination of vibrant colors and the enticing aroma will have your family eagerly anticipating their first bite. Don’t be surprised if they go back for seconds – this casserole is simply that good!
As you savor each mouthful, you’ll appreciate the careful preparation that went into this dish. From the perfectly cooked squash to the perfectly seasoned sauce, every element has been thoughtfully crafted to provide a delightful culinary experience.
Enjoy this squash casserole with your loved ones and revel in the joy of a meal well-prepared.
Frequently Asked Questions
Can I Use Frozen Squash in This Recipe?
You sure can! Using frozen squash in your recipe is a fantastic idea.
Frozen squash is just as delicious and nutritious as fresh, and it’s incredibly convenient. Simply thaw the squash before using, and you’re ready to go.
The texture and flavor will be just as amazing in your casserole. Give it a try – you’ll be thrilled with the results!
Frozen produce is a game-changer in the kitchen.
How Can I Make This Dish More Vegetarian-Friendly?
To make this dish more vegetarian-friendly, you can swap out the meat for hearty vegetables or plant-based proteins.
Try adding sautéed mushrooms, bell peppers, or diced tofu for extra texture and flavor. You could also mix in some cooked quinoa or lentils to boost the protein and make it even more satisfying.
Don’t forget to use a vegetable broth instead of chicken broth to keep it completely meat-free.
With a few simple swaps, you can enjoy a delicious and plant-based version of this classic casserole.
What Other Vegetables Can I Add to the Casserole?
To make your casserole more veggie-friendly, you can add a variety of colorful veggies!
Try diced bell peppers, sliced zucchini, or chopped broccoli. You could even throw in some mushrooms or diced tomatoes.
The possibilities are endless! Just remember to adjust the cooking time if you add extra veggies.
Experiment and have fun with it – you’ll end up with a delicious, nutrient-packed dish that’ll have everyone asking for seconds.
Can I Freeze the Leftovers of This Dish?
Absolutely! You can definitely freeze the leftovers of this delicious dish.
Just let the casserole cool completely, then portion it out into airtight containers.
When you’re ready to enjoy it again, simply thaw it in the fridge overnight and reheat it in the oven.
The flavors will stay fresh, and you’ll have a tasty, home-cooked meal at the ready.
Who doesn’t love having a little extra meal prep done ahead of time?
How Can I Make This Casserole Gluten-Free?
Making your squash casserole gluten-free is easy!
Simply swap out the regular flour for a gluten-free flour blend. You can find these at your local grocery store.
Just follow the recipe as usual, replacing the original flour measurement with the same amount of gluten-free flour.
This easy substitution will make your casserole safe for those with gluten sensitivities.
Now you can enjoy the delicious flavors without any worries. Yum!
-
Brazilian Cuisine3 months ago
Tacacá
-
Brazilian Cuisine3 months ago
Caldeirada
-
Polish Comfort Food3 months ago
Krupnik (Barley Soup)
-
Brazilian Cuisine3 months ago
Chicken in Brown Sauce
-
Southern Comfort Food3 months ago
Cheese Straws
-
African Cuisine3 months ago
Kedjenou (Ivory Coast)
-
Polish Comfort Food3 months ago
Vegetable Salad
-
American Diner Classics3 months ago
The Maillard Reaction: Understanding the Chemistry of Browning {Food Science and Cooking}