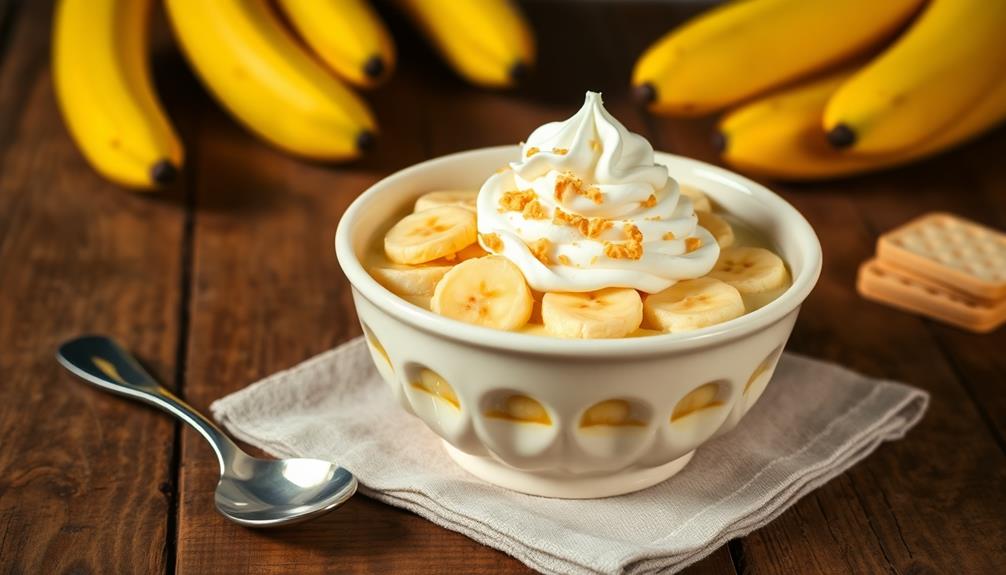
Banana pudding is a delicious Southern dessert you'll love! It's made with layers of creamy vanilla custard, sliced bananas, and crispy vanilla wafers. This no-bake treat has been a favorite at family gatherings and potlucks for over a century. You'll need milk, sugar, cornstarch, bananas, and whipping cream to make it. The pudding is layered in a dish, chilled overnight, and topped with whipped cream. It's easy to make and serves 8-10 people. You can even add your own twist with different cookies or fruits. There's so much more to discover about this comforting classic!
Key Takeaways
- Banana pudding is a classic Southern dessert layering vanilla pudding, sliced bananas, and vanilla wafers.
- The dish typically includes a creamy custard base, fresh bananas, and crispy cookies, often topped with whipped cream.
- Chilling overnight is crucial for optimal flavor and texture, allowing ingredients to meld and wafers to soften.
- It's a popular no-bake dessert for potlucks, family gatherings, and special occasions, serving 8-10 people.
- Variations can include different cookies, added spices like cinnamon, or alternative fruits for a unique twist.
History
The origins of banana pudding are steeped in Southern culinary tradition. You might be surprised to learn that this beloved dessert has been around for over a century! It first appeared in cookbooks in the late 1800s, when bananas became more widely available in the United States.
As you can imagine, the recipe has changed a bit over time. Early versions were pretty simple, with layers of vanilla custard, sliced bananas, and cookies. People used to make it with sponge cake or ladyfingers, but nowadays, you'll usually find it with vanilla wafers.
The dessert really took off in the 1920s when companies started printing recipes on their product packaging. Nabisco, the maker of Nilla Wafers, helped make the treat even more popular by featuring a banana pudding recipe on their boxes.
Today, you'll find banana pudding at family gatherings, potlucks, and restaurants all across the South. It's become such a favorite that some places even host banana pudding festivals!
Whether you prefer it warm or cold, this sweet treat continues to bring joy to dessert lovers everywhere.
Recipe
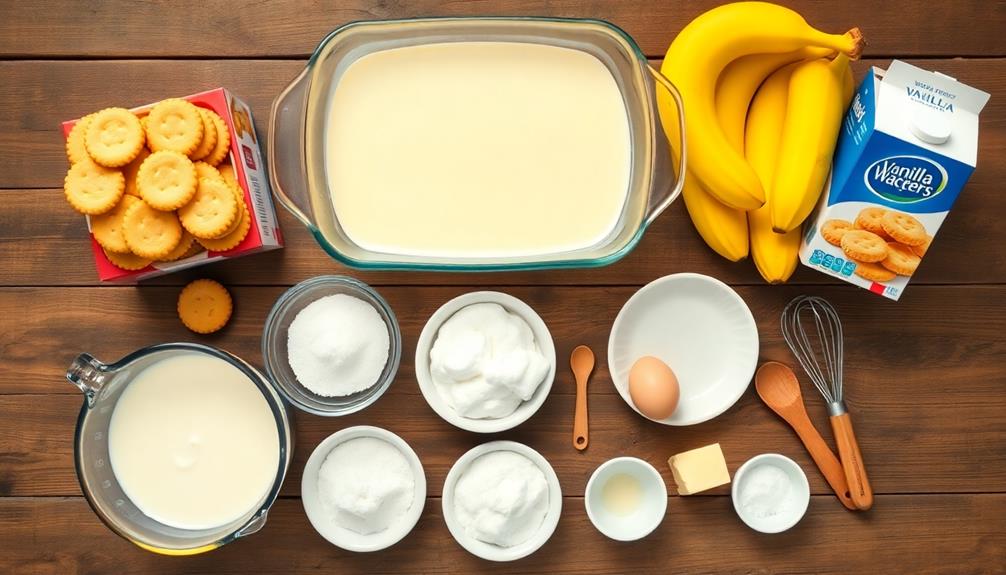
Banana pudding is a classic Southern dessert that combines creamy vanilla pudding, fresh bananas, and crispy vanilla wafers into a delightful layered treat. This no-bake dessert is perfect for potlucks, family gatherings, or any occasion where you want to impress with minimal effort.
This recipe yields a generous portion of banana pudding that can serve 8-10 people. The combination of homemade vanilla pudding, ripe bananas, and crunchy wafers creates a perfect balance of textures and flavors that will have everyone coming back for seconds.
- 4 cups whole milk
- 1 cup granulated sugar
- 1/4 cup cornstarch
- 1/4 teaspoon salt
- 4 large egg yolks
- 2 tablespoons unsalted butter
- 2 teaspoons vanilla extract
- 1 box (11 oz) vanilla wafers
- 4-5 ripe bananas, sliced
- 1 cup heavy whipping cream
- 2 tablespoons powdered sugar
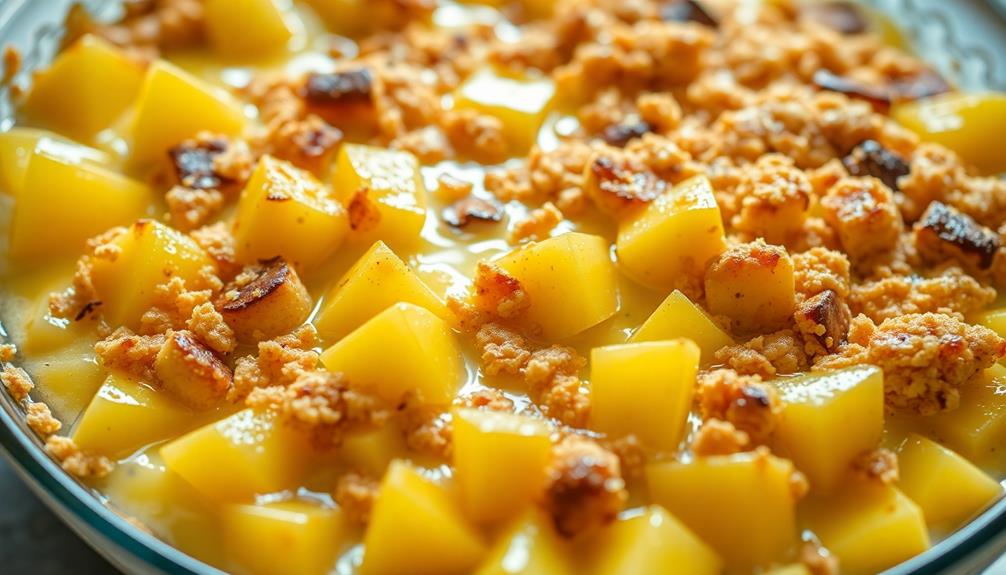
In a large saucepan, whisk together milk, sugar, cornstarch, and salt. Cook over medium heat, stirring constantly, until the mixture thickens. Remove from heat and slowly whisk in egg yolks. Return to heat and cook for 2 more minutes. Remove from heat, stir in butter and vanilla extract. Let cool slightly.
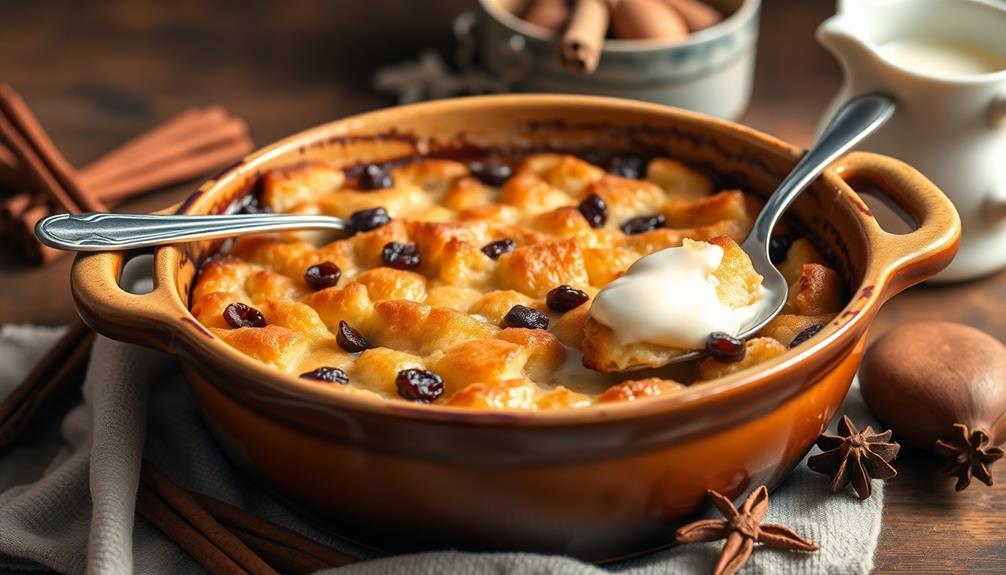
In a large bowl or trifle dish, layer vanilla wafers, banana slices, and pudding. Repeat layers until all ingredients are used, ending with pudding. Whip the heavy cream with powdered sugar until stiff peaks form. Spread whipped cream over the top layer of pudding. Refrigerate for at least 4 hours or overnight before serving.
For best results, use ripe but firm bananas to prevent them from turning brown too quickly. If you're short on time, you can use instant vanilla pudding mix instead of making it from scratch. To prevent the bananas from browning, you can brush them lightly with lemon juice before layering.
For an extra touch of indulgence, sprinkle crushed vanilla wafers on top of the whipped cream before serving.
Cooking Steps
You're in for a treat as you create this classic dessert!
To make banana pudding, you'll start by layering vanilla wafers in a dish, then whip up a creamy vanilla pudding mixture.
Next, you'll add sliced bananas and a fluffy whipped cream layer before chilling the dessert overnight, allowing all the flavors to blend perfectly.
Step 1. Layer Vanilla Wafers in Dish
To begin with, you'll need to carefully place a layer of vanilla wafers along the bottom of your serving dish. Make sure to cover the entire base, arranging the cookies in a neat pattern.
Don't worry if there are small gaps; you can fill them with broken wafer pieces.
Next, take a moment to admire your work. You're building the foundation for a delicious dessert!
Now, it's time to add some extra crunch. Stand wafers up around the edge of the dish, creating a wafer "wall." This adds a fun touch and makes your pudding look even more appealing. For an extra special touch, consider adding a layer of whipped cream on top of the pudding before adding the wafer “wall.” This will give your dessert an extra creamy and indulgent touch. For a tasty twist, try serving your pudding alongside a side of fluffy buttermilk biscuits recipe for a delightful contrast of textures and flavors. Enjoy this delicious and fun dessert!
As you continue, remember that this layer is crucial. It'll soak up the creamy pudding and give your dessert its classic taste.
If you're using a clear dish, make sure the wafers look tidy from the outside. You can always add more wafers if needed.
Step 2. Make Vanilla Pudding Mixture

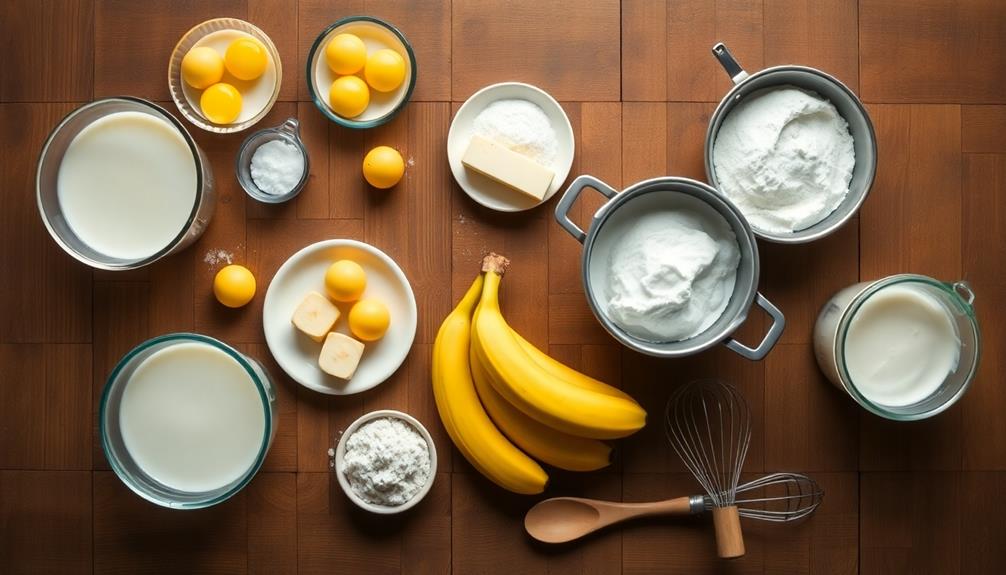
Now that you've laid the foundation, it's time to create the star of the show: the vanilla pudding mixture. In a medium-sized saucepan, combine sugar, flour, and a pinch of salt.
Slowly whisk in milk, making sure there are no lumps. Place the pan over medium heat and stir constantly. As the mixture heats up, you'll notice it starting to thicken. Keep stirring until it reaches a smooth, pudding-like consistency.
Once it's thick enough, remove the pan from the heat. Crack a few eggs into a separate bowl and whisk them together. Slowly pour a small amount of the hot pudding into the eggs, stirring quickly. This step is called tempering, and it prevents the eggs from scrambling.
Now, add the egg mixture back into the pudding and stir well. Return the pan to low heat and cook for a few more minutes, stirring constantly. Remove from heat and stir in vanilla extract for that classic flavor.
Your vanilla pudding mixture is now ready to use in your banana pudding masterpiece!
Step 3. Add Sliced Bananas

The star of the show is ready to make its appearance. It's time to add those delicious, ripe bananas to your pudding!
Start by peeling 3 to 4 medium-sized bananas. Make sure they're yellow with just a few brown spots for the best flavor.
Using a sharp knife, carefully slice the bananas into rounds about 1/4 inch thick. You'll want even slices so each bite of pudding has the perfect amount of banana.
As you slice, place the banana rounds in a bowl. If you're not using them right away, sprinkle a little lemon juice over them to prevent browning.
Now, grab your prepared vanilla pudding mixture and your serving dish. Begin layering by spreading a thin layer of pudding on the bottom.
Next, add a single layer of banana slices, placing them close together but not overlapping. Repeat these layers, alternating pudding and bananas, until you've used all your ingredients.
Make sure to end with a layer of pudding on top.
Your banana pudding is starting to take shape! The creamy pudding and sweet banana slices will create a heavenly combination that's hard to resist.
Step 4. Add Whipped Cream Layer

While the pudding and banana layers form the base of your dessert, a cloud-like layer of whipped cream will take it to new heights.
It's time to add the finishing touch that'll make your banana pudding truly irresistible!
Start by chilling a large mixing bowl and beaters in the freezer for about 15 minutes. This helps the cream whip up faster and fluffier.
Pour cold heavy whipping cream into the chilled bowl. Add a splash of vanilla extract and a bit of powdered sugar for sweetness.
Now, it's time to whip! Turn on your mixer to medium-high speed and watch the magic happen. The cream will slowly thicken, forming soft peaks. Keep going until you see stiff peaks form – this means the cream holds its shape when you lift the beaters.
Gently spread your whipped cream over the banana and pudding layers. Use a spatula to create pretty swirls and peaks on top.
This fluffy layer not only looks beautiful but also adds a light, airy texture to your dessert. Your banana pudding is now ready to chill and set before serving!
Step 5. Chill Overnight Before Serving
Having assembled your delicious layers, it's crucial to let your banana pudding chill overnight before serving. This waiting period might test your patience, but it's worth it! The chilling time allows all the flavors to blend together perfectly. It also helps the pudding set, making it easier to scoop and serve later.
To chill your pudding, cover the dish with plastic wrap or a tight-fitting lid. Place it in the refrigerator for at least 8 hours, but overnight is best. During this time, the vanilla wafers will soften and absorb some of the creamy goodness around them. The bananas will infuse their sweet flavor into the pudding, creating a harmonious taste.
When you're ready to serve, take the pudding out of the fridge. You'll notice it looks even more appetizing now! The layers will have settled, and the texture will be just right.
Grab a big spoon and scoop generous portions into bowls. Each spoonful will be a perfect mix of creamy pudding, soft cookies, and flavorful bananas. Your patience will be rewarded with a truly unforgettable dessert!
Final Thoughts
Everyone can appreciate the timeless appeal of banana pudding. It's a dessert that brings smiles to faces and warmth to hearts.
You've now learned how to create this classic treat from start to finish. Remember, the key is in the layers. Each component plays a crucial role in the overall taste and texture.
As you make your banana pudding, don't be afraid to get creative. You might want to try different types of cookies or add a sprinkle of cinnamon for extra flavor. The possibilities are endless!
Just keep in mind that the basic recipe is a winner on its own.
Sharing your banana pudding with friends and family is a great way to spread joy. It's perfect for potlucks, picnics, or just a cozy night at home.
You'll love watching people's eyes light up when they take their first bite.
Frequently Asked Questions
Can Banana Pudding Be Made Without Bananas?
You can make a pudding that mimics banana flavor without using actual bananas. It's possible to use banana extract or artificial flavoring instead. However, it won't have the same texture or authentic taste as traditional banana pudding.
How Long Does Homemade Banana Pudding Last in the Refrigerator?
You'll want to enjoy your homemade pudding quickly. It'll last about 3-4 days in the fridge if stored properly. Keep it covered tightly with plastic wrap or in an airtight container to maintain freshness.
Is Banana Pudding a Southern Dessert?
You're right to associate it with the South! Banana pudding is indeed a beloved Southern dessert. It's a staple at many family gatherings and potlucks across the region. You'll often find it featured in Southern cookbooks.
Can Banana Pudding Be Frozen for Later Consumption?
Yes, you can freeze banana pudding for later consumption. It'll keep for up to 3 months. Just wrap it tightly in plastic wrap and aluminum foil. When you're ready to eat, thaw it in the refrigerator overnight.
What Are Some Popular Variations of Traditional Banana Pudding?
You'll find several popular twists on the classic recipe. Try adding coconut, peanut butter, or chocolate for unique flavors. Some versions use different cookies or incorporate fruits like strawberries. You can even make a no-bake or vegan version.