Connect with us

Polish Comfort Food

Kielbasa (Polish Sausage)

Intriguing and flavorful, kielbasa has been a Polish culinary treasure for centuries, but its secrets extend far beyond

Published

on

polish sausage delicacy kielbasa

Kielbasa, a savory Polish sausage, has been delighting taste buds for over 500 years. You'll love its rich, smoky flavor and versatile nature. It's perfect for grilling, adding to soups, or slicing for sandwiches. Making kielbasa at home is a fun adventure, involving grinding meat, mixing spices, and stuffing casings. The key to its irresistible taste lies in the smoking process, which infuses the sausage with deep, complex flavors. Whether you're hosting a backyard barbecue or looking for a quick snack, kielbasa's hearty appeal is sure to satisfy. There's so much more to discover about this beloved Polish staple.

Key Takeaways

  • Kielbasa is a traditional Polish sausage with a history spanning over 500 years, known for its rich flavor and versatility.
  • It's typically made from pork or a mixture of pork and beef, seasoned with garlic, salt, and other spices.
  • Kielbasa can be smoked, fresh, or dried, and is often served grilled, boiled, or pan-fried.
  • The sausage is a versatile ingredient used in various dishes, from soups and stews to sandwiches and pasta.
  • Kielbasa has gained popularity globally, with numerous regional variations and adaptations in different cuisines.

History

Throughout the centuries, kielbasa has been a staple of Polish cuisine. You'll find this savory sausage at the heart of many traditional meals and celebrations. The word "kielbasa" actually means "sausage" in Polish, and it's been a part of the country's culinary heritage for over 500 years!

When you explore the history of kielbasa, you'll discover that it originated as a way to preserve meat. Clever Polish farmers and butchers would stuff seasoned pork into casings, then smoke or dry the sausages to make them last longer.

This practical method soon became an art form, with different regions developing their own unique flavors and styles.

As time went on, kielbasa's popularity grew beyond Poland's borders. Polish immigrants brought their beloved sausage recipes with them to other countries, spreading the delicious tradition around the world.

Today, you can enjoy kielbasa in countless varieties, from spicy to mild, fresh to smoked. Whether you're savoring it at a family gathering or trying it for the first time, you're tasting a piece of Polish history!

Advertisement

Recipe

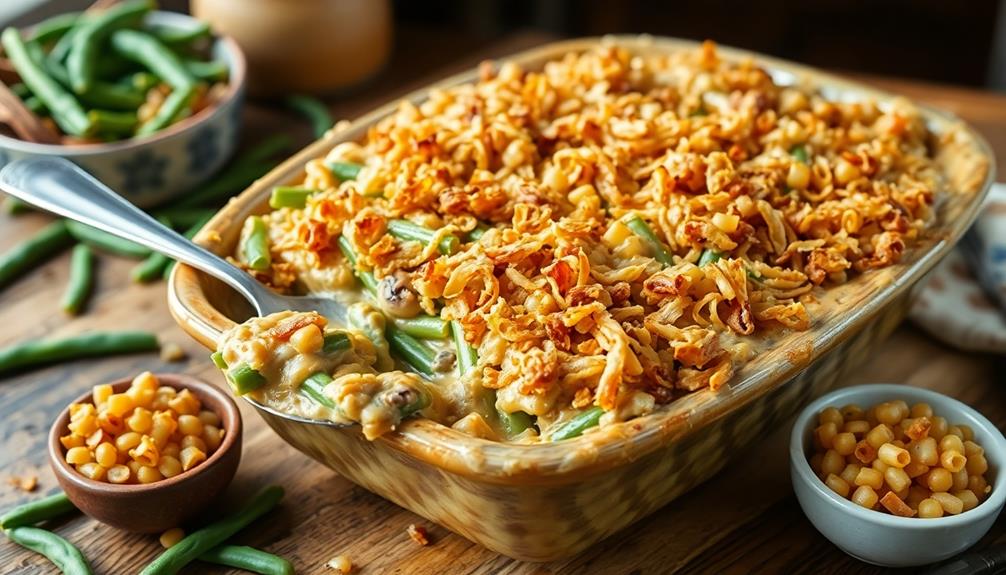
Kielbasa, a beloved Polish sausage, is a versatile and flavorful ingredient that can be prepared in various ways. This recipe focuses on a simple yet delicious method of cooking kielbasa that brings out its rich taste and satisfying texture.

While kielbasa can be enjoyed on its own, this recipe pairs it with sautéed onions and bell peppers for added flavor and nutrition. The combination of the savory sausage with the sweetness of the vegetables creates a perfect balance that will please any palate. This dish can be served as a main course or as part of a larger meal.
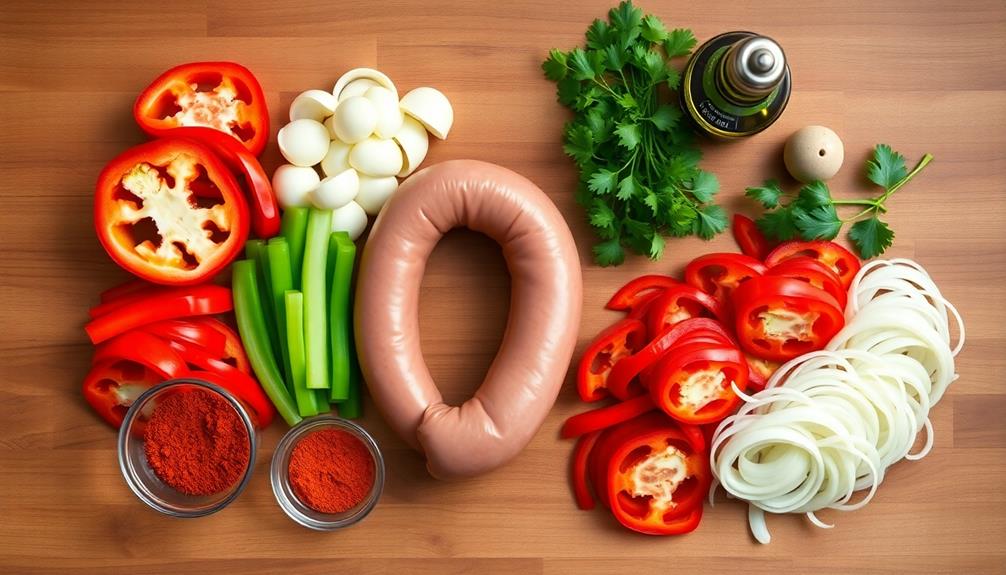
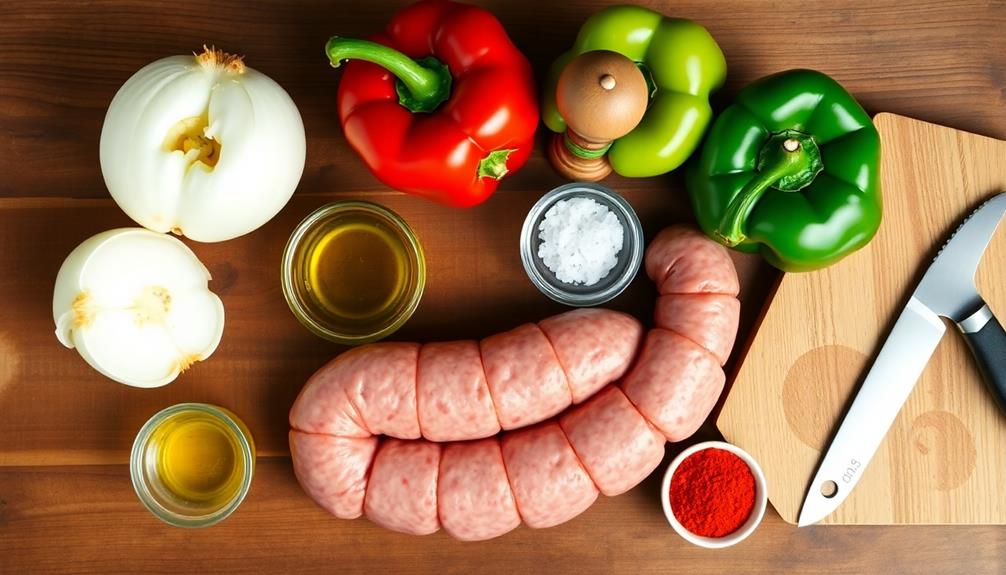
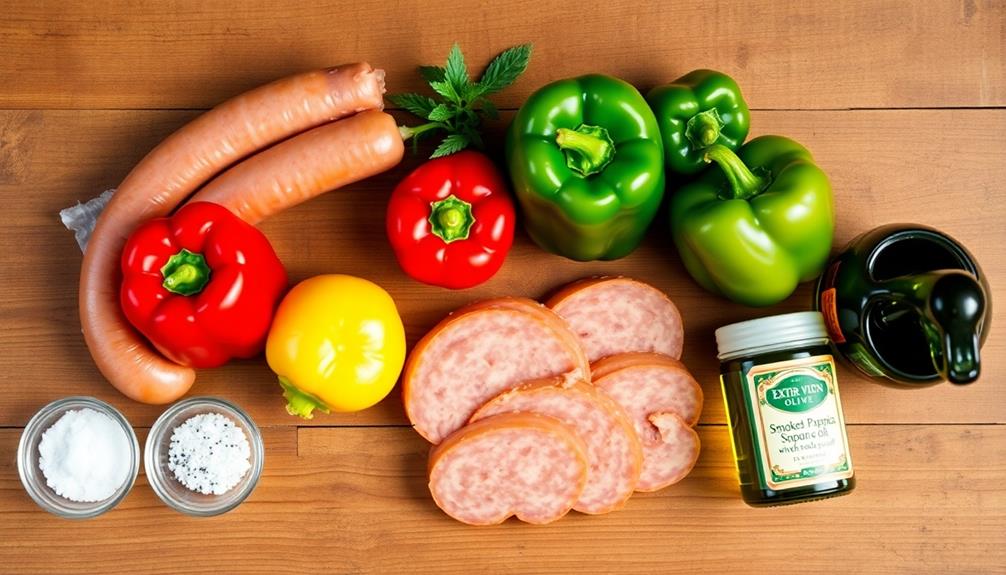
Ingredients:

  • 1 pound kielbasa
  • 1 large onion, sliced
  • 1 red bell pepper, sliced
  • 1 green bell pepper, sliced
  • 2 tablespoons olive oil
  • Salt and pepper to taste
  • 1 teaspoon paprika (optional)

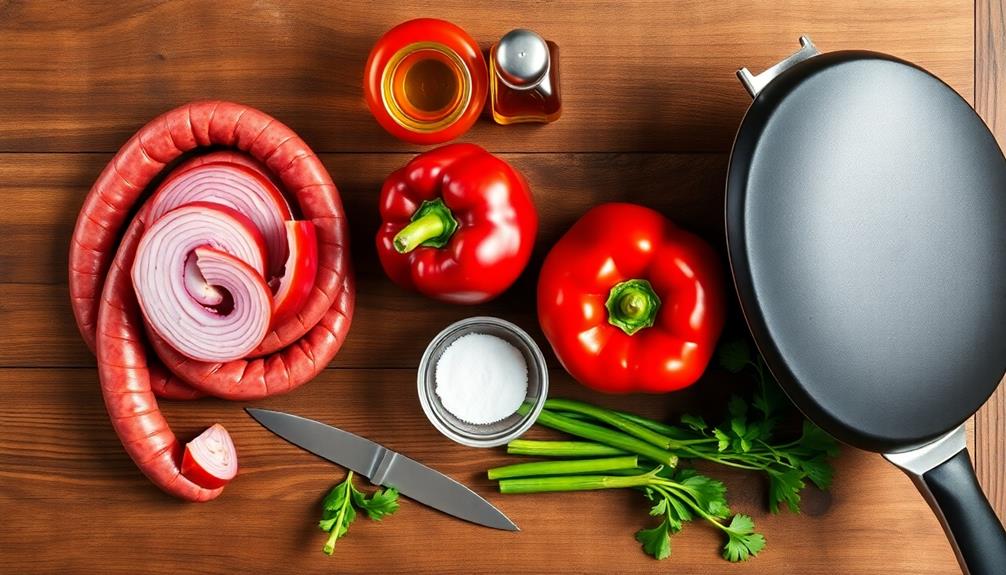
To prepare the dish, start by slicing the kielbasa into 1/2-inch thick rounds. Heat the olive oil in a large skillet over medium heat. Add the sliced onions and bell peppers, and sauté for about 5 minutes until they begin to soften.

Push the vegetables to one side of the skillet and add the kielbasa slices. Cook for 2-3 minutes on each side until they're lightly browned and heated through. Mix the kielbasa with the vegetables, adding salt, pepper, and paprika if desired.

Continue cooking for another 2-3 minutes, stirring occasionally, until everything is well combined and heated through. For best results, use a cast-iron skillet to achieve a nice sear on the kielbasa.

Advertisement

If you prefer a smokier flavor, you can grill the kielbasa instead of pan-frying it. Feel free to experiment with additional vegetables or seasonings to suit your taste.

Leftovers can be stored in an airtight container in the refrigerator for up to 3 days and reheated in a skillet or microwave.

Cooking Steps

Ready to make your own kielbasa?

You'll start by grinding the meat and mixing in the spices, creating a flavorful blend that's uniquely yours.

Next, you'll stuff this mixture into casings, shaping your sausages with care.

Advertisement

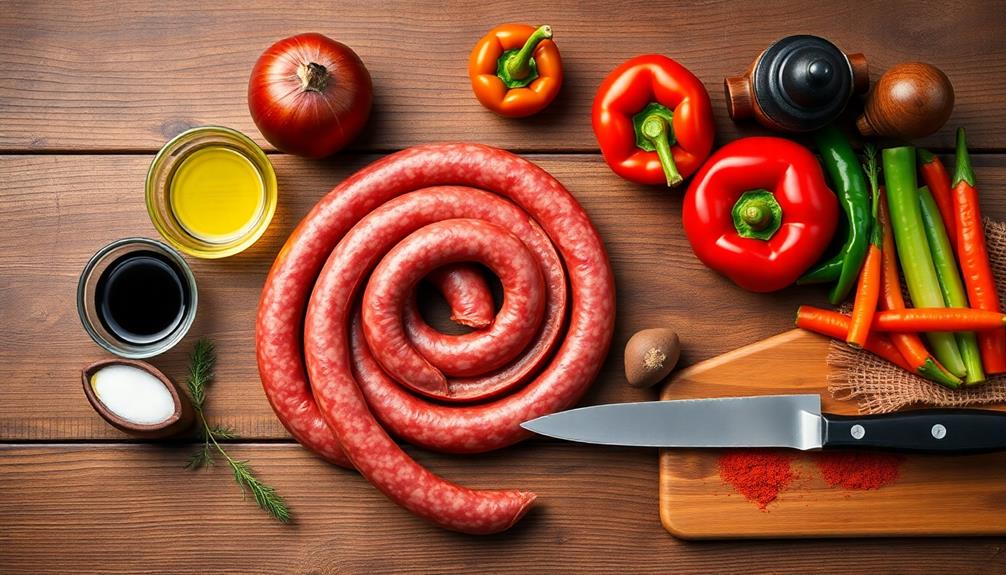
Step 1. Grind Pork and Beef

grind pork and beef

The grinding process is a crucial step in making homemade kielbasa. You'll want to start with cold meat, as it's easier to work with and produces better results.

Begin by cutting your pork and beef into small cubes, about 1-inch in size. If you have time, pop these cubes in the freezer for 30 minutes to firm them up even more.

Next, set up your meat grinder with a medium grinding plate. Feed the meat cubes through the grinder, alternating between pork and beef to ensure a good mix. As you grind, you'll see the meat transforming into a uniform texture.

Don't forget to place a bowl underneath to catch the ground meat!

Once you've ground all the meat, mix it gently with your hands. This helps distribute the fat evenly throughout the mixture.

If the meat feels too warm, refrigerate it for a bit before moving on to the next step. Remember, keeping everything cold is key to achieving that perfect kielbasa texture you're after!

Advertisement

Step 2. Add Spices and Seasonings

incorporate flavors and enhancements

Three key elements make kielbasa truly flavorful: salt, garlic, and marjoram. You'll want to add these spices generously to your ground meat mixture. For every 5 pounds of meat, use about 3 tablespoons of salt, 2-3 cloves of minced garlic, and 1 tablespoon of dried marjoram.

Don't be shy with the seasonings – they're what give kielbasa its distinctive taste!

Next, you'll add some black pepper for a bit of heat. About 1 tablespoon should do the trick. Some recipes also call for a pinch of sugar to balance the flavors.

Now, it's time to get your hands dirty! Mix the spices thoroughly into the meat, making sure they're evenly distributed. As you work the seasonings in, you'll notice the mixture taking on a beautiful aroma.

Once everything's well combined, take a small portion and fry it up in a pan. This is your chance to taste and adjust the seasonings. Too bland? Add more salt or garlic. Want more kick? Toss in some extra pepper.

Trust your taste buds – they're your best guide to perfect kielbasa!

Advertisement

Step 3. Stuff Mixture Into Casings

fill casings with mixture

With your seasoned meat mixture prepared, it's time to stuff it into casings. You'll need a sausage stuffer or a piping bag for this step. If you're using natural casings, soak them in warm water for about 30 minutes to make them more pliable.

Slide the casing onto the stuffer's nozzle, leaving a small tail hanging off the end. Start the machine or begin squeezing the piping bag, guiding the meat mixture into the casing. As it fills, use your hands to gently shape the sausage, ensuring it's evenly distributed.

Don't overstuff, or the casing might burst! When you've reached the desired length, twist the sausage to create links. Repeat this process until you've used all your meat mixture.

Once you've stuffed all the casings, prick them gently with a needle to release any air bubbles. This step helps prevent the sausages from bursting during cooking.

Step 4. Smoke Sausages for Flavor

sausages smoked for flavor

Now that your kielbasa links are prepped and ready, it's time to infuse them with that classic smoky flavor. Fire up your smoker and set it to a low temperature, around 200°F (93°C).

While it's heating, soak some wood chips in water for about 30 minutes. Apple, hickory, or cherry wood work great for kielbasa!

Once your smoker's ready, drain the wood chips and add them to the smoker box. Hang your sausages in the smoker, making sure they're not touching each other. Close the door and let the magic happen!

Advertisement

You'll want to smoke the kielbasa for about 3-4 hours, or until they reach an internal temperature of 165°F (74°C).

During the smoking process, keep an eye on the temperature and add more wood chips as needed. You'll see the sausages develop a beautiful golden-brown color as they absorb the smoky goodness. The aroma will be irresistible!

When they're done, remove the kielbasa from the smoker and let them cool slightly before slicing. Enjoy your homemade, smoky Polish sausages with pride!

Step 5. Chill Before Serving

refrigerate before serving

After smoking your kielbasa to perfection, it's crucial to chill them before serving. This step isn't just about temperature; it's about enhancing the flavor and texture of your delicious sausages. Let's dive into the chilling process!

First, allow your kielbasa to cool at room temperature for about 30 minutes. This helps prevent condensation when you refrigerate them.

Once they're cooled, wrap each sausage tightly in plastic wrap or place them in airtight containers. Pop them into the fridge for at least 4 hours, but overnight is even better.

Advertisement

During this chilling time, something magical happens. The flavors meld together, creating a more complex and delicious taste.

The texture also improves, becoming firmer and easier to slice. When you're ready to serve, take the kielbasa out of the fridge about 20 minutes before eating. This allows them to warm slightly, bringing out their full flavor profile.

Final Thoughts

Versatility defines kielbasa's enduring appeal in cuisines around the world. You'll find this delicious Polish sausage in countless dishes, from hearty soups to grilled masterpieces. Its rich flavor and satisfying texture make it a favorite for both casual meals and special occasions.

As you experiment with kielbasa, don't be afraid to get creative! Try it sliced thin on pizzas, diced in omelets, or as a flavorful addition to your favorite pasta dishes.

Remember, kielbasa isn't just for dinner – it's great for breakfast and lunch too. You can even enjoy it as a quick snack straight from the fridge.

Advertisement

Whether you're hosting a barbecue or preparing a cozy family meal, kielbasa is sure to please. Its smoky aroma and savory taste will have everyone asking for seconds.

Frequently Asked Questions

Is KiełBasa Gluten-Free?

You'll be glad to know that kiełbasa is typically gluten-free! This delicious Polish sausage is usually made from meat, spices, and natural casings. In fact, kiełbasa is a staple in Polish cuisine and is often enjoyed at celebrations and family gatherings. It can be grilled, smoked, or boiled, and is often served with traditional Polish bacon and sauerkraut. The variety of flavors and textures in kiełbasa make it a versatile and delicious addition to any meal. If you’re looking for a traditional Polish dish to pair with kiełbasa, consider trying an authentic Polish goulash recipe. This hearty stew is made with tender chunks of beef, onions, and peppers, all simmered in a rich tomato sauce with a blend of savory spices. When served alongside kiełbasa, it creates a satisfying and flavorful meal that’s sure to please. Whether you’re cooking for a special occasion or simply craving a taste of Poland, kiełbasa and authentic Polish goulash are a winning combination.

However, it's always smart to double-check the label, as some manufacturers might add fillers or binders containing gluten. If you're shopping for kiełbasa, look for brands that clearly state "gluten-free" on the packaging.

How Long Can KiełBasa Be Stored in the Refrigerator?

You'll want to keep an eye on your kiełbasa's freshness!

If it's store-bought and unopened, you can safely store it in your fridge for up to two weeks. Once you've opened it, try to enjoy it within a week.

Advertisement

For homemade kiełbasa, it's best to eat it within 3-4 days. Always check for any unusual smells or appearance before eating.

If you're not planning to eat it soon, freezing is a great option to extend its life!

Can KiełBasa Be Frozen for Later Use?

Yes, you can freeze kiełbasa for later use! It's a great way to extend its shelf life.

Before freezing, wrap the sausage tightly in plastic wrap or aluminum foil, then place it in a freezer bag. Squeeze out excess air to prevent freezer burn.

You'll be able to keep it frozen for up to 3 months. When you're ready to eat it, thaw it in the refrigerator overnight.

Advertisement

What Are the Nutritional Values of KiełBasa?

You'll find that kiełbasa packs a flavorful punch with its nutritional profile!

It's a good source of protein, giving you energy and helping build muscles. You'll also get some iron and B vitamins, which are great for your blood and metabolism.

However, keep in mind that it's high in fat and sodium. Enjoy it in moderation as part of a balanced diet.

Are There Vegetarian or Vegan Alternatives to Traditional KiełBasa?

You'll be happy to know there are tasty vegetarian and vegan alternatives to traditional sausage!

Many plant-based options use ingredients like soy protein, seitan, or vegetables to mimic the texture and flavor. You can find these at most grocery stores or make your own at home.

Advertisement

They're often seasoned with similar spices, so you'll still get that familiar taste. While they mightn't be exactly the same, they're a great way to enjoy a sausage-like experience without meat.

Advertisement

Polish Comfort Food

Kutia (Wheat Berry Pudding)

Once a ceremonial dish, Kutia’s comforting flavors and time-honored recipes offer a delightful culinary journey through Eastern European cuisine.

Published

on

wheat berry pudding delight

Kutia, a traditional Eastern European wheat berry pudding, connects generations through its time-honored recipes and wholesome ingredients. This ceremonial dish was once reserved for festive occasions, but now you can savor its comforting flavors anytime. Imagine the satisfying chew of plump wheat berries, the natural sweetness of honey, and the crunch of walnuts – it's a symphony of textures and tastes. Whether served warm or at room temperature, Kutia offers a delightful culinary experience that invites you to explore the rich tapestry of Eastern European cuisine. Keep reading to uncover the captivating history and step-by-step instructions for creating this beloved treat.

Key Takeaways

  • Kutia is a traditional sweet dish with roots in Eastern European culture, often served during holiday seasons and family gatherings.
  • The dish is made from wheat berries or other grains, sweetened with honey and enhanced with raisins, walnuts, and spices.
  • The cooking process involves soaking, boiling, and sweetening the grains, resulting in a unique blend of textures and flavors.
  • Kutia serves as a reminder to savor cultural roots and traditions, reflecting the rich diversity of culinary practices worldwide.
  • The dish promotes the importance of preserving culinary heritage and fosters community bonds through the sharing of recipes and stories across generations.

History

Kutia, a traditional sweet dish, has its roots deeply entrenched in the cultural tapestry of Eastern European countries. This ancient recipe, passed down through generations, is a testament to the region's rich culinary heritage.

Originating as a ceremonial dish, kutia was often served during important religious and cultural events, such as Christmas Eve and weddings. The dish's very name, derived from the Slavic word for "pot," hints at its long-standing tradition.

Over time, the recipe has evolved, with each family and region putting their own unique spin on the classic. Some versions feature a blend of cooked wheat berries, honey, and poppy seeds, while others incorporate nuts, dried fruits, or even spices.

Regardless of the specific ingredients, the essence of kutia remains the same – a comforting, sweet treat that brings people together and celebrates the flavors of the past.

Today, this cherished dish continues to hold a special place in the hearts and homes of those who embrace their Eastern European heritage.

Advertisement

Recipe

Kutia is a traditional Eastern European grain dish that's often served as a dessert or a sweet side dish. It's made from wheat or other grains, such as barley or millet, that are soaked, boiled, and then sweetened with honey or other sweet ingredients.

The origins of kutia can be traced back to ancient times, where it was a staple food for many cultures in the region. Over the centuries, the recipe has evolved, with different regions and households developing their own unique variations of the dish.

Ingredients:

  • 1 cup of wheat berries (or other grains, such as barley or millet)
  • 4 cups of water
  • 1/2 cup of honey
  • 1/2 cup of raisins
  • 1/4 cup of chopped walnuts
  • 1 teaspoon of ground cinnamon
  • 1/2 teaspoon of ground cloves

Cooking Instructions:

Soak the wheat berries (or other grains) in water for at least 6 hours, or overnight. Drain the grains and place them in a large pot with the 4 cups of fresh water. Bring the mixture to a boil, then reduce the heat and simmer for 1-2 hours, or until the grains are tender and the liquid has been absorbed.

Remove the pot from the heat and stir in the honey, raisins, walnuts, cinnamon, and cloves until well combined.

Advertisement

Tips:

Kutia can be served warm or chilled, depending on personal preference. If you prefer a thicker consistency, you can simmer the mixture for a bit longer. You can also experiment with different types of dried fruits, nuts, and spices to customize the flavor to your liking.

Cooking Steps

First, you'll want to soak the wheat berries overnight to soften them up.

Drain and rinse the berries, then cook them until they're nice and tender.

Finally, stir in some honey and poppy seeds to add a touch of sweetness and crunch.

Advertisement

Serve the kutia warm or at room temperature – it's sure to be a hit!

Step 1. Soak Wheat Berries Overnight

soak wheat berries overnight

To prepare the wheat berries, you'll want to soak them overnight. This simple step helps soften the grains, ensuring they'll cook up tender and plump.

Start by rinsing the wheat berries under cool running water. Then, transfer them to a large bowl and cover with at least 3 inches of water. Let the berries soak for 8-12 hours, or even overnight. This long soak time is key, as it allows the wheat to fully hydrate and become more pliable.

Once the soaking is complete, drain the wheat berries in a colander. They should have expanded in size and feel pleasantly soft to the touch.

At this point, they're ready to be cooked into the signature Kutia dish. The soaked wheat will simmer on the stovetop until tender, creating the perfect base for the rich, sweet flavors to come.

With this simple overnight prep, you're one step closer to enjoying the comforting, traditional taste of Kutia.

Advertisement

Step 2. Drain and Rinse Wheat Berries

drain and rinse wheat

After soaking the wheat berries overnight, the next step is to drain and rinse them.

Grab a colander and place it in the sink. Carefully pour the soaked wheat berries into the colander, allowing the water to drain out.

Once drained, turn on the faucet and gently rinse the wheat berries under cool, running water. Swish them around with your hand to remove any remaining debris or impurities.

The rinsing process helps to clean the wheat berries, preparing them for the next steps of the recipe.

You'll want to ensure they're free of any dirt, dust, or other unwanted materials.

After rinsing, give the colander a gentle shake to remove excess water.

Advertisement

The clean, rinsed wheat berries are now ready to be used in the Kutia recipe.

This simple yet essential step sets you up for success as you continue crafting your delicious wheat berry pudding.

Step 3. Cook Wheat Berries

prepare and cook berries

Next, add the rinsed wheat berries to a large pot and cover them with fresh, cold water.

Bring the pot to a boil over high heat, then reduce the heat to medium-low and let the wheat simmer for about 45 minutes to an hour, until they're tender but still have a slight bite.

You'll know they're ready when you can easily squish one between your fingers.

Drain the cooked wheat berries in a colander, then return them to the pot.

Advertisement

Add in your desired sweeteners, like honey or brown sugar, along with a pinch of salt to enhance the flavors.

Stir everything together until the sweetener is fully dissolved.

If the mixture seems a bit dry, you can add a splash of milk or cream to reach your desired consistency.

Now your wheat berries are ready to be transformed into the classic Ukrainian dessert, kutia!

Step 4. Add Honey and Poppy Seeds

add honey poppy seeds

With your cooked and seasoned wheat berries ready, it's time to add the signature ingredients that transform them into traditional Ukrainian kutia.

Drizzle in a generous amount of golden honey, its sweet, floral notes complementing the nutty, earthy wheat.

Advertisement

Sprinkle in a handful of poppy seeds, their tiny black specks adding a delightful crunch and subtle, nutty flavor.

Stir the honey and poppy seeds into the wheat berries until everything is evenly distributed.

The honey will coat each grain, lending a glistening sheen, while the poppy seeds weave throughout, creating a visually stunning contrast.

Take a deep breath and savor the aroma – the fragrance of the honey and the warm, toasted notes of the poppy seeds intertwine, transporting you to a cozy Ukrainian kitchen.

With the signature ingredients incorporated, your kutia is now ready to serve.

Advertisement

Scoop the sweet, aromatic mixture into bowls and prepare to indulge in a taste of traditional Ukrainian hospitality. As you savor each bite of this delectable dessert, you can imagine yourself being welcomed into a Ukrainian home with open arms. The traditional recipe for karpatka has been handed down through generations, with each family adding their own unique touch to the dish. So, as you enjoy this delightful treat, you are experiencing a piece of Ukrainian culture and history.

Step 5. Serve Warm or at Room Temperature

serve warm or room temperature

You can serve the kutia warm or at room temperature, whichever you prefer. Warm kutia is a cozy, comforting treat, with the wheat berries and poppy seeds gently heated through. The honey and spices will release their aromas, filling the air with a welcoming scent.

If you enjoy a more refreshing dessert, letting the kutia come to room temperature allows the flavors to mingle and the texture to become more cohesive.

Regardless of temperature, the kutia should be smooth, creamy, and slightly thick. The wheat berries should be soft, yet retain a pleasantly chewy bite. Sprinkle some additional poppy seeds on top for a beautiful presentation. You can also drizzle a bit of extra honey over the top, if desired.

Serve the kutia in small bowls or cups, as it's quite rich and filling. Savor each spoonful, letting the comforting flavors and textures transport you. Whether warm or at room temperature, kutia is a delightful traditional delight.

Final Thoughts

The centuries-old tradition of Kutia serves as a cherished reminder of the enduring significance of cultural heritage. As you've now discovered, this wheat berry pudding isn't merely a dish – it's a time-honored practice that connects generations and celebrates the resilience of communities.

Advertisement

Whether enjoyed during the holiday season or as a comforting treat any time of year, Kutia invites you to slow down, savor the flavors, and reflect on the rich tapestry of your own cultural roots.

As you continue your culinary journey, remember that Kutia is more than just a recipe – it's a gateway to understanding the traditions and values that shape the lives of people around the world.

By embracing this delightful dessert, you honor the hard work, ingenuity, and resilience of those who've kept this tradition alive.

Frequently Asked Questions

How Long Can Kutia Be Stored After Preparation?

You can typically store freshly made kutia in the fridge for 3-5 days after preparing it.

Just make sure to keep it in an airtight container to lock in the flavors and prevent it from drying out.

Advertisement

The cooked wheat berries and creamy texture will hold up well during this time, so you can enjoy your tasty pudding for several days.

Just be sure to give it a good stir before serving to recombine any separated ingredients.

Can Kutia Be Frozen for Later Use?

Absolutely, you can freeze kutia for later enjoyment!

Once the wheat berry pudding has cooled completely, simply portion it out into airtight containers or freezer-safe bags. It'll keep in the freezer for 2-3 months.

When you're ready to savor it again, just thaw it in the fridge overnight. The texture and flavor will stay fresh, so you can relish that delightful, comforting dessert anytime.

Advertisement

Freezing is a fantastic way to extend the life of your homemade kutia and enjoy it for weeks or months to come.

What Are Some Common Variations of Kutia?

There are lots of fun and tasty variations of kutia that you can try!

Some folks like to add dried fruits like raisins or cranberries, while others enjoy a sprinkle of cinnamon or nutmeg on top.

You can even make it with different grains like barley or buckwheat for a new twist.

The best part is you can get creative and make it your own.

Advertisement

What kind of flavors would you want to try in your kutia?

Is Kutia Suitable for Those With Dietary Restrictions?

Absolutely! Kutia can be a great option for those with dietary restrictions.

Depending on the ingredients used, it can be gluten-free, vegan, or dairy-free. You can make it with different grains like barley, millet, or quinoa instead of wheat.

And you can get creative with toppings like dried fruit, nuts, or spices to suit your tastes and needs.

Just be sure to check the recipe and adjust as needed to accommodate your dietary preferences.

Advertisement

Give it a try – you might discover a new favorite!

How Does the Taste of Kutia Compare to Other Traditional Desserts?

Compared to other traditional desserts, kutia has a unique and delightful taste.

It's a bit like a warm, creamy rice pudding, but with a lovely nutty flavor from the wheat berries. The texture is pleasantly chewy, almost like tapioca pearls.

You'll also notice subtle sweetness from the honey or sugar. It's a comforting and satisfying treat that's different from your typical cakes or cookies.

If you're looking to try something new, kutia is definitely worth a taste!

Advertisement

Continue Reading

Polish Comfort Food

Vegetable Salad

Discover the secret to crafting the ultimate vegetable salad that will leave you feeling satisfied and craving more. Keep reading to uncover the vibrant and refreshing details.

Published

on

fresh mixed vegetable salad

Vegetable salad is the perfect dish to brighten up your day! You'll love the vibrant colors, refreshing crunch, and harmonious flavors that come together in each bite. Start with a base of crisp greens, then add juicy tomatoes, crisp cucumbers, and crunchy bell peppers. Toss it all in a tangy-sweet dressing, and you've got a nourishing meal that'll leave you feeling satisfied. The best part? You can get creative and experiment with all sorts of tasty ingredients to find your new favorite combo. Intrigued? Keep reading to uncover even more tips for crafting the ultimate vegetable salad.

Key Takeaways

  • Vegetable salad is a refreshing, nutritious dish that can be served as a light meal, side, or starter, featuring a variety of crisp, seasonal produce.
  • The base of a vegetable salad typically includes mixed greens, cucumber, tomatoes, bell peppers, and onions, with options to add feta cheese and sunflower seeds.
  • A simple vinaigrette dressing, made with olive oil, balsamic vinegar, Dijon mustard, honey, and garlic, harmonizes the flavors and textures of the salad.
  • Vegetable salads offer versatility, as they can be customized with various seasonal ingredients, classic flavor combinations, and creative twists.
  • Proper presentation, with vibrant colors and diverse textures, enhances the visual appeal of vegetable salads, encouraging their consumption.

History

Salads have been a part of human cuisine for centuries, with evidence of vegetable-based dishes dating back to ancient civilizations. The earliest known salads were simple affairs, featuring locally-sourced greens, herbs, and whatever other fresh produce was available.

As trade routes expanded, salads evolved to incorporate a wider variety of ingredients, from exotic fruits to fragrant spices. This evolution is a testament to the power of imagination, which allows for profound personal change and creativity in culinary practices enhances creativity.

In medieval Europe, salads were often served as a course before the main meal, with nobles and royalty enjoying elaborately-presented dishes.

By the 18th century, the concept of the "mixed salad" gained popularity, allowing home cooks to experiment with different combinations of greens, vegetables, and dressings. This paved the way for the vibrant, diverse salads we know and love today.

Salads have long been a healthy and delicious way to enjoy the bounty of the seasons. Whether you prefer a simple green salad or a more complex creation, the history of this versatile dish is full of culinary innovation and cultural traditions.

Advertisement

Recipe

Vegetable Salad is a refreshing and nutritious dish that can be enjoyed as a light meal or a side. The combination of crisp vegetables and a tangy dressing makes it a versatile option for any occasion.

Incorporating seasonal produce can elevate your salad's flavor profile and nutritional value, similar to the benefits of a fermented vegetable plate. To prepare this delightful salad, you'll need to gather a few simple ingredients and follow a straightforward cooking method. The result is a vibrant and flavorful dish that's sure to impress your family and friends.

Ingredients:

  • 2 cups mixed greens (such as spinach, arugula, and kale)
  • 1 cup sliced cucumber
  • 1 cup cherry tomatoes, halved
  • 1/2 cup diced red bell pepper
  • 1/4 cup thinly sliced red onion
  • 2 tablespoons crumbled feta cheese
  • 2 tablespoons toasted sunflower seeds

Dressing:

  • 2 tablespoons olive oil
  • 1 tablespoon balsamic vinegar
  • 1 teaspoon Dijon mustard
  • 1 teaspoon honey
  • 1 clove garlic, minced
  • Salt and pepper to taste

Instructions:

In a large salad bowl, combine the mixed greens, cucumber, cherry tomatoes, red bell pepper, and red onion. Toss the salad ingredients together until they are well combined. In a separate small bowl, whisk together the olive oil, balsamic vinegar, Dijon mustard, salt, and pepper to make the dressing. Drizzle the dressing over the salad and toss to coat the vegetables evenly. For a refreshing twist on this classic salad, try our delicious cucumber salad recipe that includes fresh dill and a tangy lemon vinaigrette.

In a separate small bowl, whisk together the olive oil, balsamic vinegar, Dijon mustard, honey, and minced garlic. Season the dressing with salt and pepper to taste.

Advertisement

Pour the dressing over the salad and toss gently to coat. Sprinkle the crumbled feta cheese and toasted sunflower seeds on top.

Tips:

For best results, let the salad sit for a few minutes after tossing to allow the flavors to meld.

You can also experiment with different vegetables, such as shredded carrots, chopped avocado, or roasted beets, to customize the salad to your liking.

Additionally, you can add cooked grains, such as quinoa or bulgur, to make it a more substantial meal.

Advertisement

Cooking Steps

First, chop the vegetables into bite-sized pieces to create a visually appealing salad.

Next, gently mix the prepared veggies in a large bowl.

Step 1. Chop Vegetables Into Small Pieces

chop vegetables into pieces

Next, chop the vegetables into small, even pieces. This step is crucial for creating a harmonious salad. Use a sharp knife and cutting board to dice the carrots, celery, and bell peppers into bite-sized cubes. Aim for pieces that are approximately 1/2 inch in size – this will ensure a consistent texture throughout the salad.

Slice the cucumbers into thin rounds, then cut each round in half. Mince the onion into fine pieces, releasing its aromatic flavors. Finally, roughly chop the parsley, dill, and any other herbs you're using.

The key is to cut everything to a similar size, so each forkful contains a delightful mix of textures and tastes. Take your time and focus on uniform, neat cuts. Properly chopping the vegetables is the foundation for a delicious and visually appealing vegetable salad.

Step 2. Mix Vegetables

combine assorted fresh vegetables

With the vegetables chopped into uniform pieces, it's time to bring them together. In a large salad bowl, gently mix the crisp carrots, the tender zucchini, the crunchy bell peppers, and the fresh parsley.

Combine them with a light touch, ensuring each ingredient is evenly distributed throughout the bowl.

Advertisement

Next, add a drizzle of olive oil and a splash of red wine vinegar. Use your hands or a large spoon to toss the salad, coating the vegetables evenly with the flavorful dressing.

Sprinkle in a pinch of salt and a dash of black pepper, adjusting the seasoning to your taste.

Resist the urge to overmix, as you want to maintain the distinct textures and flavors of each vegetable.

Gently fold the salad until the dressing is thoroughly incorporated. Your vibrant, nutrient-packed vegetable salad is now ready to be served and enjoyed.

Step 3. Add Dressing

add dressing to salad

With the vegetables now perfectly chopped, it's time to dress the salad. In a small bowl, whisk together a simple dressing of olive oil, lemon juice, and a pinch of salt and pepper. The bright, tangy flavors will complement the crisp, fresh veggies beautifully.

To enhance the health benefits of your salad, consider adding a few drops of peppermint oil, known for its refreshing properties, to invigorate your dish.

Advertisement

Drizzle the dressing over the salad and use your hands or tongs to gently toss everything together until each piece is lightly coated. Be careful not to overmix, as you want to preserve the integrity of the ingredients. The salad should glisten with the dressing, not be drenched in it.

Once the salad is dressed, give it a final taste and adjust the seasonings as needed. A sprinkle of fresh herbs, such as parsley or dill, can also add a lovely finishing touch.

Now your vegetable salad is ready to serve and enjoy! The vibrant colors and flavors will surely delight your senses.

Step 4. Refrigerate Before Serving

chill prior to serving

After tossing the salad with the dressing, it's time to let the flavors meld. Cover the bowl or container and pop it in the fridge for at least 30 minutes. This chilling time allows the dressing to soak into the veggies, making every bite more delicious.

As the salad chills, the ingredients will firm up a bit, creating the perfect texture. The cool temperature also helps the flavors come together, so you'll get a harmonious blend in every forkful. Don't skip this important step! Refrigerating the salad before serving ensures the perfect taste and consistency.

When you're ready to enjoy, give the salad a gentle stir and serve it up. The vibrant colors and enticing aromas will have everyone's mouths watering.

Advertisement

This vegetable salad is best served chilled, so make sure to let it chill out in the fridge for a bit before digging in. Your taste buds will thank you!

Step 5. Garnish With Fresh Parsley

garnish with fresh parsley

To finish off the vegetable salad, garnish it with some fresh, vibrant parsley. The herb's bright green leaves and delicate, lacy texture will add a lovely pop of color and a burst of flavor to your creation.

Simply pluck a few sprigs from the bunch, gently rinse them under cool water, and pat them dry with a paper towel. Then, use your fingers to tear the leaves into smaller, bite-sized pieces and sprinkle them evenly over the top of the salad.

The parsley won't only enhance the visual appeal of your dish but also complement the other vegetables with its subtly sweet, grassy notes. Feel free to be generous with the garnish – a little goes a long way in brightening up the flavors and making your vegetable salad shine.

The fresh parsley will add the perfect finishing touch, inviting your guests to dig in and enjoy every last bite.

Final Thoughts

Ultimately, a well-constructed vegetable salad can elevate any meal, providing a burst of vibrant colors, flavors, and textures that perfectly complement the main dish. When crafting your own salad masterpiece, don't be afraid to get creative and experiment with various combinations of fresh, seasonal produce.

Advertisement

For instance, you might consider incorporating elements inspired by classic dishes, such as the comforting indulgence of bread pudding for a unique flavor twist. Perhaps you'll discover a new favorite pairing, like the refreshing crunch of crisp cucumber and the earthy sweetness of roasted beets. Or maybe you'll find that a drizzle of tangy vinaigrette brings all the flavors together in perfect harmony.

The true beauty of a vegetable salad lies in its versatility. It can be a light and refreshing starter, a nourishing side, or even the star of the show as a main course.

Frequently Asked Questions

How Long Does the Salad Last in the Refrigerator?

You'll be pleased to know that your tasty vegetable salad can last up to 5 days in the fridge!

Just be sure to store it in an airtight container. The cool, refreshing flavors will stay crisp and vibrant, making it the perfect side dish or snack.

Enjoy the fresh veggies for several days – it's a great way to stretch out your meal prep.

Advertisement

With proper storage, this salad will keep you satisfied and nourished all week long!

Can I Substitute Any of the Vegetables in the Recipe?

Absolutely! You can totally substitute different veggies in this salad.

Get creative and use whatever fresh, crunchy vegetables you've got on hand. Carrots, celery, bell peppers, radishes – the possibilities are endless.

Just make sure to chop everything up into bite-size pieces so it mixes together nicely. Feel free to experiment and find your perfect veggie combo.

The key is to have fun and make it your own!

Advertisement

Is the Salad Suitable for a Vegetarian or Vegan Diet?

Absolutely! The vegetable salad is an excellent choice for vegetarians and vegans.

Since it's made entirely of plant-based ingredients, it's a delightfully wholesome and nutritious option. You can enjoy this colorful, crunchy salad without any worries, as it's free from meat, dairy, and other animal-derived products.

The combination of fresh veggies makes it a versatile and satisfying dish that everyone can savor. Go ahead and dig in – this salad is a wonderful way to get your daily dose of vitamins and minerals!

Can I Make the Salad in Advance for a Party?

Absolutely! Making the salad ahead of time is a great way to save time and stress on the day of your party.

Simply prepare the ingredients, combine them in a large bowl, and store it in the fridge until you're ready to serve. The flavors will have a chance to meld together, making the salad even more delicious.

Advertisement

Just don't forget to give it a quick toss before setting it out for your guests to enjoy!

What Are Some Serving Suggestions for This Salad?

When serving this tasty vegetable salad, you've got plenty of options! You can spoon it atop crisp lettuce leaves for a fresh and crunchy presentation.

Or, scoop it into small bowls or cups for individual servings at a party. Serve it alongside crusty bread or rolls to soak up the flavorful dressing.

You could even use it as a topping for baked potatoes or grilled meats. Get creative and have fun with how you showcase this colorful, nutrient-packed salad!

Advertisement

Continue Reading

Polish Comfort Food

Kisiel (Fruit Pudding)

Prepare to indulge in the creamy, subtly sweet delight of Kisiel, a traditional Polish fruit pudding that has captivated taste buds for generations.

Published

on

fruit based pudding dessert

Kisiel, a beloved Polish fruit pudding, has delighted taste buds for centuries. This creamy yet slightly gelatinous dessert combines the natural sweetness of fresh or frozen fruit with a velvety, starch-thickened texture. Chilled or at room temperature, kisiel makes for a refreshing and comforting treat. Simply simmer fruit, sugar, and water, then thicken with cornstarch for a silky consistency. Top with nuts, whipped cream, or berries for an extra special presentation. Versatile and showcasing seasonal ingredients, kisiel is a true taste of Polish culinary heritage that you'll surely want to explore further.

Key Takeaways

  • Kisiel is a traditional Polish dessert with a history dating back to the 14th century, reflecting regional flavors and seasonal ingredients.
  • The basic kisiel recipe combines the sweetness of cooked fruit with a creamy, slightly gelatinous pudding-like texture.
  • Kisiel can be served chilled or at room temperature and is often garnished with nuts, whipped cream, or fresh berries.
  • Kisiel is known for its vibrant colors, natural sweetness, and comforting mouthfeel, making it a versatile and accessible dessert.
  • The simplicity of the kisiel recipe, along with its ability to utilize seasonal fruits, contributes to its enduring popularity in Polish households.

History

According to culinary historians, the origins of kisiel, a traditional Polish fruit pudding, can be traced back to the 14th century. This delightful dessert has been a beloved part of Polish culture for centuries, evolving over time to reflect the regional flavors and seasonal ingredients available throughout the country.

In the early days, kisiel was often made with foraged berries, fruits, and even certain roots, cooked down into a thick, jiggly consistency. As the dish gained popularity, home cooks began experimenting with a wider variety of fruits, including apples, pears, plums, and cherries. Today, kisiel is still enjoyed as a dessert, particularly in Eastern European countries where it originated. Many modern recipes for kisiel call for using store-bought fruit purees or juices instead of foraged berries. However, purists still prefer to make kisiel from scratch, and there are numerous tutorials available online on how to make fruit compote for this purpose. The process typically involves simmering the fruit with sugar and water until it reaches a thick, syrupy consistency. How to make fruit compote is a skill that has been passed down through generations, and its versatility makes it a beloved ingredient in many traditional desserts.

The addition of milk, cream, or even sour cream helped to create a richer, creamier texture, while a touch of honey or sugar added a delicate sweetness.

Today, kisiel remains a staple in Polish households, served as a comforting dessert or even enjoyed as a refreshing chilled treat on warm summer days. Its enduring popularity is a testament to the timeless appeal of this simple, yet delicious, fruit pudding.

Recipe

Kisiel, also known as fruit pudding, is a traditional Polish dessert that combines the sweetness of cooked fruit with the creamy texture of a pudding. This delightful treat is a perfect way to celebrate the abundance of seasonal fruits.

Advertisement

The key to a successful kisiel is the perfect balance between the fruit's natural sweetness and the thickening properties of the starch used in the recipe. The result is a velvety, slightly gelatinous dessert that's both comforting and refreshing.

Ingredients:

  • 3 cups fresh or frozen fruit (such as apples, pears, or berries)
  • 1/2 cup granulated sugar
  • 2 tablespoons cornstarch
  • 1 cup water
  • 1 teaspoon vanilla extract

Instructions:

In a saucepan, combine the fruit, sugar, and water. Bring the mixture to a boil, then reduce the heat and simmer for 10-15 minutes, or until the fruit is soft and the liquid is syrupy.

In a small bowl, whisk the cornstarch with a tablespoon of water to create a slurry. Slowly pour the slurry into the simmering fruit mixture, stirring constantly, until the mixture thickens to a pudding-like consistency. Remove from heat and stir in the vanilla extract.

Tips:

Advertisement

For a creamier consistency, you can substitute half of the water with milk or cream.

You can also experiment with different fruit combinations to create unique flavor profiles. Serve the kisiel chilled or at room temperature, and garnish with a dollop of whipped cream or a sprinkle of cinnamon for an extra touch of indulgence.

Cooking Steps

First, in a saucepan, combine the fruit, sugar, and water.

Bring the mixture to a boil, then let it simmer until the fruit is tender.

For added nutrition, consider incorporating ingredients like high protein and fiber to enhance the dish.

Advertisement

Step 1. Combine Fruit, Sugar, and Water

mix fruit sugar water

With the fruit, sugar, and water ready, you can now combine these key ingredients to start the cooking process.

Gently pour the fruit into a saucepan, making sure to include any juices that have accumulated. Sprinkle the sugar over the top, letting it settle evenly throughout the fruit.

Now, slowly pour in the measured water, being careful not to disturb the delicate fruit pieces.

Place the saucepan on the stovetop and turn the heat to medium. As the mixture begins to warm, you'll notice the sugar dissolving and the fruit softening.

Stir the kisiel gently with a wooden spoon, ensuring all the ingredients are well incorporated. Allow the mixture to simmer, stirring occasionally, until it thickens to your desired consistency, about 10-15 minutes.

The kisiel should have a smooth, pudding-like texture when ready. Remove from heat and let cool slightly before serving or chilling.

Advertisement

Step 2. Bring Mixture to a Boil

bring mixture to boil

Once the fruit, sugar, and water are combined, place the saucepan on the stovetop over medium heat.

Let's bring this delightful mixture to a boil! You'll notice the liquid start to shimmer and bubble as it heats up. Keep a close eye on it, stirring occasionally, until it reaches a full, rolling boil. The sound of the bubbles popping and the steam rising will let you know it's ready.

Now, don't be tempted to crank up the heat – that could cause the mixture to boil over and make a mess. Maintain that medium heat setting, allowing the ingredients to slowly come together.

As the sugar dissolves, the liquid will become thicker and more syrupy. This is exactly what you want for the perfect kisiel texture. Once it reaches a full boil, let it continue cooking for about 5 minutes, stirring occasionally, until the mixture has thickened to your desired consistency.

Get ready for the next step!

Step 3. Simmer Until Fruit Is Tender

simmer fruit until tender

Now that the mixture has reached a boil, reduce the heat to low and let it simmer gently.

This slower cooking process will allow the fruit to become tender and release its natural sweetness. As the pot bubbles away, you'll start to notice the colors of the fruit deepening and the liquid thickening into a luscious, syrupy consistency.

Advertisement

Stir the mixture occasionally to prevent any sticking or burning on the bottom of the pan. Depending on the type of fruit you're using, the simmering may take anywhere from 10 to 20 minutes.

Keep a close eye on it, tasting the fruit periodically to check for doneness. You'll know it's ready when the fruit easily mashes against the side of the pot with the back of your spoon.

The kisiel should have a smooth, velvety texture at this stage. Once the fruit is perfectly tender, remove the pot from the heat and get ready to move on to the next step.

Step 4. Thicken With Cornstarch Slurry

thicken with cornstarch slurry

To thicken the kisiel, you'll need to create a cornstarch slurry. In a small bowl, whisk together a couple of tablespoons of cornstarch with an equal amount of cold water until smooth and lump-free.

Slowly pour the slurry into the simmering fruit mixture, stirring constantly. As the slurry heats up, it will thicken the kisiel to your desired consistency. Keep stirring until the pudding has reached your preferred thickness.

The cornstarch will transform the thin, watery fruit juice into a delightfully creamy, velvety texture. You'll know it's ready when the kisiel coats the back of a spoon.

Advertisement

Adjust the amount of cornstarch slurry as needed to reach your ideal thickness. With a little patience and gentle stirring, you'll have a wonderfully smooth and pudding-like kisiel in no time.

Step 5. Serve Chilled or at Room Temperature

serve chilled or room temperature

Once the kisiel has reached your desired thickness, you have a few options for serving it. You can serve the chilled fruit pudding straight from the refrigerator, allowing the cool, creamy texture to refresh and delight your taste buds.

Alternatively, you can let the kisiel come to room temperature, which will soften the consistency and allow the flavors to open up more fully.

Whether chilled or at room temperature, the kisiel is sure to be a hit. Scoop it into small bowls and garnish with a sprinkle of chopped nuts, a dollop of whipped cream, or a few fresh berries for a visually appealing presentation.

The cool, silky pudding pairs beautifully with the crunch of nuts or the burst of juicy berries. Serve the kisiel as a light and satisfying dessert, or enjoy it as a midday snack to fuel your day.

No matter how you choose to serve it, this classic Polish treat is sure to leave you feeling comforted and content.

Advertisement

Final Thoughts

Kisiel, a traditional Polish fruit pudding, offers a delightful and versatile dessert option. Whether you serve it chilled on a hot summer day or at room temperature during a cozy gathering, this simple yet satisfying treat is sure to delight.

The natural sweetness and vibrant colors of the fruit make it a visually appealing and healthy choice, while the creamy consistency provides a comforting texture. Experiment with different seasonal fruits to discover your favorite variations, or try topping it with a dollop of whipped cream, a sprinkle of cinnamon, or a handful of toasted nuts for an extra touch of elegance.

Kisiel's versatility allows you to adapt it to your personal taste and preferences, making it a crowd-pleasing dessert that can be enjoyed year-round. So, embrace the simplicity and charm of this traditional Polish delicacy and indulge in the delightful flavors of Kisiel.

Frequently Asked Questions

What Is the Origin of the Name "Kisiel"?

You know, the name "kisiel" has a really interesting origin!

It's believed to have come from the Slavic word "kisnuty," which means "to sour." This makes sense when you consider that traditional kisiel is a tart, thickened fruit drink.

Advertisement

The name likely evolved over time as the dish became more popular across Eastern Europe.

Isn't it cool how food names can give you a glimpse into the history and culture of a region? I find that kind of thing really fascinating.

What do you think about the origins of "kisiel"?

How Long Does Kisiel Typically Take to Prepare?

Preparing kisiel typically takes around 30 minutes to an hour, depending on the ingredients and method.

The active process is relatively straightforward, involving simmering a flavorful liquid and thickening it with a starch.

Advertisement

Once the base is ready, you'll simply need to let it cool and set before enjoying this delightful sweet pudding.

With a little hands-on time and minimal effort, you can whip up a batch of homemade kisiel in no time!

Is Kisiel a Traditional Polish Dessert or a Modern Creation?

Kisiel, a beloved Polish dessert, has been a part of the country's culinary tradition for centuries.

This sweet treat originated long ago, evolving over time to become a beloved classic.

With its unique blend of flavors and textures, kisiel has stood the test of time, remaining a cherished part of Polish culture.

Advertisement

Whether you're new to this delightful dessert or a lifelong fan, you're sure to appreciate its rich history and delicious taste.

Can Kisiel Be Made With Different Types of Fruit?

Absolutely! Kisiel can be made with all sorts of delicious fruits. You can use strawberries, blueberries, raspberries, apples, or even a mix of different fruits.

The possibilities are endless! The great thing about kisiel is that it's so versatile. You can get creative and experiment with different flavor combinations to find your personal favorite.

Why not try making it with a mix of berries for a vibrant, colorful treat?

How Long Does Kisiel Keep After It's Been Made?

You can keep homemade kisiel, or fruit pudding, in the fridge for 3-5 days after you make it.

Advertisement

The exact shelf life depends on the ingredients used and how you store it.

Make sure to keep it covered and chilled to maintain its fresh, jiggly texture.

With its vibrant color and sweet, fruity flavor, you'll want to enjoy your homemade kisiel quickly before it goes bad!

Just be mindful of the expiration date, and your tasty treat will be good to go.

Advertisement

Continue Reading

Affiliate Disclaimer
As an affiliate, we may earn a commission from qualifying purchases. We get commissions for purchases made through links on this website from Amazon and other third parties.

Advertisement

Vetted

top local car washes top local car washes
Vetted2 months ago

14 Best Car Washes Near You for a Sparkling Clean Ride

I discovered the 14 best car washes near you that promise a sparkling clean ride, and you won't want to...

top mops for 2024 top mops for 2024
Vetted2 months ago

The 15 Best Mops of 2025 – Your Ultimate Guide to a Spotless Home

Find the perfect mop for your cleaning needs in 2025, and discover how these top choices can revolutionize your home...

top women s fragrances 2024 top women s fragrances 2024
Vetted2 months ago

15 Best Perfumes for Women in 2025 – A Fragrance Guide You Can’t Miss

Keen to discover the top 15 perfumes for women in 2025? Uncover unique scents that will elevate your fragrance game!

top local bars guide top local bars guide
Vetted2 months ago

14 Best Bars Near You for an Unforgettable Night Out

Looking for the perfect bar to elevate your night out? Discover the 14 best spots that promise unforgettable experiences!

luxurious beard oil selection luxurious beard oil selection
Vetted2 months ago

15 Best Beard Oils for a Luxurious Grooming Experience in 2025

Shop the 15 best beard oils for a luxurious grooming experience in 2025 and discover which ones will elevate your...

top college laptops 2024 top college laptops 2024
Vetted2 months ago

15 Best College Laptops of 2025: The Ultimate Guide for Students

With our guide to the 15 best college laptops of 2025, discover which powerful models will elevate your academic experience...

waterproof mascaras for tears waterproof mascaras for tears
Vetted2 months ago

15 Best Waterproof Mascaras That Will Survive Any Tear-Jerker

Outstanding waterproof mascaras await to keep your lashes flawless through any emotional moment; discover which ones made the top 15...

top flavorful disposable vapes top flavorful disposable vapes
Vetted2 months ago

15 Best Disposable Vapes of 2025: Top Picks for Flavor and Convenience

Prepare to discover the 15 best disposable vapes of 2025 that blend exceptional flavor and convenience, but which ones truly...

refreshing lunch salad ideas refreshing lunch salad ideas
Vetted2 months ago

15 Best Salads Near You That Will Freshen Up Your Lunch Routine

Transform your lunch with the 15 best salads nearby that will tantalize your taste buds and leave you craving more...

top convertible car seats top convertible car seats
Vetted2 months ago

15 Best Convertible Car Seats of 2025 – Safety and Comfort for Your Little One

Get ready to discover the top 15 convertible car seats of 2025 that blend safety and comfort—find out which models...

delicious fast food breakfast delicious fast food breakfast
Vetted2 months ago

15 Best Fast Food Breakfast Options That Will Make Your Mornings Delicious

Uncover the 15 best fast food breakfast options that will transform your mornings into a delicious experience you won't want...

stylish contacts for vision stylish contacts for vision
Vetted2 months ago

14 Best America’s Contacts for Clear Vision and Style

Browse through the 14 best contact lenses in America for clear vision and style, and discover which one perfectly complements...

Trending