Connect with us

Polish Comfort Food

Sernik (Polish Cheesecake)

Poland’s cherished cheesecake, Sernik, tantalizes taste buds with its creamy texture and rich history. Discover why this dessert has captivated generations and how

Published

on

delicious polish cheesecake dessert

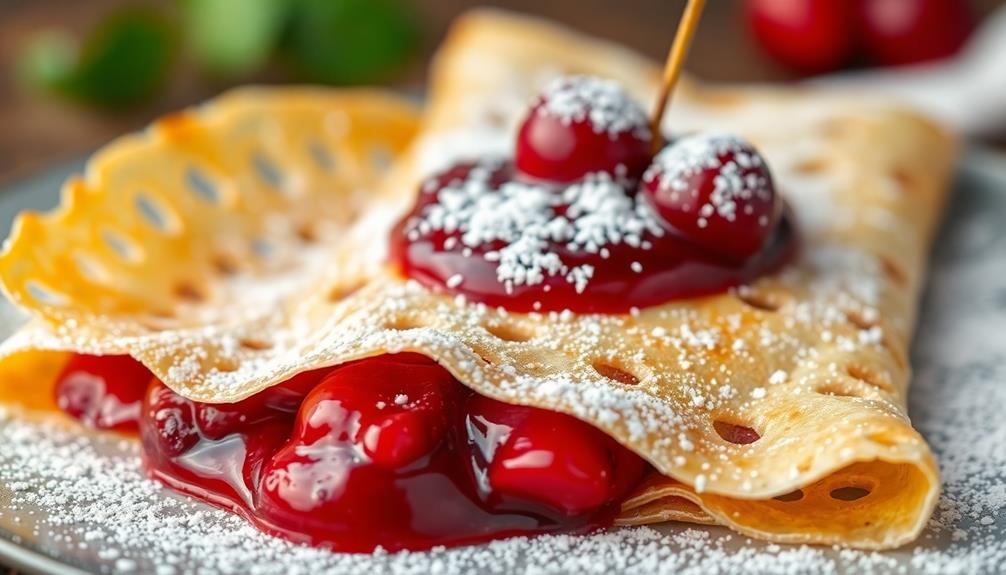
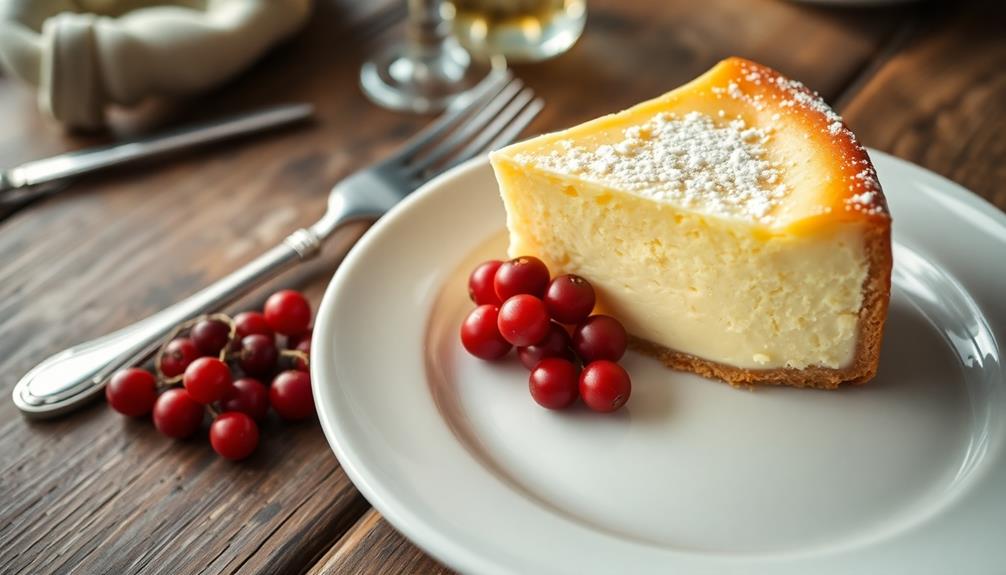
Sernik, Poland's beloved cheesecake, will make your taste buds dance! This creamy dessert uses farmer's cheese for a tangy twist on the classic. You'll love its velvety texture and rich flavor. The shortcrust pastry base adds a delightful crunch, while the pale yellow filling melts in your mouth. Top it with fresh berries, chocolate, or enjoy it plain – the choice is yours! Sernik's history dates back centuries, making it a treasured part of Polish cuisine. Whether you're celebrating a special occasion or just craving something sweet, this cheesecake won't disappoint. Dive deeper to uncover the secrets of perfecting your own sernik at home!

Key Takeaways

  • Sernik is a traditional Polish cheesecake made with farmer's cheese (twarόg), resulting in a tangy, velvety texture.
  • It typically features a shortcrust pastry base, distinguishing it from American-style cheesecakes.
  • The cheesecake is often served during holidays like Christmas and Easter in Polish households.
  • Common toppings include fresh fruits, chocolate, or raisins, with some variations featuring fruit compotes.
  • Sernik's history dates back to ancient Rome, but it evolved uniquely in Poland and gained popularity among nobility.

History

Throughout Poland's rich culinary history, sernik has held a special place as a beloved dessert. You'll find that this creamy cheesecake has been delighting Polish taste buds for centuries. It's believed to have originated in ancient Rome, but the Polish version has evolved into something truly unique. Today, sernik is a staple at family gatherings and holiday celebrations in Poland. The traditional Polish pastry is usually made with a delicate pastry crust and a rich, smooth cheese filling, often flavored with lemon zest, vanilla, or almond extract. Whether it’s baked in a rectangular form or as individual tarts, sernik is a beloved treat that continues to be passed down through generations.

In the 16th century, sernik gained popularity among the Polish nobility. They'd serve it at grand feasts and special occasions. As time went on, it became a staple in Polish homes, especially during holidays like Christmas and Easter.

You'd often see families gathering to make sernik together, passing down recipes from generation to generation.

The dessert's name comes from the Polish word "ser," meaning cheese. Traditionally, you'd make sernik with twaróg, a type of fresh cheese. Over the years, you've probably noticed that sernik has adapted to include various flavors and toppings.

From chocolate to fruit, there's a sernik for every taste. Today, you can find this cherished dessert in bakeries and homes across Poland, keeping its rich history alive with every delicious bite.

Advertisement

Recipe

Sernik, a beloved Polish cheesecake, is a rich and creamy dessert that has been a staple in Polish households for generations. This traditional recipe uses a combination of farmer's cheese (twaróg) and cream cheese to create a dense, yet smooth texture that sets it apart from other cheesecakes.

Unlike its American counterpart, Polish sernik often features a shortcrust pastry base and can be topped with various fruits, chocolate, or simply left plain. The filling is less sweet and has a slightly tangy flavor due to the use of farmer's cheese, making it a perfect balance of indulgence and refinement.

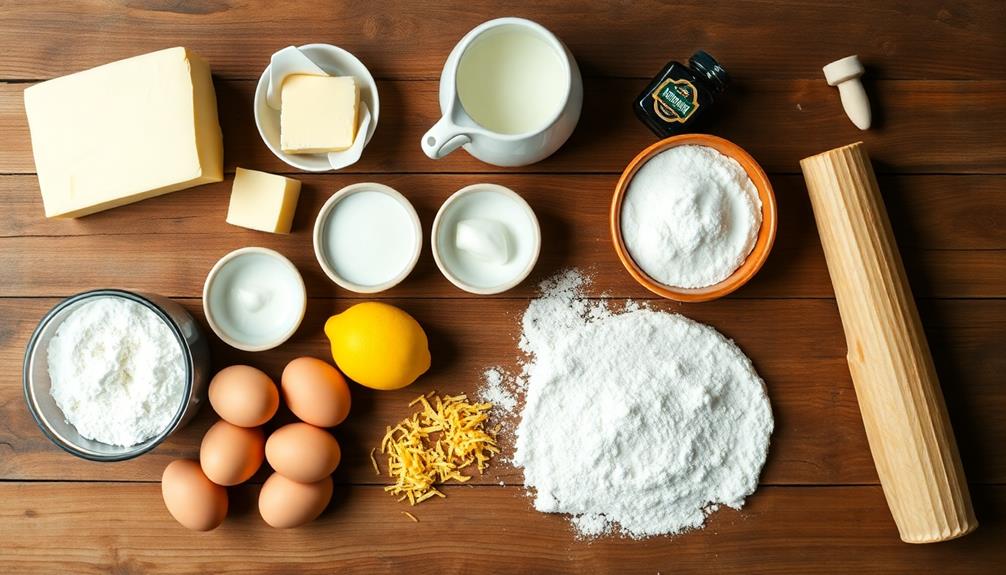
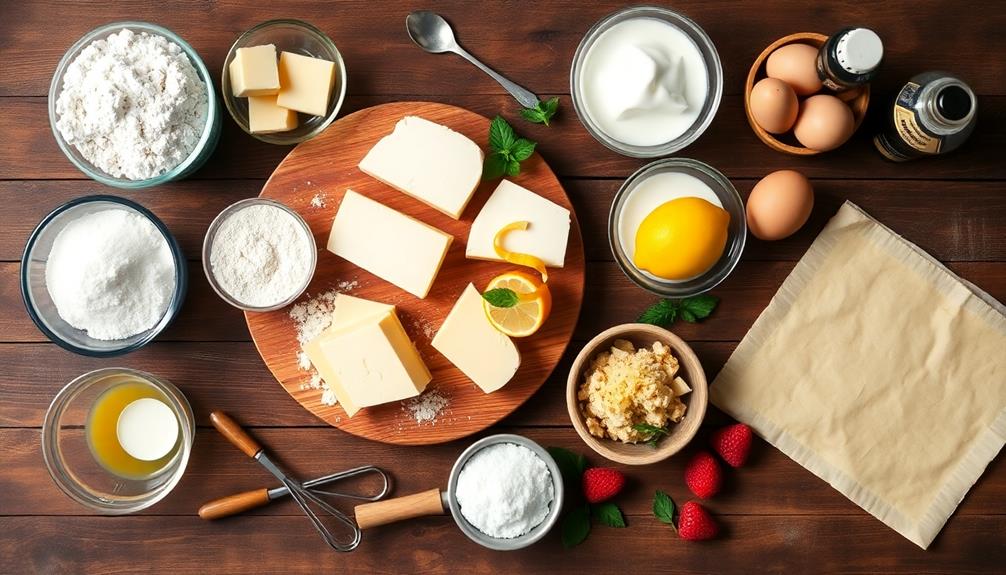
  • 450g farmer's cheese (twaróg)
  • 225g cream cheese, softened
  • 150g unsalted butter, softened
  • 200g granulated sugar
  • 4 large eggs
  • 60ml heavy cream
  • 2 tablespoons all-purpose flour
  • 1 teaspoon vanilla extract
  • Zest of 1 lemon
  • 250g shortcrust pastry
  • Powdered sugar for dusting

Preheat the oven to 160°C (320°F). Line a 23cm (9-inch) springform pan with the shortcrust pastry.

In a large bowl, beat the farmer's cheese, cream cheese, and butter until smooth. Add sugar and mix well. Beat in eggs one at a time, then add heavy cream, flour, vanilla extract, and lemon zest.

Pour the mixture into the prepared crust and bake for 60-70 minutes, or until the center is almost set. Allow to cool completely before refrigerating for at least 4 hours or overnight.

For best results, use room temperature ingredients to ensure a smooth, lump-free batter. If farmer's cheese is unavailable, you can substitute with ricotta cheese, though the texture may be slightly different.

Advertisement

To prevent cracks, avoid opening the oven door during baking and allow the cheesecake to cool slowly in the turned-off oven with the door slightly ajar. Serve chilled, dusted with powdered sugar, and optionally topped with fresh fruit or a fruit compote.

Cooking Steps

Ready to make your own sernik?

Let's walk through the cooking steps together.

You'll start by preparing the cheese mixture and making the crust, then bake your cheesecake at 350°F.

Once it's cooled, you'll decorate your sernik and serve it with fresh fruit for a truly delightful Polish dessert experience.

Advertisement

Step 1. Prepare the Cheese Mixture

prepare cheese mixture first

Once you've prepared the crust, it's time to focus on the star of the show: the cheese mixture. You'll need to gather your ingredients, including cream cheese, farmer's cheese, sugar, eggs, and vanilla extract.

Start by softening the cream cheese at room temperature for about an hour. This will make it easier to mix and create a smoother texture.

In a large bowl, combine the softened cream cheese and farmer's cheese. Use an electric mixer to blend them together until smooth and creamy.

Next, add the sugar gradually, mixing well after each addition. This helps create a silky consistency without lumps. Crack the eggs into the mixture one at a time, beating thoroughly after each one.

Finally, pour in the vanilla extract and mix until everything is well combined.

The result should be a velvety, pale yellow mixture that's thick but pourable. Take a moment to scrape down the sides of the bowl with a spatula, ensuring all ingredients are fully incorporated.

Advertisement

Your cheese mixture is now ready to be poured into the prepared crust, bringing you one step closer to enjoying your delicious Polish cheesecake!

Step 2. Make the Crust

prepare the pie crust

To create the perfect foundation for your sernik, you'll need to start with a well-crafted crust. Begin by preheating your oven to 350°F (175°C).

In a mixing bowl, combine 2 cups of crushed graham crackers, 1/4 cup of sugar, and 1/2 cup of melted butter. Mix these ingredients until they're well blended and resemble damp sand.

Now, grab a 9-inch springform pan and press the mixture firmly into the bottom and about 1 inch up the sides. Use the back of a spoon or the bottom of a measuring cup to really pack it down. This will ensure your crust holds together when you slice the cheesecake later.

Once you've formed your crust, pop it into the preheated oven for about 10 minutes. You'll know it's ready when it turns a light golden brown and fills your kitchen with a warm, buttery aroma.

After baking, set the crust aside to cool completely before adding your cheese mixture. This cooling step is crucial, as it helps prevent a soggy bottom and ensures your sernik has that perfect, crisp contrast to the creamy filling.

Advertisement

Step 3. Bake at 350°F

bake at 350 f

With your oven still preheated to 350°F (175°C), it's time to bake your sernik. Carefully place the springform pan with your prepared cheesecake into the center of the oven. Make sure it's sitting on the middle rack for even heat distribution. Set your timer for 60 minutes, but don't wander too far!

As your sernik bakes, you'll notice a delightful aroma filling your kitchen. It's perfectly normal for the top to turn a beautiful golden brown color. Around the 45-minute mark, keep a close eye on it. If you see the edges browning too quickly, cover them loosely with aluminum foil to prevent burning.

At the 60-minute point, gently shake the pan. The center should still have a slight jiggle, while the edges look set. If it's not quite there, give it another 5-10 minutes.

Once done, turn off the oven but leave the sernik inside with the door slightly ajar. This gradual cooling prevents cracks and ensures a creamy texture.

After 30 minutes, remove it and let it cool completely at room temperature before refrigerating.

Step 4. Cool and Decorate Cheesecake

chill and embellish cheesecake

Cooling your sernik properly is crucial for achieving the perfect texture and flavor. Once you've removed the cheesecake from the oven, let it cool on a wire rack for about an hour at room temperature.

Don't rush this step! As it cools, you'll notice the cake slowly settling and firming up. After the initial cooling, carefully run a knife around the edge of the pan to loosen the cake.

Advertisement

Next, refrigerate your sernik for at least 4 hours, but preferably overnight. This chilling time allows the flavors to meld and the texture to become creamy and smooth.

When you're ready to decorate, remove the cheesecake from the fridge. Now's your chance to get creative! Traditionally, sernik is topped with a dusting of powdered sugar, but you can also add fresh fruit, chocolate shavings, or a fruit compote.

For a classic Polish touch, try sprinkling some raisins on top. Remember, the decoration should complement, not overpower, the rich flavor of your homemade sernik.

With patience and care, you'll have a stunning and delicious Polish cheesecake to share with family and friends!

Step 5. Serve With Fresh Fruit

serve with fresh fruit

Now that your sernik has cooled and been decorated, it's time to enhance its presentation and flavor with fresh fruit. You'll want to choose fruits that complement the rich, creamy taste of the cheesecake. Berries are a classic choice, so consider strawberries, blueberries, or raspberries. Their bright colors will make your sernik look even more appetizing!

Consider pairing your cheesecake with a savory appetizer like Crab Cakes for a delightful contrast.

Advertisement

Slice larger fruits like peaches or plums into thin wedges for easy eating. You can arrange the fruit in a circular pattern on top of the cheesecake or create a beautiful fruit fan around the edges. If you're feeling creative, try making a colorful fruit mosaic on the surface.

Don't forget about seasonal options like fresh figs or pomegranate seeds for an extra special touch.

For a more traditional Polish presentation, serve your sernik with a side of stewed fruit compote. Cherries, apples, or plums work wonderfully for this. The warm, syrupy fruit will contrast nicely with the cool, creamy cheesecake.

Remember to provide small serving spoons so your guests can easily add their desired amount of fruit to each slice.

Final Thoughts

Satisfaction awaits those who attempt this Polish cheesecake recipe. You'll find that making sernik is a rewarding experience that connects you to centuries of culinary tradition.

Advertisement

As you savor each creamy bite, you'll appreciate the unique blend of flavors and textures that make this dessert so special.

Remember, practice makes perfect. Don't be discouraged if your first attempt isn't flawless. Each time you make sernik, you'll become more confident and skilled.

Feel free to experiment with different toppings or add your own twist to the recipe. The joy of baking lies in both following tradition and exploring new possibilities.

Sharing your homemade sernik with friends and family is a wonderful way to spread love and create lasting memories. Whether it's for a special occasion or just because, this Polish cheesecake is sure to impress.

Frequently Asked Questions

Can Sernik Be Made Without a Crust?

Yes, you can definitely make cheesecake without a crust!

Advertisement

It's called a crustless cheesecake, and it's a delicious, lighter option. You'll simply pour the creamy filling directly into your baking pan.

The result? A smooth, velvety dessert that's all about the rich, tangy flavor.

It's perfect if you're watching your carbs or just prefer the pure cheesecake taste.

Don't worry, it'll still hold its shape beautifully.

Give it a try for a delightful twist on the classic!

Advertisement

How Long Does Homemade Sernik Last in the Refrigerator?

You'll want to enjoy your homemade cheesecake quickly, but it can last up to 5 days in the fridge.

Make sure you store it in an airtight container to keep it fresh and prevent it from absorbing other flavors.

The creamy texture might change slightly over time, so it's best to eat it within the first 3 days for the best taste.

What's the Difference Between Sernik and American-Style Cheesecake?

You'll notice some key differences between sernik and American-style cheesecake.

Sernik's base is often made with a shortbread crust, while American cheesecake uses graham crackers. The filling in sernik is lighter and less sweet, typically using farmer's cheese instead of cream cheese.

Advertisement

You'll find sernik has a drier, more crumbly texture. It's often flavored with vanilla or lemon, and sometimes includes raisins.

American cheesecake is creamier and richer, with a wider variety of flavors and toppings.

Are There Regional Variations of Sernik Within Poland?

You'll find exciting regional variations of sernik across Poland! Each area puts its own spin on this beloved dessert.

In the north, you might taste a hint of lemon, while southern regions often add raisins or dried fruit.

Some places use different types of cheese, like twaróg or ricotta. You'll even find unique toppings, from chocolate to fruit sauces.

Advertisement

It's like a delicious adventure through Poland's culinary landscape, with each bite telling a story of local traditions and flavors!

Can Sernik Be Frozen for Later Consumption?

Yes, you can freeze sernik for later enjoyment! It's a great way to save your delicious treat.

Wrap individual slices tightly in plastic wrap, then place them in a freezer-safe container. They'll keep well for up to 3 months.

When you're ready to indulge, simply thaw a slice in the refrigerator overnight. While the texture might change slightly, it'll still be tasty.

Advertisement

Advertisement

Polish Comfort Food

Kutia (Wheat Berry Pudding)

Once a ceremonial dish, Kutia’s comforting flavors and time-honored recipes offer a delightful culinary journey through Eastern European cuisine.

Published

on

wheat berry pudding delight

Kutia, a traditional Eastern European wheat berry pudding, connects generations through its time-honored recipes and wholesome ingredients. This ceremonial dish was once reserved for festive occasions, but now you can savor its comforting flavors anytime. Imagine the satisfying chew of plump wheat berries, the natural sweetness of honey, and the crunch of walnuts – it's a symphony of textures and tastes. Whether served warm or at room temperature, Kutia offers a delightful culinary experience that invites you to explore the rich tapestry of Eastern European cuisine. Keep reading to uncover the captivating history and step-by-step instructions for creating this beloved treat.

Key Takeaways

  • Kutia is a traditional sweet dish with roots in Eastern European culture, often served during holiday seasons and family gatherings.
  • The dish is made from wheat berries or other grains, sweetened with honey and enhanced with raisins, walnuts, and spices.
  • The cooking process involves soaking, boiling, and sweetening the grains, resulting in a unique blend of textures and flavors.
  • Kutia serves as a reminder to savor cultural roots and traditions, reflecting the rich diversity of culinary practices worldwide.
  • The dish promotes the importance of preserving culinary heritage and fosters community bonds through the sharing of recipes and stories across generations.

History

Kutia, a traditional sweet dish, has its roots deeply entrenched in the cultural tapestry of Eastern European countries. This ancient recipe, passed down through generations, is a testament to the region's rich culinary heritage.

Originating as a ceremonial dish, kutia was often served during important religious and cultural events, such as Christmas Eve and weddings. The dish's very name, derived from the Slavic word for "pot," hints at its long-standing tradition.

Over time, the recipe has evolved, with each family and region putting their own unique spin on the classic. Some versions feature a blend of cooked wheat berries, honey, and poppy seeds, while others incorporate nuts, dried fruits, or even spices.

Regardless of the specific ingredients, the essence of kutia remains the same – a comforting, sweet treat that brings people together and celebrates the flavors of the past.

Today, this cherished dish continues to hold a special place in the hearts and homes of those who embrace their Eastern European heritage.

Advertisement

Recipe

Kutia is a traditional Eastern European grain dish that's often served as a dessert or a sweet side dish. It's made from wheat or other grains, such as barley or millet, that are soaked, boiled, and then sweetened with honey or other sweet ingredients.

The origins of kutia can be traced back to ancient times, where it was a staple food for many cultures in the region. Over the centuries, the recipe has evolved, with different regions and households developing their own unique variations of the dish.

Ingredients:

  • 1 cup of wheat berries (or other grains, such as barley or millet)
  • 4 cups of water
  • 1/2 cup of honey
  • 1/2 cup of raisins
  • 1/4 cup of chopped walnuts
  • 1 teaspoon of ground cinnamon
  • 1/2 teaspoon of ground cloves

Cooking Instructions:

Soak the wheat berries (or other grains) in water for at least 6 hours, or overnight. Drain the grains and place them in a large pot with the 4 cups of fresh water. Bring the mixture to a boil, then reduce the heat and simmer for 1-2 hours, or until the grains are tender and the liquid has been absorbed.

Remove the pot from the heat and stir in the honey, raisins, walnuts, cinnamon, and cloves until well combined.

Advertisement

Tips:

Kutia can be served warm or chilled, depending on personal preference. If you prefer a thicker consistency, you can simmer the mixture for a bit longer. You can also experiment with different types of dried fruits, nuts, and spices to customize the flavor to your liking.

Cooking Steps

First, you'll want to soak the wheat berries overnight to soften them up.

Drain and rinse the berries, then cook them until they're nice and tender.

Finally, stir in some honey and poppy seeds to add a touch of sweetness and crunch.

Advertisement

Serve the kutia warm or at room temperature – it's sure to be a hit!

Step 1. Soak Wheat Berries Overnight

soak wheat berries overnight

To prepare the wheat berries, you'll want to soak them overnight. This simple step helps soften the grains, ensuring they'll cook up tender and plump.

Start by rinsing the wheat berries under cool running water. Then, transfer them to a large bowl and cover with at least 3 inches of water. Let the berries soak for 8-12 hours, or even overnight. This long soak time is key, as it allows the wheat to fully hydrate and become more pliable.

Once the soaking is complete, drain the wheat berries in a colander. They should have expanded in size and feel pleasantly soft to the touch.

At this point, they're ready to be cooked into the signature Kutia dish. The soaked wheat will simmer on the stovetop until tender, creating the perfect base for the rich, sweet flavors to come.

With this simple overnight prep, you're one step closer to enjoying the comforting, traditional taste of Kutia.

Advertisement

Step 2. Drain and Rinse Wheat Berries

drain and rinse wheat

After soaking the wheat berries overnight, the next step is to drain and rinse them.

Grab a colander and place it in the sink. Carefully pour the soaked wheat berries into the colander, allowing the water to drain out.

Once drained, turn on the faucet and gently rinse the wheat berries under cool, running water. Swish them around with your hand to remove any remaining debris or impurities.

The rinsing process helps to clean the wheat berries, preparing them for the next steps of the recipe.

You'll want to ensure they're free of any dirt, dust, or other unwanted materials.

After rinsing, give the colander a gentle shake to remove excess water.

Advertisement

The clean, rinsed wheat berries are now ready to be used in the Kutia recipe.

This simple yet essential step sets you up for success as you continue crafting your delicious wheat berry pudding.

Step 3. Cook Wheat Berries

prepare and cook berries

Next, add the rinsed wheat berries to a large pot and cover them with fresh, cold water.

Bring the pot to a boil over high heat, then reduce the heat to medium-low and let the wheat simmer for about 45 minutes to an hour, until they're tender but still have a slight bite.

You'll know they're ready when you can easily squish one between your fingers.

Drain the cooked wheat berries in a colander, then return them to the pot.

Advertisement

Add in your desired sweeteners, like honey or brown sugar, along with a pinch of salt to enhance the flavors.

Stir everything together until the sweetener is fully dissolved.

If the mixture seems a bit dry, you can add a splash of milk or cream to reach your desired consistency.

Now your wheat berries are ready to be transformed into the classic Ukrainian dessert, kutia!

Step 4. Add Honey and Poppy Seeds

add honey poppy seeds

With your cooked and seasoned wheat berries ready, it's time to add the signature ingredients that transform them into traditional Ukrainian kutia.

Drizzle in a generous amount of golden honey, its sweet, floral notes complementing the nutty, earthy wheat.

Advertisement

Sprinkle in a handful of poppy seeds, their tiny black specks adding a delightful crunch and subtle, nutty flavor.

Stir the honey and poppy seeds into the wheat berries until everything is evenly distributed.

The honey will coat each grain, lending a glistening sheen, while the poppy seeds weave throughout, creating a visually stunning contrast.

Take a deep breath and savor the aroma – the fragrance of the honey and the warm, toasted notes of the poppy seeds intertwine, transporting you to a cozy Ukrainian kitchen.

With the signature ingredients incorporated, your kutia is now ready to serve.

Advertisement

Scoop the sweet, aromatic mixture into bowls and prepare to indulge in a taste of traditional Ukrainian hospitality. As you savor each bite of this delectable dessert, you can imagine yourself being welcomed into a Ukrainian home with open arms. The traditional recipe for karpatka has been handed down through generations, with each family adding their own unique touch to the dish. So, as you enjoy this delightful treat, you are experiencing a piece of Ukrainian culture and history.

Step 5. Serve Warm or at Room Temperature

serve warm or room temperature

You can serve the kutia warm or at room temperature, whichever you prefer. Warm kutia is a cozy, comforting treat, with the wheat berries and poppy seeds gently heated through. The honey and spices will release their aromas, filling the air with a welcoming scent.

If you enjoy a more refreshing dessert, letting the kutia come to room temperature allows the flavors to mingle and the texture to become more cohesive.

Regardless of temperature, the kutia should be smooth, creamy, and slightly thick. The wheat berries should be soft, yet retain a pleasantly chewy bite. Sprinkle some additional poppy seeds on top for a beautiful presentation. You can also drizzle a bit of extra honey over the top, if desired.

Serve the kutia in small bowls or cups, as it's quite rich and filling. Savor each spoonful, letting the comforting flavors and textures transport you. Whether warm or at room temperature, kutia is a delightful traditional delight.

Final Thoughts

The centuries-old tradition of Kutia serves as a cherished reminder of the enduring significance of cultural heritage. As you've now discovered, this wheat berry pudding isn't merely a dish – it's a time-honored practice that connects generations and celebrates the resilience of communities.

Advertisement

Whether enjoyed during the holiday season or as a comforting treat any time of year, Kutia invites you to slow down, savor the flavors, and reflect on the rich tapestry of your own cultural roots.

As you continue your culinary journey, remember that Kutia is more than just a recipe – it's a gateway to understanding the traditions and values that shape the lives of people around the world.

By embracing this delightful dessert, you honor the hard work, ingenuity, and resilience of those who've kept this tradition alive.

Frequently Asked Questions

How Long Can Kutia Be Stored After Preparation?

You can typically store freshly made kutia in the fridge for 3-5 days after preparing it.

Just make sure to keep it in an airtight container to lock in the flavors and prevent it from drying out.

Advertisement

The cooked wheat berries and creamy texture will hold up well during this time, so you can enjoy your tasty pudding for several days.

Just be sure to give it a good stir before serving to recombine any separated ingredients.

Can Kutia Be Frozen for Later Use?

Absolutely, you can freeze kutia for later enjoyment!

Once the wheat berry pudding has cooled completely, simply portion it out into airtight containers or freezer-safe bags. It'll keep in the freezer for 2-3 months.

When you're ready to savor it again, just thaw it in the fridge overnight. The texture and flavor will stay fresh, so you can relish that delightful, comforting dessert anytime.

Advertisement

Freezing is a fantastic way to extend the life of your homemade kutia and enjoy it for weeks or months to come.

What Are Some Common Variations of Kutia?

There are lots of fun and tasty variations of kutia that you can try!

Some folks like to add dried fruits like raisins or cranberries, while others enjoy a sprinkle of cinnamon or nutmeg on top.

You can even make it with different grains like barley or buckwheat for a new twist.

The best part is you can get creative and make it your own.

Advertisement

What kind of flavors would you want to try in your kutia?

Is Kutia Suitable for Those With Dietary Restrictions?

Absolutely! Kutia can be a great option for those with dietary restrictions.

Depending on the ingredients used, it can be gluten-free, vegan, or dairy-free. You can make it with different grains like barley, millet, or quinoa instead of wheat.

And you can get creative with toppings like dried fruit, nuts, or spices to suit your tastes and needs.

Just be sure to check the recipe and adjust as needed to accommodate your dietary preferences.

Advertisement

Give it a try – you might discover a new favorite!

How Does the Taste of Kutia Compare to Other Traditional Desserts?

Compared to other traditional desserts, kutia has a unique and delightful taste.

It's a bit like a warm, creamy rice pudding, but with a lovely nutty flavor from the wheat berries. The texture is pleasantly chewy, almost like tapioca pearls.

You'll also notice subtle sweetness from the honey or sugar. It's a comforting and satisfying treat that's different from your typical cakes or cookies.

If you're looking to try something new, kutia is definitely worth a taste!

Advertisement

Continue Reading

Polish Comfort Food

Vegetable Salad

Discover the secret to crafting the ultimate vegetable salad that will leave you feeling satisfied and craving more. Keep reading to uncover the vibrant and refreshing details.

Published

on

fresh mixed vegetable salad

Vegetable salad is the perfect dish to brighten up your day! You'll love the vibrant colors, refreshing crunch, and harmonious flavors that come together in each bite. Start with a base of crisp greens, then add juicy tomatoes, crisp cucumbers, and crunchy bell peppers. Toss it all in a tangy-sweet dressing, and you've got a nourishing meal that'll leave you feeling satisfied. The best part? You can get creative and experiment with all sorts of tasty ingredients to find your new favorite combo. Intrigued? Keep reading to uncover even more tips for crafting the ultimate vegetable salad.

Key Takeaways

  • Vegetable salad is a refreshing, nutritious dish that can be served as a light meal, side, or starter, featuring a variety of crisp, seasonal produce.
  • The base of a vegetable salad typically includes mixed greens, cucumber, tomatoes, bell peppers, and onions, with options to add feta cheese and sunflower seeds.
  • A simple vinaigrette dressing, made with olive oil, balsamic vinegar, Dijon mustard, honey, and garlic, harmonizes the flavors and textures of the salad.
  • Vegetable salads offer versatility, as they can be customized with various seasonal ingredients, classic flavor combinations, and creative twists.
  • Proper presentation, with vibrant colors and diverse textures, enhances the visual appeal of vegetable salads, encouraging their consumption.

History

Salads have been a part of human cuisine for centuries, with evidence of vegetable-based dishes dating back to ancient civilizations. The earliest known salads were simple affairs, featuring locally-sourced greens, herbs, and whatever other fresh produce was available.

As trade routes expanded, salads evolved to incorporate a wider variety of ingredients, from exotic fruits to fragrant spices. This evolution is a testament to the power of imagination, which allows for profound personal change and creativity in culinary practices enhances creativity.

In medieval Europe, salads were often served as a course before the main meal, with nobles and royalty enjoying elaborately-presented dishes.

By the 18th century, the concept of the "mixed salad" gained popularity, allowing home cooks to experiment with different combinations of greens, vegetables, and dressings. This paved the way for the vibrant, diverse salads we know and love today.

Salads have long been a healthy and delicious way to enjoy the bounty of the seasons. Whether you prefer a simple green salad or a more complex creation, the history of this versatile dish is full of culinary innovation and cultural traditions.

Advertisement

Recipe

Vegetable Salad is a refreshing and nutritious dish that can be enjoyed as a light meal or a side. The combination of crisp vegetables and a tangy dressing makes it a versatile option for any occasion.

Incorporating seasonal produce can elevate your salad's flavor profile and nutritional value, similar to the benefits of a fermented vegetable plate. To prepare this delightful salad, you'll need to gather a few simple ingredients and follow a straightforward cooking method. The result is a vibrant and flavorful dish that's sure to impress your family and friends.

Ingredients:

  • 2 cups mixed greens (such as spinach, arugula, and kale)
  • 1 cup sliced cucumber
  • 1 cup cherry tomatoes, halved
  • 1/2 cup diced red bell pepper
  • 1/4 cup thinly sliced red onion
  • 2 tablespoons crumbled feta cheese
  • 2 tablespoons toasted sunflower seeds

Dressing:

  • 2 tablespoons olive oil
  • 1 tablespoon balsamic vinegar
  • 1 teaspoon Dijon mustard
  • 1 teaspoon honey
  • 1 clove garlic, minced
  • Salt and pepper to taste

Instructions:

In a large salad bowl, combine the mixed greens, cucumber, cherry tomatoes, red bell pepper, and red onion. Toss the salad ingredients together until they are well combined. In a separate small bowl, whisk together the olive oil, balsamic vinegar, Dijon mustard, salt, and pepper to make the dressing. Drizzle the dressing over the salad and toss to coat the vegetables evenly. For a refreshing twist on this classic salad, try our delicious cucumber salad recipe that includes fresh dill and a tangy lemon vinaigrette.

In a separate small bowl, whisk together the olive oil, balsamic vinegar, Dijon mustard, honey, and minced garlic. Season the dressing with salt and pepper to taste.

Advertisement

Pour the dressing over the salad and toss gently to coat. Sprinkle the crumbled feta cheese and toasted sunflower seeds on top.

Tips:

For best results, let the salad sit for a few minutes after tossing to allow the flavors to meld.

You can also experiment with different vegetables, such as shredded carrots, chopped avocado, or roasted beets, to customize the salad to your liking.

Additionally, you can add cooked grains, such as quinoa or bulgur, to make it a more substantial meal.

Advertisement

Cooking Steps

First, chop the vegetables into bite-sized pieces to create a visually appealing salad.

Next, gently mix the prepared veggies in a large bowl.

Step 1. Chop Vegetables Into Small Pieces

chop vegetables into pieces

Next, chop the vegetables into small, even pieces. This step is crucial for creating a harmonious salad. Use a sharp knife and cutting board to dice the carrots, celery, and bell peppers into bite-sized cubes. Aim for pieces that are approximately 1/2 inch in size – this will ensure a consistent texture throughout the salad.

Slice the cucumbers into thin rounds, then cut each round in half. Mince the onion into fine pieces, releasing its aromatic flavors. Finally, roughly chop the parsley, dill, and any other herbs you're using.

The key is to cut everything to a similar size, so each forkful contains a delightful mix of textures and tastes. Take your time and focus on uniform, neat cuts. Properly chopping the vegetables is the foundation for a delicious and visually appealing vegetable salad.

Step 2. Mix Vegetables

combine assorted fresh vegetables

With the vegetables chopped into uniform pieces, it's time to bring them together. In a large salad bowl, gently mix the crisp carrots, the tender zucchini, the crunchy bell peppers, and the fresh parsley.

Combine them with a light touch, ensuring each ingredient is evenly distributed throughout the bowl.

Advertisement

Next, add a drizzle of olive oil and a splash of red wine vinegar. Use your hands or a large spoon to toss the salad, coating the vegetables evenly with the flavorful dressing.

Sprinkle in a pinch of salt and a dash of black pepper, adjusting the seasoning to your taste.

Resist the urge to overmix, as you want to maintain the distinct textures and flavors of each vegetable.

Gently fold the salad until the dressing is thoroughly incorporated. Your vibrant, nutrient-packed vegetable salad is now ready to be served and enjoyed.

Step 3. Add Dressing

add dressing to salad

With the vegetables now perfectly chopped, it's time to dress the salad. In a small bowl, whisk together a simple dressing of olive oil, lemon juice, and a pinch of salt and pepper. The bright, tangy flavors will complement the crisp, fresh veggies beautifully.

To enhance the health benefits of your salad, consider adding a few drops of peppermint oil, known for its refreshing properties, to invigorate your dish.

Advertisement

Drizzle the dressing over the salad and use your hands or tongs to gently toss everything together until each piece is lightly coated. Be careful not to overmix, as you want to preserve the integrity of the ingredients. The salad should glisten with the dressing, not be drenched in it.

Once the salad is dressed, give it a final taste and adjust the seasonings as needed. A sprinkle of fresh herbs, such as parsley or dill, can also add a lovely finishing touch.

Now your vegetable salad is ready to serve and enjoy! The vibrant colors and flavors will surely delight your senses.

Step 4. Refrigerate Before Serving

chill prior to serving

After tossing the salad with the dressing, it's time to let the flavors meld. Cover the bowl or container and pop it in the fridge for at least 30 minutes. This chilling time allows the dressing to soak into the veggies, making every bite more delicious.

As the salad chills, the ingredients will firm up a bit, creating the perfect texture. The cool temperature also helps the flavors come together, so you'll get a harmonious blend in every forkful. Don't skip this important step! Refrigerating the salad before serving ensures the perfect taste and consistency.

When you're ready to enjoy, give the salad a gentle stir and serve it up. The vibrant colors and enticing aromas will have everyone's mouths watering.

Advertisement

This vegetable salad is best served chilled, so make sure to let it chill out in the fridge for a bit before digging in. Your taste buds will thank you!

Step 5. Garnish With Fresh Parsley

garnish with fresh parsley

To finish off the vegetable salad, garnish it with some fresh, vibrant parsley. The herb's bright green leaves and delicate, lacy texture will add a lovely pop of color and a burst of flavor to your creation.

Simply pluck a few sprigs from the bunch, gently rinse them under cool water, and pat them dry with a paper towel. Then, use your fingers to tear the leaves into smaller, bite-sized pieces and sprinkle them evenly over the top of the salad.

The parsley won't only enhance the visual appeal of your dish but also complement the other vegetables with its subtly sweet, grassy notes. Feel free to be generous with the garnish – a little goes a long way in brightening up the flavors and making your vegetable salad shine.

The fresh parsley will add the perfect finishing touch, inviting your guests to dig in and enjoy every last bite.

Final Thoughts

Ultimately, a well-constructed vegetable salad can elevate any meal, providing a burst of vibrant colors, flavors, and textures that perfectly complement the main dish. When crafting your own salad masterpiece, don't be afraid to get creative and experiment with various combinations of fresh, seasonal produce.

Advertisement

For instance, you might consider incorporating elements inspired by classic dishes, such as the comforting indulgence of bread pudding for a unique flavor twist. Perhaps you'll discover a new favorite pairing, like the refreshing crunch of crisp cucumber and the earthy sweetness of roasted beets. Or maybe you'll find that a drizzle of tangy vinaigrette brings all the flavors together in perfect harmony.

The true beauty of a vegetable salad lies in its versatility. It can be a light and refreshing starter, a nourishing side, or even the star of the show as a main course.

Frequently Asked Questions

How Long Does the Salad Last in the Refrigerator?

You'll be pleased to know that your tasty vegetable salad can last up to 5 days in the fridge!

Just be sure to store it in an airtight container. The cool, refreshing flavors will stay crisp and vibrant, making it the perfect side dish or snack.

Enjoy the fresh veggies for several days – it's a great way to stretch out your meal prep.

Advertisement

With proper storage, this salad will keep you satisfied and nourished all week long!

Can I Substitute Any of the Vegetables in the Recipe?

Absolutely! You can totally substitute different veggies in this salad.

Get creative and use whatever fresh, crunchy vegetables you've got on hand. Carrots, celery, bell peppers, radishes – the possibilities are endless.

Just make sure to chop everything up into bite-size pieces so it mixes together nicely. Feel free to experiment and find your perfect veggie combo.

The key is to have fun and make it your own!

Advertisement

Is the Salad Suitable for a Vegetarian or Vegan Diet?

Absolutely! The vegetable salad is an excellent choice for vegetarians and vegans.

Since it's made entirely of plant-based ingredients, it's a delightfully wholesome and nutritious option. You can enjoy this colorful, crunchy salad without any worries, as it's free from meat, dairy, and other animal-derived products.

The combination of fresh veggies makes it a versatile and satisfying dish that everyone can savor. Go ahead and dig in – this salad is a wonderful way to get your daily dose of vitamins and minerals!

Can I Make the Salad in Advance for a Party?

Absolutely! Making the salad ahead of time is a great way to save time and stress on the day of your party.

Simply prepare the ingredients, combine them in a large bowl, and store it in the fridge until you're ready to serve. The flavors will have a chance to meld together, making the salad even more delicious.

Advertisement

Just don't forget to give it a quick toss before setting it out for your guests to enjoy!

What Are Some Serving Suggestions for This Salad?

When serving this tasty vegetable salad, you've got plenty of options! You can spoon it atop crisp lettuce leaves for a fresh and crunchy presentation.

Or, scoop it into small bowls or cups for individual servings at a party. Serve it alongside crusty bread or rolls to soak up the flavorful dressing.

You could even use it as a topping for baked potatoes or grilled meats. Get creative and have fun with how you showcase this colorful, nutrient-packed salad!

Advertisement

Continue Reading

Polish Comfort Food

Kisiel (Fruit Pudding)

Prepare to indulge in the creamy, subtly sweet delight of Kisiel, a traditional Polish fruit pudding that has captivated taste buds for generations.

Published

on

fruit based pudding dessert

Kisiel, a beloved Polish fruit pudding, has delighted taste buds for centuries. This creamy yet slightly gelatinous dessert combines the natural sweetness of fresh or frozen fruit with a velvety, starch-thickened texture. Chilled or at room temperature, kisiel makes for a refreshing and comforting treat. Simply simmer fruit, sugar, and water, then thicken with cornstarch for a silky consistency. Top with nuts, whipped cream, or berries for an extra special presentation. Versatile and showcasing seasonal ingredients, kisiel is a true taste of Polish culinary heritage that you'll surely want to explore further.

Key Takeaways

  • Kisiel is a traditional Polish dessert with a history dating back to the 14th century, reflecting regional flavors and seasonal ingredients.
  • The basic kisiel recipe combines the sweetness of cooked fruit with a creamy, slightly gelatinous pudding-like texture.
  • Kisiel can be served chilled or at room temperature and is often garnished with nuts, whipped cream, or fresh berries.
  • Kisiel is known for its vibrant colors, natural sweetness, and comforting mouthfeel, making it a versatile and accessible dessert.
  • The simplicity of the kisiel recipe, along with its ability to utilize seasonal fruits, contributes to its enduring popularity in Polish households.

History

According to culinary historians, the origins of kisiel, a traditional Polish fruit pudding, can be traced back to the 14th century. This delightful dessert has been a beloved part of Polish culture for centuries, evolving over time to reflect the regional flavors and seasonal ingredients available throughout the country.

In the early days, kisiel was often made with foraged berries, fruits, and even certain roots, cooked down into a thick, jiggly consistency. As the dish gained popularity, home cooks began experimenting with a wider variety of fruits, including apples, pears, plums, and cherries. Today, kisiel is still enjoyed as a dessert, particularly in Eastern European countries where it originated. Many modern recipes for kisiel call for using store-bought fruit purees or juices instead of foraged berries. However, purists still prefer to make kisiel from scratch, and there are numerous tutorials available online on how to make fruit compote for this purpose. The process typically involves simmering the fruit with sugar and water until it reaches a thick, syrupy consistency. How to make fruit compote is a skill that has been passed down through generations, and its versatility makes it a beloved ingredient in many traditional desserts.

The addition of milk, cream, or even sour cream helped to create a richer, creamier texture, while a touch of honey or sugar added a delicate sweetness.

Today, kisiel remains a staple in Polish households, served as a comforting dessert or even enjoyed as a refreshing chilled treat on warm summer days. Its enduring popularity is a testament to the timeless appeal of this simple, yet delicious, fruit pudding.

Recipe

Kisiel, also known as fruit pudding, is a traditional Polish dessert that combines the sweetness of cooked fruit with the creamy texture of a pudding. This delightful treat is a perfect way to celebrate the abundance of seasonal fruits.

Advertisement

The key to a successful kisiel is the perfect balance between the fruit's natural sweetness and the thickening properties of the starch used in the recipe. The result is a velvety, slightly gelatinous dessert that's both comforting and refreshing.

Ingredients:

  • 3 cups fresh or frozen fruit (such as apples, pears, or berries)
  • 1/2 cup granulated sugar
  • 2 tablespoons cornstarch
  • 1 cup water
  • 1 teaspoon vanilla extract

Instructions:

In a saucepan, combine the fruit, sugar, and water. Bring the mixture to a boil, then reduce the heat and simmer for 10-15 minutes, or until the fruit is soft and the liquid is syrupy.

In a small bowl, whisk the cornstarch with a tablespoon of water to create a slurry. Slowly pour the slurry into the simmering fruit mixture, stirring constantly, until the mixture thickens to a pudding-like consistency. Remove from heat and stir in the vanilla extract.

Tips:

Advertisement

For a creamier consistency, you can substitute half of the water with milk or cream.

You can also experiment with different fruit combinations to create unique flavor profiles. Serve the kisiel chilled or at room temperature, and garnish with a dollop of whipped cream or a sprinkle of cinnamon for an extra touch of indulgence.

Cooking Steps

First, in a saucepan, combine the fruit, sugar, and water.

Bring the mixture to a boil, then let it simmer until the fruit is tender.

For added nutrition, consider incorporating ingredients like high protein and fiber to enhance the dish.

Advertisement

Step 1. Combine Fruit, Sugar, and Water

mix fruit sugar water

With the fruit, sugar, and water ready, you can now combine these key ingredients to start the cooking process.

Gently pour the fruit into a saucepan, making sure to include any juices that have accumulated. Sprinkle the sugar over the top, letting it settle evenly throughout the fruit.

Now, slowly pour in the measured water, being careful not to disturb the delicate fruit pieces.

Place the saucepan on the stovetop and turn the heat to medium. As the mixture begins to warm, you'll notice the sugar dissolving and the fruit softening.

Stir the kisiel gently with a wooden spoon, ensuring all the ingredients are well incorporated. Allow the mixture to simmer, stirring occasionally, until it thickens to your desired consistency, about 10-15 minutes.

The kisiel should have a smooth, pudding-like texture when ready. Remove from heat and let cool slightly before serving or chilling.

Advertisement

Step 2. Bring Mixture to a Boil

bring mixture to boil

Once the fruit, sugar, and water are combined, place the saucepan on the stovetop over medium heat.

Let's bring this delightful mixture to a boil! You'll notice the liquid start to shimmer and bubble as it heats up. Keep a close eye on it, stirring occasionally, until it reaches a full, rolling boil. The sound of the bubbles popping and the steam rising will let you know it's ready.

Now, don't be tempted to crank up the heat – that could cause the mixture to boil over and make a mess. Maintain that medium heat setting, allowing the ingredients to slowly come together.

As the sugar dissolves, the liquid will become thicker and more syrupy. This is exactly what you want for the perfect kisiel texture. Once it reaches a full boil, let it continue cooking for about 5 minutes, stirring occasionally, until the mixture has thickened to your desired consistency.

Get ready for the next step!

Step 3. Simmer Until Fruit Is Tender

simmer fruit until tender

Now that the mixture has reached a boil, reduce the heat to low and let it simmer gently.

This slower cooking process will allow the fruit to become tender and release its natural sweetness. As the pot bubbles away, you'll start to notice the colors of the fruit deepening and the liquid thickening into a luscious, syrupy consistency.

Advertisement

Stir the mixture occasionally to prevent any sticking or burning on the bottom of the pan. Depending on the type of fruit you're using, the simmering may take anywhere from 10 to 20 minutes.

Keep a close eye on it, tasting the fruit periodically to check for doneness. You'll know it's ready when the fruit easily mashes against the side of the pot with the back of your spoon.

The kisiel should have a smooth, velvety texture at this stage. Once the fruit is perfectly tender, remove the pot from the heat and get ready to move on to the next step.

Step 4. Thicken With Cornstarch Slurry

thicken with cornstarch slurry

To thicken the kisiel, you'll need to create a cornstarch slurry. In a small bowl, whisk together a couple of tablespoons of cornstarch with an equal amount of cold water until smooth and lump-free.

Slowly pour the slurry into the simmering fruit mixture, stirring constantly. As the slurry heats up, it will thicken the kisiel to your desired consistency. Keep stirring until the pudding has reached your preferred thickness.

The cornstarch will transform the thin, watery fruit juice into a delightfully creamy, velvety texture. You'll know it's ready when the kisiel coats the back of a spoon.

Advertisement

Adjust the amount of cornstarch slurry as needed to reach your ideal thickness. With a little patience and gentle stirring, you'll have a wonderfully smooth and pudding-like kisiel in no time.

Step 5. Serve Chilled or at Room Temperature

serve chilled or room temperature

Once the kisiel has reached your desired thickness, you have a few options for serving it. You can serve the chilled fruit pudding straight from the refrigerator, allowing the cool, creamy texture to refresh and delight your taste buds.

Alternatively, you can let the kisiel come to room temperature, which will soften the consistency and allow the flavors to open up more fully.

Whether chilled or at room temperature, the kisiel is sure to be a hit. Scoop it into small bowls and garnish with a sprinkle of chopped nuts, a dollop of whipped cream, or a few fresh berries for a visually appealing presentation.

The cool, silky pudding pairs beautifully with the crunch of nuts or the burst of juicy berries. Serve the kisiel as a light and satisfying dessert, or enjoy it as a midday snack to fuel your day.

No matter how you choose to serve it, this classic Polish treat is sure to leave you feeling comforted and content.

Advertisement

Final Thoughts

Kisiel, a traditional Polish fruit pudding, offers a delightful and versatile dessert option. Whether you serve it chilled on a hot summer day or at room temperature during a cozy gathering, this simple yet satisfying treat is sure to delight.

The natural sweetness and vibrant colors of the fruit make it a visually appealing and healthy choice, while the creamy consistency provides a comforting texture. Experiment with different seasonal fruits to discover your favorite variations, or try topping it with a dollop of whipped cream, a sprinkle of cinnamon, or a handful of toasted nuts for an extra touch of elegance.

Kisiel's versatility allows you to adapt it to your personal taste and preferences, making it a crowd-pleasing dessert that can be enjoyed year-round. So, embrace the simplicity and charm of this traditional Polish delicacy and indulge in the delightful flavors of Kisiel.

Frequently Asked Questions

What Is the Origin of the Name "Kisiel"?

You know, the name "kisiel" has a really interesting origin!

It's believed to have come from the Slavic word "kisnuty," which means "to sour." This makes sense when you consider that traditional kisiel is a tart, thickened fruit drink.

Advertisement

The name likely evolved over time as the dish became more popular across Eastern Europe.

Isn't it cool how food names can give you a glimpse into the history and culture of a region? I find that kind of thing really fascinating.

What do you think about the origins of "kisiel"?

How Long Does Kisiel Typically Take to Prepare?

Preparing kisiel typically takes around 30 minutes to an hour, depending on the ingredients and method.

The active process is relatively straightforward, involving simmering a flavorful liquid and thickening it with a starch.

Advertisement

Once the base is ready, you'll simply need to let it cool and set before enjoying this delightful sweet pudding.

With a little hands-on time and minimal effort, you can whip up a batch of homemade kisiel in no time!

Is Kisiel a Traditional Polish Dessert or a Modern Creation?

Kisiel, a beloved Polish dessert, has been a part of the country's culinary tradition for centuries.

This sweet treat originated long ago, evolving over time to become a beloved classic.

With its unique blend of flavors and textures, kisiel has stood the test of time, remaining a cherished part of Polish culture.

Advertisement

Whether you're new to this delightful dessert or a lifelong fan, you're sure to appreciate its rich history and delicious taste.

Can Kisiel Be Made With Different Types of Fruit?

Absolutely! Kisiel can be made with all sorts of delicious fruits. You can use strawberries, blueberries, raspberries, apples, or even a mix of different fruits.

The possibilities are endless! The great thing about kisiel is that it's so versatile. You can get creative and experiment with different flavor combinations to find your personal favorite.

Why not try making it with a mix of berries for a vibrant, colorful treat?

How Long Does Kisiel Keep After It's Been Made?

You can keep homemade kisiel, or fruit pudding, in the fridge for 3-5 days after you make it.

Advertisement

The exact shelf life depends on the ingredients used and how you store it.

Make sure to keep it covered and chilled to maintain its fresh, jiggly texture.

With its vibrant color and sweet, fruity flavor, you'll want to enjoy your homemade kisiel quickly before it goes bad!

Just be mindful of the expiration date, and your tasty treat will be good to go.

Advertisement

Continue Reading

Affiliate Disclaimer
As an affiliate, we may earn a commission from qualifying purchases. We get commissions for purchases made through links on this website from Amazon and other third parties.

Advertisement

Vetted

top local car washes top local car washes
Vetted2 months ago

14 Best Car Washes Near You for a Sparkling Clean Ride

I discovered the 14 best car washes near you that promise a sparkling clean ride, and you won't want to...

top mops for 2024 top mops for 2024
Vetted2 months ago

The 15 Best Mops of 2025 – Your Ultimate Guide to a Spotless Home

Find the perfect mop for your cleaning needs in 2025, and discover how these top choices can revolutionize your home...

top women s fragrances 2024 top women s fragrances 2024
Vetted2 months ago

15 Best Perfumes for Women in 2025 – A Fragrance Guide You Can’t Miss

Keen to discover the top 15 perfumes for women in 2025? Uncover unique scents that will elevate your fragrance game!

top local bars guide top local bars guide
Vetted2 months ago

14 Best Bars Near You for an Unforgettable Night Out

Looking for the perfect bar to elevate your night out? Discover the 14 best spots that promise unforgettable experiences!

luxurious beard oil selection luxurious beard oil selection
Vetted2 months ago

15 Best Beard Oils for a Luxurious Grooming Experience in 2025

Shop the 15 best beard oils for a luxurious grooming experience in 2025 and discover which ones will elevate your...

top college laptops 2024 top college laptops 2024
Vetted2 months ago

15 Best College Laptops of 2025: The Ultimate Guide for Students

With our guide to the 15 best college laptops of 2025, discover which powerful models will elevate your academic experience...

waterproof mascaras for tears waterproof mascaras for tears
Vetted2 months ago

15 Best Waterproof Mascaras That Will Survive Any Tear-Jerker

Outstanding waterproof mascaras await to keep your lashes flawless through any emotional moment; discover which ones made the top 15...

top flavorful disposable vapes top flavorful disposable vapes
Vetted2 months ago

15 Best Disposable Vapes of 2025: Top Picks for Flavor and Convenience

Prepare to discover the 15 best disposable vapes of 2025 that blend exceptional flavor and convenience, but which ones truly...

refreshing lunch salad ideas refreshing lunch salad ideas
Vetted2 months ago

15 Best Salads Near You That Will Freshen Up Your Lunch Routine

Transform your lunch with the 15 best salads nearby that will tantalize your taste buds and leave you craving more...

top convertible car seats top convertible car seats
Vetted2 months ago

15 Best Convertible Car Seats of 2025 – Safety and Comfort for Your Little One

Get ready to discover the top 15 convertible car seats of 2025 that blend safety and comfort—find out which models...

delicious fast food breakfast delicious fast food breakfast
Vetted2 months ago

15 Best Fast Food Breakfast Options That Will Make Your Mornings Delicious

Uncover the 15 best fast food breakfast options that will transform your mornings into a delicious experience you won't want...

stylish contacts for vision stylish contacts for vision
Vetted2 months ago

14 Best America’s Contacts for Clear Vision and Style

Browse through the 14 best contact lenses in America for clear vision and style, and discover which one perfectly complements...

Trending