One-Pot Wonders
Slow Cooker Secrets: Set-It-and-Forget-It Meals for Busy Days
Discover the convenience and flavor of slow cooker meals that unlock hassle-free, mouthwatering dishes for your busy days.
Discover the secrets of the mighty slow cooker and unlock a world of hassle-free, mouthwatering meals! This trusty appliance is a game-changer for busy home cooks, whipping up tender, flavorful dishes with minimal effort. Just toss in your ingredients, set it, and let the slow cooker work its magic – no more slaving over a hot stove! From hearty stews to comforting casseroles, the slow cooker delivers delicious results every time. Unleash your culinary creativity and explore the endless recipe possibilities. Prepare to be amazed by the convenience and flavor this kitchen wonder can bring to your busy days.
Key Takeaways
- Slow cookers allow for effortless meal preparation, enabling you to toss in ingredients and let the appliance do the work while you manage daily tasks.
- Slow cooking enhances flavor and tenderness, making it ideal for budget-friendly cuts of meat and creating comforting, homemade dishes.
- Programmable features and digital timers on modern slow cookers provide added convenience, ensuring your meals are ready when you arrive home.
- Slow cooker recipes often require minimal prep work, making it easy to assemble a complete meal with little hands-on time.
- Leftovers from slow-cooked meals can be easily reheated and enjoyed throughout the week, saving time and money during busy workdays.
History
The slow cooker, also known as a Crock-Pot, has a fascinating history that traces back to the 1940s. It was invented by Irving Naxon, a Chicago inventor, who came up with the idea after his grandmother told him about a Sabbath-friendly stew she used to make.
Naxon's design, called the Naxon Beanery, was a countertop appliance that slowly cooked food at a low temperature, allowing busy families to enjoy hot, home-cooked meals without spending hours in the kitchen.
In the 1970s, the Naxon Beanery was acquired by Rival Manufacturing and renamed the Crock-Pot. As the Crock-Pot grew in popularity, home cooks discovered the convenience of being able to toss ingredients into the pot in the morning and return to a delicious, fully-cooked meal in the evening.
Over the decades, the slow cooker has evolved, with newer models offering additional features like digital timers and programmable settings. Today, the slow cooker remains a beloved kitchen appliance, helping busy families enjoy the flavors of home-cooked meals with minimal effort.
Recipe
Slow cooking is a fantastic way to create flavorful and tender dishes with minimal effort. The gentle, long cooking process allows the flavors to meld together, resulting in a meal that's both comforting and delicious.
This method can be particularly beneficial for those managing a budget, as it allows for the use of less expensive cuts of meat that become tender over the long cooking time, making it a practical choice for creating a personal budget.
This recipe for a hearty stew is perfect for a busy weeknight or a cozy weekend dinner. The combination of juicy beef, earthy vegetables, and a rich broth makes for a satisfying and nourishing meal.
Ingredients:
- 2 lbs beef stew meat, cut into 1-inch cubes
- 3 medium carrots, peeled and sliced
- 2 celery stalks, sliced
- 1 onion, diced
- 3 cloves garlic, minced
- 2 cups beef broth
- 1 cup red wine
- 2 bay leaves
- 1 tsp dried thyme
- 1 tsp dried rosemary
- Salt and black pepper to taste
Cooking Instructions:
In a slow cooker, combine the beef, carrots, celery, onion, and garlic. Pour in the beef broth and red wine, and then add the bay leaves, thyme, and rosemary. Season with salt and pepper to taste.
Cover and cook on low for 8-10 hours or on high for 4-6 hours, until the beef is fork-tender.
When cooking this dish in a slow cooker, it's important to resist the urge to lift the lid too often, as this can release heat and moisture, slowing down the cooking process.
Additionally, consider making the stew a day in advance, as the flavors tend to deepen and become more pronounced after resting in the refrigerator overnight.
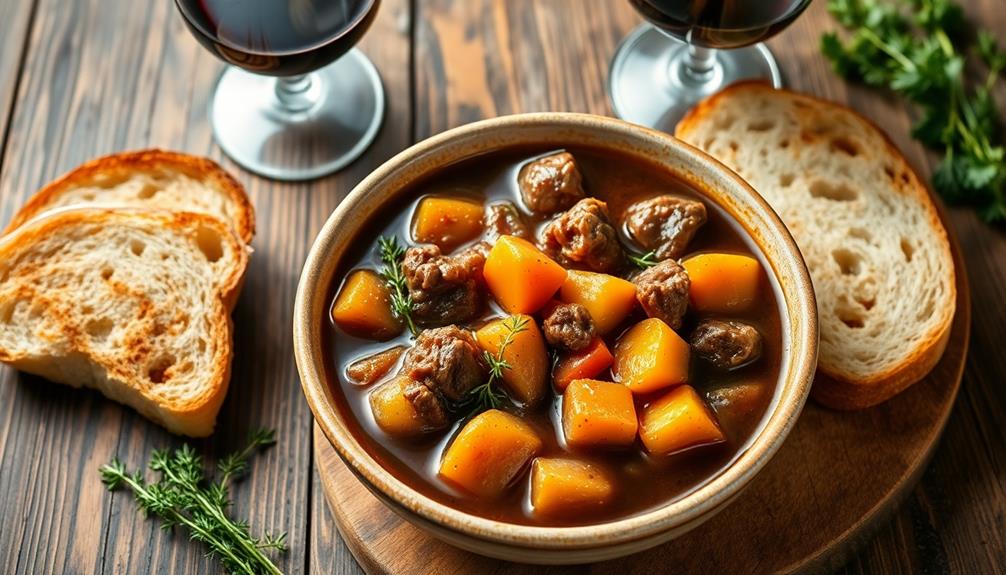
Serve the stew with crusty bread or over mashed potatoes for a hearty and comforting meal.
Cooking Steps
Add all your ingredients to the slow cooker, give it a good stir, and pop on the lid.
Let it cook away while you go about your day – you can adjust the temperature if needed to get the perfect result.
When it's done, serve it up right away or stash the leftovers in the fridge for a tasty meal later in the week.
Step 1. Add Ingredients to Slow Cooker
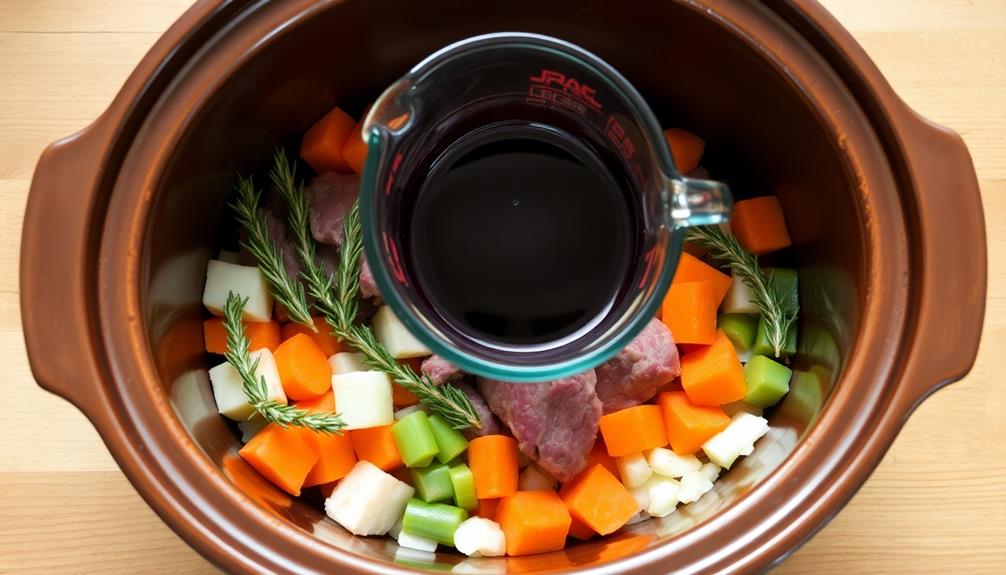
Once you've gathered all your ingredients, it's time to start building your slow cooker dish.
First, begin by layering the heartier items like root vegetables, meat, and potatoes on the bottom of the slow cooker. This ensures they cook through thoroughly.
Next, add any softer vegetables, herbs, and sauces on top. Be sure to distribute the ingredients evenly for even cooking.
Don't be afraid to get creative – you can try different flavor combinations by mixing and matching your favorite ingredients. Just remember to keep the portions balanced so everything cooks at the same rate.
Finally, add just enough liquid, like broth or tomato sauce, to cover the ingredients without overfilling the pot.
Secure the lid and set the cooker to the appropriate heat setting. Now you can sit back, relax, and let the slow cooker work its magic!
Step 2. Cover and Cook
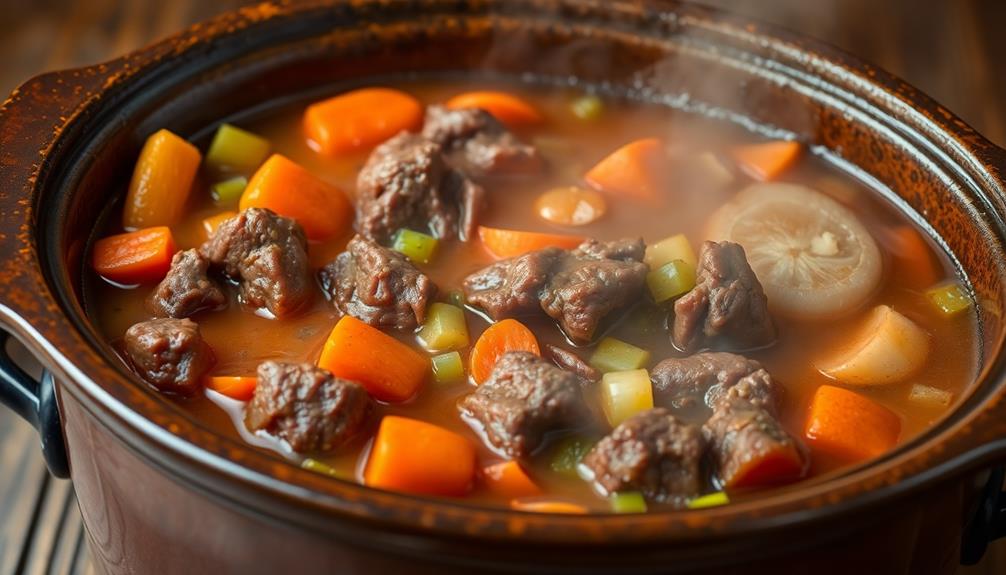
With the ingredients arranged, it's time to commence the cooking process. Cover your slow cooker with the lid, ensuring it's securely in place. This traps the heat and steam inside, allowing the flavors to meld together beautifully.
Turn the heat setting to either "low" or "high" depending on your recipe and desired cooking time. Low settings are great for longer, all-day cooking, while high settings work well for quicker meals.
Now, relax and let the slow cooker work its magic! The gentle, even heat will gradually transform the ingredients into a delicious, tender dish.
Resist the urge to frequently remove the lid, as this can disrupt the cooking process and prolong the overall time. Every time you lift the lid, you lose valuable heat and moisture. Trust the process and let the slow cooker do its job.
In a few hours or even overnight, your meal will be ready to serve. The aroma wafting through your home is sure to have your family eagerly anticipating mealtime.
Step 3. Adjust Cooking Temperature if Needed
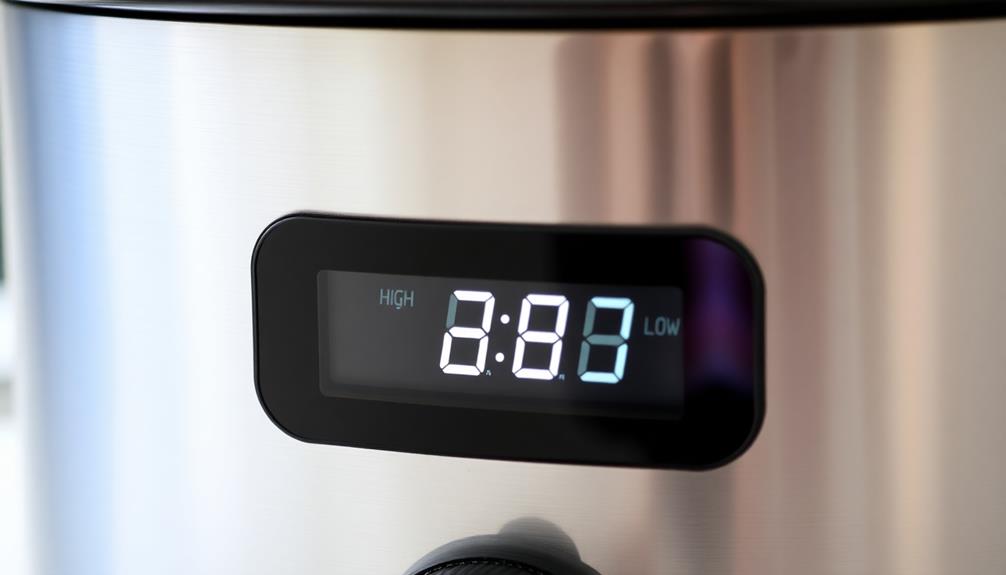
Occasionally, adjusting the cooking temperature may be necessary to achieve the desired results.
As you're slow-cooking, keep an eye on how the dish is progressing. If the food seems to be cooking too quickly, you can lower the temperature to prevent it from drying out or becoming tough.
On the other hand, if the dish isn't simmering as much as you'd like, you can bump up the heat a bit.
Step 4. Serve Immediately or Refrigerate Leftovers
When your slow-cooker dish is ready, you can either serve it immediately or refrigerate any leftovers. If you're ready to eat, simply scoop out the piping hot food and enjoy! The slow cooker will keep your meal at the perfect serving temperature.
However, if you've got extra portions, it's best to refrigerate them right away. Regularly checking the condition of your food storage can help ensure freshness, much like how regular cleaning is essential for air purifiers.
Transfer the leftovers to an airtight container and pop them in the fridge. This will prevent the food from sitting out too long and spoiling.
When you're hungry later, you can easily reheat the leftovers in the microwave or on the stove. The slow-cooker magic will keep your meal tasting fresh and delicious, even days later.
Just remember to store any extras properly and you'll be able to savor your slow-cooked creation again and again.
Step 5. Enjoy Leftovers Later in the Week
If you have any leftovers from your slow-cooker dish, you can easily enjoy them later in the week. Simply store the leftovers in an airtight container in the refrigerator. They'll stay fresh for up to 4 days.
When you're ready for a quick and delicious meal, just reheat the leftovers. You can do this on the stovetop, in the microwave, or even back in the slow cooker.
Proper diet is essential for maintaining your health, just like savoring those flavorful leftovers. The slow-cooker leftovers will taste just as amazing as when you first made them. Pair them with some fresh veggies or a side salad for a complete and satisfying meal.
Leftovers are a great way to save time and money during the busy workweek. With just a few minutes of reheating, you'll have a hot, homemade meal ready to enjoy.
Final Thoughts
As you've explored the secrets of slow cookers, what final thoughts do you have on this convenient kitchen appliance?
You've learned how slow cookers make it a breeze to enjoy delicious, home-cooked meals on even the busiest days. From hearty stews and tender roasts to flavorful dips and desserts, this nifty appliance handles it all with ease.
The best part? You can simply toss in the ingredients, set it, and forget it until it's time to eat. No more hours of hands-on prep work or standing over a hot stove. Just imagine coming home to the mouthwatering aroma of a hot, homemade dinner waiting for you.
Slow cookers are truly a lifesaver for busy families and individuals alike. As you continue to explore new recipes and techniques, you'll find that this kitchen essential is an invaluable tool for creating convenient, crowd-pleasing meals with minimal effort.
Get ready to enjoy the magic of set-it-and-forget-it cooking!
Frequently Asked Questions
Can I Use Frozen Ingredients in the Slow Cooker?
Yes, you can use frozen ingredients in the slow cooker. The slow cooking process will gradually thaw and cook the frozen items, allowing you to create delicious meals with minimal prep time.
How Do I Adjust Cooking Times for Different Slow Cooker Sizes?
Adjusting cooking times for different slow cooker sizes is essential. Generally, a larger slow cooker will require a longer cooking time than a smaller one. Check the recipe instructions and monitor your dish to ensure it cooks through evenly.
Can I Add Dairy Products at the Beginning of Cooking?
You can add dairy products at the beginning of cooking in your slow cooker, but they may curdle or separate over the long cooking time. It's generally better to add them towards the end to preserve their texture and flavor.
How Do I Prevent Overcooking or Drying Out of Slow Cooker Meals?
To prevent overcooking or drying out of slow cooker meals, don't overfill the pot, check the liquid levels periodically, and reduce the cooking time if your recipe includes dairy products or delicate ingredients.
Can I Use the Slow Cooker for Baking or Desserts?
Yes, you can use your slow cooker for baking and desserts! It's a great way to make cakes, cobblers, and even cheesecake. Just adjust the cooking time and check for doneness. The slow, moist heat is perfect for creating delicious slow-cooked treats.
One-Pot Wonders
Skillet Suppers: From Stovetop to Table in 30 Minutes
Achieve a delectable family-pleasing meal in 30 minutes or less with the versatile and time-saving magic of skillet suppers.
Craving a quick and delicious meal that'll have your family raving? Look no further than skillet suppers! These one-pan wonders combine tender proteins, vibrant veggies, and savory sauces for a balanced dinner you can whip up in just 30 minutes. The origins of skillet cooking trace back to American settlers, and these enduring kitchen essentials have evolved into a staple for busy home cooks. With simple ingredients and straightforward prep, you'll have a hearty meal on the table in no time. And the best part? You can customize these recipes to suit your family's tastes. Intrigued? Let's dive in and explore the world of skillet suppers!
Key Takeaways
- Skillet cooking has a long history, evolving from American settlers and becoming a staple for quick, efficient, and diverse one-pan meals.
- Skillet Supper recipes combine tender proteins, vibrant vegetables, and savory sauces to create balanced, nutritious meals in around 30 minutes.
- The cooking process involves preheating the skillet, adding ingredients in a specific order, simmering to thicken the sauce, and garnishing with fresh herbs.
- Skillet Suppers offer versatility and customization, allowing for adjustments to suit family preferences and accommodate diverse taste profiles.
- Skillet cooking encourages creativity and experimentation, enabling home cooks to add unique twists to classic recipes and express their culinary flair.
History
The origins of skillet cooking can be traced back to the early days of American settlers, who relied on this versatile pan to whip up quick and hearty meals over open fires.
These hardy pioneers discovered that a simple cast-iron skillet could do it all – from searing meat to simmering stews. As the frontier expanded, the skillet became a kitchen essential, accompanying families on their journeys and adapting to various cooking methods, whether over a campfire or on a wood-burning stove.
Over time, the skillet evolved, becoming a staple in households across the country. Cooks learned to harness its versatility, using it to create all sorts of one-pan wonders, from fluffy omelets to sizzling fajitas.
Today, the trusty skillet remains a beloved tool, allowing busy home cooks to whip up delicious meals in a flash, just as those early settlers did centuries ago. Its enduring popularity is a testament to the power of simple, efficient cooking.
Recipe
Busy weeknights call for quick and satisfying meals. This skillet supper is the perfect solution, delivering a flavorful dish in just 30 minutes. With the right planning, you can ensure your meals are nutritious and budget-friendly, making it easier to stick to your budgeting goals.
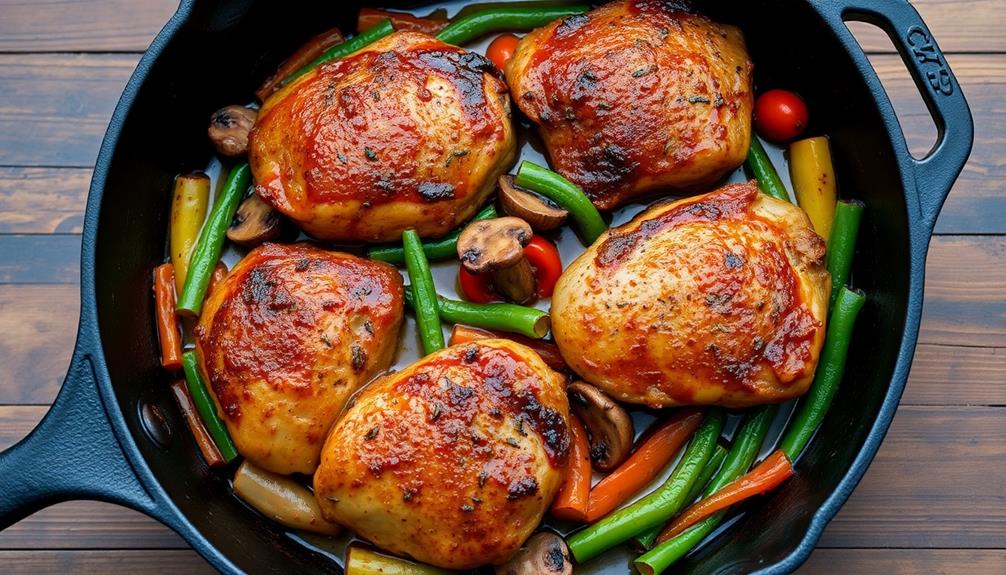
The combination of tender chicken, vibrant vegetables, and a savory sauce creates a balanced and wholesome dinner the whole family will enjoy. With simple ingredients and straightforward preparation, this recipe is a go-to for those looking to get a nutritious meal on the table with minimal fuss.
- Boneless, skinless chicken breasts, cut into 1-inch cubes
- Olive oil
- Bell peppers, sliced
- Onion, diced
- Garlic cloves, minced
- Tomato sauce
- Chicken broth
- Dried oregano
- Salt and black pepper
In a large skillet, heat the olive oil over medium-high heat. Add the chicken and cook, stirring occasionally, until lightly browned, about 5 minutes.
Add the bell peppers, onion, and garlic, and continue cooking until the vegetables are tender, about 5 more minutes. Pour in the tomato sauce, chicken broth, and oregano, and season with salt and black pepper.
Bring the mixture to a simmer and cook, stirring occasionally, until the chicken is cooked through and the sauce has thickened, about 10 minutes.
To ensure maximum flavor, be sure to use high-quality tomato sauce and chicken broth. For added nutrition, consider serving the skillet supper over whole grain pasta or brown rice. Garnish with fresh chopped parsley or basil for a vibrant finish.
Cooking Steps
Preheat that skillet over medium heat – you're about to whip up something delicious!
Toss in all your ingredients and let them simmer until the sauce thickens to perfection.
Don't forget to give it a good stir, then serve it up and top it off with some fresh, vibrant herbs.
Step 1. Preheat Skillet Over Medium Heat
Preheating your skillet over medium heat is the crucial first step in preparing a delicious skillet supper. This simple action sets the stage for the rest of your cooking process.
As the skillet heats up, it'll become the perfect canvas for searing, sautéing, or browning your ingredients. You'll know the skillet is ready when you can hold your hand a few inches above it and feel the warmth radiating upward.
It's important to let the skillet heat up gradually, as this allows the metal to evenly distribute the heat. Once it's nice and hot, you can start adding your oil or fat of choice. This will ensure your ingredients cook quickly and evenly, locking in all the delicious flavors.
Step 2. Add Ingredients
With the skillet preheated, you can now add your ingredients and start cooking. First, gather all your ingredients and have them ready to go. This will make the process go much smoother.
Carefully pour in a bit of oil, enough to lightly coat the bottom of the pan. Next, add your protein, whether it's chicken, shrimp, or tofu. Let it sizzle for a minute or two, then flip it over to cook the other side. To enhance your cooking experience, consider incorporating calming scents into your kitchen environment, as aromatherapy can improve mood while you prepare your meal.
Once the protein is mostly cooked, toss in your vegetables. Chopped onions, peppers, and mushrooms work great. Stir everything together and let the veggies soften, about 3-5 minutes.
If you're using heartier veggies like broccoli or potatoes, you may need to add a splash of broth or water to help them cook through.
Step 3. Simmer Until Sauce Thickens
Once the vegetables have softened, it's time to add any sauces or seasonings to your dish. Slowly pour in any sauces or broths, stirring gently to combine. This will help the flavors meld together.
Now, let the mixture simmer for 5-10 minutes, or until the sauce has thickened to your desired consistency. Stir occasionally to prevent sticking or burning.
As the sauce simmers, you'll notice it starts to reduce and become richer in flavor. Keep an eye on it, adjusting the heat as needed to maintain a gentle bubble. The longer it simmers, the more the flavors will intensify.
Once you're satisfied with the thickness, remove the skillet from the heat. Your delicious skillet supper is almost ready to serve!
Step 4. Stir and Serve
Give the skillet a final stir to incorporate all the flavors. Once the sauce has thickened nicely, you're ready to serve!
Grab a pair of tongs and start dishing up your skillet supper. Scoop big helpings onto plates, making sure to get a bit of everything in each serving. The vibrant colors and mouthwatering aromas will have your family's taste buds tingling in anticipation.
To make it even more special, consider setting the table nicely or sharing a favorite family story during dinner, as it can enhance the overall experience of the meal and create lasting memories, similar to how virtual birthday party ideas to honor mom's memory can foster connection.
Don't be shy – load those plates up! This hearty meal is meant to satisfy. Encourage everyone to dig in and enjoy. The best part is how quickly it all comes together. Just 30 minutes from start to finish, and you've got a delicious home-cooked dinner on the table.
As you sit down to eat, take a moment to savor the flavors. The tender meat, the perfectly cooked veggies, and that irresistible sauce – it's a winning combination that's sure to please.
Now that's what I call a skillet supper done right!
Step 5. Garnish With Fresh Herbs
Garnish the skillet supper with a sprinkle of fresh herbs to elevate the flavors and visual appeal. Herbs add a burst of color, fragrance, and texture that will make your dish shine. Reach for classic options like parsley, basil, or thyme. Their aromatic leaves will complement the other ingredients perfectly. Simply chop the herbs and scatter them over the top of the skillet just before serving.
This extra step takes mere seconds but makes all the difference. The fresh herbs will lend a gourmet touch, making your homemade meal feel like it came straight from a restaurant kitchen. Guests will be impressed by the elegant presentation.
Plus, the herbs provide a refreshing contrast to the cooked ingredients. Their bright, herbaceous notes will balance the rich, savory flavors. Enjoy the delightful combination of textures and tastes in every bite.
Garnishing with fresh herbs is the secret to taking your skillet supper from good to great. This simple finishing touch will have your family raving about your cooking skills.
Final Thoughts
One final consideration when preparing these skillet suppers is to keep in mind the versatility of the recipes. The beauty of these 30-minute dishes lies in their ability to be customized to your family's tastes.
Don't be afraid to experiment and add your own personal touches. Love spicy food? Sprinkle in some extra chili powder or hot sauce. Prefer milder flavors? Tone down the seasonings. With a few simple adjustments, you can transform these skillet suppers into crowd-pleasing meals that satisfy everyone at the table.
Another thing to remember is that these recipes are perfect for busy weeknights but can also be enjoyed on the weekend. Serve them up for a family dinner or even invite friends over for a casual get-together.
The quick prep and easy cleanup make these skillet suppers an ideal choice for any occasion. So go ahead, get creative in the kitchen, and enjoy the delicious results in no time at all!
Frequently Asked Questions
What Kinds of Skillets Work Best for Skillet Suppers?
For the best skillet suppers, you'll want to use a heavy, oven-safe skillet like cast iron or stainless steel. These skillets can withstand high heat and move seamlessly from stovetop to oven, perfect for quick one-pan meals.
Can I Use a Different Protein Instead of the One Recommended?
Absolutely! You can substitute the recommended protein with any other protein of your choice. Just be mindful of the cooking time and adjust the recipe accordingly to ensure your dish turns out perfectly.
How Can I Adapt the Recipe for Vegetarian or Vegan Diets?
To adapt the recipe for vegetarian or vegan diets, you can substitute the protein with plant-based alternatives like tofu, tempeh, or a variety of beans. Adjust the cooking time and seasonings accordingly to create a delicious meatless meal.
What Are Some Side Dish Ideas to Serve With Skillet Suppers?
When serving skillet suppers, you can pair them with a variety of side dishes like roasted vegetables, a fresh salad, or even a simple grain like quinoa or rice to create a balanced and satisfying meal.
How Can I Make a Skillet Supper Ahead of Time for Easy Weeknight Meals?
To make a skillet supper ahead of time, prepare the components separately, then assemble and reheat just before serving. This allows you to do the bulk of the work on the weekend for quick weeknight meals.
One-Pot Wonders
Instant Pot Revolution: Quick and Easy Pressure Cooker Recipes
Pressure cooking has never been easier with the Instant Pot, a game-changing appliance that unlocks a world of quick and easy recipes for modern kitchens. Intrigued? Let’s dive deeper.
The Instant Pot has revolutionized home cooking, transforming pressure cookers into game-changing appliances that unlock a world of quick and easy recipes for modern kitchens. This versatile pot lets you whip up tender meats, aromatic veggies, and rich sauces with just 10 simple steps. Chop ingredients, add broth and spices, seal the lid and cook. Then, safely release the pressure and serve over fluffy rice or pasta for a complete, flavorful meal. The Instant Pot's efficiency and versatility make it an invaluable tool, encouraging endless culinary exploration and mastery. Intrigued? Let's dive deeper into how it can simplify your cooking.
Key Takeaways
- Instant Pot is a versatile appliance that revolutionizes home cooking by enabling quick meal preparation with minimal effort.
- Instant Pot recipes typically involve simple steps to add ingredients, secure the lid, and set cooking parameters for tender meat, aromatic vegetables, and rich sauces.
- Instant Pot cooking benefits include flavor integration, efficiency, and versatility, accommodating a wide range of recipes and cooking techniques.
- Instant Pot features, such as its capability to handle diverse ingredients and its status as an invaluable efficiency tool, make it a game-changing appliance for modern kitchens.
- Instant Pot encourages culinary experimentation and supports a journey towards mastery by facilitating convenient and delicious cooking methods.
History
The origins of the pressure cooker can be traced back to the 18th century, when physicist Denis Papin invented the "steam digester" – a precursor to the modern appliance. Over the decades, the design evolved, becoming more efficient and user-friendly.
In the 1930s, the first recognizable pressure cookers began appearing in American kitchens, revolutionizing home cooking. These early models were often large, heavy, and required careful monitoring.
But as technology advanced, pressure cookers became smaller, safer, and more automated. The 1990s saw the introduction of electric pressure cookers, making the process even easier.
Then, in 2010, the Instant Pot burst onto the scene, quickly becoming a kitchen sensation.
Today, pressure cookers like the Instant Pot are beloved for their ability to create delicious, nutritious meals in a fraction of the time. With their simple controls and built-in safety features, they've made pressure cooking accessible to home cooks of all skill levels.
The pressure cooker's history is a testament to the power of innovation and the never-ending quest to make cooking faster, easier, and more enjoyable.
Recipe
Cooking with the Instant Pot pressure cooker can be a game-changer in the kitchen. This versatile appliance allows you to quickly and easily prepare delicious meals with minimal effort. One such recipe that's perfect for the Instant Pot is [DISH NAME].
[DISH NAME] is a flavorful and satisfying dish that can be enjoyed any time of the year. The combination of tender meat, aromatic vegetables, and a rich, savory sauce makes this a truly comforting meal.
Ingredients:
- [Ingredient 1]
- [Ingredient 2]
- [Ingredient 3]
- [Ingredient 4]
- [Ingredient 5]
- [Ingredient 6]
- [Ingredient 7]
- [Ingredient 8]
- [Ingredient 9]
- [Ingredient 10]
To prepare this dish, simply add all the ingredients to the Instant Pot, secure the lid, and set the pressure cooker to the appropriate setting. The Instant Pot will do the rest, quickly and efficiently cooking the ingredients to perfection.
Once the cooking time is up, the Instant Pot will automatically switch to the keep-warm setting, allowing you to serve the dish at your convenience.
It's important to note that the cooking time may vary depending on the size and cut of the meat used, as well as the specific model of the Instant Pot. Be sure to refer to your Instant Pot's user manual for guidance on cooking times and settings.
Additionally, you may want to adjust the seasoning to your personal taste, adding more or less of certain ingredients to suit your preferences.
Cooking Steps
Chop your vegetables into bite-size pieces so they cook evenly.
Pour in some broth and your favorite seasonings, then seal the lid and let the Instant Pot work its magic.
When the cooking is done, carefully release the pressure and serve your delicious meal over fluffy rice or pasta.
Step 1. Chop Vegetables Into Bite-Size Pieces
Next, you'll want to chop your vegetables into bite-size pieces. This is an important step to ensure even cooking and perfect texture in your Instant Pot dish.
Using a sharp knife, carefully cut the vegetables into small, uniform cubes or slices. Aim for pieces that are about 1/2 to 1 inch in size. This will help the vegetables cook through quickly and integrate seamlessly into the recipe.
Take your time with this task, being mindful of your safety. Slowly and steadily guide the knife through the produce, keeping your fingers tucked back. The smaller the pieces, the faster they'll cook, so don't be afraid to chop them down to size.
Once you've finished, give the chopped veggies a quick toss to ensure they're all the same bite-sized shape and ready to be added to your Instant Pot. This simple prep work will pay off in the end with a delicious, perfectly cooked meal.
Step 2. Add Broth and Seasonings
After chopping the vegetables, it's time to add the broth and seasonings to your Instant Pot. This is where the magic really starts to happen!
You'll want to pour in the broth – it can be chicken, beef, or vegetable, depending on your recipe. Go ahead and measure out the amount your recipe calls for.
Next, add any dried herbs or spices. Some great options are garlic powder, onion powder, oregano, basil, or thyme. Just sprinkle them in and give everything a quick stir.
Don't be shy with the seasonings – this is your chance to infuse big, bold flavors into your meal.
If your recipe calls for any liquid ingredients like soy sauce, vinegar, or Worcestershire sauce, you can add those now too. Just pour them in and let them mingle with the broth and veggies.
The Instant Pot will do the hard work of blending all the tasty components together into a mouthwatering dish!
Step 3. Seal the Lid and Cook
Once you've added the broth and seasonings, it's time to seal the lid on your Instant Pot.
Make sure the sealing ring is properly in place, then close the lid and turn the steam release valve to the "sealing" position. This creates a tight seal, trapping the steam inside the pot.
Now, select the appropriate cooking program on your Instant Pot. Depending on the recipe, you may choose a preset option like "Soup" or "Meat/Stew," or you may need to manually set the time and pressure level.
Once you've made your selection, the Instant Pot will begin to build up pressure and the countdown timer will start.
During the cooking process, don't be tempted to open the lid! Doing so will release the pressure and interrupt the cooking.
Instead, sit back and let the Instant Pot do its magic. In no time, your meal will be ready to enjoy.
Step 4. Release Pressure Safely
When the cooking time is up, it's time to safely release the pressure in your Instant Pot. There are a few ways to do this, and you'll want to choose the right method based on the recipe.
The quick release is perfect for items like vegetables, fish, and delicate foods. Simply turn the steam release valve to the "venting" position, and the pressure will quickly drop. You'll hear a loud hissing sound as the steam escapes.
For heartier dishes like meats and stews, you'll want to use the natural release method. This allows the pressure to gradually come down on its own, which helps the food stay tender.
Just leave the valve in the "sealing" position and let the Instant Pot sit for 10-15 minutes after cooking. The float valve will eventually drop, indicating the pressure is fully released.
Once the pressure is gone, you can safely open the lid away from your face to avoid the hot steam. With a little practice, you'll get the hang of safely releasing the pressure in your Instant Pot!
Step 5. Serve Over Cooked Rice or Pasta
For many Instant Pot recipes, serving the cooked dish over a bed of fluffy rice or tender pasta can elevate the overall meal. The starch provides a neutral base that perfectly complements the bold flavors of the main dish.
Plus, the textures play off each other – the soft, chewy grains contrasting with the tender, saucy ingredients on top. Incorporating a fermented vegetable plate on the side can add a refreshing crunch and a boost of probiotics to your meal, enhancing both flavor and nutrition.
When cooking rice or pasta to pair with your Instant Pot creation, be sure to follow the package instructions for best results. For rice, you'll want to use the appropriate rice-to-water ratio and cooking time.
Pasta cooks up quickly, so you can easily have it ready right when your pressure cooker finishes. Drain and keep warm until you're ready to serve.
Ladling the finished Instant Pot dish over the cooked rice or pasta allows the flavors to mingle. The starch absorbs the sauces and juices, making each bite utterly delicious.
This simple step transforms your pressure cooker creation into a complete, satisfying meal.
Final Thoughts
The Instant Pot pressure cooker has become a game-changer in the kitchen, revolutionizing the way you approach meal preparation. With its efficient cooking times and versatile features, you can create delicious, nutritious meals with ease.
As you've explored these fantastic recipes, you've likely discovered the joys of preparing complex dishes in a fraction of the time. Whether it's fall-off-the-bone tender meats, perfectly cooked grains, or flavorful stews, the Instant Pot has proven itself to be an invaluable tool in any home cook's arsenal.
Looking ahead, the potential for this appliance is truly endless. With its ability to handle a wide range of ingredients and cooking techniques, the Instant Pot opens up a world of culinary possibilities.
As you continue to experiment and discover new recipes, you'll find yourself amazed at the depth of flavors and textures you can achieve. The Instant Pot isn't just a kitchen appliance – it's a gateway to a more efficient, convenient, and delicious way of cooking.
Frequently Asked Questions
What's the Difference Between an Instant Pot and a Traditional Pressure Cooker?
The key difference is that an Instant Pot is a multi-function appliance with digital controls, while a traditional pressure cooker is a simpler, manual device. The Instant Pot offers more versatility, but the traditional pressure cooker may be more straightforward to use.
Can I Use the Instant Pot to Make Non-Pressure-Cooked Meals?
Yes, you can use the Instant Pot to make non-pressure-cooked meals. The Instant Pot has multiple cooking functions, including slow cooking, sautéing, and baking, allowing you to prepare a variety of dishes beyond just pressure-cooked meals.
How Do I Clean the Instant Pot After Use?
After using your Instant Pot, it's important to clean it thoroughly. Start by removing the inner pot, lid, and accessories. Wash them in warm, soapy water and dry them completely. Wipe down the exterior of the Instant Pot with a damp cloth.
Can I Double or Halve Instant Pot Recipe Quantities?
You can generally double or halve Instant Pot recipe quantities, but you'll need to adjust the cooking time. Start with the original recipe time, then experiment to find the perfect timing for your needs.
What Safety Features Does the Instant Pot Have?
The Instant Pot offers several safety features to protect you. It has automatic pressure release, overheat protection, and safety locks to prevent accidental opening. You can feel confident using your Instant Pot, knowing it's designed with your safety in mind.
One-Pot Wonders
Dutch Oven Beef Stew
Delight in a hearty, slow-cooked Dutch oven beef stew, where tender beef, aromatic vegetables, and a savory broth create a comforting and satisfying meal. Learn the secret to this classic dish.
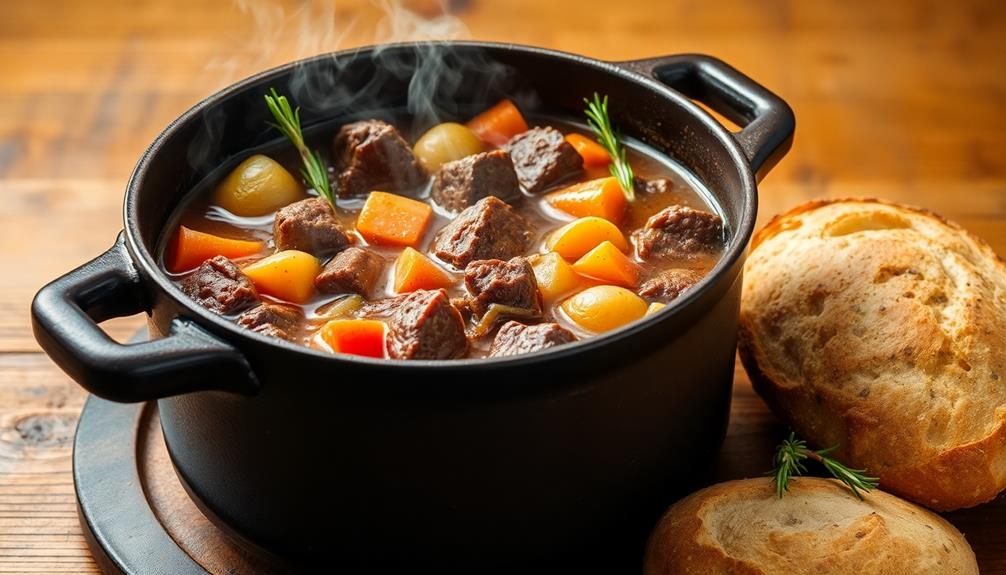
You'll love whipping up a hearty Dutch oven beef stew! This classic dish has a long, rich history, with cast-iron cooking vessels used by pioneers and settlers for delicious, slow-cooked meals. The key is taking your time to brown the beef, sauté the veggies, and let all those flavors meld together as the stew simmers away. You'll end up with tender beef, carrots, potatoes, and herbs in a savory broth that'll warm you right up. Serve it with crusty bread or creamy mashed potatoes for a comforting and satisfying meal the whole family will enjoy. Want to learn more about this cozy classic?
Key Takeaways
- Dutch ovens originated in the 17th century as versatile cast iron cooking vessels, making them ideal for slow-cooking beef stew.
- Beef stew cooked in a Dutch oven benefits from the even heat distribution and moisture retention, resulting in tender meat and rich flavors.
- The recipe calls for browning the beef to develop a caramelized crust, then simmering the ingredients slowly to allow the flavors to meld.
- Fresh herbs, such as thyme and rosemary, are added to the stew to enhance the aroma and balance the savory broth.
- Serving the Dutch oven beef stew with crusty bread or mashed potatoes creates a hearty and comforting meal perfect for cold winter nights.
History
Dutch ovens have a long and storied history, dating back to the 17th century. These versatile cooking vessels were originally made of cast iron and used by pioneers, settlers, and homesteaders to create delicious, hearty meals over an open fire.
You can just imagine the mouthwatering aromas wafting through the air as they simmered stews, roasted meats, and baked bread in their trusty Dutch ovens!
The name "Dutch oven" may have come from the German word "Deutscher Ofen," meaning "German oven." These pots were particularly popular in the American colonies, where they were used to cook a wide variety of dishes.
Over time, Dutch ovens evolved, with modern versions featuring tight-fitting lids and legs to keep them stable over the fire.
Today, they remain a beloved kitchen essential, perfect for creating comforting, flavorful dishes like the classic Dutch Oven Beef Stew. Their enduring popularity is a testament to their versatility and the delicious meals they can produce.
Recipe
Dutch oven beef stew is a classic and comforting dish that's perfect for a cozy winter meal. The slow-cooking process allows the meat to become tender and the flavors to meld together beautifully. This recipe uses a variety of vegetables and seasonings to create a rich and satisfying stew.
The key to this dish is the use of a Dutch oven, which helps to trap the heat and steam, resulting in perfectly cooked and flavorful beef. The stew can be made in advance and reheated, making it an ideal meal for a busy weeknight or a weekend gathering.
Ingredients:
- 2 lbs beef stew meat, cut into 1-inch cubes
- 2 tbsp vegetable oil
- 1 onion, diced
- 3 carrots, peeled and sliced
- 3 celery stalks, sliced
- 3 cloves garlic, minced
- 2 tbsp tomato paste
- 2 cups beef broth
- 1 cup red wine
- 2 bay leaves
- 1 tsp dried thyme
- 1 tsp dried rosemary
- 2 medium Yukon Gold potatoes, peeled and cubed
- Salt and pepper to taste
Instructions:
In a Dutch oven, brown the beef in the vegetable oil over medium-high heat. Remove the beef from the pot and set aside.
Add the onion, carrots, celery, and garlic to the pot and sauté until the vegetables are softened, about 5-7 minutes. Stir in the tomato paste and cook for 2 minutes.
Pour in the beef broth and red wine, and add the bay leaves, thyme, and rosemary. Return the beef to the pot and bring the mixture to a boil.
Reduce the heat to low, cover, and simmer for 2 hours. Add the potatoes and continue to simmer for an additional 30-45 minutes, or until the beef and potatoes are tender.
Tips:
For the best flavor, use a high-quality beef broth and a full-bodied red wine. If the stew is too thick, thin it out with a bit of extra broth or water.
Adjust the seasoning with salt and pepper to your taste. Serve the stew with crusty bread or over mashed potatoes for a hearty and satisfying meal.
Cooking Steps
First, you'll brown the beef in the Dutch oven to create a delicious, caramelized crust.
Next, toss in the chopped veggies and let them simmer until they're nice and tender.
Finally, stir in the herbs and seasonings to really make the flavors pop.
Don't forget to garnish with fresh parsley for a fresh, vibrant finishing touch!
Step 1. Brown the Beef
After preparing the beef, you'll want to brown it in batches. This step is important because it adds a delicious, caramelized flavor to the meat.
Start by heating a tablespoon of oil in your trusty Dutch oven over medium-high heat. Once the oil is shimmering, gently place the beef cubes in the pot, being careful not to overcrowd them. Let the beef sizzle and brown on one side, about 2-3 minutes. Then, use a pair of tongs to flip the pieces and brown the other side.
Once the beef is nicely browned all over, transfer it to a plate. Repeat this process with the remaining batches of beef, adding a bit more oil if needed.
Don't worry if the bottom of the pot starts to look a little dark – that's just the delicious flavor developing! Just be sure to scrape up any browned bits, as they'll add incredible depth to your stew.
With the beef browned, you're one step closer to a comforting and absolutely mouthwatering Dutch oven beef stew.
Step 2. Add Vegetables
With the beef nicely browned, you can now turn your attention to the vegetables. First, peel and chop the onions, carrots, and potatoes. The aroma of the onions sizzling in the pot will make your mouth water!
Toss in the carrots and potatoes, and let them soak up all the beefy goodness. Don't forget to add the garlic – it'll give the stew a delicious savory flavor. As the veggies cook, they'll become tender and infuse the broth with their natural sweetness.
Next, pour in the beef broth and give everything a good stir. The liquid should just barely cover the ingredients.
Now, it's time to add the seasonings. A sprinkle of thyme, a dash of Worcestershire sauce, and a pinch of salt and pepper will do the trick. With a quick whisk, you've got a rich, aromatic base for your stew.
All that's left is to let it simmer until the vegetables are fork-tender. Get ready for a hearty, homemade meal!
Step 3. Simmer Until Vegetables Are Tender
Once the vegetables have been added, let the stew simmer gently on the stovetop.
You'll want to keep the heat at a nice, low setting – just enough to maintain a gentle bubble. This slow, steady simmering is key to getting those vegetables nice and tender.
As the stew bubbles away, you'll start to notice the tantalizing aromas wafting through your kitchen. The hearty beef, the earthy potatoes, the fragrant herbs – it's enough to make your mouth water!
Keep an eye on the stew, stirring it occasionally to ensure the ingredients cook evenly.
After about 30-40 minutes, the potatoes and carrots should be fork-tender, signaling it's time to check for seasoning.
Give it a taste and add any extra salt, pepper, or herbs to suit your preferences.
Once the veggies are perfectly tender, your Dutch oven beef stew is ready to serve!
Ladle it into bowls and get ready to enjoy a comforting, homemade meal.
Step 4. Add Herbs and Seasonings
Now that the vegetables have had a chance to become tender, it's time to give your Dutch oven beef stew a final seasoning boost.
First, grab a handful of fresh thyme and rosemary and gently rub the aromatic leaves between your palms. Breathe in the earthy, savory scents as you sprinkle the herbs into the simmering stew.
Next, add a pinch of salt and a few grinds of black pepper, giving the pot a good stir. This will help the flavors meld together and really make the beef and veggies shine.
Don't forget a splash of Worcestershire sauce too – its umami richness will add depth and complexity to the dish.
Finally, taste the stew and adjust the seasoning as needed. You want the flavors to be bold, yet balanced, with the herbs and spices complementing the tender beef and soft vegetables.
Get ready, because your kitchen is about to smell absolutely divine!
Step 5. Garnish With Fresh Parsley
As the savory aroma of the herbs and seasonings fills your kitchen, it's time to add the finishing touch to your Dutch oven beef stew – a sprinkle of fresh parsley. This vibrant, fragrant herb not only adds a pop of color to your hearty dish but also enhances the overall flavor profile.
Grab a handful of lush, green parsley leaves and give them a rough chop. The delicate, slightly peppery notes of the parsley will complement the rich, beefy broth and tender chunks of meat perfectly.
Sprinkle the chopped parsley over the top of your stew, making sure to cover every bite.
As you serve the stew, the fresh parsley will release its aromatic oils, releasing a tantalizing scent that will have your family and guests eager to dig in.
The combination of the tender beef, savory broth, and bright, herbaceous parsley will create a truly satisfying and well-balanced meal. Enjoy this comforting and flavorful Dutch oven beef stew with your loved ones.
Final Thoughts
This Dutch oven beef stew is a comforting and satisfying dish that's perfect for chilly evenings. The combination of tender beef, hearty vegetables, and a savory broth is sure to warm you up from the inside out.
Don't you just love the way the aroma fills the air as it simmers away on the stovetop? It's enough to make your mouth water!
Once you've ladled up a steaming bowlful, you'll appreciate the time and care that went into crafting this delectable meal. The depth of flavor is truly remarkable, and each bite is a delightful explosion of tastes and textures.
Whether you're enjoying it on your own or sharing it with loved ones, this Dutch oven beef stew is sure to become a cherished favorite.
Go ahead, dig in and savor every last morsel – you deserve this cozy and comforting culinary experience!
Frequently Asked Questions
Can I Use a Slow Cooker Instead of a Dutch Oven?
Absolutely, you can use a slow cooker instead of a dutch oven. The slow cooker will allow the ingredients to simmer and tenderize over several hours, producing a delicious and flavorful dish just like a dutch oven would.
Do I Need to Brown the Meat Before Adding It?
Yes, you'll generally want to brown the meat before adding it to the slow cooker. This helps develop a nice sear and caramelized flavor that can't be replicated by just slow cooking the raw meat. This step also helps to lock in the juices and prevent the meat from becoming dry and tough during the slow cooking process. It’s an extra step that can make a big difference in the overall flavor and texture of the dish. Whether you’re making a stew, chili, or any other type of slow cooker recipe, taking the time to brown the meat beforehand is definitely worth it.
Can I Substitute Other Types of Meat in the Recipe?
Yes, you can substitute other types of meat in the recipe. The key is to choose a cut that's suitable for slow cooking, like pork shoulder, lamb shoulder, or even chicken thighs. Just adjust the cooking time as needed.
How Long Will the Stew Keep in the Refrigerator?
The stew will keep in the refrigerator for 3-4 days. Be sure to store it in an airtight container and reheat it thoroughly before serving. Proper storage is key to enjoying the leftovers later.
Can I Freeze the Leftover Stew for Later Use?
Yes, you can definitely freeze the leftover stew for later use. Just make sure to store it in an airtight container and it'll keep in the freezer for up to 3 months. This way, you can enjoy it again whenever you want.
-
Southern Comfort Food1 month ago
Cheese Straws
-
Brazilian Cuisine1 month ago
Caldeirada
-
Southern Comfort Food1 month ago
Creamed Corn
-
Brazilian Cuisine1 month ago
Chicken in Brown Sauce
-
Brazilian Cuisine1 month ago
Tacacá
-
Southern Comfort Food1 month ago
Squash Casserole
-
Ethiopian Cuisine1 month ago
Buna (Coffee)
-
Polish Comfort Food1 month ago
Krupnik (Barley Soup)