Connect with us

Japanese Cuisine

Udon

Captivating the hearts of noodle lovers worldwide, udon’s unparalleled versatility and depth of flavor leave you craving for more.

Published

on

japanese wheat noodle dish

You may think you know udon, but have you truly explored the depth and complexity of this beloved Japanese noodle dish? Originating centuries ago, udon has evolved into a culinary treasure that captivates the senses. The pillowy texture, the savory broth, the myriad of toppings – it's a symphony of flavors waiting to be discovered. Whether you're a seasoned udon enthusiast or a newcomer to this culinary delight, there's always more to uncover. So, get ready to embark on a journey that will tantalize your taste buds and reveal the true essence of this Japanese comfort food. If you think you’ve experienced all that Japanese noodles have to offer, think again. Udon’s cousin, the delicious Nagasaki noodle dish, offers a unique and distinct flavor profile that is sure to delight your palate. So, why not expand your culinary horizons and dive into the world of Japanese noodles? With each bowl, you’ll discover a new dimension of taste and a deeper appreciation for the art of noodle-making.

Key Takeaways

  • Udon is a type of thick, chewy wheat noodle originating from China and becoming a staple in Japanese cuisine since the 9th century.
  • Udon is often served in a dashi-based broth or stir-fried, with popular variations like kitsune udon and tempura udon.
  • Udon preparation involves boiling the noodles until chewy but tender, and the broth is typically made with dashi, soy sauce, and mirin.
  • Udon is associated with comfort food in Japan and is often enjoyed during festivals and family gatherings, representing the concept of "umami."
  • Whole wheat udon offers higher fiber content and is low in fat, making it a healthier carbohydrate choice that has gained global popularity.

History

The origins of udon can be traced back to the 9th century, when it was first introduced to Japan from China. This thick, chewy noodle quickly became a beloved staple in Japanese cuisine, with regional variations developing over the centuries.

In the 13th century, udon gained popularity in the Kagawa prefecture, located on the island of Shikoku. Local chefs perfected the art of making these noodles by hand, using high-quality wheat flour and pure spring water. The resulting texture and flavor became renowned throughout Japan, earning Kagawa the title of "Udon Country."

Today, udon remains a cherished part of Japanese culinary heritage. Whether enjoyed in a warm broth, chilled with dipping sauce, or as a base for hearty dishes, this versatile noodle continues to delight diners with its comforting and satisfying qualities.

The history of udon is a testament to the enduring appeal of traditional Japanese cuisine.

Recipe

Udon is a popular Japanese noodle dish that features thick, chewy wheat flour noodles in a savory broth. The dish is known for its satisfying texture and comforting flavor. Preparing udon at home can be a rewarding experience, allowing you to customize the dish to your taste.

Advertisement

To begin, it's important to source high-quality udon noodles, which can be found in Asian grocery stores or specialty markets. The noodles come in various shapes and sizes, so feel free to experiment with different varieties to find your preference.

  • Udon noodles
  • Dashi stock (or vegetable/chicken broth)
  • Soy sauce
  • Mirin (Japanese rice wine)
  • Green onions, sliced
  • Tempura or other desired toppings (optional)

To cook the udon, bring the dashi stock or broth to a simmer in a large pot. Add the soy sauce and mirin, adjusting the seasoning to your liking. Gently add the udon noodles and cook for 2-3 minutes, or until they're tender and heated through. Be careful not to overcook the noodles, as they should maintain a firm, chewy texture.

When serving, arrange the cooked udon noodles in bowls and ladle the hot broth over the top. Garnish with sliced green onions and, if desired, tempura or other toppings of your choice.

The key to a satisfying udon dish is achieving the perfect balance of flavors and textures, so feel free to experiment and adjust the recipe to your personal taste.

Cooking Steps

First, bring a large pot of water to a boil and add a pinch of salt.

Then, carefully drop the udon noodles into the pot and let them cook for a few minutes.

Advertisement

Step 1. Boil Water in Large Pot

boil water in pot

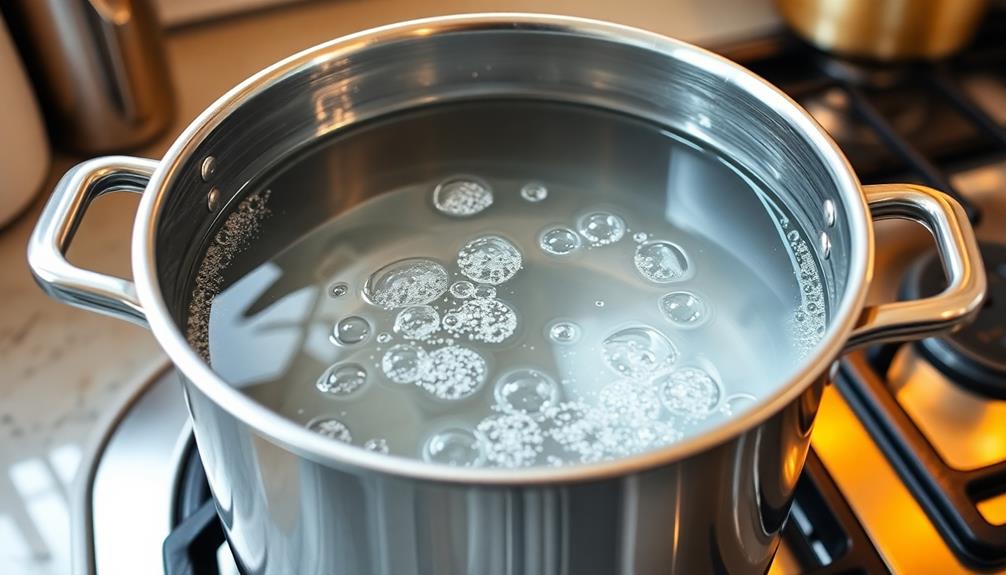
Once the large pot is ready, you'll want to fill it with a generous amount of water.

Bring the water to a rapid boil over high heat. This will ensure the udon noodles cook evenly and thoroughly. Keep a close eye on the pot, as the water can quickly come to a boil.

Once the water is at a full, rolling boil, it's time to add the udon noodles.

Carefully drop the noodles into the hot water, being cautious of any splashing. Stir the noodles gently with a wooden spoon or chopsticks to separate them and prevent them from sticking together.

Maintain the boil and cook the noodles for the recommended time, typically 8-10 minutes.

Taste the noodles occasionally to ensure they reach the desired texture – tender yet still retaining a pleasant chew.

Advertisement

When they're done, drain the noodles in a colander, reserving some of the cooking liquid if needed for the final dish.

Step 2. Add Salt to Water

add salt to water

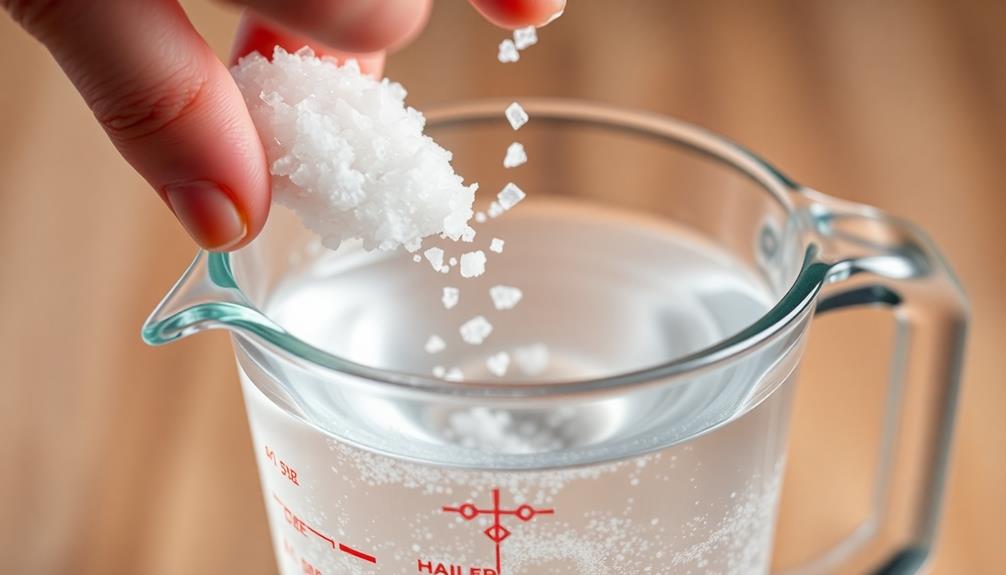
Adding a pinch of salt to the boiling water is a simple yet essential step in cooking udon noodles. This small addition enhances the overall flavor of the noodles, bringing out their natural sweetness and creating a more balanced taste.

As the water comes to a boil, sprinkle in a small amount of salt, about 1/2 teaspoon per quart of water. Stir the water gently to ensure the salt dissolves completely. The salted water will help to season the noodles from the inside out, infusing them with a delightful savor.

When the water is at a rolling boil, gently add the udon noodles. The salt in the water will help the noodles cook more evenly, preventing them from sticking together.

Stir the noodles occasionally to maintain an even cooking temperature and texture.

Step 3. Add Udon Noodles to Pot

add udon noodles pot

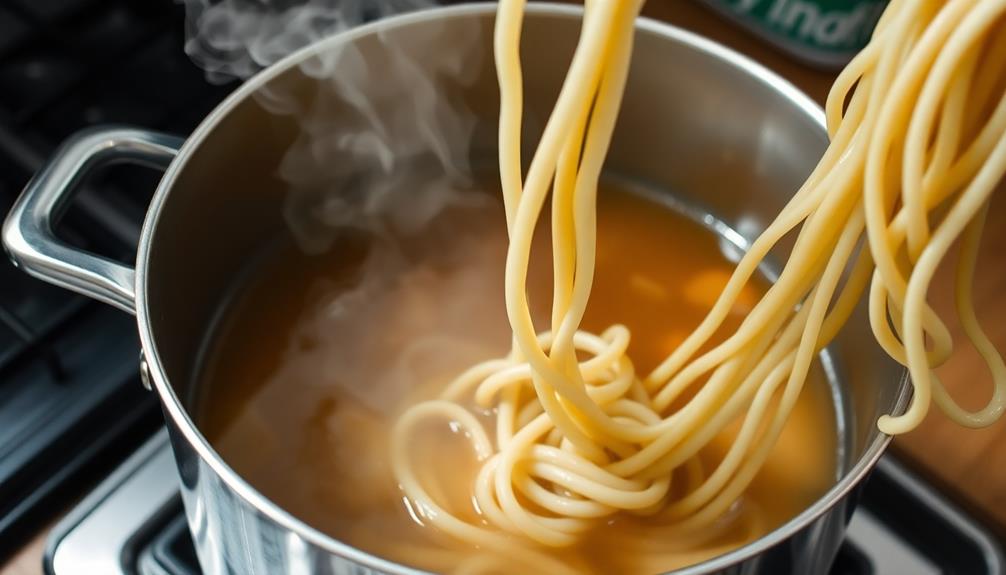
With the salted water at a rolling boil, gently lower the udon noodles into the pot. The noodles will initially stick together, but don't worry – they'll separate as they cook.

Stir the noodles occasionally to prevent sticking and ensure even cooking.

Advertisement

After a few minutes, the udon noodles will become tender and chewy. This is the perfect time to taste them and adjust the seasoning if needed. You can add more salt or a splash of soy sauce to enhance the flavor.

Once the noodles are cooked to your liking, use tongs or a slotted spoon to transfer them from the pot to your serving bowls. Be careful not to overcrowd the bowls, as you want the noodles to have room to breathe.

Drizzle a bit of the cooking liquid over the noodles to keep them moist and flavorful.

Enjoy your freshly cooked udon noodles as the base for a delicious soup or stir-fry dish. The possibilities are endless!

Step 4. Drain Noodles and Rinse With Cold Water

drain and rinse noodles

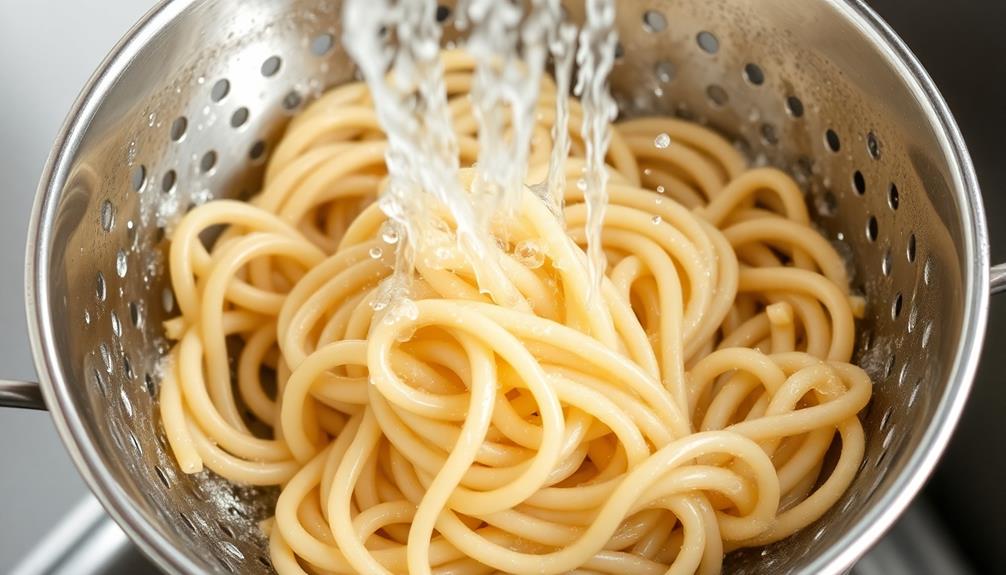
After the udon noodles have finished cooking, you'll want to drain them from the pot. Carefully pour the noodles into a colander, letting the hot water drain away.

Once they're drained, it's time to rinse the noodles with cold water. This step is crucial, as it stops the cooking process and helps remove any excess starch.

Advertisement

Grab a large bowl and fill it with cold water. Gently transfer the drained noodles into the cold water and use your hands to swish them around. This will help remove any remaining starch and ensure your noodles have a nice, firm texture.

After a minute or so, drain the noodles again, being careful not to let them stick together.

With your udon noodles now drained and rinsed, you're ready to move on to the next step in the recipe. The cold water rinse has prepared them perfectly for their final preparations and serving.

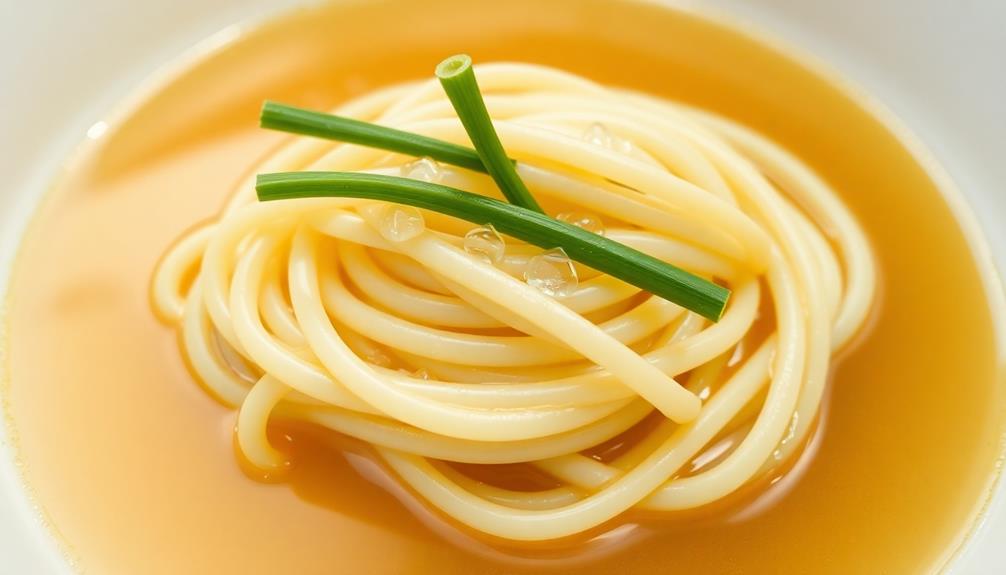
Step 5. Serve With Desired Toppings

serve with chosen toppings

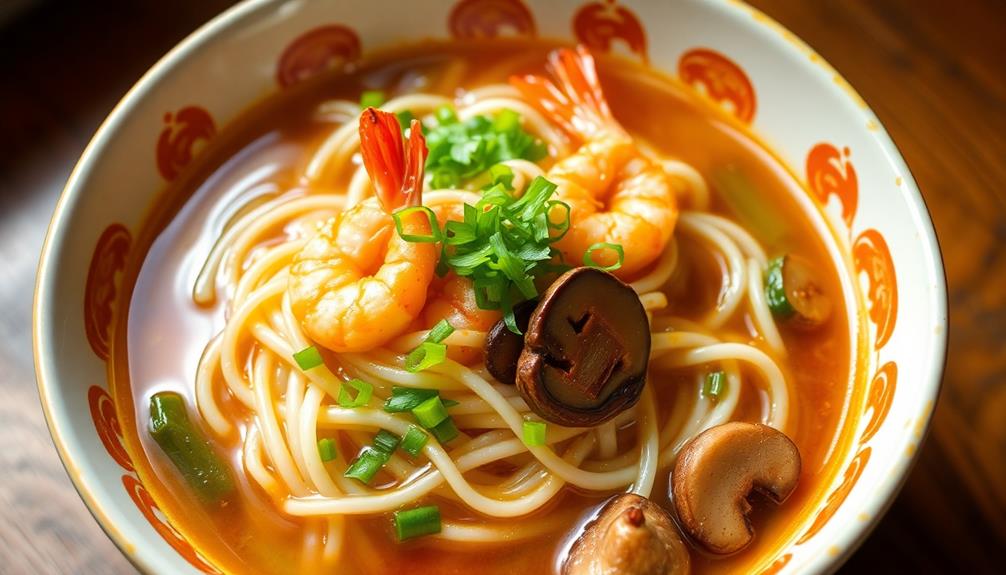
The final step is to serve your freshly cooked udon noodles with your desired toppings. This is where you can truly make the dish your own! Start by dividing the noodles into individual serving bowls. Don't be shy – pile them high for a hearty, satisfying meal.

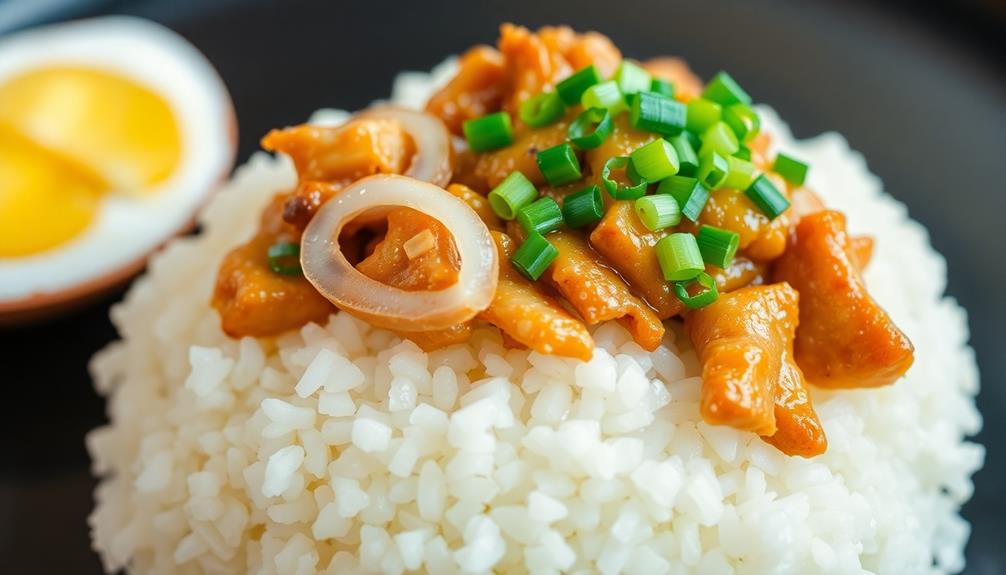
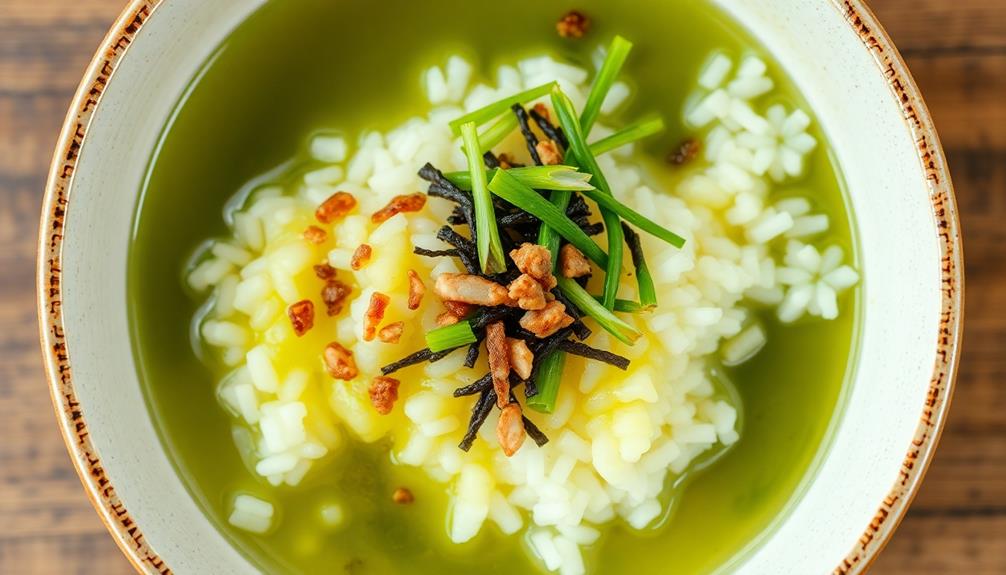
Next, select your favorite toppings. Common choices include sliced green onions, tempura bits, shredded nori, soft-boiled eggs, or even a sprinkle of crushed chili peppers for a spicy kick. If you're feeling adventurous, try adding a dollop of tangy Japanese mustard or a drizzle of savory soy sauce.

Once you've assembled your toppings, it's time to serve. Ladle in a bit of the hot broth or dipping sauce, then artfully arrange your chosen garnishes on top.

Advertisement

The contrast of the steaming noodles, cool toppings, and flavorful sauce creates a symphony of textures and tastes. Grab your chopsticks and enjoy this authentic Japanese comfort food experience!

Final Thoughts

Udon, a Japanese culinary marvel, captivates the senses with its unique texture and depth of flavor. As you've explored the preparation and serving of this delightful noodle dish, you're now ready to savor the final thoughts.

Udon's versatility is truly remarkable. Its thick, chewy strands can be enjoyed in a variety of preparations, from the classic hot broth to the refreshing zest of cold noodles.

Whether you prefer a simple seasoning or an elaborate array of toppings, the possibilities are endless.

Embracing the art of udon-making can be a rewarding and meditative experience. From the rhythmic kneading of the dough to the precise cutting and shaping, each step offers a chance to connect with the rich culinary traditions of Japan.

Advertisement

As you twirl the noodles and savor each bite, you'll be transported to a world of harmonious flavors and textures.

Advertisement

Japanese Cuisine

Kabocha Salad: The Sweet and Nutty Japanese Pumpkin Dish

Mouthwatering and nutritious, this Japanese pumpkin salad boasts a perfect balance of sweet and nutty flavors, inviting you to uncover its delightful secrets.

Published

on

sweet nutty kabocha salad

Kabocha salad – the sweet and nutty Japanese pumpkin dish! You'll love how this winter squash melts in your mouth. First, peel and chop the kabocha into bite-sized pieces, then roast it to perfection. Whisk up a mouthwatering sesame dressing and toss it with the kabocha. For added crunch and flavor, fold in roasted chestnuts and toasted sesame seeds. The combination of soft, sweet kabocha and crunchy, nutty toppings creates a harmonious medley. This healthy, versatile dish works wonderfully as a side or main course. And there's more to discover about this beloved Japanese ingredient…

Key Takeaways

  • Kabocha is a winter squash integral to Japanese cuisine for centuries, with a rich history dating back to the 16th century.
  • Kabocha's versatility in Japanese culinary practices includes roasting, steaming, and stir-frying, making it a popular ingredient in various dishes.
  • The salad features roasted kabocha cubes, a sesame-based dressing, and crunchy roasted chestnuts, creating a harmonious blend of sweet and nutty flavors.
  • Toasted sesame seeds provide an earthy crunch and visual appeal, complementing the soft texture of the roasted kabocha.
  • Kabocha salad is a healthy and versatile dish that can be served as a side, main course, or topping, appealing to a wide range of cuisines.

History

historical events and timelines

Kabocha, a type of winter squash, has been a staple in Japanese cuisine for centuries. This vibrant, rounded gourd has a dark green exterior and a bright orange flesh that's sweet and nutty.

In fact, the word "kabocha" comes from the Portuguese "cambodja," which means "Cambodia." The Portuguese first encountered this squash variety in Southeast Asia and brought it back to Japan in the 16th century.

Over time, Japanese chefs and home cooks discovered all the incredible ways to prepare kabocha. They roasted, steamed, and stir-fried it, adding it to soups, curries, and even desserts.

Kabocha's versatility and delicious flavor made it a beloved ingredient throughout the country. Today, you'll find kabocha in markets and grocery stores, ready to star in all kinds of tasty dishes – including the classic Japanese kabocha salad you're about to learn how to make!

Cooking Steps

step by step cooking instructions

Preparing the kabocha squash is the first step in the salad-making process. Start by grabbing a sharp knife and carefully slice the squash in half. Scoop out the seeds and stringy bits from the center using a spoon.

Next, place the squash halves cut-side down on a baking sheet and roast them in the oven until they're nice and tender, about 30 minutes.

Advertisement

Once the kabocha is all roasted and cooled, it's time to dice it into bite-sized pieces. Toss the cubed squash into a big salad bowl.

Now, let's add some crunchy nuts like toasted almonds or cashews. Sprinkle them over the top.

Finally, whisk together a simple dressing of olive oil, rice vinegar, a touch of honey, and a pinch of salt and pepper. Drizzle the dressing over the salad and gently toss everything together.

Voila! Your kabocha salad is ready to be enjoyed.

Step 1. Peel and Chop Kabocha Squash

peel chop kabocha squash

Start by grabbing a sturdy knife and cutting board. You'll need to peel the thick, dark green skin off the kabocha squash.

Take it slow and be careful – those skins can be tough! Once the skin is removed, slice the squash in half. Scoop out the seeds and stringy insides, then cut the flesh into 1-inch cubes.

Advertisement

The key is to chop the kabocha into even, bite-sized pieces. This will help them cook evenly and make the salad easy to eat. As you work, try to keep the cubes as uniform as possible.

Don't worry if they're not perfect – a little variation adds character!

Once all the squash is chopped, you're ready for the next step. Gather your other salad ingredients and let's start assembling this delicious kabocha creation.

The sweet, nutty flavor of the kabocha is about to shine!

Step 2. Roast Kabocha With Olive Oil

roast kabocha with olive oil

Preheat your oven to 400°F (200°C). Grab your peeled and chopped kabocha squash from the previous step. Drizzle the chunks with olive oil, making sure they're evenly coated.

Season with a pinch of salt and pepper, then toss to combine.

Advertisement

Arrange the seasoned kabocha pieces in a single layer on a baking sheet. Slide the sheet into the preheated oven and let the squash roast for 20-25 minutes. Give it a gentle stir halfway through to ensure even browning.

You'll know the kabocha is done when it's tender and caramelized around the edges.

Once roasted, remove the baking sheet from the oven and let the kabocha cool slightly. The roasting process will bring out the natural sweetness and nutty flavor of this Japanese pumpkin.

Now you're ready to assemble your delicious kabocha salad!

Step 3. Dress With Sesame Dressing

dress with sesame dressing

How do you dress the roasted kabocha to create the perfect kabocha salad? It's all about the sesame dressing!

First, whisk together the nutty sesame oil, tangy rice vinegar, and a touch of soy sauce. This creates a savory-sweet elixir that will make your taste buds dance.

Advertisement

Next, add a sprinkle of sugar and a pinch of salt to balance the flavors. Don't be shy – you want the dressing to really sing! Grate in a bit of fresh ginger for a zing of warmth and brightness.

Now, drizzle the sesame dressing over the roasted kabocha cubes. Use your hands to gently toss everything together, making sure each piece is evenly coated. The sweet pumpkin will soak up all that delicious dressing, creating a harmony of flavors in every bite.

Step 4. Toss With Roasted Chestnuts

tossed with roasted chestnuts

To elevate the kabocha salad even further, toss in some roasted chestnuts. The nutty, toasted flavor of the chestnuts complements the sweetness of the kabocha perfectly.

Simply roast the chestnuts in the oven until they're golden brown and tender, then roughly chop them into bite-sized pieces. Gently fold the roasted chestnuts into the salad, making sure they're evenly distributed.

The contrast of the soft, creamy kabocha and the crunchy, earthy chestnuts creates a delightful textural experience in every bite. Plus, the chestnuts add a touch of elegance and sophistication to the dish.

The roasted chestnuts not only enhance the overall flavor but also provide a satisfying crunch that takes the kabocha salad to the next level. This simple addition turns the salad into a truly special and memorable dish.

Advertisement

Step 5. Garnish With Toasted Sesame Seeds

garnish with sesame seeds

Toasty sesame seeds lend a delightful crunch and nutty aroma that elevates the kabocha salad. Simply toast the sesame seeds in a dry skillet over medium heat, stirring frequently, until they're golden brown and fragrant. This takes just a few minutes, so keep a close eye on them to prevent burning.

Sprinkle the toasted sesame seeds over the top of the salad, letting them scatter across the surface. Their earthy, rich flavor perfectly complements the sweet pumpkin and roasted chestnuts.

The crunchy texture also adds a satisfying contrast to the soft, tender kabocha cubes. Feel free to use a combination of black and white sesame seeds for a visually stunning presentation.

The dark and light colors create an eye-catching garnish that makes the salad even more appetizing. Finish it off by giving the salad a final toss, ensuring the sesame seeds are evenly distributed throughout.

Final Thoughts

concluding insights and reflections

Ultimately, what makes this kabocha salad a delightful dish is its harmonious blend of flavors and textures. The sweet and nutty kabocha pumpkin is the star, complemented by the crunchy toasted sesame seeds and the tangy dressing.

The salad's vibrant colors and presentation are also a delight for the senses, making it a feast for the eyes as well as the palate.

One of the best things about this recipe is its versatility. You can enjoy it as a side dish, a light main course, or even as a topping for grilled meats or roasted vegetables.

Advertisement

The flavors work beautifully with a wide range of cuisines, from Japanese to Mediterranean to American. Plus, it's a healthy and satisfying option that's sure to please everyone at the table.

Frequently Asked Questions

What Is the Nutritional Value of Kabocha Pumpkin?

You'll find that kabocha pumpkin is packed with nutrients. It's high in vitamin A, vitamin C, and fiber, making it a healthy and versatile ingredient in your diet. Plus, it has a delightfully sweet and nutty flavor.

How Long Can Kabocha Pumpkin Be Stored?

You can store kabocha pumpkin for up to 3 months if you keep it in a cool, dry place. Its thick skin helps preserve its freshness, making it a versatile and long-lasting vegetable for your kitchen.

Can Kabocha Be Substituted for Other Types of Pumpkin?

Yes, you can substitute kabocha for other types of pumpkin. Kabocha has a similar texture and sweetness, making it a suitable replacement in most recipes that call for pumpkin. Just keep in mind the flavor may be a bit nuttier.

Is Kabocha Pumpkin Suitable for Vegetarians and Vegans?

Yes, kabocha pumpkin is suitable for vegetarians and vegans. As a versatile squash, it's an excellent plant-based ingredient that can be prepared in various ways to fit a vegetarian or vegan diet.

Advertisement

What Are the Health Benefits of Eating Kabocha?

Eating kabocha provides numerous health benefits. It's rich in vitamins A and C, which support immune function and eye health. The high fiber content aids digestion, while the antioxidants may help reduce inflammation and lower disease risk.

Continue Reading

Japanese Cuisine

Soboro Bun: The Sweet and Savory Japanese Treat

Discover the enchanting fusion of sweet and savory in the beloved Japanese treat, Soboro Bun, where a crumbly pork-based topping meets a fluffy dough. Learn more.

Published

on

sweet savory japanese treat

Soboro bun is a beloved Japanese treat that'll tantalize your taste buds! This delightful pastry emerged during the Meiji period, offering a unique fusion of sweet and savory flavors. The key is the crumbly "soboro" topping – made from ground pork, soy sauce, and sugar. You'll find these comforting buns in bakeries across Japan, enjoyed by locals and visitors alike. Making them at home is a breeze too – just mix the dough, knead, proof, divide, and shape into fluffy buns. And the best part? You can experiment with all sorts of tasty fillings and toppings. Intrigued? Keep reading to uncover the mouthwatering secrets of this Japanese delight.

Key Takeaways

  • Soboro bun is a beloved Japanese comfort food that emerged during the Meiji period, featuring a unique fusion of sweet and savory flavors.
  • The "soboro" topping is made from ground pork, soy sauce, and sugar, creating a crumbly, flavorful texture.
  • Soboro buns are enjoyed in bakeries and cafes across Japan, offering a variety of fillings and toppings to appeal to diverse preferences.
  • The preparation process involves mixing, kneading, proofing, and shaping the dough to achieve a fluffy, steamed bun texture.
  • Soboro buns present an opportunity to experiment with different ingredients and flavors, making them a versatile and satisfying culinary experience.

History

historical events and timelines

Although the exact origins of the soboro bun are unclear, it's believed to have emerged as a regional delicacy in Japan during the Meiji period (1868-1912).

This fluffy, pillowy treat is a unique fusion of sweet and savory flavors, making it a true delight for the senses.

The name "soboro" actually refers to the crumbly, ground meat topping that adorns these buns. This savory component is often made from a mixture of ground pork, soy sauce, and sugar, creating a delightful contrast to the soft, sweet bread.

Over time, the soboro bun has become a beloved comfort food, with variations that include different fillings and toppings to suit diverse tastes.

Today, these charming buns can be found in bakeries and cafes across Japan, captivating both locals and visitors alike with their irresistible combination of flavors.

Advertisement

Whether you're looking for a quick snack or a satisfying breakfast, the soboro bun is sure to leave you craving more of this delectable Japanese specialty.

Cooking Steps

step by step cooking instructions

Gather the necessary ingredients and let's begin the cooking process. First, you'll want to cook the ground meat in a skillet over medium-high heat until it's crumbly and cooked through. Drain any excess fat.

To enhance your culinary experience, consider the importance of color accuracy in your home kitchen setup. Next, add the soy sauce, mirin, and sugar to the pan. Stir everything together and let it simmer for 5-7 minutes, until the sauce has thickened nicely.

Now it's time to assemble the buns. Take your fluffy steamed buns and gently pull them apart. Spoon a generous amount of the savory soboro filling into each one. Be sure to evenly distribute the mixture.

Step 1. Mix Flour and Water

combine flour and water

To begin the soboro bun-making process, mix the all-purpose flour and water in a large bowl.

You'll want to start with a gentle hand, using a wooden spoon to gently incorporate the ingredients. Don't overmix – you're aiming for a slightly shaggy dough that comes together easily.

Next, turn the dough out onto a lightly floured surface and knead it for a couple of minutes.

Advertisement

This helps develop the gluten, giving the buns a soft, fluffy texture. Once the dough is smooth and elastic, form it into a ball, place it in a greased bowl, and cover it with a damp towel.

Let the dough rest for about 30 minutes, allowing the gluten to relax.

With the dough rested and ready, you can now move on to the next step: dividing and shaping the soboro buns.

Remember to handle the dough gently to preserve those all-important air pockets that will make your buns light and fluffy.

Stay tuned for the next section to learn how to shape these delightful Japanese treats!

Advertisement

Step 2. Knead the Dough Thoroughly

knead dough thoroughly step

Thorough kneading is the secret to achieving a soft, supple dough for your soboro buns. Start by lightly dusting your work surface with flour.

Then, use the palms of your hands to push and fold the dough, rotating it as you go. This helps develop the gluten, giving the dough its elastic texture. Don't be afraid to really dig in and give it a good workout – the more you knead, the better the results!

As you knead, you'll feel the dough transform from rough and shaggy to smooth and silky. Keep at it for about 10 minutes, until the dough passes the "windowpane test."

Gently stretch a small piece – if it forms a thin, translucent sheet without tearing, you're good to go! With your dough now perfectly kneaded, you're one step closer to fluffy, irresistible soboro buns.

Get ready for the next step: shaping the dough into individual portions.

Step 3. Proof the Dough for One Hour

proof dough for one hour

After kneading the dough, it's time to let it proof for an hour. This crucial step allows the yeast to work its magic, making the dough rise and become light and fluffy.

Find a warm, draft-free spot in your kitchen and place the dough in a lightly greased bowl, covered with a damp towel or plastic wrap. As the dough proofs, the yeast will produce carbon dioxide, causing the dough to expand and double in size.

Advertisement

Be patient and resist the urge to peek – opening the oven or bowl can release the precious heat and air, slowing the proofing process.

After an hour, the dough should be soft, pillowy, and ready for the next step. Gently punch down the dough to release any air bubbles, then shape it into your desired bun form.

With the dough perfectly proofed, you're one step closer to sinking your teeth into those delectable Soboro Buns!

Step 4. Divide Dough Into Small Balls

divide dough into balls

Once the dough has finished proofing, gently punch it down to release any air bubbles. This will help create a smooth, even texture as you divide the dough.

Next, grab a handful of the dough and roll it into a small ball, about the size of a golf ball. Be gentle and try not to overwork the dough. You'll want to make around 12-15 balls, depending on how large you want your Soboro buns to be.

As you roll the dough, make sure each ball is smooth and uniform. Place the dough balls on a lightly floured surface, spacing them out a bit so they don't stick together.

Advertisement

Once all the dough is divided, cover the balls with a clean kitchen towel and let them rest for 10-15 minutes. This will help the gluten relax, making the dough easier to work with as you shape the buns.

After the resting period, you'll be ready to start shaping your Soboro buns!

Step 5. Shape Into Small Buns

shape small dough buns

To shape the Soboro buns, gently flatten each dough ball into a round disc using the palms of your hands.

Don't worry if they're not perfect – the rustic look is part of the charm! Next, use your fingers to pinch the dough around the edges, creating a small, fluffy bun.

Be careful not to overwork the dough, as this could make the buns tough.

Once you've shaped all the buns, it's time to let them rise. Cover the buns with a clean, damp towel and set them aside in a warm place for 15-20 minutes.

Advertisement

During this time, the dough will puff up and become nice and light.

Now you're ready to bake! Arrange the buns on a parchment-lined baking sheet, making sure to leave a little space between each one.

Pop them in the oven and get ready for the wonderful aroma to fill your kitchen.

In just 15-18 minutes, your Soboro buns will be golden brown and ready to enjoy!

Final Thoughts

concluding reflections and insights

Ultimately, the soboro bun is a delightful Japanese treat that seamlessly blends sweet and savory flavors.

Whether you prefer the tender, fluffy bread or the savory, seasoned ground meat topping, there's something to delight every palate.

Advertisement

The versatility of this dish is truly impressive – you can enjoy it as a snack, a side, or even a main course.

And the best part? It's surprisingly easy to make at home, allowing you to savor the authentic taste of Japan in your own kitchen.

So why not give it a try? Experiment with different toppings and fillings to find your perfect combination.

Who knows, you might just discover a new favorite treat that will transport you straight to the streets of Tokyo.

The soboro bun is a delightful reminder that the simplest pleasures in life can be the most satisfying.

Advertisement

Frequently Asked Questions

How Long Does It Take to Prepare Soboro Bun?

Preparing the soboro bun doesn't take long – you can whip it up in about 30 minutes. The key is cooking the ground meat topping quickly and assembling the buns effortlessly for a delightful homemade treat.

What Is the Shelf Life of Freshly Baked Soboro Bun?

Freshly baked soboro bun has a relatively short shelf life. It's best enjoyed within 2-3 days when stored at room temperature in an airtight container. After that, the texture and flavor may start to deteriorate.

Can Soboro Bun Be Frozen and Reheated Later?

Yes, you can freeze soboro bun and reheat it later. Just wrap it tightly in plastic or aluminum foil before freezing. When ready to enjoy, simply reheat in the oven or microwave until warmed through.

How Do I Store Leftover Soboro Bun?

You can store leftover soboro bun in an airtight container in the fridge for up to 3 days. To reheat, simply place the bun in a toaster oven or oven until heated through.

Is Soboro Bun Gluten-Free or Suitable for Dietary Restrictions?

Unfortunately, soboro bun is not gluten-free. It's made with wheat flour, which contains gluten. If you have dietary restrictions, you'll need to find a gluten-free alternative recipe or substitute the flour to make it suitable for your needs.

Advertisement

Continue Reading

Japanese Cuisine

Japanese Takoyaki: Octopus Ball Snacks

Highly addictive and crowd-pleasing, Japanese takoyaki are the savory octopus-filled balls that will leave you craving for more.

Published

on

octopus ball snack delicacy

Takoyaki are the mouthwatering Japanese octopus ball snacks you've got to try! These crispy, golden-brown bites originated in 1930s Osaka, where a street vendor named Tomekichi Endo first experimented with tasty fillings. Today, takoyaki are a beloved part of Japanese culture, featuring a fluffy wheat flour batter, tender octopus pieces, and mouthwatering toppings like savory sauce, creamy mayo, and crunchy bonito flakes. Making takoyaki is an interactive, social experience, and you can find these delightful snacks at bustling festivals, cozy restaurants, and casual street stalls across Japan. Ready to explore the irresistible world of takoyaki? Let's dive in!

Key Takeaways

  • Takoyaki is a popular Japanese street food made of bite-sized fried balls filled with octopus, tempura scraps, green onions, and other savory ingredients.
  • Takoyaki originated in Osaka, Japan during the 1930s and has since become a staple snack enjoyed nationwide, often served at festivals and casual dining spots.
  • The key ingredients in takoyaki include a wheat flour-based batter, diced octopus, and toppings such as takoyaki sauce, Japanese mayonnaise, bonito flakes, and aonori (seaweed).
  • Preparing takoyaki involves carefully pouring the batter into a specialized pan, adding the fillings, and continuously rotating the balls to achieve a crispy exterior and soft, gooey interior.
  • Takoyaki is known for its unique sensory experience and is considered a symbolic dish that represents the fusion of traditional and modern Japanese cuisine.

History

Where did the takoyaki snack originate from? You'll be delighted to know that this tasty treat has its roots in the vibrant city of Osaka, Japan!

Back in the 1930s, a savvy street vendor named Tomekichi Endo started experimenting with different fillings, eventually landing on the perfect combination – juicy octopus pieces nestled in a fluffy, golden-brown batter.

The name "takoyaki" comes from the Japanese words for "octopus" (tako) and "fried" (yaki), perfectly describing this beloved snack.

As word of Endo's creation spread, takoyaki shops began popping up all over Osaka, each with its own unique spin on the classic recipe.

Today, you can find these delightful octopus balls in every corner of Japan, enjoyed by people of all ages.

Advertisement

Whether you're strolling through a bustling festival or relaxing at a cozy izakaya, the aroma of sizzling takoyaki is sure to make your mouth water!

Recipe

Takoyaki, a beloved Japanese street food, is a delightful bite-sized treat that combines the savory flavors of octopus, dashi broth, and a variety of seasonings. These spherical snacks are a must-try for anyone looking to explore the rich culinary traditions of Japan.

At the heart of takoyaki lies a batter made from wheat flour, dashi stock, and eggs, which creates a light and fluffy interior. The real magic, however, lies in the fillings – tender pieces of octopus, aonori (dried green seaweed), pickled ginger, and crispy tempura scraps that add a delightful crunch.

  • Batter: 1 cup all-purpose flour, 1 cup dashi stock, 2 eggs, 1 tablespoon soy sauce, 1 teaspoon sugar
  • Fillings: 1 cup chopped cooked octopus, 2 tablespoons aonori (dried green seaweed), 2 tablespoons pickled ginger, 2 tablespoons tempura scraps
  • Toppings: Takoyaki sauce, Japanese mayonnaise, bonito flakes, chopped green onions

To prepare the takoyaki, heat a specialized takoyaki pan or a regular non-stick pan with round indentations. Ladle the batter into the hot pan, filling each well about three-quarters full.

Quickly add a piece of octopus, a sprinkle of aonori, pickled ginger, and tempura scraps to the center of each ball. Cook, turning the balls frequently with chopsticks or a skewer, until golden brown and cooked through, approximately 8-10 minutes.

Remember to have all your ingredients prepped and ready to go, as the cooking process moves quickly. Serve the takoyaki hot, drizzled with takoyaki sauce, Japanese mayonnaise, bonito flakes, and chopped green onions.

Advertisement

Enjoy the delightful burst of flavor in every bite!

Cooking Steps

Let's get cooking!

First, you'll whip up a tasty takoyaki batter mixture.

Next, pour that batter into the special takoyaki pan, add your octopus pieces, and cook until everything's nice and browned.

Step 1. Make Takoyaki Batter Mixture

prepare takoyaki batter mix

To make the takoyaki batter mixture, you'll need to whisk together the flour, egg, and dashi stock in a large bowl until the batter is smooth and free of lumps. The flour creates the perfect fluffy texture, while the egg adds richness and the dashi stock provides savory umami flavor.

Once the batter is ready, you can start preparing the other ingredients. Chop the green onions, pickled ginger, and octopus into small, bite-sized pieces. These colorful toppings will add wonderful pops of flavor and texture to your takoyaki.

Advertisement

Next, heat up your takoyaki pan and grease the wells. Using a small ladle or pitcher, carefully pour the batter into each well, filling them about three-quarters full.

Top each one with a few pieces of the octopus, green onions, and ginger. As the takoyaki cook, use your skewers to gently turn them, creating their signature round shape.

In no time, you'll have a delightful batch of piping hot, golden-brown takoyaki ready to enjoy!

Step 2. Pour Batter Into Takoyaki Pan

pour batter into pan

With your batter ready, it's time to start cooking! Grab your trusty takoyaki pan and get ready for some delicious octopus ball action. Carefully pour a small amount of batter into each of the round wells, filling them about three-quarters full.

Be sure to work quickly, as the batter will start to set right away.

Now, it's time to add your fillings! Drop a small cube of octopus into the center of each ball, followed by a sprinkle of green onions and pickled ginger.

Advertisement

Don't be afraid to get creative – you can also try adding cheese, shrimp, or even bacon bits!

As the takoyaki cook, use your special takoyaki tools to turn and rotate the balls, ensuring they cook evenly on all sides.

Listen for that satisfying sizzle and keep an eye on them, adjusting the heat as needed.

Once they're golden brown and fluffy, it's time to transfer them to a plate and get ready to enjoy your homemade Japanese treat!

Step 3. Add Octopus Pieces

incorporate octopus segments now

Once the batter is poured, it's time to add the star of the show – the octopus pieces.

You'll want to get your hands on some fresh, tender octopus, cut into bite-sized chunks. Carefully drop a few pieces into each well of the hot takoyaki pan. The octopus will start to sizzle and curl up as it cooks, filling the air with a delightful savory aroma.

Advertisement

Be sure to distribute the octopus evenly, so each takoyaki ball gets a tasty morsel. As the batter cooks around the octopus, you'll see the edges start to turn golden brown.

Use your takoyaki turner to gently rotate the balls, ensuring they cook evenly on all sides. The octopus should become tender and infuse the batter with its incredible flavor.

Get ready for an explosion of umami goodness in every bite!

Step 4. Cook Until Browned

cook until browned thoroughly

As the takoyaki batter sizzles around the octopus morsels, it's time to start rotating and browning the balls. Using your trusty takoyaki pan, gently turn each ball a quarter turn every 30 seconds or so. This ensures even cooking and that lovely golden-brown crust forms all around.

You'll know they're ready when the outsides are nicely browned and the insides are cooked through.

Don't be afraid to get in there with your pick or skewer, carefully rotating each ball as it cooks. The key is to keep them moving, so the batter cooks up crisp and the octopus pieces warm up perfectly.

Advertisement

Listen for that satisfying sizzle as you turn them, and catch a whiff of the savory aroma filling the air. Before you know it, you'll have a pan full of piping hot, beautifully browned takoyaki, ready to enjoy.

Step 5. Flip and Cook Until Crispy

flip cook until crispy

Carefully flipping the takoyaki, you'll want to cook them until they develop a delightfully crisp exterior. Use a pair of chopsticks or a small spatula to gently turn each ball, making sure to get an even golden-brown color all around.

As the takoyaki sizzle and dance in the pan, you'll start to smell the savory aroma of the cooked batter and fillings.

Keep a close eye on them, flipping and rotating the balls as needed to ensure they cook evenly. You'll know they're ready when the outside is crispy and the inside is hot and fluffy.

Don't be afraid to let them get a little charred in spots – that's where all the delicious, caramelized flavor comes from!

Once they're perfectly crispy, carefully transfer the takoyaki to a serving plate. Get ready to enjoy these warm, bite-sized morsels of Japanese street food perfection!

Advertisement

Final Thoughts

Enjoying the delightful takoyaki snacks is a delightful way to indulge in Japanese cuisine. These little octopus-filled balls are a true delight for the senses, with their crispy exteriors and savory, chewy interiors.

The combination of flavors, from the tender octopus to the tangy sauces, creates a truly unique and satisfying experience. Whether you're exploring the vibrant street food scene in Japan or recreating the experience at home, takoyaki are sure to leave a lasting impression.

The joy of watching the takoyaki sizzle and flip as they cook, followed by the first satisfying bite, is an experience that can be shared and enjoyed by people of all ages.

Frequently Asked Questions

What Is the Origin of the Name "Takoyaki"?

The name "takoyaki" comes from the Japanese words "tako" meaning octopus and "yaki" meaning grilled or baked. So, the name literally translates to "octopus grilled/baked ball," reflecting the dish's main ingredient.

How Long Does It Take to Cook Takoyaki?

Typically, it takes around 12-15 minutes to cook takoyaki. The balls need to be constantly rotated and cooked until they're golden brown and crispy on the outside while tender and gooey on the inside.

Advertisement

Can Takoyaki Be Made Without an Octopus Filling?

Sure, you can make takoyaki without octopus filling. Instead, you can use other ingredients like cheese, seafood, or even vegetables. The base batter is the same, so you can get creative with the fillings to suit your tastes.

Are There Any Health Benefits to Eating Takoyaki?

While takoyaki may not be the healthiest snack, it can provide some benefits. The batter contains carbohydrates for energy, and the fillings may offer vitamins and minerals. However, it's best enjoyed in moderation as part of a balanced diet. Additionally, those looking for low-carb options might want to explore alternatives to traditional takoyaki, such as using keto-friendly ingredients. For individuals following a ketogenic diet, keto fat bomb recipes can be a great way to enjoy flavorful snacks without the high carb content. Ultimately, it’s important to find a balance that works with your personal health goals.

Where Can I Find the Best Takoyaki in Japan?

You'll find the best takoyaki in Japan's bustling food markets and street vendor stalls, where seasoned chefs have perfected the art of these savory, bite-sized delights. Look for long lines of locals – that's a sure sign of exceptional takoyaki.

Continue Reading

Affiliate Disclaimer
As an affiliate, we may earn a commission from qualifying purchases. We get commissions for purchases made through links on this website from Amazon and other third parties.

Advertisement

Vetted

top local car washes top local car washes
Vetted2 months ago

14 Best Car Washes Near You for a Sparkling Clean Ride

I discovered the 14 best car washes near you that promise a sparkling clean ride, and you won't want to...

top mops for 2024 top mops for 2024
Vetted2 months ago

The 15 Best Mops of 2025 – Your Ultimate Guide to a Spotless Home

Find the perfect mop for your cleaning needs in 2025, and discover how these top choices can revolutionize your home...

top women s fragrances 2024 top women s fragrances 2024
Vetted2 months ago

15 Best Perfumes for Women in 2025 – A Fragrance Guide You Can’t Miss

Keen to discover the top 15 perfumes for women in 2025? Uncover unique scents that will elevate your fragrance game!

top local bars guide top local bars guide
Vetted2 months ago

14 Best Bars Near You for an Unforgettable Night Out

Looking for the perfect bar to elevate your night out? Discover the 14 best spots that promise unforgettable experiences!

luxurious beard oil selection luxurious beard oil selection
Vetted2 months ago

15 Best Beard Oils for a Luxurious Grooming Experience in 2025

Shop the 15 best beard oils for a luxurious grooming experience in 2025 and discover which ones will elevate your...

top college laptops 2024 top college laptops 2024
Vetted2 months ago

15 Best College Laptops of 2025: The Ultimate Guide for Students

With our guide to the 15 best college laptops of 2025, discover which powerful models will elevate your academic experience...

waterproof mascaras for tears waterproof mascaras for tears
Vetted2 months ago

15 Best Waterproof Mascaras That Will Survive Any Tear-Jerker

Outstanding waterproof mascaras await to keep your lashes flawless through any emotional moment; discover which ones made the top 15...

top flavorful disposable vapes top flavorful disposable vapes
Vetted2 months ago

15 Best Disposable Vapes of 2025: Top Picks for Flavor and Convenience

Prepare to discover the 15 best disposable vapes of 2025 that blend exceptional flavor and convenience, but which ones truly...

refreshing lunch salad ideas refreshing lunch salad ideas
Vetted2 months ago

15 Best Salads Near You That Will Freshen Up Your Lunch Routine

Transform your lunch with the 15 best salads nearby that will tantalize your taste buds and leave you craving more...

top convertible car seats top convertible car seats
Vetted2 months ago

15 Best Convertible Car Seats of 2025 – Safety and Comfort for Your Little One

Get ready to discover the top 15 convertible car seats of 2025 that blend safety and comfort—find out which models...

delicious fast food breakfast delicious fast food breakfast
Vetted2 months ago

15 Best Fast Food Breakfast Options That Will Make Your Mornings Delicious

Uncover the 15 best fast food breakfast options that will transform your mornings into a delicious experience you won't want...

stylish contacts for vision stylish contacts for vision
Vetted2 months ago

14 Best America’s Contacts for Clear Vision and Style

Browse through the 14 best contact lenses in America for clear vision and style, and discover which one perfectly complements...

Trending