Layered cakes are the ultimate decadent dessert, blending moist cake, creamy fillings, and intricate designs that make them the centerpiece of any celebration. Tracing back to ancient civilizations, these stunning creations have evolved over time to include diverse flavors and textures. Baking a layered cake requires precision, from mixing the batter to carefully assembling the layers. But the result is worth the effort – a visually stunning dessert that not only impresses guests but also delights the senses with each bite. Discover the secrets to crafting your own layered masterpiece and unlock a world of delicious possibilities.
Key Takeaways
- Layered cakes have a rich history dating back to ancient civilizations, evolving over time to feature diverse textures and flavors.
- A classic layered cake combines a moist, flavorful cake base with a creamy filling, typically made by whipping cream, confectioners' sugar, and vanilla.
- Careful attention to baking and assembly techniques is crucial for ensuring the structural integrity and visual appeal of a layered cake.
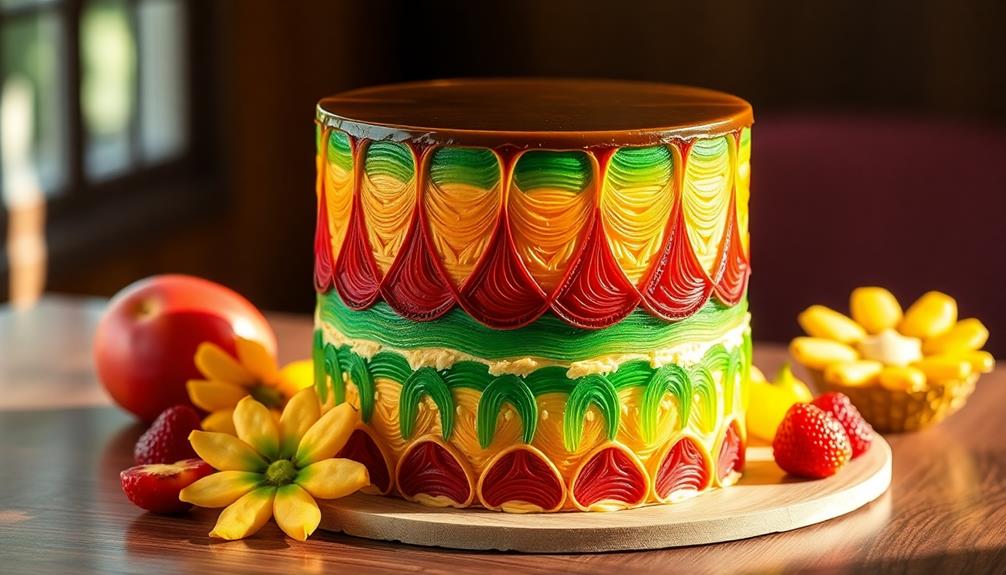
- The aesthetic appeal of a layered cake is enhanced by vibrant colors, precise layers, and artistic design elements that can impress guests.
- The quality of ingredients and attention to detail in the baking process directly impact the taste and texture of a layered cake.
Top picks for "layer cake"
Open Amazon search results for this keyword.
As an affiliate, we earn on qualifying purchases.
History
The layered cake's origins can be traced back to ancient civilizations, where bakers showcased their culinary prowess by stacking sweetened breads or cakes.
These early versions of the layered cake were often made with simple ingredients like flour, honey, and nuts. As cooking techniques evolved, bakers began experimenting with different textures and flavors, creating more elaborate and visually stunning cakes.
In medieval Europe, the layered cake became a symbol of wealth and status, with noble families competing to display the most impressive creations.
Bakers would layer cakes with fruits, creams, and even edible flowers, creating intricate designs that captivated guests. The layered cake's popularity spread to other parts of the world, with each region developing its own unique style and traditions.
Today, the layered cake remains a beloved dessert, with bakers constantly pushing the boundaries of creativity and innovation.
From the classic chocolate and vanilla to more adventurous flavor combinations, the layered cake continues to delight and inspire.
Recipe
Layered cakes are a classic dessert that can be both elegant and delicious. The key to a successful layered cake is to create a moist and flavorful cake base, paired with a creamy and complementary filling.
This recipe for a classic layered cake will guide you through the process of creating a delectable treat that's sure to impress your friends and family.
Ingredients:
- 2 cups all-purpose flour
- 2 teaspoons baking powder
- 1/2 teaspoon salt
- 1 cup unsalted butter, softened
- 1 1/2 cups granulated sugar
- 4 large eggs
- 1 teaspoon vanilla extract
- 1 cup milk
- 2 cups heavy cream
- 1/2 cup confectioners' sugar
- 1 teaspoon vanilla extract
Cooking Instructions:
Preheat your oven to 350°F (175°C). Grease and flour two 9-inch round cake pans.
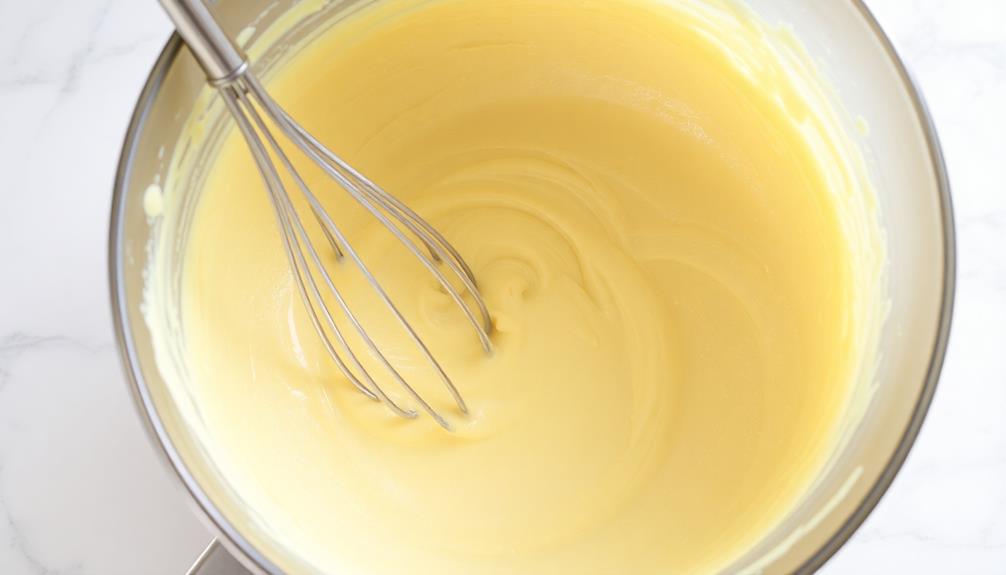
In a medium bowl, whisk together the flour, baking powder, and salt. In a large bowl, cream the butter and granulated sugar until light and fluffy. Beat in the eggs one at a time, then stir in the vanilla.
Alternately add the dry ingredients and milk to the butter mixture, mixing just until incorporated. Pour the batter into the prepared pans and bake for 25-30 minutes, or until a toothpick inserted into the center comes out clean.
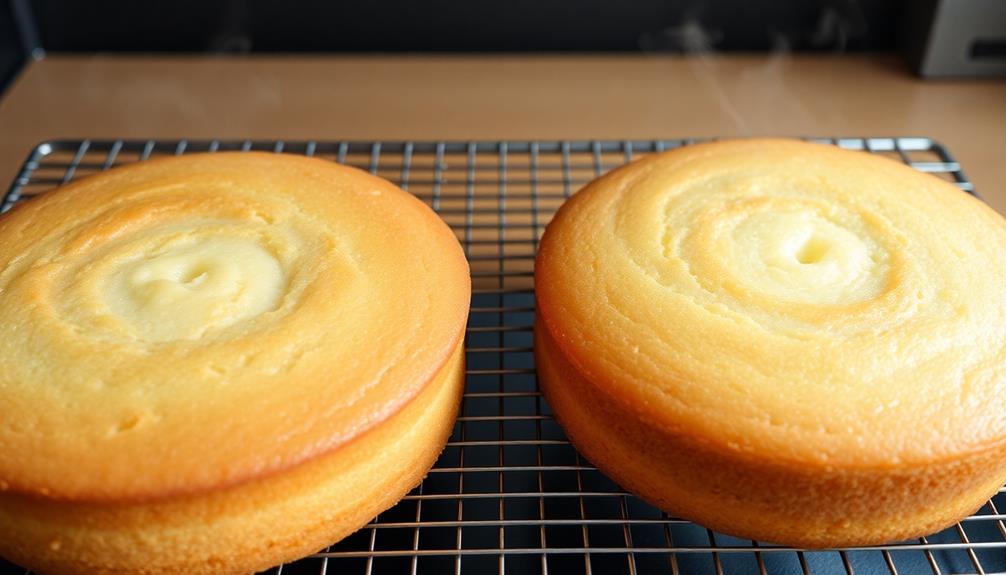
Allow the cakes to cool in the pans for 10 minutes, then transfer to a wire rack to cool completely.
Once the cakes have cooled, prepare the filling. In a large bowl, beat the heavy cream, confectioners' sugar, and vanilla until stiff peaks form.
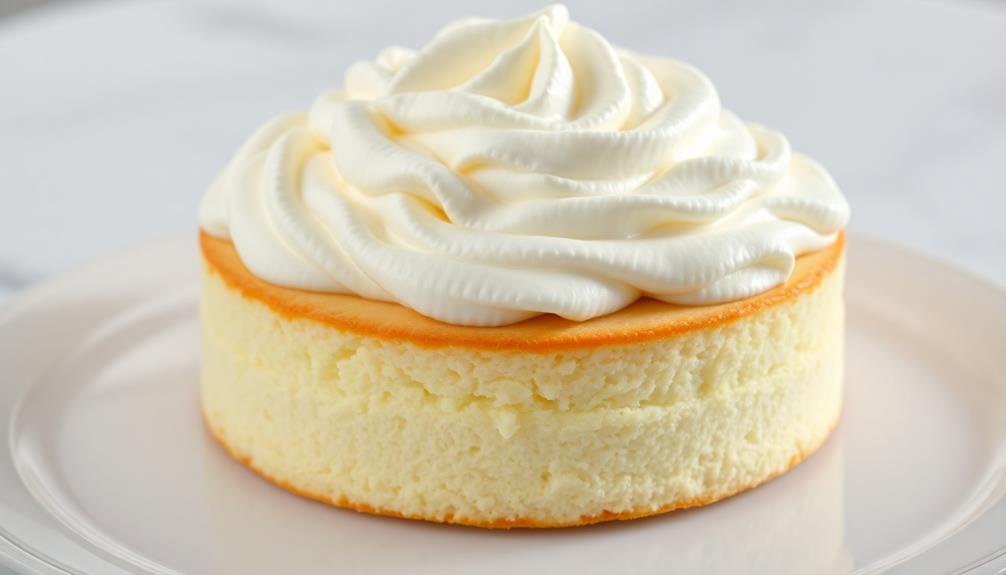
Place one cake layer on a serving plate and spread half of the whipped cream mixture over the top. Top with the second cake layer and spread the remaining whipped cream over the top and sides of the cake.
Refrigerate the cake for at least 2 hours before serving to allow the filling to set.
Tips:
- For a more pronounced flavor, you can substitute the vanilla extract with other extracts like almond or lemon.
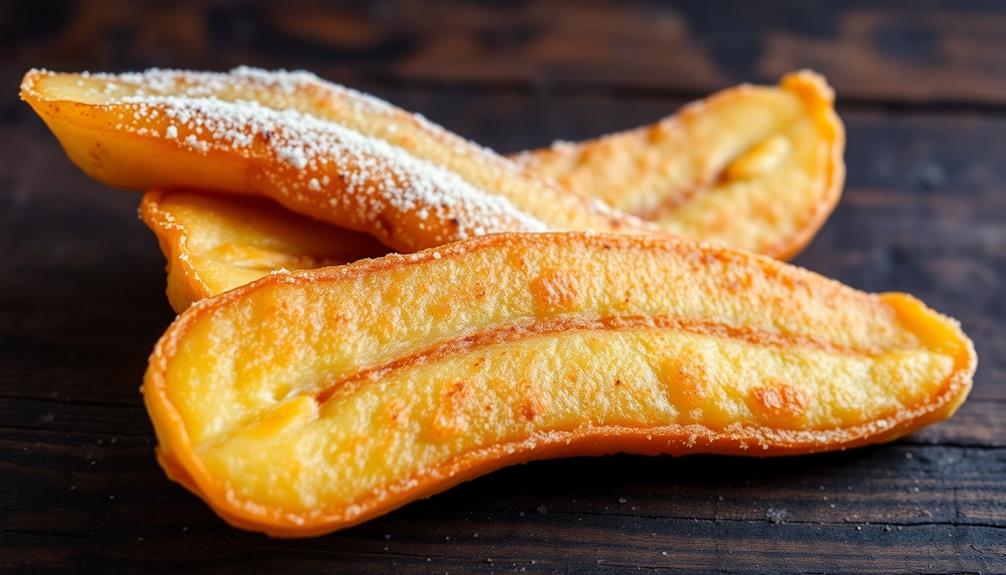
- To make the cake even more moist, you can brush the cake layers with a simple syrup or fruit juice before assembling.
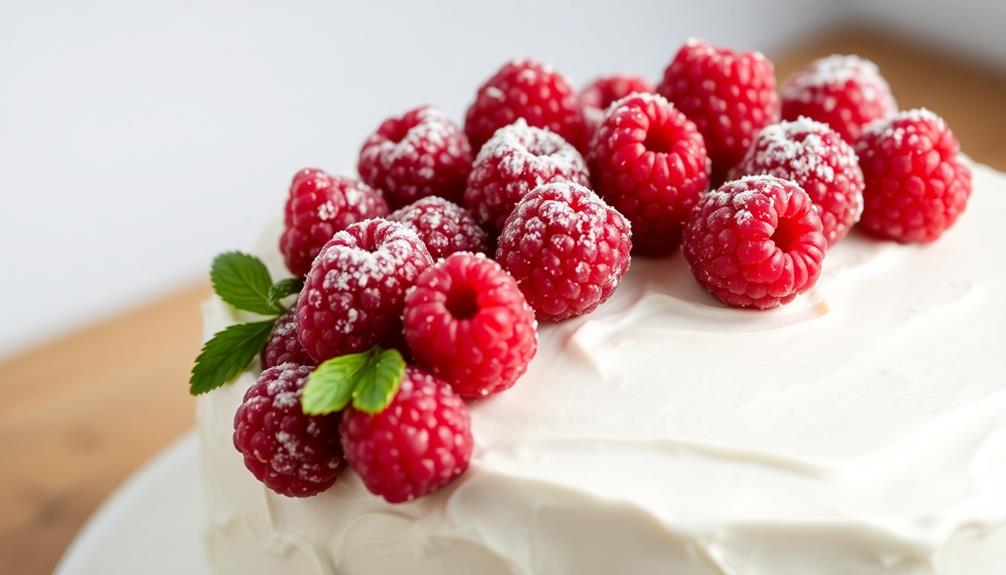
- Garnish the top of the cake with fresh berries or shaved chocolate for a beautiful and tasty presentation.
Cooking Steps
First, you'll need to grease and line your baking pan for the best results.
Next, mix up that delicious batter and get it ready for the oven.
Step 1. Grease and Line Baking Pan
Grease and flour the baking pans to ensure your delicate cake layers release effortlessly once baked. Use a non-stick cooking spray or brush the pans with a thin layer of butter or vegetable oil. Then, lightly dust the greased pans with a sprinkle of all-purpose flour, tapping out any excess. This creates a protective barrier so the cakes won't stick.
Next, line the bottom of each pan with a circle of parchment paper. This extra step guarantees a seamless release when it's time to unmold your beautiful layered cake. Gently press the paper into the pan, smoothing out any wrinkles.
Step 2. Mix the Batter
With your baking pans properly prepared, you can now move on to mixing up the cake batter. In a large mixing bowl, combine the flour, baking powder, salt, and any other dry ingredients the recipe calls for. Give these a good whisk to ensure they're evenly distributed.
Next, crack the eggs into a separate bowl and beat them lightly with a fork. Pour the eggs into the dry ingredients, followed by the milk, melted butter, and any other wet ingredients.
Use a wooden spoon or rubber spatula to gently fold the wet and dry ingredients together until just combined. Be careful not to overmix, as this can result in a tough, dense cake.
Once the batter is ready, it's time to divide it evenly between your prepared pans. Smooth the top of each layer with a spatula to ensure an even bake.
Now your cakes are ready for the oven! Just be sure to keep an eye on them and test for doneness using the toothpick method.
Step 3. Bake Each Layer Individually
Preheat your oven to the temperature specified in the recipe. Once it's nice and hot, grease and flour your cake pans. This step is crucial to ensure your layers come out cleanly from the pans.
Now, pour your batter into the prepared pans, filling them about halfway. Gently tap the pans on the counter to release any air bubbles.
Place the pans in the preheated oven and bake the layers one at a time. This way, each layer will cook evenly and have a delightful, fluffy texture.
Keep a close eye on the cakes as they bake. The timing may vary depending on your oven, so use the toothpick test to check for doneness. When a toothpick inserted into the center comes out clean, your layer is ready.
Carefully remove the pan from the oven and let the cake cool completely before attempting to remove it.
Repeat this process for each layer, allowing the oven to fully preheat between bakes. With a little patience, you'll have perfectly baked layers to assemble your beautiful layered cake.
Step 4. Stack the Layers
Once your cake layers have cooled completely, you can begin stacking them.
First, place the bottom layer on a cake stand or plate. Use a small amount of frosting or jam as "glue" to keep the layer in place. This will ensure your cake stays sturdy as you build it up.
Next, add the second layer on top, aligning it carefully. Gently press down to secure it.
Continue this process, adding a little frosting or jam between each layer. As you stack, be sure to center the layers so your cake maintains an even, straight shape.
Once all the layers are stacked, you can start frosting the outside.
Apply a thin layer of frosting all around the sides and top, creating a smooth surface. This "crumb coat" will help the final layer of frosting adhere nicely.
With your cake now stacked and coated, you're ready to decorate and serve this delightful layered creation!
Step 5. Garnish With Desired Toppings
After stacking your perfectly aligned cake layers, it's time to add the finishing touches. Grab your favorite toppings and get ready to transform your layered creation into a showstopping dessert.
Sprinkle a dusting of powdered sugar over the top, letting it gently fall around the edges for a classic, elegant look. Or, if you're feeling adventurous, try drizzling a rich chocolate ganache or caramel sauce in intricate patterns across the surface.
For a pop of color, arrange fresh berries or sliced fruit in an eye-catching design. The vibrant hues will make your cake stand out on the dessert table.
Don't be afraid to get creative with your garnishes – toasted coconut, chopped nuts, or a sprinkling of edible flowers can all add texture and interest.
Final Thoughts
As you put the final touches on your layered cake, take a moment to reflect on the journey. Baking this showstopper was no easy feat, but the end result is truly worth the effort.
Admire the vibrant colors and precise layers that you've created, a true testament to your skill and patience.
With each slice, your guests will be delighted by the moist, flavorful cake and the delightful textures. The time you spent carefully assembling the layers, frosting, and decorating has paid off.
This layered cake isn't just a dessert – it's a work of art that will leave a lasting impression.
As you savor that first bite, feel a sense of pride and accomplishment. Baking is an art form, and you have mastered it.
Enjoy the well-deserved compliments and the joy of sharing your creation with loved ones. This layered cake is a true labor of love, and you should be proud of what you've achieved. You’ve put so much effort and care into perfecting this delicious dessert, and it’s clear that it has paid off. Your hard work and dedication to this labor of love have truly shone through in every layer. The time and energy you’ve invested in mastering this Indonesian rice cake recipe have truly paid off, and it’s a beautiful thing to see the joy it brings to those who taste it.
Frequently Asked Questions
How Long Does It Take to Make Kue Lapis?
It takes a decent amount of time to make this delectable treat. You'll need to invest around 2-3 hours of hands-on work, plus additional time for baking and cooling. The result is well worth the effort, though!
What Is the Best Way to Store Kue Lapis?
The best way to store your layered cake is to keep it in an airtight container in the fridge. This'll help it stay fresh and prevent it from drying out. Just remember to bring it to room temperature before serving.
Can Kue Lapis Be Frozen?
Yes, you can freeze kue lapis. It'll help extend its shelf life. Just wrap it tightly in plastic or foil and pop it in the freezer. When you're ready to enjoy it, simply thaw it in the fridge.
How Do I Know When Kue Lapis Is Fully Cooked?
You'll know when the cake is fully cooked when the center is firm and a toothpick inserted comes out clean. The top should be lightly browned, and the layers should be set.
Can I Substitute Any Ingredients in the Kue Lapis Recipe?
You can certainly substitute some ingredients in the recipe, but you'll need to be cautious. Swap out ingredients carefully, and test the recipe to ensure the texture and flavor remain consistent with the original.