Indian Meals
Naan
History-rich naan, a beloved Indian flatbread, tantalizes taste buds worldwide. But what’s the secret behind its irresistible fluffiness?
Naan is a soft, fluffy flatbread that's popular in Indian cuisine and loved around the world. You'll find it's perfect for scooping up curries or wrapping around grilled meats. This tasty bread has a rich history, dating back to ancient Persia. To make naan, you'll mix flour, yeast, and yogurt, then let the dough rise overnight. When you're ready to cook, shape the dough into ovals and bake them in a hot tandoor oven or on a griddle. Don't forget to brush your freshly cooked naan with melted butter or ghee for extra flavor! There's so much more to discover about this delightful bread.
Key Takeaways
- Naan is a traditional Indian flatbread known for its soft, pillowy texture and golden-brown exterior.
- It originated in ancient Persia and gained popularity through trade routes across Asia.
- Key ingredients include flour, yeast, yogurt, and ghee, with optional additions like garlic or herbs.
- Traditionally cooked in a tandoor oven, naan can also be made on a stovetop or in a regular oven.
- Naan is versatile, pairing well with various dishes or enjoyed as a standalone snack.
History
The origins of naan stretch back thousands of years. You'll find this delicious flatbread has a long and fascinating history that's as rich as its flavor. Naan's story begins in ancient Persia, where it was first baked in hot tandoor ovens. As trade routes expanded, so did naan's popularity. It traveled across Asia, becoming a staple in many cultures.
You might be surprised to learn that naan wasn't always the fluffy bread you know today. Early versions were much flatter and denser. Over time, bakers discovered that adding yeast or baking powder made the dough rise, creating the soft, pillowy texture we love.
In India, naan became a favorite at the royal courts of the Mughal emperors. It was considered a luxury food, often served with rich curries and kebabs.
As you explore naan's history, you'll see how it's evolved from a royal treat to a beloved everyday bread. Today, you can find naan in restaurants and homes around the world, each region adding its own unique twist to this ancient recipe.
Recipe
Naan is a beloved Indian flatbread that has gained popularity worldwide for its soft, pillowy texture and delicious flavor. Traditionally baked in a tandoor oven, this versatile bread can also be made at home using a regular oven or stovetop method. The key to achieving the perfect naan lies in the dough preparation and cooking technique.
This recipe provides a simple yet authentic method for making naan at home. While it may not replicate the exact taste of tandoor-baked naan, it comes remarkably close and allows you to enjoy freshly made naan anytime. The dough is enriched with yogurt, which adds tenderness and a slight tang to the bread, while the addition of ghee or butter gives it a rich flavor and helps achieve those characteristic brown spots.
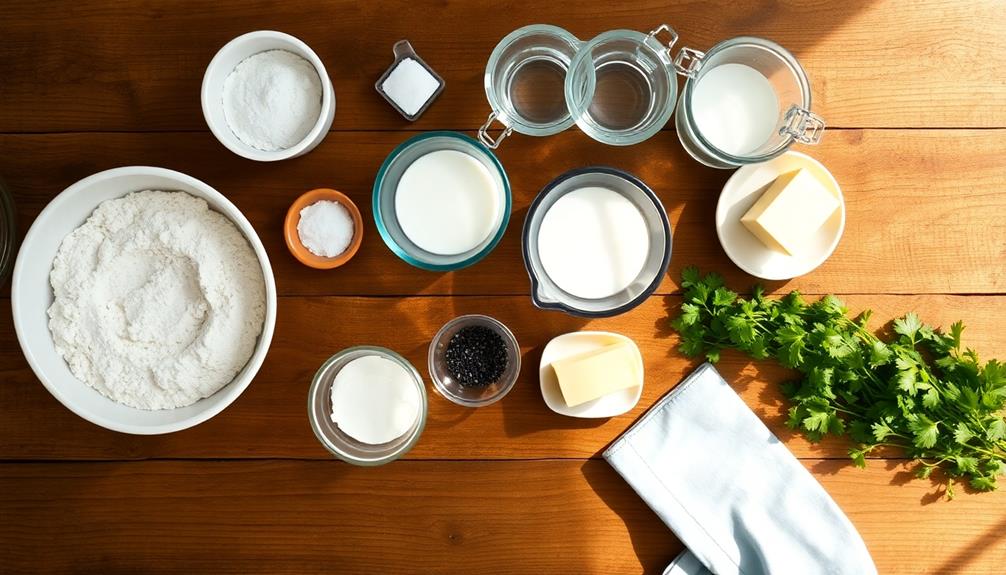
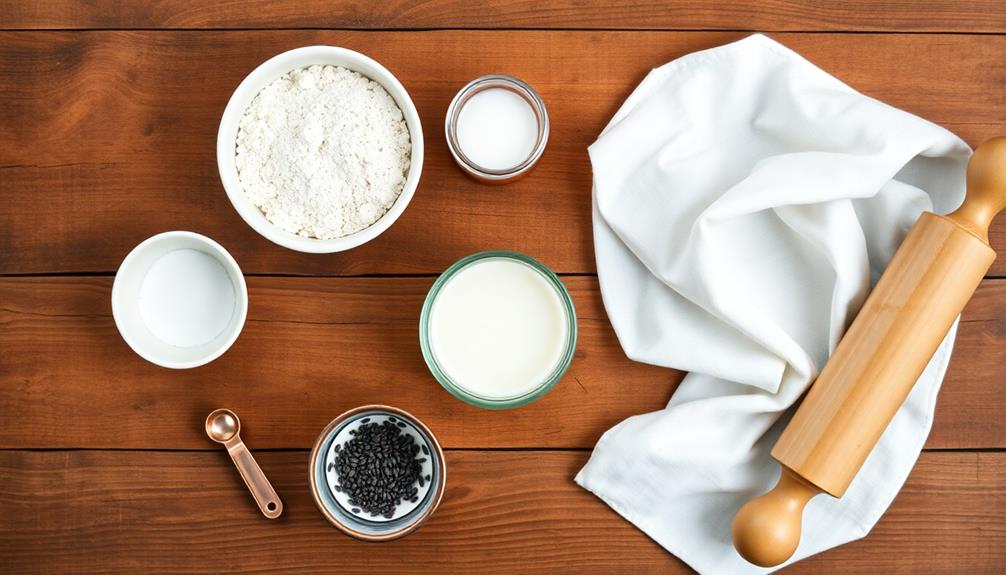
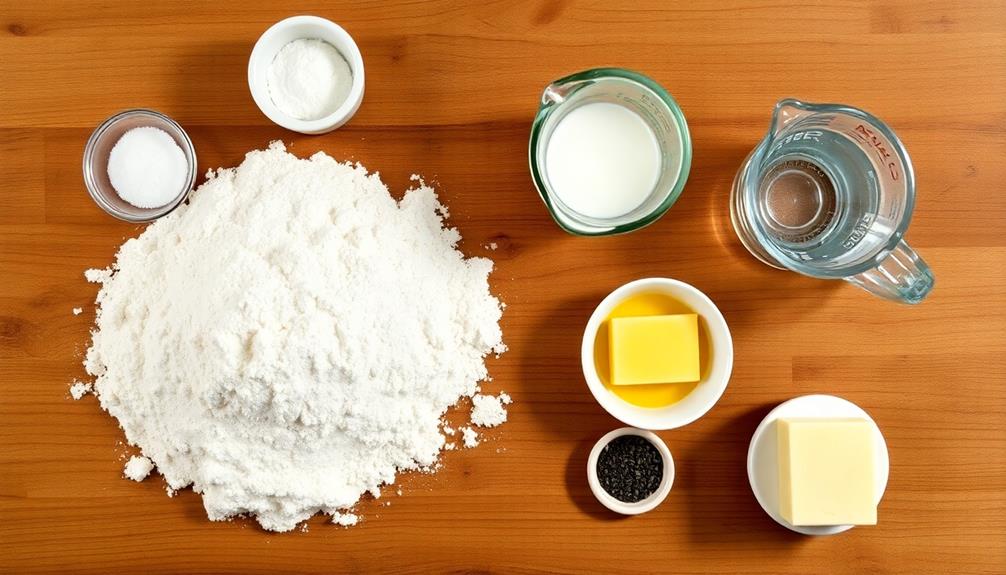
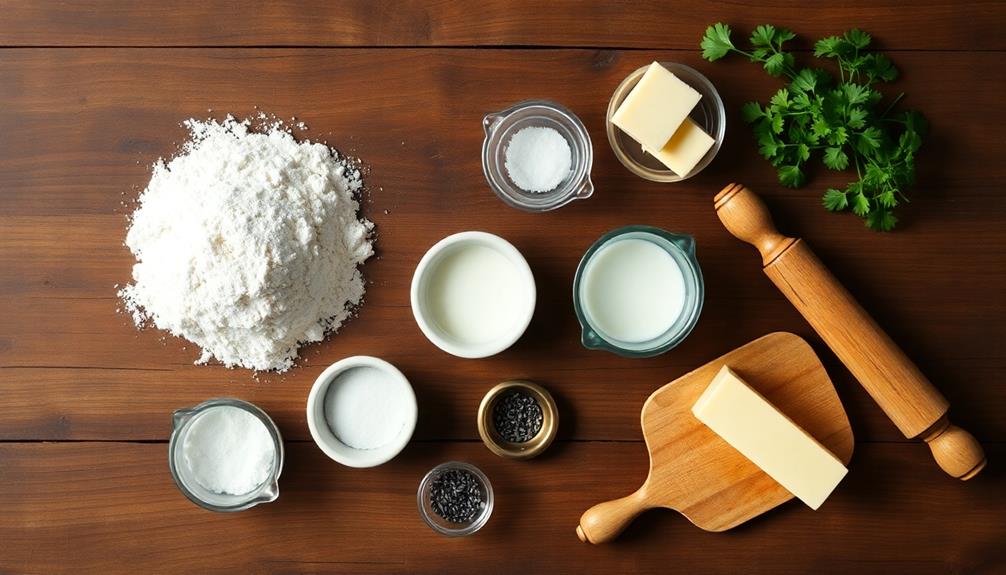
- 3 cups all-purpose flour
- 1 tsp active dry yeast
- 1 tsp sugar
- 1 tsp salt
- 1/4 cup plain yogurt
- 2 tbsp ghee or melted butter
- 3/4 cup warm water
- 1 tbsp nigella seeds (optional)
- Extra ghee or butter for brushing
To make naan, start by activating the yeast in warm water with sugar. In a large bowl, mix the flour and salt, then add the activated yeast mixture, yogurt, and ghee. Knead the dough until smooth and elastic, about 8-10 minutes. Cover and let it rise in a warm place for 1-2 hours.
Divide the dough into 8 portions and roll each into an oval shape. Sprinkle with nigella seeds if desired. Preheat a heavy skillet or griddle over high heat. Cook each naan for 1-2 minutes on each side until puffy and spotted with brown bubbles. Brush with melted ghee or butter immediately after cooking.
For best results, ensure your cooking surface is very hot before adding the naan. If using an oven, preheat it to its highest setting with a baking stone or inverted baking sheet inside. Slap the naan onto the hot surface and cook for 1-2 minutes until bubbled and browned.
You can also try adding flavors like minced garlic or chopped herbs to the dough for variety. Serve the naan warm, and if not eating immediately, wrap in a clean kitchen towel to keep soft.
Cooking Steps
Let's explore the exciting process of making naan!
You'll start by mixing flour and yeast, then knead the dough until it's smooth and let it rise overnight for the best flavor.
Once your dough is ready, you'll shape it into rounds and cook them in a traditional tandoor oven, giving your naan that authentic taste and texture.
Step 1. Mix Flour and Yeast
To begin crafting your naan dough, you'll need to combine the flour and yeast. First, grab a large mixing bowl and pour in about 3 cups of all-purpose flour. Make a small well in the center of the flour, and that's where you'll add your yeast. For this recipe, you'll want to use active dry yeast, about 1 teaspoon.
Now, it's time to wake up those tiny yeast organisms! Add a tablespoon of sugar to the well; this will give the yeast something to munch on. Next, pour in half a cup of warm water. The water should feel comfortably warm to your touch, not hot.
Gently stir the yeast mixture and let it sit for about 5 minutes. You'll know it's ready when you see little bubbles forming on top.
Once your yeast is bubbly, it's time to mix everything together. Use your hands or a wooden spoon to combine the flour with the yeast mixture. Don't worry if it looks a bit messy at first; that's perfectly normal!
Keep mixing until all the flour is incorporated and you've got a shaggy dough.
Step 2. Knead Dough Until Smooth
Kneading transforms your shaggy dough into a smooth, elastic ball. It's time to get your hands dirty! Flour your work surface lightly and turn out the dough. Use the heel of your hand to push the dough away from you, then fold it back over itself. Give it a quarter turn and repeat. You'll feel the dough changing as you work it.
Keep kneading for about 8-10 minutes. It's a bit of a workout, but it's worth it! As you knead, the gluten in the flour develops, giving your naan its signature chewy texture.
You'll know you're done when the dough feels smooth and springy. If you poke it gently, it should bounce back.
If the dough gets sticky, don't worry. Just dust your hands with a little more flour. Remember, practice makes perfect. The more you make naan, the better you'll get at knowing when the dough is just right.
Once it's smooth, form it into a ball. You're now ready for the next step in your naan-making adventure!
Step 3. Let Dough Rise Overnight
After kneading, your dough is ready for its beauty sleep. Now it's time to let it rest and grow overnight. Grab a large, clean bowl and lightly oil it to prevent sticking. Place your dough ball in the bowl and cover it with a damp cloth or plastic wrap. This will keep the dough moist and allow it to rise properly.
Find a warm, draft-free spot in your kitchen for the dough to rest. The ideal temperature is around 70-75°F (21-24°C). You'll want to let it sit for at least 8 hours, but overnight is best.
During this time, the yeast will work its magic, causing the dough to double in size and develop those delicious flavors we love in naan.
In the morning, you'll wake up to a puffy, risen dough that's full of tiny air bubbles. These bubbles will help create that light, fluffy texture we're aiming for.
Don't worry if it's risen a lot – that's exactly what we want! Your patience will be rewarded with perfectly textured naan bread.
Step 4. Shape Dough Into Rounds
The next step in your naan-making journey involves shaping the dough into rounds. After your dough has risen overnight, it's time to get your hands a little messy! Gently punch down the dough to release the air, then turn it out onto a lightly floured surface.
You'll want to divide the dough into 8 to 10 equal portions, depending on how big you'd like your naan to be.
Now, here's where the fun begins! Take each portion and roll it into a ball using your palms. Don't worry if they're not perfect – that's part of the charm of homemade naan.
Once you've got your dough balls, it's time to flatten them. Use a rolling pin to roll each ball into an oval shape, about 1/4 inch thick. If the dough sticks, just sprinkle a bit more flour on your surface.
Remember, the irregular shape adds character to your naan, so don't stress about making them perfectly round. As you shape each piece, set it aside on a lightly floured tray or board.
You're now ready for the next exciting step in creating your delicious naan!
Step 5. Cook in Tandoor Oven
Now that you've shaped your naan rounds, it's time to fire up the tandoor oven. This special clay oven gets incredibly hot, creating the perfect environment for baking naan. After carefully placing the naan rounds inside the tandoor oven, you can start preparing the traditional recipe for rogan josh. This aromatic and flavorful curry dish typically includes tender pieces of meat cooked in a rich, spicy sauce. Using authentic spices and cooking techniques, you can create a rogan josh that perfectly complements the freshly baked naan. The combination of these two traditional dishes will surely transport you to the vibrant streets of India.
If you don't have a tandoor, don't worry! You can use a regular oven with a pizza stone or a cast-iron skillet on the stovetop.
Once your tandoor is hot, carefully slap the naan dough onto the inside walls. The dough will stick to the surface, and you'll see it start to bubble and puff up.
Keep an eye on your naan as it cooks quickly, usually in just 1-2 minutes. The intense heat will give your bread those signature charred spots and a crispy exterior while keeping the inside soft and fluffy.
When the naan is golden brown with dark spots, it's ready to come out. Use long-handled tongs to remove the bread from the oven walls. Be careful, as the tandoor is extremely hot!
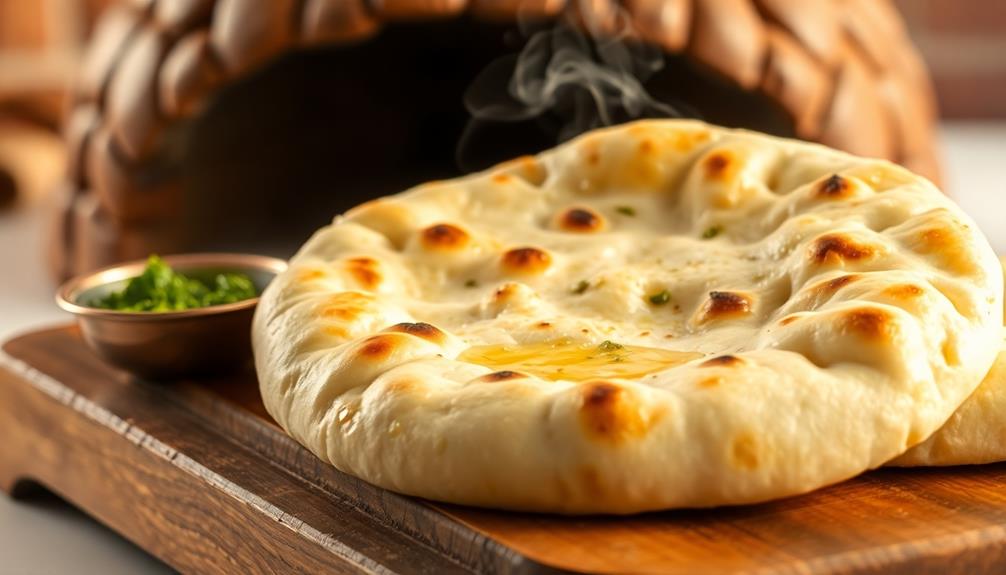
Place your freshly baked naan on a plate and brush it with melted butter or ghee for extra flavor. Your homemade naan is now ready to enjoy with your favorite curry or as a delicious snack on its own.
Final Thoughts
Exploring the world of naan reveals a bread that's both simple and complex. As you've learned, this versatile flatbread has a rich history and countless variations. You can enjoy naan in many ways, from a humble accompaniment to curries to a standalone snack.
It's amazing how a few basic ingredients can transform into such a delicious and satisfying bread.
Remember, while traditional naan is cooked in a tandoor oven, you can still make delicious versions at home using your regular oven or stovetop. Don't be afraid to experiment with different toppings and flavors to find your favorite combination.
Whether you prefer it plain, garlic-infused, or stuffed with savory fillings, there's a naan for every taste.
Next time you're at an Indian restaurant or trying your hand at home cooking, give naan a try. You'll discover why it's beloved across many cultures.
Its soft, pillowy texture and slightly charred exterior make it the perfect vehicle for scooping up sauces or wrapping around grilled meats.
Enjoy your naan adventure, and savor every bite of this timeless bread!
Frequently Asked Questions
Can Naan Be Frozen for Later Use?
You can definitely freeze naan for later use. It's a great way to extend its shelf life. Just wrap it tightly in plastic wrap or aluminum foil, then place it in a freezer bag. It'll stay fresh for up to three months.
Is Naan Suitable for People With Gluten Intolerance?
You shouldn't eat traditional naan if you're gluten intolerant. It's typically made with wheat flour, which contains gluten. However, you can find gluten-free versions made with alternative flours like rice or almond flour.
How Long Does Homemade Naan Stay Fresh?
You'll find homemade naan stays fresh for about 2-3 days at room temperature. Store it in an airtight container or plastic bag. For longer storage, freeze it for up to 2 months. Reheat before serving.
What Are Some Popular Naan Variations in Different Regions?
You'll find diverse regional variations of this flatbread. In India, you'll encounter garlic naan, butter naan, and cheese naan. Afghani naan is thicker, while Peshawari naan is stuffed with nuts and fruits. Turkish pide is another popular variation.
Can Naan Be Made Without a Tandoor Oven at Home?
Yes, you can make naan at home without a tandoor oven. You'll need a hot skillet or cast-iron pan. Preheat it on high, then cook your naan for 1-2 minutes per side until puffed and golden.
Priya is the spice queen of Cook if Ya, specializing in vibrant Indian street food and traditional meals. Her recipes are full of bold flavors and colorful spices, bringing the excitement of Indian markets to your home kitchen. She loves to show how simple, everyday meals can be elevated with the right blend of spices.
Indian Meals
Tandoori Chicken Pizza: Indian-Italian Fusion
Indulge in a tantalizing fusion of smoky tandoori chicken and melted mozzarella on a crisp, golden-brown crust for a savory delight that’ll leave you craving more.
Get ready to embark on a delicious fusion journey! Tandoori Chicken Pizza brings together the smoky, spicy flavors of Indian tandoori chicken and the comforting delight of classic Italian pizza. You'll start by marinating juicy chicken in a blend of aromatic spices, then layer it onto a crisp, golden-brown pizza crust. Top it off with melty mozzarella cheese for a creamy finish that'll make your taste buds dance. This unique dish combines the best of both culinary worlds, offering a satisfying crunch and a burst of flavors that'll leave you craving more. Intrigued? There's much more to discover about this captivating fusion creation.
Key Takeaways
- Tandoori Chicken Pizza combines the smoky, aromatic spices of Indian cuisine with the cheesy, crisp base of classic Italian pizza.
- The dish features tandoori-marinated chicken as the primary topping, providing a unique blend of flavors and textures.
- The fusion of Indian and Italian culinary traditions showcases the growing trend of cross-cultural culinary creativity and exploration.
- Preparation involves marinating the chicken in a blend of yogurt, lemon juice, and tandoori spices before baking the pizza.
- The combination of the spicy tandoori chicken, melted mozzarella cheese, and crispy pizza crust offers a satisfying and flavorful dining experience.
History
Tandoori chicken has been a beloved dish in India for centuries, originating from the northern region where the distinctive tandoor oven is commonly used. This traditional clay oven, heated with charcoal or wood, cooks the chicken to perfection, giving it a unique smoky flavor and juicy tenderness.
Over time, the popularity of tandoori chicken grew, and it became a staple in Indian cuisine.
As the world becomes more connected, the delicious flavors of tandoori chicken have found their way into an unexpected fusion – the tandoori chicken pizza! By combining the spices and cooking method of this iconic Indian dish with the classic Italian pizza, a delightful culinary collaboration was born.
The result is a harmonious blend of cultures, where the heat and complexity of tandoori chicken perfectly complements the crispy crust and melted cheese of the pizza. This innovative creation has captured the hearts and taste buds of people around the globe, proving that culinary boundaries can be beautifully blurred.
Recipe
Tandoori Chicken Pizza is a delightful fusion of Indian and Italian cuisine. The spicy and flavorful tandoori chicken is the perfect topping for a crisp and cheesy pizza base. This dish combines the rich, aromatic spices of tandoori with the comforting familiarity of a classic pizza.
To create this masterpiece, you'll need to prepare the tandoori chicken first, then assemble and bake the pizza. The result is a unique and satisfying meal that will impress your taste buds and your guests.
Ingredients:
- Boneless, skinless chicken thighs
- Yogurt
- Lemon juice
- Garlic cloves
- Ginger
- Garam masala
- Chili powder
- Salt
- Pizza dough
- Mozzarella cheese
- Tomato sauce
- Cilantro (for garnish)
Instructions:
Marinate the chicken in a mixture of yogurt, lemon juice, garlic, ginger, garam masala, chili powder, and salt. Refrigerate for at least 30 minutes or up to 24 hours.
Preheat your oven to 400°F (200°C). Roll out the pizza dough and spread the tomato sauce over the surface. Arrange the marinated tandoori chicken on top, followed by shredded mozzarella cheese.
Bake the pizza for 15-20 minutes, or until the crust is golden brown and the cheese is melted and bubbly.
To ensure the best results, make sure to marinate the chicken thoroughly and allow the flavors to meld. For an extra burst of flavor, garnish the pizza with fresh cilantro before serving. Enjoy your Tandoori Chicken Pizza!
Cooking Steps
First, you'll need to marinate the chicken in a blend of tantalizing tandoori spices.
Next, bake the pizza crust until it's perfectly crispy.
Then, spread the flavorful tandoori chicken on the crust and top it with melty mozzarella cheese.
Step 1. Marinate Chicken in Tandoori Spices
To begin the marinating process, gather the necessary tandoori spices. You'll need some zesty ginger, fragrant garlic, and a sprinkle of spicy cayenne pepper.
Don't forget the vibrant paprika, earthy cumin, and aromatic coriander. Combine these flavorful ingredients in a bowl, then add a dollop of tangy yogurt. Stir everything together until it forms a smooth, fragrant paste.
Next, place your chicken pieces in a shallow dish and generously coat them with the tandoori marinade. Make sure each piece is evenly covered, so the flavors can really soak in.
Cover the dish and pop it in the fridge for at least an hour, or up to overnight. The longer you let the chicken marinate, the more intense the tandoori flavor will be.
When you're ready to bake, preheat your oven and get ready to enjoy the delicious aromas of your tandoori-marinated chicken.
Soon, you'll have juicy, flavorful chicken ready to top your homemade Tandoori Chicken Pizza!
Step 2. Bake Pizza Crust Until Crispy
With the flavorful tandoori-marinated chicken ready, it's time to turn your attention to the pizza crust. Preheat your oven to a toasty 450°F (230°C) and let's get baking!
Spread the pizza dough out on a lightly floured surface, using your hands to stretch and shape it into a large, thin circle. Transfer the dough to a baking sheet or pizza pan, being careful not to tear it.
Pop the crust into the oven and let it bake for 8-10 minutes, until it's golden brown and crispy around the edges. You'll know it's ready when you can smell the delicious aroma of freshly baked bread wafting through your kitchen.
Once the crust is perfectly crispy, it's time to top it with the tandoori chicken and other tasty ingredients. Get ready to enjoy a mouthwatering fusion of Indian and Italian flavors in every bite!
Step 3. Spread Tandoori Chicken on Pizza Crust
Take the crispy pizza crust and evenly spread the flavorful tandoori-marinated chicken over the top.
The rich, reddish-orange hue of the spiced chicken creates a vibrant contrast against the golden-brown crust. Inhale the tantalizing aromas of ginger, garlic, and warm spices as you layer the chicken across the surface.
Be sure to cover the entire crust, leaving no bare spots, so each bite will be bursting with flavor. The tender, juicy chunks of chicken will add a satisfying texture and heartiness to the pizza.
Imagine how the savory, slightly smoky tandoori seasoning will complement the gooey mozzarella cheese and fresh toppings you’ll add next. Once the tandoori seasoning is sprinkled over the mozzarella and toppings, the flavors will meld together perfectly, creating a truly delicious and unique dish. You can then pair this with some freshly baked bread or a side of french stuffed tomatoes for a complete and satisfying meal. The tandoori seasoning will add an extra depth of flavor to the tomatoes, making them an irresistible accompaniment to your cheesy, savory creation.
With the foundation of the crisp crust and the fragrant tandoori chicken, you're well on your way to creating an incredible fusion of Indian and Italian flavors in every slice.
Step 4. Top With Mozzarella Cheese
Next, generously sprinkle the shredded mozzarella cheese over the tandoori chicken. You'll love how the creamy, melted cheese perfectly complements the bold, spicy flavors of the tandoori chicken. As the cheese melts, it forms a delightful, gooey layer that binds everything together.
Can you already imagine the aroma wafting through your kitchen? The blend of savory spices and the comforting scent of melted cheese is simply mouthwatering. Be sure to cover the entire surface of the pizza, leaving no bare spots. The more cheese, the better!
Once the cheese is evenly distributed, your pizza is ready for the oven. As it bakes, the cheese will bubble and brown, creating a beautiful, golden crust. You'll know it's done when the cheese is fully melted and the edges are crispy.
Can't you just picture that perfect slice, with the stringy cheese and tender chunks of tandoori chicken? Get ready for an explosion of flavors in every bite!
Step 5. Bake Pizza Until Cheese Melts
Preheat your oven to the recommended temperature, typically around 400°F (200°C).
Once your oven is nice and toasty, it's time to pop that pizza in! Slide the prepared pizza onto the middle rack and let it bake for 12-15 minutes. You'll know it's ready when the cheese has melted into a gooey, golden blanket over the top.
Keep an eye on it, as the cooking time may vary depending on your oven. The crust should become lightly crisp and the cheese should be deliciously melted. Mmm, can you already smell the aroma of the tandoori spices and the bubbling cheese? It's going to be a real treat!
When the timer goes off, carefully remove the pizza from the oven using oven mitts. The pan will be hot, so be extra careful.
Let the pizza cool for a minute or two before slicing into it. That way, the cheese has a chance to set and you won't end up with a sloppy, drippy mess!
Final Thoughts
Crafting the perfect Tandoori Chicken Pizza requires a delicate balance of flavors and textures. The smoky, aromatic spices of the tandoori marinade perfectly complement the melty, creamy mozzarella cheese. The juicy, tender chicken adds a wonderful heartiness, while the crisp, golden-brown crust provides a satisfying crunch with every bite.
As you take that first mouthwatering slice, you'll be transported to the vibrant streets of India, where the scent of tandoori spices fills the air. But then, the familiar comforts of a classic pizza bring you right back home.
It's a culinary adventure that combines the bold, exotic tastes of the East with the beloved traditions of the West. When the last crumb disappears, you'll be left with a smile on your face and a deep sense of satisfaction.
This Tandoori Chicken Pizza isn't just a meal – it's a delicious fusion of cultures that celebrates the endless possibilities of the culinary world.
Frequently Asked Questions
Can I Use Other Types of Cheese Besides Mozzarella?
Absolutely! You can use other types of cheese besides mozzarella for your pizza. Experiment with cheddar, Parmesan, or even a blend of cheeses to add different flavors and textures to your creation.
Is It Possible to Make This Pizza Vegetarian?
You can certainly make this pizza vegetarian. Replace the tandoori chicken with roasted vegetables like bell peppers, onions, and mushrooms. You can also incorporate paneer, a fresh Indian cheese, to add creaminess and protein to the dish.
How Long Can the Leftover Pizza Be Stored?
You can store the leftover pizza in the refrigerator for up to 3-4 days. Make sure to wrap it tightly or place it in an airtight container to prevent it from drying out or absorbing other food odors.
Can I Use Pre-Cooked Chicken for This Recipe?
You can definitely use pre-cooked chicken for this recipe. It'll save you time and still give you the delicious flavor you're looking for. Just be sure to reheat the chicken thoroughly before assembling and baking your pizza.
Is It Necessary to Marinate the Chicken Overnight?
While marinating the chicken overnight can enhance the flavor, it's not absolutely necessary. You can use pre-cooked chicken and simply season it with the tandoori spices before assembling the pizza. This will still result in a tasty dish.
Priya is the spice queen of Cook if Ya, specializing in vibrant Indian street food and traditional meals. Her recipes are full of bold flavors and colorful spices, bringing the excitement of Indian markets to your home kitchen. She loves to show how simple, everyday meals can be elevated with the right blend of spices.
Indian Meals
Indian Vada Pav: Mumbai’s Favorite Snack
Juxtaposing the savory, crispy potato patty and the soft, fluffy bread bun, vada pav captivates the taste buds as the iconic street food of Mumbai.
You'll love vada pav – it's Mumbai's most iconic street food! This tasty snack combines a soft, fluffy bread bun with a savory, crispy potato patty called a vada. The key is balancing the spices, which can include cumin, coriander, and chilies, to create that perfect blend of flavors. Vendors serve up these delightful bites fresh from their carts, creating a lively atmosphere. What makes vada pav so special is how it showcases the diversity and ingenuity of India's vibrant street food culture. Want to learn more about the history and how to make this beloved Mumbai treat?
Key Takeaways
- Vada Pav is a popular street food originating in Mumbai during the 1960s, combining a savory potato patty (vada) in a soft bread bun (pav).
- The key ingredients include boiled potatoes, onions, green chilies, and a blend of spices like cumin, coriander, and asafoetida.
- The preparation involves soaking and grinding chana dal, shaping the paste into patties, and deep-frying them to achieve a crispy texture.
- Vada Pav is customizable with various chutneys and condiments, offering a range of flavors and making it a versatile street food.
- Vada Pav is deeply ingrained in Mumbai's vibrant street food culture, representing the city's culinary diversity and serving as a gateway to Indian cuisine.
History
The origins of the beloved Indian street food, Vada Pav, can be traced back to the bustling streets of Mumbai, where it has become a cultural icon. The delicious dish was first created in the 1960s by ingenious street vendors who wanted to offer a tasty and affordable meal to the city's busy workers.
They combined a fluffy white bread bun, known as a pav, with a savory fried potato patty called a vada, creating a mouthwatering combination that quickly gained popularity.
Over the years, Vada Pav has evolved, with vendors experimenting with different spices and fillings to tantalize the taste buds of their customers.
Today, you'll find Vada Pav stalls on every corner, each one offering its own unique spin on this beloved snack. Whether you prefer it spicy, tangy, or served with an array of chutneys, Vada Pav has become an integral part of Mumbai's vibrant street food culture, delighting locals and visitors alike.
Recipe
Vada Pav is a popular Indian street food originating from the state of Maharashtra. It consists of a spiced and deep-fried potato patty, known as a "vada," served in a soft, bread-based bun or pav. This dish is a beloved snack that combines savory, tangy, and spicy flavors, making it a quintessential part of Mumbai's vibrant food culture.
The recipe for vada pav is straightforward, allowing home cooks to recreate this iconic street food with ease. The key to a delicious vada pav lies in the perfect balance of spices and the crisp texture of the vada, complemented by the soft, pillowy pav.
Ingredients:
- Potatoes, boiled and mashed
- Onion, finely chopped
- Green chili, finely chopped
- Garlic, minced
- Cumin powder
- Coriander powder
- Red chili powder
- Asafoetida (hing)
- Salt
- Oil for deep frying
- Pav (soft, bread-based buns)
To prepare the vada pav, start by mixing the mashed potatoes, onion, green chili, garlic, cumin powder, coriander powder, red chili powder, asafoetida, and salt in a bowl until well combined.
Form the mixture into small, round patties. Heat oil in a deep-frying pan or wok, and carefully add the vada one by one, frying them until golden brown and crispy. Drain the fried vada on a paper towel-lined plate.
To serve, slice the pav horizontally, place the fried vada inside, and top it with your desired chutneys or condiments, such as green chutney, sweet tamarind chutney, or spicy garlic chutney.
Enjoy the vada pav while it's hot and crispy, savoring the perfect balance of flavors and textures.
Cooking Steps
First, you'll need to soak the chana dal overnight so it's nice and soft.
Then, grab your blender and grind that soaked dal into a smooth paste.
Now, it's time to form the vada patties – use your hands to shape the mixture into round, flat discs.
Get ready to fry – heat up some oil in a pan and carefully add those vada. Fry them until they're golden brown, then serve the hot, crispy vada nestled inside soft, fluffy pav.
Step 1. Soak Chana Dal Overnight
Begin by soaking the chana dal overnight.
You'll want to rinse the little yellow lentils and then let them soak in enough water to cover them. This softens them up, making them perfect for the vada pav.
As they soak, the chana dal will slowly expand and become nice and tender.
In the morning, you can drain off the water and give the lentils a quick rinse. They're now ready to be ground into a smooth batter.
The soaking step is key – it ensures your vada pav will have the perfect fluffy texture.
Once the chana dal has soaked, you're one step closer to whipping up this tasty Mumbai street food.
Just wait until you bite into that crispy, golden vada nestled in a soft pav bun.
Mmmm, your taste buds are in for a real treat!
Step 2. Grind Soaked Dal Into Paste
After draining the soaked chana dal, go ahead and grind it into a smooth, lump-free paste. You can use a blender or a food processor to do this – just be sure to add a little water as needed to get the consistency just right. It should be thick, but still easy to stir.
Next, take a look at the paste and give it a good whiff. Mmm, can you smell those earthy, nutty aromas? That's the wonderful flavor of the chana dal coming through.
Now, it's time to get your hands a little dirty and shape the paste into small, round balls. Don't be afraid to really dig in there and mold them into perfect little vada shapes.
Once you've got your vadas all ready to go, it's time to get them cooking. Grab a pan and heat up some oil – you want it nice and hot so the vadas can sizzle and turn a beautiful golden brown.
Carefully lower them into the oil and let them cook until they're crispy and delicious. Get ready for the mouthwatering aroma to fill your kitchen!
Step 3. Form Vada Patty
Go ahead and scoop out small portions of the ground chana dal paste. Use your hands to gently form the paste into smooth, round vada patties, about 2-3 inches wide.
Make sure to pat and shape them firmly, but avoid squeezing too tightly. These little vada will puff up and get nice and crispy when you fry them, so don't worry if they seem a bit delicate at first.
Next, get your oil nice and hot in a pan or wok. Carefully slide the vada patties into the sizzling oil and let them cook for a couple of minutes until the bottoms turn golden brown.
Flip them over and fry the other side until they're evenly crispy all around. Mmm, can you just imagine the incredible aroma wafting through your kitchen?
These little vada are going to be absolutely irresistible!
Step 4. Heat Oil, Fry Vada
With the vada patties ready, it's time to bring them to life. Heat a generous amount of oil in a deep skillet over medium-high heat. Once the oil is shimmering, gently lower the vada patties into the hot oil. Fry them until they're a beautiful golden-brown color, about 2-3 minutes per side. The aroma of the crispy, spiced vada will fill your kitchen, making your mouth water in anticipation.
Fry the vada in batches to ensure they cook evenly and don't overcrowd the pan. Use a slotted spoon to carefully flip and remove them from the oil. Drain the fried vada on a paper towel-lined plate to remove any excess oil.
Now you have perfectly crispy vada, ready to be assembled into the iconic vada pav! The contrast of the soft, pillowy bun and the crunchy, flavorful vada is what makes this Mumbai street food so irresistible.
Step 5. Serve Vada in Pav
Once the vada are fried to perfection, it's time to assemble the vada pav.
Grab a soft, pillowy pav bun and slice it in half, creating a fluffy little pocket. Carefully place the golden-brown vada inside, nestling it snugly.
Now, it's time to dress up your vada pav! Drizzle a tangy, sweet-and-sour green chutney over the vada, letting it soak in those delightful flavors. Don't forget to add a pinch of spicy red garlic-chili chutney for an extra kick.
Finally, sprinkle some crisp, crunchy sev on top, adding a satisfying texture. Your vada pav is now ready to be savored!
Take a big bite and feel the soft pav, the crispy vada, and the burst of flavors dancing on your tongue. It's a taste of Mumbai street food magic that's sure to delight your senses.
Enjoy this iconic Indian snack to the fullest!
Final Thoughts
The vada pav, a beloved Indian street food, is a testament to the country's rich culinary heritage. As you've discovered, this delightful snack is more than just a fried potato patty in a soft, fluffy bun.
It's a harmonious blend of flavors and textures that has captivated the hearts and taste buds of people across India and beyond. This iconic dish has become a household favorite, cherished for its simplicity and versatility. The idli and sambar breakfast offers a delightful contrast, with the soft, spongy idli pairing perfectly with the tangy, spicy sambar. It’s a comforting and nourishing start to the day, enjoyed by both the young and old alike.
Whether you're savoring the spicy, crunchy vada or relishing the soft, pillowy pav, each bite is a delightful experience. The versatility of this dish allows you to customize it to your liking, adding chutneys, spices, or even experimenting with different fillings.
The vada pav is truly a culinary treasure that showcases the ingenuity and creativity of Indian street food culture.
As you bid farewell to this delectable journey, remember that the vada pav is more than just a snack; it's a symbol of unity, community, and the enduring spirit of Mumbai's vibrant food scene.
Embrace the vada pav as a gateway to exploring the rich diversity of Indian cuisine.
Frequently Asked Questions
Are Vada Pav Gluten-Free?
No, vada pav isn't typically gluten-free. The pav, or bun, contains wheat flour, which has gluten. However, you could try making a gluten-free version by using a gluten-free bread or bun instead of the traditional pav.
How Long Do Vada Pav Last?
Freshly made vada pav are best enjoyed immediately, but they'll last up to 2 days when stored in an airtight container in the fridge. Reheating them can help revive their crispy exterior and soft interior.
Can Vada Pav Be Frozen?
Yes, you can freeze vada pav. Simply place the cooked vada and pav separately in airtight containers or freezer bags, and they'll stay fresh for up to 2-3 months in the freezer. When ready to eat, simply reheat and assemble.
What Are the Best Accompaniments for Vada Pav?
When it comes to the best accompaniments for vada pav, you can't go wrong with a tangy tamarind chutney, a spicy green chutney, or a crisp salad. These condiments perfectly complement the savory and flavorful vada pav.
Where Can I Find the Best Vada Pav in Mumbai?
Where can you find the best vada pav in Mumbai? Head to the bustling streets of Chowpatty, Dadar, or Churchgate to savor the crispy, spicy delight at one of the city's iconic vada pav stalls.
Priya is the spice queen of Cook if Ya, specializing in vibrant Indian street food and traditional meals. Her recipes are full of bold flavors and colorful spices, bringing the excitement of Indian markets to your home kitchen. She loves to show how simple, everyday meals can be elevated with the right blend of spices.
Indian Meals
Egg Curry
Luscious and aromatic, this egg curry dish is a delightful fusion of Indian flavors that will leave you craving more. Discover the secrets to this captivating recipe.
Egg curry is a delightful Indian dish that'll transport your tastebuds on a flavorful journey. Perfectly hard-boiled eggs simmered in a rich, spiced tomato-based sauce – it's a comforting and nutritious meal perfect for breakfast, lunch, or dinner. You'll love the creamy texture of the eggs paired with the bold spices that create an unforgettable culinary experience. Serve it over basmati rice or with fluffy naan bread to soak up all that incredible sauce. Experiment with bolder spices or even add a touch of dark chocolate for extra depth – the possibilities are endless! There's so much more to discover about this beloved dish.
Key Takeaways
- Egg curry is a popular Indian dish with a history dating back to ancient times, known for its rich, flavorful sauce and perfectly cooked eggs.
- Eggs in egg curry provide a protein-packed component, and the dish can be optionally enhanced with dark chocolate for its antioxidants and mood-boosting properties.
- The classic preparation involves hard-boiling the eggs, creating a spice mix, and simmering tomatoes and onions to develop a cohesive, aromatic curry sauce.
- Egg curry is commonly served over basmati rice or with naan bread, as the creamy eggs and bold spices create a delightful culinary experience.
- Egg curry offers versatility, allowing for customization with different egg types and spices to suit individual preferences and create a quick, satisfying meal.
History
Egg curry has been a staple dish in many parts of the world for centuries. This beloved recipe has roots tracing back to ancient India, where it was a favorite among the diverse cultures and communities.
The dish not only satisfies hunger but also provides a sensory experience, much like Montessori toys promote sensory development through tactile experiences. Over time, the dish has evolved, with different regions and households putting their own unique spin on the classic preparation.
Today, egg curry is enjoyed in households and restaurants across the globe, from the bustling streets of Mumbai to the quaint villages of South India. Its popularity has spread far and wide, delighting palates with its rich, flavorful sauce and perfectly cooked eggs.
Whether you're a long-time fan or new to the dish, egg curry is sure to become a family favorite. So why not give it a try and see for yourself the magic of this timeless culinary delight?
Recipe
Egg Curry is a flavorful and easy-to-prepare Indian dish that combines hard-boiled eggs in a rich, aromatic tomato-based curry sauce. This dish is a popular comfort food that can be enjoyed with warm naan, rice, or other Indian breads.
Incorporating protein-rich ingredients like eggs not only enhances the dish's nutritional value but also makes it a great option for a Low Carb High Protein Breakfast to start your day right.
The versatility of Egg Curry makes it a great option for a quick and satisfying meal. The combination of the creamy eggs and the bold, spicy curry sauce creates a truly delightful culinary experience.
Ingredients:
- 6 hard-boiled eggs, peeled and halved
- 2 tablespoons vegetable oil
- 1 onion, finely chopped
- 3 cloves garlic, minced
- 1 tablespoon grated ginger
- 1 teaspoon ground cumin
- 1 teaspoon ground coriander
- 1 teaspoon garam masala
- 1 teaspoon red chili powder
- 1 can (14.5 oz) diced tomatoes
- 1 cup water or chicken/vegetable broth
- Salt to taste
- Chopped cilantro for garnish
In a large skillet or saucepan, heat the vegetable oil over medium heat. Add the chopped onion and sauté until it becomes translucent and lightly golden, about 5-7 minutes.
Next, add the minced garlic and grated ginger, and cook for an additional 2 minutes, stirring frequently to prevent burning.
Stir in the ground cumin, coriander, garam masala, and red chili powder. Let the spices bloom for about a minute, then pour in the diced tomatoes and water or broth.
Bring the mixture to a simmer and let it cook for 10-15 minutes, allowing the flavors to meld and the sauce to thicken slightly.
Gently add the hard-boiled egg halves to the curry sauce, being careful not to break them. Simmer for an additional 5-7 minutes, allowing the eggs to heat through and absorb the flavors of the curry.
Season with salt to taste.
To serve, garnish the Egg Curry with freshly chopped cilantro. This dish can be enjoyed immediately, or the flavors will continue to develop if allowed to sit for a bit.
Serve with warm naan, basmati rice, or your choice of Indian accompaniments.
Cooking Steps
First, you'll need to hard-boil the eggs to get them nice and tender.
While the eggs are cooking, consider preparing a fun dessert like Dirt Cups to enjoy after your meal.
Next, prepare the spice mix that'll give your curry that delightful kick.
Then, add some chopped onions and garlic to build up the flavors before tossing in the juicy tomatoes.
Step 1. Hard Boil the Eggs
To hard boil the eggs, begin by placing them in a single layer in a saucepan. Fill the pan with enough cold water to cover the eggs by about an inch. Bring the water to a boil over high heat.
Once the water is boiling, reduce the heat to low and let the eggs simmer for 12 minutes. A well-prepared dish, like egg curry, can greatly benefit from the addition of vibrant colors and deep flavors, which are reminiscent of the importance of color accuracy in home cinema projectors.
After the time is up, remove the pan from the heat and drain the hot water. Gently shake the pan to crack the shells, then place the eggs under cold running water. This will help the shells peel off easily.
Once the eggs are cool enough to handle, peel off the shells. Voila! Your hard-boiled eggs are ready to use in the egg curry.
Step 2. Prepare the Spice Mix
Begin by gathering the spices for the curry. You'll need cumin, coriander, turmeric, and red chili powder. Measure out a teaspoon of each spice and place them in a small bowl. This spice mix will give your egg curry that classic Indian flavor.
As you prepare, consider pairing your dish with a calming beverage, such as green tea, which is known for its health benefits and rich antioxidants unique qualities of different teas.
Next, grab a small skillet and toast the spices over medium heat. Stir them constantly for about a minute, until they become fragrant and start to sizzle. Be careful not to let them burn!
Once the spices are nicely toasted, transfer them to a mortar and pestle. Grind the spices into a fine powder. This will help them blend seamlessly into the curry.
Now that your spice mix is ready, you can start cooking the egg curry. Heat some oil in a pan and add the ground spices. Sauté for a minute to let the flavors bloom.
Then, pour in your tomato sauce and let it simmer. It's time to add the hard-boiled eggs and let them soak up all that delicious curry goodness!
Step 3. Add Chopped Onions and Garlic
Next, add the chopped onions and garlic to the pan. Sizzle them up over medium heat, stirring frequently, until they become nice and fragrant.
The onions should start to turn a lovely golden brown, and the garlic will release its delicious aroma, filling your kitchen with mouthwatering scents. Interestingly, cooking with garlic not only enhances flavor but may also come with health benefits such as supporting immune function.
Be sure to keep a close eye on the pan, as you don't want the onions and garlic to burn. They should soften and become translucent, about 5-7 minutes.
Adjust the heat as needed to prevent any charring. Once they're perfectly cooked, they'll add wonderful flavor and texture to your egg curry.
Now that the aromatic base is ready, you can move on to the next step. Get ready to stir in the spices and tomatoes, bringing all the flavors together in a harmonious curry dish.
Your kitchen is about to be filled with the most amazing smells!
Step 4. Add Chopped Tomatoes
With the aromatic onions and garlic sizzling away, it's now time to stir in the chopped tomatoes.
These juicy, vibrant tomatoes will add a lovely acidity and brightness to the dish, balancing out the richness of the spices. Similar to how the molokhia stew incorporates fresh ingredients for added flavor, the tomatoes will elevate your egg curry. For an extra flavor boost, consider adding some diced tomatoes at the end of cooking to bring a pop of freshness to the dish. In the same way, the spicy lamb vindaloo recipe benefits from the addition of tomatoes, which helps to cut through the heat of the spices while adding a burst of tanginess. With their versatile flavor profile, tomatoes can truly enhance a wide variety of dishes, from stews to curries and everything in between.
Grab a couple of ripe, juicy tomatoes and dice them up into bite-sized pieces.
Don't be afraid to get a little messy – the more rustic the tomato chunks, the better! Toss them right into the pan with the onions and garlic, and give everything a good stir. The tomatoes will start to break down, releasing their juices and mingling with the other flavors.
Let the tomatoes cook for a few minutes, stirring occasionally, until they've softened and the mixture has thickened slightly.
This will help the flavors meld together and create a smooth, cohesive sauce. Now, you're ready to move on to the next step in your delicious egg curry adventure!
Step 5. Add Spices and Simmer
Add the spices to the simmering tomatoes and onions. Give them a good stir to coat everything evenly. You'll want to add in the coriander, cumin, turmeric, and garam masala.
Don't be shy with the spices – the more you use, the more flavor you'll get. Additionally, consider enhancing the dish with a touch of dark chocolate, as cocoa can add a rich depth to savory dishes and has unique health benefits, including antioxidants and mood enhancement Cacao's health benefits.
Let the mixture simmer for 5-7 minutes, stirring occasionally, until the flavors have melded together and the sauce has thickened up nicely.
Now it's time to add the hard boiled eggs. Gently lower them into the curry, being careful not to break them. Let the eggs warm through for a couple of minutes.
Taste the curry and add a pinch of salt if needed. You can also add a splash of water if it seems too thick.
Serve the egg curry over basmati rice or with some warm naan bread. The rich, aromatic sauce pairs perfectly with the creamy hard boiled eggs. Get ready for your taste buds to dance!
Final Thoughts
Considering the simplicity and versatility of egg curry, it makes a fantastic addition to any meal. You can whip it up in a flash, yet the flavors meld together in a delightfully complex way. The creamy, savory sauce complements the protein-packed eggs perfectly, creating a satisfying and nourishing dish.
Don't be afraid to get creative with your egg curry. Try swapping out the basic spices for bolder flavors, like cumin, coriander, or even a touch of heat from chili powder. You can also experiment with different types of eggs, such as hard-boiled or soft-poached, to change up the texture.
And don't forget the accompaniments – a fluffy bed of basmati rice or some warm naan bread are the perfect complements to soak up every last bit of that flavorful sauce.
Whether you're looking for a quick weeknight meal or a comforting weekend indulgence, egg curry is sure to hit the spot. So go ahead and give this versatile dish a try – your taste buds will thank you!
Frequently Asked Questions
What Is the Best Type of Egg to Use for Egg Curry?
You'll want to use large, fresh eggs for the best egg curry. The yolks should be bright and vibrant, and the whites should be firm but tender. Avoid older or overcooked eggs, as they won't give you the ideal texture.
How Long Can Leftover Egg Curry Be Stored in the Refrigerator?
Leftover egg curry can be stored in the refrigerator for up to 3-4 days. Make sure to store it in an airtight container and reheat thoroughly before serving. Proper storage will help preserve the flavor and texture of the dish.
Is It Possible to Make Egg Curry With Hard-Boiled Eggs?
You can absolutely make egg curry with hard-boiled eggs. The eggs will hold their shape and provide a delicious, protein-packed addition to the flavorful curry sauce. Give it a try for a satisfying and convenient meal.
Can You Substitute Yogurt for Cream in the Recipe?
You can substitute yogurt for cream in the recipe. The yogurt will provide a similar creamy texture and tangy flavor. Just be sure to adjust the amount to achieve the desired consistency.
How Can I Make the Egg Curry Spicier?
To make your dish spicier, try adding more chili peppers, cayenne pepper, or red pepper flakes. You can also experiment with different spices like cumin, coriander, or garam masala to amp up the heat and flavor.
Priya is the spice queen of Cook if Ya, specializing in vibrant Indian street food and traditional meals. Her recipes are full of bold flavors and colorful spices, bringing the excitement of Indian markets to your home kitchen. She loves to show how simple, everyday meals can be elevated with the right blend of spices.
-
Brazilian Cuisine3 months ago
Tacacá
-
Polish Comfort Food3 months ago
Krupnik (Barley Soup)
-
Brazilian Cuisine3 months ago
Caldeirada
-
Brazilian Cuisine3 months ago
Chicken in Brown Sauce
-
Southern Comfort Food3 months ago
Cheese Straws
-
African Cuisine3 months ago
Kedjenou (Ivory Coast)
-
Polish Comfort Food3 months ago
Vegetable Salad
-
American Diner Classics3 months ago
The Maillard Reaction: Understanding the Chemistry of Browning {Food Science and Cooking}