Indian Meals
Chicken Tikka Masala
Mouthwatering Chicken Tikka Masala tantalizes taste buds with its creamy, spice-infused sauce, but the secret to its irresistible flavor lies in
Chicken Tikka Masala is a delicious dish you'll love! It's got tender chicken marinated in yogurt and spices, then grilled to perfection. The best part? It's smothered in a creamy, tomato-based sauce that's packed with flavor. You can make it at home or find it at Indian restaurants. While its origins are debated, it's now a favorite in many countries, especially Britain. Serve it with fluffy basmati rice and warm naan bread for a complete meal. It's easy to adjust the spice level to suit your taste. With a bit of practice, you'll be cooking up restaurant-quality Tikka Masala in no time. Let's explore this tasty dish further!
Key Takeaways
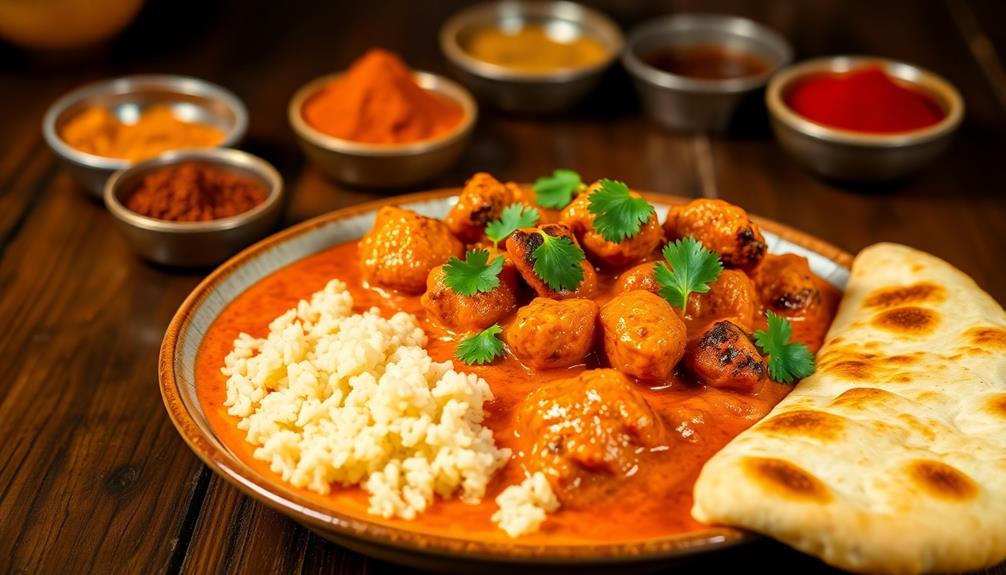
- Chicken Tikka Masala combines marinated grilled chicken with a creamy tomato-based sauce, featuring aromatic Indian spices.
- The dish's origins are disputed, with claims from both Scotland and India, but it's now recognized as Britain's national dish.
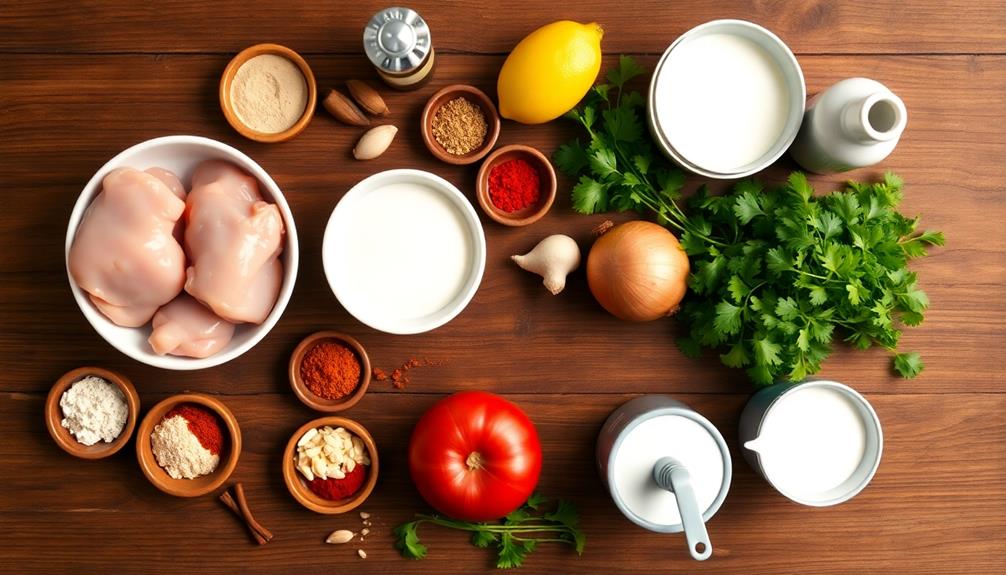
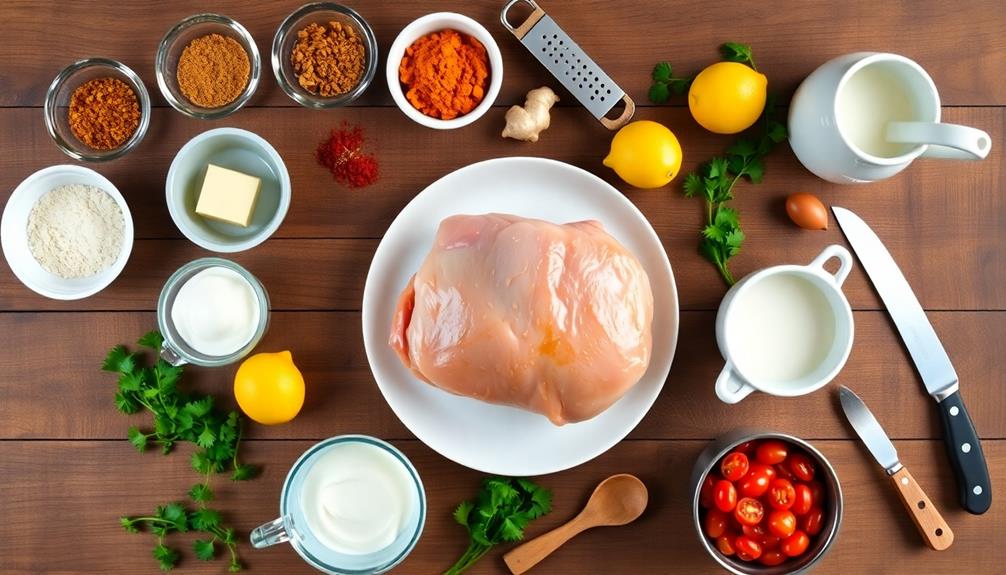
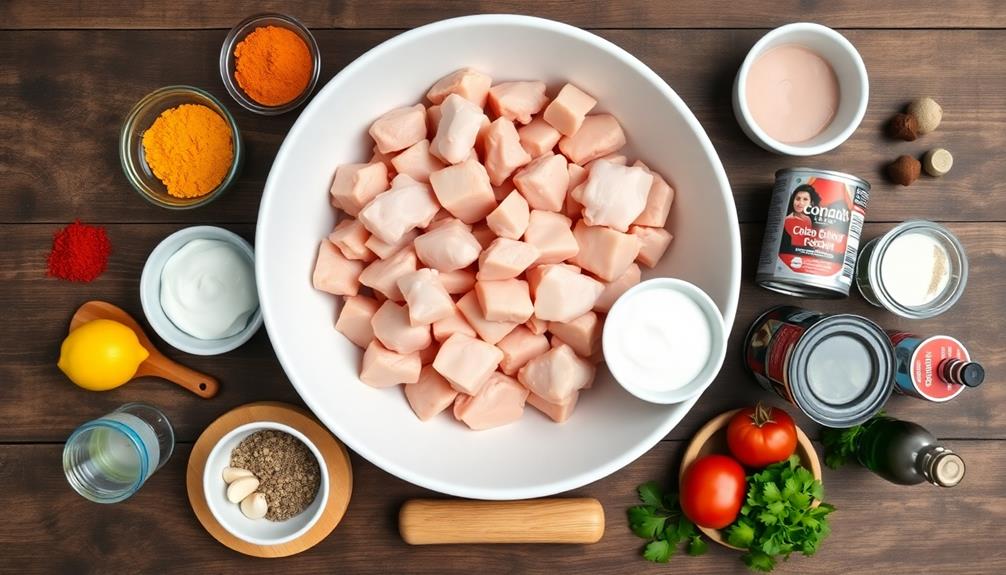
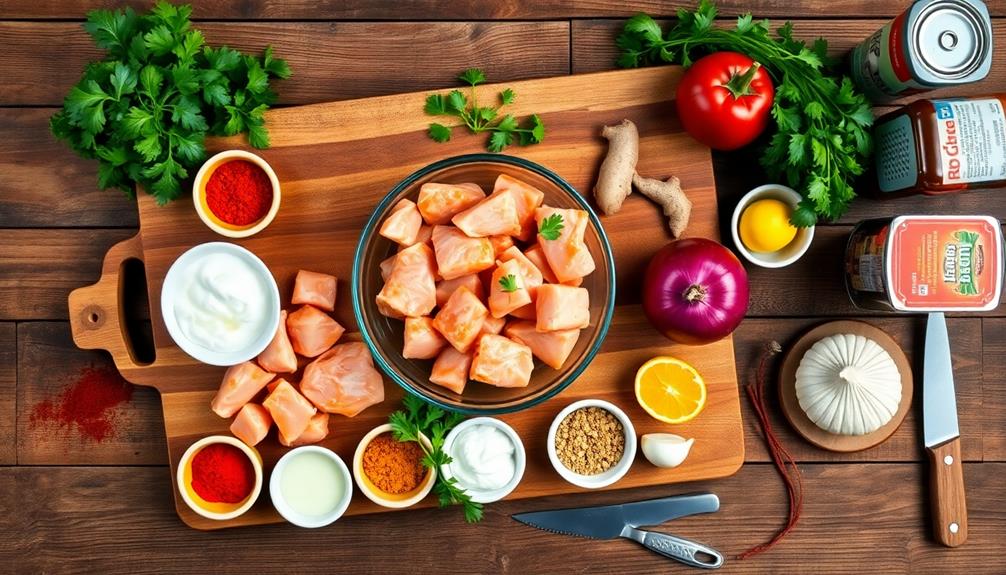
- Key ingredients include chicken thighs, yogurt marinade, spices like cumin and garam masala, crushed tomatoes, and heavy cream.
- Cooking techniques involve marination, grilling, sautéing, and simmering to develop complex flavors and tender chicken.
- It's typically served with basmati rice and naan bread, offering a balance of smoky, creamy, and spicy flavors.
History
The origins of Chicken Tikka Masala are shrouded in mystery, with several competing claims vying for recognition. You've probably heard different stories about how this beloved dish came to be!
One popular tale says it was invented in Glasgow, Scotland, in the 1970s. As the story goes, a customer at an Indian restaurant complained that his chicken tikka was too dry. The quick-thinking chef whipped up a creamy tomato sauce to pour over it, and voilà! Chicken Tikka Masala was born.
But wait, there's more! Some people believe the dish has roots in Punjab, India. They'll tell you it's a variation of butter chicken, which has been around for much longer. Others claim it was created in British India during colonial times.
No matter where it came from, you can't deny that Chicken Tikka Masala has become incredibly popular. It's now considered Britain's national dish and is loved all over the world.
You'll find it in restaurants, frozen food aisles, and home kitchens everywhere. Its journey from disputed origins to global favorite is truly remarkable!
Recipe
Chicken Tikka Masala is a beloved Indian-inspired dish that combines tender, marinated chicken with a rich, creamy tomato-based sauce. This recipe brings together aromatic spices and succulent chicken pieces to create a flavorful meal that's perfect for any occasion. For a complete Indian meal, you can serve the Chicken Tikka Masala with fragrant basmati rice or warm, fluffy naan bread. Or, for a vegetarian option, you can pair it with an easy chana masala recipe that features tender chickpeas in a flavorful tomato and spice sauce. Whatever you choose, the Chicken Tikka Masala will be a surefire hit with its delicious combination of flavors and textures.
While the origins of Chicken Tikka Masala are debated, it has become a staple in Indian restaurants worldwide. This version of the recipe aims to balance authentic flavors with accessible ingredients, making it easy to recreate this restaurant favorite in your own kitchen.
- 1.5 lbs boneless, skinless chicken thighs
- 1 cup plain yogurt
- 2 tbsp lemon juice
- 2 tsp ground cumin
- 2 tsp ground coriander
- 2 tsp turmeric powder
- 2 tsp garam masala
- 2 tsp paprika
- 2 cloves garlic, minced
- 1 tbsp grated ginger
- 2 tbsp vegetable oil
- 1 large onion, finely chopped
- 1 can (14 oz) crushed tomatoes
- 1 cup heavy cream
- Salt to taste
- Fresh cilantro for garnish
To prepare the dish, start by marinating the chicken in a mixture of yogurt, lemon juice, and half of the spices for at least 2 hours or overnight.
Grill or broil the marinated chicken until slightly charred and cooked through. In a large pan, sauté the onion in oil until golden, then add the remaining spices, garlic, and ginger.
Stir in the crushed tomatoes and simmer for 10 minutes. Add the grilled chicken and heavy cream, and simmer for an additional 10-15 minutes until the sauce thickens. Season with salt to taste and garnish with fresh cilantro before serving.
For best results, use freshly ground spices whenever possible to enhance the flavor profile of the dish. If you prefer a smoother sauce, blend the tomato mixture before adding the chicken and cream.
To adjust the heat level, you can add cayenne pepper or fresh chili peppers to taste. Serve the Chicken Tikka Masala with basmati rice or naan bread for a complete meal.
Cooking Steps
Let's get cooking!
You'll start by marinating the chicken in a flavorful yogurt mixture, then grill those tasty pieces to perfection.
Next, you'll whip up a creamy tomato sauce, combine it with the chicken, and finish off your dish with a sprinkle of fresh cilantro.
Step 1. Marinate Chicken in Yogurt Mixture
To begin the marination process, combine yogurt, lemon juice, garam masala, turmeric, cumin, and minced garlic in a large bowl. Mix these ingredients well, creating a flavorful and aromatic marinade for your chicken. You'll love how the spices blend together, filling your kitchen with enticing scents!
Next, cut your boneless chicken into bite-sized pieces. This will help the marinade coat each piece evenly, ensuring maximum flavor in every bite. Add the chicken to the bowl with the yogurt mixture and use your hands or a spoon to mix everything thoroughly. Make sure each piece of chicken is well-coated with the marinade.
Once you've mixed the chicken and marinade, cover the bowl with plastic wrap or a lid. Place it in the refrigerator for at least 2 hours, but if you can, let it marinate overnight. This extra time allows the flavors to really soak into the chicken, making it tender and delicious.
Remember to turn the chicken pieces occasionally during marination. This helps ensure all sides are evenly flavored and keeps the marinade well-distributed.
When you're ready to cook, you'll have perfectly marinated chicken for your tikka masala!
Step 2. Grill Marinated Chicken Pieces
After marinating, it's time to fire up the grill for your chicken tikka. Preheat your grill to medium-high heat, making sure it's nice and hot before you start cooking.
While the grill warms up, take your marinated chicken pieces out of the refrigerator and let them come to room temperature.
Thread the chicken onto skewers, leaving a bit of space between each piece so they cook evenly. If you're using wooden skewers, don't forget to soak them in water first to prevent burning.
Once your grill is ready, place the skewers on the grates and close the lid.
Grill the chicken for about 5-7 minutes on each side, or until it's golden brown and cooked through. You'll know it's done when the juices run clear and the internal temperature reaches 165°F (74°C).
As you're grilling, brush the chicken with some of the leftover marinade for extra flavor and moisture. Be careful not to overcook, as this can dry out your chicken.
Once it's perfectly grilled, remove the skewers from the heat and let the chicken rest for a few minutes before serving.
Step 3. Prepare Creamy Tomato Sauce
While your chicken tikka is resting, it's time to whip up the creamy tomato sauce that gives this dish its signature flavor.
Start by heating some oil in a large pan over medium heat. Add finely chopped onions and sauté them until they're golden brown and fragrant.
Next, toss in minced garlic and grated ginger, stirring for about a minute until their aroma fills the air.
Now, it's time to add the star ingredient: tomatoes! Pour in a can of crushed tomatoes and let them simmer for a few minutes.
Sprinkle in your favorite spices like garam masala, turmeric, and paprika. These will give your sauce that authentic Indian taste you're looking for. Don't forget to season with salt and pepper to taste.
Let the sauce bubble away for about 10 minutes, stirring occasionally.
Then, it's time to make it creamy! Slowly pour in some heavy cream, stirring constantly to combine. You'll see the sauce transform into a beautiful orange color.
Step 4. Combine Chicken and Sauce
The moment of truth has arrived. It's time to bring your chicken tikka and creamy tomato sauce together in perfect harmony. Get ready for a flavor explosion that'll make your taste buds dance!
First, grab your pan of simmering tomato sauce and carefully add the grilled chicken pieces. You'll want to gently stir them in, making sure each piece is coated with that luscious sauce. As you combine them, you'll notice the amazing aromas filling your kitchen. Isn't it exciting?
Now, let the chicken and sauce mingle for about 5-7 minutes on medium heat. This allows the flavors to blend and the chicken to soak up all that saucy goodness. While it's cooking, give it a stir every now and then to prevent sticking and ensure even heating.
As the dish comes together, you might notice the sauce thickening slightly. That's perfect! If it gets too thick, you can add a splash of water or cream to adjust the consistency.
Step 5. Garnish With Fresh Cilantro
Fresh cilantro brings a burst of color and flavor to your chicken tikka masala. Once you've combined the chicken with the sauce, it's time to add the finishing touch.
Take a small bunch of fresh cilantro and give it a quick rinse under cool water. Gently pat it dry with a paper towel or clean kitchen cloth.
Now, hold the cilantro stems in one hand and use your other hand to pluck off the leaves. You'll want about a handful of leaves for garnishing. Roughly chop the leaves on your cutting board, but don't make them too fine. You're aiming for visible pieces that'll stand out on top of your dish.
When you're ready to serve, spoon your chicken tikka masala into bowls or onto plates. Sprinkle the chopped cilantro evenly over each serving.
The bright green leaves will create a beautiful contrast against the rich orange sauce. Not only does cilantro look pretty, but it also adds a fresh, slightly citrusy flavor that complements the spices in your dish.
Enjoy your homemade chicken tikka masala with its perfect cilantro garnish!
Final Thoughts
Chicken Tikka Masala's allure lies in its perfect balance of flavors and textures. You've now mastered the art of creating this beloved dish, from marinating tender chicken to simmering a rich, aromatic sauce. As you savor your homemade creation, you'll notice how the smoky tandoori flavors meld beautifully with the creamy tomato-based curry.
Remember, cooking is all about experimentation and personal taste. Don't be afraid to adjust the spices to suit your preferences. You might want to add a bit more heat with extra chili powder or cool things down with a dollop of yogurt. The beauty of Chicken Tikka Masala is its versatility.
Serve your masterpiece with fluffy basmati rice or warm naan bread to soak up every last drop of the delicious sauce. It's a meal that's sure to impress family and friends alike.
With practice, you'll find yourself whipping up this restaurant-quality dish with ease. So go ahead, enjoy your culinary journey, and don't forget to share your creation with loved ones. Happy cooking!
Frequently Asked Questions
Is Chicken Tikka Masala Spicy?
Spiciness varies, but you'll typically find it's mildly spicy. You can adjust the heat level when ordering or cooking. It's creamy and flavorful, with a tomato-based sauce that balances the spices nicely. You'll love it!
Can I Use Yogurt Instead of Cream in the Recipe?
Yes, you can use yogurt instead of cream in the recipe. You'll get a tangier flavor and a lighter texture. It's a great substitute if you're looking to reduce calories or if you've run out of cream.
What Sides Pair Well With Chicken Tikka Masala?
You'll love pairing your dish with naan bread or rice. Try serving it alongside cucumber raita, mango chutney, or a fresh salad. Don't forget some roasted vegetables or lentil dal for a balanced meal.
How Long Can Leftover Chicken Tikka Masala Be Stored?
You can store your leftovers in the fridge for up to 3-4 days. Make sure you've cooled it completely before refrigerating. For longer storage, freeze it for up to 3 months. Always reheat thoroughly before eating.
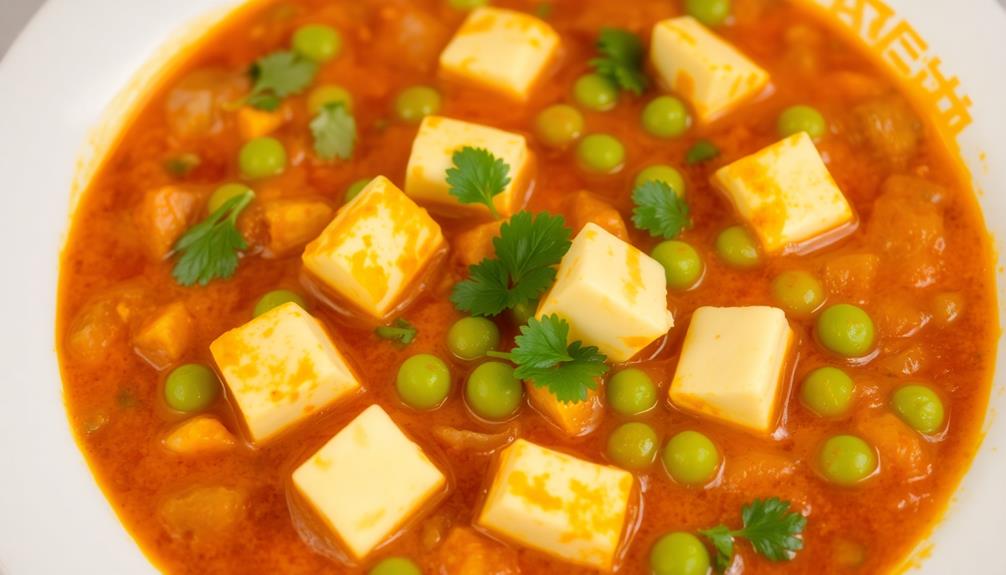
Is There a Vegetarian Version of Chicken Tikka Masala?
Yes, you can enjoy a vegetarian version called Paneer Tikka Masala. It's made with cubes of Indian cottage cheese instead of chicken. You'll find it's just as flavorful and satisfying as the original dish.
Priya is the spice queen of Cook if Ya, specializing in vibrant Indian street food and traditional meals. Her recipes are full of bold flavors and colorful spices, bringing the excitement of Indian markets to your home kitchen. She loves to show how simple, everyday meals can be elevated with the right blend of spices.
Indian Meals
Tandoori Chicken Pizza: Indian-Italian Fusion
Indulge in a tantalizing fusion of smoky tandoori chicken and melted mozzarella on a crisp, golden-brown crust for a savory delight that’ll leave you craving more.
Get ready to embark on a delicious fusion journey! Tandoori Chicken Pizza brings together the smoky, spicy flavors of Indian tandoori chicken and the comforting delight of classic Italian pizza. You'll start by marinating juicy chicken in a blend of aromatic spices, then layer it onto a crisp, golden-brown pizza crust. Top it off with melty mozzarella cheese for a creamy finish that'll make your taste buds dance. This unique dish combines the best of both culinary worlds, offering a satisfying crunch and a burst of flavors that'll leave you craving more. Intrigued? There's much more to discover about this captivating fusion creation.
Key Takeaways
- Tandoori Chicken Pizza combines the smoky, aromatic spices of Indian cuisine with the cheesy, crisp base of classic Italian pizza.
- The dish features tandoori-marinated chicken as the primary topping, providing a unique blend of flavors and textures.
- The fusion of Indian and Italian culinary traditions showcases the growing trend of cross-cultural culinary creativity and exploration.
- Preparation involves marinating the chicken in a blend of yogurt, lemon juice, and tandoori spices before baking the pizza.
- The combination of the spicy tandoori chicken, melted mozzarella cheese, and crispy pizza crust offers a satisfying and flavorful dining experience.
History
Tandoori chicken has been a beloved dish in India for centuries, originating from the northern region where the distinctive tandoor oven is commonly used. This traditional clay oven, heated with charcoal or wood, cooks the chicken to perfection, giving it a unique smoky flavor and juicy tenderness.
Over time, the popularity of tandoori chicken grew, and it became a staple in Indian cuisine.
As the world becomes more connected, the delicious flavors of tandoori chicken have found their way into an unexpected fusion – the tandoori chicken pizza! By combining the spices and cooking method of this iconic Indian dish with the classic Italian pizza, a delightful culinary collaboration was born.
The result is a harmonious blend of cultures, where the heat and complexity of tandoori chicken perfectly complements the crispy crust and melted cheese of the pizza. This innovative creation has captured the hearts and taste buds of people around the globe, proving that culinary boundaries can be beautifully blurred.
Recipe
Tandoori Chicken Pizza is a delightful fusion of Indian and Italian cuisine. The spicy and flavorful tandoori chicken is the perfect topping for a crisp and cheesy pizza base. This dish combines the rich, aromatic spices of tandoori with the comforting familiarity of a classic pizza.
To create this masterpiece, you'll need to prepare the tandoori chicken first, then assemble and bake the pizza. The result is a unique and satisfying meal that will impress your taste buds and your guests.
Ingredients:
- Boneless, skinless chicken thighs
- Yogurt
- Lemon juice
- Garlic cloves
- Ginger
- Garam masala
- Chili powder
- Salt
- Pizza dough
- Mozzarella cheese
- Tomato sauce
- Cilantro (for garnish)
Instructions:
Marinate the chicken in a mixture of yogurt, lemon juice, garlic, ginger, garam masala, chili powder, and salt. Refrigerate for at least 30 minutes or up to 24 hours.
Preheat your oven to 400°F (200°C). Roll out the pizza dough and spread the tomato sauce over the surface. Arrange the marinated tandoori chicken on top, followed by shredded mozzarella cheese.
Bake the pizza for 15-20 minutes, or until the crust is golden brown and the cheese is melted and bubbly.
To ensure the best results, make sure to marinate the chicken thoroughly and allow the flavors to meld. For an extra burst of flavor, garnish the pizza with fresh cilantro before serving. Enjoy your Tandoori Chicken Pizza!
Cooking Steps
First, you'll need to marinate the chicken in a blend of tantalizing tandoori spices.
Next, bake the pizza crust until it's perfectly crispy.
Then, spread the flavorful tandoori chicken on the crust and top it with melty mozzarella cheese.
Step 1. Marinate Chicken in Tandoori Spices
To begin the marinating process, gather the necessary tandoori spices. You'll need some zesty ginger, fragrant garlic, and a sprinkle of spicy cayenne pepper.
Don't forget the vibrant paprika, earthy cumin, and aromatic coriander. Combine these flavorful ingredients in a bowl, then add a dollop of tangy yogurt. Stir everything together until it forms a smooth, fragrant paste.
Next, place your chicken pieces in a shallow dish and generously coat them with the tandoori marinade. Make sure each piece is evenly covered, so the flavors can really soak in.
Cover the dish and pop it in the fridge for at least an hour, or up to overnight. The longer you let the chicken marinate, the more intense the tandoori flavor will be.
When you're ready to bake, preheat your oven and get ready to enjoy the delicious aromas of your tandoori-marinated chicken.
Soon, you'll have juicy, flavorful chicken ready to top your homemade Tandoori Chicken Pizza!
Step 2. Bake Pizza Crust Until Crispy
With the flavorful tandoori-marinated chicken ready, it's time to turn your attention to the pizza crust. Preheat your oven to a toasty 450°F (230°C) and let's get baking!
Spread the pizza dough out on a lightly floured surface, using your hands to stretch and shape it into a large, thin circle. Transfer the dough to a baking sheet or pizza pan, being careful not to tear it.
Pop the crust into the oven and let it bake for 8-10 minutes, until it's golden brown and crispy around the edges. You'll know it's ready when you can smell the delicious aroma of freshly baked bread wafting through your kitchen.
Once the crust is perfectly crispy, it's time to top it with the tandoori chicken and other tasty ingredients. Get ready to enjoy a mouthwatering fusion of Indian and Italian flavors in every bite!
Step 3. Spread Tandoori Chicken on Pizza Crust
Take the crispy pizza crust and evenly spread the flavorful tandoori-marinated chicken over the top.
The rich, reddish-orange hue of the spiced chicken creates a vibrant contrast against the golden-brown crust. Inhale the tantalizing aromas of ginger, garlic, and warm spices as you layer the chicken across the surface.
Be sure to cover the entire crust, leaving no bare spots, so each bite will be bursting with flavor. The tender, juicy chunks of chicken will add a satisfying texture and heartiness to the pizza.
Imagine how the savory, slightly smoky tandoori seasoning will complement the gooey mozzarella cheese and fresh toppings you’ll add next. Once the tandoori seasoning is sprinkled over the mozzarella and toppings, the flavors will meld together perfectly, creating a truly delicious and unique dish. You can then pair this with some freshly baked bread or a side of french stuffed tomatoes for a complete and satisfying meal. The tandoori seasoning will add an extra depth of flavor to the tomatoes, making them an irresistible accompaniment to your cheesy, savory creation.
With the foundation of the crisp crust and the fragrant tandoori chicken, you're well on your way to creating an incredible fusion of Indian and Italian flavors in every slice.
Step 4. Top With Mozzarella Cheese
Next, generously sprinkle the shredded mozzarella cheese over the tandoori chicken. You'll love how the creamy, melted cheese perfectly complements the bold, spicy flavors of the tandoori chicken. As the cheese melts, it forms a delightful, gooey layer that binds everything together.
Can you already imagine the aroma wafting through your kitchen? The blend of savory spices and the comforting scent of melted cheese is simply mouthwatering. Be sure to cover the entire surface of the pizza, leaving no bare spots. The more cheese, the better!
Once the cheese is evenly distributed, your pizza is ready for the oven. As it bakes, the cheese will bubble and brown, creating a beautiful, golden crust. You'll know it's done when the cheese is fully melted and the edges are crispy.
Can't you just picture that perfect slice, with the stringy cheese and tender chunks of tandoori chicken? Get ready for an explosion of flavors in every bite!
Step 5. Bake Pizza Until Cheese Melts
Preheat your oven to the recommended temperature, typically around 400°F (200°C).
Once your oven is nice and toasty, it's time to pop that pizza in! Slide the prepared pizza onto the middle rack and let it bake for 12-15 minutes. You'll know it's ready when the cheese has melted into a gooey, golden blanket over the top.
Keep an eye on it, as the cooking time may vary depending on your oven. The crust should become lightly crisp and the cheese should be deliciously melted. Mmm, can you already smell the aroma of the tandoori spices and the bubbling cheese? It's going to be a real treat!
When the timer goes off, carefully remove the pizza from the oven using oven mitts. The pan will be hot, so be extra careful.
Let the pizza cool for a minute or two before slicing into it. That way, the cheese has a chance to set and you won't end up with a sloppy, drippy mess!
Final Thoughts
Crafting the perfect Tandoori Chicken Pizza requires a delicate balance of flavors and textures. The smoky, aromatic spices of the tandoori marinade perfectly complement the melty, creamy mozzarella cheese. The juicy, tender chicken adds a wonderful heartiness, while the crisp, golden-brown crust provides a satisfying crunch with every bite.
As you take that first mouthwatering slice, you'll be transported to the vibrant streets of India, where the scent of tandoori spices fills the air. But then, the familiar comforts of a classic pizza bring you right back home.
It's a culinary adventure that combines the bold, exotic tastes of the East with the beloved traditions of the West. When the last crumb disappears, you'll be left with a smile on your face and a deep sense of satisfaction.
This Tandoori Chicken Pizza isn't just a meal – it's a delicious fusion of cultures that celebrates the endless possibilities of the culinary world.
Frequently Asked Questions
Can I Use Other Types of Cheese Besides Mozzarella?
Absolutely! You can use other types of cheese besides mozzarella for your pizza. Experiment with cheddar, Parmesan, or even a blend of cheeses to add different flavors and textures to your creation.
Is It Possible to Make This Pizza Vegetarian?
You can certainly make this pizza vegetarian. Replace the tandoori chicken with roasted vegetables like bell peppers, onions, and mushrooms. You can also incorporate paneer, a fresh Indian cheese, to add creaminess and protein to the dish.
How Long Can the Leftover Pizza Be Stored?
You can store the leftover pizza in the refrigerator for up to 3-4 days. Make sure to wrap it tightly or place it in an airtight container to prevent it from drying out or absorbing other food odors.
Can I Use Pre-Cooked Chicken for This Recipe?
You can definitely use pre-cooked chicken for this recipe. It'll save you time and still give you the delicious flavor you're looking for. Just be sure to reheat the chicken thoroughly before assembling and baking your pizza.
Is It Necessary to Marinate the Chicken Overnight?
While marinating the chicken overnight can enhance the flavor, it's not absolutely necessary. You can use pre-cooked chicken and simply season it with the tandoori spices before assembling the pizza. This will still result in a tasty dish.
Priya is the spice queen of Cook if Ya, specializing in vibrant Indian street food and traditional meals. Her recipes are full of bold flavors and colorful spices, bringing the excitement of Indian markets to your home kitchen. She loves to show how simple, everyday meals can be elevated with the right blend of spices.
Indian Meals
Indian Vada Pav: Mumbai’s Favorite Snack
Juxtaposing the savory, crispy potato patty and the soft, fluffy bread bun, vada pav captivates the taste buds as the iconic street food of Mumbai.
You'll love vada pav – it's Mumbai's most iconic street food! This tasty snack combines a soft, fluffy bread bun with a savory, crispy potato patty called a vada. The key is balancing the spices, which can include cumin, coriander, and chilies, to create that perfect blend of flavors. Vendors serve up these delightful bites fresh from their carts, creating a lively atmosphere. What makes vada pav so special is how it showcases the diversity and ingenuity of India's vibrant street food culture. Want to learn more about the history and how to make this beloved Mumbai treat?
Key Takeaways
- Vada Pav is a popular street food originating in Mumbai during the 1960s, combining a savory potato patty (vada) in a soft bread bun (pav).
- The key ingredients include boiled potatoes, onions, green chilies, and a blend of spices like cumin, coriander, and asafoetida.
- The preparation involves soaking and grinding chana dal, shaping the paste into patties, and deep-frying them to achieve a crispy texture.
- Vada Pav is customizable with various chutneys and condiments, offering a range of flavors and making it a versatile street food.
- Vada Pav is deeply ingrained in Mumbai's vibrant street food culture, representing the city's culinary diversity and serving as a gateway to Indian cuisine.
History
The origins of the beloved Indian street food, Vada Pav, can be traced back to the bustling streets of Mumbai, where it has become a cultural icon. The delicious dish was first created in the 1960s by ingenious street vendors who wanted to offer a tasty and affordable meal to the city's busy workers.
They combined a fluffy white bread bun, known as a pav, with a savory fried potato patty called a vada, creating a mouthwatering combination that quickly gained popularity.
Over the years, Vada Pav has evolved, with vendors experimenting with different spices and fillings to tantalize the taste buds of their customers.
Today, you'll find Vada Pav stalls on every corner, each one offering its own unique spin on this beloved snack. Whether you prefer it spicy, tangy, or served with an array of chutneys, Vada Pav has become an integral part of Mumbai's vibrant street food culture, delighting locals and visitors alike.
Recipe
Vada Pav is a popular Indian street food originating from the state of Maharashtra. It consists of a spiced and deep-fried potato patty, known as a "vada," served in a soft, bread-based bun or pav. This dish is a beloved snack that combines savory, tangy, and spicy flavors, making it a quintessential part of Mumbai's vibrant food culture.
The recipe for vada pav is straightforward, allowing home cooks to recreate this iconic street food with ease. The key to a delicious vada pav lies in the perfect balance of spices and the crisp texture of the vada, complemented by the soft, pillowy pav.
Ingredients:
- Potatoes, boiled and mashed
- Onion, finely chopped
- Green chili, finely chopped
- Garlic, minced
- Cumin powder
- Coriander powder
- Red chili powder
- Asafoetida (hing)
- Salt
- Oil for deep frying
- Pav (soft, bread-based buns)
To prepare the vada pav, start by mixing the mashed potatoes, onion, green chili, garlic, cumin powder, coriander powder, red chili powder, asafoetida, and salt in a bowl until well combined.
Form the mixture into small, round patties. Heat oil in a deep-frying pan or wok, and carefully add the vada one by one, frying them until golden brown and crispy. Drain the fried vada on a paper towel-lined plate.
To serve, slice the pav horizontally, place the fried vada inside, and top it with your desired chutneys or condiments, such as green chutney, sweet tamarind chutney, or spicy garlic chutney.
Enjoy the vada pav while it's hot and crispy, savoring the perfect balance of flavors and textures.
Cooking Steps
First, you'll need to soak the chana dal overnight so it's nice and soft.
Then, grab your blender and grind that soaked dal into a smooth paste.
Now, it's time to form the vada patties – use your hands to shape the mixture into round, flat discs.
Get ready to fry – heat up some oil in a pan and carefully add those vada. Fry them until they're golden brown, then serve the hot, crispy vada nestled inside soft, fluffy pav.
Step 1. Soak Chana Dal Overnight
Begin by soaking the chana dal overnight.
You'll want to rinse the little yellow lentils and then let them soak in enough water to cover them. This softens them up, making them perfect for the vada pav.
As they soak, the chana dal will slowly expand and become nice and tender.
In the morning, you can drain off the water and give the lentils a quick rinse. They're now ready to be ground into a smooth batter.
The soaking step is key – it ensures your vada pav will have the perfect fluffy texture.
Once the chana dal has soaked, you're one step closer to whipping up this tasty Mumbai street food.
Just wait until you bite into that crispy, golden vada nestled in a soft pav bun.
Mmmm, your taste buds are in for a real treat!
Step 2. Grind Soaked Dal Into Paste
After draining the soaked chana dal, go ahead and grind it into a smooth, lump-free paste. You can use a blender or a food processor to do this – just be sure to add a little water as needed to get the consistency just right. It should be thick, but still easy to stir.
Next, take a look at the paste and give it a good whiff. Mmm, can you smell those earthy, nutty aromas? That's the wonderful flavor of the chana dal coming through.
Now, it's time to get your hands a little dirty and shape the paste into small, round balls. Don't be afraid to really dig in there and mold them into perfect little vada shapes.
Once you've got your vadas all ready to go, it's time to get them cooking. Grab a pan and heat up some oil – you want it nice and hot so the vadas can sizzle and turn a beautiful golden brown.
Carefully lower them into the oil and let them cook until they're crispy and delicious. Get ready for the mouthwatering aroma to fill your kitchen!
Step 3. Form Vada Patty
Go ahead and scoop out small portions of the ground chana dal paste. Use your hands to gently form the paste into smooth, round vada patties, about 2-3 inches wide.
Make sure to pat and shape them firmly, but avoid squeezing too tightly. These little vada will puff up and get nice and crispy when you fry them, so don't worry if they seem a bit delicate at first.
Next, get your oil nice and hot in a pan or wok. Carefully slide the vada patties into the sizzling oil and let them cook for a couple of minutes until the bottoms turn golden brown.
Flip them over and fry the other side until they're evenly crispy all around. Mmm, can you just imagine the incredible aroma wafting through your kitchen?
These little vada are going to be absolutely irresistible!
Step 4. Heat Oil, Fry Vada
With the vada patties ready, it's time to bring them to life. Heat a generous amount of oil in a deep skillet over medium-high heat. Once the oil is shimmering, gently lower the vada patties into the hot oil. Fry them until they're a beautiful golden-brown color, about 2-3 minutes per side. The aroma of the crispy, spiced vada will fill your kitchen, making your mouth water in anticipation.
Fry the vada in batches to ensure they cook evenly and don't overcrowd the pan. Use a slotted spoon to carefully flip and remove them from the oil. Drain the fried vada on a paper towel-lined plate to remove any excess oil.
Now you have perfectly crispy vada, ready to be assembled into the iconic vada pav! The contrast of the soft, pillowy bun and the crunchy, flavorful vada is what makes this Mumbai street food so irresistible.
Step 5. Serve Vada in Pav
Once the vada are fried to perfection, it's time to assemble the vada pav.
Grab a soft, pillowy pav bun and slice it in half, creating a fluffy little pocket. Carefully place the golden-brown vada inside, nestling it snugly.
Now, it's time to dress up your vada pav! Drizzle a tangy, sweet-and-sour green chutney over the vada, letting it soak in those delightful flavors. Don't forget to add a pinch of spicy red garlic-chili chutney for an extra kick.
Finally, sprinkle some crisp, crunchy sev on top, adding a satisfying texture. Your vada pav is now ready to be savored!
Take a big bite and feel the soft pav, the crispy vada, and the burst of flavors dancing on your tongue. It's a taste of Mumbai street food magic that's sure to delight your senses.
Enjoy this iconic Indian snack to the fullest!
Final Thoughts
The vada pav, a beloved Indian street food, is a testament to the country's rich culinary heritage. As you've discovered, this delightful snack is more than just a fried potato patty in a soft, fluffy bun.
It's a harmonious blend of flavors and textures that has captivated the hearts and taste buds of people across India and beyond. This iconic dish has become a household favorite, cherished for its simplicity and versatility. The idli and sambar breakfast offers a delightful contrast, with the soft, spongy idli pairing perfectly with the tangy, spicy sambar. It’s a comforting and nourishing start to the day, enjoyed by both the young and old alike.
Whether you're savoring the spicy, crunchy vada or relishing the soft, pillowy pav, each bite is a delightful experience. The versatility of this dish allows you to customize it to your liking, adding chutneys, spices, or even experimenting with different fillings.
The vada pav is truly a culinary treasure that showcases the ingenuity and creativity of Indian street food culture.
As you bid farewell to this delectable journey, remember that the vada pav is more than just a snack; it's a symbol of unity, community, and the enduring spirit of Mumbai's vibrant food scene.
Embrace the vada pav as a gateway to exploring the rich diversity of Indian cuisine.
Frequently Asked Questions
Are Vada Pav Gluten-Free?
No, vada pav isn't typically gluten-free. The pav, or bun, contains wheat flour, which has gluten. However, you could try making a gluten-free version by using a gluten-free bread or bun instead of the traditional pav.
How Long Do Vada Pav Last?
Freshly made vada pav are best enjoyed immediately, but they'll last up to 2 days when stored in an airtight container in the fridge. Reheating them can help revive their crispy exterior and soft interior.
Can Vada Pav Be Frozen?
Yes, you can freeze vada pav. Simply place the cooked vada and pav separately in airtight containers or freezer bags, and they'll stay fresh for up to 2-3 months in the freezer. When ready to eat, simply reheat and assemble.
What Are the Best Accompaniments for Vada Pav?
When it comes to the best accompaniments for vada pav, you can't go wrong with a tangy tamarind chutney, a spicy green chutney, or a crisp salad. These condiments perfectly complement the savory and flavorful vada pav.
Where Can I Find the Best Vada Pav in Mumbai?
Where can you find the best vada pav in Mumbai? Head to the bustling streets of Chowpatty, Dadar, or Churchgate to savor the crispy, spicy delight at one of the city's iconic vada pav stalls.
Priya is the spice queen of Cook if Ya, specializing in vibrant Indian street food and traditional meals. Her recipes are full of bold flavors and colorful spices, bringing the excitement of Indian markets to your home kitchen. She loves to show how simple, everyday meals can be elevated with the right blend of spices.
Indian Meals
Egg Curry
Luscious and aromatic, this egg curry dish is a delightful fusion of Indian flavors that will leave you craving more. Discover the secrets to this captivating recipe.
Egg curry is a delightful Indian dish that'll transport your tastebuds on a flavorful journey. Perfectly hard-boiled eggs simmered in a rich, spiced tomato-based sauce – it's a comforting and nutritious meal perfect for breakfast, lunch, or dinner. You'll love the creamy texture of the eggs paired with the bold spices that create an unforgettable culinary experience. Serve it over basmati rice or with fluffy naan bread to soak up all that incredible sauce. Experiment with bolder spices or even add a touch of dark chocolate for extra depth – the possibilities are endless! There's so much more to discover about this beloved dish.
Key Takeaways
- Egg curry is a popular Indian dish with a history dating back to ancient times, known for its rich, flavorful sauce and perfectly cooked eggs.
- Eggs in egg curry provide a protein-packed component, and the dish can be optionally enhanced with dark chocolate for its antioxidants and mood-boosting properties.
- The classic preparation involves hard-boiling the eggs, creating a spice mix, and simmering tomatoes and onions to develop a cohesive, aromatic curry sauce.
- Egg curry is commonly served over basmati rice or with naan bread, as the creamy eggs and bold spices create a delightful culinary experience.
- Egg curry offers versatility, allowing for customization with different egg types and spices to suit individual preferences and create a quick, satisfying meal.
History
Egg curry has been a staple dish in many parts of the world for centuries. This beloved recipe has roots tracing back to ancient India, where it was a favorite among the diverse cultures and communities.
The dish not only satisfies hunger but also provides a sensory experience, much like Montessori toys promote sensory development through tactile experiences. Over time, the dish has evolved, with different regions and households putting their own unique spin on the classic preparation.
Today, egg curry is enjoyed in households and restaurants across the globe, from the bustling streets of Mumbai to the quaint villages of South India. Its popularity has spread far and wide, delighting palates with its rich, flavorful sauce and perfectly cooked eggs.
Whether you're a long-time fan or new to the dish, egg curry is sure to become a family favorite. So why not give it a try and see for yourself the magic of this timeless culinary delight?
Recipe
Egg Curry is a flavorful and easy-to-prepare Indian dish that combines hard-boiled eggs in a rich, aromatic tomato-based curry sauce. This dish is a popular comfort food that can be enjoyed with warm naan, rice, or other Indian breads.
Incorporating protein-rich ingredients like eggs not only enhances the dish's nutritional value but also makes it a great option for a Low Carb High Protein Breakfast to start your day right.
The versatility of Egg Curry makes it a great option for a quick and satisfying meal. The combination of the creamy eggs and the bold, spicy curry sauce creates a truly delightful culinary experience.
Ingredients:
- 6 hard-boiled eggs, peeled and halved
- 2 tablespoons vegetable oil
- 1 onion, finely chopped
- 3 cloves garlic, minced
- 1 tablespoon grated ginger
- 1 teaspoon ground cumin
- 1 teaspoon ground coriander
- 1 teaspoon garam masala
- 1 teaspoon red chili powder
- 1 can (14.5 oz) diced tomatoes
- 1 cup water or chicken/vegetable broth
- Salt to taste
- Chopped cilantro for garnish
In a large skillet or saucepan, heat the vegetable oil over medium heat. Add the chopped onion and sauté until it becomes translucent and lightly golden, about 5-7 minutes.
Next, add the minced garlic and grated ginger, and cook for an additional 2 minutes, stirring frequently to prevent burning.
Stir in the ground cumin, coriander, garam masala, and red chili powder. Let the spices bloom for about a minute, then pour in the diced tomatoes and water or broth.
Bring the mixture to a simmer and let it cook for 10-15 minutes, allowing the flavors to meld and the sauce to thicken slightly.
Gently add the hard-boiled egg halves to the curry sauce, being careful not to break them. Simmer for an additional 5-7 minutes, allowing the eggs to heat through and absorb the flavors of the curry.
Season with salt to taste.
To serve, garnish the Egg Curry with freshly chopped cilantro. This dish can be enjoyed immediately, or the flavors will continue to develop if allowed to sit for a bit.
Serve with warm naan, basmati rice, or your choice of Indian accompaniments.
Cooking Steps
First, you'll need to hard-boil the eggs to get them nice and tender.
While the eggs are cooking, consider preparing a fun dessert like Dirt Cups to enjoy after your meal.
Next, prepare the spice mix that'll give your curry that delightful kick.
Then, add some chopped onions and garlic to build up the flavors before tossing in the juicy tomatoes.
Step 1. Hard Boil the Eggs
To hard boil the eggs, begin by placing them in a single layer in a saucepan. Fill the pan with enough cold water to cover the eggs by about an inch. Bring the water to a boil over high heat.
Once the water is boiling, reduce the heat to low and let the eggs simmer for 12 minutes. A well-prepared dish, like egg curry, can greatly benefit from the addition of vibrant colors and deep flavors, which are reminiscent of the importance of color accuracy in home cinema projectors.
After the time is up, remove the pan from the heat and drain the hot water. Gently shake the pan to crack the shells, then place the eggs under cold running water. This will help the shells peel off easily.
Once the eggs are cool enough to handle, peel off the shells. Voila! Your hard-boiled eggs are ready to use in the egg curry.
Step 2. Prepare the Spice Mix
Begin by gathering the spices for the curry. You'll need cumin, coriander, turmeric, and red chili powder. Measure out a teaspoon of each spice and place them in a small bowl. This spice mix will give your egg curry that classic Indian flavor.
As you prepare, consider pairing your dish with a calming beverage, such as green tea, which is known for its health benefits and rich antioxidants unique qualities of different teas.
Next, grab a small skillet and toast the spices over medium heat. Stir them constantly for about a minute, until they become fragrant and start to sizzle. Be careful not to let them burn!
Once the spices are nicely toasted, transfer them to a mortar and pestle. Grind the spices into a fine powder. This will help them blend seamlessly into the curry.
Now that your spice mix is ready, you can start cooking the egg curry. Heat some oil in a pan and add the ground spices. Sauté for a minute to let the flavors bloom.
Then, pour in your tomato sauce and let it simmer. It's time to add the hard-boiled eggs and let them soak up all that delicious curry goodness!
Step 3. Add Chopped Onions and Garlic
Next, add the chopped onions and garlic to the pan. Sizzle them up over medium heat, stirring frequently, until they become nice and fragrant.
The onions should start to turn a lovely golden brown, and the garlic will release its delicious aroma, filling your kitchen with mouthwatering scents. Interestingly, cooking with garlic not only enhances flavor but may also come with health benefits such as supporting immune function.
Be sure to keep a close eye on the pan, as you don't want the onions and garlic to burn. They should soften and become translucent, about 5-7 minutes.
Adjust the heat as needed to prevent any charring. Once they're perfectly cooked, they'll add wonderful flavor and texture to your egg curry.
Now that the aromatic base is ready, you can move on to the next step. Get ready to stir in the spices and tomatoes, bringing all the flavors together in a harmonious curry dish.
Your kitchen is about to be filled with the most amazing smells!
Step 4. Add Chopped Tomatoes
With the aromatic onions and garlic sizzling away, it's now time to stir in the chopped tomatoes.
These juicy, vibrant tomatoes will add a lovely acidity and brightness to the dish, balancing out the richness of the spices. Similar to how the molokhia stew incorporates fresh ingredients for added flavor, the tomatoes will elevate your egg curry. For an extra flavor boost, consider adding some diced tomatoes at the end of cooking to bring a pop of freshness to the dish. In the same way, the spicy lamb vindaloo recipe benefits from the addition of tomatoes, which helps to cut through the heat of the spices while adding a burst of tanginess. With their versatile flavor profile, tomatoes can truly enhance a wide variety of dishes, from stews to curries and everything in between.
Grab a couple of ripe, juicy tomatoes and dice them up into bite-sized pieces.
Don't be afraid to get a little messy – the more rustic the tomato chunks, the better! Toss them right into the pan with the onions and garlic, and give everything a good stir. The tomatoes will start to break down, releasing their juices and mingling with the other flavors.
Let the tomatoes cook for a few minutes, stirring occasionally, until they've softened and the mixture has thickened slightly.
This will help the flavors meld together and create a smooth, cohesive sauce. Now, you're ready to move on to the next step in your delicious egg curry adventure!
Step 5. Add Spices and Simmer
Add the spices to the simmering tomatoes and onions. Give them a good stir to coat everything evenly. You'll want to add in the coriander, cumin, turmeric, and garam masala.
Don't be shy with the spices – the more you use, the more flavor you'll get. Additionally, consider enhancing the dish with a touch of dark chocolate, as cocoa can add a rich depth to savory dishes and has unique health benefits, including antioxidants and mood enhancement Cacao's health benefits.
Let the mixture simmer for 5-7 minutes, stirring occasionally, until the flavors have melded together and the sauce has thickened up nicely.
Now it's time to add the hard boiled eggs. Gently lower them into the curry, being careful not to break them. Let the eggs warm through for a couple of minutes.
Taste the curry and add a pinch of salt if needed. You can also add a splash of water if it seems too thick.
Serve the egg curry over basmati rice or with some warm naan bread. The rich, aromatic sauce pairs perfectly with the creamy hard boiled eggs. Get ready for your taste buds to dance!
Final Thoughts
Considering the simplicity and versatility of egg curry, it makes a fantastic addition to any meal. You can whip it up in a flash, yet the flavors meld together in a delightfully complex way. The creamy, savory sauce complements the protein-packed eggs perfectly, creating a satisfying and nourishing dish.
Don't be afraid to get creative with your egg curry. Try swapping out the basic spices for bolder flavors, like cumin, coriander, or even a touch of heat from chili powder. You can also experiment with different types of eggs, such as hard-boiled or soft-poached, to change up the texture.
And don't forget the accompaniments – a fluffy bed of basmati rice or some warm naan bread are the perfect complements to soak up every last bit of that flavorful sauce.
Whether you're looking for a quick weeknight meal or a comforting weekend indulgence, egg curry is sure to hit the spot. So go ahead and give this versatile dish a try – your taste buds will thank you!
Frequently Asked Questions
What Is the Best Type of Egg to Use for Egg Curry?
You'll want to use large, fresh eggs for the best egg curry. The yolks should be bright and vibrant, and the whites should be firm but tender. Avoid older or overcooked eggs, as they won't give you the ideal texture.
How Long Can Leftover Egg Curry Be Stored in the Refrigerator?
Leftover egg curry can be stored in the refrigerator for up to 3-4 days. Make sure to store it in an airtight container and reheat thoroughly before serving. Proper storage will help preserve the flavor and texture of the dish.
Is It Possible to Make Egg Curry With Hard-Boiled Eggs?
You can absolutely make egg curry with hard-boiled eggs. The eggs will hold their shape and provide a delicious, protein-packed addition to the flavorful curry sauce. Give it a try for a satisfying and convenient meal.
Can You Substitute Yogurt for Cream in the Recipe?
You can substitute yogurt for cream in the recipe. The yogurt will provide a similar creamy texture and tangy flavor. Just be sure to adjust the amount to achieve the desired consistency.
How Can I Make the Egg Curry Spicier?
To make your dish spicier, try adding more chili peppers, cayenne pepper, or red pepper flakes. You can also experiment with different spices like cumin, coriander, or garam masala to amp up the heat and flavor.
Priya is the spice queen of Cook if Ya, specializing in vibrant Indian street food and traditional meals. Her recipes are full of bold flavors and colorful spices, bringing the excitement of Indian markets to your home kitchen. She loves to show how simple, everyday meals can be elevated with the right blend of spices.
-
Brazilian Cuisine3 months ago
Tacacá
-
Polish Comfort Food3 months ago
Krupnik (Barley Soup)
-
Brazilian Cuisine3 months ago
Caldeirada
-
Brazilian Cuisine3 months ago
Chicken in Brown Sauce
-
Southern Comfort Food3 months ago
Cheese Straws
-
African Cuisine3 months ago
Kedjenou (Ivory Coast)
-
Polish Comfort Food3 months ago
Vegetable Salad
-
American Diner Classics3 months ago
The Maillard Reaction: Understanding the Chemistry of Browning {Food Science and Cooking}