Connect with us

Historical Cooking

Medieval Feasts: Recreating Banquets From the Middle Ages

Keen to uncover the opulent world of medieval feasting? Discover the rich culinary traditions and captivating history behind these lavish social gatherings.

Published

on

authentic medieval banquet recipes

Medieval feasts were lavish events that showcased wealth, influence, and social hierarchy. Intricate multi-course meals featured exotic ingredients and complex preparations, engaging the senses. Skilled labor was required to roast meats on a spit over an open flame and creatively garnish dishes. Maintaining a clean environment was crucial, as the cultural significance of food in social gatherings reflected deep traditions. Today, the legacy of medieval gastronomy lives on, inspiring contemporary cooks to recreate the rich culinary artistry of the past. Want to delve deeper into this captivating era of feasting and dining?

Key Takeaways

  1. Recreate the lavish grandeur of medieval feasts by showcasing exotic ingredients, intricate preparations, and elaborate centerpieces to reflect the cultural values of the time.
  2. Utilize traditional cooking techniques, such as open-flame cooking and spit-roasting, to capture the authentic flavors and textures of medieval banquets.
  3. Emphasize the importance of visual presentation by incorporating creative garnishing, vibrant colors, and textural elements to engage the senses.
  4. Maintain a clean and organized cooking environment to enhance the guest experience and reinforce the significance of cleanliness in social dining settings.
  5. Embrace the enduring legacy of medieval gastronomy by drawing inspiration from historical recipes and techniques to create a unique culinary experience.

History

Medieval feasts have a rich and fascinating history that dates back centuries. These lavish events weren't merely about indulging in sumptuous foods; they were a reflection of the social hierarchy, political power, and cultural values of the time. Nobles and royalty often used these feasts as a means to showcase their wealth, influence, and status within the community.

The menu and presentation of the dishes were carefully curated to impress and dazzle the guests, with exotic ingredients, intricate preparations, and elaborate table settings.

The traditions and customs associated with medieval feasts varied across different regions and eras, but they generally followed a similar structure. Guests were often seated according to their rank, with the most important individuals occupying the seats closest to the host.

The meal itself was a multi-course affair, with each course meticulously planned and executed. From the roasted meats and delicate pastries to the elaborate centerpieces and entertainment, every element of the feast was designed to create a truly unforgettable experience.

Recipe

Medieval Feasts: Recipe

Advertisement

Feasts were a central part of medieval life, both for celebrations and daily sustenance. The dishes served at these events often showcased the wealth and status of the host, with elaborate preparations and exotic ingredients. One such dish that was popular during this time period was a savory meat pie.

This hearty creation combined flavorful meats, aromatic spices, and a flaky pastry crust to create a satisfying and visually stunning centerpiece for the table. The recipe below captures the essence of this medieval delight, allowing modern cooks to recreate a taste of the past.

  • 2 pounds of mixed meats (such as beef, pork, and lamb), diced
  • 1 onion, finely chopped
  • 3 cloves of garlic, minced
  • 1 teaspoon of ground cinnamon
  • 1 teaspoon of ground ginger
  • 1/2 teaspoon of ground cloves
  • 1/2 teaspoon of ground nutmeg
  • Salt and pepper to taste
  • 2 sheets of puff pastry
  • 1 egg, beaten

In a large skillet, sauté the onion and garlic until softened. Add the diced meats and spices, and cook until the meat is browned and cooked through. Season with salt and pepper to taste. Allow the mixture to cool slightly.

Preheat the oven to 375°F (190°C). Line a pie dish with one sheet of puff pastry. Transfer the meat mixture to the dish and cover with the second sheet of puff pastry. Crimp the edges to seal and cut a few slits in the top to allow steam to escape. Brush the top with the beaten egg.

Bake the pie for 30-40 minutes, or until the pastry is golden brown and flaky. Allow the pie to rest for 10 minutes before slicing and serving. This dish can be served warm or at room temperature, and pairs well with a simple salad or roasted vegetables.

Cooking Steps

First, gather your ingredients and kitchen tools.

Advertisement

Next, chop and slice the ingredients as needed.

Then, add your desired spices and seasonings, cook the dish over an open flame, and serve it on platters with garnishes.

Step 1. Gather Ingredients and Kitchen Tools
collect ingredients and tools

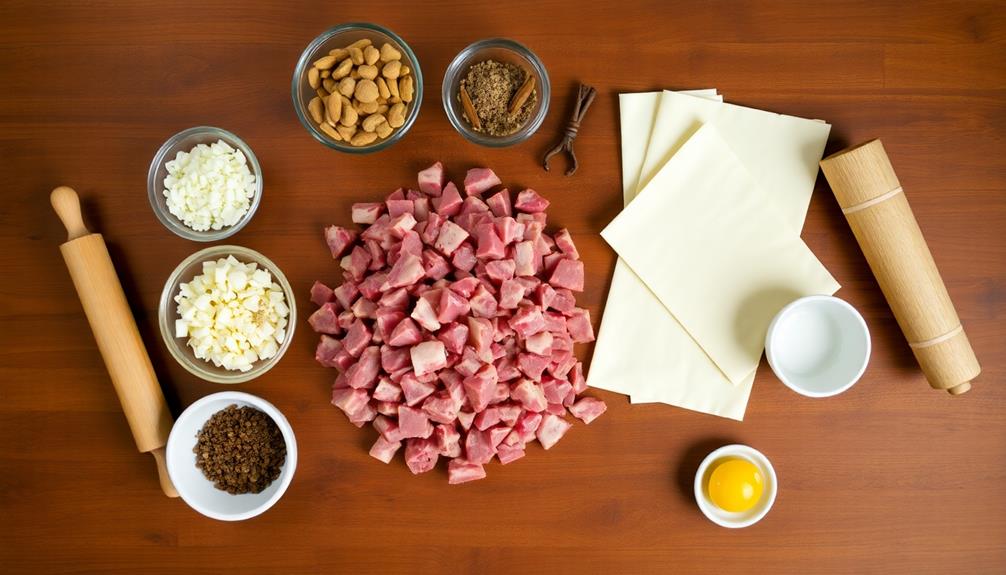
Gather your essential ingredients and kitchen tools to recreate the vibrant flavors and aromas of a medieval feast. You'll need basic staples like grains, vegetables, meat, and dairy products.

Don't forget the herbs and spices that were crucial for adding depth and complexity to medieval dishes. Invest in sturdy pots, pans, and utensils that can withstand the demands of open-flame cooking.

A spit or rotisserie will be invaluable for roasting meats. Obtain a mortar and pestle to grind spices and herbs. Gather wooden bowls, platters, and trenchers to serve your creations.

Ensure you have a reliable heat source, whether it's a fireplace, a wood-burning stove, or a modern oven. With your ingredients and tools assembled, you're ready to embark on your medieval culinary adventure, transforming simple fare into a sumptuous and authentic feast fit for a king.

Advertisement

Step 2. Chop and Slice Ingredients

chop and slice ingredients

Once you've gathered your ingredients and tools, begin chopping and slicing them to prepare for the cooking process.

Start by dicing the onions, being careful to avoid tears. Slice the carrots and parsnips into thin, even pieces. Chop the herbs, like sage and thyme, into small, fragrant pieces.

Slice the mushrooms, ensuring they're all roughly the same thickness for even cooking. If you're using meat, like chicken or beef, cut it into bite-sized cubes or strips.

Remember to use a sharp knife and a sturdy cutting board to make the task easier. Work efficiently, but take care not to rush and risk injury.

As you chop and slice, keep an eye on the various textures and sizes, aiming for consistency to ensure even cooking throughout the dish.

With your ingredients prepped, you're one step closer to creating an authentic medieval feast.

Advertisement

Step 3. Add Spices and Seasonings

incorporate spices and seasonings

With your ingredients chopped and ready, you can now begin adding the necessary spices and seasonings to create the authentic flavors of a medieval feast.

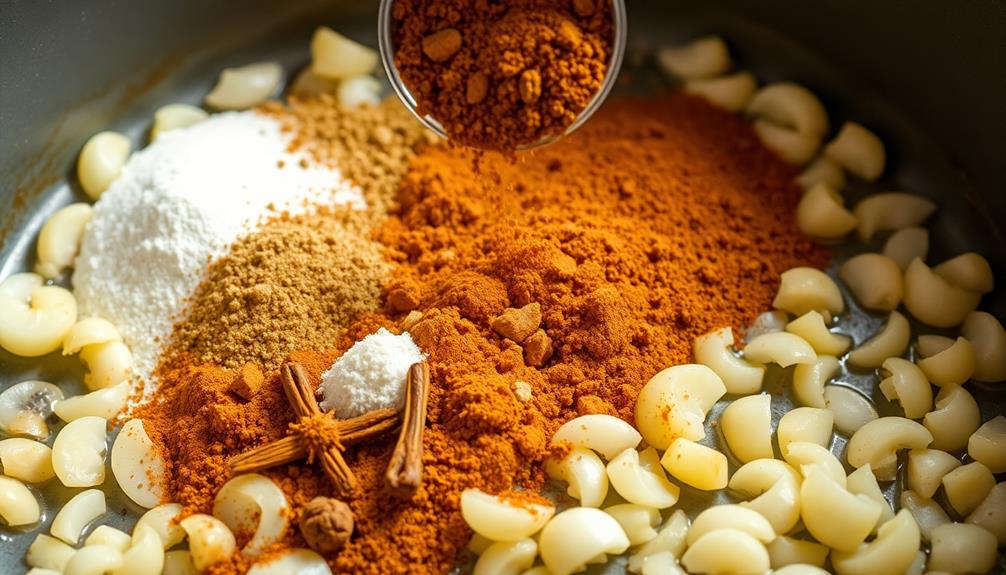
Reach for the precious saffron, cinnamon, and cloves to infuse your dishes with warmth and complexity. Did you know that certain honey varieties, like Manuka honey, are known for their antibacterial properties, which could have been highly valued in medieval cooking?

Don't be shy with the pepper – medieval cooks favored a bold, peppery kick. Sprinkle in a touch of nutmeg, ginger, and cardamom to further enhance the aroma and depth of your creations.

Remember, spices were highly prized during the Middle Ages, so use them generously to showcase their vibrant colors and captivating scents.

As you work, take a moment to inhale the heady fragrance wafting through the air. This sensory experience was an integral part of the medieval dining ritual.

With each pinch of seasoning, you're bringing the past to life, transporting your guests to a time when the table was a canvas for culinary artistry.

Advertisement

Step 4. Cook Over Open Flame

cook using open flame

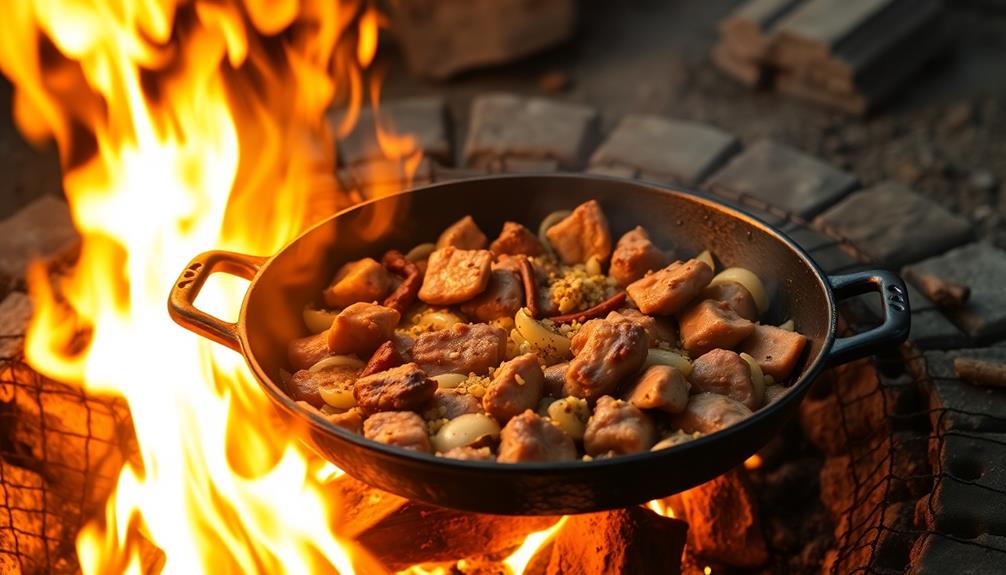
Now that you've seasoned your ingredients to perfection, it's time to bring them to life over an open flame.

Whether you're working with a roaring fireplace or a simple campfire, the key to cooking medieval-style is to harness the primal power of the flame. Carefully arrange your meats, vegetables, and breads around the perimeter of the fire, allowing the heat to envelop them.

Adjust the placement as needed, turning and basting to ensure even cooking. Don't be afraid to let the flames lick at your food – the char and smokiness will only enhance the flavors.

Keep a close eye, though, as medieval cooking can be unpredictable. Be ready to shift your ingredients, add more fuel, or quench flare-ups as they occur.

With a little practice, you'll master the art of open-flame cooking and transport your guests back to the grand halls of the Middle Ages. The aroma alone will have them eagerly anticipating each savory bite.

Step 5. Serve on Platters With Garnishes
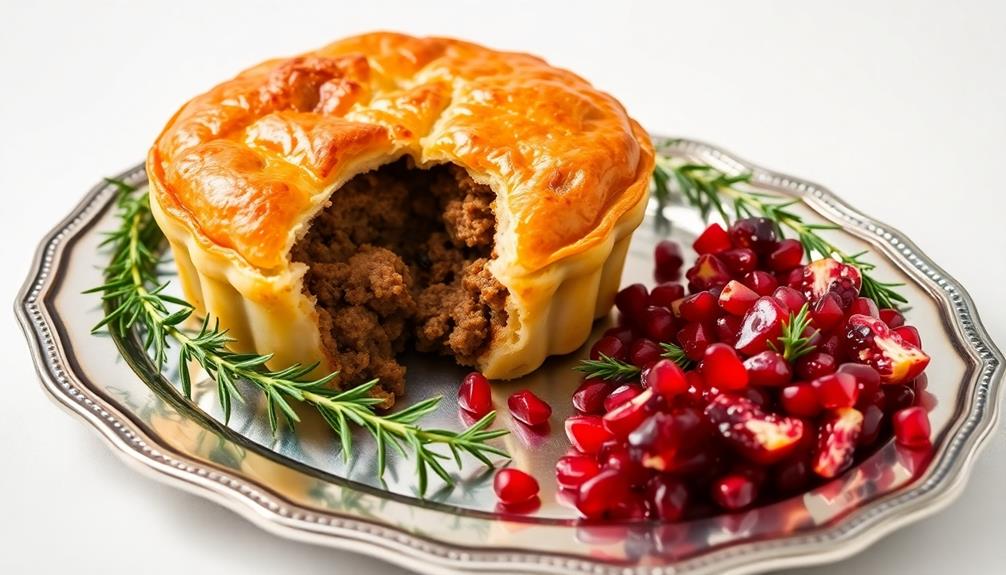
serve garnished platters beautifully

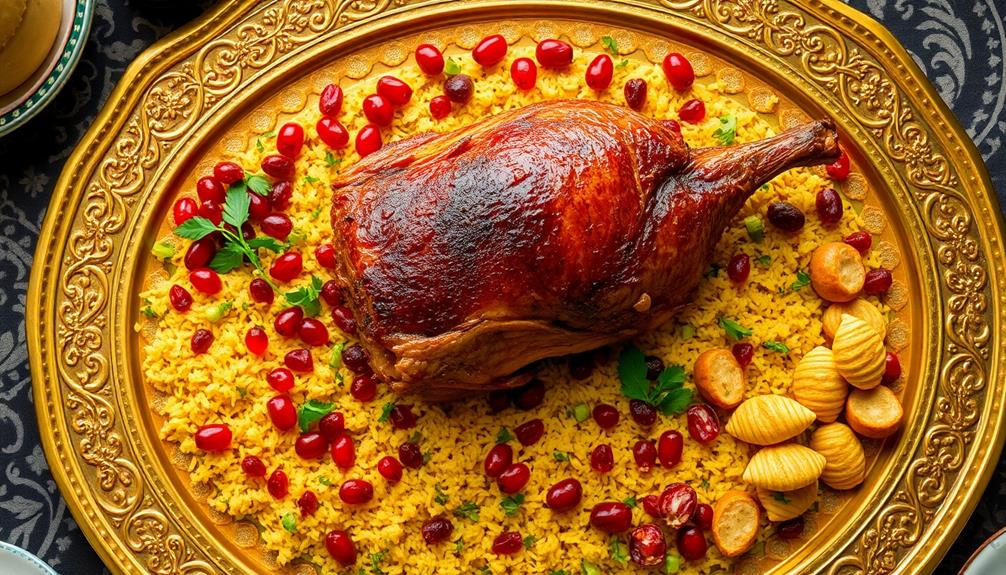
Upon completing the cooking over the open flame, arrange your delectable medieval dishes onto ornate serving platters. Maintaining a clean and organized presentation is essential, as it enhances the dining experience and promotes a sense of control and organization in daily life, which can lead to improved mental well-being.

Cover the platters with fragrant herbs and edible flowers to add both flavor and visual appeal. Place the platters on the table, ensuring they're evenly spaced and easily accessible for your guests.

Advertisement

Don't be afraid to get creative with your garnishes. Thinly slice fruits like apples or pears, and arrange them in intricate patterns around the edges of the platters. Sprinkle toasted nuts or seeds for a satisfying crunch.

Consider adding a drizzle of honey or a sprinkle of spices to elevate the presentation further. For an enjoyable gathering, remember that a tidy environment can reduce stress and enhance overall wellness, as discussed in health and wellness benefits of clean homes.

Final Thoughts

Reflecting on the grand medieval feasts, one can't help but appreciate the rich cultural tapestry that these events wove.

From the intricate platters adorned with vibrant garnishes to the grand spectacle of servitude, these banquets epitomized the opulence and grandeur of the era.

While the preparation and presentation of the food may seem labor-intensive by modern standards, it's important to remember that these feasts weren't merely about sustenance, but rather a means of showcasing wealth, power, and social status.

Advertisement

Today, as we strive to recreate these historical culinary masterpieces, we're reminded of the enduring legacy of medieval gastronomy and the cultural significance it held.

Frequently Asked Questions

What Tools Were Used in Medieval Kitchens?

Medieval kitchens utilized a variety of tools like spits, cauldrons, mortars, and pestles for preparing meals. You'd find knives, cutting boards, and ladles essential for chopping, mixing, and serving. These time-tested tools helped create the flavors of the past.

How Did Medieval Cooks Preserve Food?

To preserve food, medieval cooks used techniques like drying, salting, smoking, and pickling. They stored preserved foods in cool, dry places to extend their shelf life and prevent spoilage.

What Were the Typical Table Manners in the Middle Ages?

In the Middle Ages, table manners were quite different from today. You'd use your hands to eat, sometimes even right from the communal dishes. Napkins were rare, and burping or picking your teeth at the table were perfectly acceptable behaviors.

How Did the Nobility's Feasts Differ From Common Folk?

The nobility's feasts were far more lavish and ostentatious than the common folk's meals. They'd enjoy a wide variety of exotic dishes, while commoners made do with simpler fare and limited ingredients.

Advertisement

What Were the Common Sources of Entertainment During Medieval Feasts?

During medieval feasts, common forms of entertainment included music, dancing, storytelling, and theatrical performances. Jesters, minstrels, and jugglers often provided amusement, while nobles engaged in more elaborate pastimes like jousting and chess.

Advertisement

Historical Cooking

Ancient Roman Feast: Cooking Like a Gladiator

Glimpse into the culinary customs of ancient Roman gladiators and discover the savory secrets that fueled their strength through hearty, nutrient-dense meals.

Published

on

gladiatorial culinary ancient traditions

Discover the savory secrets of ancient Roman gladiator cuisine! These mighty warriors fueled their strength with hearty, nutrient-dense meals – think simmering stews packed with tender meats, wholesome grains, and fresh veggies. You'll be amazed by their cooking techniques, like soaking grains overnight for perfect texture. Imagine the tantalizing aromas wafting through the gladiator dining halls – it's enough to make your mouth water! By exploring these historic recipes, you'll not only learn about the culinary customs of the past, but also uncover delicious inspiration for your own wholesome and flavorful meals. Intrigued? Read on to dive deeper into the world of gladiator gastronomy!

Key Takeaways

  • The culinary prowess of gladiators in ancient Rome demonstrated their determination and skill beyond combat, with their diet playing a crucial role in shaping identity and community.
  • Gladiator meals focused on healthy, nutritious diets to meet physical demands, centered on simple, wholesome ingredients like grains, vegetables, and meat.
  • Time-honored cooking techniques were used to create nutritious dishes, including soaking grains overnight and simmering grains and vegetables until tender.
  • Hearty stew served as a staple, packed with protein, vegetables, and complex carbohydrates, reflecting the wholesome and balanced nature of the gladiator diet.
  • Cooking techniques in ancient Rome generated appealing aromas in the kitchen, evoking sensory connections to historical culinary practices and enhancing the overall dining experience.

History

Delve into the captivating history of gladiator cuisine, a culinary legacy that echoed the ferocity and spectacle of the Roman arena.

You'll be amazed to discover that these legendary warriors didn't just battle for their lives – they also competed in the kitchen! In the bustling heart of ancient Rome, gladiators would gather to prepare hearty meals that fueled their strength and resilience.

Imagine the sights and sounds of a gladiator's dining hall, where the aroma of sizzling meats and fragrant spices would fill the air.

These skilled fighters knew that a balanced diet was crucial for their success in the arena, so they'd carefully select ingredients and use time-honored cooking techniques to create nutritious and satisfying dishes.

From savory stews to robust breads, the gladiators' culinary prowess knew no bounds, reflecting the sheer determination and skill they brought to every aspect of their lives.

Advertisement

Recipe

Eating like a gladiator wasn't just about brute strength, but also about maintaining a healthy and nutritious diet to fuel their physical demands. One of the staple dishes in a gladiator's meal plan was a hearty stew, packed with protein, vegetables, and complex carbohydrates to provide sustained energy.

The inclusion of fermented vegetables could have offered additional gut health benefits, much like a fermented vegetable plate that enhances both flavor and nutrition. This recipe for a Gladiator's Beef and Vegetable Stew captures the essence of the type of wholesome, nourishing fare that would have been enjoyed by these ancient warriors. The combination of tender beef, root vegetables, and aromatic seasonings creates a robust and satisfying meal that's sure to energize and sustain you.

Ingredients:

  • 2 lbs beef chuck, cut into 1-inch cubes
  • 3 medium carrots, peeled and sliced
  • 2 medium potatoes, peeled and cubed
  • 1 large onion, diced
  • 3 cloves garlic, minced
  • 2 cups beef broth
  • 1 cup red wine
  • 2 bay leaves
  • 1 tsp dried thyme
  • Salt and pepper to taste

In a large pot or Dutch oven, brown the beef over medium-high heat until it develops a nice sear on all sides, about 5-7 minutes. Remove the beef from the pot and set aside.

Add the onions and garlic to the pot and sauté until fragrant and translucent, about 3-4 minutes. Pour in the red wine and use a wooden spoon to scrape up any browned bits from the bottom of the pot.

Add the beef back to the pot, along with the beef broth, carrots, potatoes, bay leaves, and thyme. Bring the mixture to a boil, then reduce the heat to low, cover, and simmer for 45-60 minutes, or until the beef and vegetables are tender.

Advertisement

When serving this Gladiator's Beef and Vegetable Stew, consider pairing it with a hearty, whole-grain bread or a side of roasted root vegetables to truly embrace the rustic, nutrient-dense nature of this ancient warrior's meal.

Enjoy the comforting flavors and nourishing properties that would have fueled the strength and endurance of the gladiators of old.

Cooking Steps

Soak your grains in water overnight, then drain and rinse them.

Now, add a pinch of salt and your favorite spices.

Next, toss in some fresh veggies and let the whole thing simmer until the grains are tender and delicious.

Advertisement

Yum!

Step 1. Soak Grains in Water Overnight

overnight grain soaking process

Before you can cook your grains, you'll want to soak them in water overnight. This simple step makes a big difference! When you soak the grains, it helps break down their tough outer shell. As a result, they'll cook faster and become more tender and flavorful.

To get started, grab your favorite grains – maybe some hearty barley, nutty farro, or fluffy quinoa. Place them in a large bowl and cover with plenty of fresh water. Let them sit at room temperature for at least 8 hours, or even overnight. The longer they soak, the better.

In the morning, you'll notice the grains have softened and expanded. Drain and rinse them before cooking.

Now your grains are ready to be transformed into a delicious ancient Roman feast! Get excited, because the real cooking is about to begin. With this simple soaking step, you'll be well on your way to creating a meal fit for a gladiator.

Step 2. Drain and Rinse Soaked Grains

drain and rinse grains

After letting your grains soak overnight, it's time to drain and rinse them. This simple step helps remove any impurities and excess starch, leaving you with clean, ready-to-cook grains.

Grab a colander and place it in the sink. Carefully pour the soaked grains into the colander, letting the water drain out. You might need to gently shake the colander to help the water flow through.

Advertisement

Once the grains are drained, turn on the faucet and give them a good rinse. Swish the grains around, making sure every piece gets a refresh. The water should run clear, signaling that your grains are clean and prepped for cooking.

Pat the grains dry with a paper towel if needed. Now your grains are ready to be transformed into a delicious, hearty dish fit for a gladiator! Get excited to cook up something amazing.

Step 3. Add Salt and Spices

season with salt spices

With your grains rinsed and drained, it's time to season them up! Grab a pinch of salt and sprinkle it over the grains. The salt will bring out the natural flavors and make your dish super tasty. Don't be shy – go ahead and add a dash more if you like things extra flavorful.

Incorporating healthy fats and low carb ingredients can also enhance the nutritional value of your meal, making it both delicious and beneficial for your diet. For more information, check out this Atkins Carbohydrate Counter.

Next, it's time for the spices! Reach for your favorite blend of herbs and spices. Maybe some fragrant oregano, earthy cumin, or zesty lemon pepper.

Get creative and experiment with different combinations. Rub the spices between your palms to release their aroma, then toss them into the bowl. Stir everything together until the grains are evenly coated. Mmm, can you already smell the delicious aromas?

Advertisement

Now your grains are seasoned to perfection, ready to be cooked up into a hearty, flavorful meal fit for a gladiator. Let's move on to the next step – cooking the grains!

Step 4. Add Vegetables

incorporate additional vegetables now

Now that your grains are seasoned to perfection, it's time to add some nutrient-dense vegetables. Chopping up crisp carrots, juicy tomatoes, and earthy mushrooms will bring a burst of color and flavor to your dish.

Imagine the satisfying crunch as you bite into a fresh bell pepper or the savory aroma of sautéed onions. Incorporating a variety of vegetables not only enhances the taste but also boosts the nutritional profile of your meal, much like how heat pumps improve indoor air quality by filtering and circulating fresh air.

Don't be afraid to get creative with your veggie selection. Why not try adding some leafy greens like spinach or kale for an extra nutrient boost?

Or perhaps you'll discover a new favorite by experimenting with zucchini, eggplant, or broccoli. The possibilities are endless!

As you chop and prep your vegetables, take a moment to appreciate the natural goodness you're about to enjoy. These wholesome ingredients won't only nourish your body but also transport your taste buds to the heart of ancient Rome.

Advertisement

Get ready to savor the vibrant flavors and textures that will make your gladiator-inspired feast truly unforgettable.

Step 5. Simmer Until Grains Are Tender

simmer grains until tender

Once your vegetables are prepped, go ahead and add them to the simmering grains.

Give everything a good stir, then let it simmer gently until the grains are nice and tender. This might take around 20-30 minutes, depending on what kind of grains you're using.

Keep an eye on it, giving it a stir every now and then, so the grains don't stick to the bottom of the pot.

You'll know the grains are ready when they're soft and have absorbed all that yummy vegetable flavor.

The whole kitchen will smell amazing, too! Don't be afraid to give them a little taste test to check for doneness. Just be careful, as that pot will be hot.

Advertisement

Once the grains are perfect, you can turn off the heat and let everything hang out until you're ready to serve.

Then, get ready to dig into a delicious ancient Roman-inspired feast!

Final Thoughts

Ultimately, the culinary practices of ancient Roman gladiators offer a fascinating glimpse into the past. You'll be amazed at how these mighty warriors fueled their bodies for the ultimate test of strength and endurance in the arena.

Their diet, which centered on simple, wholesome ingredients like grains, vegetables, and a touch of meat, provides a delicious and nutritious blueprint for modern-day healthy eating.

As you've learned, the gladiators' cooking techniques, such as simmering grains until perfectly tender, were both practical and flavorful.

Advertisement

Imagine the aromas wafting through the training grounds as these meals were prepared – it's enough to make your mouth water!

And the best part? You can recreate these ancient recipes in your own kitchen, connecting with the past in the most delicious way.

Frequently Asked Questions

What Were the Typical Seasonings Used in Ancient Roman Cuisine?

You'll find that ancient Roman cuisine often featured seasonings like salt, pepper, cumin, coriander, and mint. These flavorful spices were used to enhance the natural flavors of the ingredients.

Did Ancient Roman Gladiators Have Access to a Wide Variety of Ingredients?

While ancient Roman gladiators had access to a relatively limited range of ingredients, they could still create flavorful dishes by utilizing the readily available spices, herbs, and regional produce common in their local cuisine.

How Did the Cooking Techniques of Ancient Romans Differ From Modern Methods?

Roman cooking techniques differed from today's methods as they relied more on open-fire cooking and preserved ingredients. They didn't have modern appliances, but their techniques brought out bold, earthy flavors in their meals.

Advertisement

Were There Any Dietary Restrictions or Preferences Among Ancient Roman Gladiators?

As ancient Roman gladiators, you likely had a restricted diet focused on building strength and endurance. Your meals likely emphasized high-protein foods like barley, grains, and meats to fuel your intense training and combat.

What Were the Common Serving Sizes and Presentation Styles in Ancient Roman Feasts?

Common serving sizes were generous, with platters of food shared among guests. Presentation styles emphasized visual appeal, with dishes artfully arranged and decorated. Guests reclined on couches, enjoying the meal in a leisurely, social atmosphere.

Continue Reading

Historical Cooking

Medieval Banquet: A Knight’s Table

Uncover the captivating traditions that transformed a medieval banquet into a spectacle of grandeur, where the feast was merely the beginning of a remarkable journey.

Published

on

knight s table medieval feast

Step back in time and join the noble knights at their grand medieval banquet! The air is thick with the savory scents of roasted boar, seasoned with aromatic herbs and spices. The table shines with gleaming pewter mugs, reflecting the candlelight's warm glow. As you take your seat, the lively chatter and clinking of cups envelop you, transporting you to a world of feasting and merriment. Though the feast may be fit for a king, you'll soon discover there's much more to uncover about the traditions and customs that made these medieval gatherings truly extraordinary.

Key Takeaways

  • Lavish medieval banquets showcased the wealth and power of the nobility, featuring savory meats, sweet vegetables, and a focus on community and celebration.
  • Attendees experienced a warm, festive atmosphere with flickering candlelight, clinking pewter mugs, and lively music and entertainment.
  • Preparing a medieval feast involved collecting sturdy cookware, fresh ingredients, and using aromatic herbs to enhance the flavors of roasted meats.
  • Roasted boar, symbolizing power and prestige, was a featured dish, typically seasoned and slow-roasted for 3-4 hours.
  • Modern reenactments of medieval banquets allow people to experience historical dining customs and engage with the rich cultural heritage.

History

In the Middle Ages, medieval banquets were grand affairs that showcased the wealth and power of nobility. Imagine yourself as a knight, sitting at a long, ornate table, surrounded by the clinking of silverware and the chatter of guests. The air would be thick with the mouthwatering scents of roasted meats, freshly baked bread, and rich, creamy sauces.

As the feast began, servers would parade in, carrying platters piled high with succulent fowl, tender venison, and fragrant vegetables. You'd eagerly await your turn to select the choicest morsels, savoring each bite as the flavors danced on your tongue.

Between courses, minstrels would entertain the crowd with lively music and poetry, while jesters performed amusing antics to delight the diners.

Throughout the evening, the lord and lady of the manor would hold court, conversing with their guests and overseeing the festivities. It was a time of indulgence, camaraderie, and the celebration of the privileges of the noble class.

Medieval banquets were truly a feast for the senses!

Advertisement

Recipe

Roasted Boar with Spiced Apples

Medieval feasts were a grand display of extravagance and indulgence. At the center of these lavish celebrations was the roasted boar, a symbol of power and prestige. This succulent dish, often accompanied by a variety of seasonal produce, exemplified the culinary artistry of the era.

The preparation of the roasted boar required both skill and patience. The meat was carefully seasoned with a blend of herbs and spices, then slowly roasted over an open fire until it achieved a rich, caramelized crust. The resulting feast was a true testament to the epicurean delights of the Middle Ages.

Ingredients:

  • 1 whole boar, approximately 8-10 lbs
  • 2 tbsp salt
  • 1 tbsp black pepper
  • 1 tsp ground cinnamon
  • 1 tsp ground cloves
  • 1 tsp ground nutmeg
  • 4 large apples, peeled, cored, and sliced
  • 2 cups apple cider
  • 1 cup honey

Cooking Instructions:

Preheat your oven to 325°F (165°C). Rub the boar all over with the salt, black pepper, cinnamon, cloves, and nutmeg.

Advertisement

Place the boar on a roasting rack in a large roasting pan. Pour the apple cider and honey over the top of the boar. Arrange the sliced apples around the base of the pan.

Roast the boar for 3-4 hours, basting every 30 minutes, until the internal temperature reaches 145°F (63°C) for medium-rare or 160°F (71°C) for well-done.

Tips:

When selecting a boar, choose one that's young and tender. The older the boar, the tougher the meat.

Additionally, basting the roast frequently will help ensure a moist and flavorful result. Serve the roasted boar with the spiced apples and the pan juices, and accompany it with a selection of seasonal vegetables and freshly baked bread for a truly authentic medieval feast.

Advertisement

Cooking Steps

Gather up some firewood and kindling to get that fire roaring.

Then, prepare your ingredients and cooking utensils.

Next, you'll want to marinate the meat in a nice wine mixture before roasting it to perfection.

Serve it all up with some delicious seasonal veggies for a truly mouthwatering medieval feast!

Step 1. Gather Firewood and Kindling

collect firewood and kindling

Gathering the necessary firewood and kindling is a crucial step in preparing for the medieval banquet.

You'll want to collect an ample supply of dry, seasoned wood to ensure a strong, steady flame that will last throughout the evening's feast.

Advertisement

Begin by venturing into the nearby forest, your trusty axe in hand, and search for fallen branches or small logs. Carefully select pieces that are free of moisture, as damp wood won't burn as brightly.

Once you've gathered a sizable stack, find some tightly-rolled pieces of parchment or newspaper to use as kindling. These will help ignite the firewood quickly and efficiently.

Arrange the kindling and wood in the fireplace or outdoor fire pit, leaving spaces for the air to circulate.

With a single spark, the flames will spring to life, radiating warmth and setting the stage for a delightful medieval banquet.

Step 2. Prepare Ingredients and Utensils

gather ingredients and tools

With the fire now crackling, you'll need to prepare the necessary ingredients and utensils for the medieval feast.

First, gather your cooking pots, pans, and any other vessels you'll need. These sturdy, iron-forged tools will help you prepare the sumptuous dishes fit for a knight.

Advertisement

Next, round up your fresh produce – crisp vegetables, fragrant herbs, and juicy fruits. Don't forget the meats, whether it's succulent venison, savory poultry, or flavorful fish.

You'll also need salt, pepper, and any other seasonings to bring out the bold, medieval flavors. Set these ingredients within easy reach, so you can quickly add them to your simmering pots and pans.

Finally, make sure you have plenty of wooden platters, trenchers, and cups ready to serve your delectable creations.

With your workspace prepared, you can start transforming these raw materials into a feast fit for a king!

Step 3. Marinate Meat in Wine Mixture

marinate meat with wine

Marinating the meat in a rich wine mixture is a crucial step to infusing your medieval dishes with bold, complex flavors. Start by combining a full-bodied red wine, fragrant herbs, and aromatic spices in a large bowl.

Carefully add the tender cuts of meat, ensuring they're fully submerged in the fragrant marinade. Cover the bowl and let the meat soak up all that delicious flavor for at least a few hours, or even overnight if you have the time.

Advertisement

As the meat marinates, the wine will tenderize the fibers, while the herbs and spices will work their magic, transforming the ordinary into the extraordinary.

Imagine the mouthwatering aroma wafting through the castle as the meat soaks up all those rich, savory notes. When you're ready to cook, simply remove the meat from the marinade and sear it to perfection.

Get ready for a flavor explosion that will transport you back to the grand feasts of the Middle Ages!

Step 4. Roast the Marinated Meats

roast the marinated meats

Once the meat has soaked up all those wonderful flavors from the marinade, it's time to move on to the next step – roasting.

Grab your largest roasting pan and preheat your oven to a toasty 375°F. Carefully place the marinated meats into the pan, making sure they're not crowded together. You want plenty of room for the juices to sizzle and the meat to brown evenly.

As the oven heats up, you'll start to smell the mouthwatering aroma of the meat roasting. It'll make your stomach rumble with anticipation!

Advertisement

Keep a close eye on the meat, turning it every 15 minutes or so, until it's cooked to a perfect golden-brown. Use a meat thermometer to make sure it reaches the ideal internal temperature – around 145°F for medium-rare.

Once it's ready, take the pan out of the oven and let the meat rest for a few minutes before slicing into it. This allows the juices to redistribute, making every bite juicy and flavorful.

Step 5. Serve With Seasonal Vegetables

serve with seasonal vegetables

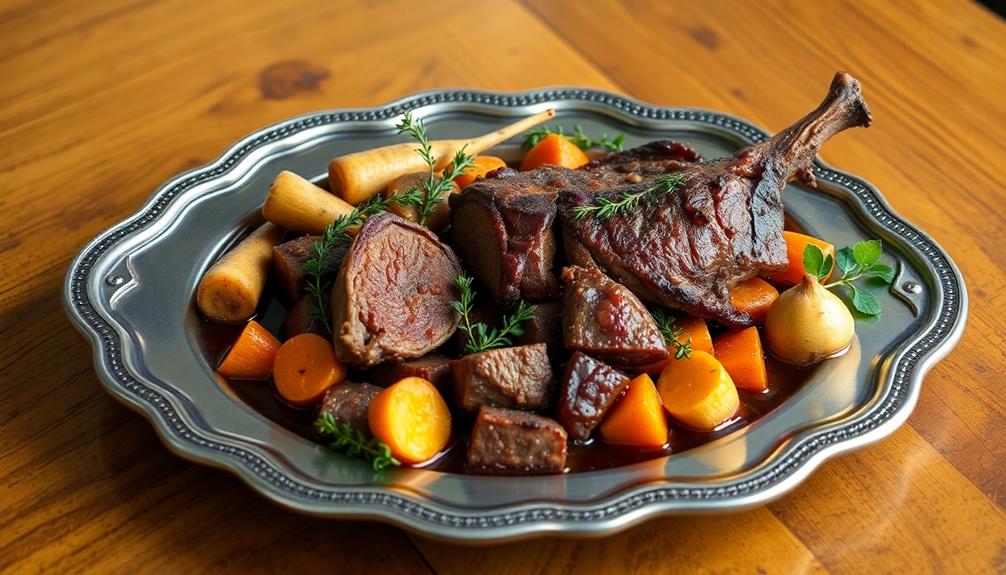
To complement the mouthwatering roasted meats, you'll want to whip up some delectable seasonal vegetables. Imagine the vibrant colors of fresh carrots, parsnips, and Brussels sprouts, all sizzling in a pan with a drizzle of fragrant olive oil. The sweet, earthy aromas will fill the air, making your mouth water in anticipation.

Now, gently toss the vegetables to ensure they're evenly coated and let them roast to perfection. You'll know they're ready when they've developed a delightful caramelized crust, yet remain tender and juicy on the inside.

For an extra burst of flavor, you can sprinkle in some aromatic herbs like rosemary or thyme.

Serve the roasted vegetables alongside the succulent roasted meats, creating a visually stunning and harmonious feast fit for a king. The combination of the savory meats and the sweet, tender vegetables will delight your senses and leave your guests thoroughly satisfied.

Advertisement

Final Thoughts

As we reflect upon the medieval banquet, let's consider the enduring legacy it has left behind. The sights, sounds, and flavors of those grand feasts have captured the imagination of people for centuries.

Imagine the flickering candlelight, the clinking of pewter mugs, and the lively chatter as knights and nobles indulged in hearty dishes.

Though the formality and extravagance may seem a world away, the spirit of community and celebration lives on.

Modern-day reenactments and themed events allow us to step back in time and experience the joy of dining like a true medieval lord or lady.

Who knows, you might even learn a thing or two about the etiquette and customs that were essential back then.

Advertisement

Frequently Asked Questions

What Type of Entertainment Was Provided at Medieval Banquets?

At medieval banquets, you'd be entertained by minstrels, musicians, and jesters who'd perform songs, dances, and comedic acts to liven up the festivities and keep the guests engaged throughout the evening.

How Did the Seating Arrangements Reflect the Social Hierarchy?

At a medieval banquet, seating arrangements reflected the social hierarchy. You'd find the most honored guests seated closest to the host, while servants and commoners were seated further away, with their position determined by their rank and status.

What Types of Tableware Were Used During Medieval Banquets?

During medieval banquets, the tableware reflected the diners' social status. The noble guests used ornate silver or gold plates, cups, and utensils, while commoners used simpler wooden or pewter dishware.

Were There Any Specific Table Manners Expected at These Events?

At medieval banquets, you'd be expected to follow strict table manners. Hands off the tablecloth, no double-dipping, and keep your elbows off the table. Proper etiquette ensured a refined dining experience for all.

How Were the Guests Expected to Dress for a Medieval Banquet?

You were expected to dress in your finest attire for a medieval banquet. Elaborate gowns, tunics, and cloaks adorned with embroidery or fur were common. Proper etiquette dictated that you present yourself as a noble guest.

Advertisement

Continue Reading

Historical Cooking

Victorian High Tea: Scones and Clotted Cream

Nostalgic visions of Victorian high tea, where flaky scones and velvety clotted cream transport you to a bygone era of refined elegance. Discover the full story.

Published

on

scones with clotted cream

Ah, the timeless delight of Victorian high tea! Picture yourself indulging in warm, flaky scones, their golden crust giving way to a soft, pillowy interior. As you take your first bite, the luxurious clotted cream melts on your tongue, its velvety texture and rich flavor elevating the experience. This cherished ritual transports you to a bygone era of refined elegance, where the beauty of hospitality and the pleasures of connection are celebrated. Savoring each morsel, you're swept away by the wondrous aromas and the sense of timelessness that high tea so uniquely evokes. And if you thought this was captivating, just wait until you discover the full story behind this enchanting tradition.

Key Takeaways

  • Scones are a staple component of Victorian high tea, often served warm and paired with clotted cream for enhanced flavor and texture.
  • The preparation of scones involves sifting flour and baking powder, incorporating cold butter, and gently kneading the dough for a flaky result.
  • High tea emphasizes the beauty of hospitality and social interaction, with scones and finger sandwiches complementing the serving of fragrant teas in delicate porcelain cups.
  • The Victorian high tea experience encourages guests to dress in their finest attire and savor each morsel, creating a refined and elegant atmosphere.
  • High tea serves as a platform for celebrating special occasions, fostering social connections and reinforcing the cultural heritage and refinement of the Victorian era.

History

Although high tea has its origins in 19th-century England, the Victorian era saw it become a popular social ritual among the upper and middle classes.

Back then, it was a chance for ladies and gentlemen to gather, sip fragrant teas, and indulge in delectable finger foods like crustless sandwiches, freshly baked scones, and rich clotted cream.

People looked forward to this cozy afternoon tradition, which often took place in elegant drawing rooms or sun-dappled gardens.

The ritual of high tea allowed Victorians to take a break from their busy lives and enjoy each other's company over a leisurely repast.

It was a time to catch up on the latest news, discuss current events, and simply savor the simple pleasures of good food and good conversation.

Advertisement

This beloved custom quickly became a hallmark of Victorian high society, cementing its place in the social fabric of the era.

Recipe

Victorian High Tea: Recipe

High tea, also known as "meat tea," was a light meal served in the late afternoon or early evening during the Victorian era. It typically consisted of savory and sweet dishes, often accompanied by tea. This recipe aims to capture the essence of a traditional Victorian high tea, showcasing a selection of delectable treats.

To complement your delightful setting, consider enhancing the atmosphere with the perfect home cinema setup, where you can enjoy classic films that reflect the elegance of the Victorian era while indulging in your treats. Top projectors for home cinema can elevate your viewing experience, making it even more memorable.

Preparing a Victorian high tea is a delightful way to transport yourself and your guests back to the elegance and refinement of the Victorian era. With its diverse array of flavors and textures, this high tea menu is sure to impress and delight.

Advertisement

Ingredients:

  • Finger sandwiches (e.g., cucumber, egg salad, smoked salmon)
  • Scones with clotted cream and jam
  • Assorted bite-sized cakes (e.g., Victoria sponge, lemon drizzle, chocolate éclair)
  • Assorted tea biscuits (e.g., shortbread, digestives, Viennese whirls)
  • Selection of teas (e.g., English breakfast, Earl Grey, Darjeeling)

To prepare the Victorian high tea, begin by preparing the finger sandwiches, ensuring the fillings are chilled and the bread is thinly sliced. Bake the scones according to your preferred recipe, and prepare the clotted cream and jam.

Assemble the assorted cakes and tea biscuits on a tiered serving stand or platter, arranging them in a visually appealing manner. Brew a selection of high-quality teas, and serve them hot in teapots along with the accompanying tea accoutrements, such as sugar cubes, lemon slices, and milk.

When hosting a Victorian high tea, attention to detail is key. Encourage your guests to dress in their finest attire, and consider playing classical music or string quartets in the background to enhance the ambiance.

Encourage your guests to savor each delectable morsel and sip their tea with pinkies raised, immersing themselves in the refined and elegant experience of a Victorian high tea.

Cooking Steps

Preheat your oven to a toasty 425°F and start sifting the flour and baking powder together.

Advertisement

Next, add the butter to the flour mixture and use your fingers to blend it all in.

Step 1. Preheat Oven to 425°F

preheat oven to 425 f

To prepare for the baking portion of your Victorian High Tea, go ahead and preheat your oven to 425°F. This nice, toasty temperature is perfect for getting your scones and other treats baked up just right.

You'll want to make sure your oven is fully heated before popping in your creations, so give it a few minutes to reach the ideal temperature. Once it's ready, you can slide in your trays and get those baked goods rising and browning beautifully.

The aroma of freshly baked scones is going to fill your kitchen and have everyone's taste buds tingling with anticipation. Just imagine the light, flaky texture and how amazing they'll taste with a generous helping of clotted cream and jam. Mmm, can't you almost smell it?

With the oven preheated, you're one step closer to serving up an authentic Victorian High Tea that your guests will truly savor.

Step 2. Sift Flour and Baking Powder

sift flour baking powder

Grab a large mixing bowl and sift together the all-purpose flour and baking powder. Give the bowl a gentle shake to help the ingredients blend. This step is crucial, as sifting allows the flour and baking powder to be evenly distributed throughout the dough. You don't want any pesky clumps!

Next, use your fingertips to lightly rub in the butter until the mixture resembles coarse breadcrumbs. Be careful not to overmix – you want to keep the dough light and flaky.

Advertisement

Now, create a well in the center of the flour mixture and pour in the cold milk. Use a fork to gently bring the dough together, taking care not to overwork it. The dough should be slightly sticky but still hold its shape.

Wonderful! You've completed the sifting step. Up next, you'll need to roll out the dough and cut out those delightful scones. Get ready for the delicious aromas to fill your kitchen!

Step 3. Add Butter to Flour Mixture

combine butter and flour

Next, use your fingertips to lightly rub the cold butter into the flour mixture until it resembles coarse breadcrumbs. This step is crucial for creating the perfect scone texture.

Gently work the butter into the flour, taking care not to overwork the dough. You want the mixture to have a few pea-sized pieces of butter remaining. This will help the scones rise beautifully and develop a flaky, tender interior.

Once the butter is fully incorporated, your flour mixture will take on a slightly crumbly appearance. This is exactly what you're looking for!

The butter coats the flour, preventing the gluten from developing too much. This creates a light, delicate scone that practically melts in your mouth.

Advertisement

With the butter blended in, your dough is now ready for the next step. Just wait until you see how deliciously flaky and buttery these scones turn out!

Step 4. Add Buttermilk and Knead Gently

add buttermilk knead gently

Now that the butter is evenly incorporated, add the buttermilk to the flour mixture. Pour it in and use your hands to gently combine everything together.

Don't overmix – you want the dough to be lightly kneaded, not tough and dense. As you work the dough, you'll feel it start to come together into a soft, pliable ball. That's just what you're aiming for!

Once it reaches this stage, you can turn it out onto a lightly floured surface and knead it a few more times. Be careful not to overwork it, or your scones will end up dry and crumbly. Knead just until the dough is smooth and uniform.

Now you're ready to pat it out and cut those delightful scone shapes! This step is all about handling the dough gently to achieve the perfect flaky, tender texture. Take your time and enjoy the process – your efforts will make for wonderfully tasty results.

Step 5. Cut Dough and Bake

cut bake dough preparation

After kneading the dough, gently roll or pat it out on a lightly floured surface until it's about 3/4-inch thick.

Now, use a sharp biscuit cutter or the rim of a glass to cut out round scone shapes, being careful not to twist the cutter as you press down. Gather up the scraps, gently re-roll, and cut out more scones until you've used up all the dough.

Advertisement

Next, place the scones on a baking sheet lined with parchment paper, making sure to space them apart so they've room to rise.

Pop them into a preheated oven and bake for 12-15 minutes, until the tops are lightly golden. Mmm, can you already smell the buttery, flaky goodness?

Once they're done, let the scones cool for a bit before serving with spoonfuls of sweet clotted cream and your favorite jam.

Time to enjoy the fruits of your labor – or should I say, the scones of your labor!

Final Thoughts

As you reflect on the Victorian High Tea experience, consider the timeless allure of this cherished tradition. Sipping fragrant tea from delicate porcelain cups, savoring tender scones with clotted cream, and indulging in delectable finger sandwiches – these are the simple pleasures that have captivated generations.

Advertisement

The ritual of high tea is a testament to the beauty of slowing down, connecting with loved ones, and honoring the gentle art of hospitality.

While the recipes and presentation may have evolved over time, the essence of high tea remains unchanged. It's a chance to step back from the hurried pace of modern life and immerse yourself in the timeless elegance of a bygone era.

Whether you're hosting a formal gathering or enjoying an intimate moment with friends, the Victorian High Tea experience is sure to leave you feeling refreshed, nourished, and inspired.

Embrace the magic, savor each delightful bite, and cherish the memories that will linger long after the final crumb has been savored.

Frequently Asked Questions

How Do I Store Leftover Scones?

To store leftover scones, wrap them tightly in plastic or place them in an airtight container. You can also freeze them for up to 3 months. Reheat before serving to restore their fresh-baked texture.

Advertisement

Can I Use Regular Cream Instead of Clotted Cream?

You can use regular cream instead of clotted cream, but it won't have the same rich, creamy texture. Clotted cream is the traditional topping for scones, but regular cream will still taste great if that's all you have on hand.

What Are Some Variations on the Traditional Scone Recipe?

You can try different variations on the classic scone recipe, like adding dried fruit, nuts, or herbs. You can also experiment with different flours, sweeteners, and baking techniques to create unique scones.

How Long Do Scones Stay Fresh?

Scones typically stay fresh for 2-3 days when stored at room temperature in an airtight container. For maximum freshness, you can freeze scones for up to 3 months and reheat them as needed.

Can I Make the Scones Ahead of Time?

Absolutely, you can make scones ahead of time. They'll stay fresh for 2-3 days when stored in an airtight container at room temperature. Just be sure to reheat them before serving for the best texture.

Advertisement

Continue Reading

Affiliate Disclaimer
As an affiliate, we may earn a commission from qualifying purchases. We get commissions for purchases made through links on this website from Amazon and other third parties.

Advertisement

Vetted

top local car washes top local car washes
Vetted1 month ago

14 Best Car Washes Near You for a Sparkling Clean Ride

I discovered the 14 best car washes near you that promise a sparkling clean ride, and you won't want to...

top mops for 2024 top mops for 2024
Vetted1 month ago

The 15 Best Mops of 2025 – Your Ultimate Guide to a Spotless Home

Find the perfect mop for your cleaning needs in 2025, and discover how these top choices can revolutionize your home...

top women s fragrances 2024 top women s fragrances 2024
Vetted1 month ago

15 Best Perfumes for Women in 2025 – A Fragrance Guide You Can’t Miss

Keen to discover the top 15 perfumes for women in 2025? Uncover unique scents that will elevate your fragrance game!

top local bars guide top local bars guide
Vetted1 month ago

14 Best Bars Near You for an Unforgettable Night Out

Looking for the perfect bar to elevate your night out? Discover the 14 best spots that promise unforgettable experiences!

luxurious beard oil selection luxurious beard oil selection
Vetted1 month ago

15 Best Beard Oils for a Luxurious Grooming Experience in 2025

Shop the 15 best beard oils for a luxurious grooming experience in 2025 and discover which ones will elevate your...

top college laptops 2024 top college laptops 2024
Vetted1 month ago

15 Best College Laptops of 2025: The Ultimate Guide for Students

With our guide to the 15 best college laptops of 2025, discover which powerful models will elevate your academic experience...

waterproof mascaras for tears waterproof mascaras for tears
Vetted1 month ago

15 Best Waterproof Mascaras That Will Survive Any Tear-Jerker

Outstanding waterproof mascaras await to keep your lashes flawless through any emotional moment; discover which ones made the top 15...

top flavorful disposable vapes top flavorful disposable vapes
Vetted1 month ago

15 Best Disposable Vapes of 2025: Top Picks for Flavor and Convenience

Prepare to discover the 15 best disposable vapes of 2025 that blend exceptional flavor and convenience, but which ones truly...

refreshing lunch salad ideas refreshing lunch salad ideas
Vetted1 month ago

15 Best Salads Near You That Will Freshen Up Your Lunch Routine

Transform your lunch with the 15 best salads nearby that will tantalize your taste buds and leave you craving more...

top convertible car seats top convertible car seats
Vetted1 month ago

15 Best Convertible Car Seats of 2025 – Safety and Comfort for Your Little One

Get ready to discover the top 15 convertible car seats of 2025 that blend safety and comfort—find out which models...

delicious fast food breakfast delicious fast food breakfast
Vetted1 month ago

15 Best Fast Food Breakfast Options That Will Make Your Mornings Delicious

Uncover the 15 best fast food breakfast options that will transform your mornings into a delicious experience you won't want...

stylish contacts for vision stylish contacts for vision
Vetted1 month ago

14 Best America’s Contacts for Clear Vision and Style

Browse through the 14 best contact lenses in America for clear vision and style, and discover which one perfectly complements...

Trending