Greek Cuisine
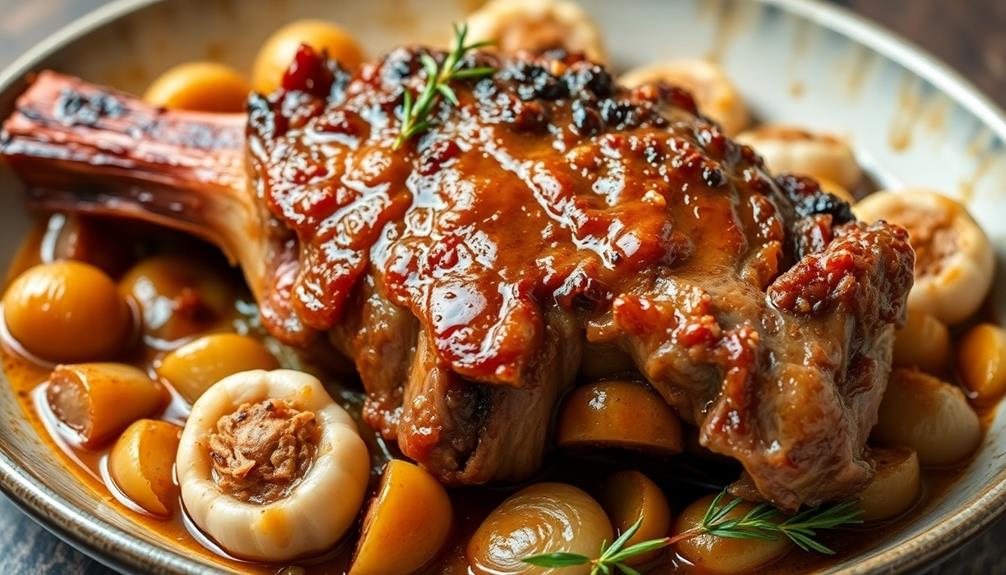
Kleftiko (Slow-Cooked Lamb)
Your taste buds will be transported to the rugged Greek countryside with this mouthwatering slow-cooked lamb dish, Kleftiko, steeped in history and flavor. Discover the story behind this timeless culinary gem.
Kleftiko, a beloved Greek dish, is a mouth-watering slow-cooked lamb that transports you to the rugged countryside, where resilient rebels known as "klefts" once concealed their cooking in underground pits during the Ottoman occupation. This rustic delicacy features tender chunks of lamb, marinated in a blend of aromatic herbs and spices, then slowly baked to perfection. The result is a deeply flavorful and comforting meal, often served with roasted potatoes or a fresh salad, and accompanied by tangy lemon wedges. Kleftiko embodies the spirit of Greek hospitality, inviting you to gather with loved ones and savor the rich history and flavors of this timeless dish. Intrigued to learn more?
Key Takeaways
- Kleftiko is a traditional Greek dish featuring slowly cooked lamb that is marinated with herbs and spices.
- It originated during the Ottoman occupation, with rebels known as "klefts" cooking lamb in underground pits to avoid detection.
- The dish is cooked at a low temperature for hours, resulting in a deeply flavorful and comforting meal.
- Kleftiko represents a communal dining experience, often enjoyed during family gatherings and celebrations.
- The dish is typically served with roasted potatoes or a fresh salad, and fresh lemon wedges complement the rich flavors of the lamb.
History
Kleftiko, the slow-cooked lamb dish, has a rich history rooted in the Greek countryside. During the Ottoman occupation of Greece, rebels known as "klefts" would hide in the mountains to avoid capture.
These klefts would cook their lamb in underground pits, slowly simmering the meat to perfection while concealing the smoke and aromas from their pursuers. This ingenious method, combining the flavors of the lamb, vegetables, and herbs, became the foundation of the beloved kleftiko dish.
Over time, this traditional cooking technique spread throughout Greece, each region adding its own unique touches. In the Mani peninsula, the lamb is often seasoned with garlic, lemon, and oregano, while in the Cycladic islands, the meat may be wrapped in grape leaves.
Today, kleftiko remains a beloved part of Greek cuisine, a testament to the resilience and ingenuity of the klefts who first developed this mouthwatering slow-cooked delight.
Recipe
Kleftiko is a traditional Greek dish that showcases the incredible flavor of slowly cooked lamb. The meat is marinated in a blend of fragrant herbs and spices, then wrapped in parchment paper and cooked at a low temperature for hours, allowing the flavors to meld and the lamb to become incredibly tender and juicy.
The slow cooking process is essential to the success of this dish, as it transforms the tough cuts of lamb into a melt-in-your-mouth delight. The result is a deeply flavorful and comforting meal that's perfect for sharing with family and friends.
Ingredients:
- 3 lbs lamb shoulder, cut into large chunks
- 1 onion, sliced
- 6 cloves garlic, minced
- 2 tbsp dried oregano
- 1 tsp dried thyme
- 1 tsp ground cinnamon
- 1 tsp ground allspice
- 1/4 cup olive oil
- Salt and pepper to taste
- 1 cup dry white wine (optional)
Cooking Instructions:
Preheat the oven to 275°F (135°C). In a large bowl, combine the lamb, onion, garlic, oregano, thyme, cinnamon, allspice, olive oil, and season with salt and pepper. Mix well to ensure the lamb is evenly coated.
Place the seasoned lamb and vegetables in the center of a large piece of parchment paper. Fold the parchment paper over the lamb to create a sealed packet, then place the packet on a baking sheet. Bake for 3-4 hours, or until the lamb is very tender and falling apart.
Tips:
For even more flavor, you can add a cup of dry white wine to the parchment packet before sealing it. The wine will create a delicious braising liquid that will infuse the lamb with additional depth of flavor.
Additionally, you can serve the kleftiko with roasted potatoes or a fresh salad for a complete and satisfying meal.
Cooking Steps
Let's start by combining all the ingredients in a roasting pan.
Cover the pan tightly with foil, then pop it in the oven at 325°F for 3 hours.
Once that time's up, remove the foil, baste the lamb, and you're ready to serve with some tangy lemon wedges on the side.
Step 1. Combine Ingredients in Roasting Pan
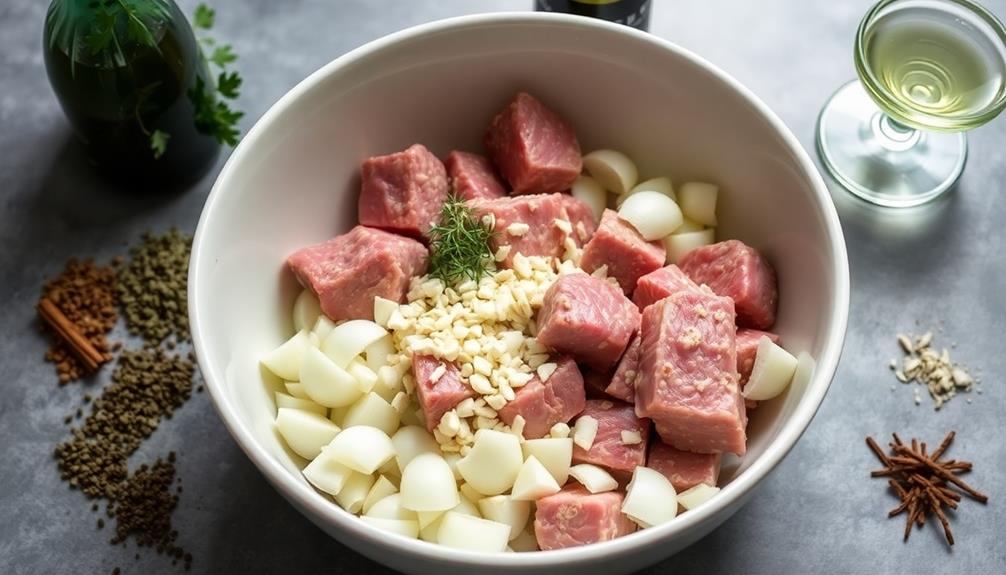
Next, gather all the prepared ingredients and combine them in a large roasting pan. Layer the lamb chunks in the center, then surround them with the wedged potatoes, onions, garlic, and oregano. Drizzle the olive oil over everything, ensuring all the ingredients are well coated.
Give the pan a gentle shake to help the flavors mingle.
Now, pour in the white wine and lemon juice. The liquid should come about halfway up the sides of the meat and vegetables. Crumble the bay leaves over the top, distributing them evenly. Finally, season generously with salt and pepper. You want to create a flavorful base for the lamb to slowly braise in as it cooks.
Once everything is assembled, cover the roasting pan tightly with aluminum foil. This will trap the steam and juices, resulting in incredibly tender, fall-off-the-bone lamb.
You're now ready to slide the pan into the oven and let the magic of slow cooking commence.
Step 2. Cover Pan With Foil
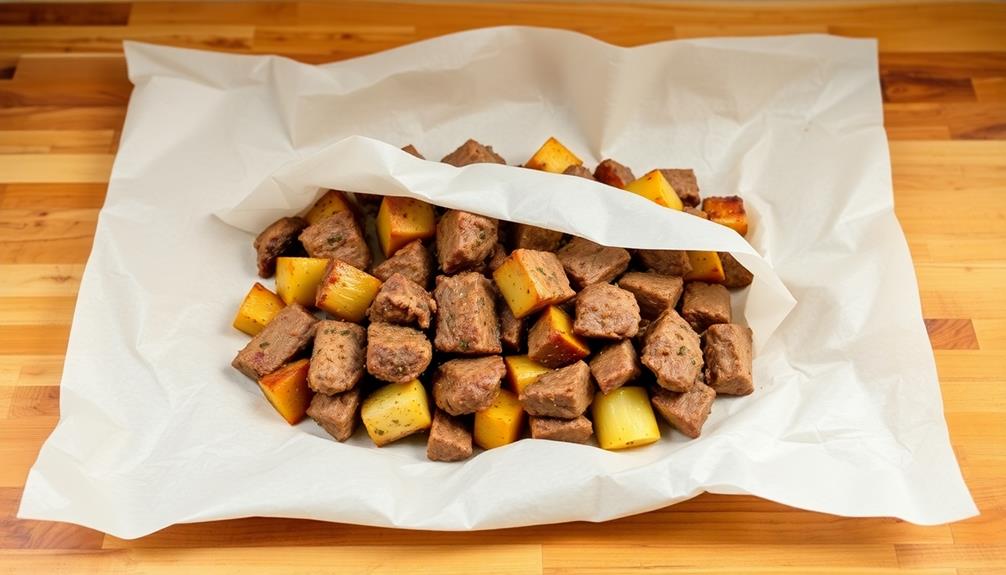
With the ingredients assembled in the roasting pan, you'll want to cover it tightly with aluminum foil. This step is crucial for creating the signature slow-cooked flavor and tender texture of the lamb.
The foil will trap the steam and juices, allowing the meat to braise gently in its own flavors. Make sure the foil is sealed securely around the edges of the pan to prevent any steam from escaping.
The foil will also help to keep the lamb moist and prevent it from drying out during the long cooking time. As the lamb cooks, the juices will create a flavorful braising liquid that will baste the meat and infuse it with amazing aromas.
When it's time to serve, simply remove the foil and you'll be greeted by a succulent, fall-off-the-bone masterpiece. The foil-wrapped cooking method is a key component of the traditional kleftiko recipe, so don't skip this important step.
Step 3. Bake at 325°F for 3 Hours
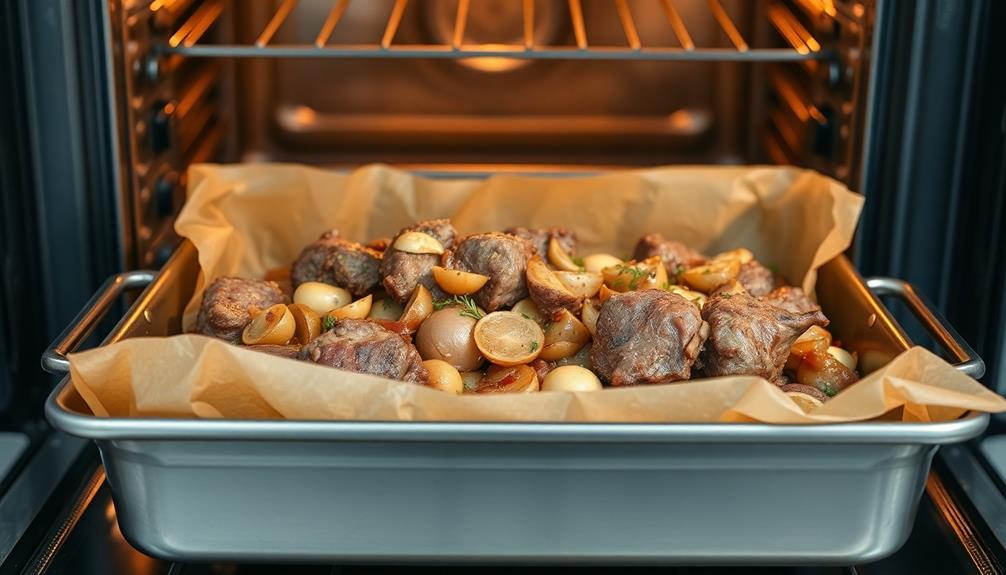
With the pan tightly sealed with foil, you'll want to place it in a preheated oven set to 325°F.
For the next three hours, this low and slow cooking method will work its magic, transforming the lamb into a meltingly tender delight.
As the meat cooks, the aromatic herbs and spices will infuse the entire dish, filling your kitchen with the most tantalizing aroma.
Every now and then, you might want to peek through the oven window, just to catch a glimpse of the lamb's progress.
But resist the urge to open the oven too often, as that will disrupt the heat and slow down the cooking process.
Trust the process, and before you know it, you'll have a succulent, fall-off-the-bone lamb dish that's well worth the wait.
The anticipation will only make the final result taste that much more heavenly.
Step 4. Remove Foil, Baste Lamb
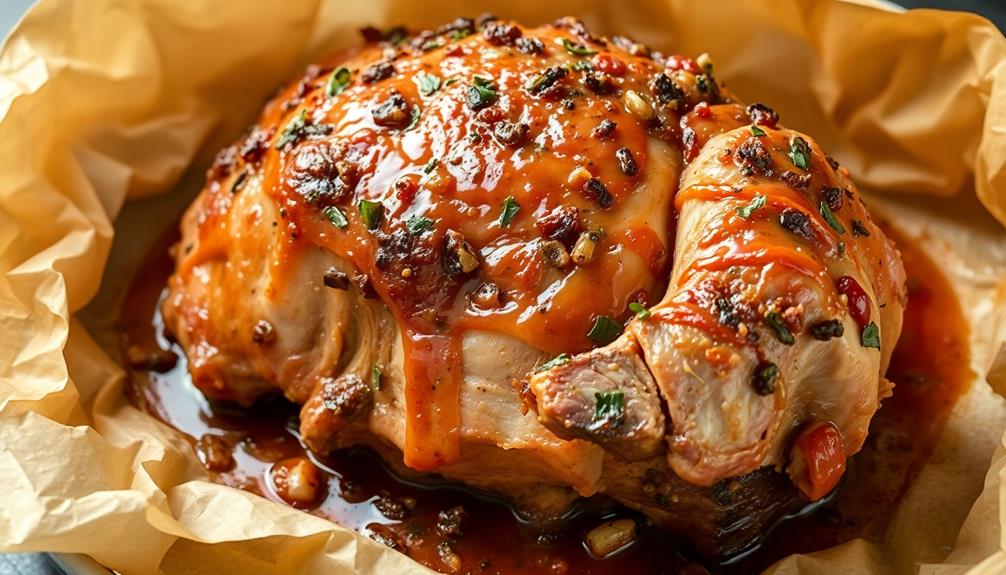
After three hours of patient waiting, it's now time to take off the foil and baste the lamb.
Carefully remove the foil from the baking dish, being mindful of the hot steam escaping. Grab a basting brush and dip it into the flavorful juices that have accumulated in the bottom of the dish.
Gently brush the juices all over the surface of the lamb, ensuring every inch is coated. The aroma of the slowly cooked meat will fill your kitchen, making your mouth water in anticipation.
Take a moment to admire the golden-brown crust that has formed on the outside of the lamb. Use a meat thermometer to check the internal temperature, aiming for an internal temperature of 165°F for medium doneness.
If the lamb needs a bit more time, re-cover with foil and return to the oven until it reaches your desired level of tenderness.
Get ready to savor the rich, succulent flavors of this slow-cooked masterpiece.
Step 5. Serve With Lemon Wedges
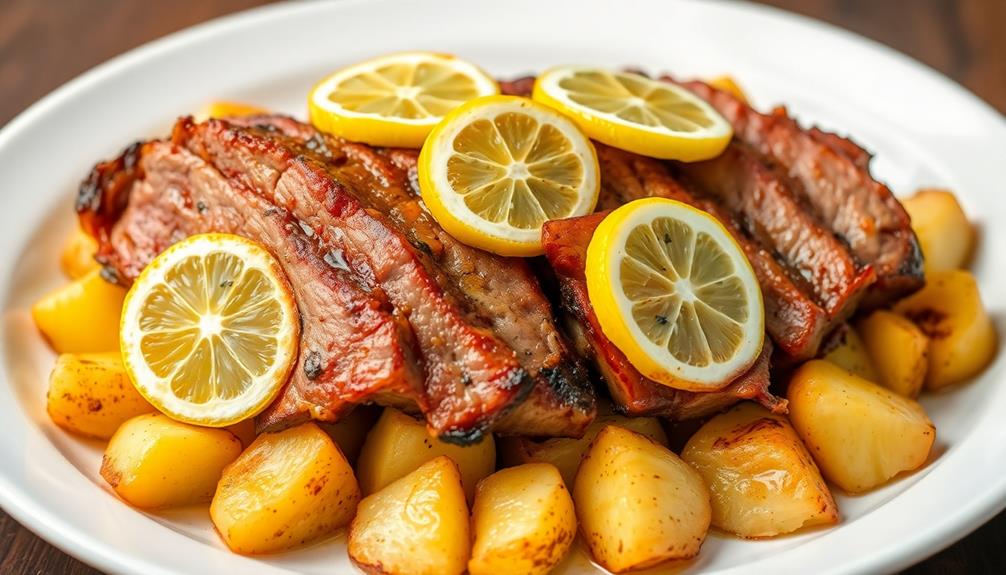
Squeeze fresh lemon wedges over the succulent lamb just before serving. The bright, tangy citrus flavor perfectly complements the rich, tender meat.
Invite your guests to pick up a wedge and squeeze it directly over their portion, allowing the zesty juice to drizzle down and mingle with the savory juices of the lamb. The contrast of the bright lemon and the melt-in-your-mouth texture of the meat is utterly irresistible.
Serve the kleftiko with the lemon wedges on the side, encouraging everyone to personalize their dish to their liking. The lemon adds a refreshing zing that cuts through the richness of the slow-cooked lamb, cleansing the palate and preparing you for the next flavorful bite. Don’t be afraid to experiment with different seasoning combinations, such as adding a sprinkle of oregano or a drizzle of olive oil to enhance the flavors. For those looking to expand their Greek culinary repertoire, consider trying your hand at a traditional kokoretsi recipe for a truly authentic dining experience. The combination of organ meats and offal, skewered and grilled to perfection, offers a unique and delicious addition to any Greek feast.
As your guests squeeze the lemon and watch the juice dance over the meat, their eyes will light up with delight at the bright, vibrant flavors. The simple addition of this citrus twist transforms the kleftiko into a truly exceptional dining experience.
Final Thoughts
Ultimately, the beauty of Kleftiko lies in its simplicity. This dish, with its slow-cooked lamb, fragrant herbs, and tender vegetables, is a true testament to the power of letting time and patience work their magic.
As you savor the first bite, you'll be transported to the sun-drenched islands of Greece, where the Kleftiko was born.
The real joy of this recipe, however, lies in the shared experience. Gather your loved ones around the table, pour a glass of robust red wine, and let the flavors of Kleftiko bring you closer together.
Dig in with your hands, tearing off succulent pieces of lamb, and don't forget to dip your bread in the flavorful juices.
The beauty of Kleftiko is that it's not just a meal – it's a celebration of life, family, and the simple pleasures that make us truly alive.
Frequently Asked Questions
What Is the Best Cut of Lamb for Kleftiko?
When choosing the best cut of lamb for your dish, you'll want to opt for a shoulder or leg cut. These tougher, well-marbled parts are perfect for the slow-cooking method, ensuring a tender, flavorful result.
Can Kleftiko Be Made With Other Types of Meat?
You can absolutely make a slow-cooked dish using other types of meat besides lamb. Pork, beef, or even chicken can work well in a recipe similar to kleftiko, providing you adjust cooking times accordingly.
How Long Does Kleftiko Need to Marinate Before Cooking?
To get the best flavor, you'll want to marinate the meat for at least 4 hours, though overnight is better. This allows the seasonings to really penetrate and tenderize the meat before cooking.
Can Kleftiko Be Cooked in a Conventional Oven?
Yes, you can cook this dish in a conventional oven. While the traditional method uses a wood-fired oven, you can achieve similar results by slowly roasting the meat in a regular oven for several hours.
Is Kleftiko Traditionally Served With Any Specific Side Dishes?
Traditionally, kleftiko is often served with specific side dishes that complement the slow-cooked lamb's rich and tender flavors. You might find it paired with roasted potatoes, tzatziki, and a fresh Greek salad to balance the meal.
Greek Cuisine
Loukaniko (Greek Sausage)
Packing a punch of rich pork, aromatic spices, and a storied history, Loukaniko is the beloved Greek sausage that beckons you to explore its culinary delights.
Loukaniko, a cherished Greek sausage, has ancient roots and symbolizes the country's rich culinary heritage. It's made from a blend of pork, fat, and aromatic spices like cinnamon, allspice, and fennel. The meat's coarse texture, juicy bite, and smoky flavor come from careful preparation – grinding, mixing, stuffing, drying, and smoking. Loukaniko is a staple at celebrations, representing Greek hospitality and community. You'll find it grilled, pan-fried, or tucked into traditional dishes. It's a delicious taste of Greece's vibrant food culture. If you'd like to learn more about this iconic sausage and how to make it, keep reading.
Key Takeaways
- Loukaniko is a traditional Greek sausage with roots in ancient Greece, linked to traditional meat preservation methods.
- It embodies a rich tradition in Greek cuisine and remains a cherished component of Greek culinary heritage, often enjoyed during festive occasions and family gatherings.
- The sausage is made from a blend of pork, pork fat, and a unique combination of seasonings, including herbs, spices, and citrus zest.
- Preparation involves grinding the meat, mixing the spices, stuffing the sausages, and drying and smoking them for added flavor.
- Loukaniko is gaining popularity among younger generations, with fusion recipes and increased availability in specialty shops and online markets.
History
Loukaniko, the beloved Greek sausage, has a rich history dating back centuries. This savory delicacy has been a beloved part of Greek culinary traditions for generations, passed down from one family to the next.
The word "loukaniko" itself derives from the ancient Greek word "lukos," meaning "wolf," a nod to the sausage's origins as a way to preserve meat in the days before modern refrigeration.
Over time, the recipe has evolved, with each region of Greece developing its own unique twist, incorporating local spices and flavors. From the sun-drenched islands of the Aegean to the rugged mountains of the mainland, the aroma of sizzling loukaniko has become synonymous with the warmth and hospitality of Greek culture.
Today, this iconic sausage remains a cherished part of Greek cuisine, a tasty link to the country's rich culinary heritage.
Recipe
Loukaniko, a classic Greek sausage, is a flavorful and versatile ingredient that can be enjoyed in a variety of dishes. Its unique blend of spices and herbs, coupled with the richness of the pork, make it a beloved staple in Greek cuisine. The process of preparing loukaniko may seem daunting, but with the right techniques, you can create an authentic and delicious version in your own kitchen.
To begin, it's important to understand the traditional methods used in crafting this sausage. The curing and drying process is an integral part of the loukaniko-making experience, as it helps to develop the complex flavors and firm texture that characterize this specialty.
Ingredients:
- 3 pounds pork shoulder, cut into 1-inch cubes
- 1 pound pork fat, cut into 1-inch cubes
- 2 tablespoons salt
- 2 teaspoons black pepper
- 1 teaspoon ground cinnamon
- 1 teaspoon ground allspice
- 1 teaspoon ground cloves
- 1/2 teaspoon ground nutmeg
- 1/2 teaspoon ground fennel seeds
- Natural sausage casings
To prepare the loukaniko, begin by mixing the pork, pork fat, salt, and spices in a large bowl until well combined. Cover and refrigerate the mixture for at least 12 hours, or up to 24 hours, to allow the flavors to meld.
Once the curing process is complete, stuff the mixture into the natural sausage casings, taking care to remove any air pockets. Hang the sausages in a cool, well-ventilated area for 7-10 days, or until they've developed a firm, dry casing.
Cooking Steps
First, you'll need to grind the pork and fat together to create the sausage mixture.
Next, mix in the aromatic spices to infuse the meat with robust Greek flavors.
Then, it's time to stuff the seasoned filling into the casings and hang the sausages to dry before smoking them over fragrant wood chips.
Step 1. Grind the Pork and Fat
Grinding the pork and fat is the next crucial step in crafting the perfect Loukaniko sausage.
You'll want to use a meat grinder or food processor to get the right texture for your sausage. Start by cutting the pork and fat into 1-inch cubes, making sure to remove any sinew or gristle.
Then, feed the cubes into the grinder, using the coarse grinding plate to get a coarse, but not too fine, consistency. As the pork and fat are ground, you'll see the mixture start to come together.
Be sure to work in small batches to avoid overworking the meat. Once all the pork and fat are ground, give the mixture a good stir to ensure everything is evenly distributed.
Now, you're ready to move on to the next step – adding the seasoning and spices! This is where the magic really happens, as you'll infuse your Loukaniko with that authentic Greek flavor.
Step 2. Mix the Spices
Next, take the ground pork and fat mixture and add the essential spices that will give your Loukaniko its signature Greek flavor.
First, sprinkle in a generous amount of aromatic dried oregano, its earthy, slightly minty notes an integral part of the sausage's profile. Then, add a pinch of ground cinnamon, which will lend a subtle warmth and complexity.
Don't forget the zesty lemon zest, its bright, citrusy zing balancing the richness of the meat.
Now, get your hands in there and thoroughly mix all the spices into the pork, ensuring they're evenly distributed.
You can almost smell the fragrant blend already, can't you? The oregano, cinnamon, and lemon will mingle together, creating a mouthwatering aroma that'll have your taste buds tingling in anticipation.
With the spices incorporated, your Loukaniko is well on its way to becoming an authentic Greek delicacy.
Step 3. Stuff the Sausage Mixture
With the spices thoroughly mixed into the pork, it's time to stuff the sausage mixture into the natural casings.
Grab a sausage stuffer or a sturdy funnel and slowly feed the seasoned meat into the casing, taking care not to overstuff or create air pockets.
Gently squeeze the casing as you fill it, ensuring an even distribution of the mixture.
Once the casing is full, tie off the end with a piece of string or secure it with a metal clip.
Repeat this process, filling the remaining casings until all the sausage mixture is used up.
Be sure to leave a few inches of empty casing at each end to allow for twisting and linking the sausages later.
With the sausages now stuffed, it's time to let them rest and develop their flavors before the next step – linking and hanging them to dry.
Step 4. Hang Sausages to Dry
After stuffing the sausages, it's time to hang them and let them dry. Find a cool, dry space with good air circulation – a basement, garage, or even your backyard will do.
Gather some sturdy twine or butcher's string and start stringing up the sausages, leaving a few inches of space between each one. Make sure they're not touching, so they can dry evenly on all sides.
As the sausages hang, you'll notice the casings start to tighten and the meat inside firms up. This process can take anywhere from a few days to a couple of weeks, depending on the weather conditions.
Be patient and let nature do its work! Check on them periodically, gently squeezing to gauge their progress. When they feel firm and the casings are a deep mahogany color, they're ready.
Enjoy your homemade loukaniko sausages, a delicious taste of Greek cuisine.
Step 5. Smoke Sausages Over Wood Chips
Once the sausages have dried to your satisfaction, it's time to add another layer of flavor by smoking them over wood chips. This step is crucial for achieving that authentic Greek taste you're after. To smoke the sausages, you will need a smoker or a charcoal grill with a smoker box. Soak the wood chips in water for at least 30 minutes before adding them to the smoker or grill. Once the chips are smoking, place the sausages on the rack and let them smoke for about 1-2 hours, or until they have developed a rich, smoky flavor. This step is crucial for achieving that authentic Greek taste, especially if you’re using these sausages in a greek meatballs recipe.
Gather your smoking equipment – you'll need a smoker or a grill with a smoking box. Choose your wood chips wisely; hickory and oak work beautifully with the rich pork flavor.
Soak the wood chips in water for about 30 minutes, then drain and add them to your smoking device. Preheat the smoker or grill to 225°F (110°C).
Carefully place the dried sausages on the grill grates, making sure they're not touching each other. Close the lid and let the sausages slowly absorb the fragrant smoke for 1-2 hours, until they develop a beautiful mahogany color and a mouthwatering aroma.
Keep an eye on the temperature and replenish the wood chips as needed. The slow smoking process will infuse the sausages with deep, complex flavors that will have your family and friends asking for seconds.
Final Thoughts
Loukaniko, the beloved Greek sausage, has captured the hearts and taste buds of many. As you've explored the art of creating this delectable meat, you've gained a deeper appreciation for the rich history and traditions that go into each bite. Additionally, the process of making Loukaniko has opened your eyes to the time-honored techniques that have been passed down through generations. This has inspired you to delve even further into traditional Greek cuisine, leading you to discover the intricacies of a slowcooked lamb recipe that has been perfected over centuries. As you continue to immerse yourself in the culinary heritage of Greece, you look forward to uncovering more hidden gems of flavor and history.
From selecting the perfect spices to carefully curing the sausage, every step has been a labor of love.
Now, as you savor the final product, take a moment to reflect on the joy of crafting something so authentically Greek.
Consider sharing your homemade loukaniko with friends and family, sparking conversations about the cultural significance and unique flavors of this beloved specialty.
The smoky aroma and juicy texture are sure to delight, leaving a lasting impression on all who indulge.
Frequently Asked Questions
How Long Does Loukaniko Last After Being Smoked?
Properly smoked sausages can last quite a while. Depending on the curing and smoking process, they may maintain their quality for up to a couple of months when stored in a cool, dry place. Just be sure to check for any signs of spoilage before consuming.
Can I Use a Different Meat Instead of Pork?
You can certainly use a different meat instead of pork, though the flavor and texture may vary. Consider alternatives like beef, lamb, or even turkey to create a unique version of the dish.
Is Loukaniko Suitable for Vegetarians or Vegans?
As a vegetarian or vegan, you'll need to avoid traditional loukaniko, as it's typically made with pork. However, you can find plant-based alternatives that capture the flavor and texture without the animal products.
What Is the Best Way to Store Loukaniko?
To store the sausage, keep it in the fridge. Wrap it tightly in plastic or place it in an airtight container. This'll help maintain its freshness and prevent it from drying out. Freezing is also an option for longer-term storage.
Can I Freeze Loukaniko for Long-Term Storage?
You can definitely freeze loukaniko for long-term storage. Properly wrapped, it'll keep in the freezer for up to 6 months. Just be sure to thaw it in the fridge before cooking for the best texture and flavor.
Greek Cuisine
Horiatiko Psomi (Country Bread)
Flavorful and time-honored, Horiatiko Psomi, the traditional Greek country bread, transports you to the heart of rural Greece with its simple yet…
Horiatiko Psomi, the traditional Greek country bread, will transport you to the heart of rural Greece with its simple yet flavorful recipe and time-honored baking techniques. For centuries, this artisanal loaf has been a staple in Greek villages, reflecting ancient culinary practices and the essence of Greek hospitality. Crafted with just 4 cups of flour, 1 tsp of salt, 1 tsp of yeast, 1.5 cups of warm water, and 1 tbsp of olive oil, it celebrates the beauty of locally sourced ingredients and communal baking. Kneaded by hand, left to rise slowly, and baked to perfection, Horiatiko Psomi's crunchy crust and soft, chewy interior will have you craving more. Let's explore the rich history and traditions behind this beloved Greek bread.
Key Takeaways
- Horiatiko Psomi is a traditional Greek bread that has been a staple in Greek villages for centuries, reflecting rural culinary practices and ancient baking techniques.
- It represents a connection to Greek cultural heritage, communal gatherings, and hospitality, symbolizing sharing and togetherness during family meals.
- The recipe is simple, using locally sourced ingredients like flour, salt, yeast, water, and olive oil, emphasizing the essence of Greek hospitality.
- The bread features a crunchy crust and a soft, chewy interior with irregular holes in the crumb, indicating excellent fermentation and contributing to its rich, earthy flavor.
- Baking Horiatiko Psomi in wood-fired ovens enhances its flavor and crust quality, reinforcing its artisanal nature and traditional baking methods.
History
Although the origins of Horiatiko Psomi aren't entirely clear, historical records indicate that this traditional Greek bread has been a staple in rural communities for centuries.
Passed down through generations, the recipe and techniques for making this hearty, crusty loaf have evolved over time, reflecting the resourcefulness and ingenuity of Greek farmers and bakers.
You can imagine the scent of freshly baked Horiatiko Psomi wafting through the quaint villages, as families gathered around the communal wood-fired ovens to share this nourishing sustenance.
The bread's simple yet satisfying flavors, made from just a few humble ingredients, became interwoven with the cultural fabric of Greece's countryside.
Today, the preservation of this artisanal tradition continues, as bakers honor the legacy of Horiatiko Psomi and ensure its place in the hearts and homes of Greek communities, both at home and abroad.
Recipe
Horiatiko Psomi, or traditional Greek village bread, is a staple in many Greek households. This rustic loaf is renowned for its crisp crust and chewy, flavorful crumb. The simplicity of the ingredients and the time-honored baking method make this bread a true representation of the country's rich culinary heritage.
The recipe for Horiatiko Psomi is a testament to the skill and patience of Greek bakers. The dough is kneaded by hand, allowing the gluten to develop and create the perfect texture. The long, slow rise ensures a depth of flavor that's simply unattainable with modern, hurried methods.
- 4 cups (500g) all-purpose flour
- 1 teaspoon salt
- 1 teaspoon active dry yeast
- 1 1/2 cups (350ml) warm water
- 1 tablespoon olive oil
Preheat the oven to 450°F (230°C). In a large bowl, combine the flour, salt, and yeast. Slowly add the warm water and olive oil, mixing until a shaggy dough forms.
Turn the dough out onto a lightly floured surface and knead for about 10 minutes, until the dough is smooth and elastic. Place the dough in a lightly oiled bowl, cover, and let rise for 1 hour, or until doubled in size.
Punch down the dough, shape it into a round loaf, and place it on a parchment-lined baking sheet. Let rise for an additional 30 minutes. Score the top of the loaf with a sharp knife, and bake for 30-35 minutes, or until the crust is a deep golden brown. Allow the bread to cool completely before slicing.
When baking Horiatiko Psomi, it's important to remember that the long, slow rise and gentle handling of the dough are key to achieving the perfect texture.
Be patient and resist the temptation to rush the process. The end result will be a truly authentic and delicious Greek village bread that will transport you to the heart of the country's culinary traditions.
Cooking Steps
Now, let's dive into the cooking steps!
First, you'll knead the dough for 10 minutes, getting those muscles working.
Then, let it rise for an hour – you'll be amazed how much it puffs up.
Finally, shape that dough into a lovely round loaf and pop it in the oven at 450°F for 35-40 minutes.
Can't wait to see that golden brown perfection!
Step 1. Knead Dough for 10 Minutes
Once you've combined all the ingredients, it's time to knead the dough for about 10 minutes. This step is crucial for developing the gluten structure and ensuring your bread has the perfect chewy texture. Roll up your sleeves and get ready to give that dough a good workout!
Start by placing the dough on a lightly floured surface. Using the heels of your hands, push the dough away from you, then fold it back towards you. Give it a quarter turn and repeat. Continue this kneading motion, applying firm, even pressure.
As you work, the dough will become smoother, more elastic, and start to develop a nice sheen. Don't be afraid to put some muscle into it – kneading for 10 minutes will really help strengthen the gluten strands and create that classic rustic crumb.
Once the dough passes the "windowpane test" (you can stretch a small piece thin enough to see through without it tearing), you'll know it's ready for the next step. Get ready to let it rise and transform into a beautiful loaf of homemade Horiatiko Psomi!
Step 2. Let Dough Rise for 1 Hour
After kneading, let the dough rise for about an hour. This step is crucial, as it allows the yeast to work its magic and create those lovely air pockets that will give your bread its signature fluffy texture.
Find a warm, draft-free spot in your kitchen and place the dough in a lightly greased bowl, cover it with a damp towel, and let it do its thing.
As the dough rises, you'll notice it gradually expand and double in size. This is a good sign – it means the yeast is happily multiplying and producing carbon dioxide, which gets trapped in the dough and creates those air pockets.
Resist the temptation to peek too often, as opening the bowl can disrupt the rising process. After about an hour, the dough should be ready to move on to the next step.
Be patient and let the dough rise at its own pace. Rushing this step can result in a dense, heavy loaf, so take the time to let the yeast work its magic.
Your delicious, homemade bread will thank you for it!
Step 3. Shape Dough Into Round Loaf
With your risen dough, you'll want to shape it into a nice round loaf. Gently punch down the dough to release any air bubbles. On a lightly floured surface, use your hands to smooth and shape the dough into a ball. Tuck the edges under, creating a tight, uniform shape. Flip the dough over so the smooth, taut surface is on top.
Using both hands, cup the dough and rotate it in circular motions, applying light pressure to further round out the loaf. The goal is a nicely formed, evenly shaped ball of dough.
Once satisfied with the shape, place the dough seam-side down in a greased bread pan or on a parchment-lined baking sheet. Cover and let rise for 30 more minutes. This final rise will help the loaf hold its shape while baking. Soon, you'll have a beautifully rustic country loaf ready for the oven.
Step 4. Bake for 35-40 Minutes at 450°F
Preheat your oven to 450°F. This temperature is perfect for baking the Horiatiko Psomi to a lovely golden brown.
Once your oven is ready, carefully transfer the round dough loaf onto a baking sheet lined with parchment paper. This will prevent the bread from sticking and ensure an even bake.
Now, place the baking sheet in the preheated oven and set a timer for 35-40 minutes. As the bread bakes, your kitchen will fill with the mouthwatering aroma of freshly baked bread.
Keep an eye on it, as oven temperatures can vary. The bread is done when it's a deep, golden color and sounds hollow when you tap the top.
Using oven mitts, remove the baking sheet from the oven. The crust should be crisp and the interior light and airy.
Allow the loaf to cool for 10-15 minutes before slicing into it. This resting period helps the bread retain its structure.
Now, enjoy the fruits of your labor – a delicious, homemade Horiatiko Psomi!
Step 5. Allow Bread to Cool
Using oven mitts, remove the baking sheet from the oven. Set it on a wire rack or heat-safe surface.
The bread needs time to cool completely before you can slice into it. This process takes around 30 minutes.
As the bread cools, you'll notice the crust transforming. It'll turn crisp and golden, the signature look of a perfectly baked loaf.
Resist the temptation to dig in too soon – your patience will be rewarded! The interior crumb requires this cooling period to fully set. Cutting into a piping hot loaf can result in a gummy, dense texture.
Once the bread reaches room temperature, you can begin slicing. Use a serrated knife and saw gently through the crust.
Admire the airy, irregular holes throughout the crumb – this is a sign of excellent fermentation and baking. Serve the slices with your favorite toppings, or simply enjoy the pure flavor of this rustic country bread.
Final Thoughts
As you've now explored the history, ingredients, and preparation of the traditional Greek bread known as horiatiko psomi, it's clear that this time-honored recipe embodies the essence of Greek culinary culture.
The patient kneading, the rhythmic folding, and the wood-fired baking all come together to create a loaf that's not just sustenance, but a connection to your cultural heritage.
When you tear into that crunchy crust and savor the soft, chewy interior, you'll be transported to the villages of Greece, where generations have gathered around the table to share this beloved bread.
It's a reminder that the simple pleasures in life – the warmth of the oven, the aroma of yeast, the communal experience of breaking bread – are often the most profound.
As you continue your culinary journey, may the spirit of horiatiko psomi inspire you to slow down, savor the moment, and cherish the traditions that make your culture so rich and vibrant.
Frequently Asked Questions
What Is the Shelf Life of Horiatiko Psomi?
You can expect your freshly baked bread to have a shelf life of 3-5 days when stored properly. Proper storage, such as keeping it in a bread box or paper bag, will help extend its freshness.
Can Horiatiko Psomi Be Made With Gluten-Free Flour?
Yes, you can make gluten-free bread using alternative flours like rice, almond, or chickpea flour. However, the texture and flavor may differ from traditional wheat-based country bread. Experiment to find the right gluten-free flour blend that suits your dietary needs.
Is Horiatiko Psomi Suitable for Vegans?
Horiatiko psomi can be suitable for vegans, as it typically doesn't contain any animal-derived ingredients. However, you'll want to check the specific recipe to ensure it's entirely vegan-friendly, as some variations may include dairy or other non-vegan elements.
How Can I Store Leftover Horiatiko Psomi?
You can store leftover bread by wrapping it tightly in plastic or placing it in a paper bag. Keep it at room temperature or freeze it for longer storage. Avoid refrigerating, as it can make the bread stale faster.
Can I Substitute Any Ingredients in the Recipe?
You can definitely substitute some ingredients in a recipe, but it's important to understand how changes may affect the final product. Consider adjusting proportions carefully and test any substitutions before making significant alterations.
Greek Cuisine
Frappe (Iced Coffee Drink)
Captivating iced coffee drink, frappe, was born in Greece, where a spilled coffee led to its accidental creation, transforming cafes and delighting coffee lovers worldwide.
Frappe, the beloved iced coffee drink, originated in Greece during the 1950s when a spilled iced coffee led to its accidental creation. This frothy, chilled delight quickly became a cultural icon, transforming Greek cafes. Today, frappe's refreshing charm has captivated coffee lovers worldwide. You brew strong coffee, chill it, and blend with milk, sugar, and ice for a smooth, creamy texture. Whether you prefer the traditional Greek style or fun flavors like mocha or pumpkin spice, frappe offers a delightful pick-me-up any time of day. Discover why this iconic iced coffee drink has become a global favorite.
Key Takeaways
- Frappe is an iced coffee drink that originated in Greece in the 1950s, originally created by accident when a coffee salesman mixed chilled coffee with ice.
- Frappe is characterized by its frothy, creamy texture, achieved by blending chilled coffee, milk, and sugar until smooth and well-combined.
- Frappe has become a cultural icon in Greece, transforming the country's cafe culture, and its popularity has since spread worldwide among coffee enthusiasts.
- Frappe is versatile, with many customizable variations, including mocha, frappuccino, and seasonal flavors, and can be enjoyed at any time of day.
- Frappe is often associated with leisurely lifestyles and relaxation, and its icy, refreshing nature makes it a popular choice in hot weather.
History
The origins of the frappe, that beloved iced coffee drink, can be traced back to a serendipitous accident in Greece during the 1950s. It all started when a sales representative for a chocolate company accidentally knocked over a glass of iced coffee, spilling the contents into a shaker filled with ice. Curious, he decided to give the mixture a vigorous shake, creating a frothy, chilled delight. This chance discovery quickly captured the hearts and taste buds of the Greek public.
The frappe soon became a cultural icon, transforming cafe culture across the country. People eagerly lined up to enjoy the refreshing blend of espresso, milk, and ice, sipped through a straw and topped with a creamy foam.
Today, the frappe remains a beloved summertime treat, a testament to the serendipity of innovation and the enduring power of accidental discoveries. Its popularity has even spread beyond Greece, delighting coffee lovers around the world with its irresistible combination of cool, creamy, and caffeinated goodness.
Recipe
A frappé is an iced coffee drink that originated in Greece and has since become popular worldwide. It's a refreshing and indulgent treat, perfect for hot summer days or anytime you need a pick-me-up.
The key to a perfect frappé is the right balance of coffee, milk, and sweetener. The drink is typically made by blending chilled coffee, milk, sugar, and ice cubes until smooth and creamy. The result is a thick, frothy, and creamy iced coffee that's both satisfying and delightful.
Ingredients:
- 2 shots of strong brewed coffee, chilled
- 1/2 cup of cold milk (dairy, almond, or soy)
- 2 tablespoons of white sugar (or to taste)
- 1 cup of ice cubes
Instructions:
Add the chilled coffee, milk, and sugar to a blender. Blend on high speed until the mixture is smooth and frothy, about 30 seconds to 1 minute.
Add the ice cubes and blend again until the mixture is thick and creamy, about 1 to 2 minutes.
For best results, use freshly brewed coffee that has been chilled in the refrigerator. You can also experiment with different sweeteners, such as honey or maple syrup, to find your perfect flavor balance.
Serve the frappé immediately, garnished with a straw and a sprinkle of cinnamon or cocoa powder, if desired.
Cooking Steps
Brew up a strong cup of coffee, then let it chill until nicely cooled.
Next, stir in your favorite sweetener to taste.
Finally, add some ice cubes and give it all a good stir until well-combined.
Don't forget to top it off with a dollop of whipped cream for a creamy, indulgent finish.
Step 1. Brew Coffee, Then Chill
To brew the coffee for your frappe, start by preparing a strong batch of your preferred coffee. Whether you're using a drip machine, French press, or pour-over method, the key is to brew the coffee a bit more concentrated than your typical cup. This will help ensure the flavor stands up to the ice and other ingredients in the frappe.
Once your coffee is brewed, let it cool slightly, then pour it into a heat-safe container and place it in the refrigerator. Chill the coffee for at least an hour, or until it's completely cold.
You want the coffee to be thoroughly chilled before you start assembling your frappe. When the coffee is ready, you can move on to blending up the other components. The cold, strong coffee will be the foundation for a refreshing and flavorful iced coffee drink.
Step 2. Add Sweetener
Next, add your desired sweetener to the chilled coffee. Whether you prefer a touch of sugar, a drizzle of honey, or a squeeze of agave, now is the time to sweeten your frappe to your taste.
Stir the sweetener into the cold brew until it's fully dissolved, creating a rich, flavourful base for your icy coffee delight.
If you're a fan of a sweeter frappe, start with a tablespoon of your preferred sweetener and give it a good stir. Taste and add more as needed, a little at a time, until you achieve the perfect balance of bold coffee and sweet indulgence.
The beauty of making your own frappe is that you can customize it exactly how you like it.
Once the sweetener is incorporated, give your frappe a final stir to ensure everything is well-combined.
Now it's time to move on to the next step: adding the ice and blending your chilled coffee creation into a smooth, frosty treat.
Step 3. Add Ice Cubes
Fill a tall glass with ice cubes, enough to nearly reach the top. This chilled foundation will help create the signature icy texture of a perfect frappe.
As the hot coffee pours over the cubes, the temperature contrast produces a delightful, frosty slushy-like consistency. Watch as the ice quickly begins to melt, blending with the coffee and creating a refreshing, cool beverage.
Ensure you use plenty of ice – the more you add, the thicker and creamier your frappe will become. For an extra-indulgent treat, consider using a blend of regular ice cubes and crushed ice. The smaller, irregular pieces will fill in the gaps between the larger cubes, resulting in an even more luscious, smooth texture.
Swirl the mixture gently with a long spoon to fully incorporate the melting ice as you sip your delightful frappe. The concentrated coffee flavor combined with the icy coolness makes for an irresistible summertime delight.
Step 4. Stir Until Well-Combined
Once the ice has been added, gently stir the mixture until the coffee and ice are well-combined. You'll want to use a spoon or a small whisk to create a smooth, uniform texture.
As you stir, you'll notice the ice cubes start to melt, blending with the coffee to create a delightfully chilled and creamy beverage. Keep stirring until there are no visible ice chunks, and the entire drink has a consistent, frothy appearance.
This step is crucial for achieving the classic frappe texture – not too thin, but not overly thick either. Take your time and pay attention to the consistency, adjusting your stirring technique as needed.
You'll know it's ready when the mixture has a rich, velvety mouthfeel, and each sip delivers a harmonious balance of coffee and ice. Once it's perfectly combined, your frappe is ready to be enjoyed!
Step 5. Garnish With Whipped Cream
To finish your frappe, top it with a generous dollop of whipped cream. The velvety, cloud-like topping adds an extra layer of creamy indulgence to this icy treat.
Grab a spoon and scoop up a bite – the cool, airy whipped cream paired with the chilled, bold coffee flavor is simply heavenly.
Homemade whipped cream is incredibly easy to make. Just pour some cold heavy cream into a bowl and beat it with a hand mixer or whisk until soft peaks form.
Stop there, or continue whipping until the cream reaches your desired thickness. For an extra touch of sweetness, you can add a sprinkle of powdered sugar as you whip.
The fluffy, cloud-like result is the perfect crowning glory for your frappe. Savor each spoonful and enjoy the delightful contrast of the cool, creamy topping and the refreshing iced coffee below.
Final Thoughts
Reflecting on the frappe, you can appreciate its versatility as an iced coffee drink that caters to various tastes.
Whether you prefer a classic café-style frappe or a creamy, indulgent version, this refreshing beverage offers a delightful experience. The ability to customize it with a range of mix-ins, from chocolate to caramel, allows you to create a unique flavor profile that suits your mood and preferences. If you’re in the mood for something sweet, consider pairing your frappe with a delicious shredded phyllo pastry recipe. The combination of the chilled frappe and the warm, flaky pastry is sure to satisfy your cravings. Whether you’re enjoying it as a mid-morning treat or an afternoon pick-me-up, this duo is perfect for any occasion.
The frothy, icy texture and the cool, invigorating sip make the frappe an ideal choice for hot summer days or a midday pick-me-up. As you savor each spoonful, you'll be transported to a cozy café or a relaxing patio, enjoying a moment of pure bliss.
The frappe's versatility extends beyond just taste, as it can be enjoyed at any time of the day, whether as a breakfast treat, an afternoon indulgence, or an evening nightcap.
Embracing the frappe's charm, you can discover a new favorite way to enjoy this beloved iced coffee drink.
Frequently Asked Questions
Is Frappe Coffee the Same as Iced Coffee?
Although they're both cold coffee drinks, a frappe isn't the same as iced coffee. A frappe is blended and has a thicker, creamier texture, while iced coffee is simply brewed coffee poured over ice.
How Long Does a Frappe Take to Make?
The time it takes to make a frappe can vary, but it's usually a quick process. You'll typically have your cold, blended beverage ready in just a few minutes, depending on the complexity of the recipe.
Can I Use Instant Coffee to Make a Frappe?
Yes, you can use instant coffee to make a frappe. Just combine the instant coffee with ice, milk, and any other desired ingredients in a blender. Blend until smooth and enjoy your homemade icy coffee treat.
What's the Difference Between a Frappe and a Milkshake?
The main difference between a frappe and a milkshake is their primary ingredient. A frappe is an iced, blended coffee drink, while a milkshake is a thick, creamy, and sweet dairy-based beverage made with ice cream.
Can I Add Alcohol to a Frappe?
You can certainly add alcohol to a frappe, though it would no longer be a traditional frappe. The alcohol would alter the flavor and texture, transforming it into a boozy coffee-flavored milkshake-like drink.
-
Southern Comfort Food1 month ago
Cheese Straws
-
Brazilian Cuisine1 month ago
Caldeirada
-
Southern Comfort Food1 month ago
Creamed Corn
-
Brazilian Cuisine1 month ago
Chicken in Brown Sauce
-
Brazilian Cuisine1 month ago
Tacacá
-
Southern Comfort Food1 month ago
Squash Casserole
-
Polish Comfort Food1 month ago
Krupnik (Barley Soup)
-
Southern Comfort Food1 month ago
Chocolate Gravy