Food Science and Cooking
Food Colloids: Understanding Gels, Foams, and Emulsions in Cuisine
Harness the power of food colloids and unlock a world of culinary creativity, from airy meringues to silky smooth sauces.
Food colloids have revolutionized modern cuisine, empowering chefs to create innovative textures and flavors that captivate the palate. From the airy lightness of meringues to the silky smoothness of hollandaise sauce, understanding the science behind gels, foams, and emulsions has transformed the culinary landscape. Tracing the origins of these colloidal principles back to ancient civilizations, the development of food colloids has enabled groundbreaking techniques like spherification and aeration, expanding the boundaries of what's possible on the plate. Intrigued? Delve deeper to uncover the rich history and culinary applications of these remarkable food colloids.
Key Takeaways
- Food colloids have a long history, dating back to ancient civilizations, and their modern development has led to innovative culinary techniques like spherification and gelification.
- Colloidal systems in food, such as meringues and hollandaise sauce, play a crucial role in enhancing sensory experiences and expanding textural and mouthfeel boundaries.
- Mastering the techniques of whipping egg whites, emulsifying egg yolks, and baking custards and quiches is essential for achieving the desired consistency and structure in egg-based dishes.
- The creation of a rich, velvety chocolate ganache tart demonstrates the emulsifying power of food colloids and the importance of temperature and timing in achieving the ideal texture.
- The future of cuisine is predicted to be heavily influenced by colloidal systems, as research and development in food science continue to fuel innovation and advancements in culinary applications.
History
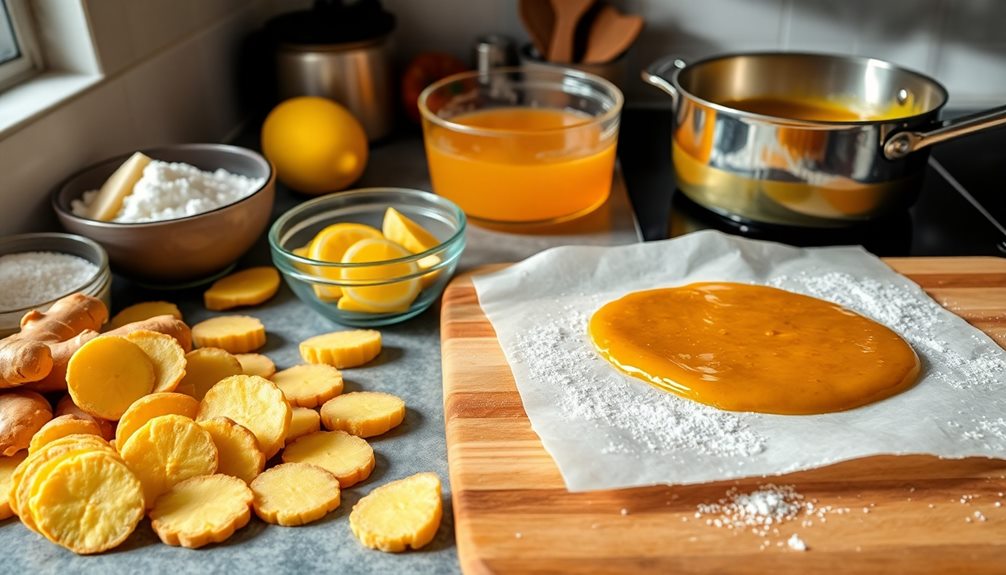
The origins of food colloids in cuisine can be traced back to ancient civilizations, where intuitive culinary practices inadvertently harnessed the principles of colloidal science. From the whipping of egg whites in ancient Egypt to the emulsification of sauces in classical French cooking, chefs have long been manipulating the behavior of dispersed systems without a formal understanding of the underlying science.
The development of modern colloid chemistry in the 19th century paved the way for a deeper comprehension of these age-old techniques. Seminal works by scientists like Thomas Graham and Richard Zsigmondy laid the foundation for understanding the role of particle size, surface tension, and intermolecular forces in the formation and stability of food colloids.
This, in turn, enabled chefs to leverage these principles more intentionally, leading to the emergence of avant-garde culinary techniques like spherification, gelification, and aeration.
Today, the study of food colloids has become an integral part of the culinary arts, allowing chefs to push the boundaries of traditional cuisine and create innovative, textural experiences for diners.
Recipe
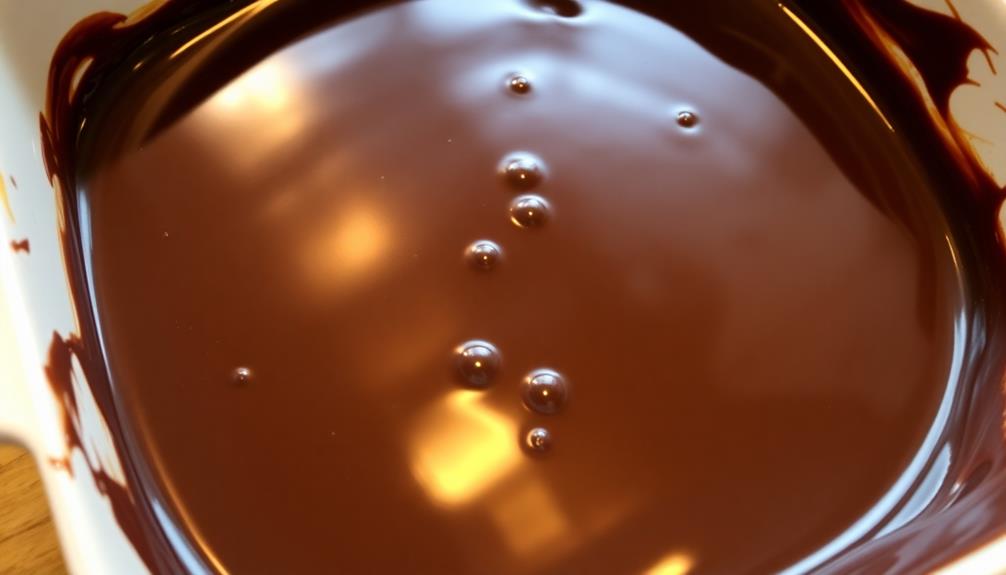
Colloid-based dishes are a fascinating exploration of the interplay between food science and culinary artistry. One such creation is the decadent Chocolate Ganache Tart, a dessert that showcases the emulsifying power of food colloids. The rich, velvety texture of this tart is achieved through the careful blending of cream and chocolate, two key components that form a stable colloid system.
Interestingly, while enjoying this indulgent dessert, individuals with health considerations, such as those with cholesterol concerns, might want to be mindful of their intake due to the high-fat content moderation recommended for individuals with cholesterol concerns. The addition of butter further enhances the mouthfeel, creating a luxurious and indulgent experience for the senses.
Ingredients:
- 1 cup heavy cream
- 8 ounces high-quality dark chocolate, chopped
- 4 tablespoons unsalted butter, softened
- 1 pre-baked 9-inch tart shell
Instructions:
In a medium saucepan, heat the heavy cream over medium heat, stirring occasionally, until it just begins to simmer. Remove from heat and add the chopped chocolate. Let the mixture sit for 2-3 minutes, then stir until the chocolate is completely melted and the mixture is smooth.
Add the softened butter and continue stirring until fully incorporated. Pour the chocolate ganache into the pre-baked tart shell and smooth the top. Refrigerate for at least 2 hours, or until set, before serving.
When preparing this dish, it's important to use high-quality ingredients and pay close attention to the temperature and timing of the chocolate and cream mixture. The emulsion is delicate, so gentle heating and stirring are essential to achieving the desired silky texture.
Serve this Chocolate Ganache Tart chilled, with a dusting of cocoa powder or a dollop of freshly whipped cream for an extra indulgent touch.
Cooking Steps
To make a successful egg-based dish, you'll need to thoroughly beat the egg whites until they're light and fluffy.
Next, whisk the egg yolks until they're emulsified and creamy.
Slowly incorporate the whipped egg whites into the yolks, gently folding them in, then bake the mixture at 350°F until it's set.
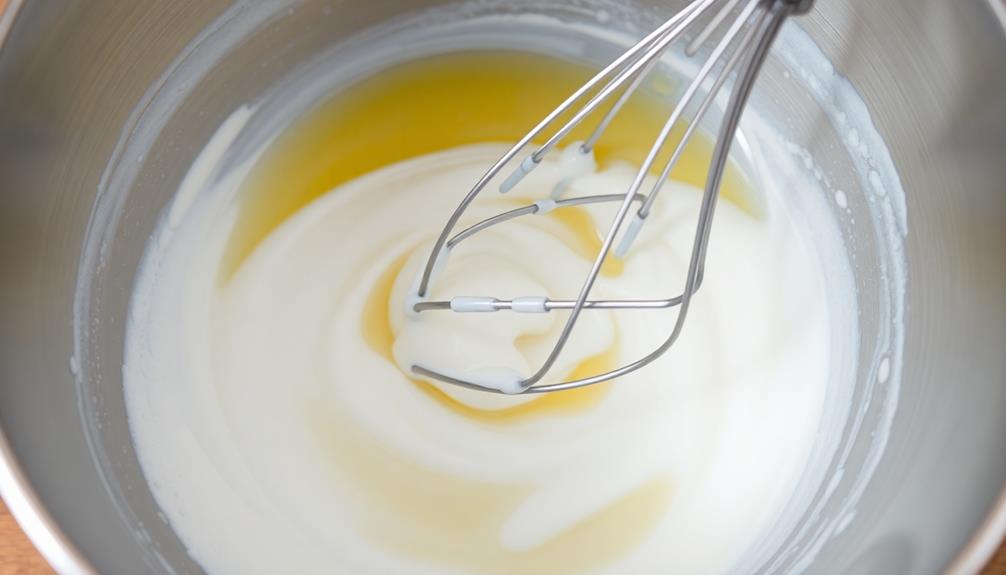
Step 1. Thoroughly Beat Egg Whites
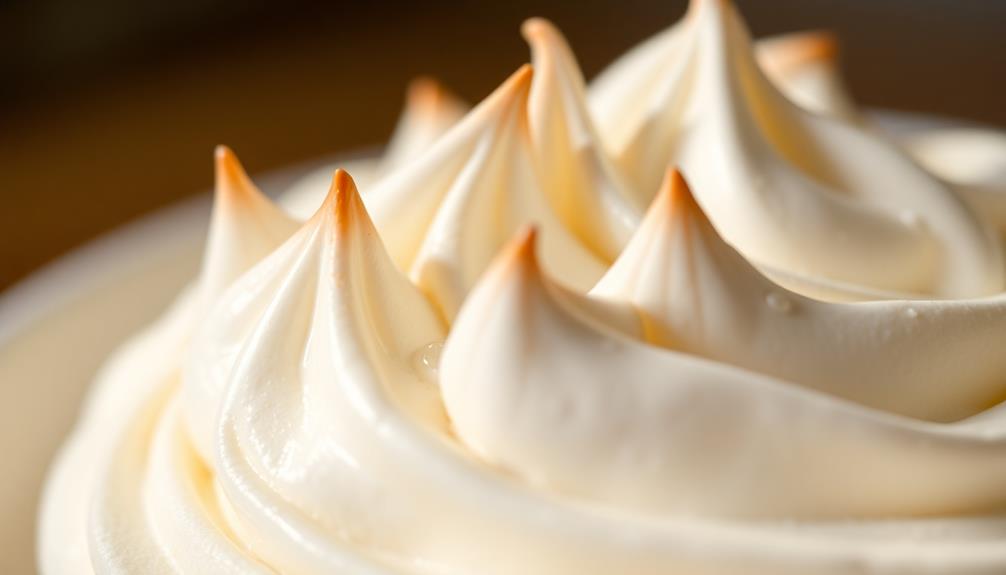
When whisking egg whites, it's crucial to thoroughly beat them until they reach a stiff, glossy peak. This process incorporates air bubbles into the whites, creating a light and airy texture, much like the health benefits of herbal teas that promote relaxation and overall wellness.
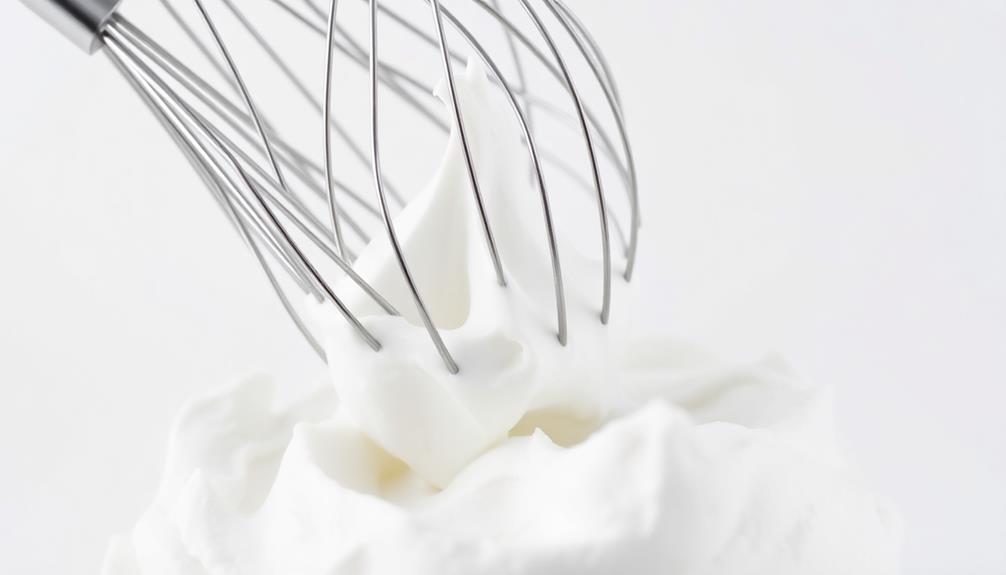
Begin by ensuring your bowl and whisk are free of any oil or fat, which can prevent the whites from whipping properly. Start whisking at a medium speed, gradually increasing the pace as the whites begin to foam.
Continue beating until the whites hold their shape and form peaks that don't droop when the whisk is lifted. Avoid over-beating, as this can cause the whites to become dry and grainy. The perfect whipped egg whites should be smooth, voluminous, and hold their structure when gently lifted.
This delicate yet essential technique is the foundation for many light and fluffy baked goods, such as soufflés, meringues, and angel food cakes. Mastering the art of whipping egg whites is a crucial skill for any home cook or professional chef.
Step 2. Whisk Egg Yolks Until Emulsified
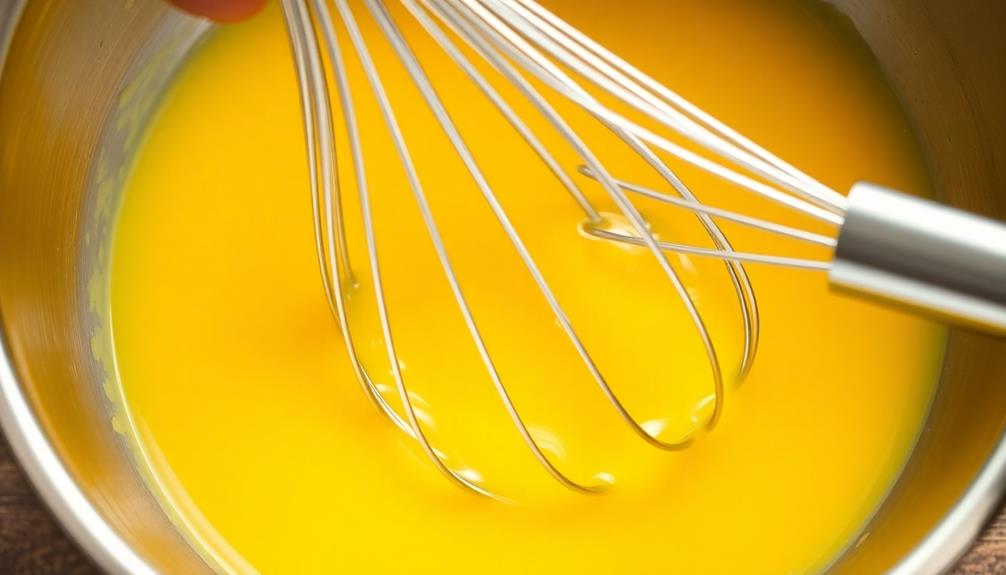
Next, whisk the egg yolks until they're fully emulsified. This process creates a stable, creamy emulsion that will serve as the base for many classic sauces and custards.
Use a whisk to beat the yolks vigorously, incorporating air and breaking down the fat globules until the mixture becomes thick and pale in color. Continuous whisking is key – don't stop until the yolks have thickened and the emulsion is complete. This typically takes 2-3 minutes of persistent whisking.
The emulsified yolks will have a smooth, velvety texture, able to bind and thicken other ingredients. Be careful not to overbeat, as this can cause the emulsion to break down.
Once the yolks are properly emulsified, you're ready to introduce other elements like butter, cream, or acids to create your desired sauce or custard. Mastering this foundational technique will open the door to countless rich and creamy culinary delights.
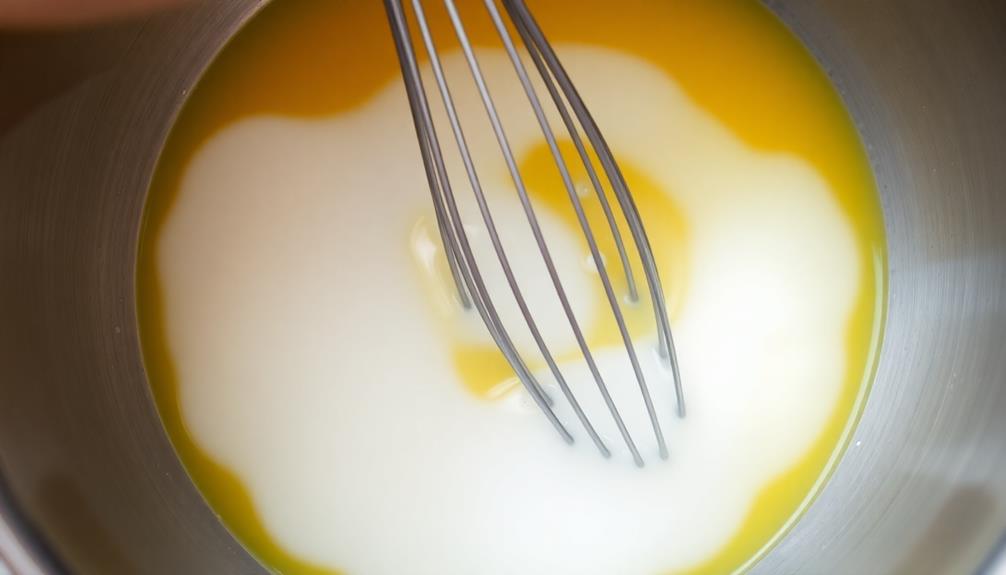
Step 3. Slowly Incorporate Whipped Egg Whites
After the egg yolks have been properly emulsified, you'll want to slowly incorporate the whipped egg whites. This process is crucial in creating a light and airy texture.
Start by gently folding the whipped whites into the emulsified yolks using a rubber spatula. Be careful not to overmix, as this can deflate the delicate egg whites and ruin the desired texture.
Fold the mixture in a circular motion, scooping from the bottom of the bowl and lifting it over the top. Continue this process until the whites are fully incorporated, and the mixture is smooth and homogeneous.
Avoid using a whisk, as it can break down the structure of the whites. The key is to handle the mixture gently and with patience, ensuring the whites maintain their volume and incorporate evenly.
This step is essential in creating dishes like soufflés, mousses, and meringues, where the lofty texture is a defining characteristic.
Step 4. Gently Fold Egg Whites Into Yolks
With the egg yolks properly emulsified, it's time to carefully incorporate the whipped egg whites. Gently fold the stiff, airy whites into the rich, creamy yolks using a rubber spatula.
This technique is similar to how a French Press brewing method emphasizes gentle handling of coffee to achieve optimal flavor. Avoid vigorous stirring, which can deflate the delicate whites. Instead, use a gentle, folding motion, gently scooping the whites from the bottom of the bowl and lifting them over the yolks.
Continue this process until the mixture is homogenous, with no visible streaks of white. Be mindful not to overmix, as this can lead to a dense, rubbery texture. The goal is to preserve the light, fluffy structure of the whipped whites while integrating them seamlessly into the yolks.
This gentle folding technique is essential for creating a delicate, airy texture in dishes like soufflés, mousses, and meringues. With a delicate touch, you can achieve the perfect balance of lightness and richness in your culinary creations.
Step 5. Bake at 350°F Until Set
Preheat your oven to a steady 350°F. The key to achieving a perfectly set custard or quiche is all in the baking.
Once you've carefully folded your whipped egg whites into the yolk mixture, it's time to transfer the batter to your prepared baking dish. Ensure the dish is oven-safe and, if necessary, lightly grease it to prevent sticking.
Gently pour the airy batter into the dish, being mindful not to deflate the delicate structure you've created. Slide the dish into the preheated oven and let the magic happen.
Bake the custard or quiche until the center is just set, usually about 30-40 minutes. Resist the urge to open the oven door too frequently, as this can cause the structure to collapse.
Instead, keep a close eye on the baking and test for doneness by gently shaking the dish. When the center no longer jiggles, it's ready to come out.
Allow the baked treat to cool slightly before slicing and serving.
Final Thoughts
The widespread application of food colloids in modern cuisine underscores their pivotal role in enhancing the sensory experience for discerning palates.
From the airy lightness of expertly crafted meringues to the silky smooth indulgence of hollandaise sauce, these colloidal systems have become indispensable tools in the culinary artist's arsenal.
As you've explored, mastering the principles of gel, foam, and emulsion formation allows chefs to push the boundaries of texture and mouthfeel, captivating the senses with each bite.
Looking ahead, the ongoing evolution of food science promises even greater culinary innovations, with colloids paving the way for novel flavor and textural profiles.
Whether you're an aspiring home cook or a Michelin-starred virtuoso, embracing the power of food colloids can elevate your culinary creations to new heights, delighting your guests with each thoughtfully prepared dish.
The future of cuisine is colloidal, and the opportunities for exploration are truly limitless.
Frequently Asked Questions
What Is the Difference Between a Gel and an Emulsion?
A gel is a semi-solid network of liquid trapped within a solid structure, while an emulsion is a mixture of two immiscible liquids, like oil and water, that are stabilized by an emulsifier. The key difference is the physical state and composition. Stable emulsions in cooking are crucial for creating smooth and creamy sauces, dressings, and mayonnaise. Gelatin, agar-agar, and pectin are commonly used to create stable gel structures in food, while egg yolks and mustard are popular emulsifiers for creating stable emulsions in cooking. Understanding the properties of gels and emulsions is essential for achieving the desired texture and consistency in various culinary applications.
How Can I Create a Stable Foam in My Cooking?
To create a stable foam in your cooking, use proteins like egg whites or dairy products. Whisk or blend them vigorously, then incorporate air carefully. Stabilize the foam with fat, sugar, or other ingredients to prevent it from collapsing.
What Are the Key Factors That Affect the Texture of a Colloid?
The key factors that affect a colloid's texture are the size and distribution of the dispersed particles, the interactions between them, and the continuous phase's viscosity. You can manipulate these factors to create desired textures in your cooking.
How Do I Determine the Correct Ratio of Ingredients for a Colloid?
To determine the correct ratio of ingredients for a colloid, you'll need to consider factors like the type of colloid, the desired texture, and the proportions of the components. Experimentation and understanding the science behind colloids are key to finding the right formula.
What Are Some Common Food Colloids Used in Professional Kitchens?
Some common food colloids used in professional kitchens include mayonnaise, hollandaise sauce, meringues, whipped cream, and certain gels like agar. These colloids help create desired textures and mouthfeel in a variety of dishes.
Food Science and Cooking
Spice Challenge: How Many Scoville Units Is Buldak Ramen?
Unleash your tastebuds with the fiery Buldak ramen, packing up to 8,000 Scoville heat units – a true test of spice tolerance.
You won't believe it, but that fiery Korean noodle dish – Buldak ramen – packs a real punch! With up to 4,400 Scoville heat units, it's a true spice challenge for the brave. It all starts with those instant ramen noodles, then you add the gochujang, gochugaru, brown sugar, and soy sauce for an explosion of savory, spicy, and sweet flavors. The heat can range from 3,000 to 8,000 Scoville units, so get ready to sweat, tear up, and laugh – it's all part of the fun! If you're up for an adventure, the Buldak ramen challenge awaits.
Key Takeaways
- Buldak ramen measures approximately 4,400 Scoville Heat Units (SHU), with a range from 3,000 to 8,000 units on the Scoville scale.
- The Scoville scale is used to quantify the spiciness in food, where higher SHU indicates greater heat and spice level.
- The intense heat and bold flavors of Buldak ramen make it a popular choice for spice enthusiasts participating in spice challenges.
- Participants often report feelings of thrill and excitement during the Buldak ramen challenge, as well as a sense of accomplishment upon completion.
- The enjoyment of Buldak ramen can lead to a memorable experience, reinforcing the idea that spice can enhance food enjoyment for those with a high spice tolerance.
History
The Buldak ramen, with its fiery reputation, has captured the attention of spice enthusiasts worldwide. This delectable dish has a storied history that dates back to the bustling streets of South Korea.
Buldak, which translates to "fire chicken," was first created in the early 2000s by a group of adventurous chefs who sought to push the boundaries of traditional Korean cuisine.
The original Buldak recipe featured a blend of scorching hot chili peppers, including the notorious Habanero and Carolina Reaper, which can measure up to 2.2 million Scoville units!
Over the years, the dish has evolved, with various iterations and spice levels to cater to different palates. Today, the Buldak ramen has become a global phenomenon, with fans eagerly seeking out the latest and spiciest versions to conquer.
Whether you're a seasoned spice enthusiast or just looking for a thrilling culinary adventure, the Buldak ramen's captivating history is sure to pique your interest and get your taste buds tingling with anticipation.
Recipe
Buldak ramen, a spicy Korean noodle dish, is known for its intense heat and bold flavors. This recipe captures the essence of Buldak, using a blend of fiery chili peppers and a variety of spices to create a truly unique and unforgettable culinary experience.
The key to this dish lies in the careful balance of the Scoville units, the measurement of a pepper's heat. Buldak ramen is typically made with a combination of gochujang (Korean chili paste), gochugaru (Korean chili flakes), and other spices, resulting in a Scoville rating that can range from 3,000 to 8,000 units, making it a true test of one's spice tolerance.
Ingredients:
- 2 packages of instant ramen noodles
- 1/4 cup gochujang (Korean chili paste)
- 2 tablespoons gochugaru (Korean chili flakes)
- 2 tablespoons brown sugar
- 2 tablespoons soy sauce
- 1 tablespoon toasted sesame oil
- 2 cloves garlic, minced
- 1 teaspoon grated ginger
- 1/2 teaspoon ground black pepper
- 2 cups water
- 2 hard-boiled eggs, halved (optional)
- Scallions, thinly sliced (optional)
Instructions:
In a large saucepan, combine the gochujang, gochugaru, brown sugar, soy sauce, sesame oil, garlic, ginger, and black pepper. Whisk the ingredients together until well-blended.
Add the water and bring the mixture to a boil. Reduce the heat and let the sauce simmer for 5 minutes, stirring occasionally, to allow the flavors to meld.
Add the ramen noodles to the sauce and cook according to the package instructions, usually 2-3 minutes. Once the noodles are cooked, remove the pan from the heat.
Divide the Buldak ramen into bowls and top with the hard-boiled egg halves and sliced scallions, if desired.
It's important to remember that the Scoville heat of this dish can vary depending on the individual's spice tolerance. Start with a smaller portion and gradually increase the amount of chili paste and flakes to find your desired level of heat.
Enjoy this Buldak ramen challenge, but be prepared for a fiery and unforgettable culinary adventure.
Cooking Steps
Bring the water to a boil, then stir in the bold Buldak powder.
Next, add the noodles and let them simmer for 3 minutes.
Step 1. Bring Water to a Boil
Fill a medium-sized pot with water and place it on the stovetop over high heat.
You'll want to bring the water to a rolling boil – this shouldn't take too long, just wait patiently and keep an eye on it.
Once the water is bubbling furiously, it's time to add the Buldak Ramen noodles and seasoning packet.
Carefully pour in the noodles, being cautious of the hot steam.
Now sprinkle in the spicy seasoning – get ready for an exciting flavor explosion!
Stir everything together, ensuring the noodles are fully submerged.
Let the ramen simmer for 3-4 minutes, allowing the noodles to soften and the flavors to meld.
Mmm, can you smell that delicious aroma filling the kitchen?
Your Buldak Ramen is almost ready to enjoy.
Just a little longer, and you'll be digging into this fiery, flavorful dish.
Stay tuned for the next steps!
Step 2. Add Buldak Powder
Once the water is boiling, carefully pour in the noodles, being mindful of the hot steam.
Now it's time to add the Buldak powder – the spicy secret ingredient that will take your ramen adventure to the next level! Tear open the seasoning packet and sprinkle it evenly over the noodles. Herbal teas, such as turmeric tea, can be a great way to soothe your stomach after indulging in spicy dishes.
Get ready for a fiery explosion of flavor! The Buldak powder is packed with a potent blend of chili peppers, measuring a whopping 3,200-8,000 Scoville heat units. That's seriously spicy stuff, so start with a small amount and add more to taste.
Stir the powder into the boiling water until it's fully dissolved, creating a rich, spicy broth.
Keep a glass of milk nearby, just in case the heat becomes too much to handle. The creamy dairy can help soothe the burning sensation.
Embrace the challenge and see if you can handle the heat! Are you ready to take on the Buldak Ramen Spice Challenge?
Step 3. Add Noodles
Add the noodles to the boiling water, being mindful of the steam. Carefully lower the noodle block into the pot, taking care not to splash the hot liquid.
Gently stir the noodles, breaking them apart as they soften. Allow the noodles to cook for the recommended time, usually 3-5 minutes, until they reach the perfect texture.
Once the noodles are cooked, drain them in a colander, ensuring you retain the flavorful broth. Rinse the noodles briefly with cool water to stop the cooking process. This will help them maintain their springy bite.
Now, add the cooked noodles back to the pot with the reserved broth. Stir in the Buldak powder, ensuring the noodles are evenly coated.
The vibrant red hue and irresistible aroma will have your senses tingling in anticipation. Get ready to experience the fiery, tongue-tingling sensation of the Buldak Ramen challenge!
Step 4. Let Noodles Simmer for 3 Minutes
After draining the noodles, return them to the pot with the reserved broth.
Bring the mixture to a gentle simmer and let it cook for 3 minutes. This allows the noodles to fully absorb the bold, spicy flavors of the Buldak broth.
As the noodles simmer, you'll notice the broth thickening slightly.
Stir the mixture occasionally to ensure even cooking. The noodles should become tender yet still have a satisfying bite to them.
When the 3 minutes are up, your Buldak ramen is ready to serve!
Carefully ladle the piping hot noodles and broth into your favorite bowl.
The vibrant red hue and enticing aroma will have your taste buds tingling with anticipation.
Get ready to embark on a flavor adventure that's sure to leave a lasting impression!
Step 5. Drain the Noodles and Serve
With the noodles simmered to perfection, it's time to drain and serve your Buldak ramen.
Carefully grab the pot and pour the steaming noodles through a colander, letting the broth drain away. Give the noodles a gentle shake to remove any excess liquid.
Now, transfer the drained noodles to your serving bowl.
Scoop out a generous portion of the deliciously spicy Buldak sauce and drizzle it over the top. Stir the sauce into the noodles, ensuring every bite is coated in that mouth-watering, fiery flavor.
For the final touch, add any desired toppings.
Sliced green onions, a sprinkle of sesame seeds, or a dollop of cool, creamy sour cream can all help balance the heat.
Once everything is perfectly arranged, it's time to dig in and enjoy your Buldak ramen challenge!
Final Thoughts
The Buldak Ramen challenge was indeed a fiery experience that tested the limits of your spice tolerance. Wow, those Scoville units really pack a punch! You've gotta hand it to the folks who can handle that level of heat. But even if your taste buds were singed, you can't help but feel a sense of pride for giving it your all.
Looking back, the journey was as thrilling as it was intense. From the moment you cracked open that steaming hot bowl, you knew you were in for an adventure. The bold flavors danced on your tongue, igniting a fire that had you reaching for the nearest glass of milk. But you powered through, determined to conquer the challenge and emerge victorious.
Now, as you sit back and reflect, you can't help but smile at the memories. Who knew a simple bowl of noodles could be so much fun? The Buldak Ramen experience has left an indelible mark, reminding you that sometimes the spiciest adventures are the most rewarding.
Frequently Asked Questions
What Is the Average Scoville Rating of Buldak Ramen?
The average Scoville rating of Buldak Ramen is around 3,000-8,000 Scoville heat units. This makes it a fairly spicy instant ramen, though the exact heat level can vary depending on the specific batch or brand.
How Do the Scoville Units of Buldak Ramen Compare to Other Spicy Foods?
The Scoville units of Buldak Ramen are quite high, ranging from 3,000 to 8,000 SHU. This places it among the spicier foods, surpassing milder peppers like jalapeños but falling short of the blazing heat of habaneros or ghost peppers.
What Are the Health Effects of Consuming Buldak Ramen?
Consuming Buldak ramen can have several health effects. It's high in sodium and may cause digestive issues like heartburn, bloating, and diarrhea. The spice can also irritate your throat and mouth. Be mindful of your portion sizes and hydration levels when enjoying this fiery dish.
Is Buldak Ramen Available in All Countries?
Buldak ramen's availability can vary by country. While it's popular in some regions, it may not be widely distributed globally. The spice level and specific ingredients can also differ depending on the local market.
How Long Does the Spiciness of Buldak Ramen Last?
The spiciness of Buldak ramen can linger for quite some time. It's an intense heat that won't fade quickly, so you'll feel the burn for a while after finishing the fiery noodles.
Food Science and Cooking
The Surprising Health Benefits of Ginger Chews
Harness the remarkable power of ginger chews, a delightful and nourishing snack that offers a wide range of surprising health benefits.
You'll be amazed by the incredible health benefits packed into every bite of ginger chews! These tasty treats have a long history rooted in traditional medicine, prized for aiding digestion, reducing inflammation, and supporting the immune system. Studies even suggest ginger may help alleviate symptoms associated with breast cancer. Beyond their spicy-sweet flavor, ginger chews are recognized for their ability to soothe upset stomachs, boost immunity, and promote overall well-being. Discover the full range of surprising benefits that make ginger chews a delightful and nourishing snack you'll want to incorporate into your daily routine.
Key Takeaways
Key points:
- Ginger chews are effective in alleviating nausea, aiding digestion, and reducing inflammation due to ginger's well-documented medicinal properties.
- Ginger chews may help boost the immune system and provide antioxidant protection, contributing to overall health and wellness.
- Consuming ginger chews regularly can potentially alleviate muscle pain and soreness, making them a valuable addition to an active lifestyle.
- Homemade ginger chews offer a preservative-free alternative to store-bought options, allowing for customization and control over the ingredients.
- Ginger chews are a convenient, portable, and versatile snack that can be easily incorporated into daily routines for maximum health benefits.
History
Though the origins of ginger chews can be traced back thousands of years, their popularity has surged in recent decades as people have discovered their diverse health benefits.
For centuries, ginger root has been used in traditional medicine across Asia and the Middle East. Ancient Chinese and Ayurvedic texts often praised ginger's ability to ease digestive issues, reduce inflammation, and boost the immune system.
Additionally, some studies suggest that ginger may have properties that can contribute to overall wellness, particularly in relation to symptoms of breast cancer.
As global trade expanded, ginger found its way to Europe and the Americas, where enterprising confectioners began crafting the chewy, aromatic treats we know and love today.
Now, ginger chews are a beloved snack around the world, offering a tasty and convenient way to experience ginger's many wonders.
Whether you enjoy them for their invigorating flavor or their impressive health properties, there's no denying the timeless appeal of this ginger-infused delight.
Recipe
Ginger chews are a delightful and healthful snack that can be easily made at home. These chewy candies harness the power of ginger, a potent spice known for its numerous health benefits, including aiding digestion and reducing inflammation. The process of making ginger chews is straightforward and offers a satisfying homemade alternative to store-bought varieties, which may contain preservatives or artificial ingredients.
The key to achieving the perfect ginger chew lies in the balance of sweet and spicy flavors. By carefully crafting the recipe, you can create a treat that tantalizes the taste buds while providing a natural boost of wellness. Dangers of raisins for dogs can be a reminder of the importance of using safe ingredients in homemade snacks.
Ingredients:
- 1 cup granulated sugar
- 1/2 cup light corn syrup
- 1/4 cup water
- 2 tablespoons freshly grated ginger
- 1/4 teaspoon ground ginger
- 1/4 teaspoon baking soda
- 1/4 teaspoon salt
Instructions:
In a medium saucepan, combine the sugar, corn syrup, and water. Bring the mixture to a boil over medium-high heat, stirring constantly. Once boiling, continue cooking without stirring until the temperature reaches 250°F on a candy thermometer.
Remove the pan from the heat and stir in the freshly grated ginger, ground ginger, baking soda, and salt. The mixture will foam and expand. Pour the hot mixture onto a lightly greased baking sheet and let it cool completely, about 1 hour.
Once cooled, use a greased knife or scissors to cut the ginger chew into bite-sized pieces.
To achieve the perfect texture, be mindful of the temperature when cooking the sugar mixture. Allowing the mixture to reach the correct hard-crack stage is essential for creating the delightfully chewy consistency. Additionally, be cautious when handling the hot candy, as it can cause burns.
Enjoy your homemade ginger chews as a satisfying and healthful snack.
Cooking Steps
Combine the ginger, sugar, and water in a saucepan.
Simmer the mixture until it thickens, about 15-20 minutes.
Pour the thickened mixture onto a baking sheet and allow it to cool completely before cutting it into chewy, delightful ginger chews.
Step 1. Combine Ginger, Sugar, and Water
To make the ginger chews, you'll first need to combine the ginger, sugar, and water. In a medium saucepan, add 1 cup of freshly grated ginger, 1 cup of white sugar, and 1 cup of water. Bring the mixture to a boil over medium-high heat, stirring constantly to dissolve the sugar.
Once the mixture is boiling, reduce the heat to medium-low and let it simmer for about 20 minutes. You'll know it's ready when the liquid has thickened and the ginger has softened. Be sure to stir the mixture every few minutes to prevent burning.
After simmering, remove the pan from the heat and let the ginger mixture cool slightly. Then, pour it onto a clean, lightly greased baking sheet or parchment paper.
Use a spatula to spread the mixture into an even layer, about 1/4-inch thick. Allow the ginger chews to cool completely before cutting them into bite-sized pieces.
Step 2. Simmer Mixture Until Thickened
Once the mixture reaches a boil, you'll want to reduce the heat to medium-low and let it simmer for about 20 minutes. This allows the flavors to meld together and the mixture to thicken up nicely.
Be sure to stir it occasionally, so nothing sticks to the bottom of the pan. Herbal ingredients like ginger are known for their health benefits, which include anti-inflammatory properties and nausea relief.
As the mixture simmers, you'll notice it start to transform. The liquid will become syrupy, and the ginger flavor will intensify.
Keep a close eye on it, so it doesn't reduce too much. You want it to have a nice, thick consistency that's perfect for making chewy ginger candies.
Once the 20 minutes are up and the mixture has thickened, it's time to remove it from the heat.
Let it cool slightly before pouring it onto a clean, lightly oiled surface. Get ready to have some fun as you start to shape and roll the ginger chews!
Step 3. Pour Mixture Onto Baking Sheet
After the mixture has cooled slightly, pour it out onto a lightly oiled baking sheet or surface.
Use a spatula to spread the mixture evenly, making sure it's about 1/4 inch thick. This will help the ginger chews hold their shape as they cool and harden.
Now, place the baking sheet in the fridge or freezer. This rapid cooling will set the ginger chews, making them perfect for cutting and wrapping.
Once the mixture has hardened, about 30 minutes, use a sharp knife to cut it into bite-sized pieces.
Carefully transfer the ginger chews to an airtight container or bag. This will keep them fresh and chewy.
Feel free to get creative – you can roll the chews in sugar, coat them in chocolate, or even add a sprinkle of cinnamon for extra flavor.
Enjoy your homemade ginger chews as a tasty and healthy treat!
Step 4. Allow Mixture to Cool
Now that you've finished cooking the ginger mixture, it's important to let it cool before moving on to the next step. This is a crucial part of the process, as it allows the chews to set and become firmer in texture.
Carefully transfer the hot mixture onto a baking sheet or parchment paper-lined surface. Spread it out evenly to help it cool more quickly.
You'll want to resist the temptation to dive right in – let the chews sit for about 15-20 minutes, until they're no longer piping hot.
As the mixture cools, you'll notice it start to harden and take on a chew-like consistency. This is exactly what you're going for!
Be patient and let the ginger chews do their thing. Once they've reached a comfortable temperature, you can move on to the next step of the recipe. Get ready to enjoy the delicious, ginger-y goodness!
Step 5. Cut Chews Into Pieces
With the ginger mixture cooled and hardened, it's time to cut the chews into individual pieces.
Grab a sharp knife and place the firm, golden slab onto a clean, sturdy cutting board. Using a gentle, sawing motion, slice the chew into evenly sized rectangles. Be careful not to let the knife slip – you want those chews to come out neat and tidy!
Once you've cut the entire batch, you can admire your handiwork.
These petite ginger chews are perfect for popping into your mouth, sharing with friends, or even gifting in cute little boxes. The vibrant, golden color and enticing ginger aroma are sure to delight all your senses.
Now, gather up those delightful ginger bites and get ready to enjoy the delicious, spicy-sweet flavor. Your taste buds are in for a real treat!
Final Thoughts
Ginger chews provide a convenient and delicious way to experience the many health benefits of ginger. Whether you're looking to soothe an upset stomach, boost your immune system, or simply enjoy a tasty treat, these chewy delights have got you covered.
What's not to love? Ginger chews pack a flavorful punch, with a spicy-sweet taste that's sure to tantalize your taste buds.
Plus, they're easy to incorporate into your daily routine, making it simple to enjoy the advantages of ginger anytime, anywhere.
Don't just take our word for it – try them for yourself and see how these remarkable little chews can brighten your day and support your overall well-being.
From their impressive health benefits to their irresistible flavor, ginger chews are a true crowd-pleaser that deserve a spot in every pantry.
Embrace the power of ginger and indulge in the goodness of these fantastic chews today!
Frequently Asked Questions
How Long Do Ginger Chews Last Before They Spoil?
You can generally expect ginger chews to last 6-12 months before they spoil, but their shelf life may vary depending on storage conditions. Proper storage in an airtight container in a cool, dry place will help them stay fresh longer.
Do Ginger Chews Have Any Side Effects?
Ginger chews are generally safe, but some people may experience mild side effects like heartburn, gas, or stomach discomfort. It's best to start with a small amount and see how your body responds.
Can Ginger Chews Be Made Vegan or Gluten-Free?
Yes, ginger chews can be made vegan and gluten-free. Many brands offer plant-based and wheat-free versions, catering to dietary preferences. You can easily find ginger chews that fit your lifestyle and dietary needs.
What Is the Proper Way to Store Ginger Chews?
To properly store ginger chews, keep them in an airtight container at room temperature. Avoid exposure to moisture, heat, and direct sunlight to maintain their texture and flavor. Proper storage will ensure your ginger chews stay fresh for longer.
Are There Any Contraindications With Ginger Chews and Medications?
Ginger chews may interact with certain medications, like blood thinners and diabetes medications. It's best to consult your healthcare provider before consuming ginger chews, especially if you're taking any prescription or over-the-counter medications.
Food Science and Cooking
How Many Ginger Chews Can You Eat in a Day? The Safe Limit
Learn the safe limit for ginger chews and discover how to enjoy their benefits without overdoing it—what’s the perfect balance?
You can safely enjoy one or two ginger chews each day! They can be delicious and helpful for your tummy, but it's important to listen to your body. If you eat more than a few, you might feel a tummy ache or worse, especially if you have certain health issues. It's always best to start with a low amount and see how you feel. Remember, moderation is key for a fun and happy experience with ginger chews. Curious about more ways to enjoy ginger or its benefits? There's plenty more to discover!
Key Takeaways
- Start with one or two ginger chews per day to assess personal tolerance.
- Gradually increase intake while monitoring for any adverse reactions.
- Daily consumption should generally not exceed a few pieces for most individuals.
- Health conditions, like diabetes, may require caution due to sugar content.
- Consult a healthcare provider if unsure about safe limits based on personal health.
History
Ginger chews have a rich history that dates back centuries. They're not just a tasty treat; they've been enjoyed by many cultures around the world! You might be surprised to learn that ginger itself has been used for thousands of years, especially in Asia. People loved it for its unique flavor and its ability to help with tummy troubles.
In the past, ginger was often mixed with sugar and other spices to create chewy candies. These treats became popular because they were easy to carry and perfect for sharing. Imagine people on long journeys, munching on ginger chews to stay refreshed and energized!
As time went on, ginger chews found their way into markets and homes, becoming a favorite for many. They're not just delicious; they also bring back memories of family gatherings and celebrations.
You might even find that they're a part of traditional remedies in some cultures, helping to soothe sore throats or settle upset stomachs.
Recipe for Homemade Ginger Chews
Ginger chews are a delightful treat that combines the spicy warmth of ginger with a chewy texture, making them a perfect snack for any time of the day. Not only do they satisfy your sweet tooth, but they also offer potential health benefits, including easing nausea and aiding digestion.
Making ginger chews at home is a simple process that allows you to control the ingredients and sweetness to your preference. To create these delicious treats, you'll need fresh ginger, sugar, and a few other pantry staples. The process involves cooking the ginger until it becomes tender, then combining it with sugar to form a chewy candy.
Once you master the technique, you can experiment with additional flavors such as lemon or honey to personalize your ginger chews even further.
Ingredients:
- 1 cup fresh ginger, peeled and sliced thinly
- 2 cups water
- 2 cups granulated sugar
- 1/4 cup corn syrup
- 1/4 teaspoon salt
- 1/2 teaspoon ground ginger (optional)
- Cornstarch or powdered sugar for dusting
Cooking Instructions:
In a medium saucepan, combine the sliced ginger and water, bringing it to a boil over medium heat. Reduce the heat and let it simmer for about 30 minutes, or until the ginger is tender.
Drain the ginger, reserving about 1/2 cup of the cooking liquid. Return the ginger to the saucepan, add the reserved liquid, sugar, corn syrup, and salt. Cook over medium heat, stirring constantly until the mixture thickens and reaches a temperature of around 250°F on a candy thermometer. This usually takes about 20-30 minutes.
Once done, pour the mixture onto a greased baking sheet and let it cool for a few minutes before cutting it into squares or your desired shape.
Extra Tips:
When making ginger chews, keep a close eye on the cooking process, as the mixture can quickly go from perfect to burnt. To ensure even cooking, stir regularly and monitor the temperature closely.
If you prefer a softer chew, remove the mixture from the heat just before it reaches 250°F. Additionally, dusting the cooled pieces with cornstarch or powdered sugar will help prevent them from sticking together.
Store your ginger chews in an airtight container at room temperature for optimal freshness.
Cooking Steps
Wondering how to make your own ginger chews at home? It's easier than you think! First, gather your ingredients: fresh ginger, sugar, water, and a little bit of lemon juice.
Start by peeling and chopping the ginger into small pieces. Then, place the ginger in a pot with water and bring it to a boil. Let it simmer for about 30 minutes. This helps release all that spicy ginger flavor!
Next, strain the ginger pieces out and keep the liquid. Add sugar to the ginger liquid and stir it until it dissolves.
Now, you want to cook this mixture on medium heat. Keep an eye on it! You'll want to stir frequently until it thickens and reaches a candy-like consistency. This can take around 15-20 minutes.
Once it's thick enough, pour it onto a greased baking sheet. Let it cool completely before cutting it into small squares.
You can even dust the pieces with a little sugar to keep them from sticking together. Enjoy your homemade ginger chews! They're perfect for a tasty snack or to share with friends!
Step 1. Measure Ginger Root Accurately
When you're ready to measure ginger root accurately, it's crucial to have the right tools on hand for precision. Start with a clean cutting board and a sharp knife. You'll also need a measuring spoon or a scale, depending on how much ginger you need.
First, grab a fresh piece of ginger root. Look for one that's firm and smooth—this means it's fresh! If you're using a scale, peel the ginger and cut off a small piece. Weigh it to get the exact amount you need.
If you're using measuring spoons, you can scoop out the minced ginger after peeling and chopping it finely.
Remember, one tablespoon of fresh ginger is about 15 grams, so adjust your measurements based on your recipe. If you're using dried ginger instead, a teaspoon is usually enough since it's more potent.
Always double-check your measurements, especially if you're making something special! By measuring ginger root accurately, you'll ensure your dishes taste just right.
Plus, it's a fun way to get familiar with cooking! Get ready to enjoy the zingy flavor of ginger in your meals!
Step 2. Chop Ginger Into Small Pieces
Chopping ginger into small pieces is a simple yet essential step that enhances its flavor in your dishes.
First, start by peeling the ginger root. You can use a spoon to scrape off the skin easily.
Once it's peeled, you'll want to grab a sharp knife and a cutting board.
Now, cut the ginger into thin slices. Make sure your fingers are tucked in, so you don't accidentally cut yourself.
After you've sliced it, stack a few slices and slice them again into thin strips.
Finally, chop those strips into small cubes. The smaller the pieces, the more flavor they'll release when cooked.
You might wonder why this matters.
Well, when ginger is chopped finely, it blends better into your recipes, making everything taste delicious!
You can add it to stir-fries, soups, or even smoothies for a zesty kick.
Step 3. Simmer Ginger in Water
Simmering ginger in water is a straightforward process that unlocks its aromatic qualities and health benefits. Ginger is known for its anti-inflammatory properties and can aid digestion, making it a perfect addition to your wellness routine.
First, grab a pot and fill it with about four cups of water. Next, add your chopped ginger pieces. If you want a stronger flavor, you can use more ginger! Turn the heat to medium-high and let the water come to a gentle boil.
Once it's boiling, reduce the heat to low and let it simmer for about 10 to 15 minutes. This is where the magic happens! The ginger will release its spicy, warm aroma, filling your kitchen with a delightful scent. You can take a moment to breathe in that lovely fragrance; it's part of the fun!
For an added boost, consider that ginger may also help improve cognitive function aiding cognitive benefits.
While it simmers, you can prepare your favorite mug or tea cup. After the simmering time, you'll have a fragrant ginger infusion ready for sipping. Feel free to add a little honey or lemon to enhance the flavor.
This warm ginger drink isn't only yummy but also great for digestion and soothing sore throats. So, enjoy your homemade ginger tea and all the cozy vibes it brings!
Step 4. Strain Mixture Through Cheesecloth
Once your ginger has finished simmering and the aroma has filled your kitchen, it's time to strain the mixture through cheesecloth. This step is super important because it helps you separate the delicious ginger-infused liquid from the chunky bits, leaving you with a smooth base for your ginger chews.
First, grab a clean piece of cheesecloth. You can find this at most grocery stores or even online. Place it over a bowl or pot, making sure it's big enough to catch all the liquid.
Carefully pour the simmered ginger mixture into the cheesecloth. You'll see the liquid flow through, while the ginger pieces stay behind. This is where the magic happens!
Once you've poured everything, gather the corners of the cheesecloth and gently squeeze it. Be careful not to burn yourself, but you want to get every last drop of that flavorful liquid.
If you have a little extra time, let it sit for a few minutes to drain fully. After that, you'll be ready to move on to making your ginger chews even tastier. Enjoy the process, and savor that lovely ginger scent!
Step 5. Add Sweetener to Taste
Now that you have your ginger-infused liquid ready, it's time to add sweetener to taste. This is where the fun begins! Sweetening your ginger mixture can make it taste just right for you.
You can use honey, sugar, or even maple syrup—whatever you like best. Start with a small amount, maybe one or two teaspoons, and stir it in well.
Then, take a sip and see how it tastes. If you want it sweeter, add more! It's all about what makes your taste buds happy. Just remember, you can always add more sweetener, but you can't take it out once it's in.
If you're feeling adventurous, why not try adding a splash of lemon juice or a sprinkle of cinnamon? These little extras can make your ginger drink even more delicious!
Once you've got the sweetness just right, you're ready to enjoy your creation. Pour it into a fun glass, grab a friend, and share the joy of your tasty ginger drink.
It's a great treat to sip on, especially when you want something warm and comforting. Enjoy!
Final Thoughts
Ultimately, knowing how many ginger chews you can eat in a day comes down to understanding your own body and health needs.
Ginger chews are delicious and can help with tummy troubles, but it's important not to overdo it. For most people, enjoying a few ginger chews each day is perfectly fine.
But if you have certain health conditions, like diabetes or stomach issues, you may want to be more careful.
Listen to your body! If you start to feel any discomfort, it might be a sign to cut back.
Frequently Asked Questions
Are Ginger Chews Safe for Children?
Ginger chews can be safe for children in moderation. They may help with digestion and nausea, but it's best to consult a pediatrician first. Always watch for allergies or sensitivities before introducing new snacks.
Can Ginger Chews Cause Digestive Issues?
Yes, ginger chews can cause digestive issues for some people. You might experience stomach upset, bloating, or diarrhea if you consume too many. It's best to enjoy them in moderation and pay attention to your body's reactions.
How Should Ginger Chews Be Stored?
You should store ginger chews in a cool, dry place, away from direct sunlight. Keeping them in an airtight container helps maintain freshness and prevents them from becoming hard or losing flavor over time.
Are There Any Allergens in Ginger Chews?
Ginger chews can contain allergens, depending on the brand. Always check the ingredient list for common allergens like soy, nuts, or gluten. If you're unsure, consult with your doctor before trying them. Stay safe!
Can Ginger Chews Interact With Medications?
Yes, ginger chews can interact with certain medications. If you're on blood thinners or diabetes medication, it's best to consult your doctor before enjoying ginger chews to avoid any potential complications or side effects.
-
Brazilian Cuisine3 months ago
Tacacá
-
Polish Comfort Food3 months ago
Krupnik (Barley Soup)
-
Brazilian Cuisine3 months ago
Caldeirada
-
Brazilian Cuisine3 months ago
Chicken in Brown Sauce
-
Southern Comfort Food3 months ago
Cheese Straws
-
African Cuisine3 months ago
Kedjenou (Ivory Coast)
-
Polish Comfort Food3 months ago
Vegetable Salad
-
American Diner Classics3 months ago
The Maillard Reaction: Understanding the Chemistry of Browning {Food Science and Cooking}