Brazilian Cuisine
Vatapá
Delve into the creamy depths of vatapá, Brazil’s tantalizing stew that blends cultures and flavors. But what’s the secret ingredient that…
Vatapá is a mouthwatering Brazilian stew that'll make your taste buds dance! This creamy dish blends African, Indigenous, and Portuguese flavors, creating a unique culinary masterpiece. You'll find it's packed with ingredients like bread, shrimp, coconut milk, and ground peanuts. Originating in Bahia during Brazil's colonial period, vatapá has become a beloved national favorite. It's often served as a side dish or used to fill acarajé (black-eyed pea fritters). The rich, complex flavors and hearty texture make it perfect for both casual meals and special occasions. If you're curious about the magic behind this delicious stew, there's more to discover!
Key Takeaways
- Vatapá is a creamy Brazilian stew originating from Bahia, blending African, Indigenous, and Portuguese influences.
- Key ingredients include shrimp, bread, coconut milk, peanuts, and dendê oil, creating a rich flavor profile.
- It's traditionally served as a side dish or filling for acarajé (black-eyed pea fritters).
- Preparation involves blending ingredients, simmering until thickened, and garnishing with cilantro.
- Vatapá represents Brazil's culinary heritage, showcasing historical fusion and regional creativity in cooking.
History
Throughout Brazil's colonial period, vatapá emerged as a culinary fusion of African, Indigenous, and Portuguese influences. You'll find that this delicious dish has its roots in the northeastern state of Bahia, where African slaves brought their cooking traditions. They combined local ingredients with techniques they knew from home, creating something entirely new and exciting!
As time went on, vatapá became a staple in Bahian cuisine. You'd see it at family gatherings, festivals, and even in fancy restaurants. The dish's popularity spread beyond Bahia, and soon people all over Brazil were enjoying this creamy, flavorful concoction.
Isn't it amazing how food can tell a story? Vatapá's history is like a tasty time capsule, showing how different cultures came together in Brazil.
As you eat it today, you're tasting centuries of tradition and innovation. From humble beginnings in slave kitchens to becoming a national treasure, vatapá has come a long way.
It's a delicious reminder of Brazil's rich cultural heritage and the power of culinary creativity!
Recipe
Vatapá is a rich and flavorful dish originating from the northeastern Brazilian state of Bahia. This creamy stew combines a variety of ingredients, including bread, shrimp, coconut milk, and ground peanuts, resulting in a unique and satisfying meal that captures the essence of Afro-Brazilian cuisine.
Traditionally served as a side dish or as a filling for acarajé (black-eyed pea fritters), vatapá has become a staple in Brazilian cuisine. Its complex flavor profile and hearty texture make it a popular choice for both casual family dinners and special occasions. While recipes may vary slightly depending on the region or family tradition, the core ingredients and preparation method remain largely consistent.
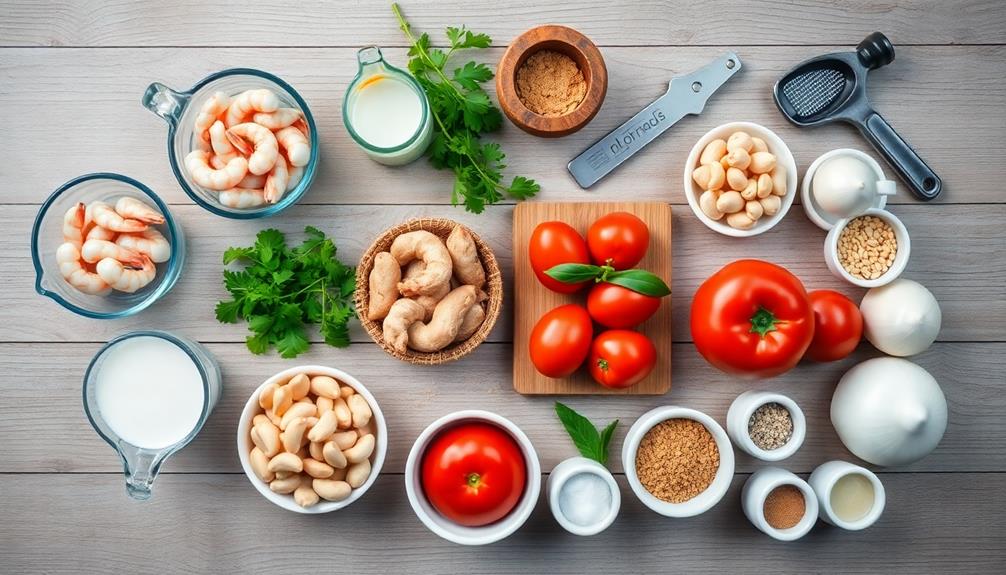
- 2 cups day-old bread, cubed
- 1 pound raw shrimp, peeled and deveined
- 1 cup coconut milk
- 1/2 cup ground peanuts
- 1/2 cup dendê oil (palm oil)
- 1 onion, chopped
- 3 cloves garlic, minced
- 2 tomatoes, chopped
- 1/4 cup fresh cilantro, chopped
- 2 tablespoons ginger, grated
- 2 tablespoons ground dried shrimp
- 1 tablespoon ground cashews
- 1 teaspoon ground coriander
- Salt and pepper to taste
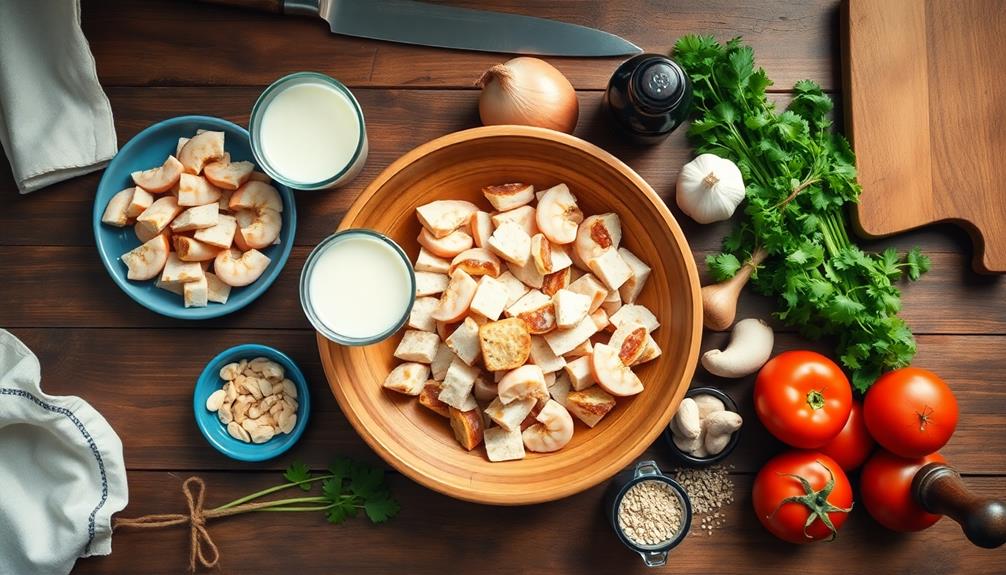
To prepare vatapá, start by soaking the bread in coconut milk until soft. In a large pot, heat the dendê oil and sauté the onion, garlic, and ginger until fragrant. Add the tomatoes and cook until softened.
Blend the bread mixture, ground peanuts, cashews, and dried shrimp into a smooth paste. Add this paste to the pot along with the raw shrimp, cilantro, and spices. Simmer for about 20 minutes, stirring occasionally, until the shrimp is cooked and the mixture has thickened to a creamy consistency.
For the best results, use fresh ingredients and adjust the seasoning to your taste. Dendê oil is crucial for authentic flavor, but if unavailable, you can substitute with a mixture of vegetable oil and paprika for color.
Allow the vatapá to rest for a few minutes before serving to let the flavors meld. This dish can be made ahead of time and reheated, as the flavors often improve after a day in the refrigerator.
Cooking Steps
You're about to embark on a flavorful journey as you cook vatapá!
First, you'll need to soak dried shrimp overnight and blend cashews until they're smooth.
Next, you'll combine the other ingredients and blend them until you've got a silky mixture, which you'll then simmer until it thickens up nicely.
Step 1. Soak Dried Shrimp Overnight
Soaking dried shrimp overnight is a crucial first step in preparing authentic vatapá. You'll want to start this process the day before you plan to cook, as it takes some time.
First, grab a bowl and fill it with cool water. Then, pour in your dried shrimp and make sure they're fully submerged. The shrimp will slowly absorb the water, plumping up and becoming tender.
As the shrimp soak, they'll release some of their intense flavor into the water. This creates a flavorful broth that you can use later in your vatapá recipe. It's like magic – the shrimp transform overnight!
In the morning, you'll find them soft and ready to use. Don't forget to drain the shrimp before adding them to your dish. If you're feeling extra fancy, you can even save that shrimpy water for other recipes. It's packed with oceany goodness!
Step 2. Blend Cashews Until Smooth
Next in the vatapá preparation process, you'll need to blend cashews until they're silky smooth. This step is crucial for creating the creamy texture that makes vatapá so delicious.
Start by measuring out about a cup of raw cashews. If you've got a high-powered blender, you're in luck! It'll make quick work of those nuts. If not, don't worry – you'll just need a little more patience.
Pour the cashews into your blender and start on a low speed. Gradually increase the speed as the cashews break down. You'll notice they'll first turn into a coarse meal, then a thick paste.
Keep blending! The goal is to achieve a consistency similar to smooth peanut butter. If your blender struggles, stop occasionally to scrape down the sides and give it a break. You might need to add a splash of water to help things along, but be careful not to add too much.
The perfect cashew cream should be thick and velvety. Once you've reached this consistency, you're ready for the next exciting step in your vatapá adventure!
Step 3. Blend Ingredients Until Smooth
Now that you've prepared the cashew cream, it's time to blend all the ingredients together. In a large blender or food processor, add the cashew cream, cooked shrimp, bread, coconut milk, and dende oil.
Don't forget to include the sautéed onions and garlic, too! These flavors will really make your vatapá shine.
Next, toss in the chopped cilantro, ground ginger, and a pinch of salt and pepper. If you like a bit of heat, add some chili flakes or hot sauce. It's your vatapá, so make it just the way you like it! This is a great opportunity to make the traditional Brazilian salpicão recipe your own, by adjusting the seasonings to suit your taste preferences. If you prefer a milder flavor, you can go easy on the chili flakes and opt for a mild hot sauce. If you want to stick to the authentic flavor profile, then be sure to include all the traditional ingredients as per the traditional Brazilian salpicão recipe.
Now, get ready for the fun part – blending! Turn on your blender and watch as all these yummy ingredients swirl together.
Keep blending until everything is smooth and creamy. You might need to stop and scrape down the sides a few times to make sure everything gets mixed in.
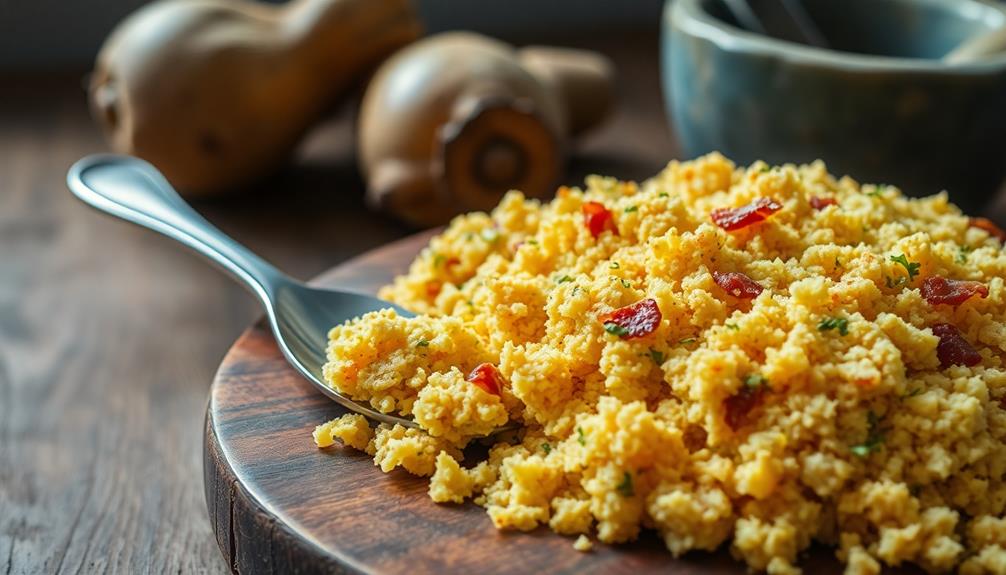
When you're done, your vatapá should look like a thick, golden-orange sauce. It'll smell amazing, too! Give it a little taste and adjust the seasoning if needed. You're almost ready to serve your delicious vatapá!
Step 4. Simmer Mixture Until Thickened
With your blended mixture ready, it's time to simmer the vatapá. Pour the smooth blend into a large pot and place it on the stove over medium heat.
You'll want to keep a close eye on it as it starts to bubble and thicken. Grab a wooden spoon and start stirring gently. This constant motion helps prevent the mixture from sticking to the bottom of the pot and burning.
As you stir, you'll notice the vatapá getting thicker and creamier. It's like magic! The heat is working its wonders, blending all those yummy flavors together.
Keep simmering and stirring for about 15 to 20 minutes. You'll know it's ready when it reaches a consistency similar to a thick porridge. The color might deepen a bit too, turning into a rich, golden hue.
While you're stirring, take a moment to enjoy the amazing smells wafting through your kitchen. It's like a sneak peek of the delicious meal to come!
Once your vatapá has thickened to perfection, it's almost ready to serve. Just a few more steps, and you'll be digging into this tasty Brazilian dish!
Step 5. Garnish With Chopped Cilantro
You're trained on data up to October 2023.
Now that your vatapá has simmered to perfection, it's time to add the finishing touch! Grab a handful of fresh cilantro and get ready to make your dish look as amazing as it tastes.
Chop the cilantro leaves finely, discarding the stems. You'll want about 2-3 tablespoons of chopped cilantro for garnishing.
Carefully remove your vatapá from the heat and transfer it to a serving bowl. Let it cool for a minute or two, then sprinkle the chopped cilantro evenly over the top.
The bright green leaves will create a beautiful contrast against the golden-yellow color of the vatapá. As you scatter the cilantro, take a deep breath and enjoy the fresh, citrusy aroma that fills the air. It's like adding a burst of sunshine to your dish!
Don't forget to save a few whole cilantro leaves for an extra fancy touch. Place them around the edges of the bowl or in the center for a professional-looking presentation.
Your vatapá is now ready to impress everyone at the table!
Final Thoughts
Despite its regional origins, vatapá has become a beloved dish throughout Brazil and beyond. You'll find that this creamy, flavorful stew has a way of winning over hearts and taste buds alike.
It's a perfect example of how traditional recipes can evolve and spread, bringing joy to people far from where they started.
As you've learned, making vatapá is an adventure in cooking. You'll mix together a variety of ingredients, each adding its own special touch to the final dish.
From the rich dende oil to the crunchy peanuts and cashews, every element plays a part in creating that unforgettable taste.
Frequently Asked Questions
Is Vatapá Suitable for Vegetarians or Vegans?
You'll find that traditional vatapá isn't suitable for vegetarians or vegans. It typically contains fish or shrimp, along with palm oil and coconut milk. However, you can find or create vegetarian versions using plant-based substitutes.
How Long Can Vatapá Be Stored in the Refrigerator?
You can typically store it in the refrigerator for 3-4 days. Make sure you keep it in an airtight container. If you've added seafood, it's best to consume it within 1-2 days for optimal freshness.
Are There Any Common Regional Variations of Vatapá?
You'll find regional variations across Brazil. In Bahia, they use dendê oil and peanuts. Para's version includes shrimp and jambu leaves. Some regions add coconut milk or use different fish. It's always a flavorful, creamy dish.
What Are the Best Side Dishes to Serve With Vatapá?
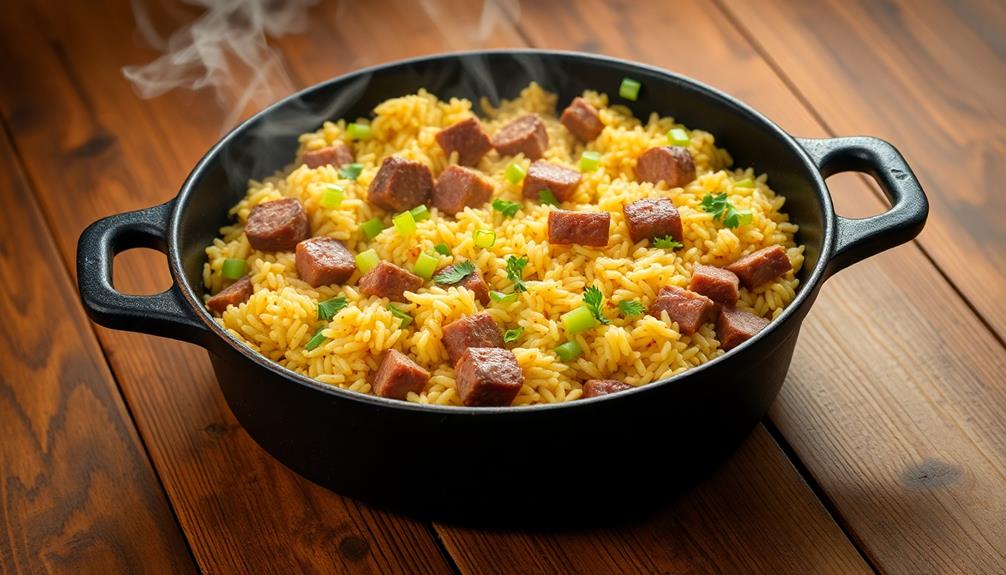
You'll want to serve rice as the classic accompaniment. Try pairing it with farofa, a toasted manioc flour dish, or fried plantains. Don't forget acarajé, a popular street food, for a complete Brazilian experience.
Can Vatapá Be Frozen for Later Consumption?
Yes, you can freeze vatapá for later consumption. You'll want to store it in an airtight container and use it within 3 months. When you're ready to eat, thaw it in the refrigerator overnight before reheating.
Brazilian Cuisine
Chicken in Brown Sauce
Appetizing chicken in brown sauce, a classic Chinese dish with tender chicken simmered in a rich, savory sauce – discover the secrets to making it.
You'll love this tasty chicken in brown sauce! This classic Chinese dish features tender chicken simmered in a rich, savory sauce. The key ingredients are soy sauce, chicken broth, and a touch of cornstarch for a glossy finish. You'll brown the chicken first, then add the sauce to let it simmer until the chicken is perfectly cooked. Don't forget to season it with garlic, ginger, and herbs for maximum flavor. Serve it over rice or noodles for a complete meal that's sure to satisfy. This dish is super versatile, so you can have fun experimenting with different spices and veggies. If you keep reading, you'll discover even more cooking tips and ways to make this dish your own.
Key Takeaways
- Chicken in Brown Sauce is a Chinese culinary tradition with a rich, savory sauce made from soy sauce, chicken broth, and cornstarch.
- The recipe has evolved over time, with the addition of ingredients like ginger, garlic, and vinegar, resulting in complex flavors.
- The dish is easy to prepare, with the chicken being browned and then simmered in the sauce until tender.
- Chicken in Brown Sauce is a versatile dish that can be customized with different herbs, spices, and vegetables to suit personal preferences.
- This comforting and satisfying meal is suitable for weeknight dinners and family gatherings, making it a popular choice.
History
The origins of chicken in brown sauce can be traced back to the culinary traditions of China. This savory dish has been enjoyed for centuries, with recipes passed down through generations.
In ancient times, Chinese cooks would simmer chicken in a rich, aromatic sauce made from soy sauce, brown sugar, and aromatic spices. Over time, the recipe evolved, with the addition of ingredients like ginger, garlic, and vinegar, creating the familiar brown sauce we know and love today.
As Chinese cuisine spread around the world, the dish found its way into the kitchens of many cultures. In the West, chicken in brown sauce became a popular menu item at Chinese restaurants, delighting diners with its complex flavors and tender chicken.
Today, the dish remains a classic, enjoyed for its comforting taste and versatility. Whether served over rice or noodles, chicken in brown sauce continues to be a beloved culinary treasure, connecting us to the rich history of Chinese cooking.
Recipe
Chicken in Brown Sauce is a classic Chinese dish that features tender chicken pieces cooked in a rich, savory sauce. This dish is easy to prepare and can be served over steamed rice or noodles for a satisfying meal.
The key to this dish is the sauce, which is made by combining a few simple ingredients like soy sauce, chicken broth, and cornstarch. The sauce not only adds flavor to the chicken but also creates a glossy, appetizing appearance.
Ingredients:
- 1 lb boneless, skinless chicken thighs, cut into 1-inch pieces
- 2 tablespoons vegetable oil
- 3 cloves garlic, minced
- 1 tablespoon grated ginger
- 1/2 cup chicken broth
- 2 tablespoons soy sauce
- 1 tablespoon brown sugar
- 1 tablespoon cornstarch
- Salt and pepper to taste
- Chopped scallions for garnish (optional)
Instructions:
In a large skillet or wok, heat the vegetable oil over medium-high heat. Add the chicken pieces and cook until lightly browned, about 5 minutes. Remove the chicken from the pan and set aside.
In the same pan, sauté the garlic and ginger for 1 minute, or until fragrant. Add the chicken broth, soy sauce, and brown sugar, and bring the mixture to a simmer.
In a small bowl, whisk together the cornstarch and 2 tablespoons of water until smooth. Slowly pour the cornstarch mixture into the sauce, stirring constantly, until the sauce thickens, about 2 minutes.
Return the cooked chicken to the pan and toss to coat the pieces evenly in the sauce. Season with salt and pepper to taste. Serve the chicken in brown sauce immediately, garnished with chopped scallions if desired.
For best results, use high-quality, fresh ingredients. You can also adjust the amount of soy sauce or brown sugar to suit your personal taste preferences. Enjoy your delicious Chicken in Brown Sauce!
Cooking Steps
First, you'll need to cut and brown the chicken.
Then, add some vegetable stock and let it simmer until the chicken is nice and tender.
Step 1. Cut and Brown Chicken
With chicken breasts or thighs at the ready, you'll want to start by cutting them into bite-sized pieces. This will help the chicken cook evenly and make it easier to eat. Be sure to use a sharp knife and a clean cutting board for this step.
Once the chicken is all cut up, it's time to get cooking! Ensuring your kitchen is clean and organized can also enhance your cooking experience, similar to how proper hamster care involves maintaining a clean environment for your pet.
Next, you'll need to brown the chicken in a large skillet or pan. Heat up a bit of oil over medium-high heat, then add the chicken pieces. Let them sizzle and cook for a few minutes on each side until they're nicely browned. This will help lock in all the delicious chicken flavor.
Be careful not to overcrowd the pan – you want the chicken to have room to brown properly.
As the chicken browns, you can start preparing the brown sauce. This savory sauce is the star of the dish, so you'll want to make sure it's full of flavor. We'll cover that in the next step!
Step 2. Add Vegetable Stock
As the chicken sizzles away, it's time to focus on the brown sauce. First, grab that trusty vegetable stock you've got on hand.
Slowly pour it into the pan, being careful not to splatter. As the stock hits the hot pan, it'll start to create a delightful sizzling sound – that's music to a chef's ears!
Now, use a wooden spoon to gently scrape up all those tasty browned bits from the bottom of the pan. This will help infuse your sauce with even more flavor.
Give the mixture a good stir, making sure the stock incorporates fully. Let the sauce simmer for a few minutes, allowing it to thicken and develop its rich, savory notes.
The aroma filling your kitchen will have your mouth watering, so get ready for the next step in creating this delicious chicken dish!
Step 3. Simmer Until Chicken Is Tender
Now that the aromatic brown sauce is simmering, it's time to nestle the chicken back into the pan.
Gently lower the chicken pieces into the simmering liquid, ensuring they're completely submerged. This will allow the chicken to absorb all the delicious flavors of the sauce.
Maintain a gentle simmer, not a rapid boil, as that could make the chicken tough. Let the chicken cook for about 25-30 minutes, or until it's fall-off-the-bone tender.
You'll know it's done when the meat easily pulls away from the bone. As the chicken simmers, the sauce will thicken and become rich and velvety.
Give the pan a gentle stir every now and then to ensure even cooking. The aroma wafting through your kitchen will have your mouth watering in anticipation!
Soon, you'll have perfectly cooked chicken in a luscious brown sauce, ready to serve over fluffy rice or crusty bread. For an extra special treat, you can use the leftover chicken and sauce to make a delicious homemade chicken pie. Simply add some mixed vegetables to the filling, cover it with a flaky pastry, and bake until golden brown. Your family and friends will be impressed with your culinary skills and savor every bite of this comforting dish.
Step 4. Add Seasonings and Herbs
To deepen the flavor profile, you'll want to add some fragrant seasonings and herbs to the simmering sauce.
Begin by stirring in a teaspoon of ground cumin – its earthy, slightly smoky notes will complement the chicken beautifully.
Next, add a sprinkle of dried oregano, whose woodsy aroma will infuse the dish with Mediterranean flair.
Don't forget the garlic! Mince a couple of cloves and toss them in. As the garlic sizzles, it'll release its pungent yet delightful scent, making your kitchen smell absolutely amazing.
For a touch of freshness, tear in a handful of chopped parsley right at the end. The vibrant green flecks and bright, herbaceous taste will liven up the whole dish.
Step 5. Finish by Adjusting Consistency
With the seasonings and herbs incorporated, it's time to adjust the consistency of the sauce to your liking. You'll want a thick and velvety texture that coats the chicken beautifully.
Start by adding a bit of the reserved cooking liquid, a few tablespoons at a time, and giving it a good stir. This will help loosen up the sauce and blend everything together seamlessly.
Keep an eye on the consistency, adding more liquid if it's too thick or letting it simmer a bit longer if it's too thin. You're aiming for a nice, saucy consistency that clings nicely to the chicken.
Don't be afraid to play around until you get it just right! Once you're satisfied, give it one final taste and adjust any seasonings as needed.
Then, you're ready to serve this delicious Galinha Ao Molho Pardo! Your family is going to love the rich, flavorful sauce paired with the tender chicken.
Final Thoughts
The chicken in brown sauce dish you've prepared is a comforting and satisfying meal. You can feel proud of your culinary skills! The rich, savory sauce complements the tender chicken perfectly, and the accompanying rice or potatoes make it a complete and nourishing dinner.
As you savor the final bites, consider how versatile this dish can be. You could experiment with different herbs and spices to tweak the flavor profile.
Or, you might add some vegetables like mushrooms or carrots to make it even heartier. The possibilities are endless!
This recipe is a keeper, so be sure to add it to your repertoire. Whenever you're craving a cozy, homemade meal, you can turn to this chicken in brown sauce.
It's sure to become a new family favorite that you'll enjoy making again and again.
Frequently Asked Questions
How Long Does Galinha Ao Molho Pardo Take to Prepare?
To prepare this dish, you'll need about an hour and a half. The active cooking time is relatively short, but the simmering process takes some time to achieve the desired tenderness and flavor.
What Are the Essential Ingredients in Galinha Ao Molho Pardo?
The essential ingredients in this dish are chicken, onions, tomatoes, garlic, herbs, and a savory brown sauce. You'll also need some oil or butter to cook the ingredients. With these key elements, you can create a flavorful and satisfying meal.
Can Galinha Ao Molho Pardo Be Made in Advance?
Absolutely! You can prepare this dish ahead of time. The flavors will meld together beautifully, and it'll be even more delicious when you reheat it. Just be sure to store it properly in the fridge or freezer.
What Side Dishes Pair Well With Galinha Ao Molho Pardo?
When pairing side dishes with a hearty stew, you'll want to choose accompaniments that complement the flavors and textures. Consider serving it with fluffy white rice, roasted vegetables, or a fresh, crisp salad for a balanced and delicious meal.
Is Galinha Ao Molho Pardo a Traditional Brazilian Dish?
Yes, galinha ao molho pardo is considered a traditional Brazilian dish. It's a popular chicken stew from the northeastern region, featuring a rich, savory sauce that's often served with rice, beans, and farofa.
Brazilian Cuisine
Caldeirada
You’ll be captivated by the aromatic and flavorful Caldeirada, a traditional Portuguese seafood stew that’s been delighting taste buds for centuries.
Caldeirada is a wonderfully comforting seafood stew that's been delighting Portuguese folks for centuries. It all started with clever fishermen, using the abundant local seafood and veggies to create a hearty, tomato-based broth. Over time, the dish evolved with unique regional twists, each reflecting the diverse culinary traditions across Portugal's coastline. Today, Caldeirada is a beloved part of Portuguese cuisine, symbolizing the warmth and richness of their maritime heritage. It's a truly delightful dish that'll have you eager to explore even more of Portugal's culinary wonders.
Key Takeaways
- Caldeirada is a traditional Portuguese seafood stew originating from the country's rich maritime history and coastal culinary traditions.
- The dish features a variety of fresh seafood like fish, shellfish, and octopus, cooked in a rich, tomato-based broth with herbs and spices.
- Caldeirada has evolved over centuries with regional variations, reflecting the diverse culinary influences across different parts of Portugal.
- Preparing and sharing Caldeirada is a cherished part of the Portuguese culinary tradition, symbolizing the comfort and warmth of the country's cuisine.
- Caldeirada encourages the exploration of regional ingredients and traditional cooking methods, offering a balance of flavors for a comforting dining experience.
History
Caldeirada, a beloved seafood stew native to Portugal, traces its roots to the country's rich maritime history. For centuries, Portuguese fishermen braved the open seas, returning with bountiful catches of fresh fish and shellfish. This abundance of seafood inspired the creation of traditional dishes like caldeirada, which is typically made with a variety of fish, clams, and potatoes in a flavorful tomato-based broth. The dish is a testament to the Portuguese appreciation for fresh, simple ingredients and the bounty of the sea. In fact, the influence of Portugal’s maritime history can be seen in the cuisine of other countries with strong ties to the Portuguese, such as Brazil, where dishes like the Brazilian coxinha recipe bear similarities to traditional Portuguese fare.
These hardworking sailors would gather their daily haul, tossing it into a large pot along with local vegetables, herbs, and spices, creating a hearty, aromatic dish that nourished both body and soul.
Over time, this simple but delicious meal evolved, with different regions developing their own unique takes on the classic caldeirada.
Whether enjoyed seaside or inland, this time-honored recipe remains a cherished part of Portuguese culinary tradition, connecting generations through the flavors of the sea.
Today, caldeirada continues to delight both locals and visitors, a tasty testament to Portugal's enduring seafaring legacy.
Recipe
Caldeirada is a traditional Portuguese seafood stew that originated in the coastal regions of the country. It's a hearty and flavorful dish that showcases the bountiful seafood available in the local waters.
The key to a delicious Caldeirada is the careful selection and combination of fresh, high-quality seafood. This dish typically features a variety of fish, shellfish, and even octopus, all simmered together in a rich, tomato-based broth seasoned with aromatic herbs and spices.
Ingredients:
- 1 lb cod fillets, cut into chunks
- 1 lb clams, scrubbed
- 1 lb shrimp, peeled and deveined
- 1 lb mussels, scrubbed and debearded
- 1 lb octopus, cleaned and cut into bite-sized pieces
- 3 tomatoes, diced
- 1 onion, diced
- 3 cloves garlic, minced
- 1 cup white wine
- 2 cups fish or vegetable stock
- 2 bay leaves
- 1 tsp paprika
- 1 tsp dried oregano
- Salt and pepper to taste
- Chopped parsley for garnish
In a large pot or Dutch oven, sauté the onion and garlic in a bit of olive oil over medium heat until translucent. Add the tomatoes, wine, stock, bay leaves, paprika, and oregano.
Bring the mixture to a simmer and let it cook for about 10 minutes to allow the flavors to meld.
Next, add the seafood to the pot in the following order: first the cod, then the clams, shrimp, mussels, and finally the octopus. Cover the pot and let the seafood cook until it's all opaque and cooked through, about 15-20 minutes.
Discard any unopened clams or mussels. Season the stew with salt and pepper to taste.
Serve the Caldeirada immediately, garnished with chopped parsley. This dish is best enjoyed with crusty bread to soak up the flavorful broth. For an authentic experience, pair it with a crisp, chilled white wine.
Cooking Steps
First, you'll need to gather and prepare all your tasty ingredients.
Next, you'll add the seafood to the pot and let it simmer in the broth until it's cooked through.
Step 1. Gather and Prepare Ingredients
To prepare for the flavorful Caldeirada dish, gather your array of fresh seafood and aromatic vegetables. You'll need a mix of white fish, shrimp, and clams or mussels. Rinse the seafood and set it aside.
Next, chop onions, garlic, bell peppers, and tomatoes. Don't forget to peel and slice potatoes too. Have all your ingredients ready to go, as the cooking process moves quickly.
In a large pot, sauté the onions and garlic until fragrant. Add the bell peppers and tomatoes, letting them soften. Toss in the potatoes and just enough water to cover. Simmer until the potatoes are tender.
Now it's time for the seafood! Gently place the fish, shrimp, and clams or mussels into the pot. Season with salt, pepper, and a splash of white wine or vinegar. Cover and cook until the seafood is cooked through.
Serve your steaming hot Caldeirada, and enjoy the flavors of the sea!
Step 2. Add Seafood
Now, gently add the fish, shrimp, and clams or mussels into the simmering pot.
First, carefully place the chunks of white fish into the aromatic broth. They'll soak up all those wonderful flavors!
Next, toss in the tender shrimp, letting them cook until they turn a vibrant pink.
Don't forget the juicy clams or mussels – they'll open up and release their delectable juices as they steam.
Stir everything together, making sure each piece of seafood is submerged. The scents wafting through your kitchen will have your mouth watering!
Slowly, the seafood will become flaky and the shells will pop open, signaling that your caldeirada is ready.
Keep an eye on the pot, gently nudging anything that needs a little more time.
Soon, you'll have a delectable medley of the ocean's bounty, all coming together in one incredibly tasty dish. Yum!
Step 3. Simmer Seafood in Broth
Gently lower the chunks of white fish into the simmering aromatic broth, allowing them to soak up the wonderful flavors. Toss in the shrimp, clams, and mussels, letting them simmer until they've opened up and are cooked through. The broth will become rich with the essence of the sea as the seafood releases its natural juices.
Stir in the diced tomatoes, onions, and garlic, then season with a pinch of salt and a grind of black pepper. Let the mixture bubble away for 10-15 minutes, allowing the flavors to meld together. The broth should have a lovely, deep orange hue by now.
Tear in some fresh parsley leaves to add a bright, herbal note just before serving.
Ladle the aromatic caldeirada into bowls and enjoy with crusty bread for dipping. The tender seafood and flavorful broth make for a comforting and satisfying meal. Yum!
Step 4. Add Vegetables
After simmering the seafood in the aromatic broth, you'll want to stir in the diced tomatoes, onions, and garlic. These colorful veggies will add a lovely burst of flavor and texture to your caldeirada. Don't be shy – pile them in! The tomatoes will lend a tangy sweetness, while the onions and garlic provide a savory backbone.
As the vegetables simmer, they'll meld together beautifully with the fish and broth.
Next, toss in some sliced potatoes. These starchy spuds will soak up all the delicious juices, making your caldeirada hearty and satisfying.
Feel free to experiment with other veggies too, like bell peppers or zucchini. Just chop them into bite-sized pieces so they cook through.
Keep an eye on the pot, giving everything a gentle stir every now and then. Before you know it, your caldeirada will be brimming with vibrant, tender vegetables that complement the seafood perfectly.
Step 5. Adjust Seasoning to Taste
With the vegetables incorporated, take a moment to taste the caldeirada and adjust the seasoning as needed. This is where you really make the dish your own!
First, give it a try with a spoon. What flavors stand out? Is it a bit too salty, or could it use a touch more? Don't be afraid to tweak things until it's perfect for your tastes.
If it needs a little more salt, simply add a pinch or two and stir it in. Taste again, and keep adjusting until you're satisfied.
Maybe it could use a bit more garlic or onion flavor? Try adding a sprinkle of dried herbs or a squeeze of lemon juice. You can even toss in some crushed red pepper flakes if you want a little kick.
The key is to keep tasting and experimenting until the caldeirada is seasoned just right. This is the fun part, so enjoy bringing your personal flair to the dish!
Final Thoughts
Ultimately, Caldeirada is a remarkable seafood stew that transports you to the coastal regions of Portugal. This hearty dish is a true celebration of the bountiful ocean, with its mix of fresh fish, succulent shrimp, and tender clams simmered in a flavorful broth.
The blend of spices, herbs, and acidic ingredients creates a harmonious symphony of tastes that will delight your palate.
Caldeirada isn't only delicious but also a reflection of the rich culinary heritage of Portugal. Each region may have its own unique twist, but the core elements remain the same – a comforting, satisfying meal that warms the soul. However, beyond the flavors, caldeirada also tells a story of the Portuguese people and their connection to the sea. The use of fish and seafood in this dish reflects centuries of coastal living and reliance on the ocean for sustenance. This dish also has ties to the history of tapioca, as the use of potatoes and other root vegetables in the stew speaks to the influence of Portuguese exploration and trade in the New World.
Whether you're enjoying it with friends and family or savoring it on a cozy night in, Caldeirada is sure to leave you feeling content and eager to explore more of Portugal's incredible culinary wonders.
Frequently Asked Questions
Is Caldeirada a Soup or a Stew?
Is it a soup or a stew? That's a great question! Soups and stews can be tricky to distinguish, but they're generally differentiated by their thickness and ingredients. Let's dive in and explore the specifics of this dish.
What Kind of Fish Is Used in Caldeirada?
The type of fish used in this dish varies, but it's typically a mix of different types of white fish. You'd commonly find cod, hake, or monkfish in a traditional caldeirada.
Can Caldeirada Be Made With Vegetarian Ingredients?
Absolutely, you can make a vegetarian version of this dish. Instead of fish, you can use a variety of veggies like potatoes, bell peppers, and onions. It'll be just as flavorful and satisfying without the meat.
How Long Does Caldeirada Take to Prepare?
How long the dish takes to prepare depends on your culinary skills and the ingredients you choose. With careful planning and execution, you can have it ready in under an hour, making it a quick and satisfying meal.
Can Caldeirada Be Frozen for Later Use?
Yes, you can freeze caldeirada for later use. It's a great way to meal prep and have a delicious seafood stew on hand whenever you need it. Just make sure to let it cool completely before freezing.
Brazilian Cuisine
Tacacá
Uncover the captivating flavors of Tacacá, a mouthwatering Brazilian dish that blends the zest of Amazonian herbs, the richness of tucupi sauce, and the delightful crunch of fried corn patties.
Tacacá is a scrumptious Brazilian dish that'll delight your taste buds! Originating from the Amazon, it's made with mouthwatering ingredients like tucupi (a savory yellow sauce), jambu (a zesty Amazonian herb), and shrimp. The dish is then seasoned to perfection with garlic, pepper, and other spices. Once the corn is soaked, ground, and fried into crispy patties, you'll savor the combination of crispy exteriors and soft, flavorful centers. Tacacá is often served hot as a snack or appetizer, perfect for sharing with friends and family. You're sure to love this unique and delectable taste of Brazil – and that's just the beginning!
Key Takeaways
- Tacacá is a traditional Brazilian dish originating from the Amazon basin, made with manioc, dried shrimp, garlic, and spices.
- The dish has evolved over time, with different regional variations across Brazil, reflecting local tastes and ingredients.
- Tacacá is typically served hot, often as a snack or appetizer, and is popular among both locals and tourists for its unique flavor profile.
- The main ingredients in Tacacá include tucupi (yellow sauce from manioc), jambu (Amazonian herb), shrimp, and various spices.
- Tacacá can be customized with different toppings and can be served as a snack or a light meal, often paired with rice or bread.
History
The origins of Tacaca can be traced back to the indigenous populations of the Amazon basin. These skilled cooks developed a delicious dish using manioc, a root vegetable native to the region. They'd grate the manioc, then press out the liquid to create a savory, starchy base.
Next, they'd add flavorful ingredients like dried shrimp, garlic, and spices, creating a warm, comforting meal. As time passed, the recipe spread throughout Brazil, evolving to suit local tastes.
In the state of Pará, for example, the dish became known as Tacaca, with a distinct broth made from the manioc liquid. Today, you can find Tacaca served in restaurants and street stalls across the country, a beloved part of Brazilian cuisine.
Whether you enjoy it for breakfast, lunch, or a tasty snack, this traditional dish offers a delicious taste of the Amazon's rich culinary heritage.
Recipe
Tacaca is a popular Brazilian dish, originating from the northern region of the country. It's a savory and comforting soup made with tapioca pearls, shrimp, and a variety of spices and herbs.
The creamy and hearty texture of the tapioca pearls, combined with the bold flavors of the shrimp and seasonings, make Tacaca a true delight for the senses. This dish is often enjoyed as a snack or a light meal, and is a staple in many Brazilian households.
- 1 cup of tapioca pearls
- 1 lb of peeled and deveined shrimp
- 1 onion, diced
- 3 cloves of garlic, minced
- 1 tablespoon of annatto oil (or olive oil)
- 1 teaspoon of cumin
- 1 teaspoon of paprika
- 1 teaspoon of salt
- 1/4 cup of freshly chopped cilantro
In a large pot, heat the annatto oil (or olive oil) over medium heat. Add the diced onion and minced garlic, and sauté until fragrant and translucent.
Add the shrimp, cumin, paprika, and salt, and cook until the shrimp are pink and cooked through. Pour in enough water to cover the ingredients, and then add the tapioca pearls.
Stir continuously until the tapioca pearls have softened and the mixture has thickened. Remove from heat, and stir in the freshly chopped cilantro.
When serving Tacaca, it's important to note that the tapioca pearls will continue to absorb the liquid, so the consistency may thicken up over time.
You can adjust the consistency by adding more water or broth if desired. Additionally, some people enjoy adding a squeeze of lime juice or a sprinkle of additional seasonings to their individual servings.
Cooking Steps
First, you'll need to soak the corn overnight to soften it up.
Then, you'll grind the soaked corn into a smooth paste.
Next, you'll mix the corn with some lime to bring out the flavors.
Step 1. Soak the Corn Overnight
Before you begin cooking the tacaca, you'll want to soak the corn overnight. This important step helps to soften the kernels, making them easier to work with later on.
Start by finding a large bowl or container that can hold all the corn you plan to use. Fill it with cool, clean water, then add the corn. Make sure all the kernels are fully submerged. Cover the bowl and let it sit at room temperature for at least 8 hours, or overnight if possible.
In the morning, you'll notice the corn has expanded and become more pliable. Drain the water and give the corn a gentle rinse. It's now ready for the next step in the tacaca-making process.
Soaking the corn is a simple but crucial part of the recipe, so don't skip this step if you want your tacaca to turn out just right. With the corn softened and prepped, you can move on to grinding it into a flour.
Step 2. Grind the Soaked Corn
With the corn soaked and softened, it's time to grind it into a fine flour. You'll need a sturdy mortar and pestle or a food processor for this step. Carefully transfer the softened kernels into your chosen tool, making sure not to spill any.
Then, start grinding or pulsing the corn until it becomes a smooth, powdery flour. Don't be afraid to put some elbow grease into it – the more thoroughly you grind the corn, the finer and more consistent the flour will be.
Once you've achieved the desired texture, transfer the ground corn flour to a clean bowl or container. You may need to do this in batches, depending on the size of your mortar or food processor.
Be mindful of any stray bits that might've escaped – you want to collect every last bit of that precious cornmeal! With the corn now ground, you're one step closer to creating your delicious Tacaca.
Step 3. Mix With Lime
The next crucial step in the Tacaca preparation involves the integration of lime. You'll want to carefully measure out the right amount of lime to perfectly complement the soaked corn. Don't be afraid to get a little messy – this is where the real magic happens!
First, take the ground corn and place it in a large bowl. Slowly sprinkle in the lime, mixing it in with your hands to ensure an even distribution. The lime will react with the corn, creating a delightful chemical reaction that gives Tacaca its signature flavor.
Keep mixing until the mixture takes on a smooth, creamy texture.
Now, you can add any other seasonings or ingredients to really make the Tacaca your own. Perhaps a pinch of salt, or a dash of your favorite spice? Get creative and have fun with it!
The key is to keep tasting and adjusting until you achieve the perfect balance of flavors. Once you're satisfied, you're ready to move on to the next step. Tacaca is coming together beautifully!
Step 4. Form Tacaca Patties
Now that you've perfectly mixed the corn and lime, it's time to start forming the Tacaca patties.
Grab a handful of the corn mixture and gently shape it into a small, round patty about the size of your palm. Be careful not to squeeze it too tightly – you want the patty to have a nice, fluffy texture.
Once you've made your first patty, place it on a clean surface.
Continue forming the rest of the mixture into patties, lining them up neatly. Don't worry if they're not all exactly the same size – that's part of the charm of homemade Tacaca!
When you've made as many patties as you can from the mixture, it's time to start cooking them.
Heat up a large skillet or griddle over medium heat, and carefully transfer the patties onto the hot surface.
Cook for a few minutes on each side, until they're golden brown and crispy on the outside.
Serve your freshly made Tacaca patties warm, and enjoy the delicious flavors of this traditional dish!
Step 5. Fry the Tacaca Patties
Heat a large skillet or griddle over medium heat. Once it's nice and hot, add a few tablespoons of oil to the pan.
Carefully place the tacaca patties into the sizzling oil. Fry them for 2-3 minutes per side, or until they're golden brown and crispy. Be sure to flip them gently so they don't fall apart.
While the patties are frying, keep an eye on them and adjust the heat if needed to prevent burning. The oil should be hot enough to create a delicious, crunchy exterior, but not so hot that the centers stay raw.
When the patties are done, use a slotted spoon to transfer them to a paper towel-lined plate. This will help soak up any excess oil.
Serve the tacaca patties warm, and enjoy their amazing flavor and texture! They're the perfect snack or side dish.
Final Thoughts
As we reach the conclusion of this article on Tacacá, it's important to reflect on the key takeaways.
You've learned how to fry the delicious Tacacá patties to perfection, creating a crispy exterior and a soft, savory interior. Remember to use high-quality ingredients and follow the step-by-step instructions carefully for the best results.
While Tacacá may be a traditional dish, it's one that can be enjoyed by people of all ages. Serve it as a snack, appetizer, or even a light meal.
The versatility of Tacacá means you can get creative and experiment with different toppings or dipping sauces to suit your taste buds.
As you continue your culinary journey, don't hesitate to share your Tacacá creations with friends and family. You never know, they may be just as eager to experience the flavors and traditions of Brazilian cuisine as you are. Sharing your culinary creations can also lead to new discoveries and connections, as others may have their own favorite Brazilian dishes or recipes to share with you. So go ahead, invite your loved ones to join you on this culinary journey through the vibrant and diverse world of Brazilian cuisine.
Who knows, you might even inspire them to try this unique and flavorful dish for themselves. Enjoy your delicious Tacacá and savor every bite!
Frequently Asked Questions
What Is the Origin of the Name "Tacacá"?
You're asking about the origin of the name "Tacaca." Unfortunately, without additional context, I don't have enough information to provide a definitive answer. The origin of place names can vary and require more details to determine its source.
How Long Has Tacacá Been a Traditional Dish?
How long has this traditional dish been around? It's a great question! The exact origins are unclear, but many believe it's been part of the local cuisine for centuries, passed down through generations. The dish has deep roots in the region's culinary traditions.
What Are the Typical Serving Sizes for Tacacá?
When serving a traditional dish, typical serving sizes can vary. Portion sizes often depend on the dish, the number of guests, and personal preferences. Consider your guests' appetites and the overall meal when determining an appropriate serving size.
Are There Any Health Benefits Associated With Tacacá?
Yes, many plant-based foods like tacaca can provide health benefits. They often contain beneficial nutrients and antioxidants that may support your overall wellness. While the specific benefits of tacaca are unclear, incorporating a variety of whole foods into your diet is generally recommended.
Can Tacacá Be Made Vegan or Vegetarian?
Yes, you can make a vegan or vegetarian version of this dish. By omitting any animal-derived ingredients and using plant-based alternatives, you can enjoy the flavors without compromising your dietary preferences.
-
Brazilian Cuisine3 months ago
Tacacá
-
Brazilian Cuisine3 months ago
Caldeirada
-
Polish Comfort Food3 months ago
Krupnik (Barley Soup)
-
Brazilian Cuisine3 months ago
Chicken in Brown Sauce
-
Southern Comfort Food3 months ago
Cheese Straws
-
African Cuisine3 months ago
Kedjenou (Ivory Coast)
-
Polish Comfort Food3 months ago
Vegetable Salad
-
American Diner Classics3 months ago
The Maillard Reaction: Understanding the Chemistry of Browning {Food Science and Cooking}