Connect with us

Brazilian Cuisine

Açaí Bowl

Glimpse the vibrant world of açaí bowls, where purple perfection meets nutritious indulgence. Discover why this Brazilian treat has become a global sensation

Published

on

delicious a a bowl delight

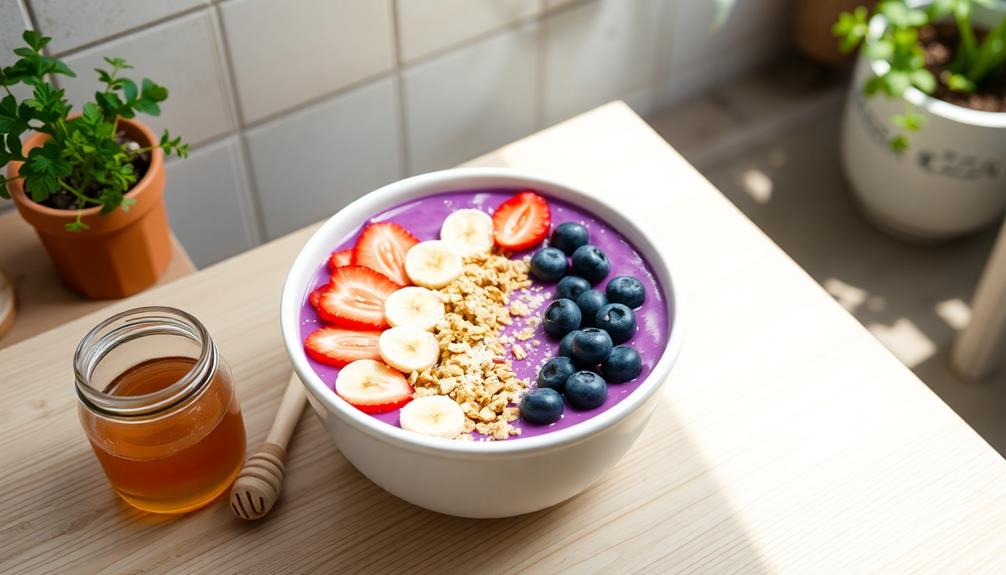
Açaí bowls are a tasty and healthy treat you'll love! They're made with frozen açaí berry pulp, blended with almond milk and banana for a smooth, creamy base. You'll top it with granola, fresh fruits, and maybe some honey or coconut flakes. These purple bowls are packed with antioxidants and fiber, making them perfect for breakfast or a snack. They originated in Brazil but became popular worldwide thanks to surfers and health food lovers. You can customize your bowl with different fruits and toppings, so it's always exciting to make. Get ready to discover all the amazing ways you can enjoy this colorful, nutritious dish!

Key Takeaways

  • Açaí bowls are nutrient-rich smoothie-like dishes featuring açaí berry pulp blended with fruits and topped with granola and other ingredients.
  • Originating from Brazil, açaí bowls have gained global popularity as a healthy breakfast or snack option.
  • The base typically consists of frozen açaí pulp blended with banana and milk, creating a thick, creamy consistency.
  • Common toppings include fresh fruits, granola, honey, nuts, seeds, and coconut flakes for added texture and flavor.
  • Açaí bowls are customizable, offering versatility in ingredients and presentation to suit various dietary preferences and tastes.
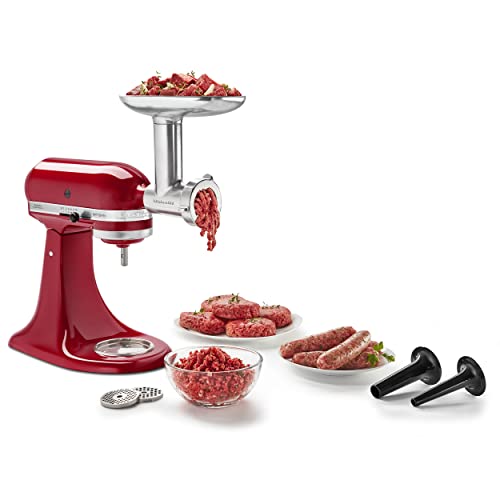
History

The açaí bowl's journey from out of the Amazon rainforest into the global health food scene began in the 1970s. You might be surprised to learn that this tasty treat has been enjoyed by indigenous people in Brazil for centuries! They'd mix the açaí berries with cassava or other grains to create a hearty meal.

In the 1970s, people from Brazil's cities started discovering this delicious purple fruit and its amazing health benefits. As açaí's popularity grew, creative food lovers began experimenting with new ways to enjoy it. They'd blend the frozen pulp with other fruits and top it with granola, creating the açaí bowl we know and love today.

In the 1990s and early 2000s, surfers in Hawaii and California fell in love with açaí bowls, helping to spread their popularity across the United States. Soon, health-conscious folks all over the world were craving these nutrient-packed bowls. Now, you can find açaí bowls in cafes, smoothie shops, and even some grocery stores!

Recipe

Açaí bowls are a vibrant and nutritious Brazilian-inspired dish that has gained popularity worldwide. These refreshing bowls are typically made with frozen açaí berry pulp, blended to a smooth consistency, and topped with various fruits, granola, and other healthy ingredients. While not technically "cooked," the preparation of an açaí bowl involves careful blending and assembly.

The key to a perfect açaí bowl lies in achieving the right texture of the base and balancing the flavors and textures of the toppings. The frozen açaí pulp is blended with a small amount of liquid to create a thick, creamy consistency similar to soft-serve ice cream. This base is then topped with an array of colorful and nutritious ingredients, making it a customizable and Instagram-worthy treat.

Advertisement
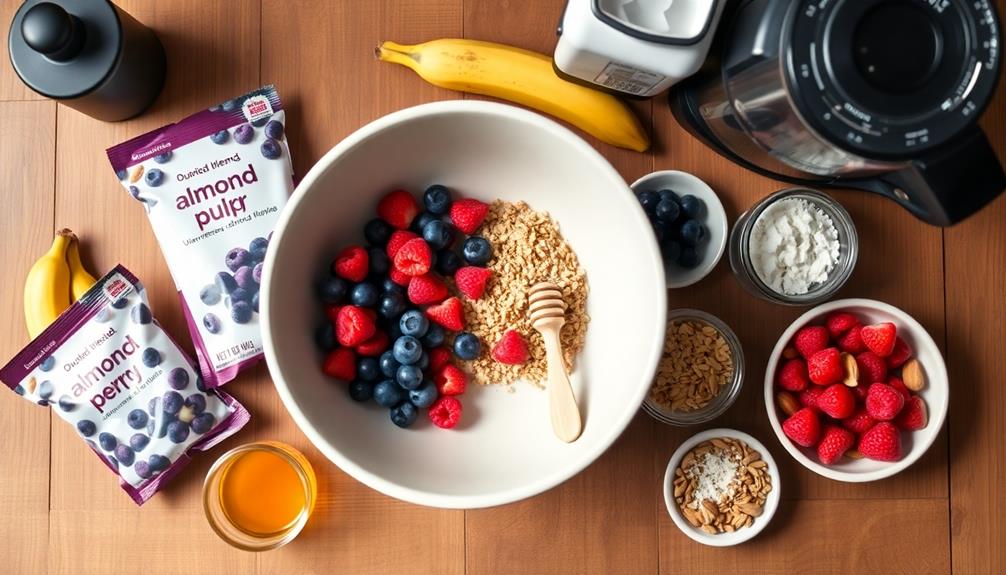
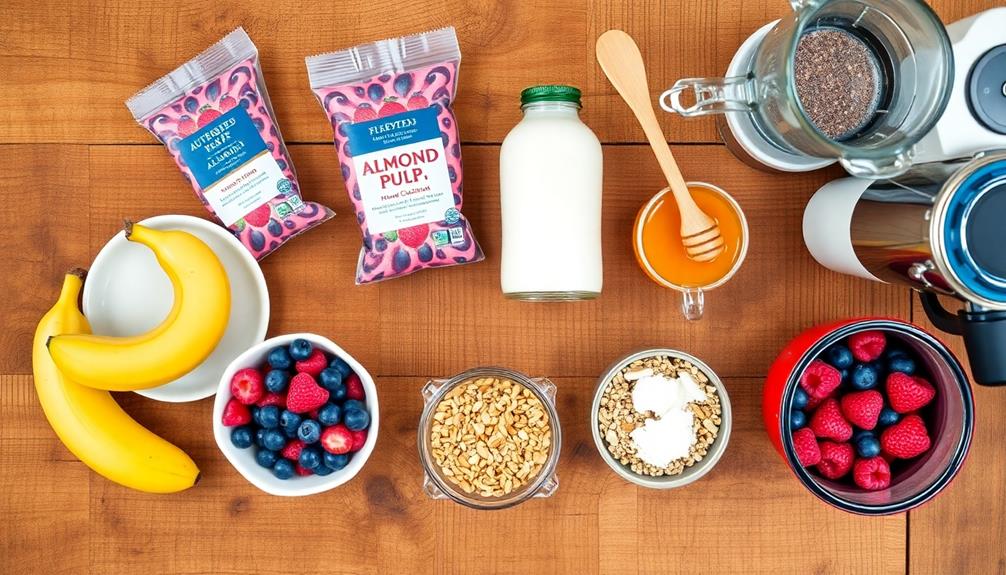
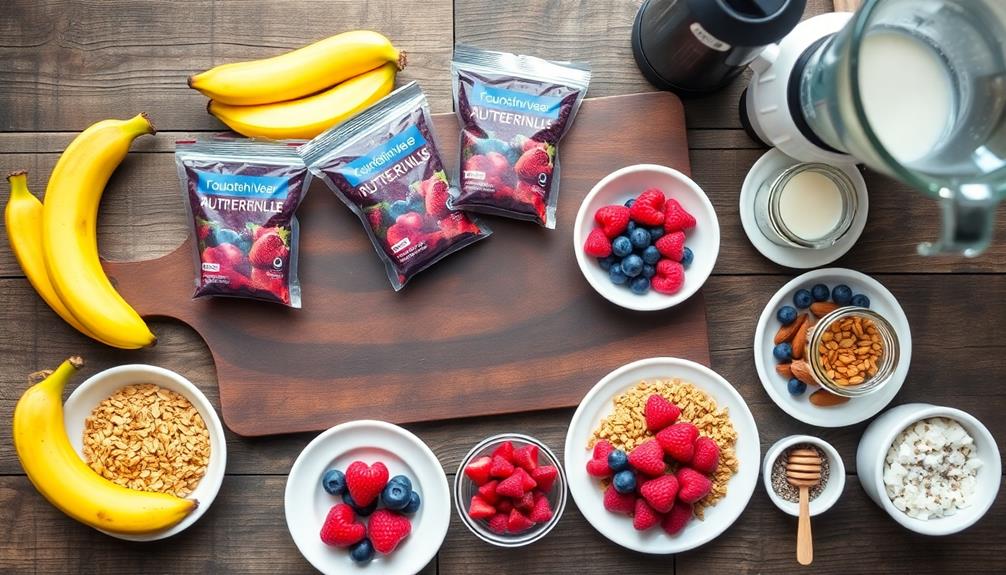
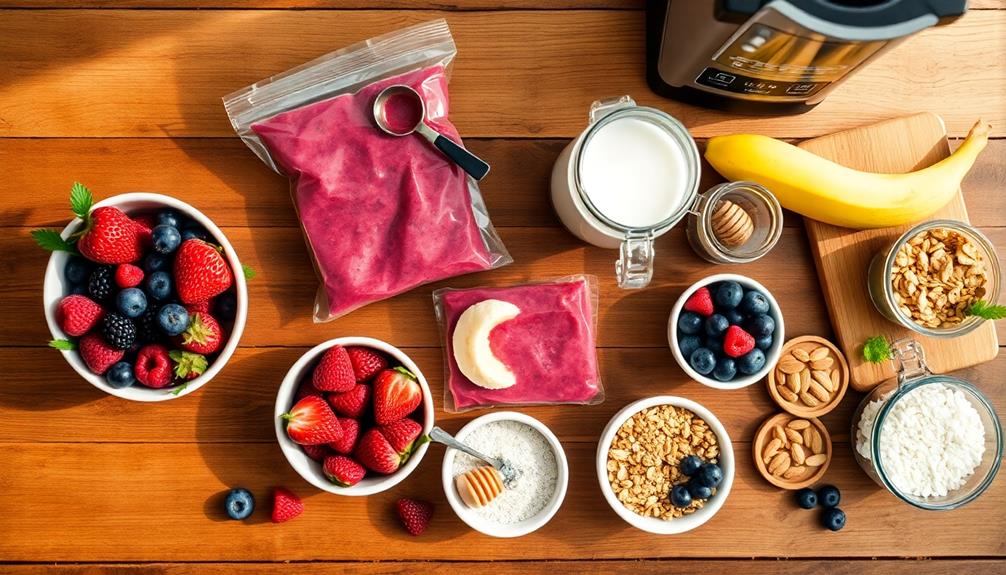
  • 2 packets (100g each) of frozen açaí berry pulp
  • 1/2 cup unsweetened almond milk (or any plant-based milk)
  • 1 banana, sliced and frozen
  • 1 cup mixed fresh berries (strawberries, blueberries, raspberries)
  • 1/4 cup granola
  • 1 tablespoon honey or agave syrup
  • 1 tablespoon chia seeds
  • 1 tablespoon sliced almonds
  • 1 tablespoon shredded coconut

To prepare the açaí bowl, start by breaking the frozen açaí pulp into chunks and placing them in a high-powered blender. Add the frozen banana slices and almond milk. Blend on high speed, stopping occasionally to scrape down the sides, until you achieve a smooth, thick consistency. If needed, add a little more liquid, but be careful not to make it too thin.

Pour the açaí mixture into a bowl and smooth the top with a spoon. Arrange the mixed berries, granola, and other toppings artfully on the surface. Drizzle with honey or agave syrup, and sprinkle with chia seeds, sliced almonds, and shredded coconut.

For the best results, use frozen açaí pulp rather than powders or juices, as it provides the authentic texture and flavor. Keep your bowl and spoon in the freezer for about 15 minutes before serving to help maintain the thick consistency of the açaí base.

Feel free to experiment with different toppings like sliced kiwi, mango, or passion fruit for variety. If you prefer a sweeter base, you can add a natural sweetener like honey or dates to the blender. Remember that açaí bowls are best enjoyed immediately after preparation to maintain their optimal texture and temperature.

Cooking Steps

You're about to embark on a delicious adventure as you create your own açaí bowl!

First, you'll blend the açaí with banana to create a smooth, creamy base.

Advertisement

Then, you'll layer on crunchy granola, fresh fruit toppings, a drizzle of honey, and a sprinkle of coconut flakes, transforming your bowl into a colorful and nutritious masterpiece.

Step 1. Blend Açaí With Banana

blend a a and banana

To begin the blending process, gather your frozen açaí pulp and a ripe banana. You'll need a sturdy blender to create the perfect smooth consistency.

First, break up the frozen açaí into smaller chunks and pop them into the blender. Next, peel your banana and slice it into rounds before adding it to the mix. This sweet fruit will complement the açaí's tangy flavor and help create a creamy texture.

Now, it's time to blend! Start on a low speed to break up the frozen bits, then gradually increase to high. You might need to stop and scrape down the sides a few times to ensure everything gets mixed evenly.

Keep blending until you see a thick, purple smoothie forming – it should look like soft-serve ice cream. If it's too thick, add a splash of your favorite milk or juice to thin it out.

Once you've reached the perfect consistency, pour your açaí-banana blend into a bowl. You're now ready to add toppings and create your own delicious açaí bowl masterpiece!

Advertisement

Step 2. Add Granola for Crunch

add crunchy granola topping

Now that your açaí-banana blend is ready, it's time to add some crunch with granola. Grab your favorite granola mix and sprinkle a generous handful over the top of your smoothie bowl. You'll love how the crunchy texture contrasts with the creamy açaí base!

If you're feeling adventurous, try making your own granola at home. Mix oats, nuts, and seeds with a bit of honey and oil, then bake until golden brown. It's super easy and tastes amazing! When you add your homemade granola to the açaí bowl, you'll get a burst of nutty flavors and satisfying crunch in every bite.

Don't stop at just one layer of granola. Create a fun pattern by adding stripes or swirls of granola on top of your bowl. This not only looks pretty but also ensures you get the perfect balance of smooth and crunchy textures throughout your açaí bowl.

Step 3. Add Fresh Fruit Toppings

fresh fruit topping addition

With the crunchy granola in place, it's time to add some vibrant fresh fruit toppings to your açaí bowl.

You'll want to choose fruits that complement the rich, berry flavor of the açaí base. Start with sliced bananas, which add a creamy texture and natural sweetness.

Next, sprinkle on some plump blueberries for an extra antioxidant boost and a burst of juicy flavor.

Don't stop there! Add some diced strawberries for a pop of color and tangy sweetness.

Advertisement

If you're feeling tropical, toss in some chunks of fresh pineapple or mango. These fruits will give your bowl a sunny, vacation-like vibe.

For a final touch, consider adding some sliced kiwi or passion fruit. Their unique flavors and textures will make your açaí bowl even more exciting.

Step 4. Drizzle With Honey

drizzle honey on top

The final touch to your açaí bowl is a drizzle of golden honey. This sweet addition not only enhances the flavor but also adds a beautiful finishing touch to your creation.

To drizzle honey perfectly, you'll want to use a small spoon or a squeeze bottle if you have one. Hold it about 6 inches above your bowl and move your hand in a zigzag motion, creating a beautiful pattern across the top.

Don't go overboard with the honey, though! A little goes a long way, and you don't want to overpower the other flavors. Start with just a tablespoon or two, and you can always add more if you'd like.

If your honey is too thick, you can warm it up slightly by placing the container in a bowl of warm water for a few minutes. This will make it easier to drizzle and create those lovely, thin lines across your açaí bowl.

Advertisement

Step 5. Sprinkle With Coconut Flakes

coconut flakes sprinkling step

Adding a sprinkle of coconut flakes is the perfect way to enhance your açaí bowl's texture and flavor. You'll love the tropical twist and crunchy goodness they bring to your creation!

To start, grab a handful of unsweetened coconut flakes from your pantry. Make sure they're fresh and crisp for the best results.

Now, hold your hand about 6 inches above the açaí bowl and gently sprinkle the flakes over the surface. Don't dump them all in one spot! Instead, use a light touch to distribute them evenly across the top. As you sprinkle, imagine you're dusting your bowl with a layer of snow. It's fun and helps you achieve that picture-perfect look!

If you want to get fancy, try toasting the coconut flakes before adding them. Just pop them in a dry skillet over medium heat for a few minutes, stirring constantly until they're golden brown. This extra step brings out their nutty flavor and makes them even crunchier.

Final Thoughts

Bursting with vibrant flavors and packed with nutrients, açaí bowls have rightfully earned their place as a trendy and healthful breakfast or snack option.

You've learned how to create your own delicious açaí bowl, from blending the perfect base to adding a variety of toppings. Remember, the key to a great açaí bowl is balance – mix textures and flavors to keep things interesting!

Advertisement

Don't be afraid to get creative with your toppings. While we've covered some popular choices, you can always experiment with seasonal fruits or your favorite nuts and seeds.

The beauty of açaí bowls is their versatility. You can make them as simple or as elaborate as you'd like.

As you enjoy your homemade açaí bowl, take a moment to appreciate the rich purple color and smooth texture. It's not just a treat for your taste buds, but a feast for your eyes too! If you’re feeling inspired, you might even want to try making your own delicious brown sauce recipe to drizzle on top. The combination of flavors and colors will make your açaí bowl not only a delicious treat, but also a work of art. The vibrant hues and tempting aromas will make it almost too beautiful to eat!

Plus, you're fueling your body with antioxidants, fiber, and healthy fats. So go ahead, dig in and savor every spoonful of your nutritious and delicious creation!

Frequently Asked Questions

Can Açaí Bowls Help With Weight Loss?

You might find açaí bowls helpful for weight loss due to their high fiber content and antioxidants. However, they're often calorie-dense, so watch portion sizes. They're not a magic solution but can be part of a balanced diet.

Advertisement

Are Açaí Bowls Safe for Pregnant Women to Eat?

You can generally eat açaí bowls while pregnant, but it's best to consult your doctor first. Ensure the ingredients are fresh and properly washed. Avoid unpasteurized juices or additives that aren't pregnancy-safe. Moderation is key.

How Long Can an Açaí Bowl Be Stored in the Refrigerator?

You can store your açaí bowl in the refrigerator for up to 2-3 days. It's best to consume it within 24 hours for optimal freshness. Be sure to cover it tightly to prevent absorption of other flavors.

Do Açaí Bowls Contain Caffeine?

You'll find that açaí bowls don't naturally contain caffeine. However, some recipes might include ingredients like guarana or chocolate that do have caffeine. If you're worried about caffeine intake, check the specific ingredients used.

Can Açaí Bowls Be Made Without a Blender?

You can make açaí bowls without a blender, but it's trickier. You'll need to mash frozen açaí pulp by hand or use pre-made açaí puree. It won't be as smooth, but it's doable in a pinch.

Advertisement

Advertisement

Brazilian Cuisine

Chicken in Brown Sauce

Appetizing chicken in brown sauce, a classic Chinese dish with tender chicken simmered in a rich, savory sauce – discover the secrets to making it.

Published

on

savory chicken brown sauce

You'll love this tasty chicken in brown sauce! This classic Chinese dish features tender chicken simmered in a rich, savory sauce. The key ingredients are soy sauce, chicken broth, and a touch of cornstarch for a glossy finish. You'll brown the chicken first, then add the sauce to let it simmer until the chicken is perfectly cooked. Don't forget to season it with garlic, ginger, and herbs for maximum flavor. Serve it over rice or noodles for a complete meal that's sure to satisfy. This dish is super versatile, so you can have fun experimenting with different spices and veggies. If you keep reading, you'll discover even more cooking tips and ways to make this dish your own.

Key Takeaways

  • Chicken in Brown Sauce is a Chinese culinary tradition with a rich, savory sauce made from soy sauce, chicken broth, and cornstarch.
  • The recipe has evolved over time, with the addition of ingredients like ginger, garlic, and vinegar, resulting in complex flavors.
  • The dish is easy to prepare, with the chicken being browned and then simmered in the sauce until tender.
  • Chicken in Brown Sauce is a versatile dish that can be customized with different herbs, spices, and vegetables to suit personal preferences.
  • This comforting and satisfying meal is suitable for weeknight dinners and family gatherings, making it a popular choice.

History

The origins of chicken in brown sauce can be traced back to the culinary traditions of China. This savory dish has been enjoyed for centuries, with recipes passed down through generations.

In ancient times, Chinese cooks would simmer chicken in a rich, aromatic sauce made from soy sauce, brown sugar, and aromatic spices. Over time, the recipe evolved, with the addition of ingredients like ginger, garlic, and vinegar, creating the familiar brown sauce we know and love today.

As Chinese cuisine spread around the world, the dish found its way into the kitchens of many cultures. In the West, chicken in brown sauce became a popular menu item at Chinese restaurants, delighting diners with its complex flavors and tender chicken.

Today, the dish remains a classic, enjoyed for its comforting taste and versatility. Whether served over rice or noodles, chicken in brown sauce continues to be a beloved culinary treasure, connecting us to the rich history of Chinese cooking.

Recipe

Chicken in Brown Sauce is a classic Chinese dish that features tender chicken pieces cooked in a rich, savory sauce. This dish is easy to prepare and can be served over steamed rice or noodles for a satisfying meal.

Advertisement

The key to this dish is the sauce, which is made by combining a few simple ingredients like soy sauce, chicken broth, and cornstarch. The sauce not only adds flavor to the chicken but also creates a glossy, appetizing appearance.

Ingredients:

  • 1 lb boneless, skinless chicken thighs, cut into 1-inch pieces
  • 2 tablespoons vegetable oil
  • 3 cloves garlic, minced
  • 1 tablespoon grated ginger
  • 1/2 cup chicken broth
  • 2 tablespoons soy sauce
  • 1 tablespoon brown sugar
  • 1 tablespoon cornstarch
  • Salt and pepper to taste
  • Chopped scallions for garnish (optional)

Instructions:

In a large skillet or wok, heat the vegetable oil over medium-high heat. Add the chicken pieces and cook until lightly browned, about 5 minutes. Remove the chicken from the pan and set aside.

In the same pan, sauté the garlic and ginger for 1 minute, or until fragrant. Add the chicken broth, soy sauce, and brown sugar, and bring the mixture to a simmer.

In a small bowl, whisk together the cornstarch and 2 tablespoons of water until smooth. Slowly pour the cornstarch mixture into the sauce, stirring constantly, until the sauce thickens, about 2 minutes.

Advertisement

Return the cooked chicken to the pan and toss to coat the pieces evenly in the sauce. Season with salt and pepper to taste. Serve the chicken in brown sauce immediately, garnished with chopped scallions if desired.

For best results, use high-quality, fresh ingredients. You can also adjust the amount of soy sauce or brown sugar to suit your personal taste preferences. Enjoy your delicious Chicken in Brown Sauce!

Cooking Steps

First, you'll need to cut and brown the chicken.

Then, add some vegetable stock and let it simmer until the chicken is nice and tender.

Step 1. Cut and Brown Chicken

cut and brown chicken

With chicken breasts or thighs at the ready, you'll want to start by cutting them into bite-sized pieces. This will help the chicken cook evenly and make it easier to eat. Be sure to use a sharp knife and a clean cutting board for this step.

Once the chicken is all cut up, it's time to get cooking! Ensuring your kitchen is clean and organized can also enhance your cooking experience, similar to how proper hamster care involves maintaining a clean environment for your pet.

Advertisement

Next, you'll need to brown the chicken in a large skillet or pan. Heat up a bit of oil over medium-high heat, then add the chicken pieces. Let them sizzle and cook for a few minutes on each side until they're nicely browned. This will help lock in all the delicious chicken flavor.

Be careful not to overcrowd the pan – you want the chicken to have room to brown properly.

As the chicken browns, you can start preparing the brown sauce. This savory sauce is the star of the dish, so you'll want to make sure it's full of flavor. We'll cover that in the next step!

Step 2. Add Vegetable Stock

incorporate vegetable stock now

As the chicken sizzles away, it's time to focus on the brown sauce. First, grab that trusty vegetable stock you've got on hand.

Slowly pour it into the pan, being careful not to splatter. As the stock hits the hot pan, it'll start to create a delightful sizzling sound – that's music to a chef's ears!

Now, use a wooden spoon to gently scrape up all those tasty browned bits from the bottom of the pan. This will help infuse your sauce with even more flavor.

Advertisement

Give the mixture a good stir, making sure the stock incorporates fully. Let the sauce simmer for a few minutes, allowing it to thicken and develop its rich, savory notes.

The aroma filling your kitchen will have your mouth watering, so get ready for the next step in creating this delicious chicken dish!

Step 3. Simmer Until Chicken Is Tender

simmer chicken until tender

Now that the aromatic brown sauce is simmering, it's time to nestle the chicken back into the pan.

Gently lower the chicken pieces into the simmering liquid, ensuring they're completely submerged. This will allow the chicken to absorb all the delicious flavors of the sauce.

Maintain a gentle simmer, not a rapid boil, as that could make the chicken tough. Let the chicken cook for about 25-30 minutes, or until it's fall-off-the-bone tender.

You'll know it's done when the meat easily pulls away from the bone. As the chicken simmers, the sauce will thicken and become rich and velvety.

Advertisement

Give the pan a gentle stir every now and then to ensure even cooking. The aroma wafting through your kitchen will have your mouth watering in anticipation!

Soon, you'll have perfectly cooked chicken in a luscious brown sauce, ready to serve over fluffy rice or crusty bread. For an extra special treat, you can use the leftover chicken and sauce to make a delicious homemade chicken pie. Simply add some mixed vegetables to the filling, cover it with a flaky pastry, and bake until golden brown. Your family and friends will be impressed with your culinary skills and savor every bite of this comforting dish.

Step 4. Add Seasonings and Herbs

seasonings and herbs addition

To deepen the flavor profile, you'll want to add some fragrant seasonings and herbs to the simmering sauce.

Begin by stirring in a teaspoon of ground cumin – its earthy, slightly smoky notes will complement the chicken beautifully.

Next, add a sprinkle of dried oregano, whose woodsy aroma will infuse the dish with Mediterranean flair.

Don't forget the garlic! Mince a couple of cloves and toss them in. As the garlic sizzles, it'll release its pungent yet delightful scent, making your kitchen smell absolutely amazing.

Advertisement

For a touch of freshness, tear in a handful of chopped parsley right at the end. The vibrant green flecks and bright, herbaceous taste will liven up the whole dish.

Step 5. Finish by Adjusting Consistency

adjust consistency as needed

With the seasonings and herbs incorporated, it's time to adjust the consistency of the sauce to your liking. You'll want a thick and velvety texture that coats the chicken beautifully.

Start by adding a bit of the reserved cooking liquid, a few tablespoons at a time, and giving it a good stir. This will help loosen up the sauce and blend everything together seamlessly.

Keep an eye on the consistency, adding more liquid if it's too thick or letting it simmer a bit longer if it's too thin. You're aiming for a nice, saucy consistency that clings nicely to the chicken.

Don't be afraid to play around until you get it just right! Once you're satisfied, give it one final taste and adjust any seasonings as needed.

Then, you're ready to serve this delicious Galinha Ao Molho Pardo! Your family is going to love the rich, flavorful sauce paired with the tender chicken.

Advertisement

Final Thoughts

The chicken in brown sauce dish you've prepared is a comforting and satisfying meal. You can feel proud of your culinary skills! The rich, savory sauce complements the tender chicken perfectly, and the accompanying rice or potatoes make it a complete and nourishing dinner.

As you savor the final bites, consider how versatile this dish can be. You could experiment with different herbs and spices to tweak the flavor profile.

Or, you might add some vegetables like mushrooms or carrots to make it even heartier. The possibilities are endless!

This recipe is a keeper, so be sure to add it to your repertoire. Whenever you're craving a cozy, homemade meal, you can turn to this chicken in brown sauce.

It's sure to become a new family favorite that you'll enjoy making again and again.

Advertisement

Frequently Asked Questions

How Long Does Galinha Ao Molho Pardo Take to Prepare?

To prepare this dish, you'll need about an hour and a half. The active cooking time is relatively short, but the simmering process takes some time to achieve the desired tenderness and flavor.

What Are the Essential Ingredients in Galinha Ao Molho Pardo?

The essential ingredients in this dish are chicken, onions, tomatoes, garlic, herbs, and a savory brown sauce. You'll also need some oil or butter to cook the ingredients. With these key elements, you can create a flavorful and satisfying meal.

Can Galinha Ao Molho Pardo Be Made in Advance?

Absolutely! You can prepare this dish ahead of time. The flavors will meld together beautifully, and it'll be even more delicious when you reheat it. Just be sure to store it properly in the fridge or freezer.

What Side Dishes Pair Well With Galinha Ao Molho Pardo?

When pairing side dishes with a hearty stew, you'll want to choose accompaniments that complement the flavors and textures. Consider serving it with fluffy white rice, roasted vegetables, or a fresh, crisp salad for a balanced and delicious meal.

Is Galinha Ao Molho Pardo a Traditional Brazilian Dish?

Yes, galinha ao molho pardo is considered a traditional Brazilian dish. It's a popular chicken stew from the northeastern region, featuring a rich, savory sauce that's often served with rice, beans, and farofa.

Advertisement

Continue Reading

Brazilian Cuisine

Caldeirada

You’ll be captivated by the aromatic and flavorful Caldeirada, a traditional Portuguese seafood stew that’s been delighting taste buds for centuries.

Published

on

portuguese fish stew recipe

Caldeirada is a wonderfully comforting seafood stew that's been delighting Portuguese folks for centuries. It all started with clever fishermen, using the abundant local seafood and veggies to create a hearty, tomato-based broth. Over time, the dish evolved with unique regional twists, each reflecting the diverse culinary traditions across Portugal's coastline. Today, Caldeirada is a beloved part of Portuguese cuisine, symbolizing the warmth and richness of their maritime heritage. It's a truly delightful dish that'll have you eager to explore even more of Portugal's culinary wonders.

Key Takeaways

  1. Caldeirada is a traditional Portuguese seafood stew originating from the country's rich maritime history and coastal culinary traditions.
  2. The dish features a variety of fresh seafood like fish, shellfish, and octopus, cooked in a rich, tomato-based broth with herbs and spices.
  3. Caldeirada has evolved over centuries with regional variations, reflecting the diverse culinary influences across different parts of Portugal.
  4. Preparing and sharing Caldeirada is a cherished part of the Portuguese culinary tradition, symbolizing the comfort and warmth of the country's cuisine.
  5. Caldeirada encourages the exploration of regional ingredients and traditional cooking methods, offering a balance of flavors for a comforting dining experience.

History

Caldeirada, a beloved seafood stew native to Portugal, traces its roots to the country's rich maritime history. For centuries, Portuguese fishermen braved the open seas, returning with bountiful catches of fresh fish and shellfish. This abundance of seafood inspired the creation of traditional dishes like caldeirada, which is typically made with a variety of fish, clams, and potatoes in a flavorful tomato-based broth. The dish is a testament to the Portuguese appreciation for fresh, simple ingredients and the bounty of the sea. In fact, the influence of Portugal’s maritime history can be seen in the cuisine of other countries with strong ties to the Portuguese, such as Brazil, where dishes like the Brazilian coxinha recipe bear similarities to traditional Portuguese fare.

These hardworking sailors would gather their daily haul, tossing it into a large pot along with local vegetables, herbs, and spices, creating a hearty, aromatic dish that nourished both body and soul.

Over time, this simple but delicious meal evolved, with different regions developing their own unique takes on the classic caldeirada.

Whether enjoyed seaside or inland, this time-honored recipe remains a cherished part of Portuguese culinary tradition, connecting generations through the flavors of the sea.

Today, caldeirada continues to delight both locals and visitors, a tasty testament to Portugal's enduring seafaring legacy.

Advertisement

Recipe

Caldeirada is a traditional Portuguese seafood stew that originated in the coastal regions of the country. It's a hearty and flavorful dish that showcases the bountiful seafood available in the local waters.

The key to a delicious Caldeirada is the careful selection and combination of fresh, high-quality seafood. This dish typically features a variety of fish, shellfish, and even octopus, all simmered together in a rich, tomato-based broth seasoned with aromatic herbs and spices.

Ingredients:

  • 1 lb cod fillets, cut into chunks
  • 1 lb clams, scrubbed
  • 1 lb shrimp, peeled and deveined
  • 1 lb mussels, scrubbed and debearded
  • 1 lb octopus, cleaned and cut into bite-sized pieces
  • 3 tomatoes, diced
  • 1 onion, diced
  • 3 cloves garlic, minced
  • 1 cup white wine
  • 2 cups fish or vegetable stock
  • 2 bay leaves
  • 1 tsp paprika
  • 1 tsp dried oregano
  • Salt and pepper to taste
  • Chopped parsley for garnish

In a large pot or Dutch oven, sauté the onion and garlic in a bit of olive oil over medium heat until translucent. Add the tomatoes, wine, stock, bay leaves, paprika, and oregano.

Bring the mixture to a simmer and let it cook for about 10 minutes to allow the flavors to meld.

Next, add the seafood to the pot in the following order: first the cod, then the clams, shrimp, mussels, and finally the octopus. Cover the pot and let the seafood cook until it's all opaque and cooked through, about 15-20 minutes.

Advertisement

Discard any unopened clams or mussels. Season the stew with salt and pepper to taste.

Serve the Caldeirada immediately, garnished with chopped parsley. This dish is best enjoyed with crusty bread to soak up the flavorful broth. For an authentic experience, pair it with a crisp, chilled white wine.

Cooking Steps

First, you'll need to gather and prepare all your tasty ingredients.

Next, you'll add the seafood to the pot and let it simmer in the broth until it's cooked through.

Step 1. Gather and Prepare Ingredients

gather and prepare ingredients

To prepare for the flavorful Caldeirada dish, gather your array of fresh seafood and aromatic vegetables. You'll need a mix of white fish, shrimp, and clams or mussels. Rinse the seafood and set it aside.

Next, chop onions, garlic, bell peppers, and tomatoes. Don't forget to peel and slice potatoes too. Have all your ingredients ready to go, as the cooking process moves quickly.

Advertisement

In a large pot, sauté the onions and garlic until fragrant. Add the bell peppers and tomatoes, letting them soften. Toss in the potatoes and just enough water to cover. Simmer until the potatoes are tender.

Now it's time for the seafood! Gently place the fish, shrimp, and clams or mussels into the pot. Season with salt, pepper, and a splash of white wine or vinegar. Cover and cook until the seafood is cooked through.

Serve your steaming hot Caldeirada, and enjoy the flavors of the sea!

Step 2. Add Seafood

incorporate seafood ingredients

Now, gently add the fish, shrimp, and clams or mussels into the simmering pot.

First, carefully place the chunks of white fish into the aromatic broth. They'll soak up all those wonderful flavors!

Next, toss in the tender shrimp, letting them cook until they turn a vibrant pink.

Advertisement

Don't forget the juicy clams or mussels – they'll open up and release their delectable juices as they steam.

Stir everything together, making sure each piece of seafood is submerged. The scents wafting through your kitchen will have your mouth watering!

Slowly, the seafood will become flaky and the shells will pop open, signaling that your caldeirada is ready.

Keep an eye on the pot, gently nudging anything that needs a little more time.

Soon, you'll have a delectable medley of the ocean's bounty, all coming together in one incredibly tasty dish. Yum!

Advertisement

Step 3. Simmer Seafood in Broth

simmer seafood in broth

Gently lower the chunks of white fish into the simmering aromatic broth, allowing them to soak up the wonderful flavors. Toss in the shrimp, clams, and mussels, letting them simmer until they've opened up and are cooked through. The broth will become rich with the essence of the sea as the seafood releases its natural juices.

Stir in the diced tomatoes, onions, and garlic, then season with a pinch of salt and a grind of black pepper. Let the mixture bubble away for 10-15 minutes, allowing the flavors to meld together. The broth should have a lovely, deep orange hue by now.

Tear in some fresh parsley leaves to add a bright, herbal note just before serving.

Ladle the aromatic caldeirada into bowls and enjoy with crusty bread for dipping. The tender seafood and flavorful broth make for a comforting and satisfying meal. Yum!

Step 4. Add Vegetables

incorporate additional vegetable ingredients

After simmering the seafood in the aromatic broth, you'll want to stir in the diced tomatoes, onions, and garlic. These colorful veggies will add a lovely burst of flavor and texture to your caldeirada. Don't be shy – pile them in! The tomatoes will lend a tangy sweetness, while the onions and garlic provide a savory backbone.

As the vegetables simmer, they'll meld together beautifully with the fish and broth.

Next, toss in some sliced potatoes. These starchy spuds will soak up all the delicious juices, making your caldeirada hearty and satisfying.

Advertisement

Feel free to experiment with other veggies too, like bell peppers or zucchini. Just chop them into bite-sized pieces so they cook through.

Keep an eye on the pot, giving everything a gentle stir every now and then. Before you know it, your caldeirada will be brimming with vibrant, tender vegetables that complement the seafood perfectly.

Step 5. Adjust Seasoning to Taste

season to your preference

With the vegetables incorporated, take a moment to taste the caldeirada and adjust the seasoning as needed. This is where you really make the dish your own!

First, give it a try with a spoon. What flavors stand out? Is it a bit too salty, or could it use a touch more? Don't be afraid to tweak things until it's perfect for your tastes.

If it needs a little more salt, simply add a pinch or two and stir it in. Taste again, and keep adjusting until you're satisfied.

Maybe it could use a bit more garlic or onion flavor? Try adding a sprinkle of dried herbs or a squeeze of lemon juice. You can even toss in some crushed red pepper flakes if you want a little kick.

Advertisement

The key is to keep tasting and experimenting until the caldeirada is seasoned just right. This is the fun part, so enjoy bringing your personal flair to the dish!

Final Thoughts

Ultimately, Caldeirada is a remarkable seafood stew that transports you to the coastal regions of Portugal. This hearty dish is a true celebration of the bountiful ocean, with its mix of fresh fish, succulent shrimp, and tender clams simmered in a flavorful broth.

The blend of spices, herbs, and acidic ingredients creates a harmonious symphony of tastes that will delight your palate.

Caldeirada isn't only delicious but also a reflection of the rich culinary heritage of Portugal. Each region may have its own unique twist, but the core elements remain the same – a comforting, satisfying meal that warms the soul. However, beyond the flavors, caldeirada also tells a story of the Portuguese people and their connection to the sea. The use of fish and seafood in this dish reflects centuries of coastal living and reliance on the ocean for sustenance. This dish also has ties to the history of tapioca, as the use of potatoes and other root vegetables in the stew speaks to the influence of Portuguese exploration and trade in the New World.

Whether you're enjoying it with friends and family or savoring it on a cozy night in, Caldeirada is sure to leave you feeling content and eager to explore more of Portugal's incredible culinary wonders.

Advertisement

Frequently Asked Questions

Is Caldeirada a Soup or a Stew?

Is it a soup or a stew? That's a great question! Soups and stews can be tricky to distinguish, but they're generally differentiated by their thickness and ingredients. Let's dive in and explore the specifics of this dish.

What Kind of Fish Is Used in Caldeirada?

The type of fish used in this dish varies, but it's typically a mix of different types of white fish. You'd commonly find cod, hake, or monkfish in a traditional caldeirada.

Can Caldeirada Be Made With Vegetarian Ingredients?

Absolutely, you can make a vegetarian version of this dish. Instead of fish, you can use a variety of veggies like potatoes, bell peppers, and onions. It'll be just as flavorful and satisfying without the meat.

How Long Does Caldeirada Take to Prepare?

How long the dish takes to prepare depends on your culinary skills and the ingredients you choose. With careful planning and execution, you can have it ready in under an hour, making it a quick and satisfying meal.

Can Caldeirada Be Frozen for Later Use?

Yes, you can freeze caldeirada for later use. It's a great way to meal prep and have a delicious seafood stew on hand whenever you need it. Just make sure to let it cool completely before freezing.

Advertisement

Continue Reading

Brazilian Cuisine

Tacacá

Uncover the captivating flavors of Tacacá, a mouthwatering Brazilian dish that blends the zest of Amazonian herbs, the richness of tucupi sauce, and the delightful crunch of fried corn patties.

Published

on

traditional brazilian fish stew

Tacacá is a scrumptious Brazilian dish that'll delight your taste buds! Originating from the Amazon, it's made with mouthwatering ingredients like tucupi (a savory yellow sauce), jambu (a zesty Amazonian herb), and shrimp. The dish is then seasoned to perfection with garlic, pepper, and other spices. Once the corn is soaked, ground, and fried into crispy patties, you'll savor the combination of crispy exteriors and soft, flavorful centers. Tacacá is often served hot as a snack or appetizer, perfect for sharing with friends and family. You're sure to love this unique and delectable taste of Brazil – and that's just the beginning!

Key Takeaways

  • Tacacá is a traditional Brazilian dish originating from the Amazon basin, made with manioc, dried shrimp, garlic, and spices.
  • The dish has evolved over time, with different regional variations across Brazil, reflecting local tastes and ingredients.
  • Tacacá is typically served hot, often as a snack or appetizer, and is popular among both locals and tourists for its unique flavor profile.
  • The main ingredients in Tacacá include tucupi (yellow sauce from manioc), jambu (Amazonian herb), shrimp, and various spices.
  • Tacacá can be customized with different toppings and can be served as a snack or a light meal, often paired with rice or bread.

History

The origins of Tacaca can be traced back to the indigenous populations of the Amazon basin. These skilled cooks developed a delicious dish using manioc, a root vegetable native to the region. They'd grate the manioc, then press out the liquid to create a savory, starchy base.

Next, they'd add flavorful ingredients like dried shrimp, garlic, and spices, creating a warm, comforting meal. As time passed, the recipe spread throughout Brazil, evolving to suit local tastes.

In the state of Pará, for example, the dish became known as Tacaca, with a distinct broth made from the manioc liquid. Today, you can find Tacaca served in restaurants and street stalls across the country, a beloved part of Brazilian cuisine.

Whether you enjoy it for breakfast, lunch, or a tasty snack, this traditional dish offers a delicious taste of the Amazon's rich culinary heritage.

Recipe

Tacaca is a popular Brazilian dish, originating from the northern region of the country. It's a savory and comforting soup made with tapioca pearls, shrimp, and a variety of spices and herbs.

Advertisement

The creamy and hearty texture of the tapioca pearls, combined with the bold flavors of the shrimp and seasonings, make Tacaca a true delight for the senses. This dish is often enjoyed as a snack or a light meal, and is a staple in many Brazilian households.

  • 1 cup of tapioca pearls
  • 1 lb of peeled and deveined shrimp
  • 1 onion, diced
  • 3 cloves of garlic, minced
  • 1 tablespoon of annatto oil (or olive oil)
  • 1 teaspoon of cumin
  • 1 teaspoon of paprika
  • 1 teaspoon of salt
  • 1/4 cup of freshly chopped cilantro

In a large pot, heat the annatto oil (or olive oil) over medium heat. Add the diced onion and minced garlic, and sauté until fragrant and translucent.

Add the shrimp, cumin, paprika, and salt, and cook until the shrimp are pink and cooked through. Pour in enough water to cover the ingredients, and then add the tapioca pearls.

Stir continuously until the tapioca pearls have softened and the mixture has thickened. Remove from heat, and stir in the freshly chopped cilantro.

When serving Tacaca, it's important to note that the tapioca pearls will continue to absorb the liquid, so the consistency may thicken up over time.

You can adjust the consistency by adding more water or broth if desired. Additionally, some people enjoy adding a squeeze of lime juice or a sprinkle of additional seasonings to their individual servings.

Advertisement

Cooking Steps

First, you'll need to soak the corn overnight to soften it up.

Then, you'll grind the soaked corn into a smooth paste.

Next, you'll mix the corn with some lime to bring out the flavors.

Step 1. Soak the Corn Overnight

soak corn overnight thoroughly

Before you begin cooking the tacaca, you'll want to soak the corn overnight. This important step helps to soften the kernels, making them easier to work with later on.

Start by finding a large bowl or container that can hold all the corn you plan to use. Fill it with cool, clean water, then add the corn. Make sure all the kernels are fully submerged. Cover the bowl and let it sit at room temperature for at least 8 hours, or overnight if possible.

In the morning, you'll notice the corn has expanded and become more pliable. Drain the water and give the corn a gentle rinse. It's now ready for the next step in the tacaca-making process.

Advertisement

Soaking the corn is a simple but crucial part of the recipe, so don't skip this step if you want your tacaca to turn out just right. With the corn softened and prepped, you can move on to grinding it into a flour.

Step 2. Grind the Soaked Corn

grind soaked corn thoroughly

With the corn soaked and softened, it's time to grind it into a fine flour. You'll need a sturdy mortar and pestle or a food processor for this step. Carefully transfer the softened kernels into your chosen tool, making sure not to spill any.

Then, start grinding or pulsing the corn until it becomes a smooth, powdery flour. Don't be afraid to put some elbow grease into it – the more thoroughly you grind the corn, the finer and more consistent the flour will be.

Once you've achieved the desired texture, transfer the ground corn flour to a clean bowl or container. You may need to do this in batches, depending on the size of your mortar or food processor.

Be mindful of any stray bits that might've escaped – you want to collect every last bit of that precious cornmeal! With the corn now ground, you're one step closer to creating your delicious Tacaca.

Step 3. Mix With Lime

mix ingredients with lime

The next crucial step in the Tacaca preparation involves the integration of lime. You'll want to carefully measure out the right amount of lime to perfectly complement the soaked corn. Don't be afraid to get a little messy – this is where the real magic happens!

First, take the ground corn and place it in a large bowl. Slowly sprinkle in the lime, mixing it in with your hands to ensure an even distribution. The lime will react with the corn, creating a delightful chemical reaction that gives Tacaca its signature flavor.

Advertisement

Keep mixing until the mixture takes on a smooth, creamy texture.

Now, you can add any other seasonings or ingredients to really make the Tacaca your own. Perhaps a pinch of salt, or a dash of your favorite spice? Get creative and have fun with it!

The key is to keep tasting and adjusting until you achieve the perfect balance of flavors. Once you're satisfied, you're ready to move on to the next step. Tacaca is coming together beautifully!

Step 4. Form Tacaca Patties

forming tacaca patties

Now that you've perfectly mixed the corn and lime, it's time to start forming the Tacaca patties.

Grab a handful of the corn mixture and gently shape it into a small, round patty about the size of your palm. Be careful not to squeeze it too tightly – you want the patty to have a nice, fluffy texture.

Once you've made your first patty, place it on a clean surface.

Advertisement

Continue forming the rest of the mixture into patties, lining them up neatly. Don't worry if they're not all exactly the same size – that's part of the charm of homemade Tacaca!

When you've made as many patties as you can from the mixture, it's time to start cooking them.

Heat up a large skillet or griddle over medium heat, and carefully transfer the patties onto the hot surface.

Cook for a few minutes on each side, until they're golden brown and crispy on the outside.

Serve your freshly made Tacaca patties warm, and enjoy the delicious flavors of this traditional dish!

Advertisement

Step 5. Fry the Tacaca Patties

fry tacaca patties now

Heat a large skillet or griddle over medium heat. Once it's nice and hot, add a few tablespoons of oil to the pan.

Carefully place the tacaca patties into the sizzling oil. Fry them for 2-3 minutes per side, or until they're golden brown and crispy. Be sure to flip them gently so they don't fall apart.

While the patties are frying, keep an eye on them and adjust the heat if needed to prevent burning. The oil should be hot enough to create a delicious, crunchy exterior, but not so hot that the centers stay raw.

When the patties are done, use a slotted spoon to transfer them to a paper towel-lined plate. This will help soak up any excess oil.

Serve the tacaca patties warm, and enjoy their amazing flavor and texture! They're the perfect snack or side dish.

Final Thoughts

As we reach the conclusion of this article on Tacacá, it's important to reflect on the key takeaways.

Advertisement

You've learned how to fry the delicious Tacacá patties to perfection, creating a crispy exterior and a soft, savory interior. Remember to use high-quality ingredients and follow the step-by-step instructions carefully for the best results.

While Tacacá may be a traditional dish, it's one that can be enjoyed by people of all ages. Serve it as a snack, appetizer, or even a light meal.

The versatility of Tacacá means you can get creative and experiment with different toppings or dipping sauces to suit your taste buds.

As you continue your culinary journey, don't hesitate to share your Tacacá creations with friends and family. You never know, they may be just as eager to experience the flavors and traditions of Brazilian cuisine as you are. Sharing your culinary creations can also lead to new discoveries and connections, as others may have their own favorite Brazilian dishes or recipes to share with you. So go ahead, invite your loved ones to join you on this culinary journey through the vibrant and diverse world of Brazilian cuisine.

Who knows, you might even inspire them to try this unique and flavorful dish for themselves. Enjoy your delicious Tacacá and savor every bite!

Advertisement

Frequently Asked Questions

What Is the Origin of the Name "Tacacá"?

You're asking about the origin of the name "Tacaca." Unfortunately, without additional context, I don't have enough information to provide a definitive answer. The origin of place names can vary and require more details to determine its source.

How Long Has Tacacá Been a Traditional Dish?

How long has this traditional dish been around? It's a great question! The exact origins are unclear, but many believe it's been part of the local cuisine for centuries, passed down through generations. The dish has deep roots in the region's culinary traditions.

What Are the Typical Serving Sizes for Tacacá?

When serving a traditional dish, typical serving sizes can vary. Portion sizes often depend on the dish, the number of guests, and personal preferences. Consider your guests' appetites and the overall meal when determining an appropriate serving size.

Are There Any Health Benefits Associated With Tacacá?

Yes, many plant-based foods like tacaca can provide health benefits. They often contain beneficial nutrients and antioxidants that may support your overall wellness. While the specific benefits of tacaca are unclear, incorporating a variety of whole foods into your diet is generally recommended.

Can Tacacá Be Made Vegan or Vegetarian?

Yes, you can make a vegan or vegetarian version of this dish. By omitting any animal-derived ingredients and using plant-based alternatives, you can enjoy the flavors without compromising your dietary preferences.

Advertisement

Continue Reading

Affiliate Disclaimer
As an affiliate, we may earn a commission from qualifying purchases. We get commissions for purchases made through links on this website from Amazon and other third parties.

Advertisement

Vetted

top local car washes top local car washes
Vetted2 months ago

14 Best Car Washes Near You for a Sparkling Clean Ride

I discovered the 14 best car washes near you that promise a sparkling clean ride, and you won't want to...

top mops for 2024 top mops for 2024
Vetted2 months ago

The 15 Best Mops of 2025 – Your Ultimate Guide to a Spotless Home

Find the perfect mop for your cleaning needs in 2025, and discover how these top choices can revolutionize your home...

top women s fragrances 2024 top women s fragrances 2024
Vetted2 months ago

15 Best Perfumes for Women in 2025 – A Fragrance Guide You Can’t Miss

Keen to discover the top 15 perfumes for women in 2025? Uncover unique scents that will elevate your fragrance game!

top local bars guide top local bars guide
Vetted2 months ago

14 Best Bars Near You for an Unforgettable Night Out

Looking for the perfect bar to elevate your night out? Discover the 14 best spots that promise unforgettable experiences!

luxurious beard oil selection luxurious beard oil selection
Vetted2 months ago

15 Best Beard Oils for a Luxurious Grooming Experience in 2025

Shop the 15 best beard oils for a luxurious grooming experience in 2025 and discover which ones will elevate your...

top college laptops 2024 top college laptops 2024
Vetted2 months ago

15 Best College Laptops of 2025: The Ultimate Guide for Students

With our guide to the 15 best college laptops of 2025, discover which powerful models will elevate your academic experience...

waterproof mascaras for tears waterproof mascaras for tears
Vetted2 months ago

15 Best Waterproof Mascaras That Will Survive Any Tear-Jerker

Outstanding waterproof mascaras await to keep your lashes flawless through any emotional moment; discover which ones made the top 15...

top flavorful disposable vapes top flavorful disposable vapes
Vetted2 months ago

15 Best Disposable Vapes of 2025: Top Picks for Flavor and Convenience

Prepare to discover the 15 best disposable vapes of 2025 that blend exceptional flavor and convenience, but which ones truly...

refreshing lunch salad ideas refreshing lunch salad ideas
Vetted2 months ago

15 Best Salads Near You That Will Freshen Up Your Lunch Routine

Transform your lunch with the 15 best salads nearby that will tantalize your taste buds and leave you craving more...

top convertible car seats top convertible car seats
Vetted2 months ago

15 Best Convertible Car Seats of 2025 – Safety and Comfort for Your Little One

Get ready to discover the top 15 convertible car seats of 2025 that blend safety and comfort—find out which models...

delicious fast food breakfast delicious fast food breakfast
Vetted2 months ago

15 Best Fast Food Breakfast Options That Will Make Your Mornings Delicious

Uncover the 15 best fast food breakfast options that will transform your mornings into a delicious experience you won't want...

stylish contacts for vision stylish contacts for vision
Vetted2 months ago

14 Best America’s Contacts for Clear Vision and Style

Browse through the 14 best contact lenses in America for clear vision and style, and discover which one perfectly complements...

Trending