
Chocolate tempering is the secret to creating irresistible, glossy confections that will delight your senses. By carefully controlling the temperature of melted chocolate, you'll achieve a smooth, snappy texture and a beautiful shine that'll make your homemade treats look professionally made. It's a crucial step that elevates the visual appeal and overall quality of your chocolates. Mastering the art of tempering takes a bit of practice, but once you get the hang of it, you'll be able to craft chocolates that are as pleasing to the eye as they are to the palate. Keep reading to discover the tempering techniques that will take your confections to the next level.
Key Takeaways
- Proper chocolate tempering ensures a smooth, glossy finish and firm texture for high-quality chocolate confections.
- Tempering involves precisely controlling the temperature of melted chocolate to produce stable cocoa butter crystals.
- Successful tempering enhances the snap, mouthfeel, and shelf life of chocolate products.
- Common tempering methods include tabling, seeding, microwave, and double boiler techniques.
- Mastering chocolate tempering can elevate home chocolate-making skills and lead to more professional-quality results.
History
The art of chocolate tempering has a storied history, tracing its origins to the ancient Mesoamerican civilizations that first cultivated cacao beans. These early cultures, like the Maya and Aztec, were the first to discover the delicious and versatile nature of chocolate. They used the beans to create a frothy, spiced beverage that was prized for its rich flavor and energizing properties. In order to harness the true potential of chocolate, these ancient civilizations also developed the technique of tempering, which involves carefully heating and cooling the chocolate to achieve the perfect balance of smooth texture and glossy finish. This process has been passed down through the generations, and today, it is an essential skill for chocolatiers and pastry chefs around the world. Whether making indulgent truffles, decadent desserts, or the ultimate tiramisu recipe, mastering the art of chocolate tempering is key to creating unforgettable culinary delights.
As chocolate made its way to Europe in the 16th century, confectioners began experimenting with new ways to transform the raw cacao into solid, glossy treats. The process of tempering, which involves carefully controlling the temperature and agitation of melted chocolate, was a crucial breakthrough.
This technique allowed chocolatiers to create the smooth, snappy texture that we associate with high-quality chocolate today. Over time, the art of tempering evolved, with master chocolatiers refining the process to achieve ever more perfect results.
Recipe
Chocolate tempering is a process that involves carefully heating and cooling chocolate to achieve a smooth, glossy finish. This technique is essential for creating professional-looking chocolate confections, as it ensures the chocolate has the right texture, snap, and shine.
Tempering chocolate can seem intimidating, but with the right approach, it's a straightforward process that can be mastered at home. By following the steps outlined in this recipe, you'll be able to temper chocolate with confidence and create delicious, visually appealing treats.
- 200g high-quality chocolate, chopped into small pieces
- 1 teaspoon coconut oil (optional)
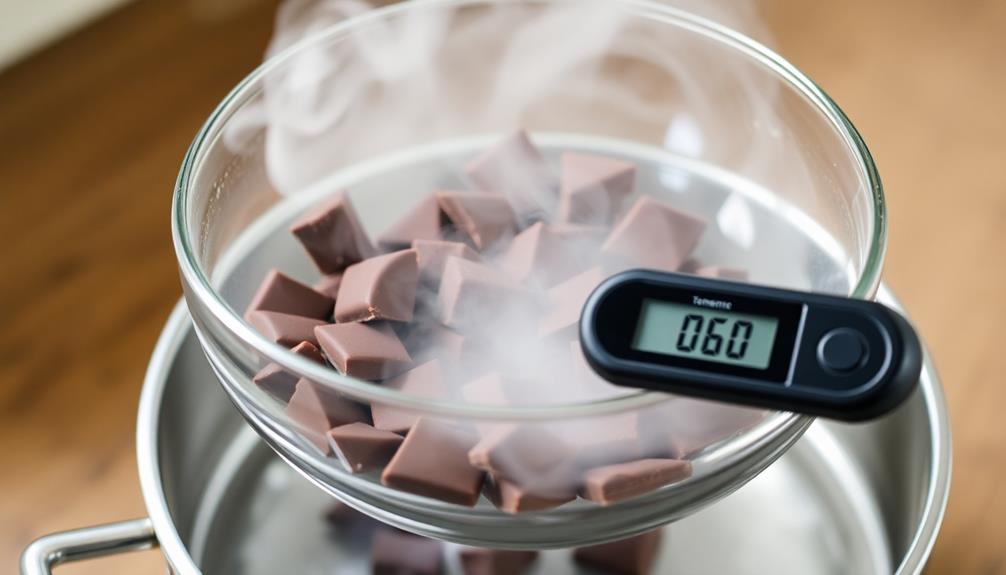
Begin by melting two-thirds of the chopped chocolate in a double boiler or heatproof bowl set over a pot of simmering water, stirring occasionally until the chocolate reaches a temperature of 45-50°C (113-122°F).
Remove the bowl from the heat and stir in the remaining one-third of the chocolate. Continue stirring until the temperature of the chocolate drops to 27-29°C (80-84°F).
Once the chocolate has reached the proper temperature range, it's now tempered and ready to use. The tempered chocolate can be used for dipping, molding, or any other chocolate-based confections.
When working with tempered chocolate, keep in mind that it has a short working time, so work quickly and efficiently.
For best results, use the tempered chocolate immediately. If you need to store it, pour it onto a clean, flat surface and allow it to set.
Once set, the tempered chocolate can be broken into pieces and stored in an airtight container at room temperature for up to two weeks.
Cooking Steps
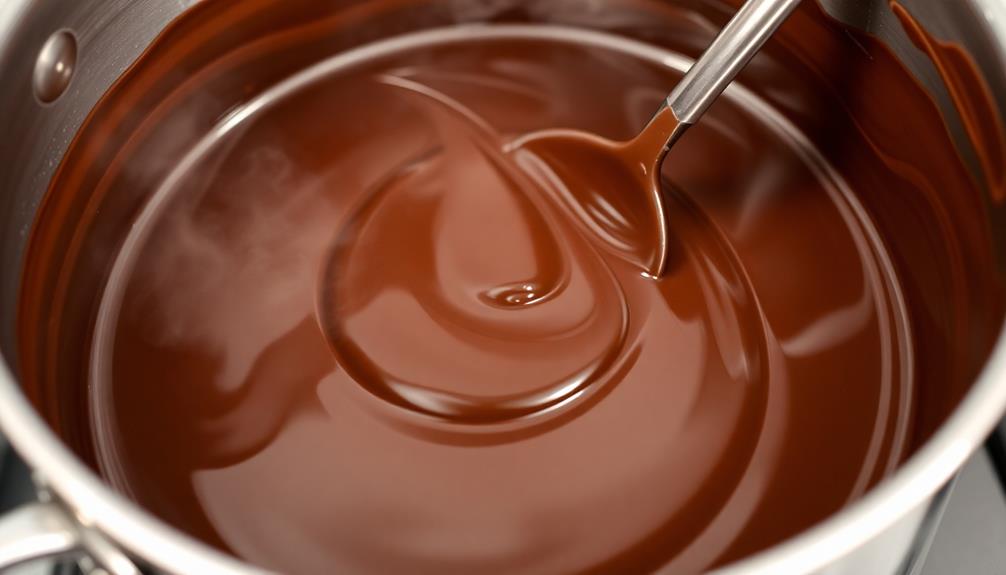
Carefully melt that chocolate over low heat, stirring it until it's fully melted.
Now, it's time to seed the chocolate to your desired temperature.
Grab a spoon and temper that chocolate by hand-stirring, then coat that mold with the tempered goodness!
Step 1. Carefully Melt Chocolate Over Low Heat

To properly melt chocolate, you'll want to do so over low heat. This gentle approach ensures the chocolate doesn't get too hot, which can cause it to seize up or burn.
Start by breaking the chocolate into small, even pieces and placing them in a heatproof bowl. Position the bowl over a saucepan filled with a couple inches of simmering water, making sure the bowl doesn't touch the water.
Stir the chocolate gently and continuously using a rubber spatula or wooden spoon. As the chocolate begins to melt, you'll notice it becoming smooth and glossy. Keep stirring until the last few pieces have melted, being careful not to overheat the chocolate.
Once it's fully melted, remove the bowl from the heat. The chocolate should now be the perfect temperature for tempering or using in your favorite recipes.
Step 2. Stir Chocolate Until Fully Melted
Once the chocolate has been gently melted, it's time to stir it continuously until it's fully melted and smooth. This is a crucial step in the tempering process, as it ensures the chocolate is evenly heated and the cocoa butter is properly distributed throughout the mixture.
Take your time and stir slowly, using a rubber spatula or wooden spoon. You'll notice the chocolate becoming smoother and more glossy as you stir. Be patient and keep stirring until there are no more visible lumps or unmelted bits.
This step helps prepare the chocolate for the next stage of tempering, where you'll adjust the temperature to achieve the perfect consistency. By taking the time to thoroughly melt the chocolate, you're setting the stage for a beautiful, shiny, and snappy final product.
Stick with it, and soon you'll have tempered chocolate that's ready to be molded, dipped, or used in all sorts of delicious creations.
Step 3. Seed Chocolate to Desired Temperature
Next, you'll seed the chocolate to the desired temperature. This step is crucial to get the perfect texture and shine.
First, take a small amount of the melted chocolate and let it cool until it's slightly thicker. This is your "seed" chocolate. Gently stir the seed chocolate into the rest of the melted chocolate. The cooler seed chocolate will help bring down the overall temperature of the batch.
Keep a close eye on the temperature, using a chocolate thermometer to monitor it closely. You want to get the chocolate to the perfect range, usually between 88-92°F (31-33°C) for dark chocolate, or 84-88°F (29-31°C) for milk chocolate.
Stir slowly and patiently until you reach the target temperature. The key is to cool the chocolate just enough to develop that lovely shine and crisp snap.
Once you've reached the perfect temperature, your chocolate is ready to use for all your delicious creations!
Step 4. Temper Chocolate by Hand-Stirring
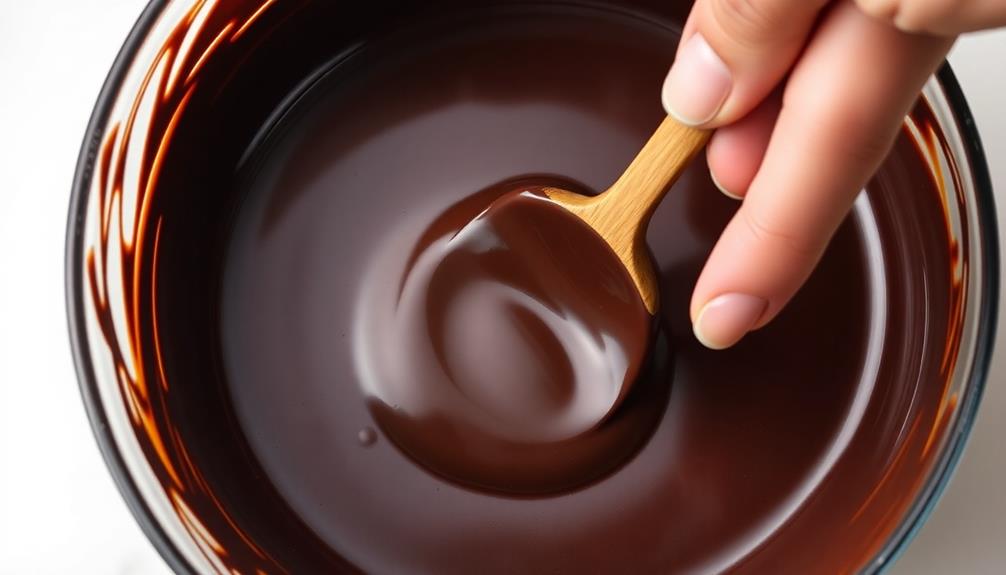
Tempering chocolate by hand-stirring is a meticulous process that requires your full attention.
Start by pouring two-thirds of your chocolate onto a clean, dry surface. Use a bench scraper or a spatula to spread the chocolate into a thin layer, about 1/4 inch thick. This allows the chocolate to cool quickly.
Now, use the bench scraper to gather the chocolate back into a pile. Slowly and steadily, begin stirring the chocolate in a figure-eight motion. This step is crucial as it evenly distributes the heat, ensuring the chocolate tempers properly.
Keep a close eye on the temperature, aiming for around 88-91°F (31-33°C). If the chocolate cools too much, simply return it to the remaining one-third and gently reheat it.
Continue stirring until the chocolate reaches the desired tempered state – it should have a smooth, glossy appearance and a firm, snappy texture.
Congratulations, you've just hand-tempered your chocolate to chocolate perfection!
Step 5. Coat Mold With Tempered Chocolate

Having tempered the chocolate, you can now begin coating your molds. Dip the mold into the tempered chocolate, making sure to cover every nook and cranny. Gently tap the mold against the side of the bowl to remove any excess chocolate. This will give your final chocolates a smooth, glossy finish.
Next, flip the mold over and let the excess chocolate drip back into the bowl. Run a spatula or knife along the edges to scrape off any extra chocolate. This will ensure your chocolates have clean, defined shapes.
Now, place the mold in the refrigerator for about 10 minutes. This will allow the chocolate to harden and set.
Once it's firm, simply pop the chocolates out of the mold. Voilà! You've created beautifully tempered chocolate treats.
Final Thoughts
Chocolate tempering is a crucial step in the chocolate-making process that can elevate the texture and shine of your final product.
By taking the time to properly temper your chocolate, you'll be rewarded with glossy, snappy confections that will impress your friends and family.
Whether you're creating luscious truffles, decadent chocolate bars, or even simple chocolate-dipped treats, tempering is the key to success.
Frequently Asked Questions
What Is the Ideal Temperature Range for Chocolate Tempering?
To achieve the perfect temper, you'll want to keep the chocolate between 88-90°F. This temperature range ensures the chocolate sets with a glossy shine and satisfying snap. Get it right, and you'll create confections that'll impress.
How Do I Prevent My Tempered Chocolate From Blooming?
To prevent your tempered chocolate from blooming, ensure you've tempered it properly by cooling it to the right temperature range. Store the tempered chocolate in a cool, dry place and avoid exposing it to fluctuations in temperature or humidity.
Can I Temper Chocolate in the Microwave?
You can temper chocolate in the microwave, but it requires careful attention. Start with small batches, melt the chocolate slowly, and stir frequently to ensure even heating. Be cautious, as overheating can ruin the temper.
How Do I Test if My Chocolate Is Properly Tempered?
To test if your chocolate is properly tempered, try the snap test. Break off a piece and listen for a crisp, clean snap. If it bends or cracks, it's not tempered enough. Keep adjusting your tempering process until you hear that perfect snap.
What Are the Common Issues With Chocolate Tempering and How Can I Fix Them?
Common tempering issues include seizing, streaking, and blooming. To fix them, you'll need to adjust your technique – perhaps by controlling temperature more precisely or using proper seed chocolate. With some practice, you can get that perfect temper.