Fried chicken's crispy golden skin and juicy, flavorful meat make it an iconic American dish! This savory treat originated in the South during the 19th century, blending Scottish and West African cooking techniques. Families perfected their own special recipes, which spread chicken's popularity through creative use of buttermilk and unique spice blends. To make mouthwatering fried chicken, you'll rinse the chicken, coat it in seasoned flour, fry it in hot oil, let it rest, and serve it sizzling hot. Fried chicken creates a feast-like atmosphere perfect for gatherings – and you'll want to know the tricks to master this classic dish. This classic southern comfort food is often served with sides like mashed potatoes, coleslaw, and biscuits, creating a truly indulgent meal. The combination of crunchy, savory chicken and rich, creamy sides is a perfect example of comforting, down-home cooking. Whether enjoyed at a picnic, family reunion, or Sunday dinner, fried chicken is a beloved dish with a rich and flavorful history.
Key Takeaways
- Fried chicken originated in the Southern United States during the 19th century, influenced by Scottish and West African cooking techniques.
- Unique seasoning and frying methods create a crispy exterior and juicy interior, with families developing their own special recipes.
- The cooking process involves rinsing the chicken, coating it in seasoned flour, frying in hot oil, and letting it rest before serving.
- Fried chicken is often served with sides like mashed potatoes, coleslaw, or biscuits, creating a festive atmosphere for gatherings.
- Fried chicken is an iconic dish enjoyed globally for generations, reflecting culinary skills and tradition, and encouraging experimentation with seasonings and sauces.
History
Though the exact origins of fried chicken remain unclear, it's believed to have been first popularized in the Southern United States during the 19th century.
The Scottish and West African cooking techniques that enslaved people brought to America are thought to have played a key role in developing this beloved dish. The unique seasoning and frying method created a crispy, golden-brown exterior with a juicy, flavorful interior – a winning combination that quickly gained popularity across the region.
As fried chicken spread, every family seemed to have their own special recipe, passed down through generations. Some used buttermilk for extra tenderness, while others experimented with spice blends to achieve the perfect taste.
Cooking Steps
Gather your ingredients and prepare your workstation. First, pat the chicken pieces dry with paper towels. This will help the seasoning and coating stick better.
Next, season the chicken all over with a blend of salt, pepper, and any other spices you love. Give the chicken a little massage to work the seasoning into the meat.
Now it's time to set up your breading station. Grab three shallow dishes – one with flour, one with beaten eggs, and one with breadcrumbs or panko. Dredge each piece of chicken first in the flour, then the eggs, and finally the breadcrumbs, pressing gently to help the coating adhere.
Heat a few inches of oil in a heavy-bottomed pot or Dutch oven to 350°F. Carefully lower the coated chicken into the hot oil and fry for 12-15 minutes, flipping halfway, until golden brown and cooked through.
Drain on a paper towel-lined plate and serve hot. Enjoy your freshly fried chicken!
Step 1. Rinse Chicken in Cold Water

Next, you'll want to rinse the chicken in cold water. This step is crucial to help remove any dirt, debris, or excess blood from the chicken. Simply place the chicken under running cold water, gently rubbing and patting it with your hands to ensure it's fully rinsed.
Be sure to pay extra attention to the nooks and crannies, like the cavity and under the wings, to make sure everything is clean. Rinsing the chicken in cold water not only helps with the overall cleanliness but also preps the chicken for the next steps.
The cold water will help tighten up the skin, making it easier to handle and fry. Once the chicken is thoroughly rinsed, pat it dry with paper towels. This will help the breading stick better when it's time to coat the chicken.
With the chicken rinsed and dried, you're now ready to move on to seasoning and breading it before frying to crispy perfection.
Step 2. Coat Chicken in Seasoned Flour

After rinsing the chicken, you'll want to prepare the seasoned flour coating. In a large shallow dish, mix together all-purpose flour, salt, pepper, paprika, garlic powder, and any other spices you love.
The key is to get that flour nice and flavorful – this is what's going to make your fried chicken so delicious!
Gently place the rinsed chicken pieces into the seasoned flour, one by one. Use your hands to really coat each piece, making sure the flour sticks to every nook and cranny.
Shake off any excess flour before carefully placing the coated chicken onto a clean plate or baking sheet. This helps the chicken get that perfect crispy texture when fried.
Once all the chicken is coated, you're ready to start frying! Heat up your oil and get ready for juicy, golden-brown fried chicken perfection.
Step 3. Fry Chicken in Hot Oil
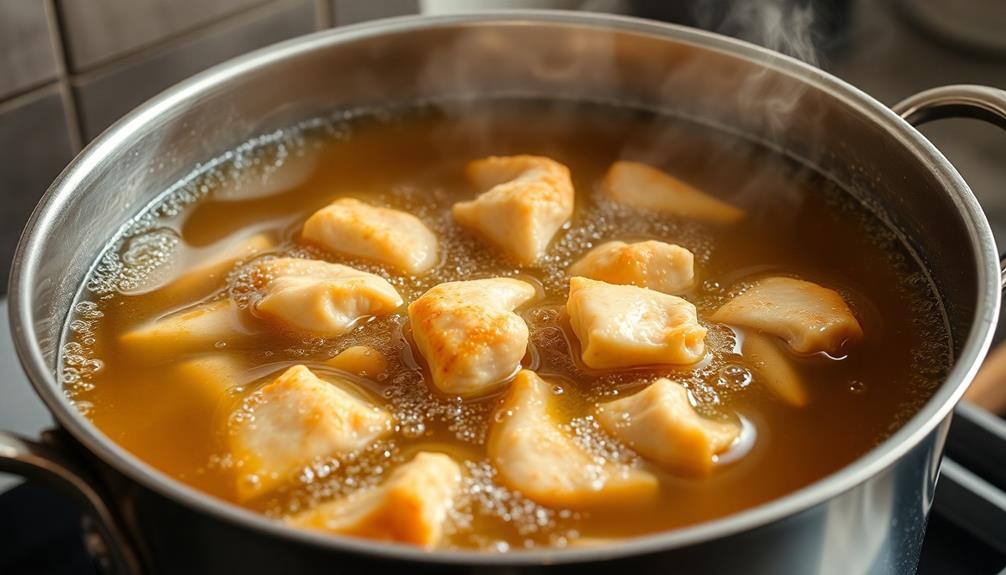
Once the chicken pieces are coated in the seasoned flour, you'll want to heat up about 2-3 inches of oil in a large, heavy-bottomed pan or Dutch oven.
The oil should reach a temperature of 350°F to 375°F. You can use a deep-fry or candy thermometer to monitor the temperature.
Gently lower the coated chicken into the hot oil, being careful not to overcrowd the pan. Fry the chicken in batches if needed, allowing the oil to return to the proper temperature between batches.
Cook the chicken for 12-15 minutes, flipping it halfway through, until it's golden brown and cooked through.
Carefully remove the fried chicken from the oil using tongs or a slotted spoon, allowing any excess oil to drip off. Transfer the chicken to a paper towel-lined plate or wire rack to drain.
Repeat the process with the remaining chicken pieces.
Once all the chicken is fried, you're ready to serve it hot and crispy, alongside your favorite sides. Enjoy your homemade fried chicken!
Step 4. Let Chicken Rest
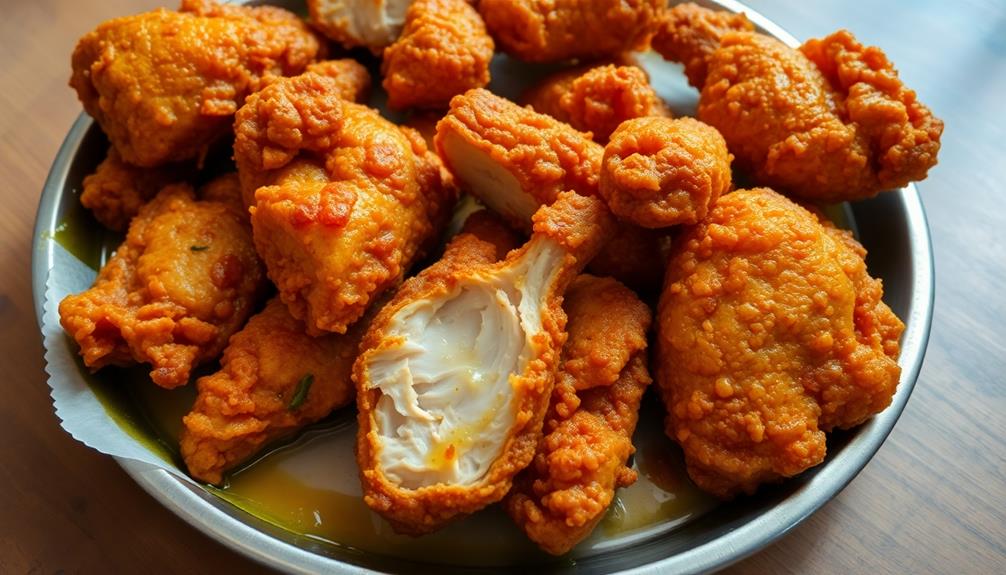
After frying the chicken to golden-brown perfection, it's important to let it rest. This step allows the juices to redistribute throughout the meat, ensuring each bite is bursting with flavor.
Don't be tempted to dig in right away – give your chicken a quick 5-10 minute break before serving.
During this resting period, the temperature of the chicken will continue to rise, cooking it just a bit more. This helps lock in all that delicious moisture you worked so hard to achieve.
Plus, the outer crust will have a chance to set, creating an irresistible crunch.
Patience is key here. Letting your fried chicken rest might seem like an unnecessary extra step, but trust us, it's well worth the wait.
Your taste buds will thank you when you sink your teeth into that perfectly cooked, juicy chicken.
Step 5. Serve Immediately
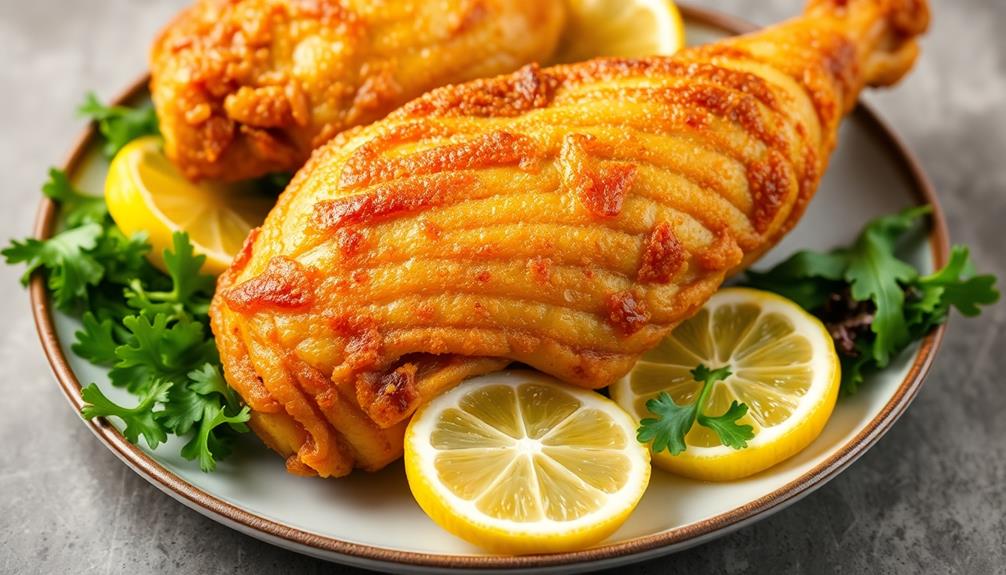
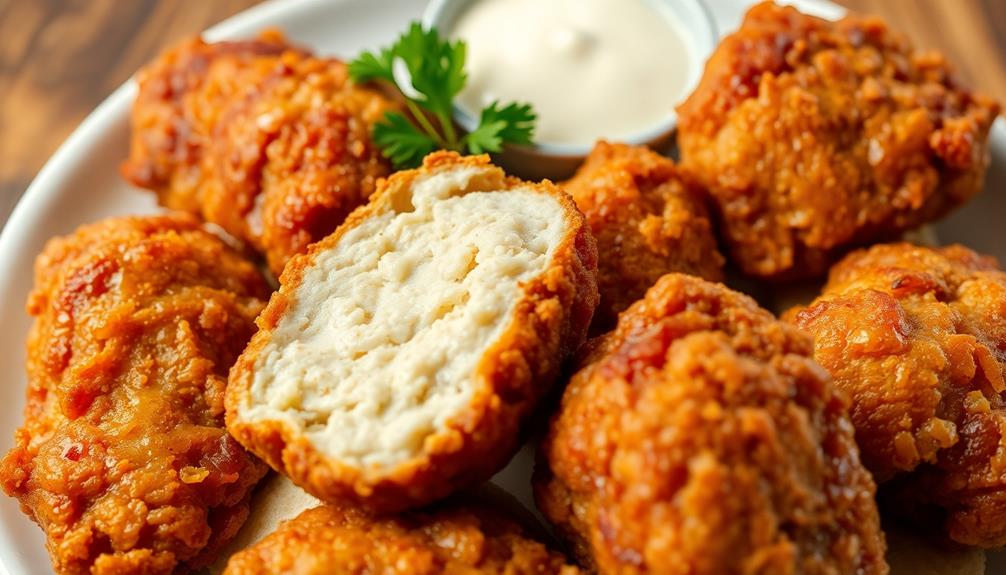
Once the chicken has rested, it's time to serve it up. This is the moment you've been waiting for! The crispy, golden-brown exterior and juicy, flavorful interior are ready to be enjoyed. Grab a plate and get ready to dig in.
Carefully transfer the fried chicken from the oil to a paper towel-lined plate or wire rack. This will help drain any excess oil and keep the crust nice and crisp.
Don't forget to season the chicken with a sprinkle of salt and pepper. The resting period has allowed the flavors to meld, so the seasoning will really shine.
Now, it's time to arrange the chicken on a serving platter or individual plates. You can serve it whole, or cut it into pieces for easy sharing.
Accompany the fried chicken with your favorite sides, like creamy mashed potatoes, tangy coleslaw, or fluffy biscuits. This is a feast fit for a king (or queen)!
Final Thoughts
Fried chicken has been a beloved and iconic dish for generations, transcending cultural boundaries and capturing the hearts and taste buds of people around the world.
As you've now mastered the art of frying chicken to perfection, it's time to sit back, relax, and savor the fruits of your labor. The golden, crispy exterior and juicy, flavorful interior are a testament to your culinary skills.
Whether you're serving it up at a family gathering, a backyard barbecue, or a simple weeknight dinner, fried chicken is sure to bring smiles and delight to all who partake.
Don't be afraid to experiment with different seasonings and dipping sauces to truly make each batch your own.
And remember, the true joy of fried chicken lies not just in the eating, but in the memories and moments it helps create.
Frequently Asked Questions
What Is the Best Oil for Frying Chicken?
When it comes to frying chicken, you'll want to choose an oil with a high smoke point. That means it can withstand high temperatures without burning or smoking.
The best oils for this are vegetable, canola, or peanut oil. They'll give your chicken that perfect golden-brown crispiness without any burnt or bitter flavors.
Plus, they're affordable and easy to find, making them a great choice for all your frying needs!
Can I Use Boneless Chicken for Fried Chicken?
Absolutely! You can definitely use boneless chicken for fried chicken.
In fact, boneless chicken is a great option because it's easier to work with and cooks up quickly. Just be sure to handle the chicken carefully so it doesn't fall apart during the frying process.
With the right technique, you can create crispy, golden-brown fried chicken that's just as delicious as the bone-in version.
Give it a try and see how it turns out!
How Do I Keep the Breading From Falling Off?
To keep the breading from falling off, start by making sure your chicken is completely dry before breading.
Dredge the chicken in flour, then dip it in beaten eggs, and finally coat it in breadcrumbs or panko. Press the breading firmly onto the chicken to help it adhere.
When frying, maintain the right oil temperature and don't overcrowd the pan. This will ensure the breading cooks up crispy and stays put.
With a little care, you can enjoy perfectly coated fried chicken every time!
Can I Brine the Chicken Before Frying?
Certainly! Brining the chicken before frying can work wonders.
The saltwater solution helps the meat stay moist and juicy, while also tenderizing it. Plus, the brine can add extra flavor too.
Just be sure to pat the chicken dry after brining, so the breading has a better chance of sticking.
Give it a try – your fried chicken is about to get even more delicious!
How Do I Prevent the Chicken From Drying Out?
To prevent your chicken from drying out, there are a few simple tricks. First, brine the chicken before frying. This adds moisture and flavor.
Next, use a thermometer to ensure you don't overcook it. Pull the chicken from the oil when it reaches 165°F.
Finally, let the chicken rest for a few minutes before serving. This allows the juices to redistribute, keeping your chicken tender and juicy.
With these steps, you'll have moist, delicious fried chicken every time!