Connect with us

Ethiopian Cuisine

Tella (Traditional Beer)

Yearning to uncover the centuries-old secrets of Tella, Ethiopia’s traditional beer that connects the past to the present and reflects the resilience of local traditions.

Published

on

traditional ethiopian beer tella

Tella is Ethiopia's centuries-old traditional beer, a cultural treasure that connects the past to the present. This flavorful brew is crafted using local grains like barley, sorghum or millet, along with water, yeast, and optional sugar and spices. The brewing process requires patience, with the soaked grains boiled, strained, and cooled before adding yeast to start fermentation. Tella's unique character varies by region, reflecting the ingenuity and resilience of local traditions. More than just a beverage, Tella symbolizes the identity and values of Ethiopian communities, often shared during social gatherings and celebrations. Intrigued? There's more to discover about this captivating cultural treasure.

Key Takeaways

  • Tella is a centuries-old traditional beer that is integral to the cultural heritage and identity of Ethiopia.
  • The brewing process involves soaking, boiling, and fermenting local grains like barley, sorghum, or millet.
  • Tella is often consumed during social gatherings, celebrations, and religious ceremonies, strengthening community bonds.
  • The unique regional variations and artisanal production methods showcase the craftsmanship and cultural significance of Tella.
  • Tella contains beneficial nutrients and may offer probiotic benefits, making it a healthier alternative to commercial beers.

History

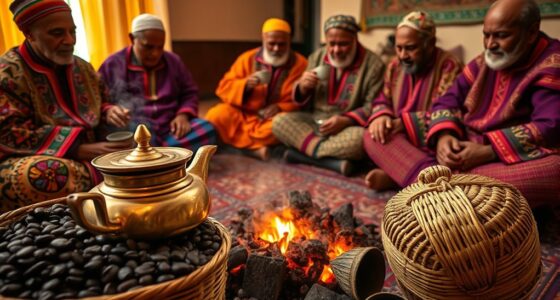
Tella, the traditional beer of Ethiopia, traces its origins back centuries, woven into the very fabric of the country's cultural heritage. This beloved beverage has been a cherished part of social gatherings, celebrations, and religious ceremonies for generations.

The process of brewing tella is a time-honored tradition, passed down through the ages, with each family or community having their own unique recipes and techniques.

The ingredients for tella typically include barley, gesho (a type of buckthorn), and water, though the exact proportions and methods can vary. The fermentation process can take several days, creating a satisfyingly complex and flavorful brew.

Tella is often served in clay pots or traditional cups, adding to the authentic experience.

Today, tella remains an integral part of Ethiopian culture, a tangible link to the nation's rich history and traditions.

Advertisement

Whether enjoyed during a festive celebration or as a daily social ritual, this traditional beer continues to bring people together and celebrate the enduring spirit of Ethiopia.

Recipe

Tella, also known as Traditional Beer, is a popular beverage in parts of Africa. It's a fermented drink made from various grains, including sorghum, millet, or barley. The brewing process involves a unique combination of techniques and ingredients that have been passed down through generations.

The recipe for Tella can vary depending on the region and personal preferences, but the core method remains consistent. Crafting this traditional beer requires patience, attention to detail, and a deep understanding of the fermentation process.

  • Sorghum or millet flour
  • Water
  • Yeast
  • Sugar (optional)
  • Spices (such as ginger, cinnamon, or cloves)

To prepare Tella, begin by mixing the sorghum or millet flour with water in a large pot. Bring the mixture to a boil, stirring constantly to prevent burning. Once the mixture has thickened, remove it from heat and allow it to cool.

Add the yeast and, if desired, a small amount of sugar. Cover the pot and let the mixture ferment for several days, stirring occasionally, until the desired level of fermentation is achieved.

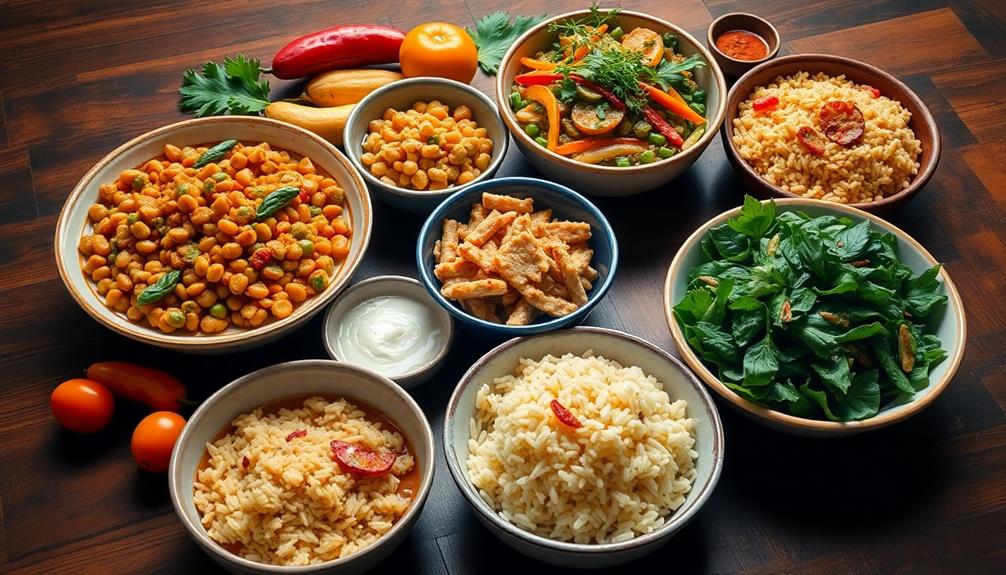
When the Tella is ready, you may wish to strain it to remove any sediment or debris. The final product can be served chilled or at room temperature, and it can be enjoyed on its own or paired with traditional African dishes.

Advertisement

Keep in mind that the flavor and alcohol content of Tella can vary depending on the length of fermentation and the specific ingredients used. For a more traditional taste, look for Tella varieties that have been fermented for a longer period of time and use a greater proportion of teff flour. These will often have a stronger, more sour flavor and higher alcohol content. However, if you prefer a milder flavor, opt for a shorter fermentation time and a mix of grains such as barley or wheat. Tella can be a great addition to a mild chicken stew recipe, adding a unique depth of flavor to the dish.

Cooking Steps

To get started, you'll need to soak the grains in water overnight.

Then, bring the soaked grains to a boil and let them simmer.

After that, strain the boiled grains to collect the filtered mixture.

Step 1. Soak Grains Overnight in Water

overnight grain soaking process

Soaking the grains overnight in water is a crucial step in the tella-making process. This allows the grains to soften and swell, preparing them for the next stages of the fermentation.

Start by rinsing the grains, such as sorghum, barley, or wheat, in clean water. Then, place them in a large container and cover them completely with fresh water. Let the grains soak for at least 8 hours, or overnight, ensuring they've ample time to absorb the moisture.

Advertisement

After the soaking period, drain the excess water, leaving just the plump, hydrated grains. This step is essential for achieving the desired texture and flavor in your tella.

The softened grains will be easier to grind, extract the sugars, and ferment, resulting in a smooth, rich traditional beer. Remember to keep the soaked grains covered and in a cool, dark place until you're ready to move on to the next step in the tella-making process.

Step 2. Boil the Soaked Grains

boil soaked grains thoroughly

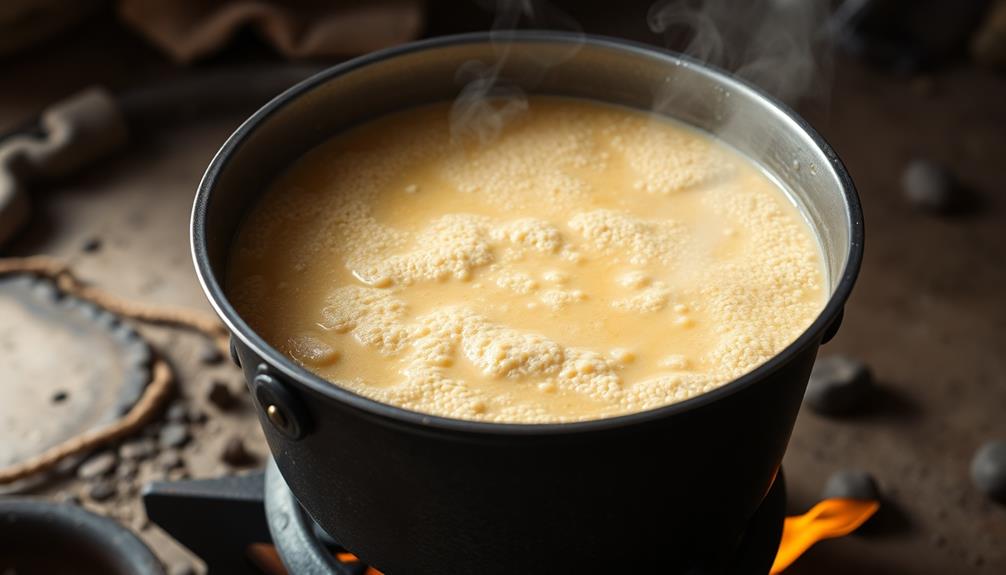
Next, you'll want to boil the soaked grains to begin the cooking process. In a large pot, combine the soaked grains and enough fresh water to cover them by about an inch.

Bring the mixture to a rolling boil over high heat, then reduce the heat to low and let it simmer for 30-45 minutes, stirring occasionally. This will soften the grains and begin the process of breaking down the starches.

Keep an eye on the pot and add more water if the mixture starts to look too dry. You'll know the grains are ready when they're soft and easily mashable.

Once they've reached the desired texture, remove the pot from the heat and let the contents cool slightly before moving on to the next step. This gentle boiling helps prepare the grains for the fermentation that will create the signature flavors of your traditional tella beer.

Advertisement

Step 3. Strain the Boiled Grains

strain boiled grains step

After the grains have been gently boiled, you'll need to strain them. Grab a large, clean colander or strainer and place it over a bowl or pot. Slowly pour the hot, boiled grains into the strainer, allowing the liquid to drain off. Be careful – the grains will be very hot!

Gently press down on the grains with a spoon to help release more of the liquid. You want to extract as much of the flavorful liquid as possible, while leaving the spent grains behind.

Once the grains have been fully strained, discard them or set them aside for another use, such as animal feed.

The strained liquid is now the wort, the foundation of your tella. Transfer the wort to a clean pot or container.

At this point, you can proceed to the next step of the tella brewing process – cooling the wort. With the grains strained, you're one step closer to enjoying a refreshing, traditional tella!

Step 4. Cool the Filtered Mixture

cool the filtered mixture

With the grains strained, the next step is to cool the wort. This is an important process, as the temperature of the liquid must be lowered before the yeast can be added.

First, place the filtered mixture into a large container or pot. Gently stir the liquid to help it cool more quickly. You can also set the container in a sink or tub filled with cold water, which will accelerate the cooling process.

Advertisement

Keep a close eye on the temperature, aiming for around 70-80°F (21-27°C). Once the wort has reached the desired temperature, it's time to add the yeast. This will kickstart the fermentation, transforming the sugars into alcohol and carbon dioxide.

Be sure to cover the container to prevent any unwanted particles from getting in. With the wort cooled and the yeast added, the tella is well on its way to becoming a delicious traditional beer.

Step 5. Add Yeast to Mixture

incorporate yeast into mixture

To kickstart the fermentation process, add the prepared yeast to the cooled wort. This living organism will convert the sugars in the mixture into alcohol and carbon dioxide, bringing your tella to life.

Sprinkle the yeast evenly over the surface of the liquid, then use a clean utensil to gently stir it in. Be careful not to over-agitate the mixture, as this can damage the delicate yeast cells.

Once the yeast is incorporated, cover the vessel and let it sit in a warm, dark place. The yeast will begin multiplying, consuming the sugars and producing the desired alcohol content.

Over the next few days, you'll notice bubbles forming and the mixture becoming more bubbly as fermentation takes hold. This is an exciting stage, as you're one step closer to enjoying your homemade tella!

Advertisement

Keep a close eye on the process, making any necessary adjustments to ensure a successful fermentation.

Final Thoughts

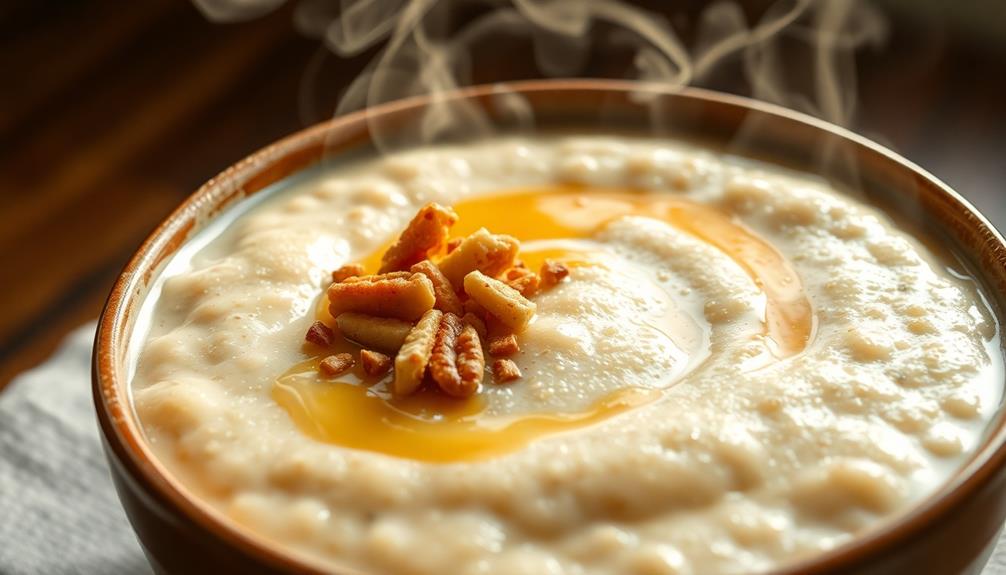
Tella, the traditional beer, holds a unique place in the cultural tapestry of many communities. As you've now added the yeast and allowed the mixture to ferment, it's time to consider the final thoughts.

The end result, a rich and flavorful libation, is well worth the effort. Savor the fruity notes and the satisfying fizz as you share this special drink with friends and family.

Remember, tella is more than just a beverage – it's a living link to the past, a tradition that connects generations. Each sip carries the weight of history, the stories of those who've come before. As you raise your glass, take a moment to appreciate the craftsmanship and the care that went into its creation.

Whether enjoyed during a festive celebration or as a leisurely accompaniment to a meal, tella is a testament to the ingenuity and resilience of your community.

Advertisement

Embrace this time-honored tradition, and let it inspire you to celebrate the enduring spirit of your cultural heritage.

Frequently Asked Questions

How Long Can Tella Be Stored Before It Spoils?

You should consume homemade fermented beverages within a few days to a week, as they don't preserve well and can spoil quickly without proper storage. Proper refrigeration may extend their shelf life slightly, but they're best enjoyed fresh.

What Are the Health Benefits of Drinking Tella?

Drinking a moderate amount of traditional fermented beverages can provide beneficial probiotic effects, aiding digestion and boosting your immune system. However, excessive consumption may lead to health issues, so it's important to enjoy these drinks in moderation as part of a balanced lifestyle.

Can Tella Be Made at Home With Modern Equipment?

You can make tella at home using modern equipment like a fermentation tank, grain mill, and temperature control. With the right ingredients and process, you can brew this traditional beer right in your own kitchen.

Is Tella Safe for Pregnant Women to Consume?

It's best to avoid drinking any alcoholic beverages during pregnancy, as they can potentially harm the developing fetus. Speak with your healthcare provider to determine the safest choices for you and your baby's wellbeing.

Advertisement

How Does the Taste of Tella Compare to Other Traditional Beers?

You'll find that the taste of tella, a traditional beer, differs from other regional brews. It has a distinctive, earthy flavor that's often described as richer and more robust compared to more mainstream beer varieties.

Advertisement

Ethiopian Cuisine

Ethiopian Delight: Discovering the Flavors of Quanta Firfir

Behold the captivating dance of flavors in Quanta Firfir, an Ethiopian staple that has enchanted palates for centuries. Delve deeper to unravel its rich cultural heritage and culinary delights.

Published

on

ethiopian quanta firfir flavors

Unravel the captivating flavors of Quanta Firfir, a beloved Ethiopian staple that's been delighting taste buds for centuries! This vibrant dish combines tender beef or lamb with the aromatic punch of berbere spice and fragrant niter kibbeh. Tear into fluffy injera to scoop up the zesty sauce, savoring the comforting warmth and cultural heritage with every bite. Quanta Firfir is a true culinary delight, reflecting Ethiopia's rich culinary tradition and the importance of shared meals. Discover more about this delectable dish and the intriguing world of Ethiopian cuisine.

Key Takeaways

  • Quanta Firfir is a traditional Ethiopian dish that showcases the country's rich culinary heritage and cultural identity through its spice blends and communal dining experience.
  • The dish combines injera, a staple flatbread, with a flavorful sauce made from meat, berbere spice, and niter kibbeh, reflecting the ingenuity of Ethiopian cooks.
  • Quanta Firfir offers a harmonious blend of tangy, spicy, and earthy flavors, inviting exploration of the diverse and vibrant cuisine of Ethiopia.
  • Sharing meals and using injera to scoop up the food are central to Ethiopian dining culture, fostering connection and strengthening relationships among family and friends.
  • Discovering Quanta Firfir can serve as an introduction to the broader culinary landscape of Ethiopia, encouraging culinary curiosity and a deeper appreciation for its rich cultural heritage.

History

historical events and narratives

Originating from the ancient Ethiopian tradition, quanta firfir's history can be traced back to the country's gastronomic roots. This beloved dish has been a staple in Ethiopian cuisine for centuries, passed down through generations and celebrated as a symbol of cultural identity.

The term "quanta firfir" refers to the technique of tearing injera, the spongy, sourdough flatbread, into bite-sized pieces and mixing it with a spicy, flavorful sauce. This method not only adds texture and depth to the dish but also allows the flavors to mingle and infuse the injera, creating a harmonious culinary experience.

The signature spices that define quanta firfir, such as berbere and niter kibbeh, are carefully blended to strike the perfect balance of heat, aromatics, and richness.

These spice mixes have been perfected over time, reflecting the ingenuity and culinary artistry of Ethiopian cooks.

Recipe

culinary instructions for preparation

Quanta Firfir is a beloved traditional Ethiopian dish that combines the vibrant flavors of berbere spice, niter kibbeh (seasoned clarified butter), and injera (spongy flatbread). This dish is a staple in many Ethiopian households and is often enjoyed as a comforting, flavorful meal.

The key to a delicious Quanta Firfir lies in the careful preparation of the berbere spice blend and the niter kibbeh. Berbere is a complex seasoning that lends a warm, earthy, and slightly spicy character to the dish, while the niter kibbeh adds a rich, aromatic depth.

Advertisement
  • 1 lb (450g) beef or lamb, cut into bite-sized pieces
  • 1 onion, diced
  • 3 cloves garlic, minced
  • 2 tablespoons berbere spice blend
  • 2 tablespoons niter kibbeh (or clarified butter)
  • 1 cup (240ml) beef or chicken stock
  • Salt and pepper to taste
  • Injera, for serving

In a large skillet or heavy-bottomed pot, heat the niter kibbeh over medium-high heat. Add the diced onion and sauté until translucent, about 5-7 minutes.

Add the minced garlic and cook for an additional 1-2 minutes, until fragrant. Stir in the berbere spice blend and the cubed meat, and sauté for 5-7 minutes, or until the meat is lightly browned.

Pour in the stock and season with salt and pepper to taste. Bring the mixture to a boil, then reduce the heat to low, cover, and simmer for 30-40 minutes, or until the meat is tender and the flavors have melded together. Adjust seasoning as needed.

Serve the Quanta Firfir hot, accompanied by fresh injera. The spongy texture of the injera pairs beautifully with the rich and flavorful Quanta Firfir. Enjoy this authentic Ethiopian delight!

Cooking Steps

step by step cooking process

First, you'll want to soak the dried anchovies overnight to soften them up.

Then, sauté the onions in a pan until they're nice and translucent.

Once that's done, add in the chopped garlic and ginger for an extra burst of flavor.

Advertisement

Step 1. Soak Dried Anchovies Overnight

soak dried anchovies overnight

Soak the dried anchovies in water overnight. This helps soften them up and brings out their delightful, savory flavors.

Just place the anchovies in a bowl, cover them with water, and let them soak until morning. The anchovies will plump up and become nice and tender, ready to add to your Quanta Firfir.

Once the anchovies have soaked, drain them and give them a quick rinse. This removes any excess saltiness.

Then, you're all set to chop them up and toss them into your Quanta Firfir. The anchovies will add a tasty umami punch that complements the other flavorful ingredients perfectly.

Get ready for an explosion of Ethiopian delight in every bite!

Step 2. Sauté Onions Until Translucent

saut onions until translucent

Next, sauté the onions until they become translucent. This step is crucial for building the foundation of flavor in your quanta firfir.

Grab your trusty skillet and heat it over medium heat. Add a drizzle of oil, just enough to coat the bottom. Once the oil is shimmering, toss in the chopped onions. Stir them around, making sure they're in an even layer.

Advertisement

Now, be patient and let them cook, stirring occasionally, until they turn soft and transparent. This should take about 5-7 minutes. Keep a close eye, as you don't want the onions to burn. They should gently sizzle and release their sweet aroma.

Once they reach that perfect translucent stage, you're ready to move on to the next step in your Ethiopian culinary adventure. Get excited, because the flavors are about to intensify!

Step 3. Add Chopped Garlic and Ginger

add garlic and ginger

With the onions now softened and translucent, it's time to ramp up the aromatics. Grab a few cloves of fresh garlic and give them a good chop. The sharp, pungent aroma will instantly fill your kitchen, awakening your senses and setting the stage for the bold flavors to come.

Next, grab a knob of ginger and slice it into thin matchsticks. The warm, slightly spicy notes of the ginger will complement the garlic perfectly, adding depth and complexity to the dish. Be generous with the ginger – you want to make sure its flavor shines through!

Once the garlic and ginger are prepped, toss them into the pan with the sautéed onions. Stir everything together, allowing the flavors to meld and the aromas to intensify. The sizzling sound and enticing scents will have your mouth watering in anticipation.

Get ready for the next step in this flavorful Ethiopian adventure!

Advertisement

Step 4. Add Spices and Simmers

add spices simmer mixture

With the aromatic garlic and ginger now sizzling in the pan, it's time to introduce the spices that will truly elevate this Ethiopian dish. First, add a generous pinch of cumin, its earthy aroma mingling with the fragrant garlic.

Next, sprinkle in some paprika, which will lend a warm, smoky flavor. Don't forget the turmeric – its vibrant golden hue will transform the dish into a vibrant medley of colors. For an added health boost, consider incorporating nutritional benefits like chia seeds, which are high in fiber and omega-3 fatty acids.

Now, it's time to let the flavors mingle. Reduce the heat to low and let the mixture simmer gently, allowing the spices to infuse the firfir with their bold and tantalizing essence.

Stir occasionally, ensuring every morsel is coated in the harmonious blend of spices. As the minutes tick by, the kitchen will be filled with the most inviting aroma, making your mouth water in anticipation.

With just a few simple steps, you're well on your way to creating an authentic and delightful Ethiopian delight.

Step 5. Add Lemon Juice and Serve

add lemon juice serve

After the spices have simmered and infused the firfir with their robust flavors, it's time to add the final touch – a bright and tangy burst of lemon juice.

Simply squeeze a generous amount of fresh lemon over the steaming firfir, allowing the tart and citrusy notes to dance with the earthy spices. Stir everything together, ensuring the lemon juice is evenly distributed.

Advertisement

The lemon juice not only brightens the dish but also helps balance the richness of the butter and spices. It adds a refreshing zing that'll make your taste buds tingle with delight.

Serve the Quanta Firfir hot, garnished with a sprinkle of chopped parsley or cilantro for a vibrant pop of color.

The combination of the firfir's comforting warmth and the lemon's zesty punch creates a truly irresistible dish that'll transport you straight to the heart of Ethiopia. Enjoy every flavorful bite!

Final Thoughts

concluding reflections and insights

As you savor the last bites of this Ethiopian delight, Quanta Firfir, let the flavors linger on your palate. The tangy, spicy blend of injera, vegetables, and seasoned meat creates a symphony of tastes that dance on your tongue. The aroma of the berbere spice mix, with its earthy notes and subtle heat, will have you craving more.

Quanta Firfir is a true celebration of Ethiopian cuisine. Vibrant colors, bold flavors, and a sense of community come together in this dish.

Whether shared with family or friends, it's a meal that brings people together and fosters connection.

Advertisement

As you reflect on your experience, remember the joy of discovering new culinary horizons. Ethiopian food is a delightful adventure, and Quanta Firfir is just the beginning.

Embrace the flavors, explore the culture, and let your taste buds be your guide on this delicious journey.

Frequently Asked Questions

What Is the Origin of the Name "Quanta Firfir"?

You wonder about the origin of the name "quanta firfir." It's likely a local Ethiopian term, combining the word "quanta" which refers to a type of injera, and "firfir" which describes the shredded, spicy preparation of the dish.

How Long Can Quanta Firfir Be Stored For?

Quanta firfir can be stored for up to a week when refrigerated in an airtight container. The spices and herbs used in its preparation help preserve its fresh flavors, allowing you to enjoy this delightful dish for several days.

Is Quanta Firfir Suitable for Vegetarians or Vegans?

Quanta firfir is suitable for vegetarians and vegans, as it's a plant-based dish made from shredded kale or other leafy greens. You can enjoy this flavorful Ethiopian staple without any animal-derived ingredients.

Advertisement

Can Quanta Firfir Be Served as a Standalone Dish?

Yes, quanta firfir can certainly be served as a standalone dish. It's a flavorful and nutrient-dense option that can make for a satisfying meal on its own, without the need for additional accompaniments.

Are There Any Variations or Regional Differences in Quanta Firfir?

Yes, there are regional variations in quanta firfir. Different parts of Ethiopia may use distinct spice blends, ingredients, or cooking methods that lend unique flavors and textures to this traditional dish.

Continue Reading

Ethiopian Cuisine

Gomen Recipe: A Flavorful Ethiopian Collard Greens Dish

Navigating the vibrant flavors of Gomen, Ethiopia’s beloved collard greens dish, unveils a culinary journey that promises to tantalize your senses. Discover more about this Ethiopian gem.

Published

on

ethiopian collard greens recipe

Get ready to tantalize your taste buds with the vibrant and flavorful Gomen – Ethiopia's beloved collard greens dish! Rooted in ancient culinary traditions, Gomen celebrates the earth's bounty and communal dining. Savory aromatics like onion, garlic, and warming spices like cumin and turmeric come together to create a harmonious blend that will transport you to the heart of Ethiopia. Tender collards simmered in a rich broth make this dish both nourishing and delightful. Serve it with traditional injera bread and prepare to be captivated by the robust flavors that have been cherished for generations. There's more to discover about this Ethiopian gem!

Key Takeaways

  • Gomen is a traditional Ethiopian dish featuring collard greens, deeply rooted in the country's rich culinary heritage and often served during family gatherings.
  • The recipe typically includes aromatics like onions, garlic, and ginger, along with spices such as cumin, turmeric, and cardamom to create a flavorful dish.
  • The cooking process involves sautéing the aromatics, adding the collard greens, and simmering the dish until the greens are tender and the flavors have melded.
  • Gomen is often served with injera bread, a traditional Ethiopian flatbread, and can be enjoyed as a side dish or a main attraction.
  • The dish showcases Ethiopia's emphasis on the nutritional value of leafy greens and the importance of communal dining and sharing in the country's culture.

History

understanding the past s significance

Gomen, a beloved Ethiopian dish of collard greens, has its roots deeply embedded in the country's rich culinary heritage. For generations, families have gathered to prepare this nourishing and aromatic delicacy, passing down cherished recipes from one season to the next.

The origins of gomen can be traced back to the traditional diets of ancient Ethiopian tribes, who recognized the incredible nutritional value of these leafy greens.

Over time, the dish has evolved, incorporating the unique flavors and techniques of different regions. In the highlands, gomen is often seasoned with fragrant spices like cardamom and turmeric, while in the south, it may feature a touch of peppery heat.

Despite these regional variations, the essence of gomen remains the same – a celebration of the earth's bounty and the joy of sharing a meal together.

Recipe

cooking instructions and ingredients

Gomen is a traditional Ethiopian dish that features collard greens simmered in a flavorful broth. This nutritious and comforting meal is a staple in Ethiopian cuisine, often served alongside injera bread or other Ethiopian dishes.

The key to a delicious gomen is to properly clean and prepare the collard greens, and to allow the flavors to meld together through a long, slow simmer. With the right combination of spices and ingredients, you can create a deeply satisfying and authentic Ethiopian dish right in your own kitchen.

Advertisement
  • 1 lb fresh collard greens, washed, stemmed, and chopped
  • 1 onion, diced
  • 3 cloves garlic, minced
  • 1 tablespoon niter kibbeh (Ethiopian spiced butter) or vegetable oil
  • 1 teaspoon ground cumin
  • 1 teaspoon ground turmeric
  • 1/2 teaspoon ground cardamom
  • 1 cup vegetable or chicken broth
  • Salt and pepper to taste

In a large pot or Dutch oven, heat the niter kibbeh or oil over medium heat. Add the onion and sauté for 5-7 minutes until translucent. Add the garlic and sauté for an additional 1-2 minutes until fragrant.

Add the chopped collard greens, cumin, turmeric, and cardamom. Stir to coat the greens in the spices. Pour in the broth and season with salt and pepper to taste. Bring the mixture to a simmer, then reduce the heat to low, cover, and let the greens cook for 45 minutes to 1 hour, stirring occasionally, until the collards are very tender.

For best results, use fresh, locally sourced collard greens. The long simmering process helps to tenderize the collards and infuse them with the aromatic spices. Serve gomen warm, alongside injera bread or other Ethiopian dishes.

Cooking Steps

meal preparation instructions guide

First, sauté the fragrant onions, garlic, and ginger in a bit of oil until they're nice and soft.

Then, toss in the vibrant collard greens and let them cook down until they're tender and wilted.

Finally, stir in the juicy tomatoes and warm spices, and let the flavors meld together as the mixture simmers.

Serve this hearty dish warm, with a bright squeeze of lemon on top.

Advertisement

Step 1. Sauté Aromatics in Oil

saut aromatics in oil

To start, heat a generous amount of oil in a large skillet over medium heat.

Once the oil is hot, add the diced onion, minced garlic, and grated ginger. Sauté these aromatic ingredients, stirring frequently, until they become fragrant and the onions turn slightly translucent, about 3-5 minutes.

Next, add the cumin, paprika, and cayenne pepper to the skillet. Stir everything together to coat the aromatics in the spices.

Let the spices toast for a minute or two, allowing their flavors to bloom and meld with the oil. Be careful not to let the garlic burn, as that can make it taste bitter.

Now, you're ready to add the chopped collard greens to the skillet. Toss the greens with the seasoned oil, making sure they're all evenly coated.

Sauté the collards, stirring occasionally, until they start to wilt and become tender, about 5-7 minutes. Adjust the heat as needed to prevent burning.

Advertisement

Step 2. Add Collard Greens to Sauté

add collard greens saut

Next, add the chopped collard greens to the sizzling skillet. Watch as they sizzle and dance in the fragrant oil, their vibrant green hues filling the air with earthy goodness.

Gently stir the greens, ensuring they're coated evenly with the aromatic mixture. As they cook, the collards will begin to wilt, their tough leaves softening and becoming more tender.

Keep a close eye, stirring occasionally, until the greens are just tender, about 5-7 minutes. You want them to still have a slight bite, not mushy or overcooked. The goal is to preserve the greens' wonderful flavor and texture.

Once they're perfectly cooked, remove the skillet from the heat. The collards are now ready to become the star of your delicious Ethiopian gomen dish. Get ready to savor the robust, satisfying taste of these flavorful greens!

Step 3. Add Tomatoes and Spices

incorporate tomatoes and spices

After the collard greens have finished sautéing, it's time to add the tomatoes and spices. First, grab a few juicy tomatoes and dice them up. These will add a delightful burst of freshness to the dish.

Next, it's time to sprinkle in the aromatic spices. A pinch of ground cumin, a dash of paprika, and a sprinkle of garlic powder will do the trick. Don't be shy – these spices are the key to unlocking the full flavor of the gomen.

Stir everything together gently, allowing the tomatoes to release their juices and the spices to meld with the collard greens. The vibrant colors and mouth-watering aromas will have your taste buds dancing with excitement.

Advertisement

Get ready for a flavor explosion that's sure to delight your senses!

With the tomatoes and spices added, your gomen is well on its way to becoming a true Ethiopian culinary masterpiece. Keep reading to learn the next steps in this flavorful journey.

Step 4. Simmer Until Collards Are Tender

simmer collards until tender

Gently simmer the collard greens, tomatoes, and spices until the leaves are tender and the flavors have melded together, about 15-20 minutes.

Stir the mixture occasionally to ensure even cooking. As the collards soften, you'll notice the vibrant colors come alive and the aroma of the spices fill your kitchen.

The longer you let the dish simmer, the more the flavors will deepen and meld, creating a truly delightful and authentic Ethiopian experience.

Once the collards are fork-tender, you're ready to serve. Spoon the gomen onto plates and enjoy this hearty, nutritious, and flavorful dish.

Advertisement

The collards will have a satisfying, velvety texture that pairs beautifully with the tomatoes and aromatic spices.

This is a dish that's sure to please the whole family, so gather around the table and savor the rich, comforting flavors of Ethiopia.

Step 5. Serve Warm, Garnished With Lemon

serve warm with lemon

Once the collards have reached the desired tenderness, it's time to serve this delightful dish. Gather your family and friends, and get ready to enjoy the vibrant flavors of this traditional Ethiopian delicacy.

Transfer the simmered collards to a serving dish, making sure to spoon the aromatic broth over the top. Serve the gomen warm, garnished with a generous squeeze of fresh lemon juice. The tart and tangy notes of the lemon will perfectly complement the rich, earthy flavors of the collards.

You can also offer some lemon wedges on the side, allowing your guests to add extra zing to their servings as desired. This dish is best enjoyed immediately, so don't hesitate to dig in!

The collards will be soft and tender, melting in your mouth with each bite. Pair it with some injera, the spongy Ethiopian flatbread, for a truly authentic and satisfying meal.

Advertisement

Savor the comforting and nourishing goodness of this beloved Ethiopian classic.

Final Thoughts

concluding reflections and insights

Ultimately, the gomen recipe is a testament to the rich culinary traditions of Ethiopia. This flavorful dish showcases the vibrancy and diversity of the country's cuisine. The blend of earthy collard greens, fragrant spices, and a touch of citrus creates a harmonious symphony of flavors that will delight your taste buds.

As you savor each bite, you'll be transported to the bustling markets and family gatherings that inspired this beloved recipe. The gomen's simplicity belies its depth of flavor, making it a comforting and accessible dish for all to enjoy.

Whether you're serving it as a side or the main attraction, the gomen will be a hit with your loved ones. Its vibrant green hue and irresistible aroma are sure to elicit smiles and eager anticipation.

Embrace the warmth and joy of this Ethiopian culinary treasure, and let it become a cherished part of your family's mealtime traditions.

Frequently Asked Questions

What Are the Health Benefits of Eating Gomen?

Eating gomen can provide you with a wealth of health benefits. It's packed with vitamins, minerals, and antioxidants that support immune function, heart health, and weight management. Plus, it's a low-calorie, high-fiber option that can aid digestion and promote overall wellbeing.

Advertisement

Is Gomen Suitable for Vegetarians or Vegans?

Yes, gomen is suitable for vegetarians and vegans as it's a plant-based dish made from collard greens, onions, garlic, and spices. It's a nutritious and flavorful option that aligns with vegetarian and vegan dietary requirements.

Can Gomen Be Made in Advance and Reheated?

Yes, you can make gomen in advance and reheat it. The dish holds up well to reheating, so you can prepare it ahead of time and enjoy it later. Just be sure to store it properly to preserve the flavors.

How Long Does Gomen Typically Take to Prepare?

Typically, preparing gomen takes around 30-45 minutes. You'll need to wash and chop the collard greens, sauté aromatics, and simmer the dish until the greens are tender. With a bit of prep work, you can have this flavorful dish on the table in no time.

What Are Some Common Side Dishes Served With Gomen?

Some common side dishes served with gomen include injera, a spongy flatbread, and other traditional Ethiopian dishes like shiro, a chickpea stew, and kitfo, a spiced minced raw beef. These accompaniments help balance the earthy flavors of the collard greens.

Advertisement

Continue Reading

Ethiopian Cuisine

Fasolia: Ethiopian Bean Stew With Deep Flavors

Tantalizing and aromatic, Fasolia is Ethiopia’s beloved bean stew that showcases its vibrant culinary heritage, with a recipe that has been perfected over centuries.

Published

on

ethiopian bean stew delight

Fasolia, Ethiopia's beloved bean stew, boasts rich, aromatic flavors perfected over centuries. You'll start by soaking dried beans overnight to soften them, then sauté fragrant onions, garlic, and spices like cumin and paprika in oil. Next, you'll add the beans, tomatoes, and more spices, simmering until the beans are tender. The result is a comforting, flavor-packed dish that showcases Ethiopia's vibrant culinary heritage. Serve fasolia with injera, rice, or couscous for a truly authentic experience. And if you're intrigued to learn more, keep reading to uncover the full recipe and cooking techniques.

Key Takeaways

  1. Fasolia is an Ethiopian bean dish with origins in the highland culinary traditions, featuring slow-simmered beans and regional variations.
  2. The dish is commonly served with accompaniments like injera, rice, or couscous, showcasing the vibrant and complex flavors of Ethiopian cuisine.
  3. The cooking process involves soaking dried beans, sautéing aromatics in oil, adding the beans, and simmering with tomatoes, garlic, and spices for a rich, flavorful base.
  4. The use of warm, earthy spices like cumin, coriander, and paprika, along with the long simmering time, contributes to the deep, complex flavors of the dish.
  5. Fasolia represents a culinary triumph of Ethiopian culture, with the dish's rich aromas and flavors creating a delightful dining experience and a lasting impression of traditional cooking mastery.

History

historical events and narratives

The origins of the Ethiopian bean stew can be traced back to the diverse culinary traditions of the Ethiopian highlands. For centuries, the people of this region have been perfecting the art of slow-simmered bean dishes, using a variety of beans and aromatic spices.

The stew, known as "fasolia," is a beloved staple in Ethiopian homes and restaurants. Over time, the recipe has evolved, with different regions and families adding their own unique twists. Some might include aromatic herbs, while others might experiment with different types of beans or a richer tomato-based broth.

What makes this stew so special is the depth of flavor it achieves through the slow cooking process. The beans become tender and infused with the fragrant spices, creating a comforting and satisfying dish.

Whether served with injera, the traditional Ethiopian flatbread, or alongside rice or couscous, fasolia is a true taste of the country's vibrant culinary heritage.

Cooking Steps

step by step cooking instructions

To begin, gather all the necessary ingredients. You'll need onions, garlic, tomatoes, spices like cumin and paprika, and of course, the star of the show – the beans! Don't forget the vegetable broth and a bit of olive oil too.

Now, let's get cooking! Start by sautéing the onions in the olive oil until they're soft and fragrant. Add the garlic and let it sizzle for a minute or two.

Advertisement

Next, toss in the tomatoes and let them simmer, breaking them down with a wooden spoon.

Time to introduce the spices! Sprinkle in the cumin, paprika, and any other seasonings you'd like. Stir everything together and let the flavors meld.

Finally, pour in the vegetable broth and add the beans. Let the stew simmer for about 20 minutes, allowing the beans to become nice and tender. Taste and adjust the seasoning as needed.

Serve this hearty Ethiopian bean stew over some fluffy injera bread or with a side of rice. Enjoy your delicious and authentic creation!

Step 1. Soak Beans Overnight, Drain

soak beans then drain

First, you'll want to soak the beans overnight. This helps them cook more quickly later on. Just place the dried beans in a large bowl and cover them with plenty of water.

They'll soak up a lot of liquid, so make sure there's at least 3 or 4 inches of water above the beans. Let them sit on the counter overnight, or for at least 8 hours.

Advertisement

In the morning, you'll see the beans have plumped up and the water level has gone down. Drain the beans in a colander, giving them a quick rinse. This gets rid of any dirt or debris.

Now your beans are ready for the next step in making this tasty Ethiopian stew. The soaking softens them up, so they'll cook faster and more evenly later on.

With this simple prep work done, you're on your way to a delicious, hearty meal!

Step 2. Sauté Aromatics in Oil

saut aromatics in oil

Now that you've prepared the beans, it's time to get the stew going. In a large pot or Dutch oven, heat a few tablespoons of oil over medium heat.

Once the oil is shimmering, add the chopped onions, garlic, and ginger. Sauté these aromatic ingredients, stirring frequently, until they're softened and fragrant, about 5-7 minutes.

Next, toss in the cumin, coriander, and paprika. These spices will infuse the oil with their warm, earthy flavors.

Advertisement

Stir everything together and let the spices toast for a minute or two, until you can smell their aroma wafting through the air. This step adds depth and complexity to the stew.

After the aromatics have developed, it's time to deglaze the pan. Pour in a splash of broth or water, scraping up any flavorful bits stuck to the bottom of the pot.

This will help build the foundation of the stew's rich, savory taste. Keep sautéing until the liquid has evaporated, about 2-3 minutes.

Step 3. Add the Beans

incorporate the beans

Finally, add the cooked beans to the pot. This is the moment you've been waiting for! Toss in those hearty, tender beans and watch them mingle with the aromatic flavors you've been building.

Gently stir the beans, making sure they're fully incorporated. You'll notice the stew thickening up as the beans release their starches. This is exactly what you want – a nice, chunky texture that'll stick to your spoon.

Don't be shy about adding a splash or two of the reserved bean cooking liquid. This flavorful liquid will help the beans seamlessly blend into the stew.

Advertisement

Taste as you go, adjusting the seasoning as needed. A pinch more salt, a sprinkle of spice – whatever your taste buds are craving.

At this point, your kitchen is likely filled with the most tantalizing aromas. Take a deep breath and let that Ethiopian magic wash over you.

You're well on your way to a belly-warming, soul-satisfying bowl of Fasolia!

Step 4. Add Tomatoes, Garlic, and Spices

incorporate tomatoes garlic spices

Next, add the chopped tomatoes, minced garlic, and aromatic spices to the pot.

You'll want to use ripe, juicy tomatoes to add a burst of flavor. Mince the garlic cloves so they'll blend right into the stew. As for the spices, go with a blend of warm, earthy seasonings like cumin, paprika, and turmeric. These will give the stew its signature Ethiopian flair.

Stir everything together and let it all mingle for a few minutes. The tomatoes will start to break down, releasing their juices, while the garlic and spices will fill your kitchen with an incredible aroma.

Advertisement

This is where the stew really starts to come together, with the beans, vegetables, and seasonings melding into a rich, flavorful base. Keep an eye on it, stirring occasionally, until the flavors have had a chance to develop.

Soon, you'll be ready to add the final touches that will make this Ethiopian bean stew absolutely irresistible.

Step 5. Simmer Until Beans Are Tender

simmer beans until tender

After adding the tomatoes, garlic, and spices, let the stew simmer gently until the beans are tender, about 20-30 minutes.

You'll know the beans are ready when they're soft and easily squished between your fingers. Gently stir the stew occasionally to prevent sticking or burning. The simmering process allows all the flavors to meld together, creating a rich, aromatic broth.

You'll be tempted to take a peek, but try to resist the urge – opening the lid too often can disrupt the simmering and slow down the cooking. As the minutes tick by, your kitchen will fill with the mouth-watering scent of this authentic Ethiopian dish.

Soon, you'll have a hearty, comforting stew that's perfect for sharing with family and friends. Don't be afraid to let it bubble away – the longer it simmers, the more intense the flavors will become.

Advertisement

Final Thoughts

concluding reflections and insights

The aromas and flavors of this Ethiopian bean stew linger, inviting you to savor each spoonful. The richness of the berbere spice blend, the creaminess of the beans, and the warmth of the stew come together in a truly delightful dish.

As you scoop up the final bites, you can't help but feel a sense of satisfaction and delight. This stew isn't just a meal; it's an experience. The layers of flavor, the soothing warmth, and the comfort it provides make it a dish you'll want to return to again and again.

Whether you're enjoying it on a cozy evening or serving it to your family, the Fasolia stew is sure to leave a lasting impression. As you savor the last few spoonfuls, you can't help but feel a sense of accomplishment.

You've mastered a traditional Ethiopian dish, bringing the rich culture and flavors of the country into your own home. This stew is a true culinary triumph, one that you'll be proud to share with your loved ones.

Frequently Asked Questions

What Is the Best Type of Beans to Use for Fasolia?

For the best type of beans to use, you'll want to go with a hearty, creamy bean like kidney, pinto, or cannellini. They'll hold their shape and soak up all the fantastic flavors in your dish.

Can Fasolia Be Made With Canned Beans?

You can certainly make fasolia with canned beans. While fresh or dried beans offer more depth of flavor, canned beans are a convenient option that can still result in a tasty dish.

Advertisement

How Long Does Fasolia Typically Take to Prepare?

Preparing this dish typically takes 30 to 60 minutes, depending on whether you're using canned beans or dried beans that need to be soaked and cooked. The exact time can vary based on the specific recipe and your cooking methods.

Can Fasolia Be Frozen and Reheated?

You can definitely freeze and reheat fasolia. The stew holds up well in the freezer, and reheats easily on the stovetop or in the microwave. Just be sure to let it thaw completely before reheating for best results.

What Are Some Common Accompaniments to Serve With Fasolia?

When serving this hearty bean dish, consider pairing it with some classic accompaniments like injera (Ethiopian flatbread), rice, or a side salad. You could also offer a dollop of yogurt or some crumbled feta cheese to complement the deep flavors.

Continue Reading

Affiliate Disclaimer
As an affiliate, we may earn a commission from qualifying purchases. We get commissions for purchases made through links on this website from Amazon and other third parties.

Advertisement

Vetted

top local car washes top local car washes
Vetted2 months ago

14 Best Car Washes Near You for a Sparkling Clean Ride

I discovered the 14 best car washes near you that promise a sparkling clean ride, and you won't want to...

top mops for 2024 top mops for 2024
Vetted2 months ago

The 15 Best Mops of 2025 – Your Ultimate Guide to a Spotless Home

Find the perfect mop for your cleaning needs in 2025, and discover how these top choices can revolutionize your home...

top women s fragrances 2024 top women s fragrances 2024
Vetted2 months ago

15 Best Perfumes for Women in 2025 – A Fragrance Guide You Can’t Miss

Keen to discover the top 15 perfumes for women in 2025? Uncover unique scents that will elevate your fragrance game!

top local bars guide top local bars guide
Vetted2 months ago

14 Best Bars Near You for an Unforgettable Night Out

Looking for the perfect bar to elevate your night out? Discover the 14 best spots that promise unforgettable experiences!

luxurious beard oil selection luxurious beard oil selection
Vetted2 months ago

15 Best Beard Oils for a Luxurious Grooming Experience in 2025

Shop the 15 best beard oils for a luxurious grooming experience in 2025 and discover which ones will elevate your...

top college laptops 2024 top college laptops 2024
Vetted2 months ago

15 Best College Laptops of 2025: The Ultimate Guide for Students

With our guide to the 15 best college laptops of 2025, discover which powerful models will elevate your academic experience...

waterproof mascaras for tears waterproof mascaras for tears
Vetted2 months ago

15 Best Waterproof Mascaras That Will Survive Any Tear-Jerker

Outstanding waterproof mascaras await to keep your lashes flawless through any emotional moment; discover which ones made the top 15...

top flavorful disposable vapes top flavorful disposable vapes
Vetted2 months ago

15 Best Disposable Vapes of 2025: Top Picks for Flavor and Convenience

Prepare to discover the 15 best disposable vapes of 2025 that blend exceptional flavor and convenience, but which ones truly...

refreshing lunch salad ideas refreshing lunch salad ideas
Vetted2 months ago

15 Best Salads Near You That Will Freshen Up Your Lunch Routine

Transform your lunch with the 15 best salads nearby that will tantalize your taste buds and leave you craving more...

top convertible car seats top convertible car seats
Vetted2 months ago

15 Best Convertible Car Seats of 2025 – Safety and Comfort for Your Little One

Get ready to discover the top 15 convertible car seats of 2025 that blend safety and comfort—find out which models...

delicious fast food breakfast delicious fast food breakfast
Vetted2 months ago

15 Best Fast Food Breakfast Options That Will Make Your Mornings Delicious

Uncover the 15 best fast food breakfast options that will transform your mornings into a delicious experience you won't want...

stylish contacts for vision stylish contacts for vision
Vetted2 months ago

14 Best America’s Contacts for Clear Vision and Style

Browse through the 14 best contact lenses in America for clear vision and style, and discover which one perfectly complements...

Trending