Connect with us

Vietnamese Cuisine

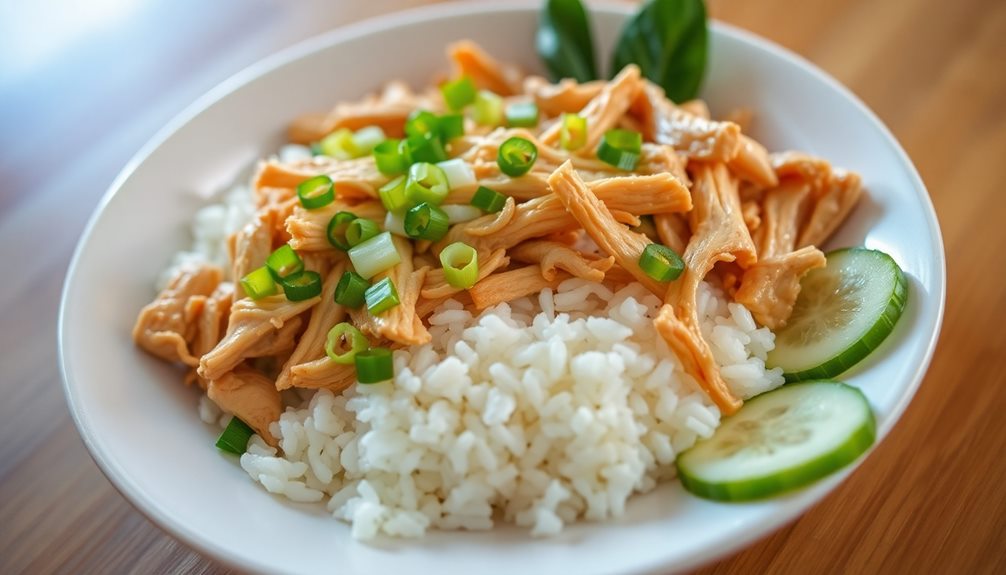
Cơm Gà: The Vietnamese Chicken Rice Dish You Must Try

Brimming with the aromatic flavors of lemongrass, ginger, and tender poached chicken, Cơm Gà is a Vietnamese culinary treasure waiting to be discovered.

Published

on

vietnamese chicken rice delight

Cơm Gà, the Vietnamese chicken rice dish, is a must-try culinary delight! Its origins trace back to Southeast Asia, with a unique twist from Vietnamese cooks. The key ingredients – poached chicken, fragrant rice, and fresh herbs – create a harmonious blend of flavors and textures. Start by rinsing the chicken, then marinate it in a savory mix of lemongrass, ginger, and spices. Simmer the chicken until tender, then fluff the rice and assemble the dish. Enjoy this beloved national dish of Vietnam, and get ready to discover even more about its captivating history and authentic preparation.

Key Takeaways

Key points:

  • Originated from traditional Southeast Asian culinary influences, incorporating Chinese and Malay cuisines.
  • Unique Vietnamese touch enhances the fragrance and flavor, making it a beloved national dish.
  • Comprises poached chicken and fragrant rice, creating a distinct and harmonious taste.
  • Precise cooking techniques, such as marinating the chicken and fluffing the rice, are crucial for authenticity.
  • Easy to prepare at home, allowing home cooks to enjoy the authentic flavors of this Vietnamese specialty.

History

historical knowledge and events

The origins of the Vietnamese chicken rice dish can be traced back to the culinary traditions of Southeast Asia. It's believed that this beloved dish evolved from the rice and chicken staples of the region, blending Chinese and Malay influences.

Over time, Vietnamese cooks added their own unique twist, creating the fragrant and flavorful dish we know today.

The key to the dish's distinctive taste lies in the careful balance of ingredients. Tender chicken is poached in a broth infused with aromatic spices, then served over fluffy, fragrant rice.

The rice absorbs the rich, savory flavors, while the chicken remains moist and juicy. Garnishes like sliced cucumber, fresh herbs, and a tangy dipping sauce complete the dish, creating a harmonious symphony of textures and tastes.

Advertisement

What started as a humble peasant meal has now become a beloved national dish, enjoyed by people from all walks of life in Vietnam.

The enduring popularity of this chicken rice dish is a testament to the ingenuity and culinary prowess of the Vietnamese people.

Cooking Steps
step by step cooking instructions

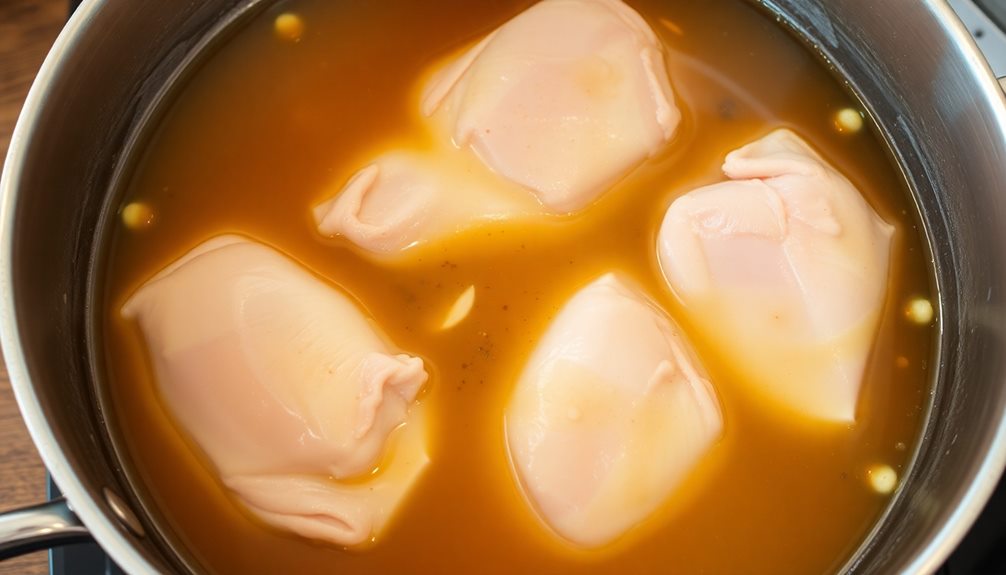
Preparing the Vietnamese chicken rice dish is a straightforward process. First, you'll need to gather your ingredients – tender chicken, fragrant jasmine rice, aromatic herbs, and vibrant vegetables.

Start by simmering the chicken in a flavorful broth until it's cooked through and falling off the bone. Then, use the same broth to cook the rice, infusing it with rich, savory notes.

While the rice is cooking, chop up your vegetables – crisp lettuce, juicy tomatoes, and crunchy cucumbers. Tear the fresh herbs, like Vietnamese mint and cilantro, to release their bold, refreshing flavors.

When the rice is fluffy and the chicken is tender, it's time to assemble your dish. Scoop the rice into a bowl, top it with the shredded chicken, and arrange the colorful vegetables and herbs around the edges.

Advertisement

Step 1. Rinse Chicken Thoroughly in Water

rinse chicken with water

Before you begin cooking the chicken, it's important to ensure it's thoroughly rinsed under cool running water. This step helps remove any dirt, debris, or bacteria that may be on the surface of the meat. Carefully inspect each piece, paying close attention to the nooks and crannies, to make sure it's completely clean.

Once the chicken is rinsed, you'll want to pat it dry with some paper towels. This will help the meat brown and crisp up nicely when you cook it.

It's also a good idea to give the cutting board a quick rinse and wipe down before placing the chicken on it. This helps prevent the spread of any lingering germs.

With the chicken prepped and ready to go, you can move on to the next step in the cooking process. Get excited, because the amazing flavors of this Vietnamese dish are about to come to life!

Step 2. Marinate Chicken in Spices
marinate chicken with spices

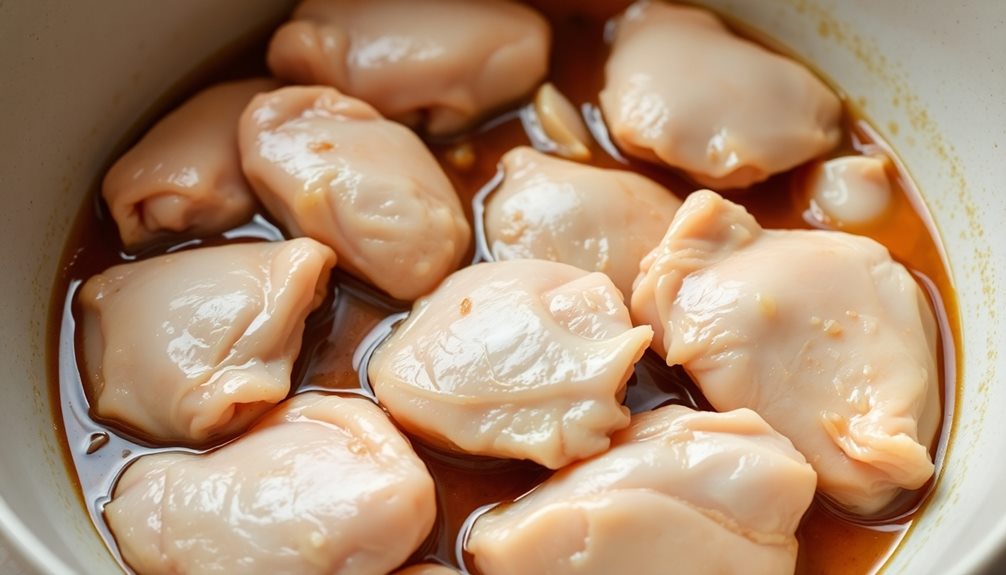
With the chicken prepped and ready, let's move on to marinating it in a flavorful blend of spices. In a large bowl, combine the chicken with some fragrant lemongrass, freshly grated ginger, and a pinch of ground turmeric.

These aromatic ingredients will infuse the meat with a delightful aroma and vibrant color. Next, drizzle in a few tablespoons of fish sauce and a touch of brown sugar. The fish sauce will lend a savory umami note, while the sugar will help balance the flavors and create a nice caramelized crust when the chicken is cooked.

Use your hands to gently massage the spices into the chicken, ensuring every nook and cranny is coated. Cover the bowl and let the chicken marinate in the fridge for at least 30 minutes, or up to 4 hours if you have the time.

Advertisement

This allows the flavors to really penetrate the meat, making it even more delectable.

Step 3. Bring Chicken and Marinade to Boil
boil chicken with marinade

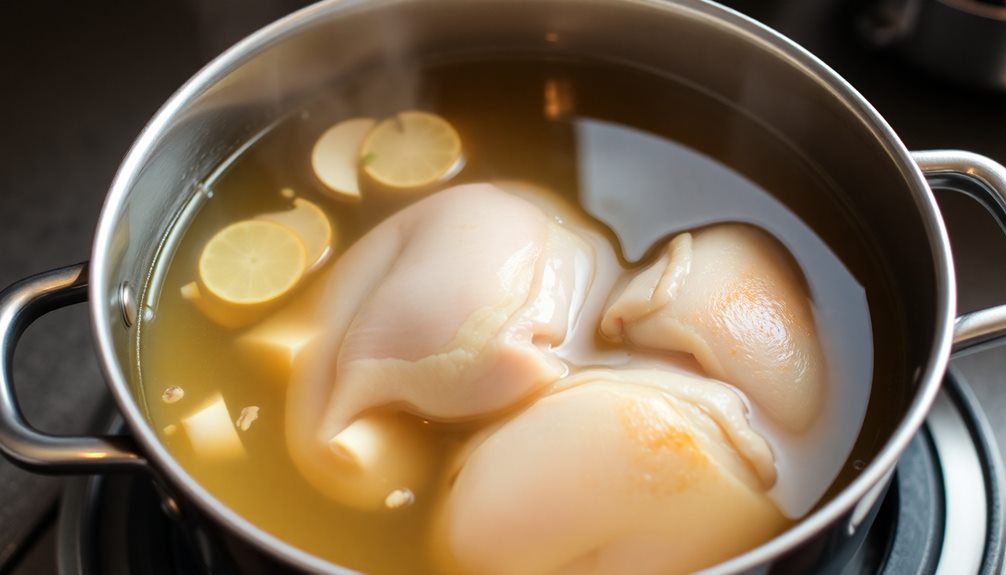
Now that the chicken has had a chance to soak up all those lovely flavors, it's time to get cooking. Grab the marinated chicken and add it to a large pot. Pour in the marinade, making sure the chicken is completely submerged.

Bring the mixture to a boil over medium-high heat. Once it reaches a rolling boil, reduce the heat to low and let it simmer for about 20 minutes. This will allow the chicken to cook through and the flavors to meld together.

As the chicken simmers, you'll notice the liquid starting to reduce and thicken. This is exactly what you want! The sauce will become rich and aromatic, infusing the chicken with an incredible depth of flavor.

Be sure to stir the pot occasionally to prevent any sticking or burning.

When the chicken is cooked through and the sauce has thickened to your liking, you're ready for the next step. Carefully remove the chicken from the pot and set it aside.

Advertisement

Get ready to assemble your delicious Vietnamese chicken rice dish!

Step 4. Cook Chicken Until Tender

cook chicken until tender

Once the chicken has finished simmering, it's time to ensure it's cooked through and tender.

You'll want to use a pair of tongs or a fork to gently remove the chicken from the pot. Be careful, as the chicken will be hot! Transfer the chicken to a cutting board and let it rest for a few minutes. This resting period allows the juices to redistribute throughout the meat, making it even more tender and flavorful.

Now, take a sharp knife and start slicing the chicken into bite-sized pieces. You can slice it crosswise or lengthwise, whatever you prefer.

As you slice, keep an eye out for any signs that the chicken isn't fully cooked, like pinkish-red areas. If you spot any, simply return the chicken to the pot and let it simmer a little longer until it's completely white all the way through.

Once the chicken is nicely sliced and cooked to perfection, it's ready to be added to your Cơm Gà dish.

Advertisement

Get ready to enjoy the delicious flavors of this Vietnamese classic!

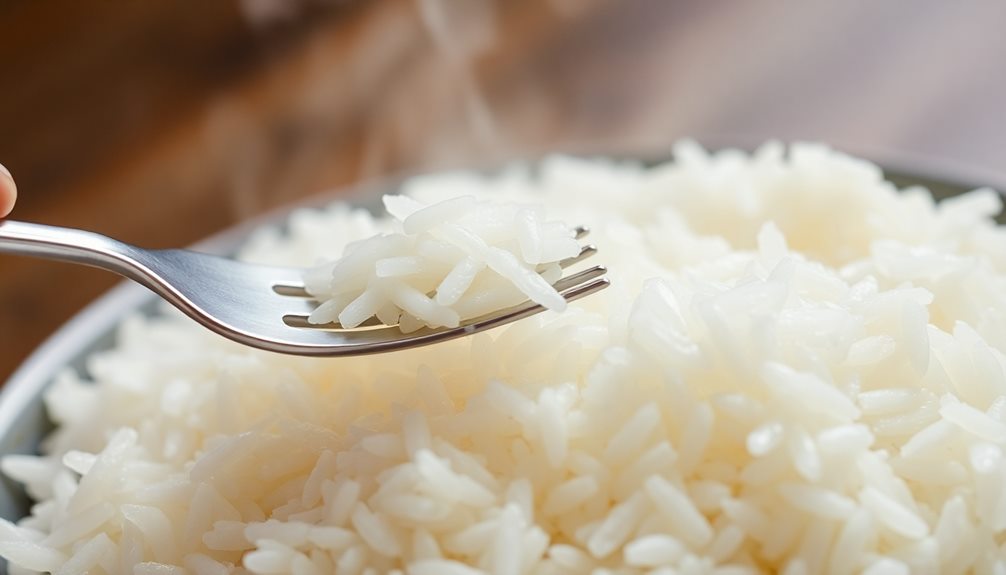
Step 5. Fluff Rice With Fork
fluff rice using fork

After the chicken has been cooked and sliced, you'll want to fluff the rice with a fork. This step is crucial for achieving the perfect texture.

Simply take a fork and gently run it through the cooked rice, separating the grains and creating a light, fluffy mound. Be careful not to overmix or press down on the rice, as this can make it sticky and clumpy.

The key is to use a gentle, lifting motion, allowing the rice to aerate and become light and airy. This will create the ideal base for your delicious Vietnamese chicken rice dish.

Once the rice is perfectly fluffed, you can begin assembling your meal, layering the tender, flavorful chicken on top and adding any desired garnishes or sauces.

The combination of the soft, fluffy rice and the juicy, seasoned chicken is simply divine. Get ready to enjoy a truly authentic taste of Vietnam!

Advertisement

Final Thoughts

concluding reflections and insights

As you've explored the flavors and techniques of this delightful Vietnamese chicken rice dish, you may find yourself eager to recreate it in your own kitchen. The final thoughts are clear – this is a dish worth savoring and sharing.

The fragrant rice, the tender chicken, and the vibrant array of toppings come together in a symphony of taste and texture that will transport you to the bustling streets of Vietnam.

With a little practice, you'll be able to master the art of fluffing the rice and preparing the perfectly cooked chicken. The best part? This dish is surprisingly easy to make at home, allowing you to enjoy the authentic flavors whenever the craving strikes.

So, gather your ingredients, fire up the stove, and get ready to impress your friends and family with your culinary prowess.

Cơm gà, the Vietnamese chicken rice dish, is a true delight that deserves a permanent place in your recipe repertoire.

Frequently Asked Questions

What Is the Origin of the Name "CơM Gà"?

You'll find that the name "cơm gà" originates from the Vietnamese language, where "cơm" means "rice" and "gà" means "chicken," reflecting the dish's key ingredients of steamed rice and chicken.

Advertisement

How Long Does It Typically Take to Prepare CơM Gà?

Preparing cơm gà typically takes around an hour. You'll need to simmer the chicken, cook the rice, and assemble the dish with the garnishes. With some practice, you'll get the timing down and have a delicious meal in no time.

What Are the Common Variations of the CơM Gà Recipe?

The common variations of the cơm gà recipe include using different cuts of chicken, adding additional vegetables like cabbage or carrots, and experimenting with the seasoning and cooking methods to suit your personal taste preferences.

Can CơM Gà Be Served at Any Time of the Day?

Yes, you can enjoy cơm gà at any time of the day. It's a versatile dish that works well for breakfast, lunch, or dinner, depending on your preference and appetite.

Is CơM Gà a Healthy Dish to Incorporate Into a Diet?

Yes, cơm gà can be a healthy addition to your diet. It's a nutrient-dense meal that provides protein, carbohydrates, and essential vitamins and minerals. However, be mindful of portion sizes and how it's prepared to maintain a balanced, healthy intake.
Advertisement
Advertisement

Vietnamese Cuisine

Chả Cá Lã Vọng: The Vietnamese Fish Dish You Must Try

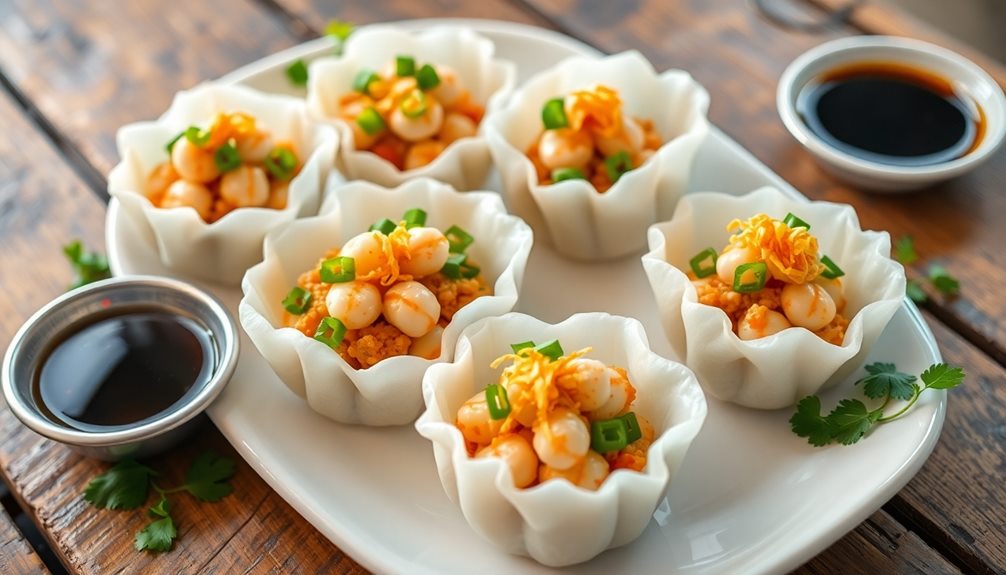
Nestled in the vibrant tapestry of Vietnamese culinary heritage, “Chả Cá Lã Vọng” beckons with its captivating blend of crispy fish, aromatic lemongrass, and a promise of culinary enchantment.

Published

on

vietnamese fish dish delight

Prepare to embark on a captivating culinary journey with Chả Cá Lã Vọng, a beloved Vietnamese fish dish that'll transport your taste buds to the sun-kissed coastlines. Originating in late 19th century Hanoi, this mouthwatering creation showcases the ingenuity and traditions of Vietnam's coastal communities. Crispy fish fillets mingle with aromatic lemongrass, ginger, and garlic, creating a symphony of flavors that'll delight your senses. Served alongside fluffy rice or springy noodles, this dish encourages gathering with loved ones, symbolizing the warmth and hospitality at the heart of Vietnamese cuisine. Get ready to discover why this fish dish is a must-try for any food enthusiast.

Key Takeaways

  • Chả Cá Lã Vọng is a beloved Vietnamese grilled fish dish with origins in late 19th century Hanoi, reflecting the nation's rich culinary heritage and coastal traditions.
  • The dish combines fragrant lemongrass, ginger, and fresh white fish fillets, resulting in a captivating fusion of flavors and textures.
  • Sharing Chả Cá Lã Vọng is a cherished social tradition that encourages gatherings among families and friends, symbolizing hospitality and community spirit.
  • This versatile dish can be enjoyed for both weekend feasts and casual meals, appealing to both adventurous and traditional palates.
  • Serving Chả Cá Lã Vọng provides a memorable dining experience, offering a sensory journey through the vibrant colors, inviting aroma, and delectable flavors of Vietnamese cuisine.

History

historical events and narratives

The history of Vietnamese fish dishes can be traced back to the country's coastal geography and reliance on seafood as a dietary staple. For generations, coastal communities have perfected the art of preparing delectable fish-based meals, infusing them with the vibrant flavors of Vietnamese cuisine.

One such iconic dish is the Chả Cá Lã Vọng, a beloved specialty from Hanoi.

This dish's origins can be traced to the late 19th century, when a family in the Đồng Xuân market began serving up their unique take on grilled fish. The secret lies in the marinade, a tantalizing blend of turmeric, dill, and a touch of fish sauce, which imparts a depth of flavor that's simply irresistible.

Over time, the dish gained a devoted following, becoming a must-try for both locals and visitors alike.

Today, the Chả Cá Lã Vọng remains a beloved part of Vietnam's culinary heritage, showcasing the country's rich coastal traditions and the ingenuity of its people.

Advertisement

Recipe

culinary instructions and ingredients

Vietnamese Fish Dish

Recipe

Vietnamese cuisine is renowned for its delicate balance of flavors and fresh ingredients. This traditional fish dish is a prime example of the country's culinary artistry. The combination of tender white fish, aromatic herbs, and a nuanced sauce creates a harmonious and deeply satisfying meal.

The key to this dish's success lies in the careful selection and preparation of the ingredients. The fish should be fresh, flaky, and of high quality, while the herbs and spices must be perfectly balanced to enhance the natural flavors of the seafood.

  • White fish fillets (such as cod, tilapia, or snapper)
  • Lemongrass, finely chopped
  • Garlic, minced
  • Ginger, grated
  • Fish sauce
  • Lime juice
  • Chili peppers, sliced (optional)
  • Cilantro, chopped
  • Mint leaves
  • Rice or vermicelli noodles

To prepare the dish, gently poach the fish fillets in a fragrant broth made from the lemongrass, garlic, ginger, fish sauce, and lime juice. Serve the fish immediately, garnished with the sliced chili peppers, cilantro, and mint leaves.

Accompany the dish with steamed rice or vermicelli noodles to soak up the delicious sauce.

When cooking this Vietnamese fish dish, be mindful of not overcooking the fish, as it can easily become tough and dry. Additionally, experiment with the spice level by adjusting the amount of chili peppers used, as the heat can vary depending on personal preference.

Advertisement

Enjoy this authentic and flavorful Vietnamese delicacy.

Cooking Steps

recipe preparation instructions

Start by cleaning and scaling the fish – you don't want any stray scales in your dish!

Next, marinate the fish in a mix of fragrant spices to really make those flavors pop.

Then, fry the fish in hot oil until it's golden brown and crispy.

Finish by garnishing with fresh herbs for a vibrant, mouthwatering presentation.

Serve this Vietnamese fish dish hot with a side of steamed rice – a truly delightful meal!

Advertisement

Step 1. Clean and Scale Fish

prepare fish for cooking

Before you can begin cooking the delectable Vietnamese fish dish, it's important to properly clean and scale the fish. First, rinse the fish under cool running water to remove any dirt or debris.

Using a sharp knife, gently scrape the scales off the skin, working from the tail towards the head. Be careful not to cut the flesh. Once the scales are removed, use a pair of sharp kitchen shears to snip off the fins and tail.

Next, make a small incision along the belly of the fish to remove the internal organs. Rinse the cavity thoroughly under water to wash away any blood or impurities.

Pat the fish dry with paper towels, ensuring it's completely clean and ready for cooking. With the hard work done, you can now move on to the exciting part – preparing the flavorful marinade and cooking the fish to perfection.

Get ready to savor the authentic taste of this beloved Vietnamese dish!

Step 2. Marinate Fish in Spices

marinate fish with spices

To begin, gather a mix of aromatic spices and herbs that will infuse the fish with bold Vietnamese flavors. Lemongrass, ginger, garlic, and chili peppers are classic choices. Chop these ingredients into a flavorful paste, then rub it all over the clean and scaled fish fillets.

Next, whisk together a marinade of fish sauce, lime juice, brown sugar, and a splash of water. Pour this over the seasoned fish, ensuring every nook and cranny is coated. Cover the dish and let it sit in the fridge for 30 minutes to an hour, allowing the flavors to meld.

Advertisement

When ready to cook, heat a bit of oil in a skillet over medium-high heat. Gently place the marinated fish fillets in the pan and sear for 3-4 minutes per side, until they develop a nice golden-brown crust.

Serve the fragrant, spice-rubbed fish immediately, garnished with fresh herbs and a squeeze of lime. Enjoy the perfect balance of sweet, sour, and savory in every bite!

Step 3. Fry Fish in Hot Oil

fry fish in oil

After marinating the fish in the aromatic spice mixture, it's time to bring the flavors to life through frying.

Grab your trusty skillet and heat up some oil over medium-high heat. When the oil starts to shimmer, it's ready for action! Carefully place the marinated fish fillets into the hot oil, making sure not to crowd the pan.

Now, get ready for the sizzle! As the fish hits the oil, it'll create a beautiful golden-brown crust, locking in all that delicious flavor. Gently flip the fillets after a couple of minutes, cooking until they're perfectly crispy on both sides. The aroma alone will have your mouth watering!

Once the fish is cooked through, transfer it to a plate lined with paper towels to drain off any excess oil.

Advertisement

Serve it up hot and enjoy the perfect balance of tender, flaky fish and crispy, flavor-packed exterior. This Vietnamese dish is sure to delight your taste buds and transport you straight to the vibrant street markets of Vietnam.

Step 4. Garnish With Fresh Herbs

garnish with fresh herbs

First, gather a handful of fresh Vietnamese herbs, such as cilantro, mint, and Thai basil. These vibrant greens will add a burst of flavor and a beautiful pop of color to your dish.

Gently wash and pat dry the herbs, then tear or chop them into bite-sized pieces.

Next, sprinkle the chopped herbs over the fried fish, making sure to cover the entire surface. The fragrant herbs will complement the savory flavors of the fish, creating a harmonious blend of tastes and textures.

Don't be afraid to get a little creative! You can arrange the herbs in a decorative pattern, or try mixing and matching different varieties for a visually stunning presentation.

The key is to let the fresh, lively herbs shine and enhance the overall appeal of your Vietnamese fish dish.

Advertisement

With the final touch of the herbal garnish, your "Chả Cá Lã Vọng" is now complete and ready to be savored. Enjoy the vibrant, flavorful combination of crispy fried fish and aromatic herbs!

Step 5. Serve Hot With Steamed Rice

serve hot with rice

Serve the Vietnamese fish dish piping hot, accompanied by a bed of fluffy, freshly steamed rice. The aroma of the spices and the sizzle of the fish will fill the air, enticing your senses.

Scoop up a generous portion of the flavorful fish, making sure to capture all the delectable sauce. Savor each bite, letting the tender, flaky fish melt in your mouth. The steamed rice provides the perfect canvas to soak up every last drop of the aromatic broth.

Garnish the dish with a sprinkle of chopped green onions and cilantro, adding a vibrant pop of color and a burst of fresh flavor.

The combination of the hot, savory fish and the fluffy, comforting rice creates a harmonious balance that will transport your taste buds straight to the heart of Vietnam. Enjoy this authentic and satisfying meal with your loved ones, and let the flavors transport you to a new culinary adventure.

Final Thoughts

concluding reflections and insights

The Vietnamese fish dish offers a captivating fusion of flavors that transports your taste buds on a culinary journey. From the fragrant lemongrass and ginger to the succulent fish and crunchy vegetables, every bite is a delightful discovery.

What makes this dish truly special is the way it brings people together. Sharing a steaming plate of Chả Cá Lã Vọng is a beloved tradition, where families and friends gather to savor the flavors and create cherished memories.

Advertisement

The vibrant colors and inviting aroma set the stage for a memorable dining experience.

Whether you're enjoying it as a weekend feast or incorporating it into your weekly meal rotation, this Vietnamese fish dish is sure to become a new favorite.

Frequently Asked Questions

What Are the Main Ingredients in Chả Cá Lã VọNg?

The main ingredients in chả cá lã vọng are fish, turmeric, dill, peanuts, and vermicelli noodles. You'll find these flavorful components come together to create a truly delightful and authentic Vietnamese dish.

How Long Does It Take to Prepare Chả Cá Lã VọNg?

Preparing chả cá lã vọng takes some time, but it's well worth the effort. You'll need to allow about an hour and a half to properly marinate the fish and assemble all the components.

Can Chả Cá Lã VọNg Be Made Vegetarian?

While chả cá là vọng is traditionally a fish dish, you can make a vegetarian version by substituting the fish with plant-based proteins like tofu or mushrooms. The flavors will still be delicious without the seafood.

Advertisement

How Is Chả Cá Lã VọNg Typically Served?

Typically, chả cá là vọng is served with a variety of fresh herbs, rice noodles, and dipping sauces. You'll often find it presented on a sizzling platter, allowing you to assemble your own flavorful bites.

What Are the Traditional Accompaniments for Chả Cá Lã VọNg?

Chả cá lã vọng is traditionally served with rice noodles, fresh herbs like dill and mint, and a dipping sauce made with fish sauce, lime juice, and chili peppers. Don't forget to add these tasty accompaniments to your meal!

Continue Reading

Vietnamese Cuisine

Canh Khoai Mỡ: Vietnamese Yam Soup That’s Both Nutty and Creamy

Brimming with the rich, creamy texture of Vietnamese yam and aromatic spices, this beloved soup offers a comforting and satisfying experience.

Published

on

nutty creamy vietnamese yam soup

Canh khoai mì, the Vietnamese yam soup, is a comforting delight that's been savored for centuries. Its nutty, creamy texture comes from the humble yet versatile yam, a staple in Vietnamese cuisine. The soup's vibrant hue and aromatic broth make it a visual treat, perfect for sharing with loved ones. You'll find the yams complement the aromatic spices beautifully, creating a balanced, satisfying flavor. Enjoy it piping hot, perhaps with a dash of chili sauce for an extra kick. Ready to uncover more about this beloved Vietnamese classic? Let's dive in!

Key Takeaways

  • Canh khoai mì is a traditional Vietnamese soup made with Vietnamese yams, known for its nutty and creamy texture.
  • The dish features a savory broth, often enhanced with coconut milk for a richer consistency.
  • Yams are a nutritious main ingredient, providing dietary fiber, essential vitamins, and complex carbohydrates.
  • The soup is versatile, suitable for various occasions, and often complemented with herbs and spices.
  • Canh khoai mì is a comforting and flavorful dish that has been a staple in Vietnamese cuisine for centuries.

History

past events and narratives

According to historical accounts, Vietnamese yam soup, or canh khoai mi, has been a beloved dish in Vietnamese cuisine for centuries. This nourishing and comforting soup has its roots deeply woven into the country's culinary traditions, with records dating back to the 15th century.

Over the years, it's become a staple in households across Vietnam, enjoyed for its unique blend of flavors and its ability to warm the soul.

The key ingredient, the yam, is a starchy root vegetable that's been a dietary staple in Vietnam for generations. Yams are believed to have been introduced to the region centuries ago, and they've since become an integral part of Vietnamese cooking.

In fact, the Vietnamese word for yam, "khoai mi," is derived from the Chinese term for this versatile vegetable.

As Vietnamese culture and traditions have evolved, so too has the recipe for this beloved soup. While the core ingredients remain the same, creative cooks have put their own spin on canh khoai mi, making it a truly dynamic and ever-evolving dish.

Advertisement

Recipe

cooking instructions and ingredients

Vietnamese Yam Soup is a comforting and flavorful dish that showcases the natural sweetness of yams. This soup is a staple in Vietnamese cuisine and is often enjoyed as a warming meal on chilly days.

The key to a delicious Vietnamese Yam Soup is the blend of aromatic ingredients that create a depth of flavor. The combination of fragrant spices, fresh herbs, and tender yams results in a dish that's both nourishing and satisfying.

  • 2 lbs yams, peeled and cut into 1-inch cubes
  • 1 onion, diced
  • 3 cloves garlic, minced
  • 1 tablespoon ginger, grated
  • 1 teaspoon ground coriander
  • 1 teaspoon ground cumin
  • 6 cups vegetable or chicken broth
  • 2 tablespoons fish sauce
  • 1 tablespoon lime juice
  • Salt and pepper to taste
  • Chopped cilantro for garnish

In a large pot, sauté the onion, garlic, and ginger in a bit of oil until fragrant and softened. Add the ground coriander and cumin, and cook for an additional minute to bloom the spices.

Pour in the broth and add the yam cubes. Bring the soup to a boil, then reduce the heat and simmer for 20-25 minutes, or until the yams are tender.

Once the yams are cooked through, stir in the fish sauce and lime juice. Season with salt and pepper to taste.

Ladle the soup into bowls and garnish with fresh cilantro. This Vietnamese Yam Soup is best served hot, accompanied by crusty bread or steamed rice for a satisfying and nourishing meal.

Cooking Steps

prepare cook serve enjoy

Peel the yams and cut them into chunks.

Next, you'll sauté the onion and garlic until fragrant.

Advertisement

Then, add the yams and stock, and let it simmer until the yams are tender.

Step 1. Peel and Cut Yams Into Chunks

peel cut yams chunks

Begin by slicing off the ends of the yams. This will create a flat surface to work with.

Next, use a sharp knife or a vegetable peeler to carefully remove the skin from the yams. Be gentle, as the yams can be quite tough.

Once the yams are peeled, it's time to cut them into chunks. Aim for pieces that are about 1-inch cubes. This will help them cook evenly in the soup. As you cut, try to keep the chunks a consistent size for the best results.

Rinse the yam chunks under cool water to remove any dirt or debris. Pat them dry with a paper towel or clean kitchen towel.

Now, you're ready to add the yams to the soup pot and let them simmer until tender. The chunks will take on a soft, creamy texture, perfect for this comforting Vietnamese yam soup.

Advertisement

Step 2. Sauté Onion and Garlic

saut onion and garlic

With the yams prepped, it's time to start building the flavor base for the soup. In a large pot, drizzle in a bit of oil and place it over medium heat. Once the oil is shimmering, add the diced onion.

Sauté the onion, stirring occasionally, until it's soft and translucent, about 5 minutes.

Next, toss in the minced garlic. Stir it in and let the garlic sizzle for about 1 minute until it's fragrant and golden. Be careful not to let the garlic burn, as that can make it taste bitter.

The aromatic onion and garlic will create a delightful foundation for the rest of the soup. Their savory flavors will infuse the broth and complement the sweet yams perfectly.

With this flavor base ready, you can now add the remaining ingredients to the pot and let the soup simmer to perfection.

Step 3. Add Yams and Stock

incorporate yams and stock

Add the prepped yams to the aromatic onion and garlic. They'll soak up all that lovely flavor!

To enhance the cozy atmosphere while you cook, consider setting the mood with a stylish ambiance through soft lighting or a calming scent.

Advertisement

Next, pour in the chicken or veggie stock and let it all simmer away. The yams will get nice and tender, and the broth will become rich and creamy.

As the soup bubbles, you can't help but breathe in that cozy, comforting aroma. It's like a warm hug on a chilly day.

The yams will start to break down, thickening the soup and making it oh-so-satisfying.

Be sure to taste and adjust the seasoning as needed – a pinch of salt here, a dash of pepper there. You want to find that perfect balance of flavors.

Once the yams are fork-tender, you're ready to ladle up bowls of this nourishing Vietnamese delight. Get ready for oohs and aahs all around!

Advertisement

Step 4. Simmer Until Yams Are Tender

simmer yams until tender

Once the yams and stock are added, let the soup simmer gently until the yams become fork-tender, about 20-25 minutes. You'll know they're ready when you can easily pierce them with a fork.

As the soup simmers, the yams will soften and release their natural sweetness, creating a wonderfully creamy and comforting texture.

Stir the pot occasionally to ensure even cooking. The longer you simmer, the more the flavors will meld together. You might even notice the broth taking on a slightly nutty aroma as the yams break down.

Feel free to adjust the heat as needed to maintain a gentle simmer – you don't want the soup to boil vigorously, or the yams may become mushy.

When the yams are tender, your Vietnamese yam soup is ready for the next step. Get ready to enjoy the delightful balance of earthy, sweet, and savory flavors in every spoonful!

Step 5. Puree Soup Until Smooth

smooth puree soup preparation

The yams have now softened to a fork-tender consistency. Time to puree the soup until it's silky-smooth!

Carefully transfer the simmered yams and their cooking liquid to a blender. Blend on high speed until the mixture is completely smooth and creamy. This may take a minute or two, so be patient and let the blender do its work.

Advertisement

Once blended, return the pureed soup to the pot. Give it a gentle stir to incorporate any remaining bits.

Taste and adjust the seasoning as needed – you may want to add a pinch more salt or pepper to really make the flavors pop.

The soup should now have a luxuriously velvety texture.

Ladling it into bowls, you'll notice how the pureed yams create a wonderfully thick and comforting base.

Get ready to savor the nutty, sweet aroma and flavor in every spoonful!

Advertisement

Final Thoughts

concluding insights and reflections

With the nourishing Vietnamese Yam Soup now complete, you can confidently serve it to your family and friends. This vibrant dish is sure to delight all who try it. The beautiful orange hue and creamy texture make it a feast for the senses.

The versatility of this soup is truly impressive. It can be enjoyed as a comforting main course or a light and refreshing appetizer. The nutty flavor of the yams pairs beautifully with the aromatic broth, creating a harmonious balance of tastes.

Whether you're sharing this soup at a festive gathering or enjoying a quiet meal at home, it's sure to bring a smile to everyone's face. The nourishing ingredients and soothing warmth will leave your loved ones feeling satisfied and content.

Embrace the joy of this Vietnamese culinary treasure and savor every spoonful.

Frequently Asked Questions

What Is the Nutritional Value of Vietnamese Yam Soup?

Vietnamese yam soup provides a nutritious and filling meal. It's high in carbohydrates from the yams, and contains protein from ingredients like shrimp or pork. The soup also offers essential vitamins and minerals for a balanced diet.

Can I Substitute Ingredients in the Recipe?

You can certainly substitute ingredients in the recipe to suit your taste preferences or dietary needs. Just be mindful of how the new ingredients will affect the overall flavor and texture of the dish.

Advertisement

How Long Does the Soup Keep in the Fridge?

The soup should keep in the fridge for 3-4 days. Make sure to store it in an airtight container, and it'll retain its flavor and texture. Reheat it gently when you're ready to enjoy it again.

Is This Soup Suitable for Vegetarians or Vegans?

Yes, this soup is suitable for vegetarians and vegans as it doesn't contain any animal products. The key ingredients are yams, coconut milk, and spices, making it a delicious plant-based option.

Can I Freeze the Soup for Later Consumption?

You can freeze this yam soup for later enjoyment. Simply cool it completely, then transfer it to an airtight container or freezer bag. It'll keep for several months in the freezer, making for easy reheating and serving.

Continue Reading

Vietnamese Cuisine

Sweet and Crispy: Vietnamese Banh Cam Recipe

Flaunting a golden-brown crust and a soft, chewy interior, Vietnamese Banh Cam is a beloved treat that’s a must-try for those seeking a delectable culinary adventure.

Published

on

crispy vietnamese banh cam

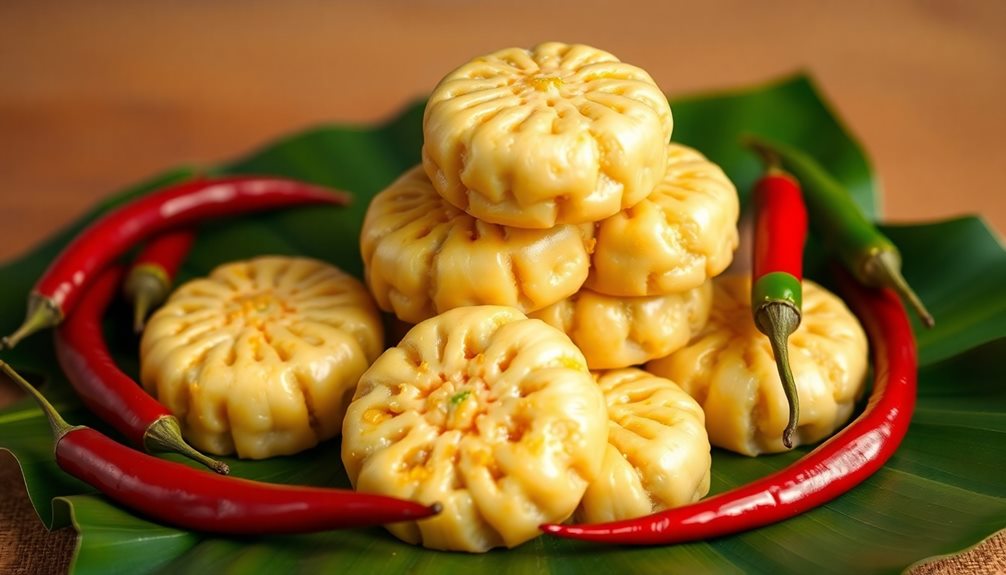
Get ready to indulge in the sweet and crispy delight of Vietnamese Banh Cam! This beloved treat features a golden-brown crust that gives way to a soft, chewy interior. The secret? A mung bean paste filling and a coating of toasted sesame seeds. It's no wonder Banh Cam is a cherished part of Vietnamese culture, often enjoyed during special celebrations. Whether you're a local or a visitor, this snack is sure to bring a smile to your face. And if you're curious to learn more about this delectable delicacy, keep reading!

Key Takeaways

  • Banh Cam is a popular Vietnamese treat featuring a crispy golden exterior and a soft, chewy interior with a sweet coconut-based filling.
  • The recipe combines glutinous rice flour, mung bean paste, and toasted sesame seeds to achieve the signature sweet and crunchy profile.
  • The cooking process involves frying the rice dough balls until golden brown, then rolling them in sesame seeds for an extra layer of texture and flavor.
  • Banh Cam is traditionally served warm, often as a snack or during special occasions like the Lunar New Year, reflecting its cultural significance in Vietnamese cuisine.
  • Achieving the right balance of textures and flavors is crucial to capturing the delightful sensory experience that makes Banh Cam a beloved Vietnamese delicacy.

History

understanding past events contextually

Banh cam, or Vietnamese fried sesame balls, have a rich history dating back centuries. These delightful treats were first created by Vietnamese cooks, who took inspiration from China's traditional sesame-coated pastries. With advancements in culinary techniques, the recipe has seen variations over the years, much like how proper maintenance ensures vehicle efficiency. The addition of a sweet mung bean filling and a crispy, golden exterior has become a hallmark of this beloved snack.

Banh cam hold a special place in Vietnamese culture, often served during Lunar New Year celebrations and other important festivals. Families gather to lovingly prepare these bite-sized delicacies, passing down the techniques from generation to generation. The process of rolling, filling, and frying the perfect banh cam is a cherished tradition, imbuing each one with a sense of warmth and community.

Today, banh cam remain a beloved snack, enjoyed by people of all ages. Whether served warm and freshly fried or prepared ahead of time, these sweet and crunchy treats never fail to bring a smile to the faces of those who indulge in them.

Recipe

cooking instructions and ingredients

Banh Cam, also known as Vietnamese fried sesame balls, are a popular snack and dessert in Vietnam. These little morsels are made with a glutinous rice flour dough that's filled with a sweet mung bean paste, coated in sesame seeds, and then deep-fried until golden and crispy.

The combination of the chewy, slightly sweet dough and the creamy, nutty mung bean filling makes for a delightful contrast in both texture and flavor. Banh Cam are often served as an afternoon snack or as part of a larger Vietnamese dessert spread.

Ingredients:

Advertisement
  • 1 cup glutinous rice flour
  • 1/4 cup granulated sugar
  • 1/4 cup water
  • 1 cup mung bean paste
  • Vegetable oil for frying
  • 1 cup white sesame seeds

Directions:

In a large mixing bowl, combine the glutinous rice flour and sugar. Gradually add the water and knead the mixture until a smooth, pliable dough forms. Cover the dough and let it rest for 30 minutes.

Divide the dough into 12 equal portions and roll each piece into a ball. Using your thumb, make an indentation in the center of each ball and fill with about 1 tablespoon of mung bean paste. Pinch the dough around the filling to fully enclose it.

Pour the vegetable oil into a deep pot or Dutch oven, and heat it to 350°F (175°C). Working in batches, carefully drop the filled dough balls into the hot oil and fry for 2-3 minutes, until golden brown. Use a slotted spoon to transfer the fried banh cam to a paper towel-lined plate.

While still warm, roll the banh cam in the sesame seeds, gently pressing to ensure the seeds adhere.

Serve the banh cam warm or at room temperature. The crispy exterior and sweet, creamy interior make these Vietnamese fried sesame balls an irresistible treat.

Advertisement

Cooking Steps

preparation and cooking instructions

First, you'll mix the sticky rice flour until it forms a smooth dough.

Then, roll the dough into small, bite-sized balls.

Next, gently fry the rice balls until they're golden brown.

Once fried, roll the warm banh cam in a bed of toasted sesame seeds.

Serve these delightful Vietnamese treats while they're still hot!

Step 1. Mix Sticky Rice Flour

mix sticky rice flour

To begin the process, you'll need to mix the sticky rice flour thoroughly. In a large bowl, combine the rice flour with a bit of water, just enough to create a smooth, pliable dough.

Don't overmix – you want the consistency to be similar to playdough. Next, knead the dough gently with your hands until it's well-incorporated and free of any lumps. This step is crucial, as it helps the dough come together and develop the perfect texture for frying.

Advertisement

Once the dough is ready, pinch off a small amount and roll it into a ball between your palms. The size should be about an inch in diameter.

Repeat this process until you've formed all the dough into bite-sized balls. Be sure to keep the formed balls covered with a damp cloth to prevent them from drying out as you work.

With the dough prepped, you're now ready to move on to the frying step and bring these tasty Vietnamese treats to life!

Step 2. Form Small Balls

shape into small balls

With the dough prepped, you can now start forming the small balls. Grab a piece of the sticky rice dough and gently roll it between your palms to create a smooth, round ball. Make sure each one is about the size of a small walnut – not too big, not too small. This step takes a bit of practice, but you'll get the hang of it in no time!

Once you've got all the dough shaped into little spheres, it's time to get frying. Heat up some oil in a pan or wok, making sure it's nice and hot. Carefully drop the balls into the oil and let them sizzle until they're a beautiful golden brown.

Be careful not to overcrowd the pan – work in batches to ensure even cooking.

Advertisement

Drain the fried banh cam on a paper towel-lined plate, then enjoy their sweet, crispy goodness. The perfect snack or dessert!

Step 3. Fry the Rice Balls Until Golden

fry rice balls golden brown

Once the rice balls are formed, you can begin frying them. Gently lower the balls, one by one, into the hot oil. The oil should be around 350°F (175°C) for best results. As the balls hit the oil, they'll start to sizzle and turn a lovely golden-brown color.

Carefully turn them occasionally using a slotted spoon to ensure even cooking. Keep a close eye on the balls, as they can quickly go from perfectly crispy to burnt. The frying process should take around 2-3 minutes per batch.

Once the balls are a beautiful golden hue, use the slotted spoon to transfer them to a paper towel-lined plate to drain excess oil.

Repeat this process with the remaining rice balls, working in small batches to maintain the oil temperature. The key is to fry them until they're delightfully crispy on the outside yet soft and gooey on the inside.

Serve the freshly fried banh cam while they're still warm and enjoy their sweet, nutty goodness!

Advertisement

Step 4. Roll Balls in Sesame Seeds

coat balls with sesame

After frying the rice balls, you'll want to roll them in toasted sesame seeds. This extra step adds a wonderful nutty flavor and a delightful crunch to the already delicious banh cam.

Simply pour some sesame seeds onto a plate or shallow bowl. Gently roll each warm rice ball in the seeds, making sure to coat them evenly on all sides. The heat from the freshly fried balls will help the sesame seeds stick beautifully.

Once the rice balls are coated, place them on a clean plate or baking sheet. Repeat this process with the remaining rice balls.

The sesame seed coating not only enhances the flavor but also gives the banh cam a visually appealing, golden-speckled appearance. Your guests will be delighted by the satisfying texture and enticing aroma.

Enjoy these sweet and crispy Vietnamese treats while they're still warm and freshly coated in the toasted sesame seeds.

Step 5. Serve Banh Cam Warm

serve banh cam warm

Serve the banh cam warm for the best experience. The golden, crispy shells will crackle as you take your first bite, revealing the soft, sweet interior. Don't wait too long to enjoy these delightful treats, as they taste their absolute best when freshly fried.

To serve, arrange the warm banh cam on a platter. You can lightly dust them with additional toasted sesame seeds for a lovely presentation. Accompanying the banh cam with a sweet dipping sauce, like a simple syrup or honey, is a delicious option. Guests will love dipping the warm, crispy balls into the sweet sauce, savoring each delectable morsel.

Advertisement

These Vietnamese fritters are a true crowd-pleaser, perfect for sharing with family and friends during special occasions or festive gatherings.

Serve them hot, straight from the oil, and watch your loved ones delight in the irresistible combination of sweet and crunchy. Enjoy!

Final Thoughts

concluding reflections and insights

Ultimately, banh cam is a delightful Vietnamese treat that's well worth the effort to make. The sweet, crispy exterior and soft, chewy interior create a texture that's truly irresistible.

Serving these little fried balls warm, straight from the oil, is the best way to enjoy their fresh-from-the-fryer goodness.

As you savor each bite, you'll be transported to the vibrant streets of Vietnam, where vendors sell these irresistible snacks to eager customers. The combination of the golden-brown crust, the fragrant coconut, and the subtly sweet syrup is a symphony of flavors that will delight your senses.

Whether you're celebrating a special occasion or simply craving a delightful treat, banh cam is sure to put a smile on your face. Gather your family and friends, and dive into this delectable Vietnamese delight.

Advertisement

The memories and joy it brings will linger long after the last crumb has been enjoyed.

Frequently Asked Questions

What Is the Difference Between Banh Cam and Banh Rán?

The key difference between banh cam and banh ran is that banh cam is a fried sticky rice ball, while banh ran is a fried sticky rice ring. Banh cam often has a sweet filling, while banh ran tends to be savory.

How Long Do the Fried Balls Typically Stay Crispy?

The fried balls typically stay crispy for a couple of hours. However, their crispness will start to diminish over time. To maintain their crunch, it's best to enjoy the fried balls soon after they're cooked.

Can I Substitute the Sticky Rice Flour With Regular Flour?

You can substitute the sticky rice flour with regular all-purpose flour, but the result won't be as chewy and crisp. The sticky rice flour is essential to achieving the authentic texture of this Vietnamese fried snack.

Is There a Gluten-Free Version of the Banh Cam Recipe?

To make a gluten-free version of the banh cam recipe, you can substitute the sticky rice flour with a gluten-free flour blend. This will maintain the texture and flavor of the traditional dish without the gluten.

Advertisement

How to Store Leftover Banh Cam and for How Long?

You can store leftover banh cam by placing them in an airtight container in the refrigerator. They'll stay fresh for up to 3 days. To reheat, simply pop them in the oven or air fryer for a few minutes to crisp them up again.

Continue Reading

Affiliate Disclaimer
As an affiliate, we may earn a commission from qualifying purchases. We get commissions for purchases made through links on this website from Amazon and other third parties.

Advertisement

Latest

crunchy korean seaweed rolls crunchy korean seaweed rolls
Korean Cuisine2 hours ago

Fried Seaweed Rolls: A Crunchy Korean Appetizer You’ll Love

How do crispy fried seaweed rolls filled with savory goodness become the ultimate Korean appetizer? Discover the delightful flavors that...

irresistibly creamy cheese tart irresistibly creamy cheese tart
Baking and Pastry4 hours ago

Baked Cheese Tart: The Creamy Dessert Everyone Loves

Baked cheese tart brings together creamy perfection and a crunchy crust, leaving you craving more—discover how to make this irresistible...

nutty creamy vietnamese yam soup nutty creamy vietnamese yam soup
Vietnamese Cuisine5 hours ago

Canh Khoai Mỡ: Vietnamese Yam Soup That’s Both Nutty and Creamy

Brimming with the rich, creamy texture of Vietnamese yam and aromatic spices, this beloved soup offers a comforting and satisfying...

vietnamese fish dish delight vietnamese fish dish delight
Vietnamese Cuisine5 hours ago

Chả Cá Lã Vọng: The Vietnamese Fish Dish You Must Try

Nestled in the vibrant tapestry of Vietnamese culinary heritage, "Chả Cá Lã Vọng" beckons with its captivating blend of crispy...

japanese vs korean ramen japanese vs korean ramen
Asian Cuisine5 hours ago

Ramen Rivalry: Is It Japanese or Korean?

Hungry for a taste of the ramen rivalry? Explore the unique flavors and cultural traditions that define Japanese and Korean...

vietnamese chicken rice delight vietnamese chicken rice delight
Vietnamese Cuisine5 hours ago

Cơm Gà: The Vietnamese Chicken Rice Dish You Must Try

Brimming with the aromatic flavors of lemongrass, ginger, and tender poached chicken, Cơm Gà is a Vietnamese culinary treasure waiting...

comforting korean pumpkin porridge comforting korean pumpkin porridge
Korean Cuisine5 hours ago

Korean Pumpkin Porridge: The Comforting Taste of Hobakjuk

Get a taste of the traditional Korean pumpkin porridge, hobakjuk, a velvety dish that offers a comforting balance of natural...

tapioca pearl bubble tea tapioca pearl bubble tea
Beverage Deep Dives10 hours ago

Bubble Tea: Tapioca Pearl Perfection

Nourish your taste buds with the captivating blend of black tea and chewy tapioca pearls that make up the irresistible...

quick skillet meals cookbook quick skillet meals cookbook
One-Pot Wonders10 hours ago

Skillet Suppers: From Stovetop to Table in 30 Minutes

Achieve a delectable family-pleasing meal in 30 minutes or less with the versatile and time-saving magic of skillet suppers.

mediterranean scrambled eggs dish mediterranean scrambled eggs dish
Kitchen Hacks and Tips14 hours ago

Turkish Menemen: Scrambled Eggs With a Mediterranean Twist

Discover the captivating flavors of Turkish Menemen, a breakfast dish that combines scrambled eggs with a savory medley of tomatoes,...

ancient nutrition modern lifestyle ancient nutrition modern lifestyle
Cooking for Special Diets18 hours ago

Paleo Diet: Stone Age Nutrition

Geared towards recapturing the dietary habits of our evolutionary predecessors, the Paleo diet promises a wealth of unexpected health benefits...

nutritious african leafy greens nutritious african leafy greens
African Cuisine21 hours ago

African Greens Recipe: Nutritious and Flavorful Leafy Greens

Prepare to delight your taste buds with this nutritious African greens recipe that combines vibrant flavors and creamy goodness—discover the...

Trending