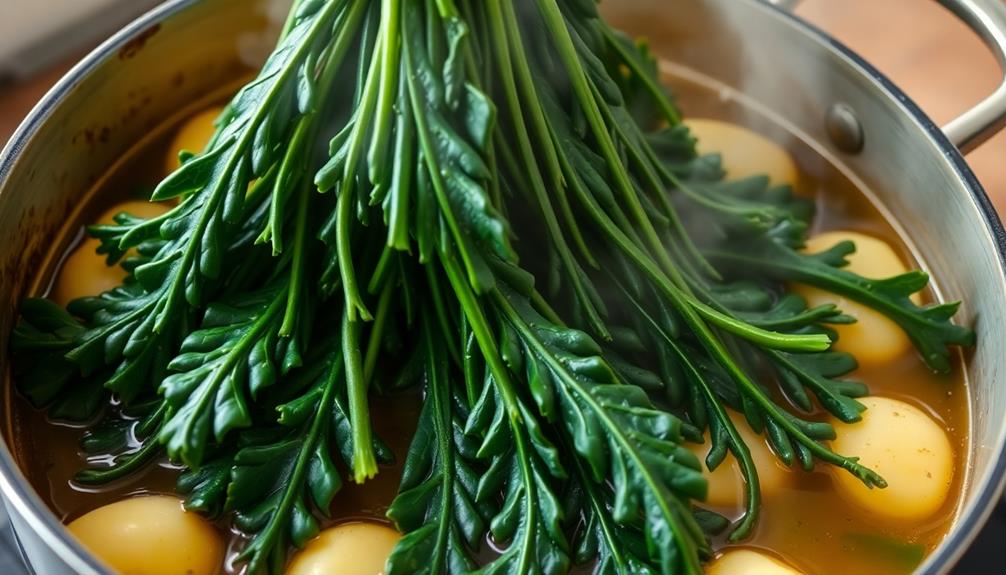
Connect with us

Global Soup Tour

Caldo Verde: Portugal’s Green Soup With Kale and Chorizo

Perfecting the art of Caldo Verde, Portugal’s iconic green soup infused with the robust flavors of kale and chorizo sausage, is a culinary odyssey worth exploring.

Published

on

portuguese kale and chorizo soup

Caldo Verde is Portugal's beloved green soup that'll transport you to the heart of the Minho region. It's a comforting dish brimming with tender kale and savory chorizo sausage – a cherished culinary tradition that epitomizes the country's vibrant food culture and deep connection to the land. The soup's vibrant color and hearty texture make it a symbol of Portuguese identity and pride, often enjoyed in family gatherings and celebrations. Caldo Verde's simplicity and use of local ingredients foster a sense of togetherness, and if you keep reading, you'll discover the rich history and cooking steps behind this timeless culinary treasure.

Key Takeaways

  • Caldo Verde is a traditional Portuguese soup from the Minho region, known for its vibrant green color and key ingredient of kale.
  • This soup symbolizes Portuguese identity and is often enjoyed in family gatherings and celebrations, fostering a sense of community.
  • The recipe features humble yet flavorful ingredients, including potatoes, onions, garlic, and the optional addition of chorizo sausage.
  • Caldo Verde is characterized by its simple preparation method, where the kale is finely sliced, and the potatoes are boiled and mashed to achieve a creamy texture.
  • This nutritious soup is rich in vitamins, fiber, and healthy fats, making it a wholesome and comforting option for various dietary needs.

History

Although its origins are unclear, Caldo Verde is believed to have emerged as a traditional dish in the Minho region of northern Portugal. This hearty, comforting soup has been a beloved part of Portuguese culture for centuries.

The name "Caldo Verde" translates to "green broth," which refers to the key ingredient – kale. This nutrient-rich leafy green is finely shredded and simmered in a simple broth along with potatoes, onions, and garlic. The result is a vibrant, flavorful soup that's both soothing and satisfying.

Over time, Caldo Verde has become a cherished symbol of Portuguese identity and pride. Families gather to share this beloved dish, often adding their own unique touches, like the spicy cured sausage called chouriço.

Whether enjoyed on a chilly day or as part of a celebratory feast, Caldo Verde has firmly cemented its place as a timeless culinary tradition in Portugal.

Recipe

Caldo Verde is a beloved Portuguese soup that embodies the country's rustic charm and culinary heritage. This vibrant green soup is a comforting and nourishing dish, perfect for chilly days or as a starter to any meal.

Advertisement

At its core, Caldo Verde is a celebration of simplicity. The humble ingredients, when combined with care and skill, create a symphony of flavors that will delight your senses.

Ingredients:

  • 1 lb (450g) potatoes, peeled and sliced
  • 1 lb (450g) kale or collard greens, stems removed and leaves sliced into thin strips
  • 1 onion, diced
  • 3 cloves garlic, minced
  • 4 cups (1 liter) chicken or vegetable broth
  • 2 tbsp olive oil
  • Salt and black pepper to taste
  • Sliced chouriço (Portuguese sausage) or smoked pork sausage, for serving (optional)

Instructions:

In a large pot, heat the olive oil over medium heat. Add the onion and garlic, and sauté until softened and fragrant, about 5 minutes.

Add the sliced potatoes and broth, and bring to a boil. Reduce the heat and simmer for 15-20 minutes, or until the potatoes are tender.

Once the potatoes are cooked, add the sliced kale or collard greens to the pot. Simmer for an additional 10-15 minutes, or until the greens are tender.

Advertisement

Season the soup with salt and black pepper to taste.

Tips:

For a heartier meal, serve the Caldo Verde with slices of chouriço or smoked pork sausage. The spicy sausage pairs beautifully with the earthy flavors of the soup.

Additionally, you can garnish the soup with a drizzle of high-quality olive oil and a sprinkle of freshly chopped parsley for a touch of freshness.

Cooking Steps

Slice the potatoes into thin rounds and set them aside.

Advertisement

Next, sauté the chopped onions and garlic in a pot until they're fragrant.

Now, add the kale and let it wilt down.

Step 1. Slice Potatoes Into Thin Rounds

slice potatoes into rounds

The potato's thin, even slices are the foundation for caldo verde's hearty texture. You'll want to grab a sharp knife and carefully slice the potatoes into rounds about 1/8 inch thick. This even thickness ensures the potatoes cook through at the same rate, creating a smooth, creamy base for the soup.

Take your time and focus on making each slice as uniform as possible. The thin, delicate potato rounds will almost melt into the broth, thickening it to a luxurious consistency.

As you work, place the sliced potatoes in a bowl of cold water to prevent them from browning. This step keeps the potatoes looking fresh and vibrant, ready to become the flavorful foundation of your caldo verde.

Once all the potatoes are sliced, drain them well and add them to the pot. They'll soak up the savory broth, softening into tender bites that complement the bold kale and spicy chorizo.

Advertisement

With the potatoes prepped, you're well on your way to an authentic taste of Portugal.

Step 2. Sauté Chopped Onions and Garlic
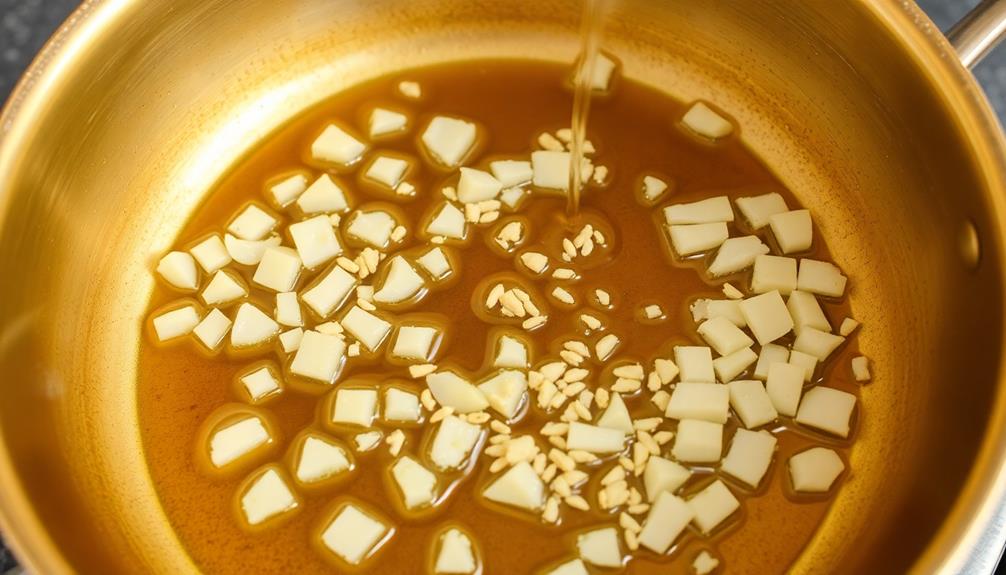
saut onions and garlic

With your neatly sliced potatoes ready, it's time to sauté the onions and garlic. Grab a large skillet and heat it over medium-high heat. Add a drizzle of olive oil to the pan, and once it's shimmering, toss in the chopped onions.

Stir them around and let them sizzle for a minute or two, until they start to turn translucent and release their fragrant aroma.

Next, add the minced garlic to the pan. Be careful not to let the garlic burn – it can quickly go from perfectly toasted to bitter and acrid. Stir the garlic constantly for about 30 seconds, just until you can smell its delightful scent wafting through the kitchen.

Now that the onions and garlic are nicely sautéed, it's time to move on to the next step in creating this authentic Portuguese soup.

Keep an eye on the heat and adjust it as needed to prevent any burning or scorching. Sautéing is all about finding that perfect balance of heat and timing.

Advertisement

Step 3. Add the Kale

incorporate the kale

Now that the onions and garlic are nicely sautéed, it's time to add the kale.

Grab a bunch of fresh, vibrant kale and give it a good wash. Tear the leaves into bite-sized pieces, discarding any tough stems. Toss the kale into the pot with the sizzling onions and garlic.

Stir it all together, making sure the kale gets coated in the aromatic oil. As the kale cooks, it will wilt and turn a deep, rich green. Keep stirring occasionally to prevent burning.

The kale will release its natural juices, which will mingle with the onions and garlic to create a flavorful base for the soup. Let the kale cook for about 5 minutes, or until it's tender but still has a slight bite.

Now that the kale is incorporated, it's time to add the broth and start building the soup's delicious flavor.

Step 4. Add Potatoes and Broth
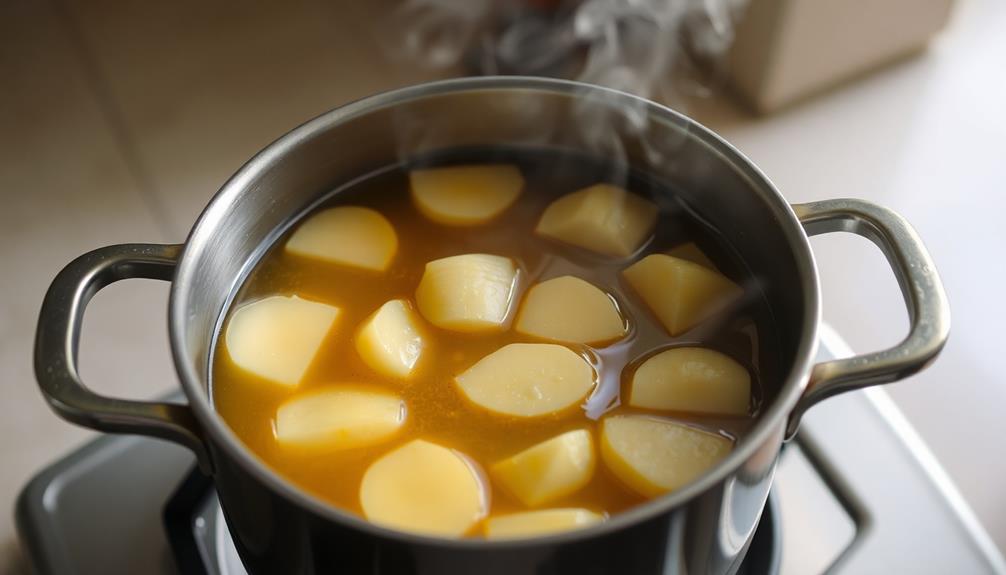
incorporate potatoes and broth

Next, grab a few potatoes and peel them. You'll want about 3 or 4 medium-sized ones.

Once they're peeled, slice them into thin, round discs. They'll cook faster that way.

Advertisement

Now, it's time to add the potatoes to your pot. Toss them in with the kale you added earlier.

Next, pour in the broth. You can use chicken or vegetable broth – whichever you prefer. The broth will help cook the potatoes and give your soup lots of flavor.

Bring the whole mixture to a boil, then reduce the heat and let it simmer for about 15 minutes. This will allow the potatoes to become nice and tender.

As the potatoes cook, the broth will thicken up, creating a hearty, satisfying base for your Caldo Verde.

The kale will also become nice and soft, blending perfectly with the potatoes and broth.

Advertisement

Soon, your kitchen will be filled with the comforting aroma of this classic Portuguese soup.

Step 5. Simmer Until Potatoes Are Tender
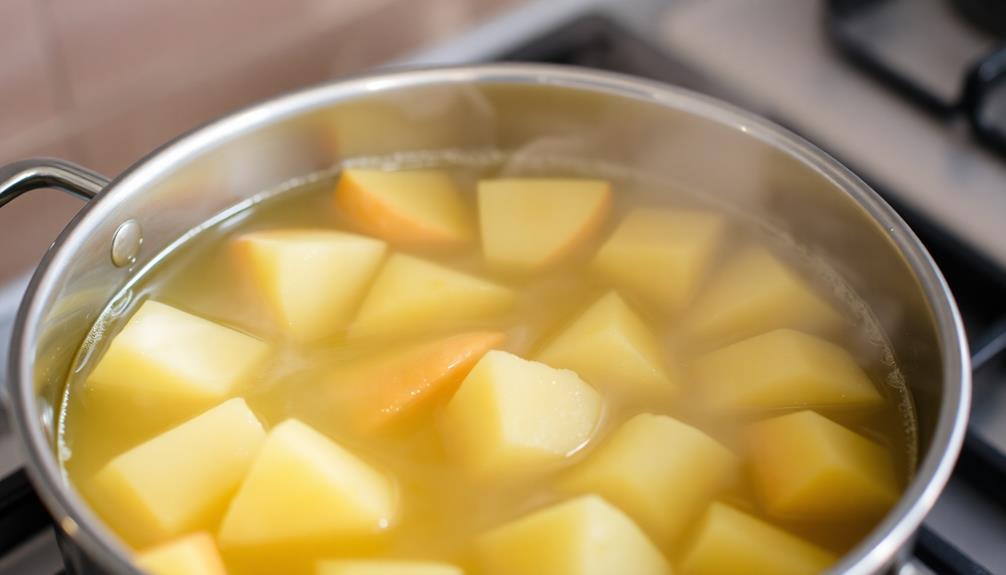
simmer potatoes until tender

Once the potatoes are added, let the mixture simmer for about 15 minutes. This'll allow the potatoes to become nice and tender.

You'll know they're ready when you can easily pierce them with a fork. Don't forget to stir the pot occasionally so nothing sticks to the bottom.

As the soup simmers, the flavors will meld together beautifully. You'll start to smell the earthy kale and spicy chorizo come alive. It's an irresistible aroma that'll have your mouth watering!

Once the potatoes are fork-tender, the soup is ready to serve. Ladle it into bowls and get ready to dive in.

The hearty broth, soft potatoes, and flavorful greens make for a wonderfully comforting and satisfying meal. This traditional Portuguese soup is sure to warm you up from the inside out.

Advertisement

Enjoy every last spoonful – it's pure bliss!

Final Thoughts

Caldo Verde is a beloved Portuguese soup that encapsulates the essence of the country's culinary heritage. It's a dish that brings people together, reminding us of the simple joys of home-cooked meals and the treasures that can be found in the most humble of ingredients.

The combination of tender potatoes, vibrant kale, and the smoky, spicy chorizo creates a symphony of flavors that dance on the tongue, leaving you craving more with every spoonful.

As you savor the last bites of your Caldo Verde, you can't help but feel a sense of connection to the rich traditions of Portugal. It's a soup that transcends borders, reminding us that great food has the power to bring people together and celebrate the diversity of our world. Next, you may find yourself craving the comforting, soulful Vietnamese pho of Hanoi or perhaps the spicy and aromatic flavors of Indian curry. Each dish tells a story, and with every flavorful bite, you are transported to a different corner of the globe. It’s a beautiful reminder that we are all connected through the universal language of food.

Whether you're enjoying it on a chilly evening or a sunny afternoon, Caldo Verde is a heartwarming reminder of the comfort and joy that can be found in the most genuine and authentic of culinary experiences.

Advertisement

Frequently Asked Questions

What Is the Traditional Serving Size for Caldo Verde?

The traditional serving size for caldo verde is typically a hearty bowl, meant to be enjoyed as a main course. The portion should be large enough to satisfy your appetite and provide a comforting, filling meal.

Can Caldo Verde Be Made Vegetarian or Vegan?

Yes, you can absolutely make caldo verde vegetarian or vegan. Simply omit the chorizo and use vegetable broth instead of chicken stock. The kale and potatoes are the stars of this comforting soup.

How Long Does Caldo Verde Typically Take to Prepare?

Typically, preparing caldo verde takes around 30 to 45 minutes. You'll need to chop the vegetables, sauté the onions and garlic, simmer the potatoes, and add the kale or spinach just before serving for the best flavor and texture.

Is Caldo Verde Considered a Healthy or Hearty Soup?

Caldo verde is considered a healthy and hearty soup. The kale and potatoes provide essential nutrients, while the chorizo adds a savory element that makes it satisfying and filling. It's a well-balanced dish that can be enjoyed year-round.

Are There Any Regional Variations of Caldo Verde in Portugal?

Yes, there are regional variations of caldo verde across Portugal. Different regions may use different types of leafy greens, sausages, or potatoes to create their own unique takes on this traditional Portuguese soup.

Advertisement
Advertisement

Global Soup Tour

Vietnamese Pho: The Ultimate Comfort Soup

Keen to discover the aromatic, flavorful journey that Vietnamese pho, the ultimate comfort soup, can take you on? Dive in and explore its rich cultural heritage.

Published

on

ultimate comfort vietnamese pho

Pho, the beloved Vietnamese soup, will transport you on a flavorful journey! This comforting dish emerged from a fusion of Vietnamese and French culinary traditions, featuring an aromatic broth, tender meat, and hearty rice noodles. The key ingredients – beef broth, beef sirloin, onion, ginger, and spices – come together to create a savory, sweet, and fragrant taste profile. As you savor each slurp, you'll be delighted by the fresh garnishes like basil, bean sprouts, and lime. Pho is not just a meal, but a celebration of Vietnamese culture and cuisine. Are you ready to discover more about this ultimate comfort soup? If you’re a fan of comforting soups, you may also want to explore the delicious world of Japanese cuisine with a traditional Japanese miso soup recipe. This soothing and hearty soup is made with miso paste, tofu, seaweed, and green onions, creating a rich and umami-filled broth. Just like Pho, Japanese miso soup is a celebration of culture and culinary tradition, and it’s sure to satisfy your cravings for a warm and flavorful bowl. Why not expand your culinary horizons and try your hand at making both Pho and Japanese miso soup at home?

Key Takeaways

  • Pho is a beloved Vietnamese comfort food that emerged as a fusion of Vietnamese and French culinary traditions in the early 20th century.
  • The dish features a savory, sweet, sour, and fragrant taste profile, with a rich and comforting beef broth as the foundation.
  • Pho's preparation involves simmering beef bones for hours to create a flavorful broth, infusing it with aromatic spices and allowing flavors to develop.
  • Pho is celebrated for its cultural significance, representing the vibrant street food scene of Hanoi and showcasing Vietnamese cuisine globally.
  • Consuming pho is described as a sensory journey, providing nourishment for both body and soul, and offering potential health benefits.

History

The origins of Vietnamese pho can be traced back to the early 20th century, when the dish emerged as a fusion of Vietnamese and French culinary traditions.

You see, during the French colonial period, the Vietnamese people were introduced to the French soup known as pot-au-feu. But being the innovative folks they are, the Vietnamese put their own spin on it, using local ingredients like star anise, cinnamon, and fragrant herbs to create the aromatic broth we all know and love today.

As the dish spread throughout Vietnam, different regions began to develop their own unique variations. In the north, the pho tends to have a clearer broth, while the southern version is often more robust and flavorful.

No matter where you go, though, pho is a beloved comfort food that brings people together and warms the soul. It's a true cultural treasure that reflects the ingenuity and culinary prowess of the Vietnamese people.

Recipe

Pho, a beloved Vietnamese noodle soup, is a delightful blend of aromatic spices, tender meat, and hearty rice noodles. This recipe will guide you through the process of creating an authentic and flavorful bowl of pho right in your own kitchen.

Advertisement

At the heart of pho is a rich, simmered broth that requires time and patience to develop its depth of flavor. The key lies in allowing the spices and aromatics to infuse the broth, creating a complex and satisfying base for the dish.

Ingredients:

  • 8 cups beef broth
  • 1 lb beef sirloin, thinly sliced
  • 8 oz rice noodles
  • 1 onion, thinly sliced
  • 2 inches fresh ginger, peeled and sliced
  • 3 whole cloves
  • 3 whole star anise
  • 1 cinnamon stick
  • 1 tbsp fish sauce
  • 2 tbsp lime juice
  • Salt and pepper to taste
  • Garnishes: fresh basil, bean sprouts, lime wedges, chili sauce

In a large pot, combine the beef broth, ginger, cloves, star anise, and cinnamon stick. Bring to a boil, then reduce heat and simmer for 30 minutes, allowing the flavors to meld.

Remove the spices and discard. Add the sliced beef, fish sauce, and lime juice to the broth, and season with salt and pepper to taste. Bring the broth back to a simmer and cook the beef until it's just cooked through, about 5 minutes.

To serve, place the rice noodles in the bottom of a bowl and ladle the hot broth and beef over the top. Garnish with fresh basil, bean sprouts, lime wedges, and chili sauce, if desired.

The key to an authentic pho experience is to allow each diner to customize their bowl with the desired garnishes, creating a personalized and delicious meal.

Advertisement

Cooking Steps

Let's get started on the cooking steps for authentic Vietnamese pho!

First, you'll simmer the bones to make a flavorful broth, then add aromatic spices and let it all meld together.

Next, you'll toss in the rice noodles and top it off with fresh bean sprouts and thinly sliced beef.

Get ready to dive into a steaming bowl of this delicious noodle soup!

Step 1. Prepare Broth by Simmering Bones

simmer bones for broth

To prepare the broth, you'll need to simmer the bones for several hours. Start by gathering your ingredients – beef bones, onion, ginger, and a few spices like star anise and cinnamon.

Place the bones in a large pot, cover them with water, and bring everything to a boil. Once it's boiling, reduce the heat and let the bones simmer gently for 3-4 hours. This long, slow cooking process is the key to creating a rich, flavorful broth.

Advertisement

As the bones simmer, the collagen will break down, infusing the broth with a silky, velvety texture. You'll also see some impurities rise to the surface – skim these off with a ladle to keep your broth clear and clean.

Add the onion, ginger, and spices about halfway through the simmering time. This will allow their flavors to really infuse into the broth. Soon, your kitchen will be filled with the most amazing aroma – savory, fragrant, and oh-so-comforting.

Step 2. Add Spices and Simmer

spices added simmering process

Once you've simmered the bones for a few hours, it's time to add the aromatic spices that will infuse your pho broth with its signature flavor.

Grab a cheesecloth and fill it with whole star anise, cinnamon sticks, cloves, and cardamom pods. Carefully lower the spice bundle into the simmering broth and let it work its magic for 30 minutes to an hour. The fragrant aromas will start to fill your kitchen, making your mouth water in anticipation.

Now it's time to add some fish sauce and a pinch of sugar. The fish sauce will provide a savory, umami depth, while the sugar helps balance the flavors.

Give the broth a gentle stir and let it continue simmering for another 30 minutes. As the broth simmers, the spices will release their essence, creating a complex and delightful pho base.

Advertisement

Get ready for the most flavorful and authentic pho you've ever tasted!

Step 3. Add Rice Noodles

add rice noodles now

Adding the rice noodles is the next step in crafting an authentic Vietnamese pho.

You'll want to use the traditional, thin rice noodles, also known as bánh phở. Gently place the noodles into the hot broth, making sure they're fully submerged. As the noodles soak up the savory flavors, they'll soften and become delightfully chewy.

Stir the noodles occasionally to prevent them from sticking together. The rice noodles will only need a few minutes to cook, so keep a close eye on them. You'll know they're ready when they're tender yet still have a nice bite to them.

With the noodles perfectly cooked, you're one step closer to enjoying a steaming bowl of authentic Vietnamese pho. Get ready to savor the aromatic broth, tender meat, and slurp-worthy noodles – it's going to be an absolute delight!

Step 4. Add Bean Sprouts

add bean sprouts now

After adding the rice noodles, toss in the fresh bean sprouts.

These crunchy little veggies add the perfect crunch to your pho! Grab a handful and drop them right into the steaming hot broth. Watch them dance and sizzle as they hit the liquid. The bean sprouts will lightly cook, absorbing all the delicious flavors of the pho. Their mild, slightly sweet taste complements the richness of the broth.

Advertisement

Don't be shy – load up your bowl with as many bean sprouts as you like! They're packed with vitamins and nutrients, making your pho even healthier.

The crisp texture also adds a wonderful contrast to the soft noodles. Garnish your masterpiece with a squeeze of fresh lime juice and enjoy! The combination of tender beef, fragrant herbs, chewy noodles, and crunchy bean sprouts is simply irresistible.

Get ready for an explosion of flavor in every slurp!

Step 5. Add Thinly Sliced Beef

add thinly sliced beef

With the crunchy bean sprouts now adding their refreshing touch, it's time to turn your attention to the star of the show – the thinly sliced beef.

Carefully placing these thin, tender strips into the steaming broth is a true delight. As they gently cook, you'll watch them transform from a cool, vibrant red to a succulent, mouthwatering brown.

The flavor of the beef perfectly complements the aromatic spices, creating a symphony of tastes that will have your taste buds dancing with joy.

Advertisement

Don't be afraid to add a generous portion – the beef is the heart and soul of this classic Vietnamese dish.

Swirl it around, letting it soak up all the goodness of the broth, then take a deep breath and savor the first slurp.

With each bite, you'll be transported to the bustling streets of Vietnam, where the aroma of pho fills the air and warms the soul.

Final Thoughts

Crafting the perfect pho requires a delicate balance of flavors, textures, and techniques. Now that you've added the thinly sliced beef, it's time to sit back and enjoy the fruits of your labor.

The aromas of the simmering broth, the soft noodles, and the tender beef will have your mouth watering in no time. As you take your first sip, you'll be rewarded with a symphony of tastes – the savory, the sweet, the sour, and the fragrant.

Advertisement

The bean sprouts, lime wedges, and fresh herbs add a refreshing crunch and zest to the dish, perfectly complementing the rich, comforting broth.

This Vietnamese classic isn't just a meal, it's an experience. With each slurp, you'll be transported to the bustling streets of Hanoi, surrounded by the vibrant culture and flavors that make pho so beloved around the world.

Savor every moment, and let the warmth and nourishment of this incredible soup fill your heart and soul.

Frequently Asked Questions

What Are the Health Benefits of Pho?

The health benefits of pho include providing essential nutrients, boosting your immune system, aiding digestion, and promoting hydration. It's a low-calorie, nutrient-dense meal that can be part of a balanced diet.

Can Pho Be Made Vegetarian or Vegan?

Yes, you can absolutely make pho vegetarian or vegan. Simply swap out the traditional beef broth for a flavorful vegetable or mushroom broth, and use tofu or plant-based protein instead of meat.

Advertisement

How Can I Customize Pho to My Taste?

To customize pho to your taste, you can adjust the spices, add extra vegetables, use different proteins like tofu or mushrooms, and play around with the garnishes. Experiment to find the version that suits your palate.

What Is the Difference Between Northern and Southern Pho?

The main difference between northern and southern pho lies in the broth. Northern pho has a lighter, clearer broth, while southern pho has a richer, sweeter broth. You can customize either style to suit your taste preferences.

How Long Can Leftover Pho Be Stored?

Leftover pho can be stored in the refrigerator for 3-4 days. Make sure to store the broth and noodles separately, and reheat thoroughly before serving. Enjoy your pho for several days after the initial meal.

Continue Reading

Global Soup Tour

Russian Borscht: Hearty Beet Soup

Treat your taste buds to a vibrant and hearty beet soup that’s a beloved classic in Eastern European cuisine, with a rich history and comforting flavors.

Published

on

hearty beet soup recipe

Russian borscht is a hearty and vibrant beet soup that'll take your taste buds on a delicious journey! This iconic dish traces its roots back to ancient Slavic cultures, blending the earthy sweetness of beets with a savory broth and an array of veggies. It's packed with vitamins, minerals, and antioxidants, making it a healthy and satisfying meal. Get ready to enjoy its beautiful crimson color, rich aroma, and comforting flavors. Whether you like it garnished with sour cream and dill or paired with crusty bread, borscht is a versatile delight that'll have you craving more. And there's more to discover about this beloved Eastern European classic

Key Takeaways

  • Russian borscht is a traditional Eastern European soup made with beets, providing a vibrant color, earthy flavor, and nutritional benefits.
  • The soup's base is typically a broth, often beef or vegetable, with additional vegetables like onions, carrots, potatoes, and cabbage.
  • Borscht is known for its anti-inflammatory properties and potential to lower blood pressure due to the beneficial compounds found in beets.
  • The cooking process involves sautéing the vegetables, adding the broth and seasonings, and simmering to infuse the flavors.
  • Borscht is commonly served hot, garnished with sour cream and dill, and pairs well with crusty bread or rye for a hearty and satisfying meal.

History

Although borscht is often associated with Russian cuisine, its origins can be traced back to ancient Slavic cultures.

These early peoples living in modern-day Ukraine, Belarus, and Russia enjoyed a hearty soup made with beets, a vegetable that grew abundantly in their regions.

Over time, this simple dish evolved, with different cultures and regions adding their own unique twists and flavors.

Recipe

Borscht is a classic Russian soup that has been enjoyed for centuries. This vibrant, beetroot-based dish isn't only delicious but also rich in nutrients.

Whether you're a seasoned cook or a beginner, this recipe will guide you through the process of creating an authentic and flavorful borscht.

Advertisement

The key to a perfect borscht lies in the careful balance of ingredients and the slow simmering process that allows the flavors to meld together seamlessly. The result is a soup that's both comforting and sophisticated, perfect for sharing with family and friends.

  • 3 medium-sized beets, peeled and grated
  • 1 medium onion, diced
  • 2 carrots, peeled and diced
  • 2 potatoes, peeled and diced
  • 1 cabbage, shredded
  • 4 cups beef or vegetable broth
  • 2 tablespoons tomato paste
  • 2 tablespoons apple cider vinegar
  • 1 bay leaf
  • Salt and pepper to taste

In a large pot, sauté the onion and carrots in a bit of oil until softened, about 5 minutes.

Add the grated beets, potatoes, and cabbage, and continue to cook for another 5 minutes.

Pour in the broth, tomato paste, and apple cider vinegar, and bring the mixture to a boil.

Reduce the heat and let the borscht simmer for 30-40 minutes, or until the vegetables are tender.

Season with salt, pepper, and the bay leaf.

Advertisement

Remember to adjust the acidity and seasoning to your personal taste.

Serve the borscht hot, garnished with a dollop of sour cream or a sprinkle of fresh dill.

Enjoy the vibrant color and the comforting, earthy flavors of this classic Russian dish.

Cooking Steps

Peel and chop those vibrant beets, then sauté the onions until they're nice and translucent.

Next, add the carrots and celery, and pour in the broth to let it all simmer together.

Advertisement

Don't forget the tomato paste and your favorite spices – they'll really make the flavors pop!

Step 1. Peel and Chop Beets

peel chop prepare beets

Grab a sharp knife and peel the beets, removing the tough outer skin. Be careful – those beets can really stain your fingers!

Once they're peeled, give the beets a good rinse under cool water. Now it's time to chop them up. Slice the beets in half, then cut them into thin, bite-sized pieces. You want them to be about the size of a nickel or a dime.

The smaller you chop the beets, the quicker they'll cook. As you're chopping, you might notice the beets start to bleed a deep, purple-red color. That's normal – it's just the natural juices coming out.

Toss the chopped beets into your soup pot, and you're one step closer to a steaming bowl of classic Russian borscht! The deep, earthy flavor of the beets is going to be the star of this show.

Step 2. Sauté Onions Until Translucent

saut onions until translucent

Next, add a generous amount of olive oil or butter to your soup pot and place it over medium heat.

As the oil or butter heats up, it's time to add the onions. You'll want to use a nice, big yellow onion, chopped into small, even pieces.

Advertisement

Gently place the onion slices into the hot pan and let them sizzle away. Give them a stir every now and then to make sure they don't burn.

In just a few minutes, you'll start to notice the onions becoming soft and translucent. This is exactly what you're going for!

The onions will release their natural sweetness, filling your kitchen with a delightful aroma.

Keep a close eye on them, stirring occasionally, until the onions are completely tender and see-through.

Once they reach this perfect state, you're ready to move on to the next step in creating your delicious Russian borscht!

Advertisement

Step 3. Add Carrots and Celery

add carrots and celery

With the onions now perfectly softened and translucent, it's time to add the next essential ingredients – carrots and celery.

Chop up a couple of carrots and a couple of stalks of celery into bite-sized pieces. Toss them into the pot and give everything a good stir.

You'll start to notice the aroma of the veggies filling the air as they sizzle and cook. The carrots will add a lovely sweetness, while the celery brings a refreshing crunch.

Sauté the carrots and celery for about 5 minutes, until they've softened up a bit but still have a slight bite. This step is all about building layers of flavor, so don't be afraid to let the veggies get a little color.

As they cook, the flavors will meld together, creating a delightful foundation for your hearty borscht. Keep an eye on the pot and stir occasionally to ensure everything cooks evenly.

Step 4. Add Broth and Simmer

add broth then simmer

After the carrots and celery have softened, it's time to add the broth. Pour in your favorite vegetable or chicken broth and give the pot a gentle stir. You'll see the broth start to simmer and the vegetables begin to release their delicious flavors.

Now, let the borscht simmer for about 20 minutes, allowing the ingredients to meld together. As it simmers, the aroma of the beets, onions, and spices will fill your kitchen, making your mouth water.

Advertisement

Stir the pot occasionally to ensure everything cooks evenly. During the simmering process, the beets will become tender and the broth will thicken up, creating a hearty and satisfying soup.

This is the perfect time to give the borscht a taste and adjust the seasonings if needed. Add a pinch more salt or pepper to suit your personal preferences. Soon, your Russian borscht will be ready to enjoy!

Step 5. Add Tomato Paste and Spices

add tomato paste spices

Once the borscht has simmered and the vegetables have softened, it's time to add the next layer of flavor.

Grab that tube of tomato paste and give it a good squeeze. Watch as the rich, red paste swirls into the broth, bringing a burst of sweet and tangy notes. Don't be shy – add a few more tablespoons to really amp up the tomato flavor.

Now it's time for the spices. Reach for the paprika, caraway seeds, and a pinch of cayenne pepper. Sprinkle them in, stirring as you go, and breathe in the aromatic blend.

The paprika will lend a lovely smoky sweetness, while the caraway seeds add an earthy, almost licorice-like taste. The cayenne pepper will give the borscht a gentle kick, perfect for warming you up on a chilly day.

Advertisement

Keep tasting and adjusting the seasonings until the flavors are just right. Your borscht is really starting to come together now!

Final Thoughts

Ultimately, Russian borscht is a versatile and beloved dish that can be enjoyed in countless ways. Whether you prefer your borscht thick and hearty or light and refreshing, the combination of earthy beets, tangy sour cream, and fragrant dill is sure to delight your taste buds.

The vibrant purple hue of the soup isn't only visually stunning, but it also speaks to the incredible nutritional benefits of beets, which are packed with vitamins, minerals, and antioxidants.

As you ladle up a steaming bowl of borscht, the aroma of the simmering vegetables and spices will transport you to a cozy Russian kitchen. The rich, velvety texture of the soup, accented by the cooling creaminess of the sour cream, creates a harmonious balance of flavors that will have you coming back for seconds. If you’re in the mood for something different, try pairing your borscht with a side of pita bread and hummus for a unique twist on this classic dish. The earthy flavors of the borscht compliment the bold, tangy taste of the hummus, creating a delightful culinary fusion. This unexpected combination may just become your new middle eastern brunch favorite.

Frequently Asked Questions

What Is the Best Type of Beet to Use for Borscht?

The best type of beet to use for borscht is a chunkier, more vibrant variety like the golden or chioggia beets. They'll give your soup a beautiful color and a sweet, earthy flavor that's perfect for this classic dish.

Advertisement

How Can I Make Borscht More Creamy?

To make your borscht more creamy, you can blend a portion of the cooked beets and vegetables before adding them back to the soup. This will create a luxurious, velvety texture without compromising the dish's signature bold flavors.

Can I Use Canned Beets Instead of Fresh?

Yes, you can use canned beets instead of fresh. They'll give your borscht a similar flavor, though the texture won't be quite as fresh. Just be sure to adjust the seasoning to your taste.

Is Borscht Gluten-Free?

Yes, borscht is typically gluten-free. The main ingredients in borscht are beets, broth, and various vegetables, none of which contain gluten. As long as no gluten-containing ingredients are added, you can enjoy borscht as a gluten-free soup.

How Long Does Borscht Keep in the Refrigerator?

Borscht typically keeps well in the refrigerator for 3-5 days. Store it in an airtight container, and you can even freeze it for up to 3 months. Just be sure to reheat it thoroughly before serving.

Advertisement
Continue Reading

Global Soup Tour

Japanese Miso Soup: Daily Staple

Tantalizing and soulful, the Japanese miso soup – a daily staple – offers a delectable blend of umami flavors and probiotic benefits, inviting you to explore its rich cultural heritage.

Published

on

essential japanese miso soup

Miso soup is a cherished daily staple in Japanese homes, a comforting tradition passed down through generations. This savory broth with tofu and vibrant garnishes nourishes both body and soul. You'll delight in the umami flavors and satisfying textures, perfect for a light breakfast or a soothing afternoon pick-me-up. Miso's probiotic benefits support gut health, while the low-calorie, nutrient-dense ingredients make it an ideal choice for healthy eating. With so many customizable options, you're sure to find a version that suits your personal taste. Intrigued? Let's explore the rich history and cultural significance of this beloved Japanese dish.

Key Takeaways

  • Miso soup is a centuries-old staple in Japanese cuisine, rooted in the traditional practice of fermenting soybeans.
  • The dish holds rich cultural significance, often associated with home-cooked meals and commonly consumed as a breakfast item.
  • Miso soup's core components include umami-rich miso paste, dashi broth, tofu, seaweed, and green onions, providing a balance of flavors and nutrients.
  • Miso soup is low in calories, high in probiotics, and rich in vitamins, making it a healthy and versatile meal option.
  • The customizable nature of miso soup allows for various regional variations and personal preferences, contributing to its enduring popularity.

History

Miso soup has long been a staple in Japanese cuisine, tracing its roots back hundreds of years. It all started with the ancient practice of fermenting soybeans, which eventually led to the creation of this beloved dish.

Over time, various regions of Japan developed their own unique miso recipes, each with its own distinct flavor profile. Some use lighter, sweeter misos, while others prefer the bold, savory varieties.

No matter the type, miso soup has become an integral part of the Japanese daily routine, enjoyed for its comforting warmth and nutritious benefits. From busy office workers to cozy family dinners, this humble soup has the power to bring people together and nourish the body and soul.

Its rich history and cultural significance make miso soup a true treasure of Japanese culinary heritage.

Recipe

Miso soup is a quintessential Japanese dish that has been enjoyed for centuries. It's a nourishing and comforting broth that can be customized with a variety of ingredients to suit individual preferences.

Advertisement

At its core, miso soup is a simple yet flavorful dish that showcases the umami-rich paste known as miso. This fermented soybean paste adds depth and complexity to the broth, creating a satisfying and balanced flavor profile.

  • Dashi (Japanese stock)
  • Miso paste (white, yellow, or red)
  • Tofu, cubed
  • Wakame (dried seaweed), reconstituted
  • Scallions, sliced
  • Mushrooms (such as shiitake or enoki), sliced
  • Carrots, julienned
  • Potatoes, cubed

In a medium saucepan, bring the dashi to a gentle simmer. Gently whisk in the miso paste, adjusting the amount to suit your taste preferences. Add the tofu, wakame, scallions, and any other desired vegetables.

Simmer the soup for 5-10 minutes, or until the vegetables are tender and the flavors have melded together.

When preparing miso soup, it's important to avoid boiling the broth, as this can alter the delicate flavor and texture of the miso paste. Additionally, consider using a combination of miso pastes (e.g., white and red) to create a more complex and balanced flavor profile.

Lastly, the toppings can be customized to include seasonal ingredients, such as spinach, bok choy, or even a soft-boiled egg.

Cooking Steps

Ready to get cooking? First, bring the dashi stock to a rolling boil.

Advertisement

Next, gently stir in the miso paste until it's fully dissolved.

Then, add the tofu and veggies and let everything simmer until heated through.

Don't forget to top it off with a sprinkle of fresh green onions for a tasty finishing touch!

Step 1. Bring Dashi Stock to a Boil

boil dashi stock first

Simmering the dashi stock to a gentle boil, you'll want to keep a watchful eye, as the key to a well-balanced miso soup lies in this foundational step.

Bring the pot to a lively simmer, but be careful not to let it reach a rolling boil, which can result in a bitter, overpowered flavor. As the bubbles start to rise and the surface begins to dance, you'll know it's ready.

Now, this is where the magic happens! Grab your ladle and give the stock a gentle stir, releasing the aromatic umami notes that will infuse your soup.

Advertisement

The rich, savory aroma will start to fill the air, making your mouth water in anticipation. Be patient and let the stock simmer for a few minutes, allowing the flavors to meld and intensify.

This is the essential foundation that will support the miso's delicate flavors to come.

Step 2. Add Miso Paste to Dashi

miso paste into dashi

With the dashi stock now simmering to perfection, it's time to add the miso paste. Grab a small ladle and scoop up a bit of the hot broth. Carefully lower the ladle into the miso paste, swirling it around to dissolve the thick, savory goodness.

Slowly drizzle the miso-infused broth back into the pot, creating a rich, creamy texture. Don't worry if a few lumps remain – that's part of the charm!

Now, give the soup a gentle stir. Watch as the miso melts and blends seamlessly, turning the clear dashi into a comforting, amber-colored delight.

Breathe in the amazing aroma – the salty-sweet scent of miso mingling with the earthy dashi will have your taste buds tingling with anticipation. Get ready for a sip of this umami-packed masterpiece!

Advertisement

Whether you prefer light, white miso or the deeper, more intense flavors of red or brown miso, the possibilities are endless. Time to enjoy the ultimate Japanese comfort food.

Step 3. Add Tofu and Vegetables

incorporate tofu and vegetables

Next, go ahead and add the tofu and veggies to the aromatic miso-infused broth.

First, grab a nice, firm block of tofu and cut it into bite-sized cubes. Aren't those little cubes just so cute? Gently drop them into the simmering soup, where they'll soak up all the delicious flavors.

Now it's time for the veggies! Choose your favorites – maybe some sliced mushrooms, leafy greens, or crunchy carrots. Toss them right in and watch as they soften and become so tender. The vibrant colors will make your miso soup look like a work of art.

As the tofu and veggies mingle with the flavorful broth, your kitchen will be filled with the most amazing aroma.

It's making your mouth water, isn't it? Just a few more minutes and your nourishing, comforting miso soup will be ready to enjoy.

Advertisement

Mm, can you almost taste it?

Step 4. Garnish With Chopped Green Onions

garnish with green onions

The final touch that elevates your miso soup is a sprinkle of freshly chopped green onions. These bright, vibrant green stalks add a lovely pop of color and a delightful, oniony crunch to your savory soup.

Simply take a handful of green onions, give them a good rinse, and then slice them into thin, bite-sized pieces. Scatter the chopped onions over the surface of your steaming miso broth, watching them dance and float on top.

The combination of the earthy, umami-rich miso and the refreshing, slightly sweet green onions is an absolute delight for your taste buds. The onions also lend a beautiful, aromatic fragrance that heightens the overall experience.

Go ahead, take a deep breath and savor that wonderful aroma before taking your first sip. With the green onions added, your miso soup is now complete and ready to be enjoyed!

Step 5. Serve Immediately While Hot

serve hot immediately enjoy

Serve your freshly prepared miso soup immediately while it's hot. The steaming broth will warm you from the inside out, and the aroma of the savory miso paste will make your mouth water.

Carefully ladle the piping hot soup into your favorite bowl, being careful not to spill a single drop. You'll notice the vibrant green onions dancing on the surface, adding a pop of color and a delightful crunch with each bite.

Advertisement

As you take your first sip, the umami-rich flavors of the miso and dashi stock will tantalize your taste buds. The soft tofu cubes will melt in your mouth, providing a delightful contrast to the crisp seaweed and tender mushrooms.

Savor each flavorful spoonful, letting the warmth of the soup envelop you. This traditional Japanese dish is meant to be enjoyed immediately, so don't let it cool.

Slurp up every last drop for a truly authentic miso soup experience.

Final Thoughts

Ultimately, miso soup's simplicity and versatility make it a delightful choice for any meal.

Whether you're looking for a cozy weeknight dinner or a refreshing lunch, this classic Japanese dish has you covered. The savory, umami-rich broth pairs perfectly with the soft, tender tofu and crunchy vegetables, creating a harmony of flavors and textures that will leave you feeling satisfied and nourished.

Advertisement

Plus, the customizable nature of miso soup allows you to experiment with different ingredients, so you can tailor it to your own tastes.

From soothing on a cold day to cooling on a hot one, miso soup is a year-round wonder that deserves a spot in your regular meal rotation.

Frequently Asked Questions

What Is the Optimal Temperature for Serving Miso Soup?

The optimal temperature for serving miso soup is between 120-130°F (49-54°C). It should be warm enough to enjoy the complex flavors, but not so hot that it burns your mouth. Enjoy your miso soup at the perfect sipping temperature.

How Long Can Leftover Miso Soup Be Stored in the Refrigerator?

Leftover miso soup can be stored in the refrigerator for up to 3-4 days. Be sure to store it in an airtight container and reheat it thoroughly before serving for optimal flavor and safety.

What Are the Health Benefits of Regularly Consuming Miso Soup?

Consuming miso soup regularly provides numerous health benefits. It's rich in probiotics, which support gut health, and contains antioxidants that can boost your immune system. Plus, it's a low-calorie, nutrient-dense meal that can aid in weight management.

Advertisement

Can Miso Soup Be Frozen for Later Use?

You can absolutely freeze miso soup for later use. Just be sure to portion it out and store it in airtight containers. When you're ready to enjoy it, simply thaw it in the fridge and reheat it on the stovetop.

What Are Some Variations of Traditional Japanese Miso Soup?

There are several tasty variations of traditional Japanese miso soup, including ones with clams, tofu, wakame seaweed, and even kimchi. You can experiment with different types of miso and add your favorite vegetables or proteins.

Continue Reading

Affiliate Disclaimer
As an affiliate, we may earn a commission from qualifying purchases. We get commissions for purchases made through links on this website from Amazon and other third parties.

Advertisement

Latest

spicy korean pork stir fry spicy korean pork stir fry
Korean Cuisine1 hour ago

Duruchigi: Korean Spicy Pork Stir-Fry

On a quest for a flavorful dish that brings joy to the table? Discover the secrets behind the vibrant and...

dairy free soft vegan bread dairy free soft vegan bread
Baking and Pastry4 hours ago

Vegan Milk Bread: Soft and Fluffy Without the Dairy

Savor the softness of vegan milk bread that's delightfully fluffy and dairy-free; discover the secrets to perfecting this irresistible treat!

vietnamese ginger braised chicken vietnamese ginger braised chicken
Vietnamese Cuisine4 hours ago

Ga Kho Gung: Vietnamese Braised Chicken With Ginger

Unlock the mouthwatering secrets of Ga Kho Gung, a beloved Vietnamese braised chicken dish that's been delighting families for centuries.

sweet savory braised pork sweet savory braised pork
Vietnamese Cuisine4 hours ago

Vietnamese Thịt Kho Tàu: Sweet and Savory Braised Pork

Jump into the savory-sweet world of Vietnamese Thịt Kho Tàu, where tender pork simmers in a caramelized sauce for a...

bold spicy vietnamese ginger chicken bold spicy vietnamese ginger chicken
Vietnamese Cuisine4 hours ago

Vietnamese Ginger Chicken: Ginger Chicken for Bold and Spicy Flavors

Kickstart your taste buds with Vietnamese Ginger Chicken, a bold and spicy dish that'll transport you to the vibrant flavors...

flavorful chicken shawarma rice flavorful chicken shawarma rice
Middle Eastern Cuisine4 hours ago

Chicken Shawarma Rice: a Fusion Dish Packed With Flavor

Kick your taste buds into high gear with Chicken Shawarma Rice, a fusion dish that blends tender spice-rubbed chicken and...

crispy korean seaweed rolls crispy korean seaweed rolls
Korean Cuisine5 hours ago

Gimmari Korean: The Crispy Seaweed Rolls You’ll Love

Crispy, golden-brown gimmari are the irresistible Korean seaweed rolls with an ancient heritage that'll have you hooked - dive deeper...

instagrammable smoothie bowl creations instagrammable smoothie bowl creations
Beverage Deep Dives10 hours ago

Smoothie Bowl Art: Instagram-Worthy Breakfasts

Joyful, colorful, and nutrient-rich, smoothie bowls have become a social media sensation, tempting you to discover the secrets behind these...

effortless meals with slow cooker effortless meals with slow cooker
One-Pot Wonders10 hours ago

Slow Cooker Secrets: Set-It-and-Forget-It Meals for Busy Days

Discover the convenience and flavor of slow cooker meals that unlock hassle-free, mouthwatering dishes for your busy days.

effortless cooking with prep effortless cooking with prep
Kitchen Hacks and Tips13 hours ago

Mise En Place: the Key to Effortless Cooking

Never underestimate the power of mise en place - the ultimate secret to unlocking a world of effortless cooking and...

gut friendly low fodmap recipes gut friendly low fodmap recipes
Cooking for Special Diets18 hours ago

Low-FODMAP Diet: Gut-Friendly Recipes

Unlock the secrets to soothing your tummy troubles with delectable low-FODMAP recipes that'll leave you feeling nourished and satisfied. Discover...

flavorful african cassava leaf flavorful african cassava leaf
African Cuisine20 hours ago

Cassava Leaf: A Staple of African Cuisine Full of Flavor

Cassava leaves create a flavorful connection to African cuisine, inviting you to discover their unique taste and versatility in your...

Trending