Vietnamese Cuisine
Thit Ba Chi: Vietnamese Braised Pork Belly Recipe
O savor the rich flavors of Thit Ba Chi, a Vietnamese braised pork belly recipe that promises a delightful culinary experience; discover the secret to its tenderness!
Thit Ba Chi is a tasty Vietnamese dish made with braised pork belly that's perfect for family gatherings! First, you'll gather ingredients like pork belly, fish sauce, and sugar. You'll caramelize sugar until it's golden, then coat the pork in this yummy mixture. Simmer it low and slow so the flavors mix well and the meat becomes tender. Season with garlic, soy sauce, and black pepper for extra taste! Once it's ready, serve it over fluffy jasmine rice, and watch everyone enjoy. It's a heartwarming dish that's fun to make. Keep going to discover more about this delightful recipe!
Key Takeaways
- Thit Ba Chi, or Vietnamese braised pork belly, symbolizes family values and is often prepared for special occasions.
- Essential ingredients include pork belly, fish sauce, soy sauce, garlic, sugar, and black pepper for authentic flavor.
- Begin by caramelizing sugar to create a rich base before adding the pork belly and seasonings.
- Simmer the dish over low heat to achieve tender meat and a thick, sticky sauce.
- Serve Thit Ba Chi with steamed jasmine rice and optional fresh vegetables for a complete meal.
History
Vietnamese braised pork belly, or "thịt kho", has a rich history that reflects the country's agricultural traditions and family values. This delicious dish dates back many generations and is often made during special occasions and family gatherings.
You'll find that it's more than just food; it's a symbol of love and togetherness. In Vietnam, families would traditionally raise their own pigs, making pork a staple in their diet. When it came time to cook, they'd use simple ingredients like fish sauce, sugar, and black pepper, which were easy to find.
This dish embodies the idea of using what you have to create something special. Thịt kho is often served with rice, and it's the perfect meal to share with loved ones. The sweet and savory flavors not only fill your belly but also warm your heart.
With each bite, you can taste the love that goes into cooking it.
Cooking Steps
To get started with cooking your braised pork belly, gather all your ingredients and equipment to ensure a smooth process.
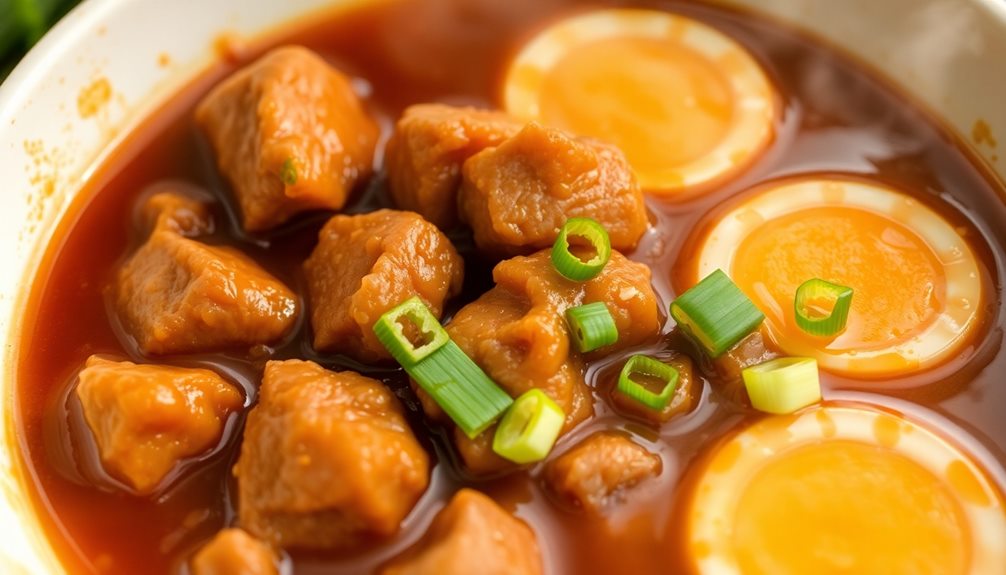
You'll need pork belly, soy sauce, fish sauce, sugar, garlic, and some hard-boiled eggs for that extra yum! Once you've got everything, chop the pork into bite-sized pieces.
Now, heat a large pot over medium heat. Add the pork, letting it sizzle until it's golden brown. This step makes it super tasty!
Next, toss in minced garlic and stir for a minute until it smells amazing.
Pour in the soy sauce and fish sauce, then sprinkle in the sugar. Stir everything together, letting the flavors mix.
Add enough water to cover the pork, and bring it to a boil. Once it's bubbling, reduce the heat and let it simmer for about an hour. This is when the magic happens!
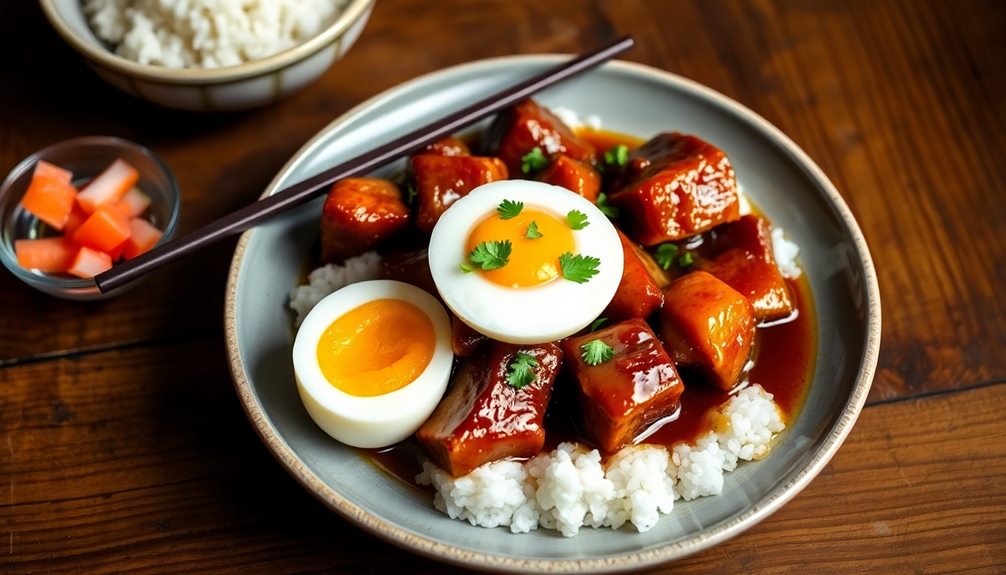
After an hour, gently add the hard-boiled eggs, letting them soak up all those delicious flavors.
Cook for another 30 minutes, and then it's done! Serve your braised pork belly with rice, and enjoy the wonderful taste of Vietnam right at home!
Step 1. Prepare Ingredients for Braising
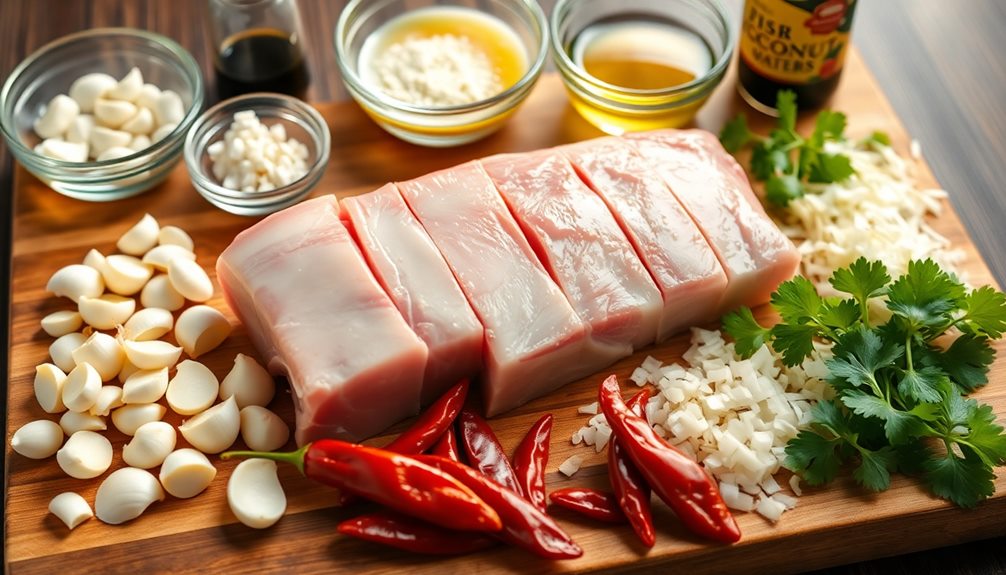
Before diving into the cooking process, you'll want to gather all the ingredients for braising. This step is super important because it makes everything easier and more fun!
You'll need about two pounds of pork belly, which will turn deliciously tender and flavorful. Don't forget to grab some fish sauce, soy sauce, and sugar for seasoning. You'll also need garlic, shallots, and black pepper to add that yummy taste!
Next, you'll want to pick up some hard-boiled eggs and green onions. The eggs soak up the delicious sauce and become a tasty treat on their own. The green onions will add a nice touch when you're ready to serve!
Make sure you have a pot or a Dutch oven ready, too. Once you have everything laid out, you'll feel like a master chef, ready to create something amazing.
Step 2. Add Caramelized Sugar Mixture
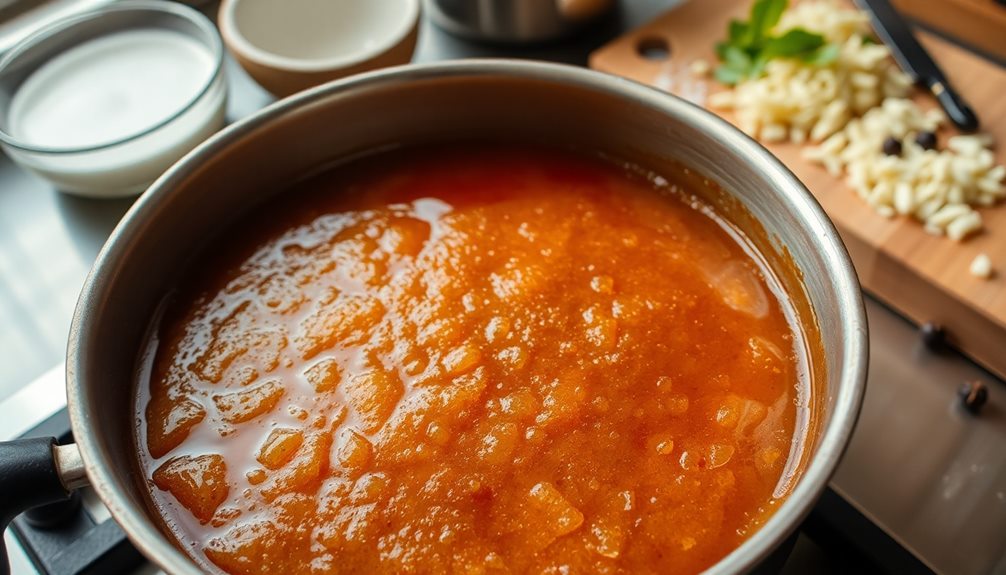
Start by caramelizing the sugar in your pot or Dutch oven to create a rich, flavorful base for the dish. Pour in the sugar and turn the heat to medium. Keep an eye on it as it starts to melt and turn a beautiful golden color. Stir it gently with a wooden spoon to avoid burning.
Once it's nicely caramelized, you'll notice a sweet aroma filling your kitchen!
Next, carefully add in a bit of water. It might bubble up, so stand back! This will help create a smooth caramel sauce. Stir well until the sugar dissolves completely.
Once that's done, it's time to add your pork belly pieces. Make sure they get coated in that delicious caramel mixture. This step is super important because it adds a wonderful flavor to your dish.
Now, sprinkle in some salt and pepper for seasoning. You can also toss in some garlic or shallots if you like! They'll add even more depth to the taste.
Stir everything together, and get ready for the next steps. You're doing an amazing job, and soon you'll have a dish that's full of delightful flavors!
Step 3. Simmer Until Tender
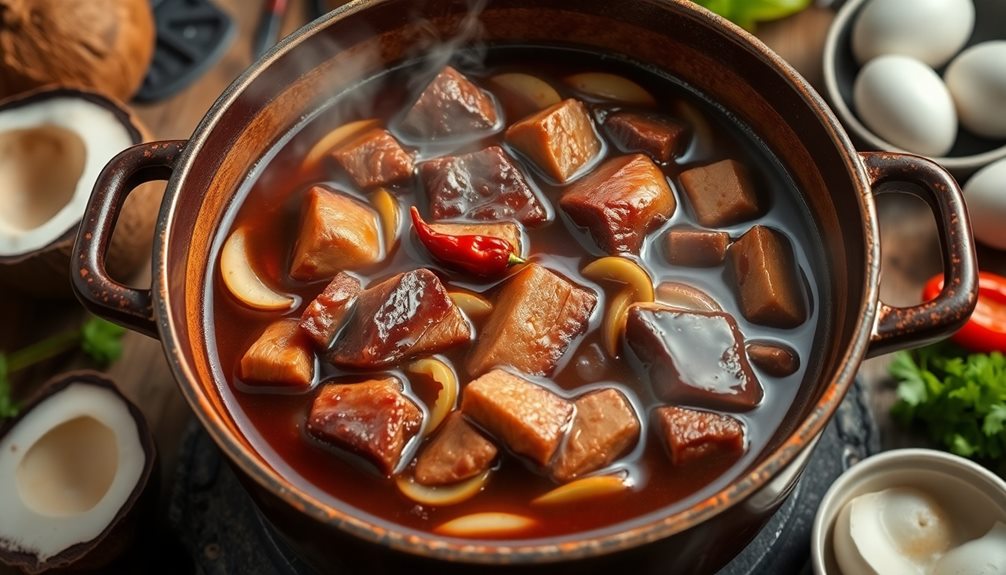
Now that your pork belly is coated in that enticing caramel mixture, it's time to let it simmer. Grab a pot and place it on the stove over low heat. You want to cook it slowly, so those flavors can blend perfectly.
Cover the pot with a lid but leave a little crack for steam to escape. This helps the meat become tender and juicy!
As it simmers, you'll notice the rich aroma filling your kitchen. It's like a warm hug! Let the pork belly simmer for about an hour. Don't rush it; good things take time.
Check on it every now and then, stirring gently to make sure nothing sticks to the bottom of the pot. If you see the sauce getting too thick, you can add a splash of water or broth to keep it nice and saucy.
You're looking for that perfect tenderness, where the meat easily pulls apart with a fork. Once it's ready, you'll feel a sense of accomplishment!
Your patience will pay off when you see that beautiful, glossy sauce, ready to be served. Exciting, isn't it?
Step 4. Add Seasonings and Herbs
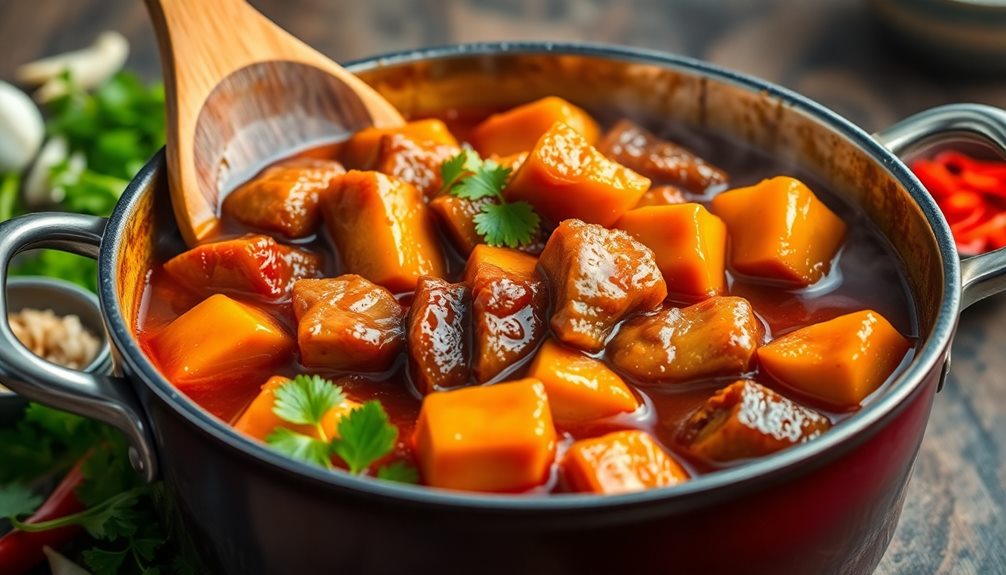
As your pork belly simmers to perfection, it's time to elevate those flavors by adding seasonings and herbs.
First, grab your salt and pepper. A sprinkle of salt will help enhance the natural flavor of the pork, while a dash of pepper adds a bit of zing.
Next, don't forget about the sugar! It balances the saltiness and adds a hint of sweetness that's just delightful.
Now, let's add some soy sauce. Pour in a good amount, and watch as it gives your dish a rich color and savory taste.
If you have it, toss in some fish sauce for an authentic Vietnamese twist. It's packed with umami and makes everything better! The saltiness and depth of the fish sauce will elevate your dish, bringing a unique balance to the flavors. For an even more flavorful option, you can try incorporating this ingredient into a traditional Vietnamese crab soup recipe. This comforting soup combines delicate crab meat, aromatic herbs, and a rich broth, making it a perfect meal for any occasion.
Step 5. Serve With Steamed Rice
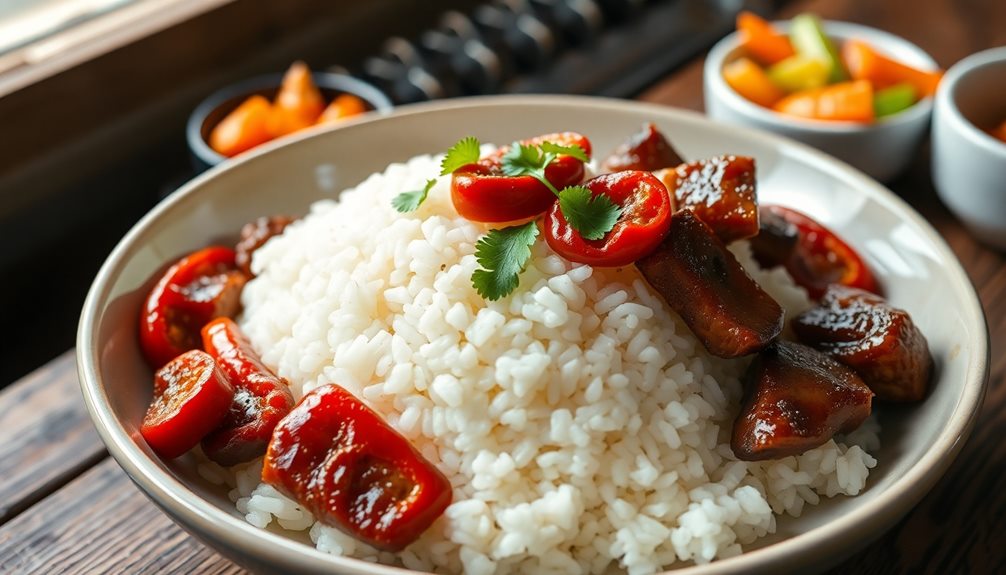
Once those flavors have melded beautifully, it's time to serve your delicious braised pork belly alongside fluffy steamed rice.
First, grab a large pot and fill it with water. Bring it to a boil and add your rice. You can use jasmine rice for a lovely aroma! Let it cook until it's soft and fluffy, usually about 15-20 minutes.
While the rice cooks, take a moment to check on your braised pork belly. The sauce should be thick and sticky, coating the tender meat perfectly.
When the rice is done, drain any excess water and fluff it with a fork.
Now, it's time to plate! Serve a generous scoop of rice on each plate, then add a hearty portion of the braised pork belly next to it.
Don't forget to drizzle some of that rich sauce over the rice. It's the best part!
You might want to add some fresh sliced cucumbers or pickled veggies on the side for a refreshing crunch.
Enjoy your meal with family or friends, and watch as smiles spread around the table. You've just created something special!
Final Thoughts
Ultimately, mastering the art of Vietnamese braised pork belly can elevate your culinary skills and impress your guests. This dish isn't just about cooking; it's about creating a wonderful experience for everyone at your table.
Imagine the delightful aroma filling your kitchen as the pork belly simmers, making everyone eager to taste it!
When you finally serve it up, you'll see smiles all around. The tender, juicy meat paired with the rich, savory sauce is simply irresistible.
Plus, the best part? You can easily customize the flavors to suit your taste! Add more spices or a hint of sweetness to make it uniquely yours.
Don't forget to share your cooking journey with friends and family. Invite them to join you in the kitchen, and let them help with the prep. It's a fantastic way to bond and create lasting memories.
Frequently Asked Questions
Can I Use a Different Cut of Pork for This Recipe?
Yes, you can use a different cut of pork for this recipe. Just keep in mind that cooking times and flavors may vary, so adjust accordingly to ensure your dish turns out delicious.
What Side Dishes Pair Well With ThịT Ba Chỉ?
You'll love pairing your dish with steamed jasmine rice, pickled vegetables, or a fresh green salad. These sides balance the richness and enhance flavors, making your meal vibrant and satisfying. Enjoy the combination!
How Do I Store Leftovers Properly?
To store leftovers properly, let them cool to room temperature first. Then, transfer them to airtight containers and refrigerate. They'll stay fresh for up to four days, or freeze them for longer storage.
Can I Make ThịT Ba Chỉ in a Slow Cooker?
Yes, you can make it in a slow cooker! Just layer your ingredients, set it on low, and let it cook for several hours. You'll enjoy tender, flavorful results without much fuss.
What Variations Exist for This Traditional Recipe?
You can explore various variations by adding ingredients like mushrooms, hard-boiled eggs, or different spices. Try using alternative meats, too, such as chicken or beef, to create unique flavors while keeping the essence of the dish.
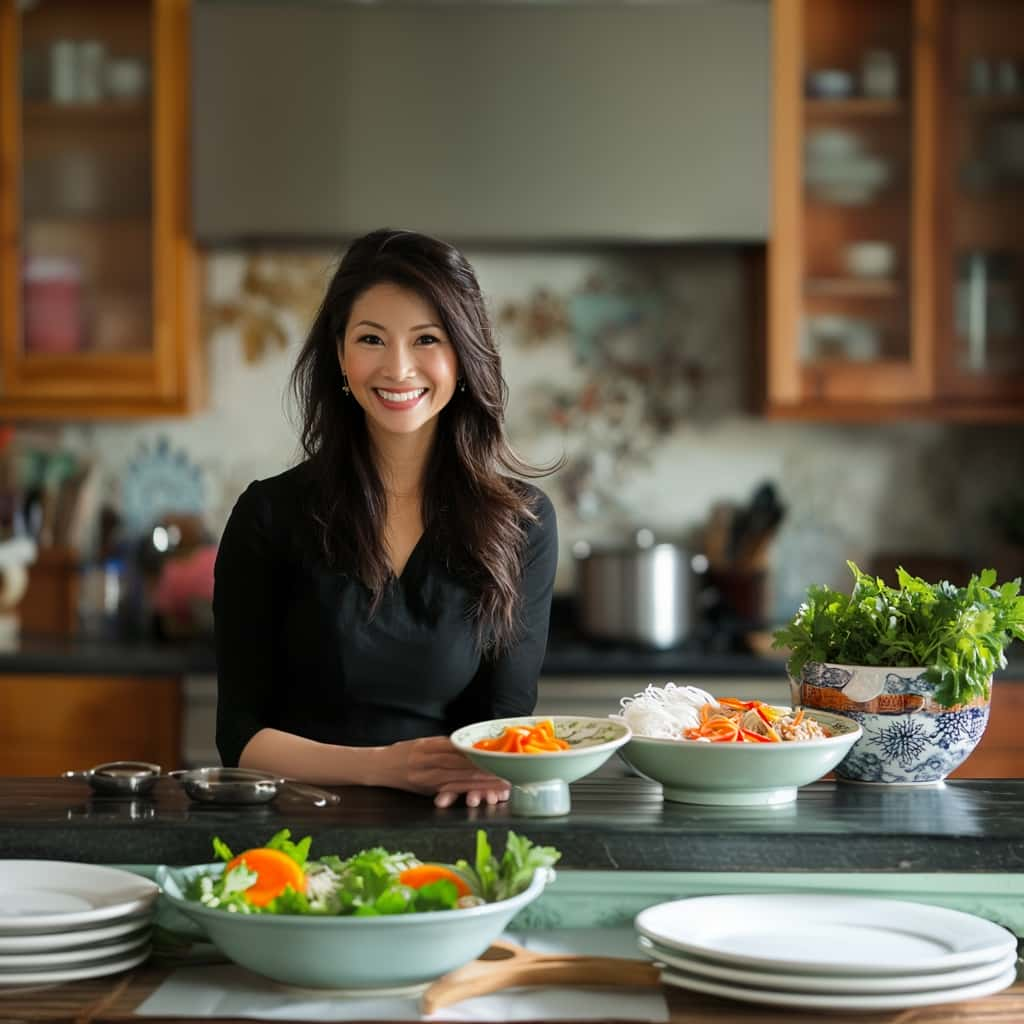
Mai is a passionate chef specializing in Vietnamese cuisine. From fragrant pho to fresh spring rolls and banh mi, Mai’s dishes showcase the balance of sweet, salty, sour, and spicy that defines Vietnamese cooking. Her recipes emphasize fresh herbs, flavorful broths, and the light, vibrant ingredients that make Vietnamese food so special.
Vietnamese Cuisine
Vietnamese Giò Heo: The Savory Pork Hock Recipe You’ll Love
Offering a mouthwatering fusion of fragrant spices and tender pork, this cherished Vietnamese dish promises a culinary adventure that will captivate your senses.
Get ready to savor the tender, savory goodness of Vietnamese Giò Heo – a cherished pork hock dish that's been delighting families for generations! This comforting meal blends aromatic spices, fragrant herbs, and juicy pork for a flavor explosion. Originating in rural regions, Giò Heo showcases Vietnam's rich culinary heritage, celebrating the art of communal dining and passing down beloved recipes. Whether you enjoy it alone or share it with loved ones, this dish is sure to warm your soul and leave you craving more. Keep reading to discover the secrets behind this authentic Vietnamese delicacy.
Key Takeaways
- Giò Heo is a centuries-old Vietnamese dish featuring tender pork hock, fragrant spices, and delicate wrappers, reflecting the country's rich culinary heritage.
- The dish is often served during festive gatherings, encouraging sharing and passing down recipes through generations, representing family-oriented meals.
- The preparation involves layering and tightly wrapping a mixture of ground pork, garlic, shallots, spices, and rice paper for a unique taste experience.
- Slow cooking techniques are used to achieve optimal tenderness and flavor, with emphasis on balancing the savory, sweet, and fragrant elements.
- Giò Heo offers a unique dining experience that celebrates the resourcefulness and creativity inherent in Vietnamese cuisine.
History
The origins of Giò Heo, a popular Vietnamese pork sausage, can be traced back centuries. This savory delight has been a staple in Vietnamese cuisine for generations, passed down from one family to the next.
What started as a simple way to preserve pork has evolved into a beloved dish that celebrates the country's rich culinary heritage.
Giò Heo's roots lie in the rural regions of Vietnam, where resourceful farmers would use every part of the pig to nourish their families. The pork hocks, often discarded by others, were slow-cooked to extract the flavorful juices and tender meat.
This process not only tenderized the tough cuts but also infused them with a depth of flavor that became the hallmark of Giò Heo. Over time, the dish was refined, with the addition of aromatic spices and herbs, creating the distinctive taste that Vietnamese families cherish today.
Recipe
Gio Heo, or Vietnamese Pork Roll, is a savory and flavorful dish that originates from Vietnam. It features a combination of tender pork, fragrant spices, and a delicate wrapper, creating a delightful and satisfying eating experience.
The unique preparation process involves carefully layering the pork, seasonings, and other ingredients, then tightly wrapping them to form a cylindrical shape. This technique not only enhances the flavors but also gives the dish its distinctive appearance.
Ingredients:
- 1 lb ground pork
- 1 tsp ground black pepper
- 1 tsp salt
- 2 cloves garlic, minced
- 1 shallot, finely chopped
- 1 tbsp fish sauce
- 1 tbsp sugar
- 1 tsp ground coriander
- 1 tsp ground cumin
- 1 tsp ground fennel
- 1 tsp ground cardamom
- 1 package rice paper wrappers
Cooking Instructions:
In a mixing bowl, combine the ground pork, black pepper, salt, garlic, shallot, fish sauce, sugar, coriander, cumin, fennel, and cardamom. Mix well until all the ingredients are evenly distributed.
Lay a rice paper wrapper on a clean work surface, and place a portion of the pork mixture in the center. Fold the sides of the wrapper over the filling, then tightly roll the wrapper to form a cylindrical shape. Repeat this process with the remaining wrappers and pork mixture.
Additional Tips:
When working with rice paper wrappers, it's important to keep them moist to prevent them from becoming brittle. You can lightly mist the wrappers with water or dip them in water briefly before using.
Additionally, be careful not to overstuff the wrappers, as this can cause them to tear or break during the rolling process. Enjoy your homemade Gio Heo, either on its own or with your favorite dipping sauce.
Cooking Steps
First, you'll want to season the pork hock with a bit of salt.
Then, you'll braise the pork hock in a tasty liquid until it's nice and tender.
Finally, you'll caramelize the pork hock by broiling it until it's beautifully golden brown.
Serve this delicious Giò Heo with some fluffy white rice for a truly mouthwatering meal!
Step 1. Season Pork Hock With Salt
Seasoning the pork hock with salt is a crucial step in this Vietnamese Giò Heo recipe.
You'll want to thoroughly rub salt all over the surface of the pork, ensuring every nook and cranny is coated. This not only seasons the meat, but also helps to draw out excess moisture, leading to a wonderfully crispy skin when cooked.
Be generous with the salt – around 1 teaspoon per pound of pork should do the trick.
Rub it in with your fingertips, getting into all the creases and crevices. Don't be afraid to really massage the salt into the meat. This will help it penetrate deep and infuse the pork with that signature salty-savory flavor.
Once the pork hock is well-seasoned, you're ready to move on to the next step.
Get ready for the pork to transform into a crispy, caramelized masterpiece!
Step 2. Braise Pork Hock in Liquid
With the pork hock now beautifully seasoned, you'll want to braise it in a savory liquid. In a large pot or Dutch oven, add the pork hock and cover it with water or broth. Bring the liquid to a boil, then reduce the heat to low, cover the pot, and let it simmer for about 2 hours. This low and slow cooking method will make the meat incredibly tender and flavorful.
As the pork hocks braise, the liquid will infuse them with an array of aromatic spices and herbs. You may want to add some whole cloves of garlic, slices of ginger, star anise, cinnamon sticks, and a few bay leaves to the pot. These ingredients will create a truly authentic Vietnamese flavor profile.
Be sure to check on the pork hocks occasionally, adding more liquid if needed to keep them submerged. After 2 hours, the meat should be falling off the bone and ready to serve. Get ready to enjoy this deliciously tender, savory Vietnamese Gìò Heo!
Step 3. Caramelize Pork Hock With Sugar
After braising the pork hock in the aromatic liquid, you'll want to caramelize it with sugar to create a beautiful glossy glaze.
To do this, simply sprinkle some white sugar over the top of the pork hock. Use your hands to gently rub the sugar all over the surface, making sure to coat it evenly.
Next, place the pork hock under a hot broiler for 2-3 minutes. Watch it closely as the sugar will quickly start to melt and caramelize, creating a lovely golden-brown crust.
Once you see that crispy, caramelized layer forming, remove the pork hock from the oven.
Now, let the pork hock rest for a few minutes. As it cools, the sugar will continue to set, resulting in a shiny, sticky glaze that clings to the meat.
Slice into the pork hock and enjoy the perfect balance of savory and sweet flavors! The caramelized exterior adds an irresistible crunch and depth of flavor to this Vietnamese classic.
Step 4. Broil Pork Hock Until Caramelized
Next, pop the pork hock under a hot broiler and keep an eye on it.
You'll want to broil it until the skin is beautifully caramelized, a deep golden brown. Resist the urge to walk away – this part goes quickly!
Every minute or two, turn the hock to ensure even browning all around.
Once that crackly crust starts to form, you'll know it's time to take it out. The internal temperature should reach 165°F.
Be careful when you remove it, as the pork hock will be piping hot. Let it rest for a few minutes before slicing into it.
Now, admire your handiwork! The pork hock should have an irresistible sheen and a satisfying crunch when you take a bite.
Prepare to be amazed by the incredible flavors that come through – the sweetness from the caramelization, the savory pork, and that signature Vietnamese flair.
Get ready to dig in and enjoy every last morsel!
Step 5. Serve Pork Hock With Rice
Now it's time to serve up this delectable pork hock. Grab your plate and get ready for a flavor explosion!
Place a generous portion of the caramelized pork hock over a bed of fluffy, fragrant white rice. The savory, sticky glaze will soak into the rice, creating an irresistible combination.
Don't forget to spoon over any of the remaining cooking juices – they're packed with rich, porky goodness.
Top the dish with a sprinkle of chopped scallions or cilantro for a pop of freshness.
Serve this Vietnamese Giò Heo immediately while the pork is still warm and crispy. The contrasting textures and bold, satisfying flavors will have your taste buds dancing.
Encourage everyone to dig in and savor every bite! This dish is best enjoyed family-style, so gather around the table and share in the deliciousness.
Get ready for oohs and aahs as your loved ones experience the magic of this incredible pork hock recipe.
Final Thoughts
The Vietnamese Giò Heo recipe is a delightful blend of savory flavors that showcases the rich cultural heritage of Vietnamese cuisine.
Whether you're hosting a festive gathering or simply craving a comforting meal, this pork hock dish is sure to impress. The slow-simmered pork, infused with aromatic spices and herbs, creates a mouthwatering centerpiece that brings the family together.
Serve it alongside fluffy white rice, and you've got a truly satisfying and authentic Vietnamese experience.
Don't be intimidated by the unfamiliar ingredients – the step-by-step instructions make it easy to recreate this beloved dish in your own kitchen.
So why not give it a try? Your taste buds will thank you, and you'll have a new favorite recipe to share with loved ones.
Embrace the flavors of Vietnam and indulge in the deliciousness of Vietnamese Giò Heo!
Frequently Asked Questions
Can Vietnamese Giò Heo Be Made With Other Types of Pork?
Yes, you can make gio heo with other types of pork. The dish's flavor and texture will vary depending on the cut of pork you use, but it's a versatile recipe that can be tailored to your preferences.
How Long Does the Marinating Process Typically Take for Giò Heo?
The marinating process typically takes anywhere from 2-4 hours. You'll want to give the pork enough time to fully absorb the flavors of the marinade, so don't rush it. Patience is key for the best results.
What Are the Key Spices Used in the Traditional Giò Heo Recipe?
The key spices used in the traditional Gio Heo recipe typically include star anise, cinnamon, and black pepper. These aromatic spices lend the pork hock dish its distinct savory and fragrant flavor profile.
Can Giò Heo Be Stored for Later Use, and if So, How?
Yes, you can store Giò Heo for later use. Simply refrigerate the cooked pork hock in an airtight container for up to 5 days. When ready to serve, reheat it gently on the stovetop or in the oven.
Are There Any Variations or Regional Differences in Giò Heo Recipes?
Yes, there are regional variations in gio heo recipes. Depending on the area, the seasonings and cooking methods may differ to reflect local flavors and preferences. Some regions may add unique spices or use different braising techniques.
Mai is a passionate chef specializing in Vietnamese cuisine. From fragrant pho to fresh spring rolls and banh mi, Mai’s dishes showcase the balance of sweet, salty, sour, and spicy that defines Vietnamese cooking. Her recipes emphasize fresh herbs, flavorful broths, and the light, vibrant ingredients that make Vietnamese food so special.
Vietnamese Cuisine
Bánh Ram It: Vietnamese Sticky Rice Cakes With Crispy Goodness
Luring the senses with its soft, chewy interior and crispy outer shell, Bánh ram it, a centuries-old Vietnamese sticky rice cake, promises a flavorful journey through culinary heritage.
Embark on a flavorful journey through Vietnam's culinary heritage with bánh ram it – a delightful sticky rice cake that delights the senses. This centuries-old delicacy features a soft, chewy interior and a satisfying crispy outer shell, crafted by skilled cooks. The preparation process is a meticulous dance, from soaking the rice overnight to steaming it with fragrant coconut milk. Wrapping the cakes in banana leaves adds an extra layer of flavor and tradition. Discover the unique regional variations that make bánh ram it a beloved snack and ceremonial offering across Vietnam. This delicacy promises to nourish both your body and soul.
Key Takeaways
- Bánh ram it is a traditional Vietnamese snack made from sticky rice, coconut milk, sugar, and salt, with a soft, chewy texture and crispy exterior.
- The dish has a long history, with origins traced back to the Ly and Tran dynasties, where it was served at royal banquets.
- Preparation involves soaking the sticky rice overnight, steaming the rice mixture, and wrapping the cakes in banana leaves for added flavor.
- Regional variations exist, with unique flavors and textures, reflecting the diverse culinary heritage of Vietnam.
- Bánh ram it is not only a beloved snack but also holds ceremonial significance, making it an integral part of Vietnam's cultural identity.
History
Originating in the ancient rice-growing regions of Vietnam, sticky rice cakes have long held a cherished place in the country's culinary heritage.
These delectable treats, known as bánh ram it, have been crafted by skilled Vietnamese cooks for centuries, passing down their time-honored recipes from generation to generation.
The history of these sticky rice cakes can be traced back to the Ly and Tran dynasties, when they were often served at royal banquets and important ceremonies.
Over time, the recipe has evolved, with different regions developing their own unique variations, each with its own distinctive flavors and textures.
Today, bánh ram it remains a beloved snack and ceremonial offering, enjoyed by people across Vietnam.
From the bustling markets of Hanoi to the tranquil villages of the Mekong Delta, these sticky rice cakes continue to delight and nourish the senses, a testament to the rich culinary traditions of Vietnam.
Cooking Steps
To begin, gather the necessary ingredients and prepare your work surface. You'll need sticky rice, coconut milk, sugar, and salt.
Start by soaking the sticky rice in water for at least 2 hours or up to overnight. This will help the rice become soft and pliable.
Next, drain the rice and transfer it to a steamer basket. Steam the rice for about 20-25 minutes, stirring occasionally, until it's cooked through and tender.
While the rice is steaming, combine the coconut milk, sugar, and salt in a saucepan. Heat the mixture, stirring frequently, until the sugar has dissolved and the sauce is smooth.
Once the rice is cooked, transfer it to a large bowl. Slowly pour the coconut milk mixture over the hot rice, stirring gently to coat each grain.
Knead the mixture with your hands until it forms a sticky, cohesive dough.
Step 1. Soak Sticky Rice Overnight
Soaking the sticky rice overnight is a crucial first step in crafting these traditional Vietnamese delicacies.
You'll want to start by placing the rice in a large bowl and adding enough water to fully submerge the grains. Cover the bowl and let it sit at room temperature for at least 8 hours, or overnight.
This soaking process softens the rice, making it easier to work with and ensuring a perfectly chewy texture in the final cakes.
While the rice soaks, you can prepare the other ingredients needed for the recipe.
When you're ready to continue, simply drain the rice in a colander and give it a gentle rinse.
The rice should now be plump, hydrated, and ready to be transformed into beautiful, fragrant Banh Ram It.
With this crucial step complete, you're well on your way to creating a batch of these beloved Vietnamese treats.
Step 2. Drain and Rinse Sticky Rice
After the rice has soaked overnight, it's time to prepare it for the next step. Grab a colander and carefully pour the rice into it, letting the excess water drain out.
Once the rice is mostly drained, give it a quick rinse under some cool, running water. This helps remove any remaining starch or impurities. Gently swish the rice around with your hands to ensure everything gets a good cleaning.
Now, shake the colander to help the rice drain even more. You want to get rid of as much water as possible before the next stage. The drier the rice, the better it'll cook up.
Once you're satisfied with the drainage, transfer the rice to a large bowl or tray. Spread it out in an even layer so it can air-dry for a bit. This step is crucial, as wet rice won't cook properly.
Take a few minutes to let the rice firm up before moving on. Soon, you'll be ready to steam those sticky rice cakes to perfection!
Step 3. Combine Rice With Coconut Milk
With the rice nicely dried, it's time to combine it with the coconut milk. In a large bowl, pour in the creamy, fragrant coconut milk.
Gently stir in the sticky rice, making sure each grain is coated evenly. You'll notice the rice starts to soften and plump up as it absorbs the rich, coconut-y goodness.
Next, cover the bowl and let the mixture sit for about 30 minutes. This allows the flavors to meld and the rice to fully soak up the coconut milk.
Occasionally give it a gentle stir to ensure even distribution.
Once the time is up, the rice should have a luxurious, velvety texture. It's now ready to be shaped into the iconic Vietnamese sticky rice cakes.
Grab small handfuls of the coconut-infused rice and mold them into bite-sized oval shapes.
Be careful not to pack it too tightly, as you want the cakes to maintain their soft, pillowy consistency.
Step 4. Steam the Rice Mixture
Once the rice mixture is ready, go ahead and set up your steaming apparatus.
You'll need a pot with a tight-fitting lid and a steamer basket that fits inside. Fill the pot with about 2 inches of water, making sure the water doesn't touch the bottom of the steamer basket. Bring the water to a boil over high heat.
When the water is boiling, carefully place the steamer basket filled with the rice mixture into the pot. Cover the pot with the lid and let the rice steam for about 25-30 minutes, or until the rice is tender and the cakes have a sticky, glutinous texture.
Resist the urge to lift the lid during the steaming process, as this will release the steam and slow down the cooking.
Once the rice is done, remove the steamer basket and let the cakes cool slightly before serving. They'll be hot and delicious, perfect for sharing with family and friends.
Step 5. Wrap in Banana Leaves
To wrap the steamed rice cakes, you'll need some fresh banana leaves. Look for leaves that are large, pliable, and free of any holes or blemishes. Carefully rinse the leaves under cool water to remove any dirt or debris, then pat them dry with a clean towel.
Now, take a leaf and place it shiny-side down. Scoop about 2-3 tablespoons of the warm, sticky rice mixture onto the center of the leaf. Fold the sides of the leaf over the rice, then roll it up tightly to enclose the filling completely. Secure the wrapped cake with a thin strip of banana leaf or some kitchen string.
Repeat this process with the remaining rice mixture and leaves, creating a neat bundle of aromatic, steaming-hot bánh rạm ít. These wrapped cakes are now ready to be steamed again briefly before serving.
The banana leaf wrapper will infuse the rice with a subtle, fragrant flavor that's simply irresistible.
Final Thoughts
Vietnamese sticky rice cakes are a delightful and unique culinary experience. These traditional treats are a true delight for the senses. The soft, chewy texture of the sticky rice perfectly complements the crispy outer shell, creating a heavenly sensation in your mouth. One bite, and you'll be transported to the bustling streets of Vietnam, where the aroma of these cakes fills the air.
As you savor each morsel, you'll appreciate the care and craftsmanship that goes into their preparation. From the meticulous wrapping in fragrant banana leaves to the delicate steaming process, every step is carried out with precision. The result is a dish that not only nourishes the body but also the soul, connecting you to the rich cultural heritage of Vietnam.
Whether enjoyed as a snack or a dessert, these Vietnamese sticky rice cakes are sure to leave a lasting impression. Their unique flavors and textures will have you coming back for more, eager to explore the depth and complexity of this beloved delicacy.
Frequently Asked Questions
How Long Do Bánh Ram It Take to Ferment?
The fermentation process for these sticky rice cakes typically takes 12-24 hours. You'll want to allow the batter to rest and ferment fully to develop the desired flavor and texture.
Can I Substitute the Rice Flour With Other Flours?
You can substitute the rice flour with other flours, but it'll affect the texture and flavor. Try experimenting with glutinous rice flour, tapioca flour, or even a blend to see what works best for your needs.
How Do I Know When the Bánh Ram It Are Fully Cooked?
To know when the sticky rice cakes are fully cooked, look for the edges to turn golden brown and crispy. You can also test them by gently pressing on the center – it should feel firm and hold its shape.
Can I Freeze the Bánh Ram It for Later Use?
Yes, you can freeze the bánh ram it for later use. Just wrap them tightly in plastic or aluminum foil to prevent freezer burn. When ready to eat, thaw them at room temperature before reheating.
What Is the Best Way to Reheat the Bánh Ram It?
To reheat the bánh ram it, you can either place it in a preheated oven for 5-10 minutes or warm it up on the stovetop over medium heat, turning occasionally, until heated through. Avoid microwaving as it may make the texture soggy.
Mai is a passionate chef specializing in Vietnamese cuisine. From fragrant pho to fresh spring rolls and banh mi, Mai’s dishes showcase the balance of sweet, salty, sour, and spicy that defines Vietnamese cooking. Her recipes emphasize fresh herbs, flavorful broths, and the light, vibrant ingredients that make Vietnamese food so special.
Vietnamese Cuisine
Goi Du Du: Vietnamese Papaya Salad Bursting With Fresh Flavors
Welcoming your taste buds to a Vietnamese culinary adventure, Goi Du Du: Vietnamese Papaya Salad Bursting With Fresh Flavors is a must-try for those seeking a vibrant and authentic experience.
Embrace the bold flavors of Vietnam with the vibrant Goi Du Du – Vietnamese Papaya Salad! This refreshing dish bursts with crunchy delight, captivating your taste buds with its harmonious blend of sweet, sour, and herbal notes. Shredded green papaya and carrots provide a satisfying texture, while crushed peanuts and fresh herbs like mint and cilantro elevate the dish. It's a popular street food that's perfect for casual gatherings or family meals. What makes this salad truly special is its deep cultural roots and adaptability – you'll discover more about its fascinating history and regional variations if you keep reading.
Key Takeaways
- Vietnamese papaya salad, known as Goi Du Du, is a refreshing dish with deep roots in Vietnamese cuisine, reflecting diverse culinary traditions.
- It is made primarily with shredded green papaya, carrots, bean sprouts, peanuts, and aromatic herbs, creating a balance of sweet, tangy, and crunchy flavors.
- The salad is a popular street food and can be served as a light appetizer or side dish, often at family gatherings and festive celebrations.
- The versatile recipe allows for customization, including optional proteins, and is low in calories, making it suitable for healthy diets.
- The dish represents the vibrant food culture of Vietnam and continues to evolve while maintaining its traditional roots.
History
Papaya salad has long been a beloved dish in Vietnamese cuisine, with roots tracing back to the country's diverse culinary traditions. This refreshing and vibrant dish showcases the unique flavors and textures that have captivated Vietnamese families for generations.
The origins of this salad can be found in the lush tropical regions of Vietnam, where papayas grow abundantly. Over time, enterprising cooks began experimenting with papaya's crisp texture and subtle sweetness, blending it with a variety of fresh herbs, vegetables, and zesty dressings.
This fusion of flavors created a truly remarkable dish that has become a staple at family gatherings, street markets, and festive celebrations.
Today, the Vietnamese papaya salad continues to evolve, with each region and household putting their own spin on the classic recipe. From the tangy and spicy versions of the north to the more sweet and balanced renditions of the south, this dish showcases the incredible diversity and creativity of Vietnamese culinary heritage.
Recipe
Papaya salad, known as Gỏi Đu Đủ in Vietnamese, is a refreshing and vibrant dish that showcases the natural sweetness and crunch of green papaya. This salad is a popular street food in Vietnam and is often enjoyed as a light and healthy appetizer or side dish.
The combination of thinly sliced papaya, tangy lime dressing, and aromatic herbs creates a harmonious balance of flavors and textures, making it a delightful addition to any meal.
Ingredients:
- 1 green papaya, peeled, seeded, and shredded
- 1 carrot, peeled and julienned
- 1 cup bean sprouts
- 1/2 cup roasted peanuts, chopped
- 1/2 cup fresh mint leaves
- 1/2 cup fresh cilantro leaves
- 2 tablespoons lime juice
- 2 tablespoons fish sauce
- 1 tablespoon sugar
- 1 Thai chili, thinly sliced (optional)
Instructions:
In a large bowl, combine the shredded papaya, julienned carrot, bean sprouts, chopped peanuts, mint leaves, and cilantro leaves.
In a separate small bowl, whisk together the lime juice, fish sauce, and sugar until the sugar is dissolved.
Pour the dressing over the salad and toss gently to coat evenly. If desired, add thinly sliced Thai chili for a touch of heat.
When preparing this dish, it's important to use a green, unripe papaya, as it provides the perfect crunch and texture for the salad.
Adjust the seasoning to your taste, adding more lime juice for tartness or fish sauce for a savory umami flavor.
Serve this Vietnamese papaya salad chilled or at room temperature, and enjoy its refreshing and vibrant flavors.
Cooking Steps
Shred the green papaya into thin, julienne strips.
Toss the papaya with tangy lime juice and savory fish sauce.
Add crisp shredded carrots, crunchy crushed peanuts, and aromatic fresh herbs for a vibrant and flavor-packed Vietnamese papaya salad.
Step 1. Shred Green Papaya Julienne
To prepare the green papaya for the salad, you'll need to shred it into thin, julienne strips. Using a sharp knife or a mandoline slicer, carefully slice the papaya lengthwise into long, thin strips.
Don't worry if they're not perfectly uniform – the variation in size will add texture and interest to the final dish.
Once you've shredded the papaya, give it a good rinse under cold water to remove any dirt or debris. Then, use your hands to gently squeeze out any excess moisture, being careful not to break the delicate strips.
This will help the papaya absorb all the vibrant flavors of the salad dressing.
Now, your green papaya is ready to be tossed with the other fresh ingredients, like crunchy carrots, tangy lime juice, and fragrant herbs.
Get ready to experience the bright, refreshing tastes of this classic Vietnamese salad!
Step 2. Toss With Lime Juice and Fish Sauce
With the papaya neatly shredded, you're ready to toss it with the bright and bold flavors that make this salad shine.
Start by squeezing in the tangy juice of fresh limes. A few tablespoons should do the trick, adding a zesty punch that awakens your taste buds.
Next, drizzle in some savory fish sauce. This umami-rich condiment infuses the salad with a depth of flavor that's simply irresistible. Don't be shy – a couple of tablespoons will create the perfect balance.
Use your hands or a pair of tongs to gently toss everything together, ensuring the papaya is evenly coated in the lime and fish sauce mixture.
The result is a vibrant, flavorful salad that's bursting with freshness.
Now, your Vietnamese papaya salad is ready to serve! Garnish it with a sprinkle of crushed peanuts or a handful of fresh herbs for a finishing touch.
Get ready to delight your senses and impress your guests with this irresistible dish.
Step 3. Add Shredded Carrots
Take a moment to add some shredded carrots to the mix. These vibrant, crunchy veggies will bring a delightful pop of color and texture to your Vietnamese papaya salad.
Grab a handful of carrots and, using a sharp vegetable peeler or a box grater, shred them into thin, delicate strands. Toss the shredded carrots into the salad, mixing them in with the tangy lime juice and savory fish sauce.
The carrots will add a satisfying crunch that perfectly complements the soft, juicy papaya. Feel free to adjust the amount of carrots to your taste – a little can go a long way in enhancing the overall balance and harmony of this fresh, flavorful dish.
With the addition of these sweet, earthy carrots, your Vietnamese papaya salad is well on its way to being a delightful and visually appealing culinary creation.
Step 4. Add Crushed Peanuts
Next, let's add some crunch to the salad with crushed peanuts! You're going to love the delightful texture they bring.
Grab a handful of roasted, unsalted peanuts and place them in a ziplock bag. Use a rolling pin or the back of a spoon to gently crush the peanuts into small, bite-sized pieces. Be careful not to over-crush them – you want some delicious crunch, not dust!
Sprinkle the crushed peanuts over the shredded papaya and carrots. The peanuts will add a wonderful nutty flavor and satisfying crunch to every bite. Feel free to add a little more or less, depending on your personal taste preferences.
Now that you've added the peanuts, your Vietnamese papaya salad is really coming together! The tangy dressing, crunchy veggies, and toasted peanuts create such a mouthwatering combination.
Get ready for your taste buds to be dazzled!
Step 5. Add Chopped Fresh Herbs
Chopping fresh herbs is the next step in elevating your Vietnamese papaya salad. You'll want to gather a vibrant mix of fragrant herbs like cilantro, Thai basil, and mint.
Finely chop these leafy greens, releasing their aromatic oils and adding a burst of freshness to your salad. In addition to their flavor, these herbs reflect a growing trend towards local options for fresh, unique flavors that many consumers are embracing.
The cilantro's bright, citrusy notes will complement the crisp papaya perfectly. The Thai basil brings a touch of licorice, while the mint offers a cool, refreshing finish.
Together, these herbs create a flavor symphony that will have your taste buds dancing.
Gently fold the chopped herbs into your salad, making sure they're evenly distributed. The vibrant green flecks will add both flavor and visual appeal, making your Vietnamese papaya salad a true feast for the senses.
Get ready to enjoy the perfect balance of sweet, sour, and herbal flavors in every bite!
Final Thoughts
When all is said and done, the Vietnamese papaya salad is a delightful and refreshing dish that transports your taste buds to the vibrant flavors of Southeast Asia.
The fresh herbs you've added, like mint and cilantro, provide a burst of aromatic goodness that perfectly complements the crunchy papaya and tangy dressing.
The vibrant colors and textures of this salad make it a feast for the eyes as well as the palate.
It's the kind of dish that's sure to impress your friends and family, whether you're serving it as a light main course or a unique side.
Plus, it's easy to prepare, so you can whip it up in no time for a quick and healthy meal.
Frequently Asked Questions
What Is the Cultural Significance of Goi Du Du?
Goi du du is a beloved Vietnamese salad that reflects the country's vibrant culinary heritage. It's a delightful blend of fresh produce, showcasing the region's abundant natural resources and emphasizing the importance of balance in traditional Vietnamese cuisine.
Can I Substitute Ingredients in the Goi Du Du Recipe?
You can certainly substitute ingredients in the recipe. Feel free to experiment with different vegetables, fruits, or proteins to suit your personal preferences. Just be mindful of maintaining the overall balance of flavors and textures.
How Long Can Goi Du Du Be Stored Before Serving?
You can store the papaya salad for up to 2 days in the fridge, but it's best served fresh for maximum flavor and crunch. The salad won't keep well beyond that as the vegetables will start to wilt and lose their crisp texture.
Is Goi Du Du a Vegetarian-Friendly Dish?
Is goi du du a vegetarian-friendly dish? Yes, it can be! The traditional recipe uses only plant-based ingredients, making it a great option for vegetarians. Just be sure to double-check any restaurant's preparation to ensure it meets your dietary needs.
What Are Some Serving Suggestions for Goi Du Du?
You can serve goi du du as a refreshing side dish, or you can add protein like shrimp or tofu to make it a complete meal. Top it with crunchy peanuts and fresh herbs for extra flavor and texture.
Mai is a passionate chef specializing in Vietnamese cuisine. From fragrant pho to fresh spring rolls and banh mi, Mai’s dishes showcase the balance of sweet, salty, sour, and spicy that defines Vietnamese cooking. Her recipes emphasize fresh herbs, flavorful broths, and the light, vibrant ingredients that make Vietnamese food so special.
-
Southern Comfort Food1 month ago
Cheese Straws
-
Brazilian Cuisine1 month ago
Caldeirada
-
Southern Comfort Food1 month ago
Creamed Corn
-
Brazilian Cuisine1 month ago
Chicken in Brown Sauce
-
Brazilian Cuisine1 month ago
Tacacá
-
Southern Comfort Food1 month ago
Chocolate Gravy
-
Southern Comfort Food1 month ago
Squash Casserole
-
Ethiopian Cuisine1 month ago
Buna (Coffee)